经过大量翻阅文章总结出springboot连接串口最可行的方法!希望能帮到大家( •̀ ω •́ )✧
使用Rxtx实现串口通信
1、配置pom.xml
<!-- 串口内容读取 --><dependency><groupId>org.bidib.jbidib.org.qbang.rxtx</groupId><artifactId>rxtxcomm</artifactId><version>2.2</version></dependency><!-- 测试 --><dependency><groupId>org.springframework.boot</groupId><artifactId>spring-boot-test</artifactId><scope>test</scope></dependency><dependency><groupId>junit</groupId><artifactId>junit</artifactId><scope>test</scope></dependency>
2、创建串口类
@Slf4j
@Data
public class SerialPortEntity {private String portName;//端口号private Integer baudrate;//波特率private int databits;//数据位private String databitsStr;//数据位字符串private int stopbits;//停止位private String stopbitsStr;//停止位字符串private int paritybit;//校验位private String paritybitStr;//校验位字符串private SerialPort serialPort = null; //串口会话public SerialPortEntity(String portName, Integer baudrate, String paritybit, String databits, String stopbits){this.portName = portName;this.baudrate = baudrate;this.databitsStr = databits;this.stopbitsStr = stopbits;this.paritybitStr = paritybit;//校验位switch (paritybit) {case "NONE":this.paritybit = SerialPort.PARITY_NONE;break;case "ODD":this.paritybit = SerialPort.PARITY_ODD;break;case "EVEN":this.paritybit = SerialPort.PARITY_EVEN;break;case "MARK":this.paritybit = SerialPort.PARITY_MARK;break;case "SPACE":this.paritybit = SerialPort.PARITY_SPACE;break;}//数据位switch (databits) {case "5":this.databits = SerialPort.DATABITS_5;break;case "6":this.databits = SerialPort.DATABITS_6;break;case "7":this.databits = SerialPort.DATABITS_7;break;case "8":this.databits = SerialPort.DATABITS_8;break;}//停止位switch (stopbits) {case "1":this.stopbits = SerialPort.STOPBITS_1;break;case "1.5":this.stopbits = SerialPort.STOPBITS_1_5;break;case "2":this.stopbits = SerialPort.STOPBITS_2;break;}}// 连接串口public SerialPort connect(){// 查看所有串口SerialPortUtil serialPortUtil = SerialPortUtil.getSerialPortUtil();List<String> portList = serialPortUtil.findPort();log.info("发现全部端口: "+portList);log.info("尝试打开端口:"+portName+" ....");// 打开指定端口SerialPort serialPort = serialPortUtil.openPort(portName,baudrate,databits,paritybit,stopbits);SerialPortListener listener = new SerialPortListener();listener.setSerialPort(serialPort);setSerialPort(serialPort);serialPortUtil.addListener(serialPort,listener);return serialPort;}// 关闭串口public void close(){SerialPortUtil serialPortUtil = SerialPortUtil.getSerialPortUtil();if(serialPort != null) serialPortUtil.closePort(serialPort);else log.info("请先调用connect方法!");}// 发送指令public void send(byte[] code){SerialPortUtil serialPortUtil = SerialPortUtil.getSerialPortUtil();if(serialPort != null) serialPortUtil.sendToPort(serialPort,code);else log.info("请先调用connect方法!");}}
3、创建监听器
@Slf4j
@Data
public class SerialPortListener implements SerialPortEventListener {private SerialPort serialPort = null;@Overridepublic void serialEvent(SerialPortEvent serialPortEvent) {switch (serialPortEvent.getEventType()){// 串口存在有效数据case SerialPortEvent.DATA_AVAILABLE:byte[] bytes = SerialPortUtil.getSerialPortUtil().readFromPort(serialPort);log.info("===========start===========");log.info(new Date() + "【读到的字符】:-----" + Arrays.toString(bytes));log.info(new Date() + "【字节数组转16进制字符串】:-----" + ModBusUtils.bytes2HexString(bytes));log.info("===========end===========");break;// 2.输出缓冲区已清空case SerialPortEvent.OUTPUT_BUFFER_EMPTY:log.error("输出缓冲区已清空");break;// 3.清除待发送数据case SerialPortEvent.CTS:log.error("清除待发送数据");break;// 4.待发送数据准备好了case SerialPortEvent.DSR:log.error("待发送数据准备好了");break;// 10.通讯中断case SerialPortEvent.BI:log.error("与串口设备通讯中断");break;default:break;}}
}
4、创建串口工具类
@Slf4j
public class SerialPortUtil {private static SerialPortUtil serialPortUtil = null;static {serialPortUtil = new SerialPortUtil();}private SerialPortUtil(){}/*** 获取提供服务的SerialTool对象* @return serialPortUtil*/public static SerialPortUtil getSerialPortUtil(){if(serialPortUtil == null){serialPortUtil = new SerialPortUtil();}return serialPortUtil;}/*** 查找所有可用端口* @return 可用端口名称列表*/public ArrayList<String> findPort() {// 获得当前所有可用串口Enumeration<CommPortIdentifier> portList = CommPortIdentifier.getPortIdentifiers();ArrayList<String> portNameList = new ArrayList<>();// 将可用串口名添加到List并返回该Listwhile (portList.hasMoreElements()) {String portName = portList.nextElement().getName();portNameList.add(portName);}return portNameList;}/*** 打开串口* @param portName 端口名称* @param baudrate 波特率  9600* @param databits 数据位  8* @param parity   校验位(奇偶位)  NONE :0* @param stopbits 停止位 1* @return 串口对象*/public SerialPort openPort(String portName, int baudrate, int databits, int parity, int stopbits) {try {// 通过端口名识别端口CommPortIdentifier portIdentifier = CommPortIdentifier.getPortIdentifier(portName);// 打开端口,并给端口名字和一个timeout(打开操作的超时时间)CommPort commPort = portIdentifier.open(portName, 5000);// 判断是不是串口if (commPort instanceof SerialPort) {SerialPort serialPort = (SerialPort) commPort;// 设置一下串口的波特率等参数serialPort.setSerialPortParams(baudrate, databits, stopbits, parity);log.info("打开串口 " + portName + " 成功 !");return serialPort;} else {log.error("不是串口");}} catch (NoSuchPortException e1) {log.error("没有找到端口");e1.printStackTrace();} catch (PortInUseException e2) {log.error("端口被占用");e2.printStackTrace();} catch (UnsupportedCommOperationException e) {e.printStackTrace();}return null;}/*** 关闭串口* @param serialPort 待关闭的串口对象*/public void closePort(SerialPort serialPort) {if (serialPort != null) {serialPort.close();}}/*** 往串口发送数据* @param serialPort 串口对象*/public void sendToPort(SerialPort serialPort, byte[] bytes) {OutputStream out = null;try {out = serialPort.getOutputStream();out.write(bytes);out.flush();} catch (IOException e) {e.printStackTrace();} finally {try {if (out != null) {out.close();}} catch (IOException e) {e.printStackTrace();}}}/*** 从串口读取数据* @param serialPort 当前已建立连接的SerialPort对象* @return 读取到的数据*/public byte[] readFromPort(SerialPort serialPort) {InputStream in = null;byte[] bytes = null;try {Thread.sleep(500);} catch (InterruptedException e) {e.printStackTrace();}try {in = serialPort.getInputStream();// 获取buffer里的数据长度int bufferlength = in.available();while (bufferlength != 0) {// 初始化byte数组为buffer中数据的长度bytes = new byte[bufferlength];in.read(bytes);bufferlength = in.available();}} catch (IOException e) {e.printStackTrace();} finally {try {if (in != null) {in.close();}} catch (IOException e) {e.printStackTrace();}}return bytes;}/*** 添加监听器* @param port     串口对象* @param listener 串口监听器*/public void addListener(SerialPort port, SerialPortEventListener listener) {try {// 给串口添加监听器port.addEventListener(listener);// 设置当有数据到达时唤醒监听接收线程port.notifyOnDataAvailable(true);// 设置当通信中断时唤醒中断线程port.notifyOnBreakInterrupt(true);} catch (TooManyListenersException e) {log.error("太多监听器");e.printStackTrace();}}/*** 删除监听器** @param port     串口对象* @param listener 串口监听器*/public void removeListener(SerialPort port, SerialPortEventListener listener) {// 删除串口监听器port.removeEventListener();}/*** 设置串口的Listener** @param serialPort* @param listener*/public static void setListenerToSerialPort(SerialPort serialPort, SerialPortEventListener listener) {try {// 给串口添加事件监听serialPort.addEventListener(listener);} catch (TooManyListenersException e) {e.printStackTrace();}// 串口有数据监听serialPort.notifyOnDataAvailable(true);// 中断事件监听serialPort.notifyOnBreakInterrupt(true);}
}
5、测试类
@SpringBootTest
@Slf4j
public class RxtxTest {@Testpublic void SerialDemo(){SerialPortEntity serialPortEntity = new SerialPortEntity("COM4",19200,"NONE","8","1");try {SerialPort serialPort = serialPortEntity.connect();serialPortEntity.send(new byte[]{1,3,0,38,0,1,101,(byte)193});Thread.sleep(10000);serialPortEntity.close();}catch (Exception e){serialPortEntity.close();e.printStackTrace();}}
}
好啦!现在来测试一下( •̀ ω •́ )✧~
准备调试工具
串口调试工具:http://www.zlmcu.com/document/com_debug_tools.html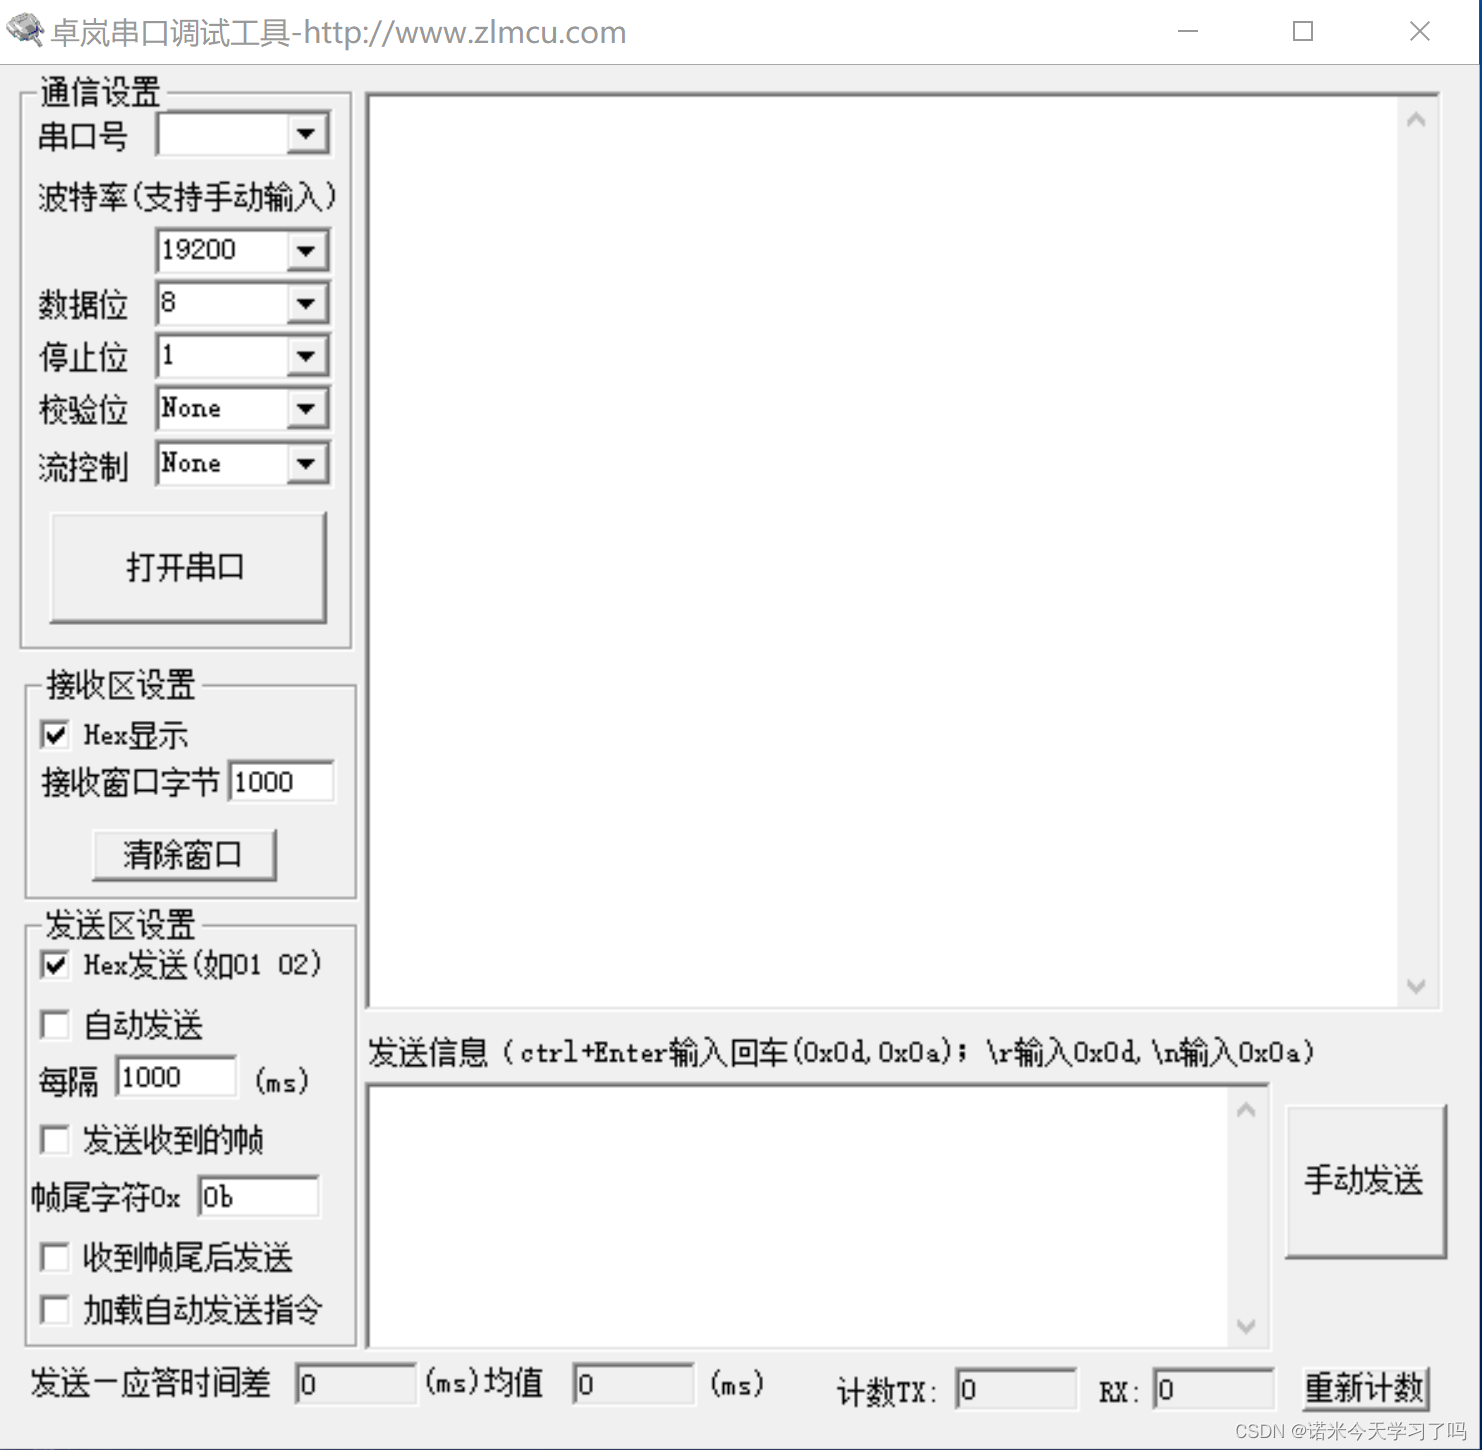
虚拟串口工具 :https://download.csdn.net/download/qq_37281772/87449453
操作步骤
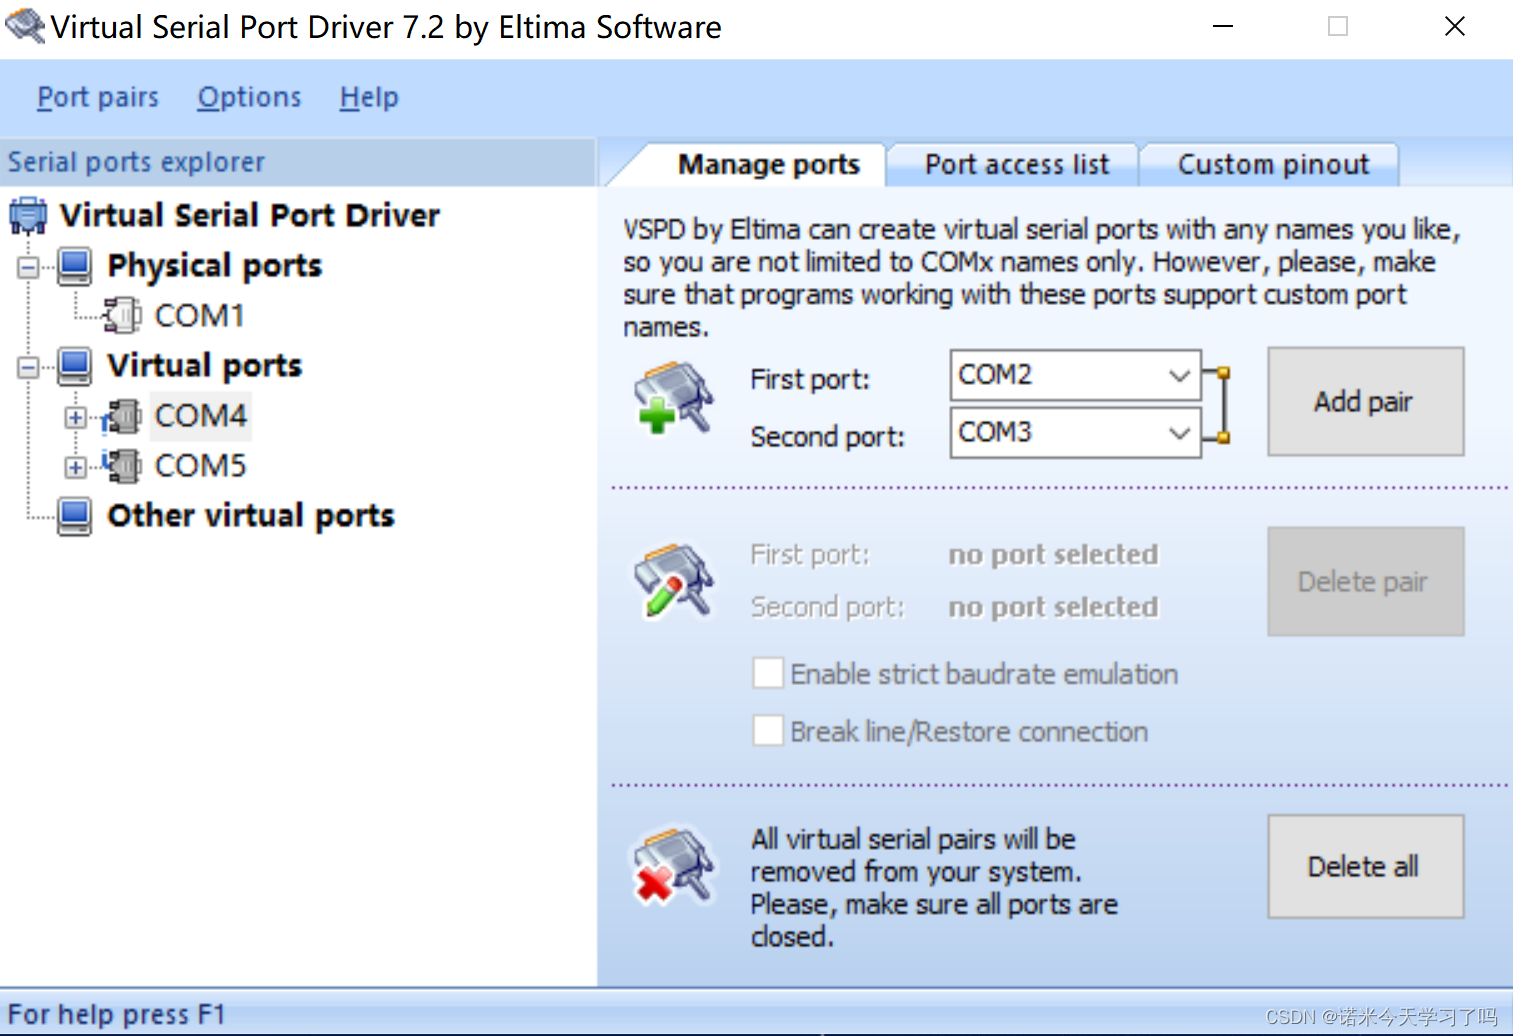
1、打开虚拟串口工具,创建虚拟串口对,我使用的是COM4和COM5(端口可自定义)
2、打开串口调试工具,打开COM5串口(因为上面测试代码打开了COM4)
3、启动Test代码
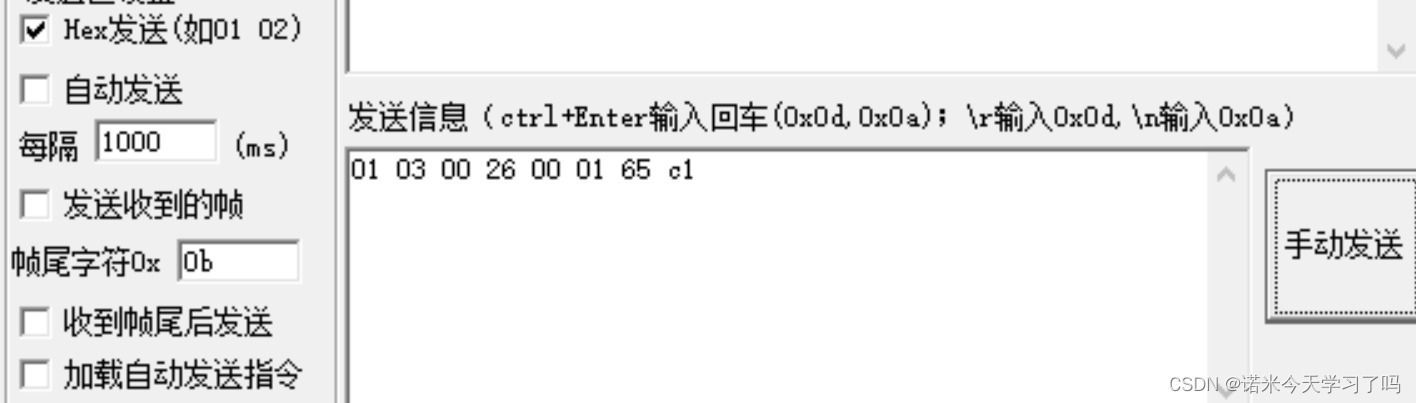
COM4给COM5下发指令

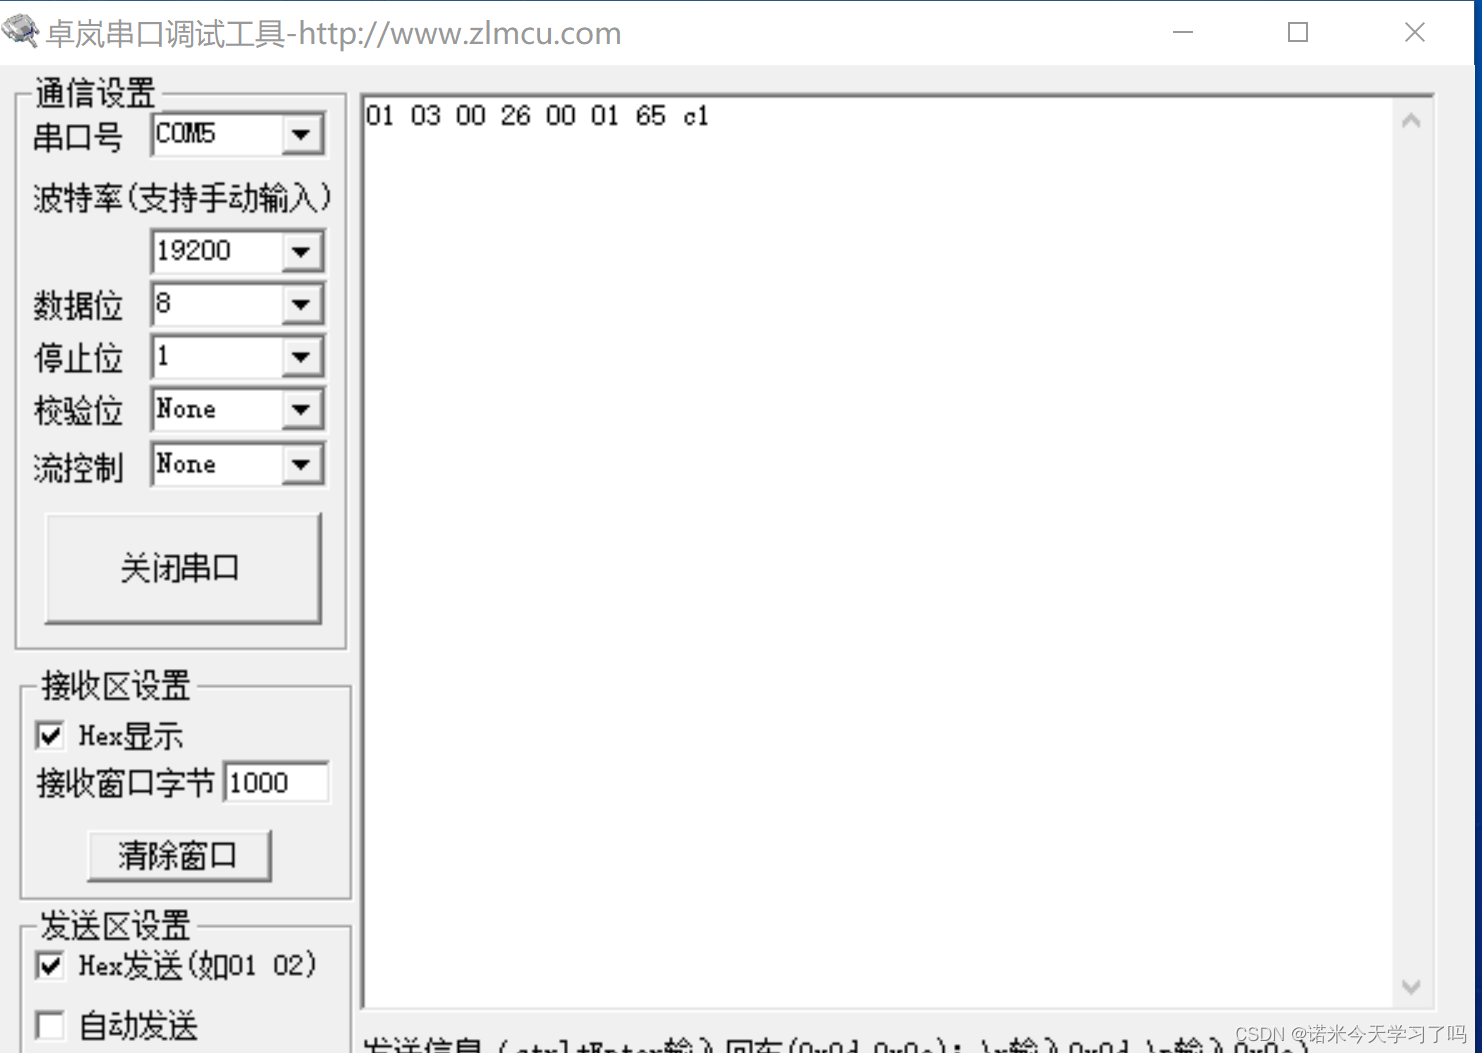
COM5给COM4下发指令

萌新第一次写文,如文章有误,欢迎指出哈ヾ(>▽<)o*
参考文献:
1、Netty介绍:https://www.cnblogs.com/MrRightZhao/p/11925307.html
2、Netty集成串口RXTX编程:https://www.jianshu.com/p/9e9747dedc3d
3、Java使用Netty实现Modbus-RTU通信协议:https://blog.csdn.net/qq_40042416/article/details/128457288
4、springboot+netty+串口:https://blog.csdn.net/csweldn520/article/details/116661871
5、java利用socket通信实现Modbus-RTU通信协议:https://blog.csdn.net/qq_40042416/article/details/115672989