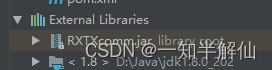
1.引入RXTXcomm.JAR包
-
首先下载相应的jar文件
压缩包包括:RXTXcomm.jar(64位环境)、win32com.dll和javax.comm.properties。
下载地址:https://www.aliyundrive.com/s/JSeSQsAyYeZ
点击链接保存,或者复制本段内容,打开「阿里云盘」APP ,无需下载极速在线查看,视频原画倍速播放。
介绍:RXTXcomm.jar提供了通讯用的java API,win32com.dll提供了供RXTXcomm.jar调用的本地驱动接口,javax.comm.properties是这个驱动的类配置文件 -
拷贝RXTXcomm.jar到<JAVA_HOME>\jre\lib\ext目录下面;
-
拷贝javax.comm.properties到<JAVA_HOME>\jre\lib目录下面;
-
拷贝win32com.dll到<JAVA_HOME>\jre\bin目录下面;
2.启动类
package com.datago.serialport;import com.datago.serialport.controller.boot.MyLister;
import com.datago.serialport.controller.boot.PortInit;
import com.datago.serialport.controller.boot.SerialPortUtil;
import org.springframework.boot.SpringApplication;
import org.springframework.boot.autoconfigure.SpringBootApplication;import javax.annotation.PreDestroy;@SpringBootApplication
public class SerialPortApplication {public static void main(String[] args) {SpringApplication.run(SerialPortApplication.class, args);}@PreDestroypublic void destory() {//关闭应用前,关闭端口SerialPortUtil serialPortUtil = SerialPortUtil.getSerialPortUtil();serialPortUtil.removeListener(PortInit.serialPort, new MyLister());serialPortUtil.closePort(PortInit.serialPort);}
}
3.启动程序打开串口通信,添加端口监听
package com.datago.serialport.controller.boot;import gnu.io.SerialPort;
import org.springframework.beans.factory.annotation.Value;
import org.springframework.boot.ApplicationArguments;
import org.springframework.boot.ApplicationRunner;
import org.springframework.stereotype.Component;import java.util.ArrayList;/*** @ProjectName serial-port* @Package com.datago.serialport.controller.boot* @Name PortInit* @Author HB* @Date 2022/7/13 09:55* @Version 1.0*/
@Component
public class PortInit implements ApplicationRunner {public static SerialPort serialPort = null;@Value("${portname}")private String portname;@Overridepublic void run(ApplicationArguments args) {//查看所有串口SerialPortUtil serialPortUtil = SerialPortUtil.getSerialPortUtil();ArrayList<String> port = serialPortUtil.findPort();System.out.println("发现全部串口:" + port);System.out.println("打开指定portname:" + portname);//打开该对应portname名字的串口SerialPort serialPort = serialPortUtil.openPort(portname, 9600, SerialPort.DATABITS_8, SerialPort.STOPBITS_1, SerialPort.PARITY_NONE);this.serialPort=serialPort;//给对应的serialPort添加监听器serialPortUtil.addListener(serialPort, new MyLister());System.out.println("可以正常发送数据");}
}
4.监听类
package com.datago.serialport.controller.boot;import gnu.io.SerialPort;
import gnu.io.SerialPortEvent;
import gnu.io.SerialPortEventListener;
import lombok.SneakyThrows;import java.util.Date;/*** @ProjectName serial-port* @Package com.datago.serialport.controller.boot* @Name MyLister* @Author HB* @Date 2022/7/13 10:38* @Version 1.0*/
public class MyLister implements SerialPortEventListener {@Override@SneakyThrowspublic void serialEvent(SerialPortEvent arg0) {if (arg0.getEventType() == SerialPortEvent.DATA_AVAILABLE) {SerialPortUtil serialPortUtil = SerialPortUtil.getSerialPortUtil();SerialPort serialPort = PortInit.serialPort;byte[] bytes = serialPortUtil.readFromPort(serialPort);serialPortUtil.sendToPort(serialPort,"-----nihao-----".getBytes());String byteStr = new String(bytes, 0, bytes.length).trim();System.out.println("================start============");System.out.println(new Date() + "读到的字节数组:-----" + byteStr);String needData = printHexString(bytes);System.out.println(new Date()+"字节数组转字符串:------"+needData);String s = hexStringToString(needData).trim();if (s.equals("1")){//关闭应用前,关闭端口serialPortUtil.removeListener(serialPort, new MyLister());serialPortUtil.closePort(serialPort);System.out.println("==================close=====================");}System.out.println(new Date()+"16进制字符串转字符串:------"+hexStringToString(needData));System.out.println("================end=============");}}//字节数组转字符private String printHexString(byte[] b) {StringBuffer sdf = new StringBuffer();for (int i = 0; i < b.length; i++) {String hex = Integer.toHexString(b[i] & 0xFF);if (hex.length() == 1) {hex = "0" + hex;}sdf.append(hex.toUpperCase() + " ");}return sdf.toString().trim();}//16进制转换为String类行字符串public static String hexStringToString(String s) {if (s == null || s.equals("")) {return null;}s = s.replace(" ", "");byte[] baKeyword = new byte[s.length() / 2];for (int i = 0; i < baKeyword.length; i++) {try {baKeyword[i] = (byte) (0xff & Integer.parseInt(s.substring(i * 2, i * 2 + 2), 16));} catch (Exception e) {e.printStackTrace();}}try {s = new String(baKeyword, "UTF-8");new String();} catch (Exception e) {e.printStackTrace();}return s;}}
5.串口通信工具类
package com.datago.serialport.controller.boot;import gnu.io.*;
import lombok.extern.slf4j.Slf4j;import java.io.IOException;
import java.io.InputStream;
import java.io.OutputStream;
import java.util.ArrayList;
import java.util.Enumeration;
import java.util.TooManyListenersException;/*** @ProjectName serial-port* @Package com.datago.serialport.controller.boot* @Name SerialPortUtil* @Author HB* @Date 2022/7/13 09:58* @Version 1.0*/
@Slf4j
public class SerialPortUtil {private static SerialPortUtil serialPortUtil = null;static {//在该类被ClassLoader加载时就初始化一个serialTool对象if (serialPortUtil == null) {serialPortUtil = new SerialPortUtil();}}//私有化SerialTool类的构造方法,不允许其他类生成SerialTool对象private SerialPortUtil() {}/*** 获取提供服务的SerialTool对象*/public static SerialPortUtil getSerialPortUtil() {if (serialPortUtil == null) {serialPortUtil = new SerialPortUtil();}return serialPortUtil;}/*** 查询所有可用端口*/public ArrayList<String> findPort() {//获取当前所有可用串口Enumeration<CommPortIdentifier> portList = CommPortIdentifier.getPortIdentifiers();ArrayList<String> portNameList = new ArrayList<>();//将可用串口名添加到List并返回该Listwhile (portList.hasMoreElements()) {String portName = portList.nextElement().getName();portNameList.add(portName);}return portNameList;}/*** 打开串口*/public SerialPort openPort(String portName, int baudrate, int databits, int parity, int stopbatis) {try {//通过端口名识别端口CommPortIdentifier portIdentifier = CommPortIdentifier.getPortIdentifier(portName);//打开端口,并给端口名字一个timeout(打开操作的超时时间)CommPort commPort = portIdentifier.open(portName, 2000);//判断是不是串口if (commPort instanceof SerialPort) {SerialPort serialPort = (SerialPort) commPort;//设置一下串口的波特率等参数try {serialPort.setSerialPortParams(9600, SerialPort.DATABITS_8, SerialPort.STOPBITS_1, SerialPort.PARITY_NONE);} catch (UnsupportedCommOperationException e) {e.printStackTrace();}log.info("Open-------------{}" + portName + "sucessfully");return serialPort;} else {log.error("不是串口----------{}");}} catch (NoSuchPortException e) {log.error("没有找到端口--------------{}");e.printStackTrace();} catch (PortInUseException e) {log.error("端口被占用--------------{}");e.printStackTrace();}return null;}/*** 关闭串口*/public void closePort(SerialPort serialPort) {if (serialPort != null) {serialPort.close();}}/*** 往串口发送数据*/public void sendToPort(SerialPort serialPort, byte[] order) {OutputStream out = null;try {out = serialPort.getOutputStream();out.write(order);out.flush();} catch (IOException e) {e.printStackTrace();} finally {try {if (out != null) {out.close();}} catch (IOException e) {e.printStackTrace();}}}/**从串口读取数据*/public byte[] readFromPort(SerialPort serialPort){InputStream in=null;byte[] bytes=null;try {in=serialPort.getInputStream();int bufflenth=in.available();while (bufflenth!=0){bytes=new byte[bufflenth];in.read(bytes);bufflenth=in.available();}}catch (IOException e){e.printStackTrace();}finally {try {in.close();} catch (IOException e) {e.printStackTrace();}}return  bytes;}/**添加监听器*/public void addListener(SerialPort port,SerialPortEventListener listener){try {//给串口添加监听器port.addEventListener(listener);//设置当有数据到时唤醒监听接收线程port.notifyOnDataAvailable(true);//设置当通信中断时唤醒中断线程port.notifyOnBreakInterrupt(true);}catch (TooManyListenersException e){log.error("太多监听器-------------{}");e.printStackTrace();}}/**删除监听器*/public void removeListener(SerialPort port,SerialPortEventListener listener){//删除串口监听器port.removeEventListener();}
}