NLP系列讲解笔记
本专题是针对NLP的一些常用知识进行记录,主要由于本人接下来的实验需要用到NLP的一些知识点,但是本人非NLP方向学生,对此不是很熟悉,也是因为本人对NLP灰常感兴趣,想扎进去好好研究研究,所以打算做个笔记记录一下自己的学习过程,也是为了博士的求学之路做铺垫!希望大家喜欢。
如果有哪里写的不对,欢迎大家批评指正,感谢感谢!
传送门:
第一章 细讲:Attention模型的机制原理
第二章 Attention实现超详细解析( tfa, keras 方法调用源码分析 & 自建网络)
目录
- NLP系列讲解笔记
- 前言
- 案例详解
- 简要介绍
- 准备工作
- Import
- 数据集的下载
- 数据清洗以及预处理
- Encoder- Decoder模型构建
- Encoder
- Decoder
- Train
- Define the optimizer and the loss function
- Checkpoints (Object-based saving)
- One train_step operations
- Train the model
- 利用不同Decoder模型实现机器翻译
- Use tf-addons BasicDecoder for decoding
- Use tf-addons BeamSearchDecoder
- 效果对比
- BasicDecoder
- BeamSearchDecoder
- GitHub地址
- 总结
- 彩蛋
- 参考
前言
这次我决定以案例实现为材料,再用一章节的内容给大家详细介绍一下Attention模型。这个案例主要是利用tfa框架Sequence to Sequence Model Architecture中的Attention以及Encoder-Decoder方法实现神经机器翻译(Neural Machine Translation,NMT),当然翻译的准确性不可能像BERT之类的那么好,但可以作为一个入门实验,通过这个案例,大家应该对Attention的使用有了更清晰、更全面的认识。
注:本实验全部代码以及数据集我都放到了最后所提供的自己的GitHub仓库当中,有需要的可以自行clone!
案例详解
简要介绍
本实验主要是基于TensorFlow Addons(简称tfa)所提供的NMT案例所改的,由于源代码是西班牙语—>英语的转换,我对西班牙语一窍不通🤦♂️,所以我稍微改了一下,改成了英译汉的机器翻译模型,baseline代码链接看参考1。
实验结果示意图如图所示,假装输出是汉语🐶,我不想单独画一个图了😂(图片来自网络):

本实验所用平台为jupyter lab,python版本为3.6。具体步骤主要包括四步:
- Data cleaning
- Data preparation
- Neural Translation Model with Attention
- Final Translation with
tf.addons.seq2seq.BasicDecoderandtf.addons.seq2seq.BeamSearchDecoder
准备工作
Import
第一件事就是导入一些必要的库,本实验所用库版本如下:
tensorflow-gpu==2.2.0
keras==2.4.3
tensorflow-addons==0.11.2
numpy==1.18.1
pandas==1.0.1
matplotlib==3.1.3
import tensorflow as tf
import tensorflow_addons as tfaimport matplotlib.pyplot as plt
import matplotlib.ticker as ticker
from sklearn.model_selection import train_test_split
# 此模块提供对Unicode字符数据库的访问,该字符数据库为所有Unicode字符定义字符属性。
# ref:https://cloud.tencent.com/developer/section/1371917
import unicodedata
import re
import numpy as np
import os
import io
import time
没什么好讲的,继续下一步。
数据集的下载
导入库之后,我们开始下载实验所需数据集。
网址:http://www.manythings.org/anki/
在这个网站当中,提供了很多语言转换的数据集,比如:
May I borrow this book? ¿Puedo tomar prestado este libro?
各位有兴趣想实现其他语言转换的,可以自行下载对应语言数据集,本实验主要用的是cmn-eng数据集。
def download_nmt():path_to_zip = tf.keras.utils.get_file('cmn-eng.zip', origin='http://storage.googleapis.com/download.tensorflow.org/data/cmn-eng.zip',extract=True)path_to_file = os.path.dirname(path_to_zip)+"/cmn-eng/cmn.txt"return path_to_file
tf.keras.utils.get_file的作用主要是直接从URL下载资源,用法如下:
tf.keras.utils.get_file(fname, # 文件名,如果指定了绝对路径"/path/file.txt",则文件将会保存到该位置origin, # url地址untar=False, # 是否需要解压缩,已被extract替代md5_hash=None, # MD5哈希值,用于数据校验,支持sha256和md5哈希file_hash=None, # 下载后的文件的期望哈希字符串。 支持 sha256 和 md5 两个哈希算法。cache_subdir='datasets', # 用于缓存数据的文件夹,若指定绝对路径"/path/folder"则将存放在该路径下hash_algorithm='auto', # 选择文件校验的哈希算法,可选项有'md5', 'sha256', 和'auto'. 默认'auto'自动检测使用的哈希算法extract=False,# 若为True则试图提取文件,例如tar或zip archive_format='auto', # 试图提取的文件格式,可选为'auto', 'tar', 'zip', 和None.cache_dir=None # 文件缓存后的地址,若为None,则默认存放在根目录的.keras文件夹中
)
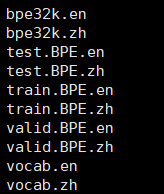
所下载的数据格式如下:

数据集一行就是一个样本。txt文档会被分为三列:第一列是英文,第二列是英文对应的中文翻译,第三列我们不需要,直接丢掉就行了。
注:本实验已经下载好了数据集,并已在GitHub中提供给大家。
数据清洗以及预处理
在Data Cleaning and Data Preparation中,我们主要做了以下几步操作:
- Add a start and end token to each sentence.
为每个句子加一个开始和结束标签; - Clean the sentences by removing special characters.
清除特殊字符; - Create a Vocabulary with word index (mapping from word → id) and reverse word index (mapping from id → word).
tokenize:创建词到id编码的映射以及反映射; - Pad each sentence to a maximum length. (Why? you need to fix the maximum length for the inputs to recurrent encoders)
为每个序列设定一个最大长度,也可以理解为步长。为了Encoder以及Decoder的输入工作。
我们通过定义一个NMTDataset class来实现以上4步操作。基本步骤如图所示:

#无需下载
file_path = r'./dataset/cmn-eng/cmn.txt'class NMTDataset:def __init__(self, problem_type='en-cmn'):self.problem_type = 'en-cmn' # 英语转普通话self.inp_lang_tokenizer = Noneself.targ_lang_tokenizer = Nonedef unicode_to_ascii(self, s):# unicodedata.normalize('NFD', s)# 返回Unicode字符串unistr的常规表单形式。表单的有效值为'NFC','NFKC','NFD'和'NFKD'。# unicodedata.category(unichr)# 以字符串形式返回分配给Unicode字符unichr的常规类别。return ''.join(c for c in unicodedata.normalize('NFD', s) if unicodedata.category(c) != 'Mn')# 把句子按字分开,不破坏英文结构,,只处理中文结构# 例如: "我爱tensorflow" -> "['我', '爱', 'tenforflow']"def preprocess_sentence_chinese(self,sent):# 首先分割 英文 以及英文和标点# \w 用于匹配字母,数字或下划线字符,等价于“[A-Za-z0-9_]”# \W 用于匹配所有与\w不匹配的字符;pattern_char_1 = re.compile(r'([\W])')parts = pattern_char_1.split(sent)parts = [p for p in parts if len(p.strip())>0]# 分割中文# \u4e00-\u9fa5判断是否为中文pattern = re.compile(r'([\u4e00-\u9fa5])')chars = pattern.split(sent)chars = [w for w in chars if len(w.strip())>0]out_chn = " ".join(chars)return '<start> ' + out_chn + ' <end>'## 处理英文结构,以空格间隔def preprocess_sentence_english(self, w):#w = self.unicode_to_ascii(w.lower().strip())# creating a space between a word and the punctuation following it# eg: "he is a boy." => "he is a boy ."# Reference:- https://stackoverflow.com/questions/3645931/python-padding-punctuation-with-white-spaces-keeping-punctuation# 利用正则表达式划分句子w = re.sub(r"([?.!,¿])", r" \1 ", w)w = re.sub(r'[" "]+', " ", w)# replacing everything with space except (a-z, A-Z, ".", "?", "!", ",")w = re.sub(r"[^a-zA-Z?.!,¿]+", " ", w)w = w.strip()# adding a start and an end token to the sentence# so that the model know when to start and stop predicting.return '<start> ' + w + ' <end>'def create_dataset(self, path, num_examples):# path : path to spa-eng.txt file# num_examples : Limit the total number of training example for faster training (set num_examples = len(lines) to use full data)# 数据集一行就是一个样本。txt文档会被分为三列,# 数据集一行就是一个样本。可以看到会被分为三列,第一列是英文,第二列是英文对应的中文翻译,第三列我们不需要,直接丢掉就行了。# create_dataset的功能就是读入这样的文本,处理之后分别返回处理之后的英语-中文句子列表。lines = io.open(path, encoding='UTF-8').read().strip().split('\n')# 英文文本english_words = []# 中文文本chinese_words = []for l in lines[:num_examples]:word_arrs = l.split('\t')if len(word_arrs) < 2:continueenglish_w = self.preprocess_sentence_english(word_arrs[0])chinese_w = self.preprocess_sentence_chinese(word_arrs[1])english_words.append(english_w)chinese_words.append(chinese_w)# 返回[('<start> 嗨 。 <end>', '<start> Hi .  <end>')]return chinese_words,english_words# 构建id-word对应关系def tokenize(self, lang):# lang = list of sentences in a language# print(len(lang), "example sentence: {}".format(lang[0]))# oov_token: 如果给出,它将被添加到 word_index 中,并用于在 text_to_sequence 调用期间替换词汇表外的单词。lang_tokenizer = tf.keras.preprocessing.text.Tokenizer(filters='', oov_token='<OOV>')lang_tokenizer.fit_on_texts(lang)## tf.keras.preprocessing.text.Tokenizer.texts_to_sequences converts string (w1, w2, w3, ......, wn) ## to a list of correspoding integer ids of words (id_w1, id_w2, id_w3, ...., id_wn)tensor = lang_tokenizer.texts_to_sequences(lang) ## tf.keras.preprocessing.sequence.pad_sequences takes argument a list of integer id sequences ## and pads the sequences to match the longest sequences in the given input#  If not provided,sequences will be padded to the length of the longest individual sequencetensor = tf.keras.preprocessing.sequence.pad_sequences(tensor, padding='post')return tensor, lang_tokenizer# load_dataset、tokenize: 创建字典、文本转向量def load_dataset(self, path, num_examples=None):# creating cleaned input, output pairstarg_lang, inp_lang = self.create_dataset(path, num_examples)input_tensor, inp_lang_tokenizer = self.tokenize(inp_lang)target_tensor, targ_lang_tokenizer = self.tokenize(targ_lang)# inp_tensor是文本转向量的结果,向量里的每个元素id对应到词典库的单词。# inp_tokenizer是构造的词典库,构造的方式是给每个词分配一个唯一的整数id, return input_tensor, target_tensor, inp_lang_tokenizer, targ_lang_tokenizerdef call(self, num_examples, BUFFER_SIZE, BATCH_SIZE):#file_path = download_nmt()input_tensor, target_tensor, self.inp_lang_tokenizer, self.targ_lang_tokenizer = self.load_dataset(file_path, num_examples)# 训练集:验证集 = 8:2input_tensor_train, input_tensor_val, target_tensor_train, target_tensor_val = train_test_split(input_tensor, target_tensor, test_size=0.2)# 数据集加载train_dataset = tf.data.Dataset.from_tensor_slices((input_tensor_train, target_tensor_train))# 参数buffer_size值越大,意味着数据混乱程度也越大。# 先抽出BUFFER_SIZE条数据,训练数据时再随机从buffer区域内随机选择BATCH_SIZE条数据# 参数drop_remainder:表示在少于batch_size元素的情况下是否应删除最后一批 ; 默认是不删除。train_dataset = train_dataset.shuffle(BUFFER_SIZE).batch(BATCH_SIZE, drop_remainder=True)val_dataset = tf.data.Dataset.from_tensor_slices((input_tensor_val, target_tensor_val))val_dataset = val_dataset.batch(BATCH_SIZE, drop_remainder=True)return train_dataset, val_dataset, self.inp_lang_tokenizer, self.targ_lang_tokenizer
我已经在一些比较容易模糊的地方加了必要的注释,有的是tfa案例所给,有的是我加上的,这不重要,希望大家可以理解代码的作用。接下来给大家看看效果。
dataset_creator = NMTDataset('en-cmn')
dataset_creator.preprocess_sentence_chinese("我爱中国!"),dataset_creator.preprocess_sentence_english("I love CHINA!")
>>>output:('<start> 我 爱 中 国 ! <end>', '<start> I love CHINA ! <end>')
然后定义一些必要的超参数:
BUFFER_SIZE = 32000
BATCH_SIZE = 64
# Let's limit the #training examples for faster training
num_examples = 30000dataset_creator = NMTDataset('en-cmn')
# 训练集、验证集、输入英文的标记<id,word>,输出汉语的标记<id,word> id从1开始
train_dataset, val_dataset, inp_lang, targ_lang = dataset_creator.call(num_examples, BUFFER_SIZE, BATCH_SIZE)example_input_batch, example_target_batch = next(iter(train_dataset))
example_input_batch.shape, example_target_batch.shape>>>output:(TensorShape([64, 38]), TensorShape([64, 46]))
在分词器中,我们使用了tf.keras.preprocessing.text.Tokenizer,最终效果是这样子的:
inp_lang.word_index, targ_lang.word_index
>>> output:
{'<OOV>': 1,'<start>': 2,'<end>': 3,'.': 4,'i': 5,'the': 6,'to': 7,'you': 8,...},{'<OOV>': 1,'<start>': 2,'<end>': 3,'。': 4,'我': 5,'的': 6,'了': 7,'你': 8,'他': 9,'不': 10,...}
而在输入输出中,主要是由id编码组成的list,比如:
example_target_batch[:3]
>>>output:
<tf.Tensor: shape=(3, 46), dtype=int32, numpy=
array([[   2,    5,    6, 1051,  553,    4,    3,    0,    0,    0,    0,0,    0,    0,    0,    0,    0,    0,    0,    0,    0,    0,0,    0,    0,    0,    0,    0,    0,    0,    0,    0,    0,0,    0,    0,    0,    0,    0,    0,    0,    0,    0,    0,0,    0],[   2,    5,  143,  394,   10, 1498,   13,  408,  669,  767,  309,317,   17,    4,    3,    0,    0,    0,    0,    0,    0,    0,0,    0,    0,    0,    0,    0,    0,    0,    0,    0,    0,0,    0,    0,    0,    0,    0,    0,    0,    0,    0,    0,0,    0],[   2,  341,  583,  265,  372,  203,    8,   46,  202,  257,   12,3,    0,    0,    0,    0,    0,    0,    0,    0,    0,    0,0,    0,    0,    0,    0,    0,    0,    0,    0,    0,    0,0,    0,    0,    0,    0,    0,    0,    0,    0,    0,    0,0,    0]], dtype=int32)>
一些重要的参数设定:
vocab_inp_size = len(inp_lang.word_index)+1
vocab_tar_size = len(targ_lang.word_index)+1
# 类似于步长,每次输入、输出的长度
max_length_input = example_input_batch.shape[1]
max_length_output = example_target_batch.shape[1]# 词嵌入层神经元个数
embedding_dim = 256
# Encoder LSTM层输入神经元个数
units = 1024
# 每一轮迭代次数
steps_per_epoch = num_examples//BATCH_SIZEprint("max_length_english, max_length_chinese, vocab_size_english, vocab_size_chinese")
max_length_input, max_length_output, vocab_inp_size, vocab_tar_size
>>> output:
max_length_english, max_length_chinese, vocab_size_english, vocab_size_chinese
(38, 46, 6757, 3723)
代码不是很难理解,而且我也已经加了必要的注释,希望有助于大家的理解。
OK,数据预处理到此就告一段落了,接下来开始构建我们自己的Encoder和Decoder层了,自建网络如果有不明白的可以看我上一篇文章,链接在顶部传送门中。
Encoder- Decoder模型构建
Encoder
先看Encoder层:
class Encoder(tf.keras.Model):def __init__(self, vocab_size, embedding_dim, enc_units, batch_sz):# vocab_size: 词典表大小# embedding_dim:词嵌入维度 # enc_uints: 编码LSTM节点数量,也是输出节点数 # batch_sz 批大小super(Encoder, self).__init__()self.batch_sz = batch_szself.enc_units = enc_unitsself.embedding = tf.keras.layers.Embedding(vocab_size, embedding_dim)##-------- LSTM layer in Encoder ------- ##self.lstm_layer = tf.keras.layers.LSTM(self.enc_units,return_sequences=True,return_state=True,recurrent_initializer='glorot_uniform')def call(self, x, hidden):x = self.embedding(x)# output返回的是所有步长的信息,h和c返回的是最后一步长的信息output, h, c = self.lstm_layer(x, initial_state = hidden)return output, h, cdef initialize_hidden_state(self):# 参数初始化,包括一个hidden 一个cell statereturn [tf.zeros((self.batch_sz, self.enc_units)), tf.zeros((self.batch_sz, self.enc_units))]

基本思路就是:
- 通过tf自带的Embedding层,将输入的id编码词变成embedding_dim(256)维度的词向量;
(该处其实就是简单的one-hot到隐含层的权重映射) - 接着构建一个LSTM层作为隐含层,便于处理输入词向量;
initialize_hidden_state()主要是参数初始化,包括一个hidden 一个cell state,初始值为全0
现在测试下代码:
## Test Encoder Stackencoder = Encoder(vocab_inp_size, embedding_dim, units, BATCH_SIZE)# sample input
sample_hidden = encoder.initialize_hidden_state()
sample_output, sample_h, sample_c = encoder(example_input_batch, sample_hidden) # 等价于执行call函数
print ('Encoder output shape: (batch size, sequence length, units) {}'.format(sample_output.shape)) ### 所有步长的输出
print ('Encoder h vecotr shape: (batch size, units) {}'.format(sample_h.shape))。# 只包含最后一个Encoder的输出
print ('Encoder c vector shape: (batch size, units) {}'.format(sample_c.shape)) # 同上>>>output:
Encoder output shape: (batch size, sequence length, units) (64, 38, 1024)
Encoder h vecotr shape: (batch size, units) (64, 1024)
Encoder c vector shape: (batch size, units) (64, 1024)
Decoder
Encoder比较好理解,但是Decoder其实不是很好理解,先看看代码吧。
class Decoder(tf.keras.Model):def __init__(self, vocab_size, embedding_dim, dec_units, batch_sz, attention_type='luong',memory=None):# vocab_size 词典大小# embedding_dim 词嵌入维度# dec_uints Decoder输出神经元数# batch_sz 批大小# attention_type 注意力机制类型super(Decoder, self).__init__()self.batch_sz = batch_szself.dec_units = dec_unitsself.attention_type = attention_typeself.memory = memory# Embedding Layerself.embedding = tf.keras.layers.Embedding(vocab_size, embedding_dim)#Final Dense layer on which softmax will be applied# 最后的softmax输出,判断应该输出哪个词汇self.fc = tf.keras.layers.Dense(vocab_size)# Define the fundamental cell for decoder recurrent structure# 将Encoder输出经过attention处理之后输入到LSTMCell里面self.decoder_rnn_cell = tf.keras.layers.LSTMCell(self.dec_units)'''tfa.seq2seq.sampler.TrainingSampler()简略读取输出的训练采样器。调用trainingSampler.initialize(input_tensors)时,取各batch中time_step=0的数据,拼接成一个数据集,返回。下一次调用sampler.next_inputs函数时,会取各batch中time_step++的数据,拼接成一个数据集,返回。'''# Samplerself.sampler = tfa.seq2seq.sampler.TrainingSampler()# Create attention mechanism with memory = None# -------代码通过setup_memory()输入encoder的输出,可以通过设定memory起到相同效果-----------# memory可选,The memory to query,如果要加的话,一般为RNN encoder的输出。维度为[batch_size, max_time, ...]self.attention_mechanism = self.build_attention_mechanism(self.dec_units, self.memory, self.batch_sz*[max_length_input], self.attention_type)# Wrap attention mechanism with the fundamental rnn cell of decoderself.rnn_cell = self.build_rnn_cell(batch_sz)# Define the decoder with respect to fundamental rnn cell# 总的来说,传进了一个rnn_cell以及一个output_layer(fc),之后BasicDecoderOutput中的step是基于前一时刻的cell输出以及当前的输入不断计算当前的输出,# 之后经过output_layer最终形成序列。(类似于RNN的原理)self.decoder = tfa.seq2seq.BasicDecoder(self.rnn_cell, sampler=self.sampler, output_layer=self.fc)def build_rnn_cell(self, batch_sz):# Wraps another RNN cell with attention# attention_layer_size:the depth of the attention (output) layer(s),与“attention_layer”设置其一就好# AttentionWrapper在原本RNNCell的基础上在封装一层attentionrnn_cell = tfa.seq2seq.AttentionWrapper(self.decoder_rnn_cell, self.attention_mechanism, attention_layer_size=self.dec_units) return rnn_celldef build_attention_mechanism(self, dec_units, memory, memory_sequence_length, attention_type='luong'):# ------------- ## typ: Which sort of attention (Bahdanau, Luong)# dec_units: final dimension of attention outputs,与LSTMCell保持一致 # memory: encoder hidden states of shape (batch_size, max_length_input, enc_units)# memory_sequence_length: 1d array of shape (batch_size) with every element set to max_length_input (for masking purpose)if(attention_type=='bahdanau'):return tfa.seq2seq.BahdanauAttention(units=dec_units, memory=memory, memory_sequence_length=memory_sequence_length)else:return tfa.seq2seq.LuongAttention(units=dec_units, memory=memory, memory_sequence_length=memory_sequence_length)# The batch_size argument passed to the get_initial_state method of this wrapper is equal to true_batch_size * beam_width.# The initial state created with get_initial_state above contains a cell_state value containing properly tiled final state from the encoder.# 使用上面的 get_initial_state 创建的初始状态包含一个 cell_state 值,该值包含来自编码器的最终状态[encoder__final_h,encoder_final_c]def build_initial_state(self, batch_sz, encoder_state, Dtype):decoder_initial_state = self.rnn_cell.get_initial_state(batch_size=batch_sz, dtype=Dtype)decoder_initial_state = decoder_initial_state.clone(cell_state=encoder_state)return decoder_initial_statedef call(self, inputs, initial_state):x = self.embedding(inputs)# 因为最后一个输出一定会是<end>outputs, _, _ = self.decoder(x, initial_state=initial_state, sequence_length=self.batch_sz*[max_length_output-1])# output [batch,target_length-1,target_vocab_size]return outputs
为了便于大家的理解,我在代码当中加了足够多的注释,先给大家看下两种Attention理解的具体机制原理图。

我现在主要给大家说几个比较容易糊涂的点:
self.embedding:因为每一个Decoder的输出 y i y_{i} yi都有一个上一次的 y i − 1 y_{i-1} yi−1作为输入,这个作用主要是作为Decoder第一次的的初始输入y;tf.keras.layers.Dense(vocab_size):在这里我们并没有定义输出函数softmax,因为我们在后面的loss function中定义了一个参数tf.keras.losses.SparseCategoricalCrossentropy(from_logits=True, reduction='none'),from_logits = True 表示是原始数据,系统会帮你做softmax后再进行计算,reduction='none’意思是不做批数据均值化处理。self.build_attention_mechanism(self.dec_units, self.memory, self.batch_sz*[max_length_input], self.attention_type):在这里,我们的memory=None,memory是计算attention score的必要输入,为啥要为None呢?之所以这样是由于我们在后面会使用代码通过setup_memory()输入encoder的输出,当然,你也可以直接在这里通过设定memory起到相同效果,一般为RNN encoder的输出。tfa.seq2seq.AttentionWrapper(self.decoder_rnn_cell, self.attention_mechanism, attention_layer_size=self.dec_units):我注释也写得很清楚,这主要是用于整合Decoder的RNN层以及Attention层,AttentionWrapper在原本RNNCell的基础上再封装一层attention,attention_layer_size:the depth of the attention (output) layer(s),与“attention_layer”设置其一就好。tfa.seq2seq.sampler.TrainingSampler():Sampler类,在tf1.x中叫Helper,其实就是Decoder阶段如何根据预测结果得到下一时刻的输入,比如训练过程中应该直接使用上一时刻的真实值作为下一时刻输入(TrainingSampler),预测过程中可以使用贪婪搜索选择概率最大的那个值作为下一时刻(GreedyEmbeddingSampler)等等。所以Sampler也就可以大致分为训练时Sampler和预测时Sampler两种,后面我们也会讲。tfa.seq2seq.BasicDecoder(self.rnn_cell, sampler=self.sampler, output_layer=self.fc):这就是定义Decoder解码器了,总的来说,传进了一个rnn_cell以及一个output_layer(fc),之后BasicDecoderOutput中的step是基于前一时刻的cell输出以及当前的输入不断计算当前的输出,之后经过output_layer最终形成序列(类似于RNN的原理)。build_initial_state:使用 get_initial_state 创建初始状态包含一个 cell_state 值,该值包含来自编码器的最终状态[encoder__final_h,encoder_final_c],该步骤主要是为了BeamSearchDecoder的使用,BeamSearchDecoder后面再讲。
以上就是我个人当时第一次看源码的时候比较糊涂的地方,特地给大家分享一下,这是我个人的理解,如果哪里说错了,请大家指正,感谢🙏!
接下来测试一下:
# Test decoder stackdecoder = Decoder(vocab_tar_size, embedding_dim, units, BATCH_SIZE, 'luong')#初始化一个y_init,当作第一个输出的输入y
sample_x = tf.random.uniform((BATCH_SIZE, max_length_output))
decoder.attention_mechanism.setup_memory(sample_output)# [sample_h, sample_c]最后一个步长的输出hidden and cell state设定为decoder rnn_cell的初始状态
initial_state = decoder.build_initial_state(BATCH_SIZE, [sample_h, sample_c], tf.float32)sample_decoder_outputs = decoder(sample_x, initial_state)print("Decoder Outputs Shape: ", sample_decoder_outputs.rnn_output.shape)
>>>output:Decoder Outputs Shape:  (64, 45, 3723)
再给大家看下一些常用数值:
vocab_tar_size, embedding_dim, units, BATCH_SIZE,max_length_output,sample_output.shape
# (3723, 256, 1024, 64, 46, TensorShape([64, 38, 1024]))
Train
Define the optimizer and the loss function
# default learning_rate=0.001
optimizer = tf.keras.optimizers.Adam()# 自定义loss函数
def loss_function(real, pred):# real shape = (BATCH_SIZE, max_length_output)# pred shape = (BATCH_SIZE, max_length_output, tar_vocab_size )# from_logits = True 表示是原始数据,系统会帮你做softmax后再进行计算cross_entropy = tf.keras.losses.SparseCategoricalCrossentropy(from_logits=True, reduction='none')loss = cross_entropy(y_true=real, y_pred=pred)# 设定0为False,非0为Truemask = tf.logical_not(tf.math.equal(real,0))   #output 0(False) for y=0 else output 1(True)mask = tf.cast(mask, dtype=loss.dtype) # 为了除去0这个干扰项,因为一开始的masking以0为填充loss = mask* loss# mean的时候包括了含有0的个数loss = tf.reduce_mean(loss)return loss
tf.logical_not:逻辑非运算
tf.logical_not(tf.math.equal([[0,2,1],[0,1,8]],0))
'''
<tf.Tensor: shape=(2, 3), dtype=bool, numpy=
array([[False,  True,  True],[False,  True,  True]])>
'''
Checkpoints (Object-based saving)
checkpoint_dir = './training_checkpoints'
checkpoint_prefix = os.path.join(checkpoint_dir, "ckpt")
checkpoint = tf.train.Checkpoint(optimizer=optimizer,encoder=encoder,decoder=decoder)
加载模型文件:
# restoring the latest checkpoint in checkpoint_dir
checkpoint.restore(tf.train.latest_checkpoint(checkpoint_dir))
One train_step operations
本实验将以图模式运行(大佬都喜欢tf1.x的执行模式啊)
@tf.function:
在 TensorFlow 2.0 中,推荐使用 @tf.function (而非 1.X 中的 tf.Session )实现 Graph Execution,
从而将模型转换为易于部署且高性能的 TensorFlow 图模型。
只需要将我们希望以 Graph Execution 模式运行的代码封装在一个函数内,并在函数前加上 @tf.function 即可。
# 将模型以图模式运行
'''
@tf.function
在 TensorFlow 2.0 中,推荐使用 @tf.function (而非 1.X 中的 tf.Session )实现 Graph Execution,
从而将模型转换为易于部署且高性能的 TensorFlow 图模型。
只需要将我们希望以 Graph Execution 模式运行的代码封装在一个函数内,并在函数前加上 @tf.function 即可,
'''
@tf.function
def train_step(inp, targ, enc_hidden):loss = 0with tf.GradientTape() as tape:enc_output, enc_h, enc_c = encoder(inp, enc_hidden)dec_input = targ[ : , :-1 ] # Ignore <end> tokenreal = targ[ : , 1: ]         # ignore <start> token# Set the AttentionMechanism object with encoder_outputsdecoder.attention_mechanism.setup_memory(enc_output)# Create AttentionWrapperState as initial_state for decoderdecoder_initial_state = decoder.build_initial_state(BATCH_SIZE, [enc_h, enc_c], tf.float32)pred = decoder(dec_input, decoder_initial_state)# pred.rnn_output Shape:  (batch, tar_length, tar_vocab_size)logits = pred.rnn_outputloss = loss_function(real, logits)variables = encoder.trainable_variables + decoder.trainable_variablesgradients = tape.gradient(loss, variables)optimizer.apply_gradients(zip(gradients, variables))return loss
Train the model
设定epoch为15,代码如下:
EPOCHS = 15# Encoder:
encoder = Encoder(vocab_inp_size, embedding_dim, units, BATCH_SIZE)# sample input
sample_hidden = encoder.initialize_hidden_state()
sample_output, sample_h, sample_c = encoder(example_input_batch, sample_hidden) # 等价于执行call函数# Decoder
decoder = Decoder(vocab_tar_size, embedding_dim, units, BATCH_SIZE, 'luong')#初始化一个y_init,当作第一个输出的输入y
sample_x = tf.random.uniform((BATCH_SIZE, max_length_output))
decoder.attention_mechanism.setup_memory(sample_output)
# [sample_h, sample_c]最后一个步长的输出hidden and cell state设定为decoder rnn_cell的初始状态
initial_state = decoder.build_initial_state(BATCH_SIZE, [sample_h, sample_c], tf.float32)
sample_decoder_outputs = decoder(sample_x, initial_state)lossList = []
for epoch in range(EPOCHS):start = time.time()enc_hidden = encoder.initialize_hidden_state()total_loss = 0# 一个hidden一个cell stateprint('encoder hiden shape:',np.array(enc_hidden).shape)for (batch, (inp, targ)) in enumerate(train_dataset.take(steps_per_epoch)):batch_loss = train_step(inp, targ, enc_hidden)total_loss += batch_lossif batch % 100 == 0:print('Epoch {} Batch {} Loss {:.4f}'.format(epoch + 1,batch,batch_loss.numpy()))# saving (checkpoint) the model every 2 epochsif (epoch + 1) % 2 == 0:checkpoint.save(file_prefix = checkpoint_prefix)print('Epoch {} Loss {:.4f}'.format(epoch + 1,total_loss / steps_per_epoch))print('Time taken for 1 epoch {} sec\n'.format(time.time() - start))lossList.append(total_loss / steps_per_epoch)plt.plot(lossList,label="loss")
plt.legend()
plt.show()

从图中可以看出,15轮之后,loss已经很低了,到底有没有过拟合呢,我们测试一下,测试之前,我们还需要一点准备工作。
利用不同Decoder模型实现机器翻译
Use tf-addons BasicDecoder for decoding
BasicDecoder是最基础的Decoder方法,GreedyEmbeddingHelper:预测阶段最常使用的Sampler,下一时刻输入是上一时刻概率最大的单词通过embedding之后的向量,即贪心选择。
def evaluate_sentence(sentence):sentence = dataset_creator.preprocess_sentence_english(sentence)inputs = [inp_lang.word_index[i] for i in sentence.split(' ')]inputs = tf.keras.preprocessing.sequence.pad_sequences([inputs],maxlen=max_length_input,padding='post')inputs = tf.convert_to_tensor(inputs)inference_batch_size = inputs.shape[0]print("input shape:",inputs.shape)result = ''enc_start_state = [tf.zeros((inference_batch_size, units)), tf.zeros((inference_batch_size,units))]enc_out, enc_h, enc_c = encoder(inputs, enc_start_state)dec_h = enc_hdec_c = enc_cstart_tokens = tf.fill([inference_batch_size], targ_lang.word_index['<start>'])end_token = targ_lang.word_index['<end>']"""A inference sampler that takes the maximum from the output distribution.Uses the argmax of the output (treated as logits) and passes theresult through an embedding layer to get the next input."""# “GreedyEmbeddingHelper”:预测阶段最常使用的Sampler,下一时刻输入是上一时刻概率最大的单词通过embedding之后的向量# 即贪心选择greedy_sampler = tfa.seq2seq.GreedyEmbeddingSampler()# Instantiate BasicDecoder objectdecoder_instance = tfa.seq2seq.BasicDecoder(cell=decoder.rnn_cell, sampler=greedy_sampler, output_layer=decoder.fc)# Setup Memory in decoder stackdecoder.attention_mechanism.setup_memory(enc_out)# set decoder_initial_statedecoder_initial_state = decoder.build_initial_state(inference_batch_size, [enc_h, enc_c], tf.float32)### Since the BasicDecoder wraps around Decoder's rnn cell only, you have to ensure that the inputs to BasicDecoder ### decoding step is output of embedding layer. tfa.seq2seq.GreedyEmbeddingSampler() takes care of this. ### You only need to get the weights of embedding layer, which can be done by decoder.embedding.variables[0] and pass this callabble to BasicDecoder's call() function# get the weights of embedding layer decoder_embedding_matrix = decoder.embedding.variables[0]outputs, _, _ = decoder_instance(decoder_embedding_matrix, start_tokens = start_tokens, end_token= end_token, initial_state=decoder_initial_state)return outputs.sample_id.numpy()def translate(sentence):result = evaluate_sentence(sentence)print(result)result = targ_lang.sequences_to_texts(result)print('Input: %s' % (sentence))print('Predicted translation: {}'.format(result))
代码不是很难,主要的难点上面Decoder已经讲过了,我就不废话了。
Use tf-addons BeamSearchDecoder
在BeamSearchDecoder中,存在一个beam search,不保证全局最优,但是比greedy search搜索空间更大,一般结果比greedy search要好。greedy search 可以看做是 beam size = 1时的 beam search。
BeamSearchDecoder每次预测都记录最优的beam_width个预测,然后沿着这beam_width个预测继续预测, 每次后续的预测都只挑选下一步最好的beam_width个预测。 这样加大了搜索范围,使我们有机会接触到全局较优路径,如图:

'''
beam search不保证全局最优,但是比greedy search搜索空间更大,一般结果比greedy search要好。
greedy search 可以看做是 beam size = 1时的 beam search。
每次预测都记录最优的3个预测,然后沿着这3个预测继续预测,
每次后续的预测都只挑选下一步最好的3个预测。 这样加大了搜索范围,使我们有机会接触到全局较优路径。
'''
def beam_evaluate_sentence(sentence, beam_width=3):sentence = dataset_creator.preprocess_sentence_english(sentence) inputs = [inp_lang.word_index[i] for i in sentence.split(' ')]inputs = tf.keras.preprocessing.sequence.pad_sequences([inputs],maxlen=max_length_input,padding='post')inputs = tf.convert_to_tensor(inputs)inference_batch_size = inputs.shape[0]result = ''enc_start_state = [tf.zeros((inference_batch_size, units)), tf.zeros((inference_batch_size,units))]enc_out, enc_h, enc_c = encoder(inputs, enc_start_state)dec_h = enc_hdec_c = enc_cstart_tokens = tf.fill([inference_batch_size], targ_lang.word_index['<start>'])end_token = targ_lang.word_index['<end>']# From official documentation# NOTE If you are using the BeamSearchDecoder with a cell wrapped in AttentionWrapper, then you must ensure that:# The encoder output has been tiled to beam_width via tfa.seq2seq.tile_batch (NOT tf.tile).# The batch_size argument passed to the get_initial_state method of this wrapper is equal to true_batch_size * beam_width.# The initial state created with get_initial_state above contains a cell_state value containing properly tiled final state from the encoder.enc_out = tfa.seq2seq.tile_batch(enc_out, multiplier=beam_width)decoder.attention_mechanism.setup_memory(enc_out)print("beam_with * [batch_size, max_length_input, rnn_units] :  3 * [1, ",max_length_input,", 1024]] :", enc_out.shape)# set decoder_inital_state which is an AttentionWrapperState considering beam_widthhidden_state = tfa.seq2seq.tile_batch([enc_h, enc_c], multiplier=beam_width)decoder_initial_state = decoder.rnn_cell.get_initial_state(batch_size=beam_width*inference_batch_size, dtype=tf.float32)decoder_initial_state = decoder_initial_state.clone(cell_state=hidden_state)# Instantiate BeamSearchDecoderdecoder_instance = tfa.seq2seq.BeamSearchDecoder(decoder.rnn_cell,beam_width=beam_width, output_layer=decoder.fc)decoder_embedding_matrix = decoder.embedding.variables[0]# The BeamSearchDecoder object's call() function takes care of everything.outputs, final_state, sequence_lengths = decoder_instance(decoder_embedding_matrix, start_tokens=start_tokens, end_token=end_token, initial_state=decoder_initial_state)# outputs is tfa.seq2seq.FinalBeamSearchDecoderOutput object. # The final beam predictions are stored in outputs.predicted_id# outputs.beam_search_decoder_output is a tfa.seq2seq.BeamSearchDecoderOutput object which keep tracks of beam_scores and parent_ids while performing a beam decoding step# final_state = tfa.seq2seq.BeamSearchDecoderState object.# Sequence Length = [inference_batch_size, beam_width] details the maximum length of the beams that are generated# outputs.predicted_id.shape = (inference_batch_size, time_step_outputs, beam_width)# outputs.beam_search_decoder_output.scores.shape = (inference_batch_size, time_step_outputs, beam_width)# Convert the shape of outputs and beam_scores to (inference_batch_size, beam_width, time_step_outputs)final_outputs = tf.transpose(outputs.predicted_ids, perm=(0,2,1))beam_scores = tf.transpose(outputs.beam_search_decoder_output.scores, perm=(0,2,1))return final_outputs.numpy(), beam_scores.numpy()def beam_translate(sentence):result, beam_scores = beam_evaluate_sentence(sentence)print(result.shape, beam_scores.shape)for beam, score in zip(result, beam_scores):print(beam.shape, score.shape)output = targ_lang.sequences_to_texts(beam)output = [a[:a.index('<end>')] for a in output]beam_score = [a.sum() for a in score]print('Input: %s' % (sentence))for i in range(len(output)):print('{} Predicted translation: {}  {}'.format(i+1, output[i], beam_score[i]))
需要注意一点,beam_score的计算,源码上是这么说的:
The scores this step, which are the log probabilities over the output vocabulary, possibly penalized by length and attention coverage. When tfa.seq2seq.BeamSearchDecoder is created with output_all_scores=False (default), this will be a float32 Tensor of shape [batch_size, beam_width] containing the top scores corresponding to the predicted IDs. When output_all_scores=True, this contains the scores for all token IDs and has shape [batch_size, beam_width, vocab_size].
翻译过来就是:
这一步的分数,即输出词汇的对数概率,可能会受到length和attention覆盖的影响。 当 tfa.seq2seq.BeamSearchDecoder 使用 output_all_scores=False(默认)创建时,这将是一个形状为 [batch_size, beam_width] 的 float32 张量,包含与预测 ID 对应的最高分数。 当 output_all_scores=True 时,这包含所有令牌 ID 的分数,并且形状为 [batch_size, beam_width, vocab_size]
效果对比
看一下实现的效果:
BasicDecoder

BeamSearchDecoder

其实差别不是很大,比较简单的基本都能翻译正确,稍微难点就错了,所以现在基本没有人用这个,玩玩就好,哈哈哈,还是BERT流弊啊!
讲到这里,代码基本都讲完了,如果需要全部代码,我提供了我的GitHub地址,需要的自行Clone哈!
GitHub地址
https://github.com/changliang5811/en-chn_translation_tfa_soft-attention.git
如果网络不好也可以通过CSDN资源下载,链接:机器翻译NMT with Attention
总结
写到这里,Attention三部曲,完结!
从原理机制到源码解析,再到案例实战,我希望大家看了我这三章一整套内容,可以对Attention模型有了更深的了解,可以用于自己的科研实验当中,希望我这篇文章可以为大家接下来的科研实验提供一个思路和解决方案!那样我就觉得我文章没有白写,值!
我可能写的稍微粗略了点,如果大家有哪里不明白,可以私信或者留言,知无不言,言无不尽!本人水平有限,有不对的地方欢迎大家批评指正!
感谢各位大佬分享的精彩文章,链接我均附在参考当中,再次表示感谢🙏!
最近我导师给我的的任务又开始多了起来😮💨。对了,给接下来即将步入科研事业的小白或者几近崩溃的研究生说几句话,纯属个人想法:
没有白打的工,这肯定或多或少会给你带来一定的收获,一定会有知识,但一定不会全是知识,放平心态,不怨不怠,不攀不比,踏踏实实,尽力就好,你已经做得很棒了!
所以我接下来一段时间可能更新博客没那么及时,但是我会抽出时间来写的,希望大家谅解😭😭😭!
彩蛋
也不打哑迷了,下一篇——词向量介绍以及具体实现!
万事开头难,希望接下来的博客之旅,我可以一直坚持下去!加油吧,科研人!
最后,再次感谢大家的阅读,我们下一章,词向量,不见不散哈😊!
参考
- https://tensorflow.google.cn/addons/tutorials/networks_seq2seq_nmt
- https://zhuanlan.zhihu.com/p/342948279
- https://zhuanlan.zhihu.com/p/82829880
- https://blog.csdn.net/qq_41329791/article/details/112393783
- https://www.jianshu.com/p/5ff760348eba

![学习CANopen --- [3] NMT报文](https://img-blog.csdnimg.cn/20200606102208730.png?x-oss-process=image/watermark,type_ZmFuZ3poZW5naGVpdGk,shadow_10,text_aHR0cHM6Ly9ibG9nLmNzZG4ubmV0L3doYWh1MTk4OQ==,size_16,color_FFFFFF,t_70)