1、选项卡TabHost介绍
TabHost可以方便地在窗口上放置多个标签页,每个标签页相当于获得了一个与外部容器大小相同的组件摆放区域
TabHost是一个简单的容器,提供如下两种方法来创建选项卡
newTabSpec(String tag):创建选项卡
addTab(TabHost.TabSpec tabSpec):添加选项卡
使用TabHost有三种方法
2、方法1,继承TabActivity
主布局文件不需要定义TabHost组件,这里用三个垂直的LinearLayout作为标签页,每个标签页里面有两个TextView组件,main_tab.xml代码如下:
<FrameLayoutxmlns:android="http://schemas.android.com/apk/res/android"android:id="@android:id/tabcontent"android:layout_width="match_parent"android:layout_height="match_parent"><!-- 定义第一个标签页的内容 --><LinearLayoutandroid:id="@+id/tab01"android:orientation="vertical"android:layout_width="match_parent"android:layout_height="match_parent"><TextViewandroid:layout_width="wrap_content"android:layout_height="wrap_content"android:text="第一个标签页的第1个TextView组件"android:textSize="8pt" /><TextViewandroid:layout_width="wrap_content"android:layout_height="wrap_content"android:text="第一个标签页的第2个TextView组件"android:textSize="8pt" /></LinearLayout><!-- 定义第二个标签页的内容 --><LinearLayoutandroid:id="@+id/tab02"android:orientation="vertical"android:layout_width="match_parent"android:layout_height="match_parent"><TextViewandroid:layout_width="wrap_content"android:layout_height="wrap_content"android:text="第二个标签页的第1个TextView组件"android:textSize="8pt" /><TextViewandroid:layout_width="wrap_content"android:layout_height="wrap_content"android:text="第二个标签页的第2个TextView组件"android:textSize="8pt" /></LinearLayout><!-- 定义第三个标签页的内容 --><LinearLayoutandroid:id="@+id/tab03"android:orientation="vertical"android:layout_width="match_parent"android:layout_height="match_parent"><TextViewandroid:layout_width="wrap_content"android:layout_height="wrap_content"android:text="第三个标签页的第1个TextView组件"android:textSize="8pt" /><TextViewandroid:layout_width="wrap_content"android:layout_height="wrap_content"android:text="第三个标签页的第2个TextView组件"android:textSize="8pt" /></LinearLayout>
</FrameLayout>
在Java代码中将Activity继承TabActivity,具体代码如下:
package com.example.tabhosttest;import android.app.TabActivity;
import android.os.Bundle;
import android.view.LayoutInflater;
import android.widget.TabHost;
import android.widget.TabHost.OnTabChangeListener;
import android.widget.Toast;public class MainActivity extends TabActivity
{@Overridepublic void onCreate(Bundle savedInstanceState){super.onCreate(savedInstanceState);//setContentView(R.layout.main_tab);// 获取该Activity里面的TabHost组件TabHost tabHost = getTabHost();LayoutInflater.from(this).inflate(R.layout.main_tab,  tabHost.getTabContentView(), true);// 创建第一个Tab页/*TabHost.TabSpec tab1 = tabHost.newTabSpec("tab1").setIndicator("标签页一") // 设置标题.setContent(R.id.tab01); //设置内容// 添加第一个标签页tabHost.addTab(tab1);TabHost.TabSpec tab2 = tabHost.newTabSpec("tab2").setIndicator("标签页二").setContent(R.id.tab02);// 添加第二个标签页tabHost.addTab(tab2);TabHost.TabSpec tab3 = tabHost.newTabSpec("tab3").setIndicator("标签页三").setContent(R.id.tab03);// 添加第三个标签页tabHost.addTab(tab3);*//* 以上创建和添加标签页也可以用如下代码实现 */tabHost.addTab(tabHost.newTabSpec("tab1").setIndicator("标签页一").setContent(R.id.tab01));tabHost.addTab(tabHost.newTabSpec("tab2").setIndicator("标签页二").setContent(R.id.tab02));tabHost.addTab(tabHost.newTabSpec("tab3").setIndicator("标签页三").setContent(R.id.tab03));//标签切换事件处理,setOnTabChangedListener  tabHost.setOnTabChangedListener(new OnTabChangeListener(){    @Override  // tabId是newTabSpec参数设置的tab页名,并不是layout里面的标识符idpublic void onTabChanged(String tabId) {  if (tabId.equals("tab1")) {   //第一个标签  Toast.makeText(MainActivity.this, "点击标签页一", Toast.LENGTH_SHORT).show();}  if (tabId.equals("tab2")) {   //第二个标签  Toast.makeText(MainActivity.this, "点击标签页二", Toast.LENGTH_SHORT).show();}  if (tabId.equals("tab3")) {   //第三个标签  Toast.makeText(MainActivity.this, "点击标签页三", Toast.LENGTH_SHORT).show();}  }              }); }
}
这里有两个地方注意一下,第一没有使用setContentView,而是用inflate方法;第二在设置标签页改变监听器时,onTabChanged的参数tabId是使用newTabSpec方法的参数设置的标签页名称,而不是布局文件中标签页的标识符Id;第三为了测试方便使用了Toast,
关于inflate和Toast,下面再学习,先简单了解一下
LayoutInflater的作用是将xml布局文件实例话,Toast是在屏幕上显示提示信息
点击第二个标签页之后,显示效果如下图9-2-1所示:

图 9-2-1
3、方法2,在布局文件中使用TabHost,不用继承TabActivity
使用findViewById获取TabHost组件
1 在界面布局中定义TabHost组件,并为该组件定义选项卡内容
2 使用findViewById获取TabHost组件
3 通过TabHost对象的方法来创建和添加选项卡
布局文件为activity_main.xml如下:
<TabHostxmlns:android="http://schemas.android.com/apk/res/android"android:id="@android:id/tabhost"android:layout_width="match_parent"android:layout_height="match_parent"android:layout_weight="1"><LinearLayout android:orientation="vertical"android:layout_width="match_parent"android:layout_height="match_parent"><!-- TabWidget组件id值不可变--><TabWidget android:id="@android:id/tabs"android:layout_width="match_parent"android:layout_height="wrap_content"></TabWidget><!-- FrameLayout布局,id值不可变--><FrameLayout android:id="@android:id/tabcontent"android:layout_width="fill_parent"android:layout_height="fill_parent"android:layout_above="@android:id/tabs"><!-- 第一个tab的布局 -->  <LinearLayout  android:id="@+id/tab1"  android:layout_width="match_parent"  android:layout_height="match_parent" >  <TextView  android:layout_width="wrap_content"  android:layout_height="wrap_content"  android:text="第一个tab的布局" />  </LinearLayout>  <!-- 第二个tab的布局 -->  <LinearLayout  android:id="@+id/tab2"  android:layout_width="match_parent"  android:layout_height="match_parent" >  <TextView  android:layout_width="wrap_content"  android:layout_height="wrap_content"  android:text="第二个tab的布局" />  </LinearLayout>  </FrameLayout>     </LinearLayout>
</TabHost>
java代码如下:
package com.example.tabhost;
import android.app.Activity;
import android.os.Bundle;
import android.widget.TabHost;
public class MainActivity extends Activity {
@Override
protected void onCreate(Bundle savedInstanceState) {
super.onCreate(savedInstanceState);
setContentView(R.layout.activity_main);
TabHost tab = (TabHost) findViewById(android.R.id.tabhost);
//初始化TabHost容器
tab.setup();
//在TabHost创建标签,然后设置:标题/图标/标签页布局
tab.addTab(tab.newTabSpec("tab1").setIndicator("本地音乐" , null).setContent(R.id.tab1));
tab.addTab(tab.newTabSpec("tab2").setIndicator("网络音乐" , null).setContent(R.id.tab2));
}
}
这段非转载代码,用的和作者不是一个xml,效果图如下:
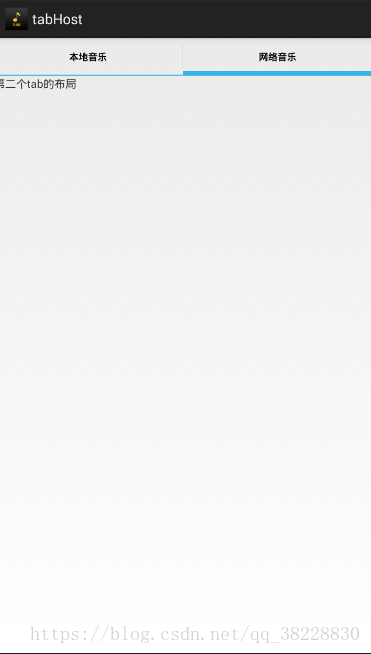
4、方法3基本和方法2类似,不用继承TabActivity,只是Tab的内容分开到单独的xml文件,每个标签页都需要inflate一次,和方法2最大的区别就是标签页分开到不同的xml文件中
tab1对应的tab1.xml:
<LinearLayoutxmlns:android="http://schemas.android.com/apk/res/android"android:id="@+id/tab01"android:orientation="vertical"android:layout_width="match_parent"android:layout_height="match_parent"><TextViewandroid:layout_width="wrap_content"android:layout_height="wrap_content"android:text="第一个标签页的第1个TextView组件"android:textSize="8pt" /><TextViewandroid:layout_width="wrap_content"android:layout_height="wrap_content"android:text="第一个标签页的第2个TextView组件"android:textSize="8pt" />
</LinearLayout>
tab2对应的tab2.xml:
<LinearLayoutxmlns:android="http://schemas.android.com/apk/res/android"android:id="@+id/tab02"android:orientation="vertical"android:layout_width="match_parent"android:layout_height="match_parent"><TextViewandroid:layout_width="wrap_content"android:layout_height="wrap_content"android:text="第二个标签页的第1个TextView组件"android:textSize="8pt" /><TextViewandroid:layout_width="wrap_content"android:layout_height="wrap_content"android:text="第二个标签页的第2个TextView组件"android:textSize="8pt" />
</LinearLayout>
tab3对应的tab3.xml:
<LinearLayoutxmlns:android="http://schemas.android.com/apk/res/android"android:id="@+id/tab03"android:orientation="vertical"android:layout_width="match_parent"android:layout_height="match_parent"><TextViewandroid:layout_width="wrap_content"android:layout_height="wrap_content"android:text="第三个标签页的第1个TextView组件"android:textSize="8pt" /><TextViewandroid:layout_width="wrap_content"android:layout_height="wrap_content"android:text="第三个标签页的第2个TextView组件"android:textSize="8pt" />
</LinearLayout>
主布局文件main.xml:
<?xml version="1.0" encoding="utf-8"?>
<TabHostxmlns:android="http://schemas.android.com/apk/res/android"android:id="@+id/tabhost"android:layout_width="match_parent"android:layout_height="match_parent"android:layout_weight="1"><LinearLayoutandroid:layout_width="match_parent"android:layout_height="match_parent"android:orientation="vertical"><TabWidgetandroid:id="@android:id/tabs"android:layout_width="match_parent"android:layout_height="wrap_content"/><FrameLayoutandroid:id="@android:id/tabcontent"android:layout_width="match_parent"android:layout_height="match_parent"></FrameLayout></LinearLayout>
</TabHost>
Java代码如下:
package com.example.tabhosttest;import android.app.Activity;
import android.app.TabActivity;
import android.os.Bundle;
import android.view.LayoutInflater;
import android.widget.TabHost;
import android.widget.TabHost.OnTabChangeListener;
import android.widget.Toast;public class MainActivity extends Activity
{@Overridepublic void onCreate(Bundle savedInstanceState){super.onCreate(savedInstanceState);// 方法2、3使用:setContentView(R.layout.main);// 获取该Activity里面的TabHost组件// 方法1使用:// TabHost tabHost = getTabHost();// 方法1使用:// LayoutInflater.from(this).inflate(R.layout.main_tab, tabHost.getTabContentView(), true);// 方法2、3使用TabHost tabHost = (TabHost)findViewById(R.id.tabhost);tabHost.setup();// 方法3使用,动态载入xml,不需要ActivityLayoutInflater.from(this).inflate(R.layout.tab1, tabHost.getTabContentView());LayoutInflater.from(this).inflate(R.layout.tab2, tabHost.getTabContentView());LayoutInflater.from(this).inflate(R.layout.tab3, tabHost.getTabContentView());// 创建第一个Tab页/*TabHost.TabSpec tab1 = tabHost.newTabSpec("tab1").setIndicator("标签页一") // 设置标题.setContent(R.id.tab01); //设置内容// 添加第一个标签页tabHost.addTab(tab1);TabHost.TabSpec tab2 = tabHost.newTabSpec("tab2").setIndicator("标签页二").setContent(R.id.tab02);// 添加第二个标签页tabHost.addTab(tab2);TabHost.TabSpec tab3 = tabHost.newTabSpec("tab3").setIndicator("标签页三").setContent(R.id.tab03);// 添加第三个标签页tabHost.addTab(tab3);*//* 以上创建和添加标签页也可以用如下代码实现 */tabHost.addTab(tabHost.newTabSpec("tab1").setIndicator("标签页一").setContent(R.id.tab01));tabHost.addTab(tabHost.newTabSpec("tab2").setIndicator("标签页二").setContent(R.id.tab02));tabHost.addTab(tabHost.newTabSpec("tab3").setIndicator("标签页三").setContent(R.id.tab03));//标签切换事件处理,setOnTabChangedListener  tabHost.setOnTabChangedListener(new OnTabChangeListener(){    @Override  // tabId是newTabSpec第一个参数设置的tab页名,并不是layout里面的标识符idpublic void onTabChanged(String tabId) {  if (tabId.equals("tab1")) {   //第一个标签  Toast.makeText(MainActivity.this, "点击标签页一", Toast.LENGTH_SHORT).show();}  if (tabId.equals("tab2")) {   //第二个标签  Toast.makeText(MainActivity.this, "点击标签页二", Toast.LENGTH_SHORT).show();}  if (tabId.equals("tab3")) {   //第三个标签  Toast.makeText(MainActivity.this, "点击标签页三", Toast.LENGTH_SHORT).show();}  }              }); }
}
![[Android] 选项卡组件TabHost](https://img-blog.csdnimg.cn/dc9f0f49547249eaafc3834526938007.png?x-oss-process=image/watermark,type_d3F5LXplbmhlaQ,shadow_50,text_Q1NETiBA5Yaw6JC96aKo57Wh,size_16,color_FFFFFF,t_70,g_se,x_16)