1. Xwiki介绍

印象笔记、有道笔记、为知笔记都是挺好的商用笔记知识管理软件,不过有些敏感文件是不太好放到互联网上的。
所以搭建一套内部局域网知识管理平台是非常有意义的,在开源Wiki系统中,XWiki是做的最好的产品之一。因为它提供的功能与Confluence的功能非常相似,不需要学习任何语法格式,可以直接在线像编辑Word一样编辑WIKI页面。通过配置插件和扩展,还可以实现包括Markdown语法之内的各种延展功能。
所以在2021年就撸了一遍xwiki,现在把当时的记录整理一遍,以飨同行。
2. 简介
本文基于Centos7.x+Tomcat+Mysql进行部署Xwiki11.10.10。

 Xwiki安装前仔细阅读Release Notes for XWiki 11.10.10,可以避免走很多不必要的坑。
3.安装步骤
3.1安装Tomcat
安装tomcat前首先要安装对应的jdk并配置Java环境。
3.1.1下载jdk安装包
官网下载地址:http://www.oracle.com/technetwork/java/javase/downloads/jdk8-downloads-2133151.html
我这边是下载的jdk-8u181-linux-x64.tar.gz
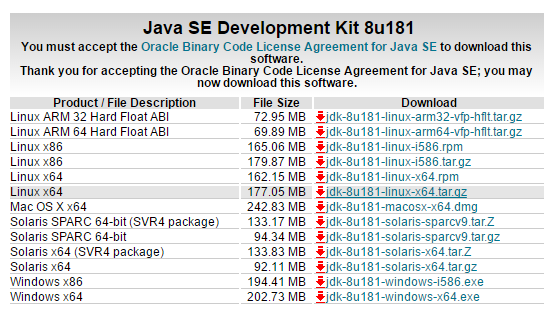
如果Linux本身连接到互联网,我们可以直接通过wget命令直接把JDK安装包下载下来。
3.1.2解压jdk安装包
将我们下载好的JDK安装包上传到服务器,进行解压。

我是放在了/usr/local/java文件下,所以要创建java文件夹并将解压文件移动到java下
mkdir -p /usr/local/java
3.1.3修改配置文件(配置环境变量)
vim /etc/profile
export JAVA_HOME=/usr/local/java/jdk1.8.0_271
export JAVA_BIN=/usr/local/java/jdk1.8.0_271/bin
export PATH=${JAVA_HOME}/bin:$PATH
export CLASSPATH=.:${JAVA_HOME}/lib/dt.jar:${JAVA_HOME}/lib/tools.jar
用vim编辑器来编辑profile文件,在文件末尾添加一下内容:

:wq回车保存退出。
保存之后通过source /etc/profile命令使修改的配置生效

3.1.4测试JDK安装是否成功
java -version 出现安装版本信息

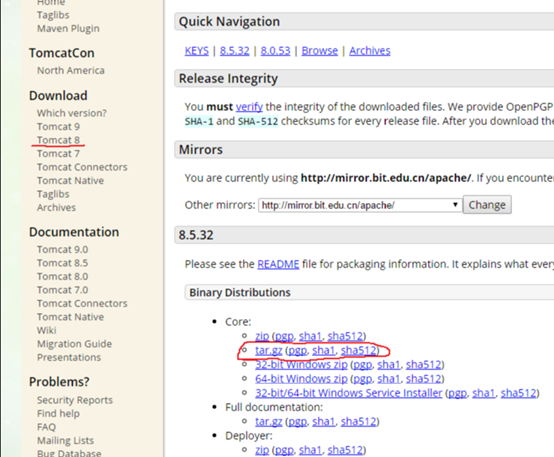
3.1.5安装tomcat
下载安装tomcat(http://tomcat.apache.org/)我这边是下载的apache-tomcat-8.5.32.tar.gz
解压
tar -zxvf apache-tomcat-9.0.41.tar.gz
我是放在了usr/local/tomcat下所以要创建tomcat文件夹并将解压文件移动到tomcat下
mkdir /usr/local/tomcat
mv apache-tomcat-9.0.41 /usr/local/tomcat/
进入tomcat安装bin目录并启动
cd /usr/local/tomcat/apache-tomcat-9.0.41/bin
./startup.sh

成功启动后浏览器输入http://localhost:8080/查看信息(如果不是本机则输入对应IP)至此,tomcat安装完成,后续可添加项目重启tomcat服务。
3.1.6将tomcat添加为linux系统服务
⑴复制catalina.sh作为系统服务脚本
cp -p /usr/local/tomcat/apache-tomcat-9.0.41/bin/catalina.sh /etc/init.d/tomcat 重命名的tomcat为以后的服务名
⑵修改脚本
vim /etc/init.d/tomcat
在脚本较前面的位置加下面两行注释
#chkconfig:2345 10 90
#description:Tomcat service
JAVA_HOME=/usr/local/java/jdk1.8.0_271
CATALINA_HOME=/usr/local/tomcat/apache-tomcat-9.0.41
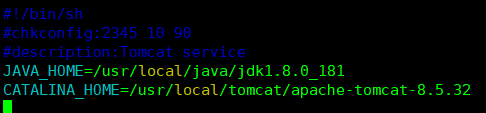
第一行是服务的配置:
第一个数字是服务的运行级,2345表明这个服务的运行级是2、3、4和5级(Linux的运行级为0到6);
第二个数字是启动优先级,数值从0到99;
第三个数是停止优先级,数值也是从0到99。
第二行是对服务的描述
如果该注释有误,在添加服务时会出现"tomcat不支持chkconfig"的错误提示
第三四行 为设置环境变量
在profile文件中设置的变量不起作用,要在这里再设置一遍
⑶添加脚本的可执行权限
chmod 755 /etc/init.d/tomcat
⑷添加为系统服务
chkconfig --add tomcat
⑸查看系统服务列表
chkconfig --list | grep tomcat
⑹启停tomcat 服务
启动tomcat
service tomcat start
停止
service tomcat stop
⑺设置为开机自动启动
vi /etc/rc.local
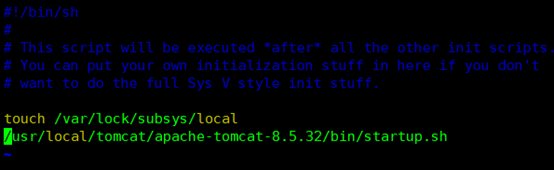
添加startup.sh的路径
/usr/local/tomcat/apache-tomcat-9.0.41/bin/startup.sh完成
⑻修改tomcat服务器的启动端口(未修改)
cd /usr/local/tomcat/apache-tomcat-8.5.32/conf/
vim server.xml

修改将Tomcat服务器启动时使用的8080端口,例如改成9999
Make sure you give enough memory to Java since by default Tomcat is not configured with enough memory for XWiki.
When you run XWiki in Tomcat with the default settings, you'll probably get an Out Of Memory error (java.lang.OutOfMemoryError: Java heap space or java.lang.OutOfMemoryError: PermGen space) since the default Tomcat memory settings are not enough for XWiki Memory Requirements. You'll need to allocate more memory to the JVM.
One easy solution to configure Tomcat's memory is to create a setenv.sh file (or setenv.bat on Windows) in [TOMCAT_HOME]/bin/ (where [TOMCAT_HOME] is where you've installed Tomcat) and inside this file add the following (adjust the memory values according to the XWiki Memory Requirements). For example:
CATALINA_OPTS="-Xmx4096m -XX:MaxPermSize=960m"
⑼手动解压war包到对应目录
Extract the XWiki WAR into a directory named xwiki in TOMCAT_HOME/webapps/
jar -xvf project.war
3.2 设置 permanent目录
Open TOMCAT_HOME/webapps/xwiki/WEB-INF/xwiki.properties files and configure a permanent directory
Permanent Directory
To set the permanent directory, you have 2 options:
Set the xwiki.data.dir system property when starting the JVM (ie. the Servlet Container's JVM, specifically: -Dxwiki.data.dir=...)
Set the environment.permanentDirectory property in your xwiki.properties file
Make sure to choose a folder different from the XWiki home on which XWiki (which usually means whatever user running the application server in which XWiki is installed) has write access. For example the standard Debian package use /var/lib/xwiki/data which is usually a good fit for many Linux distributions.
If the location points to a file or a directory to which XWiki(需要新建用户?) does not have write access to, a warning will be printed in the log and the temporary directory will be used as a default. The temporary directory can be periodically cleaned and all its content deleted so it is critical that it is not used for anything else. Thus it's especially important to set the Permanent directory to not point to the temporary directory.
Start Tomcat
When Tomcat has opened go to your wiki by accessing http://localhost:8080/xwiki/bin/view/Main/
NOTE - if you have issues with maximum cache size - In your $CATALINA_BASE/conf/context.xml add the following content before </Context>:
<Resources cachingAllowed="true" cacheMaxSize="100000" ></Resources>
Activate headless mode
If you're operating XWiki on a Linux server with no X11 libraries installed you have to enable headless mode for your Tomcat installation. Sometimes this is also needed on Windows platforms. Typical exceptions are:
Exception: Could not initialize class sun.awt.X11.XToolkit
java.lang.InternalError: Can't connect to X11 window server using 'localhost:10.0' as the value of the DISPLAY variable
On Linux create a file /TOMCAT_HOME/bin/setenv.sh and insert the following code:
#!/bin/sh
export JAVA_OPTS="${JAVA_OPTS} -Djava.awt.headless=true"
On Windows create a file /TOMCAT_HOME/bin/setenv.bat and insert the following code:
set JAVA_OPTS=%JAVA_OPTS% -Djava.awt.headless=true
When running as a Windows service the setenv.bat is not working. See registry HKEY_LOCAL_MACHINE\SOFTWARE\Apache Software Foundation\Procrun 2.0\FOOBAR\Parameters\Java for similar settings.
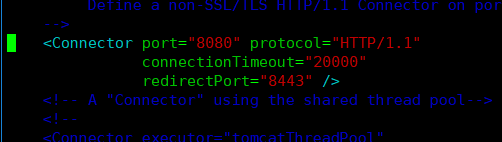
Optional configuration
Edit your conf/server.xml to enable gzip compression: <Connector port="8080" ... compression="on" compressionMinSize="2048" compressibleMimeType="text/html,text/xml,text/css,text/javascript,application/x-javascript"></Connector>
If you want to modify the port on which Tomcat will run, edit TOMCAT_HOME/conf/server.xml/. Search for 8080 (sometimes 8180 if you are under Linux) and replace with the port value you wish to use.
It is possible to setup a Tomcat Java Server as a UNIX Daemon - JSVC. Just follow these instructions. The only reason to make Tomcat a daemon is to make it runnable on the 80th port, which can be replaced by using NginX as a proxy on the 80th port and then forwarding to Tomcat to the 8080th port.
Policy configuration
For those who activate the security manager for Tomcat, add this portion of code to the end of your conf/catalina.policy file from your Tomcat installation. You can adapt the code for the available installations of OpenOffice/LibreOffice on your server and for different databases :
grant codeBase "file:${catalina.base}/webapps/xwiki/WEB-INF/lib/-" {
// for mySQL connection
permission java.net.SocketPermission "127.0.0.1:3306", "connect,resolve";
// XWiki must have access to all properties in read/write
permission java.util.PropertyPermission "*", "read, write";
// Generic detected permissions
permission java.lang.reflect.ReflectPermission "suppressAccessChecks";
permission java.lang.RuntimePermission "createClassLoader";
permission java.lang.RuntimePermission "setContextClassLoader";
permission java.lang.RuntimePermission "accessClassInPackage.org.apache.catalina.loader";
permission java.lang.RuntimePermission "accessDeclaredMembers";
permission java.lang.RuntimePermission "getenv.ProgramFiles";
permission java.lang.RuntimePermission "getenv.APPDATA";
permission java.lang.RuntimePermission "accessClassInPackage.sun.reflect";
permission java.lang.RuntimePermission "getClassLoader";
permission java.lang.RuntimePermission "accessClassInPackage.org.apache.catalina.connector";
permission java.lang.RuntimePermission "accessClassInPackage.org.apache.tomcat.util.threads";
permission java.lang.RuntimePermission "reflectionFactoryAccess";
permission java.lang.RuntimePermission "accessClassInPackage.com.sun.jmx.interceptor";
permission java.lang.RuntimePermission "accessClassInPackage.com.sun.jmx.mbeanserver";
permission java.lang.RuntimePermission "modifyThread";
permission java.lang.RuntimePermission "getProtectionDomain";
// JAXB permissions
permission javax.xml.bind.JAXBPermission "setDatatypeConverter";
// Serialization related permissions
permission java.io.SerializablePermission "allowSerializationReflection";
permission java.io.SerializablePermission "creator";
permission java.io.SerializablePermission "enableSubclassImplementation";
// Internal resources access permissions
permission java.io.FilePermission "synonyms.txt", "read";
permission java.io.FilePermission "lang/synonyms_en.txt", "read";
permission java.io.FilePermission "quartz.properties", "read";
permission java.io.FilePermission "/templates/-", "read";
permission java.io.FilePermission "/skins/-", "read";
permission java.io.FilePermission "/resources/-", "read";
// MBean related permissions
permission javax.management.MBeanServerPermission "createMBeanServer";
permission javax.management.MBeanPermission "*", "registerMBean";
permission javax.management.MBeanPermission "*", "unregisterMBean";
permission javax.management.MBeanTrustPermission "register";
permission javax.management.MBeanPermission "-#-[-]", "queryNames";
permission javax.management.MBeanServerPermission "findMBeanServer";
// LibreOffice/OpenOffice related permissions
permission java.io.FilePermission "/opt/openoffice.org3/program/soffice.bin", "read";
permission java.io.FilePermission "/opt/libreoffice/program/soffice.bin", "read";
permission java.io.FilePermission "/usr/lib/openoffice/program/soffice.bin", "read";
permission java.io.FilePermission "/usr/lib/libreoffice/program/soffice.bin", "read";
// Allow file storage directory reading - for directory and everything underneath
// This is dependent on the setting of environment.permanentDirectory in xwiki.properties
permission java.io.FilePermission "${catalina.base}${file.separator}xwikidata${file.separator}", "read,write,delete";
permission java.io.FilePermission "${catalina.base}${file.separator}xwikidata${file.separator}-", "read,write,delete";
// Allow file storage directory reading - temporary directory and everything underneath
// This is dependent on the setting of environment.temporaryDirectory in xwiki.properties.
permission java.io.FilePermission "${catalina.base}${file.separator}temp${file.separator}", "read,write,delete";
permission java.io.FilePermission "${catalina.base}${file.separator}temp${file.separator}-", "read,write,delete";
};
后续还可以配置ngnix https
3.3安装mysql
下载途径:From the Download MySQL Community Server page in the MySQL Developer Zone.
shell> sudo yum install mysql-community-{server,client,common,libs}-* -y
3.3.1启动服务
[root@sty software]# service mysqld start
Initializing MySQL database: /usr/sbin/mysqld: error while loading shared libraries: libnuma.so.1: cannot open shared object file: No such file or directory
MySQL has a dependency on the libaio library. Data directory initialization
and subsequent server startup steps will fail if this library is not installed locally.
If necessary, install it using the appropriate package manager. For example, on
Yum-based systems:
shell> yum search libaio # search for info
shell> yum install libaio # install library
[root@sty software]# yum install libaio* -y
[root@sty software]# service mysqld start
Initializing MySQL database: [ OK ]
Starting mysqld: [ OK ]
[root@sty software]# service mysqld status
mysqld (pid 63380) is running...
[root@sty software]#
3.3.2查看root密码
[root@xwiki soft]# more /var/log/mysqld.log |grep password
2021-01-16T10:18:48.243819Z 6 [Note] [MY-010454] [Server] A temporary password is generated for root@localhost: Hur!dHpCh1d? [root@xwiki soft]#
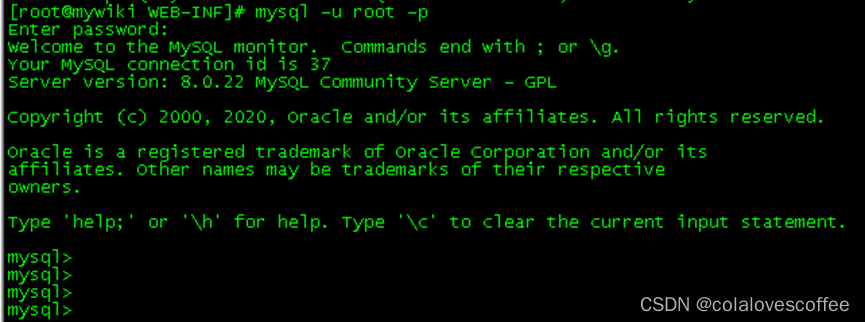
3.3.3登录
shell> mysql –u root -p
3.3.4修改密码规则以及修改密码
如果是以前的MySQL版本,常使用password函数来进行修改密码
mysql> update mysql.user set password=password('xxx') where user='root';
但是MySQL8之后,没有了password字段和password()函数,所以不能使用上面的修改密码的方法。
修改密码
mysql> alter user 'root'@'localhost' identified by 'Root@123456';
我们也还可以使用mysqladmin命令来进行修改
mysqladmin -u root -p '旧密码' password '新密码'
# mysqladmin -u root -p'Root@12345' password 'xxx'
alter user 'xwiki'@'localhost' identified by 'xwiki';
alter user 'root'@'localhost' identified by 'root';
mysql> set global validate_password.policy=LOW;
mysql> set global validate_password.length=4;
3.3.5创建xwiki数据库
mysql -u root -e "create database xwiki default character set utf8mb4 collate utf8mb4_bin"
mysql -u root -e "grant all privileges on *.* to xwiki@localhost"
ALTER USER 'xwiki'@'localhost' IDENTIFIED WITH MYSQL_NATIVE_PASSWORD BY ‘Passw0rd’;
ALTER USER 'root'@'localhost' IDENTIFIED WITH MYSQL_NATIVE_PASSWORD BY ‘Root@123456’;
If the above command fails with a password-does-not-meet-requirements error, uninstall the MySQL password_validate plugin or pick a more complex password and update the password used by default in hibernate.cfg.xml:
mysql -u root -p -e "uninstall plugin validate_password;"
Please make sure that the DNS-name "localhost" is defined in your hosts-file (i.e. /etc/hosts)
You need to have the MySQL JDBC Driver JAR (named mysql-connector-java*.jar) installed in XWiki's WAR file. If this file isn't present in XWiki's WEB-INF/lib directory you'll need to download it and copy it there. You can download it from the MySQL Connector/J Driver page or directly from the Maven Central Repository(这里有现成的).
You need the 5.x version or higher. The 3.x version doesn't handle Boolean data correctly and will either throw errors or will make all documents hidden by default.
Now you need to tell XWiki to use MySQL. To do this, edit the WEB-INF/hibernate.cfg.xml file where you have expanded the XWiki WAR file and replace the matching properties with the following ones:
<property name="connection.url">jdbc:mysql://localhost/xwiki</property>
<property name="connection.username">xwiki</property>
<property name="connection.password">Xwiki_123456</property>
<property name="connection.driver_class">com.mysql.jdbc.Driver</property>
<property name="dialect">org.hibernate.dialect.MySQL5InnoDBDialect</property>
<property name="connection.useUnicode">true</property>
<property name="connection.characterEncoding">UTF-8</property>
XML如何添加注释?
注释以 <!-- 开始并以 --> 结束,
例如 <!--注释内容-->。注释可以出现在文档序言中,包括文档类型定义 (DTD);文档之后;或文本内容中。 注释不能出现在属性值中。 不能出现在标记中。
分析器在遇到 > 时,就认为注释已结束;然后继续将文档作为正常的 XML 处理。 因此,字符串 > 不能出现在注释中。 除了该限制之外,任何合法的 XML 字符均可以出现在注释中,与 CDATA 节非常类似。 这样,可以从分析器看到的输出流中删除 XML 注释,同时又不会删除文档的内容。
以下注释可以用于暂时除去标记。
<!--- <test pattern="SECAM" /><test pattern="NTSC" /> -->
| 此处mysql8 需要配置publickey ttps://mysqlconnector.net/connection-options/ |
| <property name="hibernate.connection.url">jdbc:mysql://localhost/xwiki?allowPublicKeyRetrieval=true&useSSL=false&serverTimezone=${timezone}</property> |
By default MySQL only accepts packets that are smaller than 1MB. If you get the "Packet for query is too large (max_allowed_packet)" error then see the Packet too large error page. For example to increase the packet size to 32M you could start the MySQL server with mysqld --console --max_allowed_packet=32M or you can modify directly the my.cnf configuration file to set this value permanently.
If an empty XWiki starts with no errors, but you are unable to upload the default set of pages (XAR file) try to increase the max_allowed_packet parameter as shown above.
3.3.6给任意IP授权(尚未做)
3.3.7创建索引Indexes
// Required
create index xwl_value on xwikilargestrings (xwl_value(50));
create index xwd_parent on xwikidoc (xwd_parent(50));
create index xwd_class_xml on xwikidoc (xwd_class_xml(20));
create index ase_page_date on activitystream_events (ase_page, ase_date);
create index xda_docid1 on xwikiattrecyclebin (xda_docid);
create index ase_param1 on activitystream_events (ase_param1(200));
create index ase_param2 on activitystream_events (ase_param2(200));
create index ase_param3 on activitystream_events (ase_param3(200));
create index ase_param4 on activitystream_events (ase_param4(200));
create index ase_param5 on activitystream_events (ase_param5(200));
// Only required if you use stats (feature is off by default)
create index xws_number on xwikistatsdoc (XWS_NUMBER);
create index xws_classname on xwikistatsdoc (XWS_CLASSNAME);
create index xwr_number on xwikistatsreferer (XWR_NUMBER);
create index xwr_classname on xwikistatsreferer (XWR_CLASSNAME);
create index xwr_referer on xwikistatsreferer (XWR_REFERER(50));
create index xwv_user_agent on xwikistatsvisit (XWV_USER_AGENT(255));
create index xwv_cookie on xwikistatsvisit (XWV_COOKIE(255));
create index xwv_classname on xwikistatsvisit (XWV_CLASSNAME);
create index xwv_number on xwikistatsvisit (XWV_NUMBER);
Note to XWiki developers: The following indexes could be created automatically though since they're less than 255 characters and thus should be added in a future version of XWiki so that they don't need to be created manually:
create index xws_number on xwikistatsdoc (XWS_NUMBER);
create index xws_classname on xwikistatsdoc (XWS_CLASSNAME);
create index xwr_number on xwikistatsreferer (XWR_NUMBER);
create index xwr_classname on xwikistatsreferer (XWR_CLASSNAME);
create index xwv_classname on xwikistatsvisit (XWV_CLASSNAME);
create index xwv_number on xwikistatsvisit (XWV_NUMBER);
create index xda_docid1 on xwikiattrecyclebin (xda_docid);
3.4配置数据库相关参数
Create a user with all privileges on that database
Copy your RDBMS Java drivers to the XWiki webapp's WEB-INF/lib directory
Configure XWiki to use the created database. This involves modifying the WEB-INF/hibernate.cfg.xml file as is described in the tutorials for each database below.
XWiki will automatically create the various tables it needs when it executes on the first run
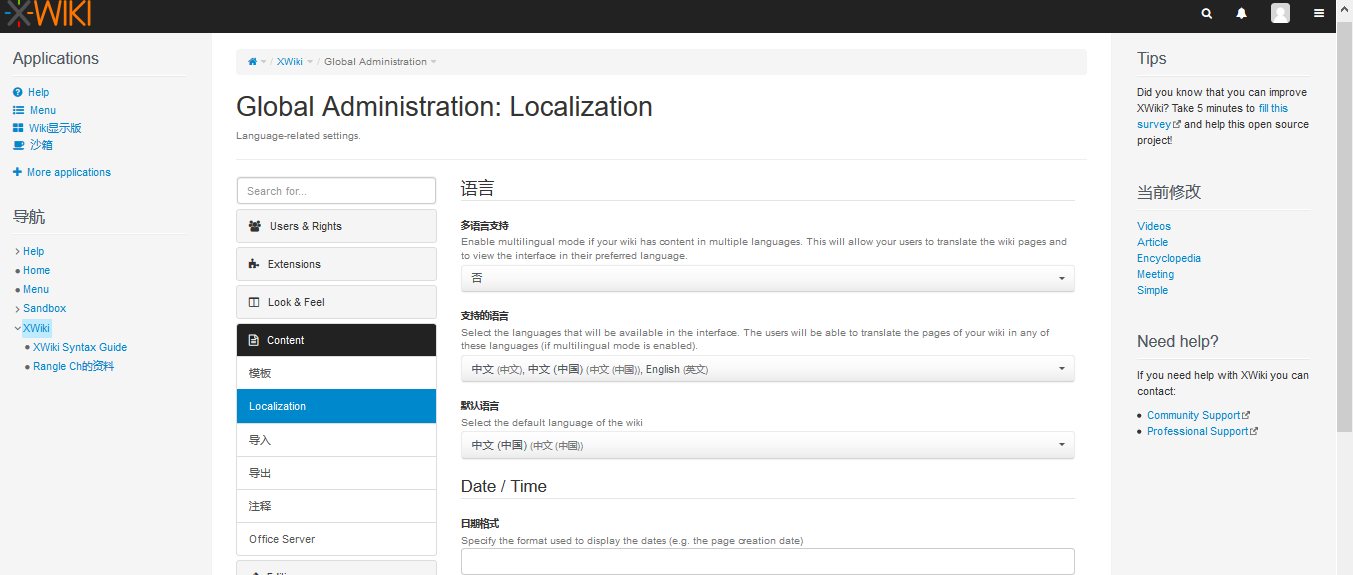
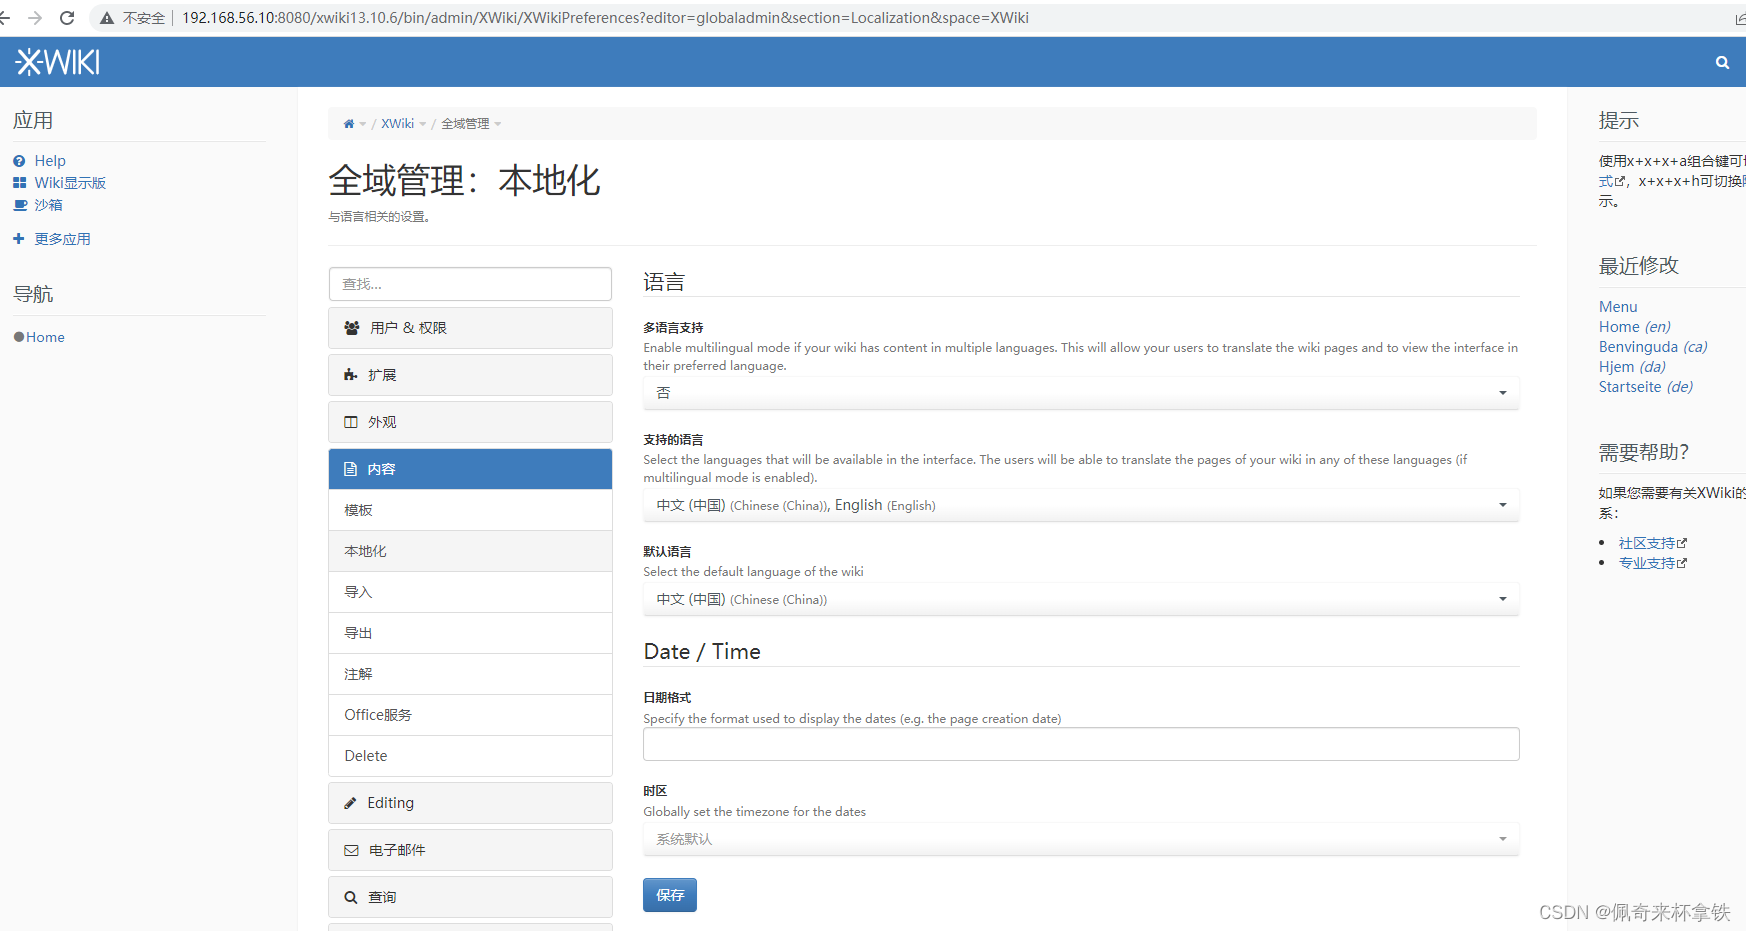
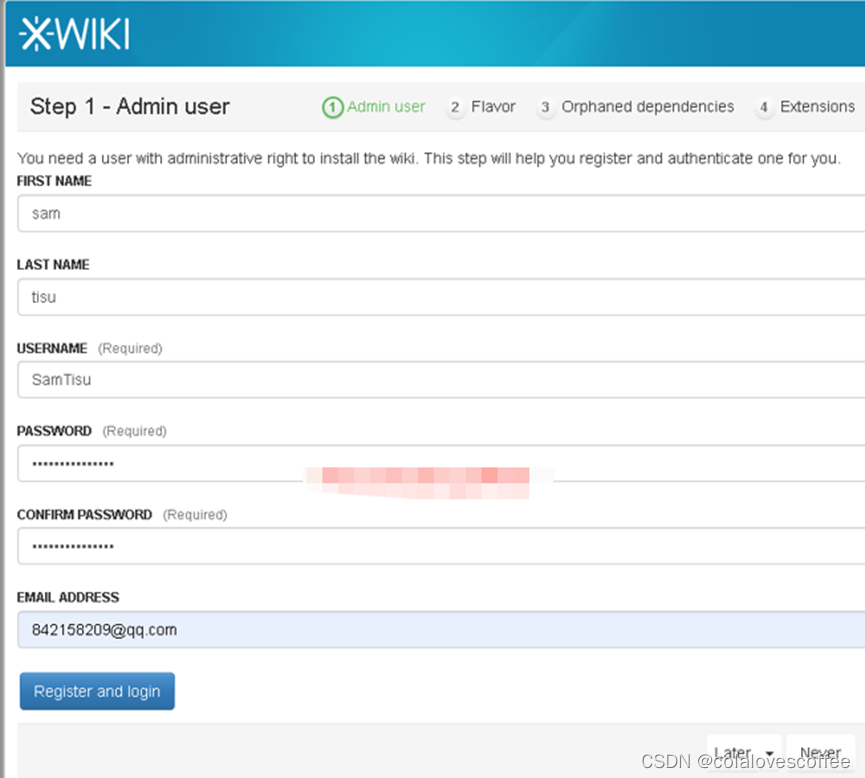
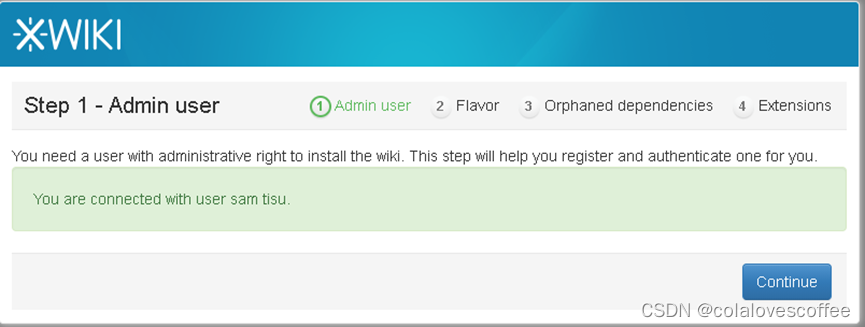
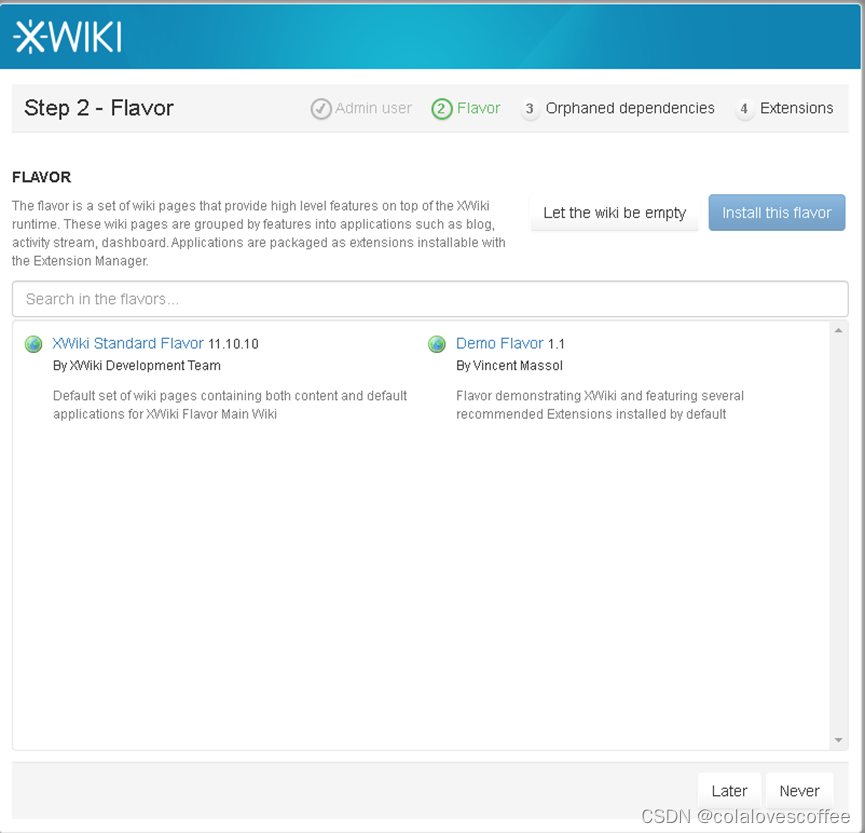
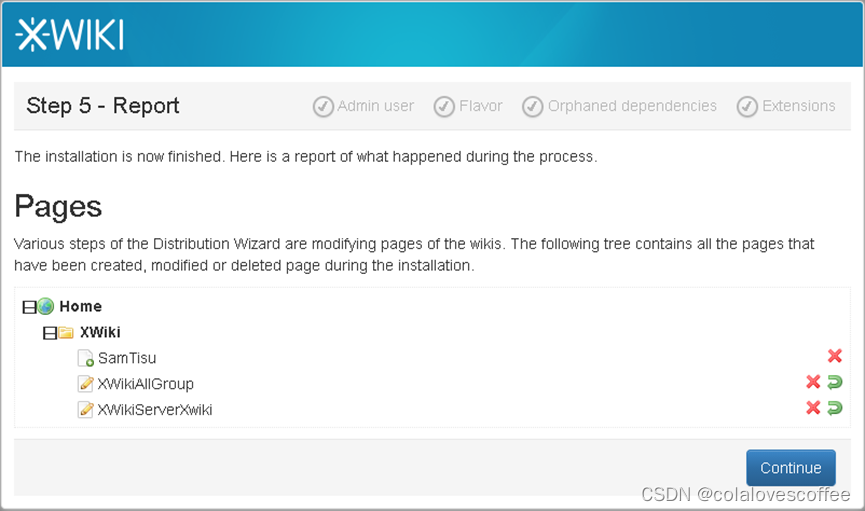
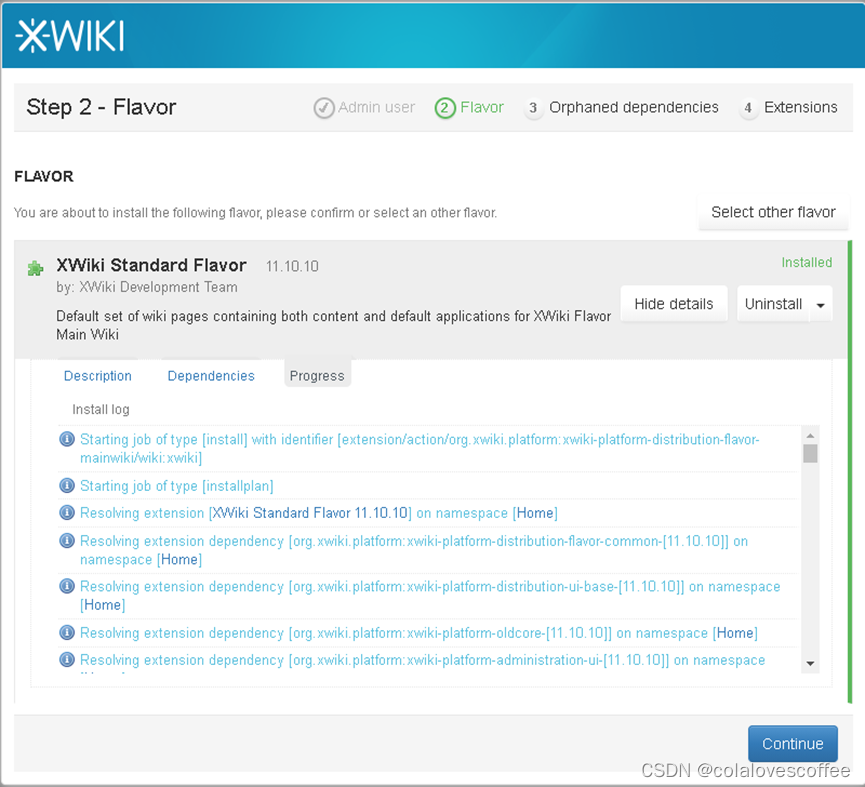
3.5配置Xwiki Ui界面


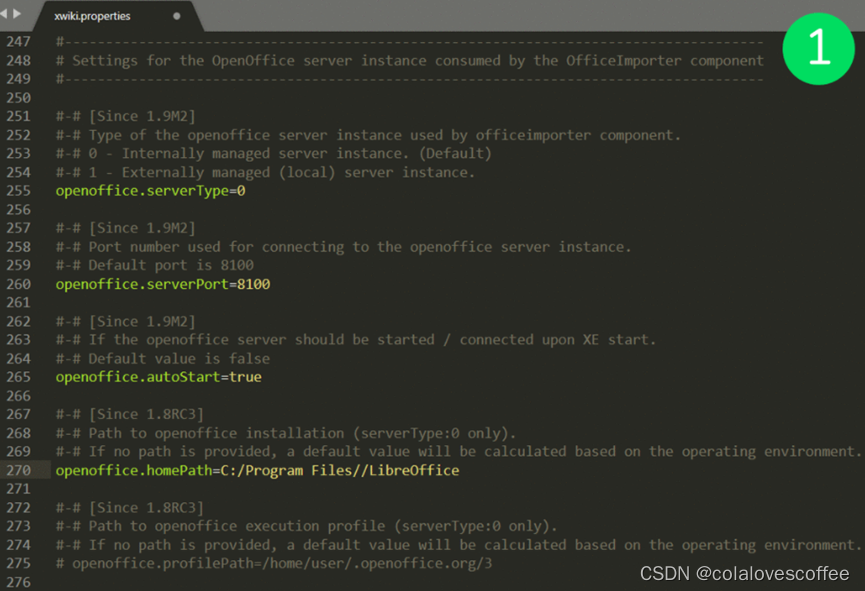
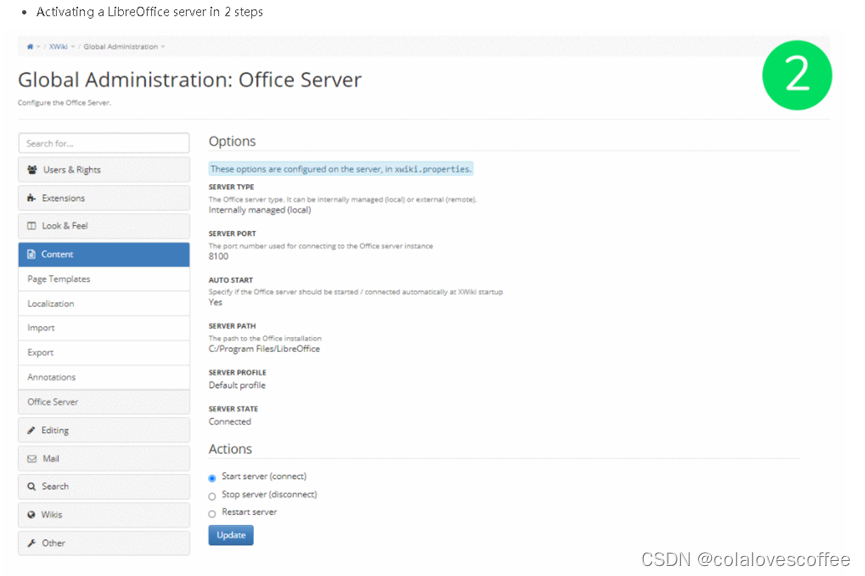
3.6开启Office Importer Application 方便word文档直接导入xwiki
The Office Importer application comes pre-bundled with XWiki versions greater than 1.8M1, so there is no need for a manual installation. The Office Importer makes use of a running Libre Office server to convert office documents into HTML before they are finally transformed into XWiki 2.0 syntax. Thus, a Libre Office server instance is required on the server computer which hosts your XWiki installation. Beginning with XWiki 1.8.4 you can configure a Libre Office or an OpenOffice server in the following ways described below.
4.结语
过程其实还是比较折腾的,自己搭的时候前前后后花了四五天的时间。官网还提供了docker安装选择,想用而且想偷懒的同学可以考虑。