在本教程中,您将学习如何使用 OpenCV 使用 EAST 文本检测器检测图像中的文本。
EAST 文本检测器要求我们在我们的系统上运行 OpenCV 3.4.2 或 OpenCV 4 。
-
论文原文:https://arxiv.org/abs/1704.03155
-
代码地址:https://github.com/argman/EAST
原文:
https://www.pyimagesearch.com/2018/08/20/opencv-text-detection-east-text-detector/
在今天教程的第一部分中,我将讨论为什么在自然场景图像中检测文本会如此具有挑战性。 从那里我将简要讨论 EAST 文本检测器,我们为什么使用它,以及是什么让算法如此新颖——我还将提供原始论文的链接,以便您可以阅读详细信息,如果您愿意的话。
最后,我将提供我的 Python + OpenCV 文本检测实现,以便您可以开始在自己的应用程序中应用文本检测。
为什么自然场景文本检测如此具有挑战性?
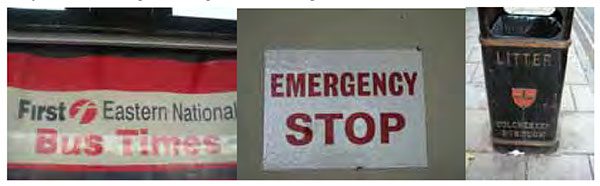
在受约束的受控环境中检测文本通常可以通过使用基于启发式的方法来完成,例如利用梯度信息或文本通常被分组为段落并且字符出现在一条直线上的事实。
然而,自然场景文本检测是不同的——而且更具挑战性。 由于廉价数码相机的普及,更不用说现在几乎每部智能手机都配备了相机这一事实,我们需要高度关注拍摄图像的条件——此外,我们可以做出哪些假设,哪些不可行。 我在 Celine Mancas-Thillou 和 Bernard Gosselin 的 2017 年优秀论文《自然场景文本理解》中描述了自然场景文本检测挑战的总结版本,如下所示:
- 图像/传感器噪声:手持相机的传感器噪声通常高于传统扫描仪的噪声。此外,低价相机通常会插入原始传感器的像素以产生真实的颜色。
- 视角:自然场景文本自然会有与文本不平行的视角,使文本更难识别。
- 模糊:不受控制的环境往往会模糊,特别是如果最终用户使用的智能手机没有某种形式的稳定性。
- 光照条件:我们无法对自然场景图像中的光照条件做出任何假设。可能接近黑暗,相机上的闪光灯可能打开,或者太阳可能很耀眼,使整个图像饱和。
- 分辨率:并非所有相机都是一样的——我们可能会处理分辨率低于标准的相机。
- 非纸质物体:大多数(但不是全部)纸张不具有反射性(至少在您尝试扫描的纸张环境中)。自然场景中的文本可能具有反射性,包括徽标、标志等。
- 非平面对象:考虑将文本环绕在瓶子周围时会发生什么 - 表面上的文本会扭曲变形。虽然人类可能仍然能够轻松“检测”和阅读文本,但我们的算法将面临困难。我们需要能够处理这样的用例。
- 未知布局:我们不能使用任何先验信息来为我们的算法提供有关文本所在位置的“线索”。
EAST 深度学习文本检测器
[外链图片转存失败,源站可能有防盗链机制,建议将图片保存下来直接上传(img-XXPKId7V-1637126841247)(https://pyimagesearch.com/wp-content/uploads/2018/08/opencv_text_detection_east.jpg)]
随着 OpenCV 3.4.2 和 OpenCV 4 的发布,我们现在可以使用名为 EAST 的基于深度学习的文本检测器,该检测器基于 Zhou 等人 2017 年的论文 EAST: An Efficient and Accurate Scene Text Detector。
我们称该算法为“EAST”,因为它是一个:高效且准确的场景文本检测管道。
这组作者说,EAST 管道能够预测 720p 图像上任意方向的单词和文本行,而且可以以 13 FPS 的速度运行。 也许最重要的是,由于深度学习模型是端到端的,因此可以避开其他文本检测器通常应用的计算成本高的子算法,包括候选聚合和单词分区。
为了构建和训练这样一个深度学习模型,EAST 方法利用了新颖、精心设计的损失函数。 有关 EAST 的更多详细信息,包括架构设计和训练方法,请务必参阅作者的出版物。
项目结构
$ tree --dirsfirst
.
├── images
│   ├── car_wash.png
│   ├── lebron_james.jpg
│   └── sign.jpg
├── frozen_east_text_detection.pb
├── text_detection.py
└── text_detection_video.py
请注意,我在 images/ 目录中提供了三张示例图片。 您可能希望添加自己的智能手机收集的图像或您在网上找到的图像。 我们今天将审查两个 .py 文件:
- text_detection.py :检测静态图像中的文本。
- text_detection_video.py :通过网络摄像头或输入视频文件检测文本。
实施说明
我今天包含的文本检测实现基于 OpenCV 的官方 C++ 示例;但是,我必须承认,将其转换为 Python 时遇到了一些麻烦。
首先,Python 中没有 Point2f 和 RotatedRect 函数,因此,我无法 100% 模仿 C++ 实现。 C++ 实现可以生成旋转的边界框,但不幸的是,我今天与您分享的那个不能。
其次,NMSBoxes 函数不返回 Python 绑定的任何值(至少对于我的 OpenCV 4 预发布安装),最终导致 OpenCV 抛出错误。 NMSBoxes 函数可以在 OpenCV 3.4.2 中工作,但我无法对其进行详尽的测试。
我在 imutils 中使用我自己的非最大值抑制实现解决了这个问题,但同样,我不相信这两个是 100% 可互换的,因为看起来 NMSBoxes 接受额外的参数。
鉴于所有这些,我已尽最大努力为您提供最好的 OpenCV 文本检测实现,使用我拥有的工作功能和资源。如果您对该方法有任何改进,请随时在下面的评论中分享。
使用 OpenCV 实现我们的文本检测器
在开始之前,我想指出您的系统上至少需要安装 OpenCV 3.4.2(或 OpenCV 4)才能使用 OpenCV 的 EAST 文本检测器,接下来,确保您的系统上也安装/升级了 imutils:
pip install --upgrade imutils
此时您的系统已经配置完毕,因此打开 text_detection.py 并插入以下代码:
# import the necessary packages
from imutils.object_detection import non_max_suppression
import numpy as np
import argparse
import time
import cv2
# construct the argument parser and parse the arguments
ap = argparse.ArgumentParser()
ap.add_argument("-i", "--image", type=str,help="path to input image")
ap.add_argument("-east", "--east", type=str,help="path to input EAST text detector")
ap.add_argument("-c", "--min-confidence", type=float, default=0.5,help="minimum probability required to inspect a region")
ap.add_argument("-w", "--width", type=int, default=320,help="resized image width (should be multiple of 32)")
ap.add_argument("-e", "--height", type=int, default=320,help="resized image height (should be multiple of 32)")
args = vars(ap.parse_args())
首先,导入所需的包和模块。 值得注意的是,我们从 imutils.object_detection 导入了 NumPy、OpenCV 和我对 non_max_suppression 的实现。 然后我们继续解析五个命令行参数:
–image :我们输入图像的路径。
–east : EAST 场景文本检测器模型文件路径。
–min-confidence :确定文本的概率阈值。 可选, default=0.5 。
–width :调整后的图像宽度 - 必须是 32 的倍数。默认值为 320 时可选。
–height :调整后的图像高度 - 必须是 32 的倍数。默认值为 320 时可选。
重要提示:EAST 文本要求您的输入图像尺寸是 32 的倍数,因此如果您选择调整 --width 和 --height 值,请确保它们是 32 的倍数! 从那里,让我们加载我们的图像并调整它的大小:
# load the input image and grab the image dimensions
image = cv2.imread(args["image"])
orig = image.copy()
(H, W) = image.shape[:2]
# set the new width and height and then determine the ratio in change
# for both the width and height
(newW, newH) = (args["width"], args["height"])
rW = W / float(newW)
rH = H / float(newH)
# resize the image and grab the new image dimensions
image = cv2.resize(image, (newW, newH))
(H, W) = image.shape[:2]
我们加载并复制我们的输入图像。 确定原始图像尺寸与新图像尺寸的比率(基于为 --width 和 --height 提供的命令行参数)。 然后我们调整图像大小,忽略纵横比。 为了使用 OpenCV 和 EAST 深度学习模型进行文本检测,我们需要提取两层的输出特征图:
# define the two output layer names for the EAST detector model that
# we are interested -- the first is the output probabilities and the
# second can be used to derive the bounding box coordinates of text
layerNames = ["feature_fusion/Conv_7/Sigmoid","feature_fusion/concat_3"]
我们构建了一个 layerNames 列表:
第一层是我们的输出 sigmoid 激活,它为我们提供了一个区域是否包含文本的概率。
第二层是输出特征图,表示图像的“几何”——我们将能够使用这个几何来推导出输入图像中文本的边界框坐标
让我们加载 OpenCV 的 EAST 文本检测器:
# load the pre-trained EAST text detector
print("[INFO] loading EAST text detector...")
net = cv2.dnn.readNet(args["east"])
# construct a blob from the image and then perform a forward pass of
# the model to obtain the two output layer sets
blob = cv2.dnn.blobFromImage(image, 1.0, (W, H),(123.68, 116.78, 103.94), swapRB=True, crop=False)
start = time.time()
net.setInput(blob)
(scores, geometry) = net.forward(layerNames)
end = time.time()
# show timing information on text prediction
print("[INFO] text detection took {:.6f} seconds".format(end - start))
我们使用 cv2.dnn.readNet 将神经网络加载到内存中,方法是将路径传递给 EAST 检测器。
然后,我们通过将其转换为 blob 来准备我们的图像。要阅读有关此步骤的更多信息,请参阅深度学习:OpenCV 的 blobFromImage 工作原理。 为了预测文本,我们可以简单地将 blob 设置为输入并调用 net.forward。 这些行被抓取时间戳包围,以便我们可以打印经过的时间。 通过将 layerNames 作为参数提供给 net.forward,我们指示 OpenCV 返回我们感兴趣的两个特征图:
-
用于导出输入图像中文本的边界框坐标的输出几何图
-
同样,分数图,包含给定区域包含文本的概率
我们需要一个一个地循环这些值中的每一个:
# grab the number of rows and columns from the scores volume, then
# initialize our set of bounding box rectangles and corresponding
# confidence scores
(numRows, numCols) = scores.shape[2:4]
rects = []
confidences = []
# loop over the number of rows
for y in range(0, numRows):# extract the scores (probabilities), followed by the geometrical# data used to derive potential bounding box coordinates that# surround textscoresData = scores[0, 0, y]xData0 = geometry[0, 0, y]xData1 = geometry[0, 1, y]xData2 = geometry[0, 2, y]xData3 = geometry[0, 3, y]anglesData = geometry[0, 4, y]
我们首先获取分数卷的维度(,然后初始化两个列表:
- rects :存储文本区域的边界框 (x, y) 坐标
- 置信度:将与每个边界框关联的概率存储在 rects 中
我们稍后将对这些区域应用非极大值抑制。 循环遍历行。提取当前行 y 的分数和几何数据。 接下来,我们遍历当前选定行的每个列索引:
# loop over the number of columnsfor x in range(0, numCols):# if our score does not have sufficient probability, ignore itif scoresData[x] < args["min_confidence"]:continue# compute the offset factor as our resulting feature maps will# be 4x smaller than the input image(offsetX, offsetY) = (x * 4.0, y * 4.0)# extract the rotation angle for the prediction and then# compute the sin and cosineangle = anglesData[x]cos = np.cos(angle)sin = np.sin(angle)# use the geometry volume to derive the width and height of# the bounding boxh = xData0[x] + xData2[x]w = xData1[x] + xData3[x]# compute both the starting and ending (x, y)-coordinates for# the text prediction bounding boxendX = int(offsetX + (cos * xData1[x]) + (sin * xData2[x]))endY = int(offsetY - (sin * xData1[x]) + (cos * xData2[x]))startX = int(endX - w)startY = int(endY - h)# add the bounding box coordinates and probability score to# our respective listsrects.append((startX, startY, endX, endY))confidences.append(scoresData[x])
对于每一行,我们开始遍历列。 我们需要通过忽略概率不够高的区域来过滤掉弱文本检测。
当图像通过网络时,EAST 文本检测器自然会减小体积大小——我们的体积大小实际上比我们的输入图像小 4 倍,因此我们乘以 4 以将坐标带回原始图像。
提取角度数据。 然后我们分别更新我们的矩形和置信度列表。 我们快完成了! 最后一步是对我们的边界框应用非极大值抑制来抑制弱重叠边界框,然后显示结果文本预测:
# apply non-maxima suppression to suppress weak, overlapping bounding
# boxes
boxes = non_max_suppression(np.array(rects), probs=confidences)
# loop over the bounding boxes
for (startX, startY, endX, endY) in boxes:# scale the bounding box coordinates based on the respective# ratiosstartX = int(startX * rW)startY = int(startY * rH)endX = int(endX * rW)endY = int(endY * rH)# draw the bounding box on the imagecv2.rectangle(orig, (startX, startY), (endX, endY), (0, 255, 0), 2)
# show the output image
cv2.imshow("Text Detection", orig)
cv2.waitKey(0)
正如我在上一节中提到的,我无法在我的 OpenCV 4 安装 (cv2.dnn.NMSBoxes) 中使用非最大值抑制,因为 Python 绑定没有返回值,最终导致 OpenCV 出错。我无法完全在 OpenCV 3.4.2 中进行测试,因此它可以在 v3.4.2 中运行。
相反,我使用了 imutils 包(第 114 行)中提供的非最大值抑制实现。结果看起来还是不错的;但是,我无法将我的输出与 NMSBoxes 函数进行比较以查看它们是否相同。 循环我们的边界框,将坐标缩放回原始图像尺寸,并将输出绘制到我们的原始图像。原始图像会一直显示,直到按下某个键。
作为最后的实现说明,我想提一下,我们用于循环分数和几何体的两个嵌套 for 循环将是一个很好的例子,说明您可以利用 Cython 显着加速您的管道。我已经使用 OpenCV 和 Python 在快速优化的“for”像素循环中展示了 Cython 的强大功能。
OpenCV 文本检测结果
您准备好将文本检测应用于图像了吗?
下载frozen_east_text_detection,地址:
oyyd/frozen_east_text_detection.pb (github.com)
。 从那里,您可以在终端中执行以下命令(注意两个命令行参数):
$ python text_detection.py --image images/lebron_james.jpg \--east frozen_east_text_detection.pb
您的结果应类似于下图:
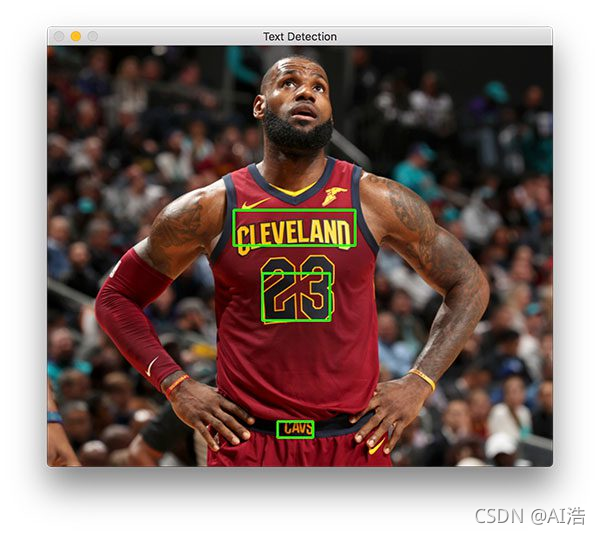
在勒布朗·詹姆斯身上标识了三个文本区域。 现在让我们尝试检测商业标志的文本:
$ python text_detection.py --image images/car_wash.png \--east frozen_east_text_detection.pb
使用 OpenCV 检测视频中的文本
现在我们已经了解了如何检测图像中的文本,让我们继续使用 OpenCV 检测视频中的文本。 这个解释将非常简短; 请根据需要参阅上一节了解详细信息。 打开 text_detection_video.py 并插入以下代码:
# import the necessary packages
from imutils.video import VideoStream
from imutils.video import FPS
from imutils.object_detection import non_max_suppression
import numpy as np
import argparse
import imutils
import time
import cv2
我们首先导入我们的包。 我们将使用 VideoStream 访问网络摄像头和 FPS 来对这个脚本的每秒帧数进行基准测试。 其他一切都与上一节相同。
为方便起见,让我们定义一个新函数来解码我们的预测函数——它将在每一帧中重复使用,并使我们的循环更清晰:
def decode_predictions(scores, geometry):# grab the number of rows and columns from the scores volume, then# initialize our set of bounding box rectangles and corresponding# confidence scores(numRows, numCols) = scores.shape[2:4]rects = []confidences = []# loop over the number of rowsfor y in range(0, numRows):# extract the scores (probabilities), followed by the# geometrical data used to derive potential bounding box# coordinates that surround textscoresData = scores[0, 0, y]xData0 = geometry[0, 0, y]xData1 = geometry[0, 1, y]xData2 = geometry[0, 2, y]xData3 = geometry[0, 3, y]anglesData = geometry[0, 4, y]# loop over the number of columnsfor x in range(0, numCols):# if our score does not have sufficient probability,# ignore itif scoresData[x] < args["min_confidence"]:continue# compute the offset factor as our resulting feature# maps will be 4x smaller than the input image(offsetX, offsetY) = (x * 4.0, y * 4.0)# extract the rotation angle for the prediction and# then compute the sin and cosineangle = anglesData[x]cos = np.cos(angle)sin = np.sin(angle)# use the geometry volume to derive the width and height# of the bounding boxh = xData0[x] + xData2[x]w = xData1[x] + xData3[x]# compute both the starting and ending (x, y)-coordinates# for the text prediction bounding boxendX = int(offsetX + (cos * xData1[x]) + (sin * xData2[x]))endY = int(offsetY - (sin * xData1[x]) + (cos * xData2[x]))startX = int(endX - w)startY = int(endY - h)# add the bounding box coordinates and probability score# to our respective listsrects.append((startX, startY, endX, endY))confidences.append(scoresData[x])# return a tuple of the bounding boxes and associated confidencesreturn (rects, confidences)
定义了 decode_predictions 函数。
该函数用于提取: 文本区域的边界框坐标 和一个文本区域检测的概率 此专用函数将使代码在此脚本中稍后更易于阅读和管理。 让我们解析我们的命令行参数:
# construct the argument parser and parse the arguments
ap = argparse.ArgumentParser()
ap.add_argument("-east", "--east", type=str, required=True,help="path to input EAST text detector")
ap.add_argument("-v", "--video", type=str,help="path to optinal input video file")
ap.add_argument("-c", "--min-confidence", type=float, default=0.5,help="minimum probability required to inspect a region")
ap.add_argument("-w", "--width", type=int, default=320,help="resized image width (should be multiple of 32)")
ap.add_argument("-e", "--height", type=int, default=320,help="resized image height (should be multiple of 32)")
args = vars(ap.parse_args())
命令行参数解析:
–east : EAST 场景文本检测器模型文件路径。
–video :我们输入视频的路径。 可选 — 如果提供了视频路径,则不会使用网络摄像头。
–min-confidence :确定文本的概率阈值。 可选, default=0.5 。
–width :调整后的图像宽度(必须是 32 的倍数)。 可选的 default=320 。
–height :调整后的图像高度(必须是 32 的倍数)。 可选的 default=320 。
与上一节中的纯图像脚本相比(在命令行参数方面)的主要变化是我用 --video 替换了 --image 参数。 重要提示:EAST 文本要求您的输入图像尺寸是 32 的倍数,因此如果您选择调整 --width 和 --height 值,请确保它们是 32 的倍数! 接下来,我们将执行模仿前一个脚本的重要初始化:
# initialize the original frame dimensions, new frame dimensions,
# and ratio between the dimensions
(W, H) = (None, None)
(newW, newH) = (args["width"], args["height"])
(rW, rH) = (None, None)
# define the two output layer names for the EAST detector model that
# we are interested -- the first is the output probabilities and the
# second can be used to derive the bounding box coordinates of text
layerNames = ["feature_fusion/Conv_7/Sigmoid","feature_fusion/concat_3"]
# load the pre-trained EAST text detector
print("[INFO] loading EAST text detector...")
net = cv2.dnn.readNet(args["east"])
高度/宽度和比率初始化将允许我们稍后正确缩放边界框。 我们的输出层名称已定义,加载我们预先训练的 EAST 文本检测器。 以下块设置我们的视频流和每秒帧数计数器:
# if a video path was not supplied, grab the reference to the web cam
if not args.get("video", False):print("[INFO] starting video stream...")vs = VideoStream(src=0).start()time.sleep(1.0)
# otherwise, grab a reference to the video file
else:vs = cv2.VideoCapture(args["video"])
# start the FPS throughput estimator
fps = FPS().start()
我们的视频流设置为: 网络摄像头 或视频文件
初始化每秒帧数计数器并开始循环传入帧:
# loop over frames from the video stream
while True:# grab the current frame, then handle if we are using a# VideoStream or VideoCapture objectframe = vs.read()frame = frame[1] if args.get("video", False) else frame# check to see if we have reached the end of the streamif frame is None:break# resize the frame, maintaining the aspect ratioframe = imutils.resize(frame, width=1000)orig = frame.copy()# if our frame dimensions are None, we still need to compute the# ratio of old frame dimensions to new frame dimensionsif W is None or H is None:(H, W) = frame.shape[:2]rW = W / float(newW)rH = H / float(newH)# resize the frame, this time ignoring aspect ratioframe = cv2.resize(frame, (newW, newH))
遍历视频/网络摄像头帧。 我们的框架被调整大小,保持纵横比。 从那里,我们获取维度并计算缩放比例。 然后我们再次调整框架的大小(必须是 32 的倍数),这次忽略纵横比,因为我们已经存储了安全保存的比率。 推理和绘制文本区域边界框发生在以下几行:
# construct a blob from the frame and then perform a forward pass# of the model to obtain the two output layer setsblob = cv2.dnn.blobFromImage(frame, 1.0, (newW, newH),(123.68, 116.78, 103.94), swapRB=True, crop=False)net.setInput(blob)(scores, geometry) = net.forward(layerNames)# decode the predictions, then apply non-maxima suppression to# suppress weak, overlapping bounding boxes(rects, confidences) = decode_predictions(scores, geometry)boxes = non_max_suppression(np.array(rects), probs=confidences)# loop over the bounding boxesfor (startX, startY, endX, endY) in boxes:# scale the bounding box coordinates based on the respective# ratiosstartX = int(startX * rW)startY = int(startY * rH)endX = int(endX * rW)endY = int(endY * rH)# draw the bounding box on the framecv2.rectangle(orig, (startX, startY), (endX, endY), (0, 255, 0), 2)
在这个区块中,我们:
通过创建 blob 并将其传递到网络,使用 EAST 检测文本区域 。
解码预测并应用 NMS。 我们使用之前在此脚本中定义的 decode_predictions 函数和我的 imutils non_max_suppression 便利函数。
循环边界框并将它们绘制在框架上。 这涉及按之前收集的比率缩放框。
从那里我们将关闭帧处理循环以及脚本本身:
# update the FPS counterfps.update()# show the output framecv2.imshow("Text Detection", orig)key = cv2.waitKey(1) & 0xFF# if the `q` key was pressed, break from the loopif key == ord("q"):break
# stop the timer and display FPS information
fps.stop()
print("[INFO] elasped time: {:.2f}".format(fps.elapsed()))
print("[INFO] approx. FPS: {:.2f}".format(fps.fps()))
# if we are using a webcam, release the pointer
if not args.get("video", False):vs.stop()
# otherwise, release the file pointer
else:vs.release()
# close all windows
cv2.destroyAllWindows()
我们在循环的每次迭代中更新我们的 fps 计数器,以便在我们跳出循环时可以计算和显示计时。 我们在第 165 行显示 EAST 文本检测的输出并处理按键。 如果“q”被按下以“退出”,我们就会跳出循环并继续清理和释放指针。
视频文字检测结果
打开一个终端并执行以下命令(这将启动您的网络摄像头,因为我们没有通过命令行参数提供 --video):
python text_detection_video.py --east frozen_east_text_detection.pb
总结
在今天的博文中,我们学习了如何使用 OpenCV 的新 EAST 文本检测器来自动检测自然场景图像中文本的存在。
文本检测器不仅准确,而且能够在 720p 图像上以大约 13 FPS 的速度近乎实时地运行。
为了提供 OpenCV 的 EAST 文本检测器的实现,我需要转换 OpenCV 的 C++ 示例;但是,我遇到了许多挑战,例如:
- 无法使用 OpenCV 的 NMSBoxes 进行非最大值抑制,而必须使用 imutils 中的实现。
- 由于缺少 RotatedRect 的 Python 绑定,无法计算真正的旋转边界框。
跳出循环时可以计算和显示计时。 我们在第 165 行显示 EAST 文本检测的输出并处理按键。 如果“q”被按下以“退出”,我们就会跳出循环并继续清理和释放指针。
视频文字检测结果
打开一个终端并执行以下命令(这将启动您的网络摄像头,因为我们没有通过命令行参数提供 --video):
python text_detection_video.py --east frozen_east_text_detection.pb
总结
在今天的博文中,我们学习了如何使用 OpenCV 的新 EAST 文本检测器来自动检测自然场景图像中文本的存在。
文本检测器不仅准确,而且能够在 720p 图像上以大约 13 FPS 的速度近乎实时地运行。
为了提供 OpenCV 的 EAST 文本检测器的实现,我需要转换 OpenCV 的 C++ 示例;但是,我遇到了许多挑战,例如:
- 无法使用 OpenCV 的 NMSBoxes 进行非最大值抑制,而必须使用 imutils 中的实现。
- 由于缺少 RotatedRect 的 Python 绑定,无法计算真正的旋转边界框。
我试图让我的实现尽可能接近 OpenCV,但请记住,我的版本与 C++ 版本并非 100% 相同,并且随着时间的推移可能会有一两个小问题需要解决。 无论如何,我希望你喜欢今天的 OpenCV 文本检测教程!
完整代码:
https://download.csdn.net/download/hhhhhhhhhhwwwwwwwwww/43592497