一、ListView的简单用法
2. 训练目标
1) 掌握 ListView 控件的使用
2) 掌握 Adapter 桥梁的作用
实现步骤:
1)首先新建一个项目, 并让ADT 自动帮我们创建好活动。然后修改activity_main.xml 中的代码,如下所示:
<?xml version="1.0" encoding="utf-8"?>
<LinearLayout xmlns:android="http://schemas.android.com/apk/res/android"xmlns:tools="http://schemas.android.com/tools"android:id="@+id/activity_main"android:layout_width="match_parent"android:layout_height="match_parent"tools:context="cn.edu.bu.a13lab07.MainActivity"><ListViewandroid:layout_width="match_parent"android:layout_height="match_parent"android:id="@+id/list_view"></ListView>
</LinearLayout>
在布局中加入ListView 控件,并为ListView 指定了一个id 设置成match_parent 占满整个空间
2)在MainActivity 中
public class MainActivity extends Activity {
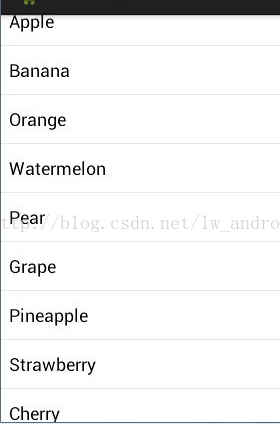
private String[] data = { "Apple", "Banana", "Orange", "Watermelon",
"Pear", "Grape", "Pineapple", "Strawberry", "Cherry", "Mango" };
@Override
protected void onCreate(Bundle savedInstanceState) {
super.onCreate(savedInstanceState);
setContentView(R.layout.activity_main);
ArrayAdapter<String> adapter = new ArrayAdapter<String>(
MainActivity.this, android.R.layout.simple_list_item_1, data);
ListView listView = (ListView) findViewById(R.id.list_view);
listView.setAdapter(adapter);
}
} (1)、在这里我运用了系统包含的一个TextView的布局文件:android.R.layout.simple_expandable_list_item_1,调用这个比较方便,
(2)、ArrayAdapter<String> adapter = new ArrayAdapter<String>( MainActivity.this, android.R.layout.simple_list_item_1, data); 的意思是:创建一个数组适配器的代码,里面有三个参数,第一个参数是上下文,就是当前的Activity, 第二个参数是android sdk中自己内置的一个布局,它里面只有一个TextView,这个参数是表明我们数组中每一条数据的布局是这个view,就是将每一条数据都显示在这个 view上面;第三个参数就是我们要显示的数据。listView会根据这三个参数,遍历data里面的每一条数据,读出一条,显示到第二 个参数对应的布局中,这样就形成了我们看到的listView.
(3)、ArrayAdapter是BaseAdapter的子类
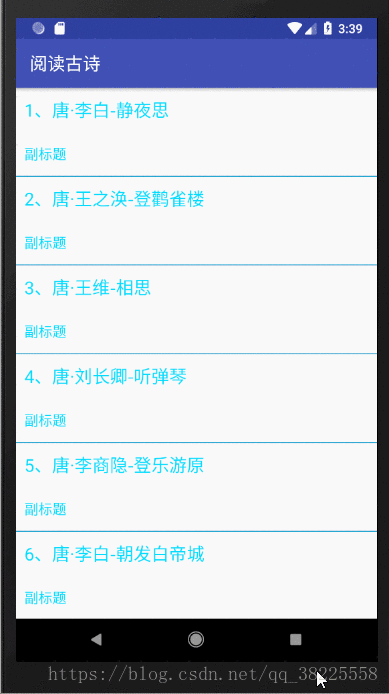
3)运行效果图:
二、定制ListView界面
1.训练目标
1) 掌握 ListView 控件的使用
2) 掌握如何自定义 Adapter 的使用
2. 主要参考步骤及代码
1) 定义一个实体类 Fruit,作为 ListView 适配器的适配类型。
2) 为 ListView 的子项指定一个我们自定义的布局 fruit_item.xml。
3) 创建一个自定义的适配器 FruitAdapter,这个适配器继承自 ArrayAdapter。重写构造方法和 getView 方法。
4)在MainActivity中编写,初始化水果数据
1、定义一个实体类Fruit
package cn.edu.bu.a13lab07;/*** Created by lw on 2017/4/14.*/public class Fruit {private String name;private int imageId;public Fruit(String name, int imageId) {this.name = name;this.imageId = imageId;}public String getName() {return name;}public int getImageId() {return imageId;}
}
2、为 ListView 的子项指定一个我们自定义的布局 fruit_item.xml。
<?xml version="1.0" encoding="utf-8"?>
<LinearLayout xmlns:android="http://schemas.android.com/apk/res/android"android:layout_width="match_parent"android:layout_height="match_parent"><ImageViewandroid:id="@+id/fruit_image"android:layout_width="wrap_content"android:layout_height="wrap_content" /><TextViewandroid:id="@+id/fruit_name"android:layout_width="wrap_content"android:layout_height="wrap_content"android:layout_gravity="center"android:layout_marginLeft="10dip" />
</LinearLayout>
3、创建一个自定义的适配器 FruitAdapter,这个适配器继承自 ArrayAdapter。重写构造方法和 getView 方法。
package cn.edu.bu.a13lab07;import android.content.Context;
import android.view.LayoutInflater;
import android.view.View;
import android.view.ViewGroup;
import android.widget.ArrayAdapter;
import android.widget.ImageView;
import android.widget.TextView;import java.util.List;/*** Created by lw on 2017/4/14.*/public class FruitAdapter extends ArrayAdapter{private final int resourceId;public FruitAdapter(Context context, int textViewResourceId, List<Fruit> objects) {super(context, textViewResourceId, objects);resourceId = textViewResourceId;}@Overridepublic View getView(int position, View convertView, ViewGroup parent) {Fruit fruit = (Fruit) getItem(position); // 获取当前项的Fruit实例View view = LayoutInflater.from(getContext()).inflate(resourceId, null);//实例化一个对象ImageView fruitImage = (ImageView) view.findViewById(R.id.fruit_image);//获取该布局内的图片视图TextView fruitName = (TextView) view.findViewById(R.id.fruit_name);//获取该布局内的文本视图fruitImage.setImageResource(fruit.getImageId());//为图片视图设置图片资源fruitName.setText(fruit.getName());//为文本视图设置文本内容return view;}
}
View view = LayoutInflater.from(getContext()).inflate(resourceId, null);使用Inflater对象来将布局文件解析成一个View
4、在MainActivity中编写,初始化水果数据
package cn.edu.bu.a13lab07;import android.app.Activity;
import android.os.Bundle;
import android.widget.ArrayAdapter;
import android.widget.ListView;import java.util.ArrayList;
import java.util.List;public class MainActivity extends Activity {private List<Fruit> fruitList = new ArrayList<Fruit>();@Overrideprotected void onCreate(Bundle savedInstanceState) {super.onCreate(savedInstanceState);setContentView(R.layout.activity_main);initFruits(); // 初始化水果数据FruitAdapter adapter = new FruitAdapter(MainActivity.this, R.layout.fruit_item, fruitList);ListView listView = (ListView) findViewById(R.id.list_view);listView.setAdapter(adapter);}private void initFruits() {Fruit apple = new Fruit("Apple", R.drawable.apple_pic);fruitList.add(apple);Fruit banana = new Fruit("Banana", R.drawable.banana_pic);fruitList.add(banana);Fruit orange = new Fruit("Orange", R.drawable.orange_pic);fruitList.add(orange);Fruit watermelon = new Fruit("Watermelon", R.drawable.watermelon_pic);fruitList.add(watermelon);Fruit pear = new Fruit("Pear", R.drawable.pear_pic);fruitList.add(pear);Fruit grape = new Fruit("Grape", R.drawable.grape_pic);fruitList.add(grape);Fruit pineapple = new Fruit("Pineapple", R.drawable.pineapple_pic);fruitList.add(pineapple);Fruit strawberry = new Fruit("Strawberry", R.drawable.strawberry_pic);fruitList.add(strawberry);Fruit cherry = new Fruit("Cherry", R.drawable.cherry_pic);fruitList.add(cherry);Fruit mango = new Fruit("Mango", R.drawable.mango_pic);fruitList.add(mango);}
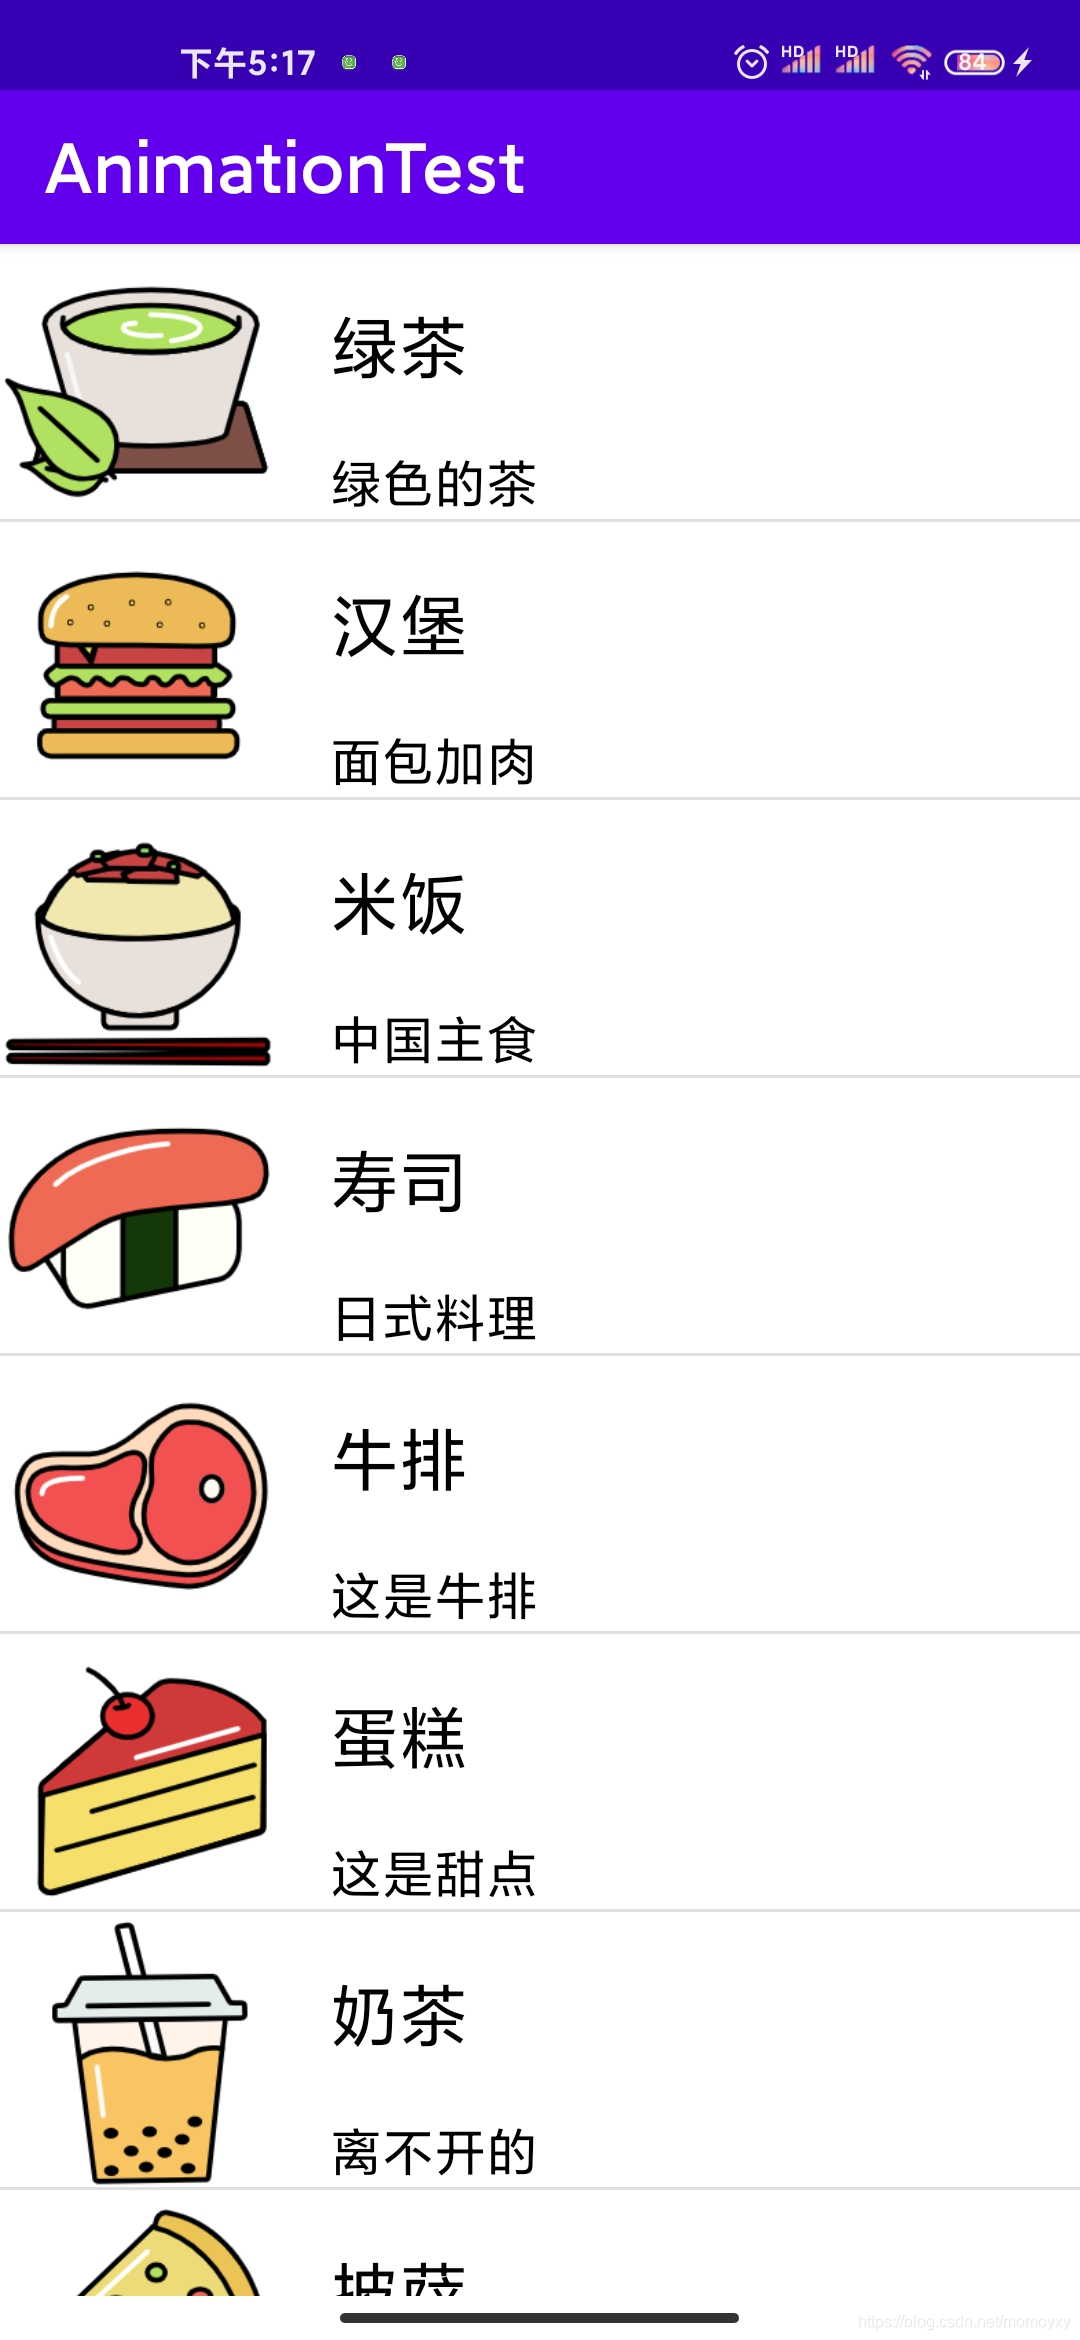
}5、运行效果图
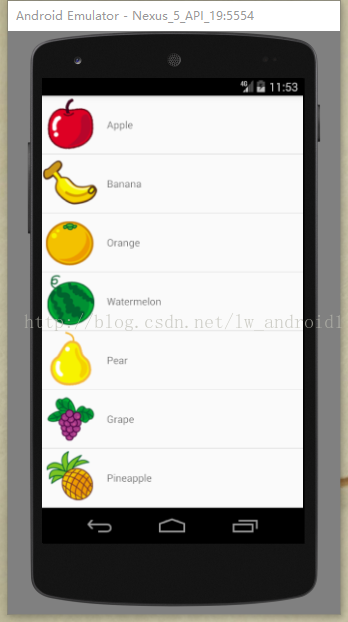
这样一个简单的ListView界面就完成了