前言介绍:
关于 ListView 我们大家都应该是非常的熟悉了,在 Android 开发中是经常用到的,今天就再来回顾一下,ListView 的使用方法,和一些需要优化注意的地方,还有日常开发过程中的一些小技巧和经验。
ListView 简介
ListView 是 Android 系统为我们提供的一种列表显示的一种控件,使用它可以用来显示我们常见的列表形式。继承自抽象类 AdapterView。
类的关系图:
表现形式
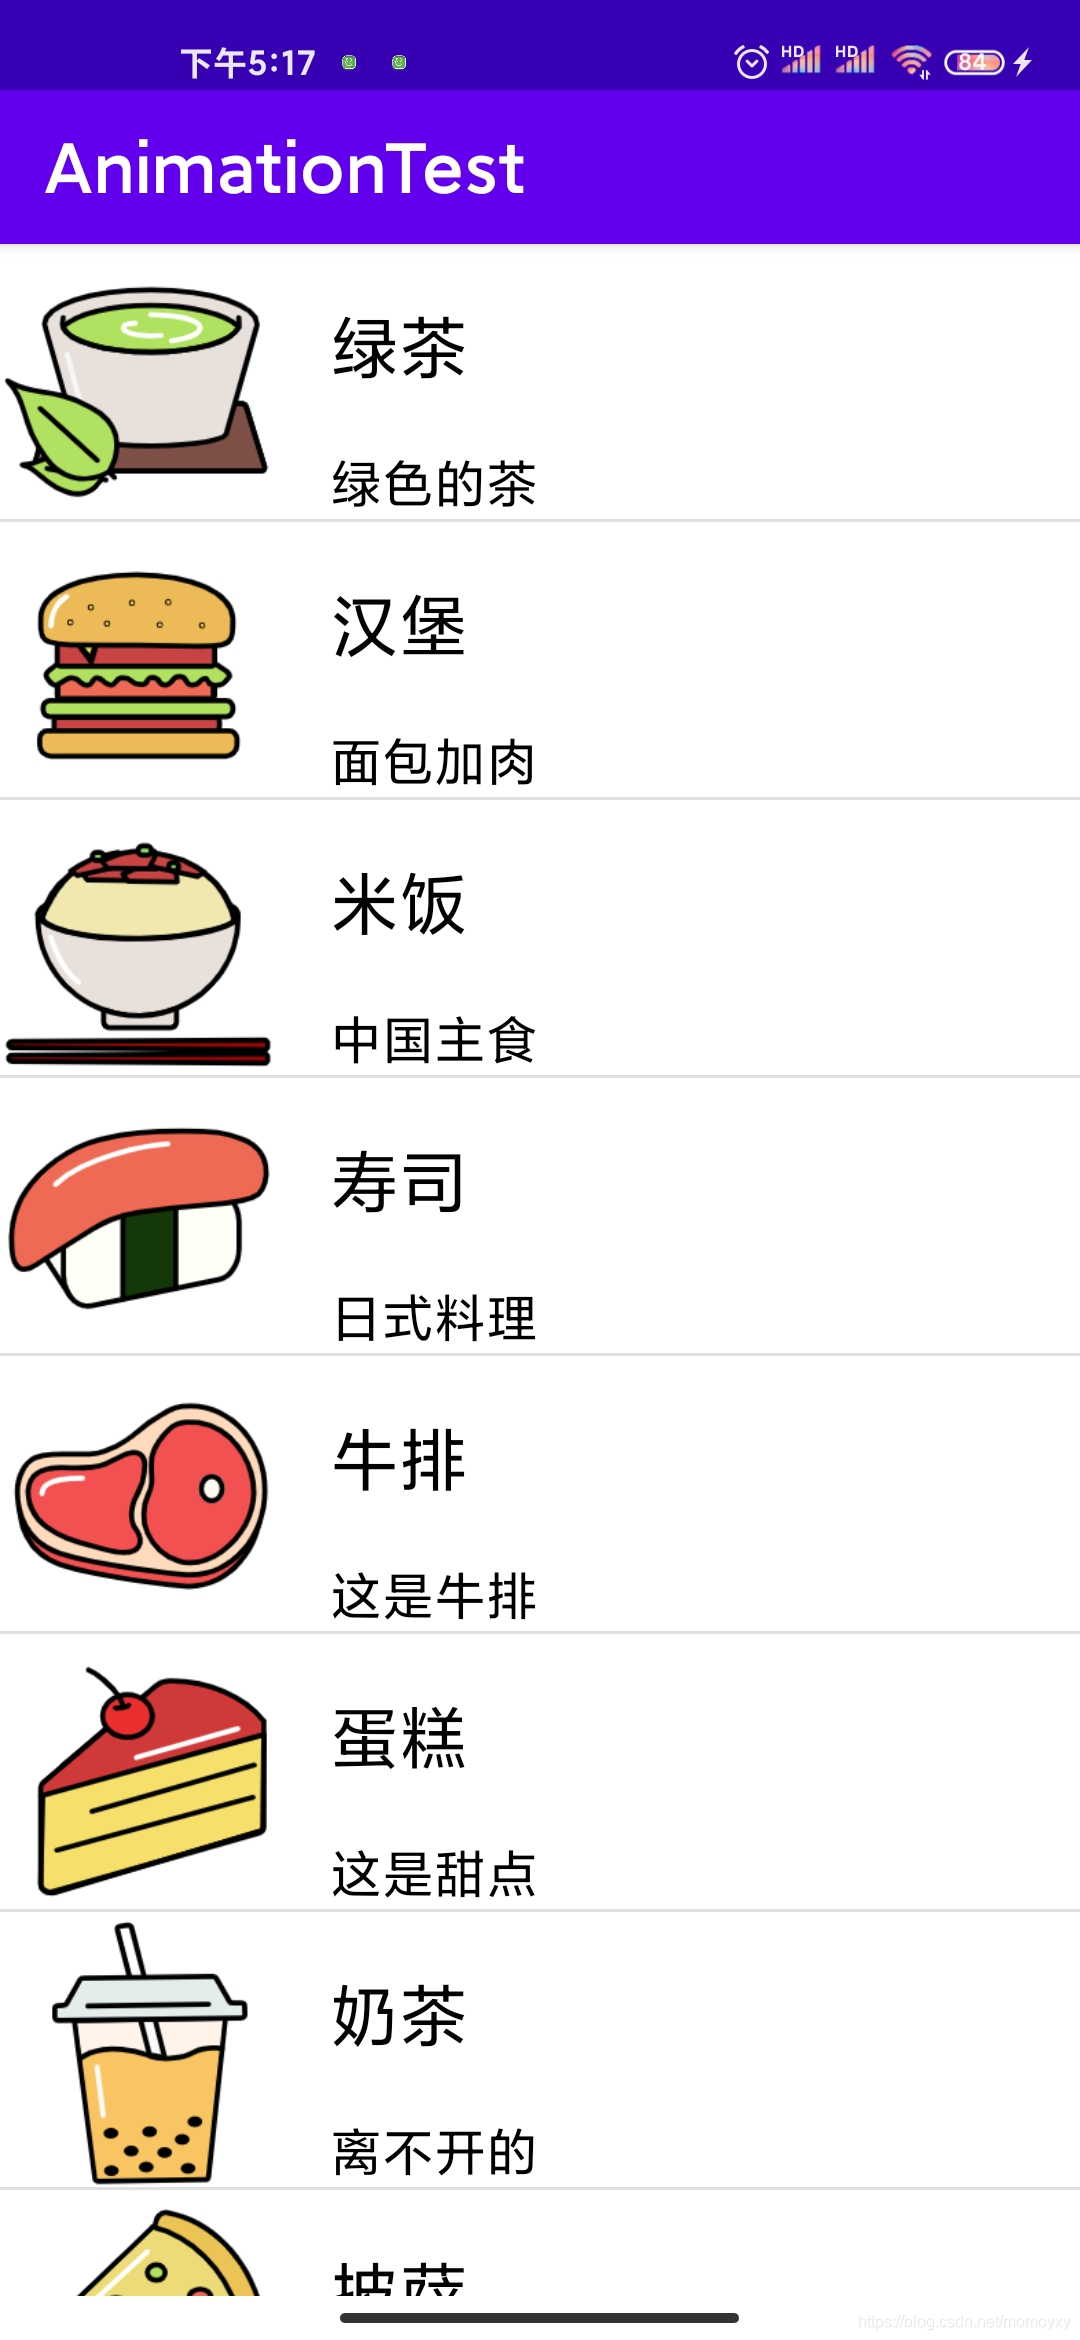
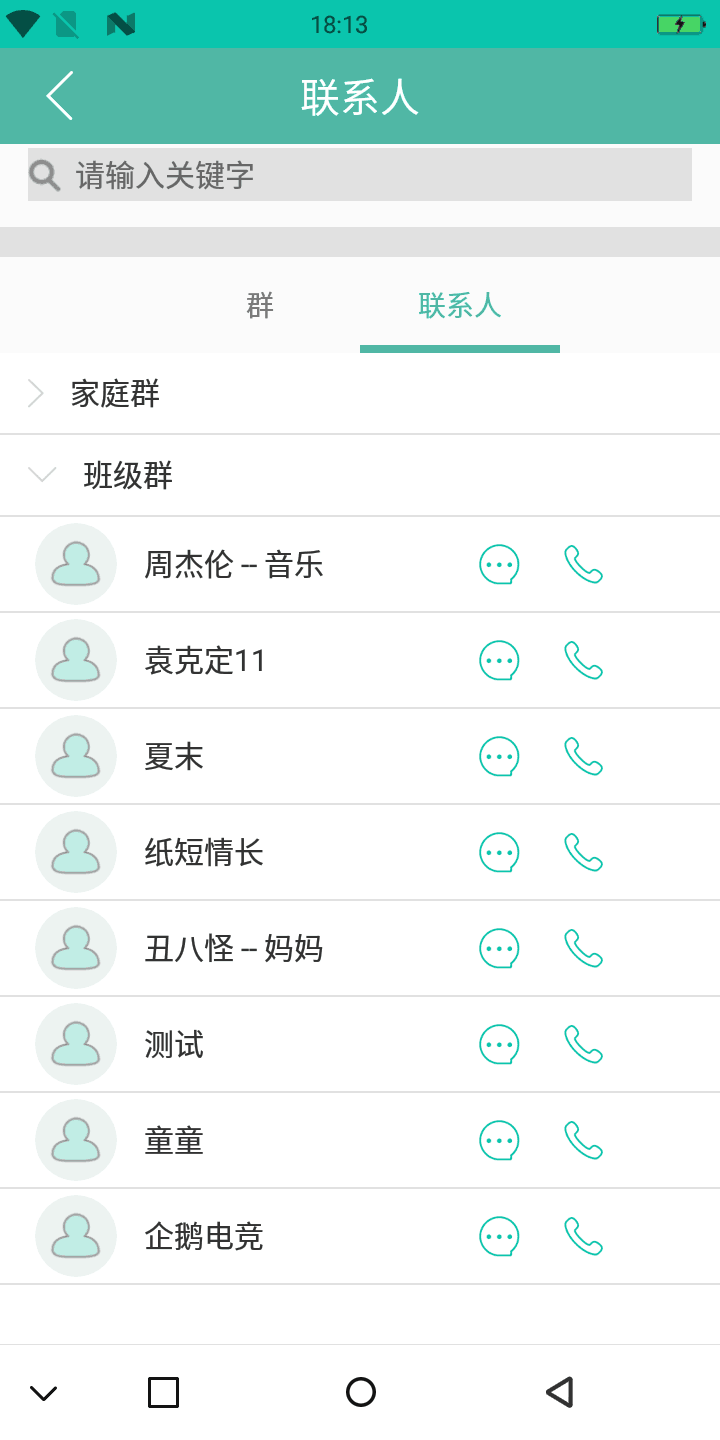
这就是一种最简单的 ListView 的表现形式,黑色框就是 ListView 控件,其中由一个个的 item 组成(红色框内容),然后可以通过向下滑动来查看很多的条目。
工作原理
ListView 仅是作为容器(列表),用于装载显示数据(就是上面的一个个的红色框的内容,也称为 item)。item 中的具体数据是由适配器(adapter)来提供的。
适配器(adapter):作为 View (不仅仅指的 ListView)和数据之间的桥梁或者中介,将数据映射到要展示的 View 中。这就是最简单适配器模式,也是适配器的主要作用!
当需要显示数据的时候,ListView 会从适配器(Adapter)中取出数据,然后来加载数据。
ListView 负责以列表的形式向我们展示 Adapter 提供的内容
缓存原理
前面讲了 ListView 负责把 Adapter 提供的内容一一的展现出来,每一条数据对应一个 item 。试想如果把所有的数据信息全部加载到 ListView 上显示,加入这些数据有 100 条。那么 ListView 就要创建 100 个视图。如果有更多的数据,那么 ListView 就会创建更多的视图。这种行为显然是不可取的,这样会消耗大量的内容。
解决方案:
为了节省内存的占用,ListView 是不会为每一条数据创建一个视图的,而是采用了 Recycler组件 的方式。回收和复用 View。
那么是如何来复用的呢?
我们都知道一个屏幕可见的内容就是那么大,所以用户一次能看到的 item 就是固定的那么几个。假如当屏幕一次可以显示 x 个 item 时(不用是完整的),那么 ListView 会创建 x+1 个视图;当第1个 item 离开屏幕的时候,此时这个 item 的 View 就会被回收,再入屏的 item 的 View 就会优先从该缓存中获取。
只有 item 完全离开屏幕后才会复用,这也是为什么 ListView 要创建比屏幕需要显示视图多 1 个的原因:缓冲显示视图。
第 1 个 item 离开屏幕是有一个过程的,会有 1 个 第一个 item 的下半部分 & 第 X+1 个 item 的上半部分同时在屏幕中显示的状态 这种情况是没法使用缓存的 View 的。只能继续用新创建的视图 View。
实例演示:
假如屏幕一次只能显示 5 个 item,那么 ListView 会创建 (5+1)个 item 视图;当第 1 个 item 完全离开屏幕后才会回收至缓存,从而复用。(用于显示第 7 个 item)。
演示图来自网络:
具体使用
引入 ListView 和普通的 View 一样,直接在布局中添加 ListView 控件即可。
xml 中文件配置信息
<LinearLayout xmlns:android:"http://schemas.android.com/apk/res/android"xmlns:tools:"http://schemas.android.com/tools"android:layout_width="match_parent"android:layout_height="match_parent"android:background="#FFE1FF"android:orientation="vertical"><ListViewandroid:id="@+id/listView"android:layout_height="match_parent"android:layout_width="match_parent"/>
</LinearLayout>
AbsListView 常用属性和相关方法:
| 属性 | 说明 | 备注 |
|---|---|---|
| android:choiceMode | 列表的选择行为:默认:none 没有选择行为 | 选择方式:none:不显示任何选中项目 singleChoice:允许单选 multipleChoiceModel:允许多选 配合 getCheckedItemPosition 、getCheckedItemCount、等使用 |
| android:drawSelectorOnTop | 如果该属性设置为 true,选中的列表项的选中颜色会 成为前景颜色(实验没有效果) | |
| android:transcriptMode | 指定列表添加新的选项的时候,是否自动滑动到底部,显示新的选项。 | disabled:取消 transcriptMode 模式; 默认的 normal:当接受到数据集合改变的通知,并且仅仅当最后一个选项已经显示在屏幕的时候,自动滑动到底部。 alwaysScroll:无论当前列表显示什么选项,列表将会自动滑动到底部显示最新的选项。 |
ListView 提供的 xml 属性
| XML 属性 | 说明 | 备注 |
|---|---|---|
| android:divider | 设置 List 列表项的分隔条(可用颜色分割,也可用图片 Drawable 分割) | 不设置列表之间的分割线,可设置属性为 @null |
| android:dividerHeight | 用于设置分隔条的高度 | |
| android:background 属性 | 设置列表的背景 | |
| android:entries | 指定一个数组资源,Android 将根据该数组资源来生成 ListView | |
| android:footerDividerEnabled | 如果设置成 false 则不在 footerView 之前绘制分隔条 | |
| android:headerDividerEnabled | 如果设置成 false 则不再 headerView 之前绘制分隔条 |
Adapter 简介
使用 ListView 的话就离不开 Adapter 了。
Adapter 本身是一个接口,Adapter 接口及其子类的继承关系如下图:
- Adapter 接口派生了 ListAdapter 和 SpinnerAdapter 两个子接口
其中 ListAdapter 为 AbsAdapter 提供列表项,SpinnerAdapter 为 AbsSpinner 提供列表项
ArrayAdapter 、SimpleAdapter 都是 Android API 给我们提供好的适配器,直接使用即可,不过模式都已经写死了。
- ArrayAdapter:简单、易用的 Adapter,用于将数组数据作为数据源绑定到列表项中。支持泛型操作
- SimpleAdapter:相比 ArrayAdapter 来说,功能比较强大,可以将数据源的数据一一的绑定到 item 中的 view 中。
- CursorAdapter:用于绑定游标(直接从数据库取出数据)作为列表项的数据源,和数据库有关系,不常用。
- BaseAdapter:这个是我们在实际开发中经常用到的,我们需要继承 BaseAdapter 来自定义我们自己的适配器
常用适配器介绍与使用
ArrayAdapter
特定:使用简单、用于将数组、List 形式的数据绑定到列表中作为数据源,支持泛型操作
步骤:
- 在 xml 文件布局上实现 ListView
- 在 Activity 中定义数据源(列表或者数组)
- 构造 ArrayAdapter 对象,设置适配器
- 将 ListView 绑定到 ArrayAdapter 上
- 完事
具体实现:
- 添加 ListView
<LinearLayout xmlns:android="http://schemas.android.com/apk/res/android"android:orientation="vertical"android:layout_width="match_parent"android:layout_height="match_parent"><ListViewandroid:layout_width="match_parent"android:layout_height="match_parent"android:id="@+id/lv"></ListView>
</LinearLayout>
- 定义数据源
List<String> listData = new ArrayList<>();
for(int i=0;i<20;i++){listData.add("item数据"+i);
}
- 创建 ArrayAdapter 适配器
ArrayAdapter<String> arrayAdapter = new ArrayAdapter<>(this,android.R.layaout.simple_list_item_1,listData);这里简单介绍一下 ArrayAdapter 的构造方法,ArrayAdapter 有好几个构造方法。
其中第一参数都是 Context 第二个参数就是要添加的 item 的布局 id 然后就是数据,数据可以使用数组也可以使用List。还有一点要注意的是,如果 List 里面存放的是一个普通对象而不是String 的话,则显示在 item 中的数据为这个对象调用 toString 后的结果。
- 将 ArrayAdapter 适配器绑定到 ListView 上
listView.setAdapter(arrayAdapter);
使用 ArrayAdapter 的缺点
ArrayAdapter 使用起来非常简单,也就导致了功能实现非常局限,每个列表项只能是 TextView。可用的 item 布局要足够简单!
SimpleAdapter
相比 ArrayAdapter 来说,功能比较强大,可以将数据源的数据一一的绑定到 item 中的 view 中。
使用步骤:
- 在 xml 中添加 ListView
- 实现 item 布局(根据实际UI需求)
- 创建数据源(数据源形式有要求 List<?extends Map<String,? >>)
- 创建 SimpleAdapter 适配器
- 将 SimpleAdapter 适配器绑定到 ListView 中
- 完事
具体实现
- 在 xml 中添加 ListView
<LinearLayout xmlns:android="http://schemas.android.com/apk/res/android"android:orientation="vertical"android:layout_width="match_parent"android:layout_height="match_parent"><ListViewandroid:layout_width="match_parent"android:layout_height="match_parent"android:id="@+id/lv"></ListView>
</LinearLayout>
- 实现 item 布局,这里我自己随便写了一个布局
<LinearLayout xmlns:android="http://schemas.android.com/apk/res/android"android:orientation="vertical"android:layout_width="match_parent"android:layout_height="match_parent"><TextViewandroid:layout_width="wrap_content"android:layout_height="wrap_content"android:text=""android:textColor="@color/colorAccent"android:id="@+id/tv_one"/><TextViewandroid:layout_width="wrap_content"android:layout_height="wrap_content"android:text=""android:textColor="@color/colorAccent"android:id="@+id/tv_two"/><TextViewandroid:layout_width="wrap_content"android:layout_height="wrap_content"android:text=""android:textColor="@color/colorAccent"android:id="@+id/tv_three"/><ImageViewandroid:contentDescription="@string/app_name"android:layout_width="wrap_content"android:layout_height="wrap_content"android:id="@+id/tv_four"/>
</LinearLayout>
-
创建数据源,使用 SimpleAdapter 的时候创建数据源很关键。
数据源的固定格式是 List<?extends Map<String,?extends Object>> ,一般我们都这样写 List<HashMap<String,Object>> ,当然 List 里面存放的一条一条的数据就是对应 itme 中的数据。如果 item 中的布局有点复杂的话,item 中的每个控件又需要设置不同的值,那么 item 中的每个布局的内容就又对应 HashMap 中的值了。
// 比如上面的布局,有 4 个内容需要填充,则对应的数据源应该是
HashMap<String,Object> hashMap = new HashMap<>();
hashMap.put("name","小明");
hashMap.put("age",18);
hashMap.put("height",180);
hashMap.put("picture",R.drawable.icon);
然后多了个 item 就是设置多个这样的 hashMap 加入到 List 中构成数据源。// 具体的实现方法:
List<HashMap<String,Object>> listData = new ArrayList();
String[] name = new String[]{"小明","小华","小赵","小王"};
String[] age = new int[]{15,16,17,18};
int[] height = new int[]{180,179,174,177};
int[] picture = new int[]{R.drawable.icon,R.drawable.c,R.drawable.a,R.drawable.aa,R.drawable.ww};
for(int i =0;i<name.length,i++){HashMap<String,Object> hashMap = new HashMap<>();hashMap.put("name",name[i]);hashMap.put("age",age[i]);hashMap.put("height",height[i]);hashMap.put("picture",picture[i]);listData.add(hashMap);
}-
创建 SimpleAdapter
SimpleAdapter 的创建是非常容易和固定的,因为它就只有一个构造方法
// 将 hashMap 的 key 组成一个字符串数组
String[] form = new String[]{"name","age","height","picture"};
// 将 item 布局中的 view 的 id 组成一个数组,要和 form 对应
int[] to = new int[]{R.id.tv_one,R.id.tv_two,R.id.tv_three,R.id.tv_four};
SimpleAdapter simpleAdapter = new SimpleAdapter(this,listData,R.layout.item_simple_adapter,form,to);- 将 SimpleAdapter 绑定到 ListView 中
listView.setAdapter(simpleAdapter);BaseAdapter
我们在实际开发过程中接触最多的就是 BaseAdapter 了。可以最大程度的定制我们自己的 item。
实现步骤
- 在布局中添加 ListView
- 实现 item 布局(根据 ui 设计的)
- 创建数据源
- 创建自己的 Adapter 类 继承 BaseAdapter
- 创建自定义的 Adapter 类对象
- 将创建的适配器绑定到 ListView 上
具体实现步骤
-
布局中添加 ListView(就不再写代码了,和上面一样
-
实现 item 布局(依然使用 SimpleAdapter 中的 item 布局就可以了)
-
创建数据源
class User{private String name;private int age;private int height;private int picture();get.. set... 方法 } List<User> listData = new ArrayList<>(); for(int i=0;i<20;i++){User user = new User();user.setName("小明"+i);user.setAge(age);user.setHeight(height);user.setPicture(id);listData.add(user); } -
创建自己的 Adapter
// 继承 BaseAdapter 必须要实现它的 4 个方法
class MyAdapter extends BaseAdapter{// 返回适配器中所代表的数据集合的条数// 会首先执行这个方法(连续执行好几次),如果是 0 则后面的方法就不会执行了@Overridepublic int getCount() {return 0;}// 返回数据集合中指定索引 position 对应的数据项// 手动调用才会执行@Overridepublic Object getItem(int position) {return null;}// 返回列表中与指定索引对应的行 id// 手动调用才会执行@Overridepublic long getItemId(int position) {return 0;}// 返回指定索引对应的数据的视图,会多次调用@Overridepublic View getView(int position, View convertView, ViewGroup parent) {return null;}
}
重点讲解一下 BaseAdapter 中的这四个方法
- BaseAdapter 之所以十分灵活,就是因为我们需要自己重写它的很多方法,尤其是
getView()方法,返回我们任意想要的布局类型。 - 结合上面的 4 个方法了解一下 ListView 的绘制过程:
- 通过调用
getCount()获取 ListView 的长度(item 的个数) - 通过调用
getView(),根据 ListView 的长度逐一绘制 ListView 的每一行 - 获取数据时,通过
getItem()getItemId()来获取 Adapter 中的数据
- 通过调用
重点看一下 getView
实现方式一:
直接返回索引对应的数据的视图
@Override
public View getView(int position,View convertView,ViewGroup parent){View item = mInflater.inflater(R.layout.item,null);TextView tv = item.findViewById(R.id.tv);ImageView iv = item.findViewById(R.id.iv);Button bt = item.findViewById(R.id.bt);tv.setTextView("");img.setImageResource("");....各种设置return item;
}这是最直接的一种方式,目标很明确就是返回对应的视图。同样缺点也很明确,没有利用 ListView 对 item 的复用机制,假如有 1000 个 item  就要绘制 1000 个 view。然后再进行 findViewById 会十分消耗资源。实现方式二:使用 convertView 作为 View 缓存
将 convertView 作为 getView 的输入参数、返回参数
借助 ListView 的缓存机制,实现 view 的复用。@Override
public View getView(int position,View convertView,ViewGroup parent){// 检测有无可重复使用的 View,如果没有就创建新的// ListView 的缓存原理前面已经介绍了,从页面消失进入缓存区的 View 就会传递过来if(convertView == null){convertView = mInflater.inflater(R.layout.item,null);}TextView tv = convertView.findViewById(R.id.tv);ImageView iv = convertView.findViewById(R.id.iv);Button bt = convertView.findViewById(R.id.bt);tv.setTextView("");img.setImageResource("");....各种设置return convertView;
}
// 优点:减少了 View 的重新绘制,实现了 view 复用机制
// 缺点:每次都要 findViewById 寻找组件实现方式三:在方式二的基础上,进行优化,引入 ViewHolder 减少 findViewById
class ViewHolder{TextView tv;ImageView iv;Button bt;
}
@Override
public View getView(int position,View convertView,ViewGroup parent){ViewHolder viewHolder;if(convertView == null){convertView = mInflater.inflater(R.layout.item,null);viewHolder = new ViewHolder();viewHolder.tv = convertView.findViewById(R.id.tv);viewHolder.iv = convertView.findViewById(R.id.iv);viewHolder.bt = convertView.findViewById(R.id.bt);// 将 viewHolder 绑定到 convertView 中实现复用convertView.setTag(viewHolder);}else{viewHolder = (ViewHolder)convertView.getTag();}viewHolder.iv.set..........各种设置return convertView;
}// 优点:重用 View 的时候不用再次重复使用 findViewById 了。是 ListView 的最佳方案
Adapter 优化总结:
[外链图片转存失败(img-ZQ0DpTV6-1566898993572)(F:\MyFile\myproject\MyGitHub\sydmobile.github.io\pic\2019618-ListView\adapter优化方案.png)]
- 创建自己定义的 Adapter
- 将 Adapter 绑定到 ListView 上。
Adapter 的一些其他优化
getView 内部应做尽可能少的业务逻辑处理。因为 getView 调用很频繁。
关于可见和不可见的逻辑可以提前在数据源里面填充好。
getView 中不要出现大量的对象
最好把创建对象放到 ViewHolder 中
加载图片,滑动的时候不要加载图片,会造成 ListView 卡顿,需要在监听器里面判断 ListView 的状态。
listView.setOnScrollListener(new OnScrollListenr){@Overridepublic void onScrollStateChanged(AbsListView lsitView,int scrollState){if(scrollState == AbsListView.OnScrollListener.SCROLL_STATE_FLING){imageLoader.stopProcessingQueue();}else{// 加载图片}}
}
本篇文章大部分内容参考:https://www.jianshu.com/p/4e8e4fd13cf7 对作者表示感谢!!

