对话框是提示用户作出决定或输入额外信息的小窗口,通常不会填充整个屏幕,用于进行一些额外交互
Dialog 类是对话框的基类,但应该避免直接实例化 Dialog,而应使用其子类,比如
- AlertDialog
此对话框可显示标题、提示信息、按钮、可选择项列表或自定义布局等 - DatePickerDialog 或 TimePickerDialog
此类对话框带有允许用户选择日期或时间的预定义 UI
这些类定义了对话框的样式和结构,但开发者应该将 DialogFragment 用作对话框的容器。DialogFragment 类提供了创建对话框和管理其外观所需的所有控件,而不是调用 Dialog 对象上的方法
使用 DialogFragment 管理对话框可确保它能正确处理生命周期事件,如用户按“返回”按钮或旋转屏幕时。 此外,DialogFragment 类还允许将对话框的 UI 作为嵌入式组件在较大 UI 中重复使用,就像传统 Fragment 一样
DialogFragment 类最初是通过 Android 3.0(API 11)添加的,如果想要使应用可以在运行 Android 1.6 或更高版本的设备上使用 DialogFragment 以及各种其他 API,可以使用支持库附带的 DialogFragment 类(android.support.v4.app.DialogFragment)。如果应用支持的最低版本是 API 级别 11 或更高版本,则可使用 DialogFragment 的框架版本(android.app.DialogFragment)
一、基础用法
通过扩展 DialogFragment 类并在 onCreateDialog() 回调方法中创建 AlertDialog
public class MyDialogFragment extends DialogFragment {@Overridepublic Dialog onCreateDialog(Bundle savedInstanceState) {AlertDialog.Builder builder = new AlertDialog.Builder(getActivity());builder.setTitle("title").setMessage("message").setPositiveButton("确定", new DialogInterface.OnClickListener() {public void onClick(DialogInterface dialog, int id) {}}).setNegativeButton("取消", new DialogInterface.OnClickListener() {public void onClick(DialogInterface dialog, int id) {}});return builder.create();}}- 1
- 2
- 3
- 4
- 5
- 6
- 7
- 8
- 9
- 10
- 11
- 12
- 13
- 14
- 15
- 16
- 17
- 18
- 19
- 20
- 21
之后,当创建此类的实例并调用该对象上的 show() 方法时,就可以显示出对话框了
这是 DialogFragment 最基础用法,之后会介绍几种不同的样式
二、包含两个按钮的对话框
在 ButtonDialogFragment 类中重载 show() 方法,传入所有需要的参数,并调用 DialogFragment 类本身的 show(FragmentManager manager, String tag) 方法,从而显示对话框。”tag” 参数是系统用于保存片段状态并在必要时进行恢复的唯一标记名称,该标记还允许通过调用 findFragmentByTag() 获取片段的句柄
/*** Created by 叶应是叶 on 2017/2/23.*/public class ButtonDialogFragment extends DialogFragment {private DialogInterface.OnClickListener positiveCallback;private DialogInterface.OnClickListener negativeCallback;private String title;private String message;public void show(String title, String message, DialogInterface.OnClickListener positiveCallback,DialogInterface.OnClickListener negativeCallback, FragmentManager fragmentManager) {this.title = title;this.message = message;this.positiveCallback = positiveCallback;this.negativeCallback = negativeCallback;show(fragmentManager, "ButtonDialogFragment");}@Overridepublic Dialog onCreateDialog(Bundle savedInstanceState) {AlertDialog.Builder builder = new AlertDialog.Builder(getActivity());builder.setTitle(title);builder.setMessage(message);builder.setPositiveButton("确定", positiveCallback);builder.setNegativeButton("取消", negativeCallback);return builder.create();}}
- 1
- 2
- 3
- 4
- 5
- 6
- 7
- 8
- 9
- 10
- 11
- 12
- 13
- 14
- 15
- 16
- 17
- 18
- 19
- 20
- 21
- 22
- 23
- 24
- 25
- 26
- 27
- 28
- 29
- 30
- 31
- 32
- 33
- 34
- 35
之后,提供调用方法
public void showButtonDialogFragment(View view) {ButtonDialogFragment buttonDialogFragment = new ButtonDialogFragment();buttonDialogFragment.show("Hi,你好", "叶应是叶", new DialogInterface.OnClickListener() {@Overridepublic void onClick(DialogInterface dialog, int which) {Toast.makeText(MainActivity.this, "点击了确定 " + which, Toast.LENGTH_SHORT).show();}}, new DialogInterface.OnClickListener() {@Overridepublic void onClick(DialogInterface dialog, int which) {Toast.makeText(MainActivity.this, "点击了取消 " + which, Toast.LENGTH_SHORT).show();}}, getFragmentManager());}- 1
- 2
- 3
- 4
- 5
- 6
- 7
- 8
- 9
- 10
- 11
- 12
- 13
- 14
运行效果
三、包含一个中性按钮的对话框
思路类似,对话框包含一个中性按钮
/*** Created by ZY on 2017/2/23.*/public class NeutralDialogFragment extends DialogFragment {private DialogInterface.OnClickListener neutralCallback;private String title;private String message;private String hint;public void show(String title, String message, String hint, DialogInterface.OnClickListener neutralCallback,FragmentManager fragmentManager) {this.title = title;this.message = message;this.hint = hint;this.neutralCallback = neutralCallback;show(fragmentManager, "NeutralDialogFragment");}@Overridepublic Dialog onCreateDialog(Bundle savedInstanceState) {AlertDialog.Builder builder = new AlertDialog.Builder(getActivity());builder.setTitle(title);builder.setMessage(message);builder.setNeutralButton(hint, neutralCallback);return builder.create();}}- 1
- 2
- 3
- 4
- 5
- 6
- 7
- 8
- 9
- 10
- 11
- 12
- 13
- 14
- 15
- 16
- 17
- 18
- 19
- 20
- 21
- 22
- 23
- 24
- 25
- 26
- 27
- 28
- 29
- 30
- 31
- 32
- 33
提供调用方法
public void showNeutralDialogFragment(View view) {NeutralDialogFragment neutralDialogFragment = new NeutralDialogFragment();neutralDialogFragment.show("Hi,你好", "叶应是叶", "确定~", new DialogInterface.OnClickListener() {@Overridepublic void onClick(DialogInterface dialog, int which) {Toast.makeText(MainActivity.this, "点击了按钮 " + which, Toast.LENGTH_SHORT).show();}}, getFragmentManager());}- 1
- 2
- 3
- 4
- 5
- 6
- 7
- 8
- 9
- 10
运行效果

四、列表对话框
/*** Created by ZY on 2017/2/23.*/public class ItemsDialogFragment extends DialogFragment {private String title;private String[] items;private DialogInterface.OnClickListener onClickListener;public void show(String title, String[] items, DialogInterface.OnClickListener onClickListener,FragmentManager fragmentManager) {this.title = title;this.items = items;this.onClickListener = onClickListener;show(fragmentManager, "ItemsDialogFragment");}@Overridepublic Dialog onCreateDialog(Bundle savedInstanceState) {AlertDialog.Builder builder = new AlertDialog.Builder(getActivity());builder.setTitle(title).setItems(items, onClickListener);return builder.create();}}- 1
- 2
- 3
- 4
- 5
- 6
- 7
- 8
- 9
- 10
- 11
- 12
- 13
- 14
- 15
- 16
- 17
- 18
- 19
- 20
- 21
- 22
- 23
- 24
- 25
- 26
- 27
- 28
提供调用方法
public void showItemsDialogFragment(View view) {ItemsDialogFragment itemsDialogFragment = new ItemsDialogFragment();String[] items = {"Hi", "Hello", "叶"};itemsDialogFragment.show("Hi,你好", items, new DialogInterface.OnClickListener() {@Overridepublic void onClick(DialogInterface dialog, int which) {Toast.makeText(MainActivity.this, "点击了第 " + (which + 1) + " 个选项", Toast.LENGTH_SHORT).show();}}, getFragmentManager());}- 1
- 2
- 3
- 4
- 5
- 6
- 7
- 8
- 9
- 10
运行效果
五、多项选择对话框
/*** Created by ZY on 2017/2/23.*/public class MultiChoiceDialogFragment extends DialogFragment {private String title;private String[] items;private DialogInterface.OnMultiChoiceClickListener onMultiChoiceClickListener;private DialogInterface.OnClickListener positiveCallback;public void show(String title, String[] items, DialogInterface.OnMultiChoiceClickListener onMultiChoiceClickListener,DialogInterface.OnClickListener positiveCallback, FragmentManager fragmentManager) {this.title = title;this.items = items;this.onMultiChoiceClickListener = onMultiChoiceClickListener;this.positiveCallback = positiveCallback;show(fragmentManager, "MultiChoiceDialogFragment");}@Overridepublic Dialog onCreateDialog(Bundle savedInstanceState) {AlertDialog.Builder builder = new AlertDialog.Builder(getActivity());builder.setTitle(title).setMultiChoiceItems(items, null, onMultiChoiceClickListener).setPositiveButton("确定", positiveCallback);return builder.create();}}- 1
- 2
- 3
- 4
- 5
- 6
- 7
- 8
- 9
- 10
- 11
- 12
- 13
- 14
- 15
- 16
- 17
- 18
- 19
- 20
- 21
- 22
- 23
- 24
- 25
- 26
- 27
- 28
- 29
- 30
- 31
- 32
提供调用方法
public void showMultiChoiceDialogFragment(View view) {MultiChoiceDialogFragment multiChoiceDialogFragment = new MultiChoiceDialogFragment();final String[] items = {"Hi", "Hello", "叶"};final List<Integer> integerList = new ArrayList<>();multiChoiceDialogFragment.show("Hi,你好", items, new DialogInterface.OnMultiChoiceClickListener() {@Overridepublic void onClick(DialogInterface dialog, int which, boolean isChecked) {if (isChecked) {integerList.add(which);} else {integerList.remove(which);}}}, new DialogInterface.OnClickListener() {@Overridepublic void onClick(DialogInterface dialog, int which) {String hint = "";for (int i = 0; i < integerList.size(); i++) {hint = items[integerList.get(i)] + hint;}Toast.makeText(MainActivity.this, hint, Toast.LENGTH_SHORT).show();}}, getFragmentManager());}- 1
- 2
- 3
- 4
- 5
- 6
- 7
- 8
- 9
- 10
- 11
- 12
- 13
- 14
- 15
- 16
- 17
- 18
- 19
- 20
- 21
- 22
- 23
- 24
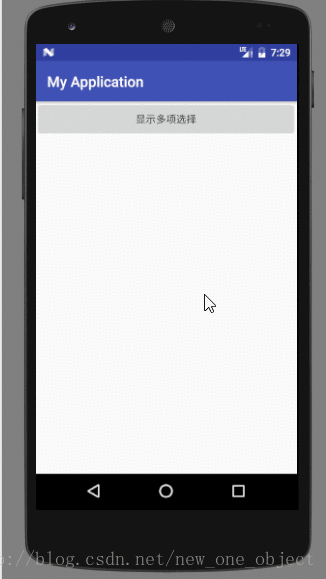
运行效果
六、单项选择对话框
/*** Created by ZY on 2017/2/23.*/public class SingleChoiceDialogFragment extends DialogFragment {private String title;private String[] items;private DialogInterface.OnClickListener onClickListener;private DialogInterface.OnClickListener positiveCallback;public void show(String title, String[] items, DialogInterface.OnClickListener onClickListener,DialogInterface.OnClickListener positiveCallback, FragmentManager fragmentManager) {this.title = title;this.items = items;this.onClickListener = onClickListener;this.positiveCallback = positiveCallback;show(fragmentManager, "SingleChoiceDialogFragment");}@Overridepublic Dialog onCreateDialog(Bundle savedInstanceState) {AlertDialog.Builder builder = new AlertDialog.Builder(getActivity());builder.setTitle(title).setSingleChoiceItems(items, 0, onClickListener).setPositiveButton("确定", positiveCallback);return builder.create();}}- 1
- 2
- 3
- 4
- 5
- 6
- 7
- 8
- 9
- 10
- 11
- 12
- 13
- 14
- 15
- 16
- 17
- 18
- 19
- 20
- 21
- 22
- 23
- 24
- 25
- 26
- 27
- 28
- 29
- 30
- 31
- 32
提供调用方法
private int index;public void showSingleChoiceDialogFragment(View view) {SingleChoiceDialogFragment singleChoiceDialogFragment = new SingleChoiceDialogFragment();String[] items = {"Hi", "Hello", "叶"};singleChoiceDialogFragment.show("Hi,你好", items, new DialogInterface.OnClickListener() {@Overridepublic void onClick(DialogInterface dialog, int which) {index = which;}}, new DialogInterface.OnClickListener() {@Overridepublic void onClick(DialogInterface dialog, int which) {Toast.makeText(MainActivity.this, "选择了第" + (index + 1) + "项", Toast.LENGTH_SHORT).show();}}, getFragmentManager());}- 1
- 2
- 3
- 4
- 5
- 6
- 7
- 8
- 9
- 10
- 11
- 12
- 13
- 14
- 15
- 16
- 17
- 18
运行效果

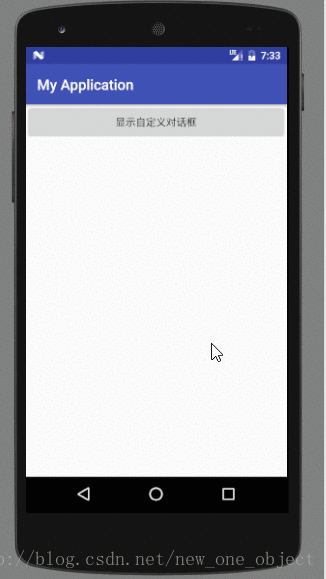
七、自定义对话框
可以通过创建一个自定义布局,然后调用 AlertDialog.Builder 对象上的 setView() 方法将其添加到 AlertDialog 中,从而让对话框拥有自定义样式
首先自定义布局
<LinearLayout xmlns:android="http://schemas.android.com/apk/res/android"android:layout_width="wrap_content"android:layout_height="wrap_content"android:orientation="vertical"><ImageView
        android:layout_width="match_parent"android:layout_height="64dp"android:background="#FFFFBB33"android:contentDescription="@string/app_name"android:scaleType="fitXY"android:src="@drawable/head" /><EditText
        android:id="@+id/username"android:layout_width="match_parent"android:layout_height="wrap_content"android:layout_marginBottom="4dp"android:layout_marginLeft="4dp"android:layout_marginRight="4dp"android:layout_marginTop="16dp"android:hint="用户名"android:inputType="textEmailAddress" /><EditText
android:id="@+id/password"android:layout_width="match_parent"android:layout_height="wrap_content"android:layout_marginBottom="16dp"android:layout_marginLeft="4dp"android:layout_marginRight="4dp"android:layout_marginTop="4dp"android:fontFamily="sans-serif"android:hint="密码"android:inputType="textPassword" /></LinearLayout>- 1
- 2
- 3
- 4
- 5
- 6
- 7
- 8
- 9
- 10
- 11
- 12
- 13
- 14
- 15
- 16
- 17
- 18
- 19
- 20
- 21
- 22
- 23
- 24
- 25
- 26
- 27
- 28
- 29
- 30
- 31
- 32
- 33
- 34
- 35
- 36
- 37
在 DialogFragment 的 onCreateDialog() 方法中加载自定义布局,并添加到 AlertDialog.Builder 中
此外,自定义一个接口 Callback,用于获取用户名与密码
/*** Created by ZY on 2017/2/23.*/public class ViewDialogFragment extends DialogFragment {public interface Callback {void onClick(String userName, String password);}private Callback callback;public void show(FragmentManager fragmentManager) {show(fragmentManager, "ViewDialogFragment");}@Overridepublic Dialog onCreateDialog(Bundle savedInstanceState) {AlertDialog.Builder builder = new AlertDialog.Builder(getActivity());LayoutInflater inflater = getActivity().getLayoutInflater();final View view = inflater.inflate(R.layout.dialog_signin, null);builder.setView(view).setPositiveButton("确定", new DialogInterface.OnClickListener() {@Overridepublic void onClick(DialogInterface dialog, int which) {if (callback != null) {EditText et_userName = (EditText) view.findViewById(R.id.username);EditText et_password = (EditText) view.findViewById(R.id.password);callback.onClick(et_userName.getText().toString(), et_password.getText().toString());}}});return builder.create();}@Overridepublic void onAttach(Context context) {super.onAttach(context);if (context instanceof Callback) {callback = (Callback) context;} else {throw new RuntimeException(context.toString() + " must implement Callback");}}@Overridepublic void onDestroy() {super.onDestroy();callback = null;}
}- 1
- 2
- 3
- 4
- 5
- 6
- 7
- 8
- 9
- 10
- 11
- 12
- 13
- 14
- 15
- 16
- 17
- 18
- 19
- 20
- 21
- 22
- 23
- 24
- 25
- 26
- 27
- 28
- 29
- 30
- 31
- 32
- 33
- 34
- 35
- 36
- 37
- 38
- 39
- 40
- 41
- 42
- 43
- 44
- 45
- 46
- 47
- 48
- 49
- 50
- 51
- 52
令 Activity 实现 Callbak 接口
public class MainActivity extends AppCompatActivity implements ViewDialogFragment.Callback {@Overrideprotected void onCreate(Bundle savedInstanceState) {super.onCreate(savedInstanceState);setContentView(R.layout.activity_main);}public void showViewDialogFragment(View view) {ViewDialogFragment viewDialogFragment = new ViewDialogFragment();viewDialogFragment.show(getFragmentManager());}@Overridepublic void onClick(String userName, String password) {Toast.makeText(MainActivity.this, "用户名: " + userName + " 密码: " + password, Toast.LENGTH_SHORT).show();}}- 1
- 2
- 3
- 4
- 5
- 6
- 7
- 8
- 9
- 10
- 11
- 12
- 13
- 14
- 15
- 16
- 17
- 18
- 19
运行效果