YOLO v5与双目测距结合,实现目标的识别和定位测距
- 1、首先安装YOLO v5
- 2、数据集的标定
- 3、双目测距代码的单独运行调试
- 4、YOLO v5与双目测距的代码的结合
- 5、最终识别测距效果
- 6、代码下载调试运行
- 7、最终演示视频
- 欢迎各位点赞投币收藏哦🤣🤣🤣
- 8、需要指导的小伙伴可以加我QQ哦~
系统环境:VMware Fusion 虚拟机 Ubuntu18.04
CPU: intel core i7 8750H
python版本:python3.6.13(anaconda安装的python3.6的虚拟环境)
yolov5模型版本:YOLO v5s
双目摄像头间距:12cm
双目摄像头焦距:100度/3mm
双目摄像头输出分辨率为:2560*720。
1、首先安装YOLO v5
YOLO v5的安装请参考我的另一篇博客:https://blog.csdn.net/qq_40700822/article/details/118487596
2、数据集的标定
参考我的另一篇博客:https://blog.csdn.net/qq_40700822/article/details/118550250
3、双目测距代码的单独运行调试
参考我的另一篇博客:https://blog.csdn.net/qq_40700822/article/details/115765728
4、YOLO v5与双目测距的代码的结合
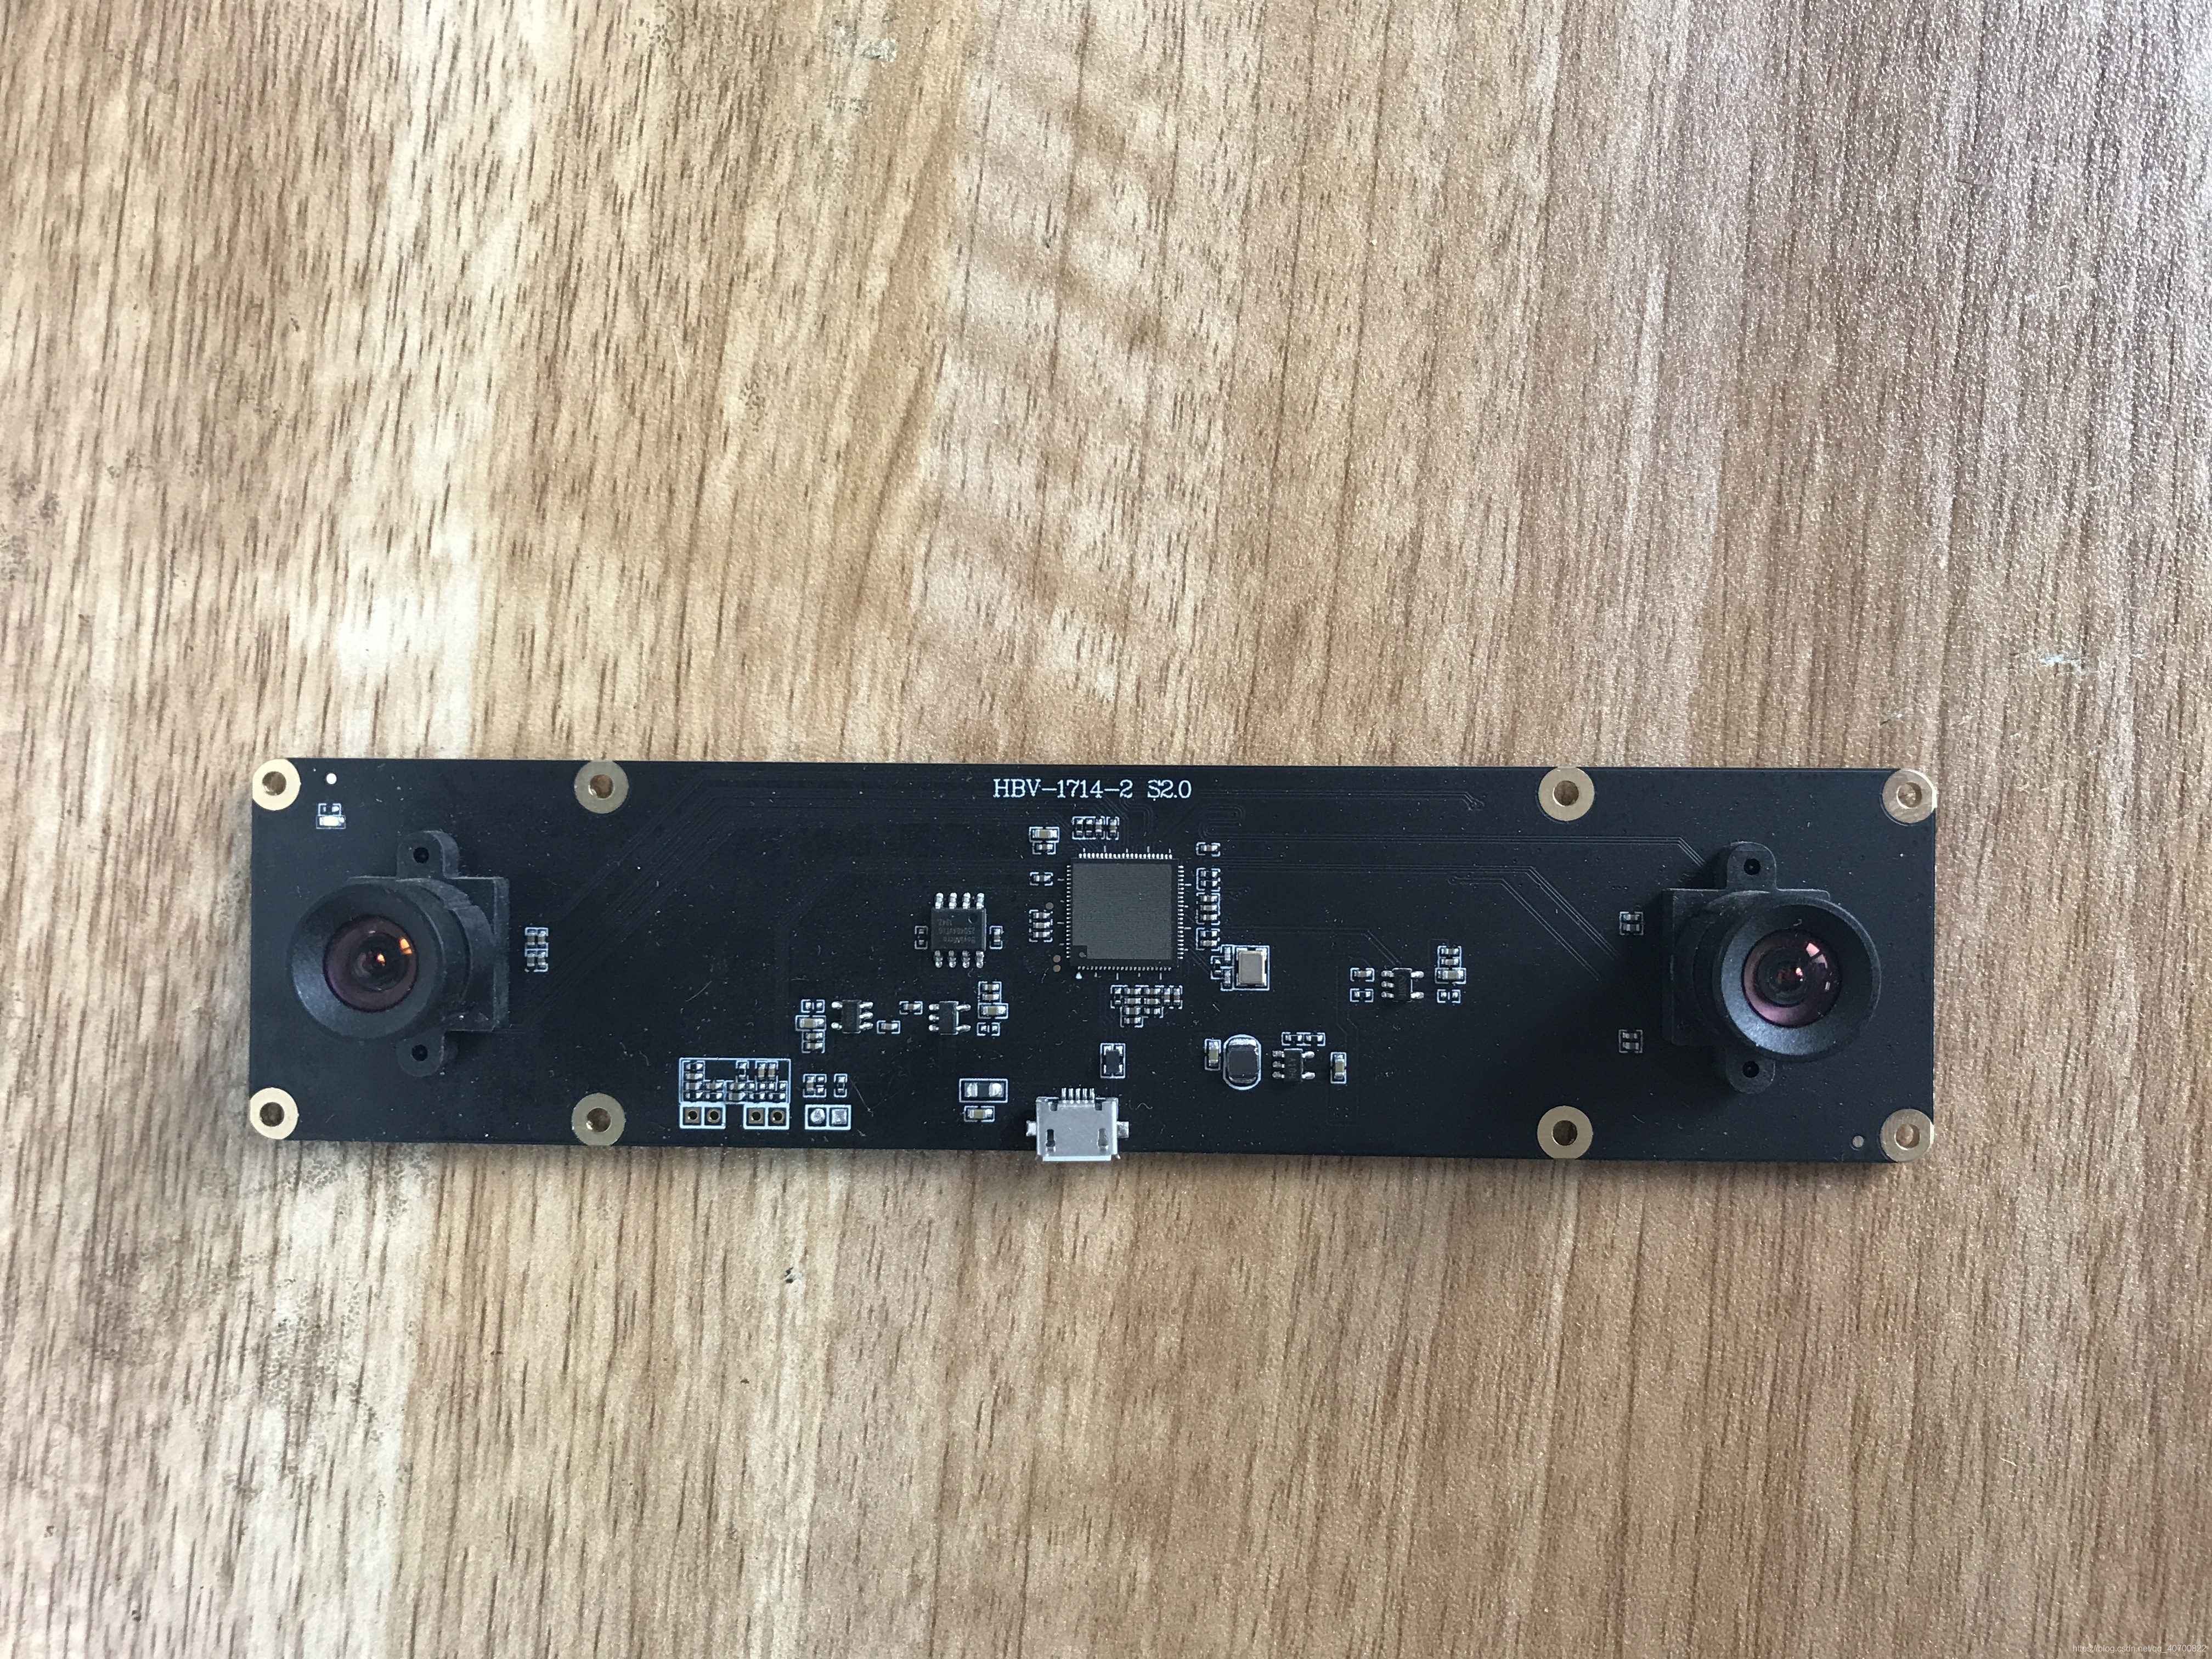
我用的双目相机长这样,某宝220元购入的。
要想将双目测距的代码加入到YOLO v5中,就需要将YOLO v5检测目标的代码看懂,这部分学起来对我来说是比较吃力的。
我这里的结合用的比较简单,就是把双目测距的代码加入到了yolov5的detect.py中。具体加在了打印目标框的位置,如下代码所示。
detect_and_strereo_video_003.py
 # -*- coding: utf-8 -*-
import argparse
import time
from pathlib import Pathimport cv2
import torch
import torch.backends.cudnn as cudnn
from numpy import randomimport numpy as np
from PIL import Image, ImageDraw, ImageFontfrom models.experimental import attempt_load
from utils.datasets import LoadStreams, LoadImages
from utils.general import check_img_size, check_requirements, check_imshow, non_max_suppression, apply_classifier, \scale_coords, xyxy2xywh, strip_optimizer, set_logging, increment_path
from utils.plots import plot_one_box
from utils.torch_utils import select_device, load_classifier, time_synchronizedfrom stereo.dianyuntu_yolo import preprocess, undistortion, getRectifyTransform, draw_line, rectifyImage,\stereoMatchSGBM, hw3ToN3, DepthColor2Cloud, view_cloudfrom stereo import stereoconfig_040_2num = 210 #207 209 210 211
def detect(save_img=False):num = 210source, weights, view_img, save_txt, imgsz = opt.source, opt.weights, opt.view_img, opt.save_txt, opt.img_sizewebcam = source.isnumeric() or source.endswith('.txt') or source.lower().startswith(('rtsp://', 'rtmp://', 'http://') )# Directoriessave_dir = Path( increment_path(Path(opt.project) / opt.name, exist_ok=opt.exist_ok) )  # increment run(save_dir / 'labels' if save_txt else save_dir).mkdir(parents=True, exist_ok=True)  # make dir# Initializeset_logging()device = select_device(opt.device)half = device.type != 'cpu'  # half precision only supported on CUDA# Load modelmodel = attempt_load(weights, map_location=device)  # load FP32 modelstride = int(model.stride.max())  # model strideimgsz = check_img_size(imgsz, s=stride)  # check img_sizeif half:model.half()  # to FP16# Second-stage classifierclassify = Falseif classify:modelc = load_classifier(name='resnet101', n=2)  # initializemodelc.load_state_dict(torch.load('weights/resnet101.pt', map_location=device)['model']).to(device).eval()# Set Dataloadervid_path, vid_writer = None, Noneif webcam:view_img = check_imshow()cudnn.benchmark = True  # set True to speed up constant image size inferencedataset = LoadStreams(source, img_size=imgsz, stride=stride)else:save_img = Truedataset = LoadImages(source, img_size=imgsz, stride=stride)print("img_size:")print(imgsz)# Get names and colorsnames = model.module.names if hasattr(model, 'module') else model.namescolors = [[random.randint(0, 255) for _ in range(3)] for _ in names]# Run inferenceif device.type != 'cpu':model(torch.zeros(1, 3, imgsz, imgsz).to(device).type_as(next(model.parameters())))  # run oncet0 = time.time()for path, img, im0s, vid_cap in dataset:img = torch.from_numpy(img).to(device)img = img.half() if half else img.float()  # uint8 to fp16/32img /= 255.0  # 0 - 255 to 0.0 - 1.0if img.ndimension() == 3:img = img.unsqueeze(0)# Inferencet1 = time_synchronized()pred = model(img, augment=opt.augment)[0]# Apply NMSpred = non_max_suppression(pred, opt.conf_thres, opt.iou_thres, classes=opt.classes, agnostic=opt.agnostic_nms)t2 = time_synchronized()# Apply Classifierif classify:pred = apply_classifier(pred, modelc, img, im0s)# Process detectionsfor i, det in enumerate(pred):  # detections per imageif webcam:  # batch_size >= 1p, s, im0, frame = path[i], '%g: ' % i, im0s[i].copy(), dataset.countelse:p, s, im0, frame = path, '', im0s, getattr(dataset, 'frame', 0)p = Path(p)  # to Pathsave_path = str(save_dir / p.name)  # img.jpgtxt_path = str(save_dir / 'labels' / p.stem) + ('' if dataset.mode == 'image' else f'_{frame}')  # img.txts += '%gx%g ' % img.shape[2:]  # print stringgn = torch.tensor(im0.shape)[[1, 0, 1, 0]]  # normalization gain whwhif len(det):# Rescale boxes from img_size to im0 sizedet[:, :4] = scale_coords(img.shape[2:], det[:, :4], im0.shape).round()# Print resultsfor c in det[:, -1].unique():n = (det[:, -1] == c).sum()  # detections per classs += f"{n} {names[int(c)]} {'s' * (n > 1)} , "  # add to string# Write resultsfor *xyxy, conf, cls in reversed(det):if save_txt:  # Write to filexywh = (xyxy2xywh(torch.tensor(xyxy).view(1, 4)) / gn).view(-1).tolist()  # normalized xywhprint("xywh  x : %d, y : %d"%(xywh[0],xywh[1]) )line = (cls, *xywh, conf) if opt.save_conf else (cls, *xywh)  # label formatwith open(txt_path + '.txt', 'a') as f:f.write(('%g ' * len(line)).rstrip() % line + '\n')if save_img or view_img:  # Add bbox to imagelabel = f'{names[int(cls)]} {conf:.2f} 'plot_one_box(xyxy, im0, label=label, color=colors[int(cls)], line_thickness=3)##print label x,y zuobiao x = (xyxy[0] + xyxy[2]) / 2y = (xyxy[1] + xyxy[3]) / 2#print(" %s is  x: %d y: %d " %(label,x,y) )height_0, width_0 = im0.shape[0:2]if (x <= int(width_0/2) ):t3 = time_synchronized()#################################stereo codep = numstring = ''#print("P is %d" %p )# 读取数据集的图片#iml = cv2.imread('./stereo/yolo/zuo/%szuo%d.bmp' %(string,p) )  # 左图#imr = cv2.imread('./stereo/yolo/you/%syou%d.bmp' %(string,p) )  # 右图#iml = cv2.imread('./stereo/yolo/zuo/%szuo%d.bmp' %(string,p) )  # 左图#imr = cv2.imread('./stereo/yolo/you/%syou%d.bmp' %(string,p) )  # 右图#height_0, width_0 = im0.shape[0:2]#print("width_0 =  %d "  % width_0)#print("height_0 = %d "  % height_0)iml = im0[0:int(height_0), 0:int(width_0/2)]imr = im0[0:int(height_0), int(width_0/2):int(width_0) ]height, width = iml.shape[0:2]#cv2.imshow("iml",iml)#cv2.imshow("imr",im0)#cv2.waitKey(0)#print("width =  %d "  % width)#print("height = %d "  % height)# 读取相机内参和外参config = stereoconfig_040_2.stereoCamera()# 立体校正map1x, map1y, map2x, map2y, Q = getRectifyTransform(height, width, config)  # 获取用于畸变校正和立体校正的映射矩阵以及用于计算像素空间坐标的重投影矩阵#print("Print Q!")#print("Q[2,3]:%.3f"%Q[2,3])iml_rectified, imr_rectified = rectifyImage(iml, imr, map1x, map1y, map2x, map2y)# 绘制等间距平行线,检查立体校正的效果line = draw_line(iml_rectified, imr_rectified)#cv2.imwrite('./yolo/%s检验%d.png' %(string,p), line)# 消除畸变iml = undistortion(iml, config.cam_matrix_left, config.distortion_l)imr = undistortion(imr, config.cam_matrix_right, config.distortion_r)# 立体匹配iml_, imr_ = preprocess(iml, imr)  # 预处理,一般可以削弱光照不均的影响,不做也可以iml_rectified_l, imr_rectified_r = rectifyImage(iml_, imr_, map1x, map1y, map2x, map2y)disp, _ = stereoMatchSGBM(iml_rectified_l, imr_rectified_r, True) #cv2.imwrite('./yolo/%s视差%d.png' %(string,p), disp)# 计算像素点的3D坐标(左相机坐标系下)points_3d = cv2.reprojectImageTo3D(disp, Q)  # 可以使用上文的stereo_config.py给出的参数#points_3d = points_3d'''#print("x is :%.3f" %points_3d[int(y), int(x), 0] )print('点 (%d, %d) 的三维坐标 (x:%.3fcm, y:%.3fcm, z:%.3fcm)' % (int(x), int(y), points_3d[int(y), int(x), 0]/10, points_3d[int(y), int(x), 1]/10, points_3d[int(y), int(x), 2]/10) )'''count = 0#try:while( (points_3d[int(y), int(x), 2] < 0) | (points_3d[int(y), int(x), 2] > 2500) ):count += 1x += countif( 0 < points_3d[int(y), int(x), 2] < 2300 ):breaky += countif( 0 < points_3d[int(y), int(x), 2] < 2300 ):breakcount += 1x -= countif( 0 < points_3d[int(y), int(x), 2] < 2300 ):breaky -= countif( 0 < points_3d[int(y), int(x), 2] < 2300 ):break#if(count%2==1):#    x += 1#else:#    y += 1text_cxy = "*"cv2.putText(im0, text_cxy, (x, y) ,  cv2.FONT_ITALIC, 1.2, (0,0,255), 3)#print("count is %d" %count)print('点 (%d, %d) 的三维坐标 (x:%.1fcm, y:%.1fcm, z:%.1fcm)' % (int(x), int(y), points_3d[int(y), int(x), 0]/10, points_3d[int(y), int(x), 1]/10, points_3d[int(y), int(x), 2]/10) )dis = ( (points_3d[int(y), int(x), 0] ** 2 + points_3d[int(y), int(x), 1] ** 2 + points_3d[int(y), int(x), 2] **2) ** 0.5 ) / 10print('点 (%d, %d) 的 %s 距离左摄像头的相对距离为 %0.1f cm' %(x, y,label, dis) )text_x = "x:%.1fcm" %(points_3d[int(y), int(x), 0]/10)text_y = "y:%.1fcm" %(points_3d[int(y), int(x), 1]/10)text_z = "z:%.1fcm" %(points_3d[int(y), int(x), 2]/10)text_dis = "dis:%.1fcm" %discv2.rectangle(im0,(xyxy[0]+(xyxy[2]-xyxy[0]),xyxy[1]),(xyxy[0]+(xyxy[2]-xyxy[0])+5+220,xyxy[1]+150),colors[int(cls)],-1);cv2.putText(im0, text_x, (xyxy[0]+(xyxy[2]-xyxy[0])+5, xyxy[1]+30),  cv2.FONT_ITALIC, 1.2, (255,255,255), 3)cv2.putText(im0, text_y, (xyxy[0]+(xyxy[2]-xyxy[0])+5, xyxy[1]+65),  cv2.FONT_ITALIC, 1.2, (255, 255, 255), 3)cv2.putText(im0, text_z, (xyxy[0]+(xyxy[2]-xyxy[0])+5, xyxy[1]+100), cv2.FONT_ITALIC, 1.2, (255, 255, 255), 3)cv2.putText(im0, text_dis, (xyxy[0]+(xyxy[2]-xyxy[0])+5, xyxy[1]+145), cv2.FONT_ITALIC, 1.2, (255, 255, 255), 3)t4 = time_synchronized()print(f'Done. ({t4 - t3:.3f}s)')# Print time (inference + NMS)print(f'{s}Done. ({t2 - t1:.3f}s)')# Stream resultsif view_img:cv2.imshow(str(p), im0)cv2.waitKey(1)  # 1 millisecond# Save results (image with detections)if save_img:if dataset.mode == 'image':cv2.imwrite(save_path, im0)else:  # 'video'if vid_path != save_path:  # new videovid_path = save_pathif isinstance(vid_writer, cv2.VideoWriter):vid_writer.release()  # release previous video writerfourcc = 'mp4v'  # output video codecfps = vid_cap.get(cv2.CAP_PROP_FPS)w = int(vid_cap.get(cv2.CAP_PROP_FRAME_WIDTH))h = int(vid_cap.get(cv2.CAP_PROP_FRAME_HEIGHT))vid_writer = cv2.VideoWriter(save_path, cv2.VideoWriter_fourcc(*fourcc), fps, (w, h))vid_writer.write(im0)if save_txt or save_img:s = f"\n{len(list(save_dir.glob('labels/*.txt')))} labels saved to {save_dir / 'labels'}" if save_txt else ''print(f"Results saved to {save_dir}{s}")print(f'Done. ({time.time() - t0:.3f}s)')if __name__ == '__main__':parser = argparse.ArgumentParser()parser.add_argument('--weights', nargs='+', type=str, default='last_dead_fish_1000.pt', help='model.pt path(s)')parser.add_argument('--source', type=str, default='./shuangmu_dead_fish_011.mp4' , help='source')  # file/folder, 0 for webcamparser.add_argument('--img-size', type=int, default=640, help='inference size (pixels)')parser.add_argument('--conf-thres', type=float, default=0.25, help='object confidence threshold')parser.add_argument('--iou-thres', type=float, default=0.45, help='IOU threshold for NMS')parser.add_argument('--device', default='', help='cuda device, i.e. 0 or 0,1,2,3 or cpu')parser.add_argument('--view-img', action='store_true', help='display results')parser.add_argument('--save-txt', action='store_true', help='save results to *.txt')parser.add_argument('--save-conf', action='store_true', help='save confidences in --save-txt labels')parser.add_argument('--classes', nargs='+', type=int, help='filter by class: --class 0, or --class 0 2 3')parser.add_argument('--agnostic-nms', action='store_true', help='class-agnostic NMS')parser.add_argument('--augment', action='store_true', help='augmented inference')parser.add_argument('--update', action='store_true', help='update all models')parser.add_argument('--project', default='runs/detect', help='save results to project/name')parser.add_argument('--name', default='exp', help='save results to project/name')parser.add_argument('--exist-ok', action='store_true', help='existing project/name ok, do not increment')opt = parser.parse_args()print(opt)check_requirements()with torch.no_grad():if opt.update:  # update all models (to fix SourceChangeWarning)for opt.weights in ['yolov5s.pt', 'yolov5m.pt', 'yolov5l.pt', 'yolov5x.pt']:detect()strip_optimizer(opt.weights)else:detect()
5、最终识别测距效果
由于我使用的死鱼的模型,所以测试就使用的死鱼照片测试的。
效果如下图所示。
近景效果。
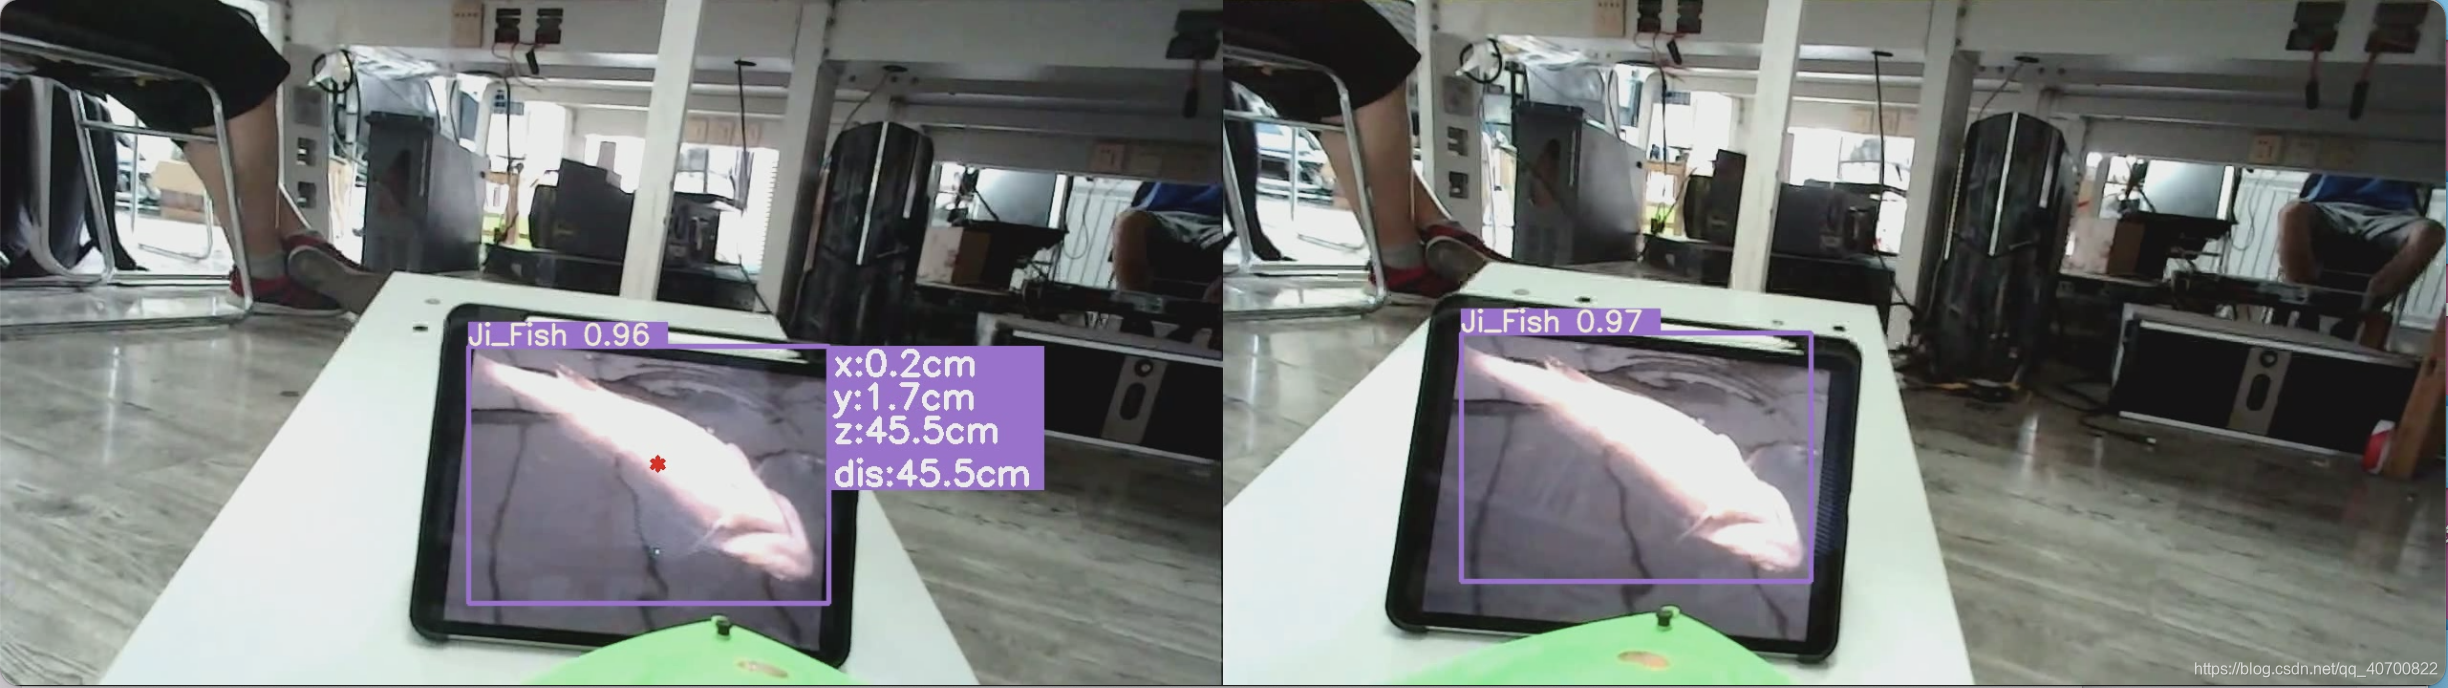
远景效果。

6、代码下载调试运行
yolov5加双目测距的代码,下载后直接运行detect_and_stereo_video_003.py即可开始识别定位。注意是在yolov5的环境运行的。
资源包下载地址:
https://download.csdn.net/download/qq_40700822/87226878?spm=1001.2014.3001.5503
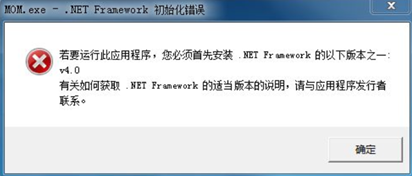
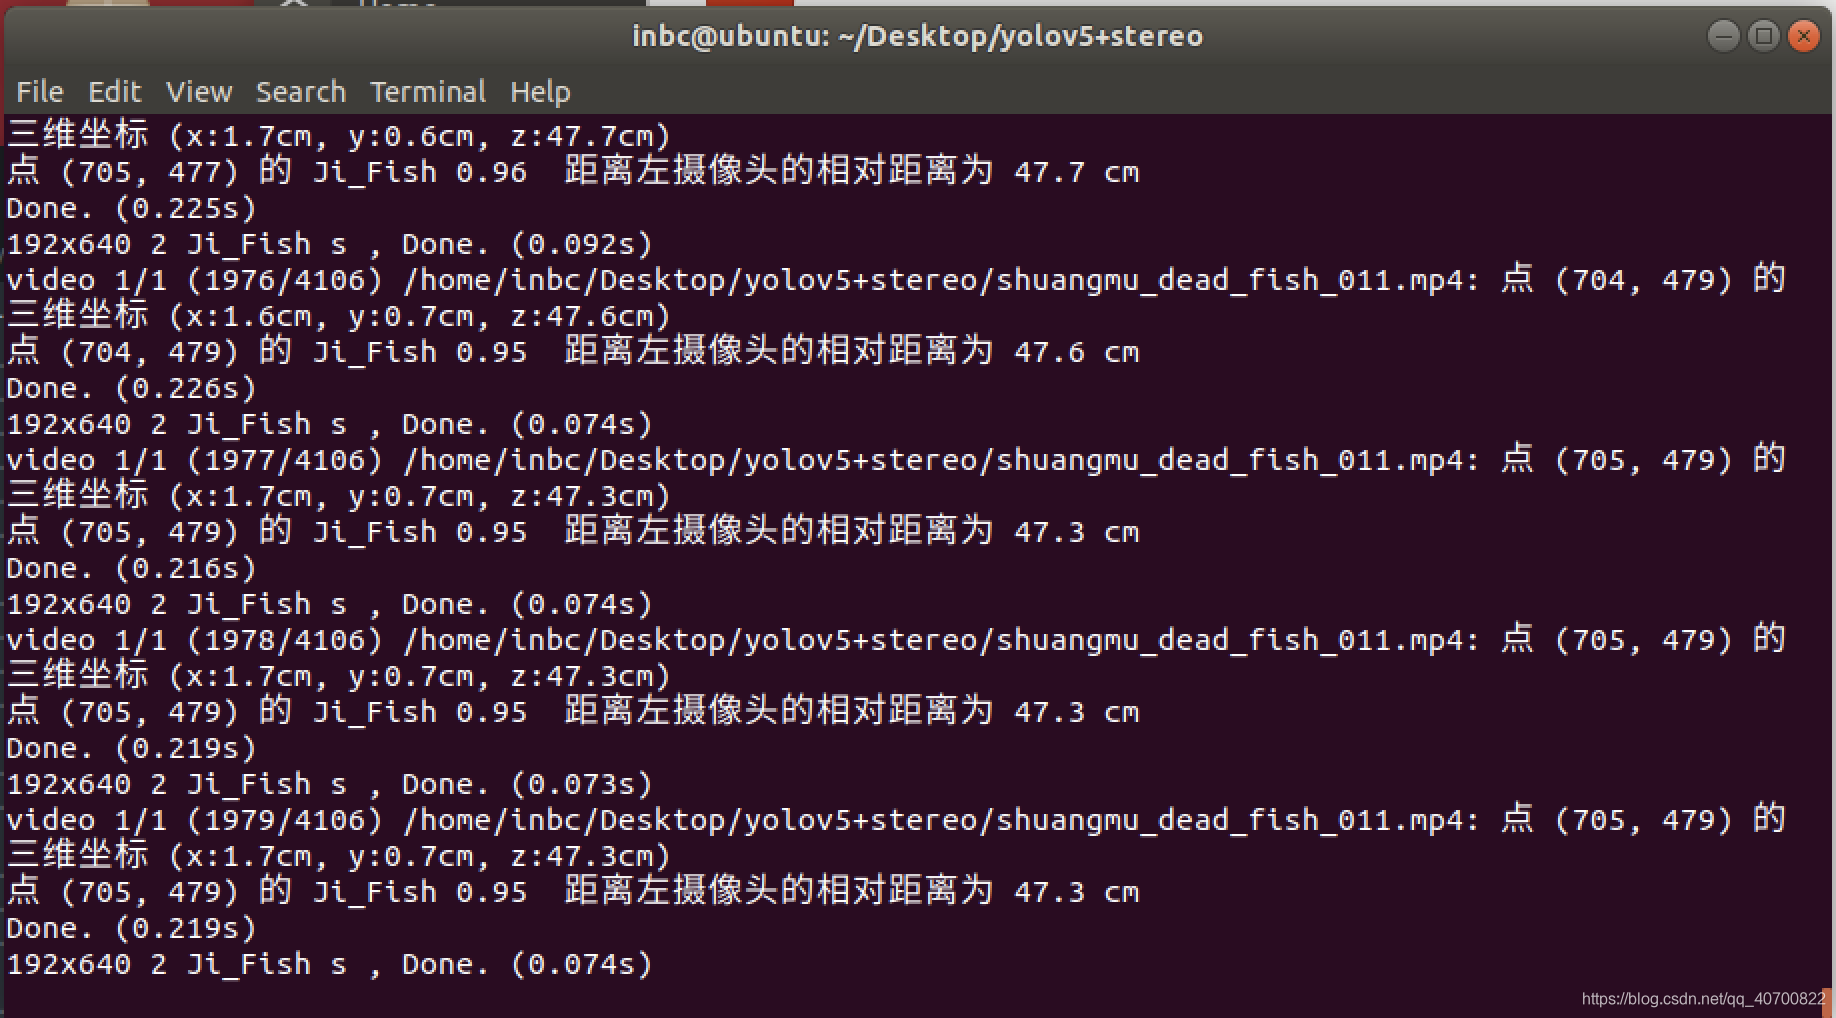
运行detect_and_stereo_video_003.py程序后出现以下情况表示,运行成功,可以把自己的模型替换掉我的模型,实现其他物体的识别测距和定位。注意摄像头的型号规格。
7、最终演示视频
欢迎各位点赞投币收藏哦🤣🤣🤣!【毕业设计-基于YOLO V5智能追踪记录装置的设计-哔哩哔哩】https://b23.tv/iTkkRJ
8、需要指导的小伙伴可以加我QQ哦~
$ QQ=1024062844
$ 加QQ群免费获取资料哦:544210336