链接:https://pan.baidu.com/s/1IczvAUFhNz23xvCjlTiI_A?pwd=ruge
- Redis入门篇
https://blog.csdn.net/tongxin_tongmeng/article/details/126620333 - 集群配置文件(3主3从)
1.复制/home/redis/redis-7.0.4/redis.conf到/home/redis/workspace/cluster_one
cp /home/redis/redis-7.0.4/redis.conf /home/redis/workspace/cluster_one/redis_7001.conf
cp /home/redis/redis-7.0.4/redis.conf /home/redis/workspace/cluster_one/redis_7002.conf
cp /home/redis/redis-7.0.4/redis.conf /home/redis/workspace/cluster_one/redis_7003.conf
cp /home/redis/redis-7.0.4/redis.conf /home/redis/workspace/cluster_one/redis_7004.conf
cp /home/redis/redis-7.0.4/redis.conf /home/redis/workspace/cluster_one/redis_7005.conf
cp /home/redis/redis-7.0.4/redis.conf /home/redis/workspace/cluster_one/redis_7006.conf2.编辑/home/redis/workspace/cluster_one/redis_7001.conf
设置服务端口:port 7001
解除本机绑定:# bind 127.0.0.1 -::1
守护方式启动:daemonize yes
设置pid路径:pidfile /home/redis/workspace/cluster_one/redis_7001.pid
设置存储路径:dir /home/redis/workspace/cluster_one
设置连接密码:requirepass 123456
AOF方式持久化:appendonly yes
AOF存储文件名:appendfilename "appendonly_7001.aof"
AOF持久化策略:appendfsync always
开启集群:cluster-enabled yes
集群Node名称:luster-config-file nodes_7001.conf
集群超时时间:cluster-node-timeout 50003.编辑/home/redis/workspace/cluster_one/redis_7002.conf
设置服务端口:port 7002
解除本机绑定:# bind 127.0.0.1 -::1
守护方式启动:daemonize yes
设置pid路径:pidfile /home/redis/workspace/cluster_one/redis_7002.pid
设置存储路径:dir /home/redis/workspace/cluster_one
设置连接密码:requirepass 123456
AOF方式持久化:appendonly yes
AOF存储文件名:appendfilename "appendonly_7002.aof"
AOF持久化策略:appendfsync always
开启集群:cluster-enabled yes
集群Node名称:luster-config-file nodes_7002.conf
集群超时时间:cluster-node-timeout 50004.编辑/home/redis/workspace/cluster_one/redis_7003.conf
设置服务端口:port 7003
解除本机绑定:# bind 127.0.0.1 -::1
守护方式启动:daemonize yes
设置pid路径:pidfile /home/redis/workspace/cluster_one/redis_7003.pid
设置存储路径:dir /home/redis/workspace/cluster_one
设置连接密码:requirepass 123456
AOF方式持久化:appendonly yes
AOF存储文件名:appendfilename "appendonly_7003.aof"
AOF持久化策略:appendfsync always
开启集群:cluster-enabled yes
集群Node名称:luster-config-file nodes_7003.conf
集群超时时间:cluster-node-timeout 50005.编辑/home/redis/workspace/cluster_one/redis_7004.conf
设置服务端口:port 7004
解除本机绑定:# bind 127.0.0.1 -::1
守护方式启动:daemonize yes
设置pid路径:pidfile /home/redis/workspace/cluster_one/redis_7004.pid
设置存储路径:dir /home/redis/workspace/cluster_one
设置连接密码:requirepass 123456
AOF方式持久化:appendonly yes
AOF存储文件名:appendfilename "appendonly_7004.aof"
AOF持久化策略:appendfsync always
开启集群:cluster-enabled yes
集群Node名称:luster-config-file nodes_7004.conf
集群超时时间:cluster-node-timeout 50006.编辑/home/redis/workspace/cluster_one/redis_7005.conf
设置服务端口:port 7005
解除本机绑定:# bind 127.0.0.1 -::1
守护方式启动:daemonize yes
设置pid路径:pidfile /home/redis/workspace/cluster_one/redis_7005.pid
设置存储路径:dir /home/redis/workspace/cluster_one
设置连接密码:requirepass 123456
AOF方式持久化:appendonly yes
AOF存储文件名:appendfilename "appendonly_7005.aof"
AOF持久化策略:appendfsync always
开启集群:cluster-enabled yes
集群Node名称:luster-config-file nodes_7005.conf
集群超时时间:cluster-node-timeout 50007.编辑/home/redis/workspace/cluster_one/redis_7006.conf
设置服务端口:port 7006
解除本机绑定:# bind 127.0.0.1 -::1
守护方式启动:daemonize yes
设置pid路径:pidfile /home/redis/workspace/cluster_one/redis_7006.pid
设置存储路径:dir /home/redis/workspace/cluster_one
设置连接密码:requirepass 123456
AOF方式持久化:appendonly yes
AOF存储文件名:appendfilename "appendonly_7006.aof"
AOF持久化策略:appendfsync always
开启集群:cluster-enabled yes
集群Node名称:luster-config-file nodes_7006.conf
集群超时时间:cluster-node-timeout 5000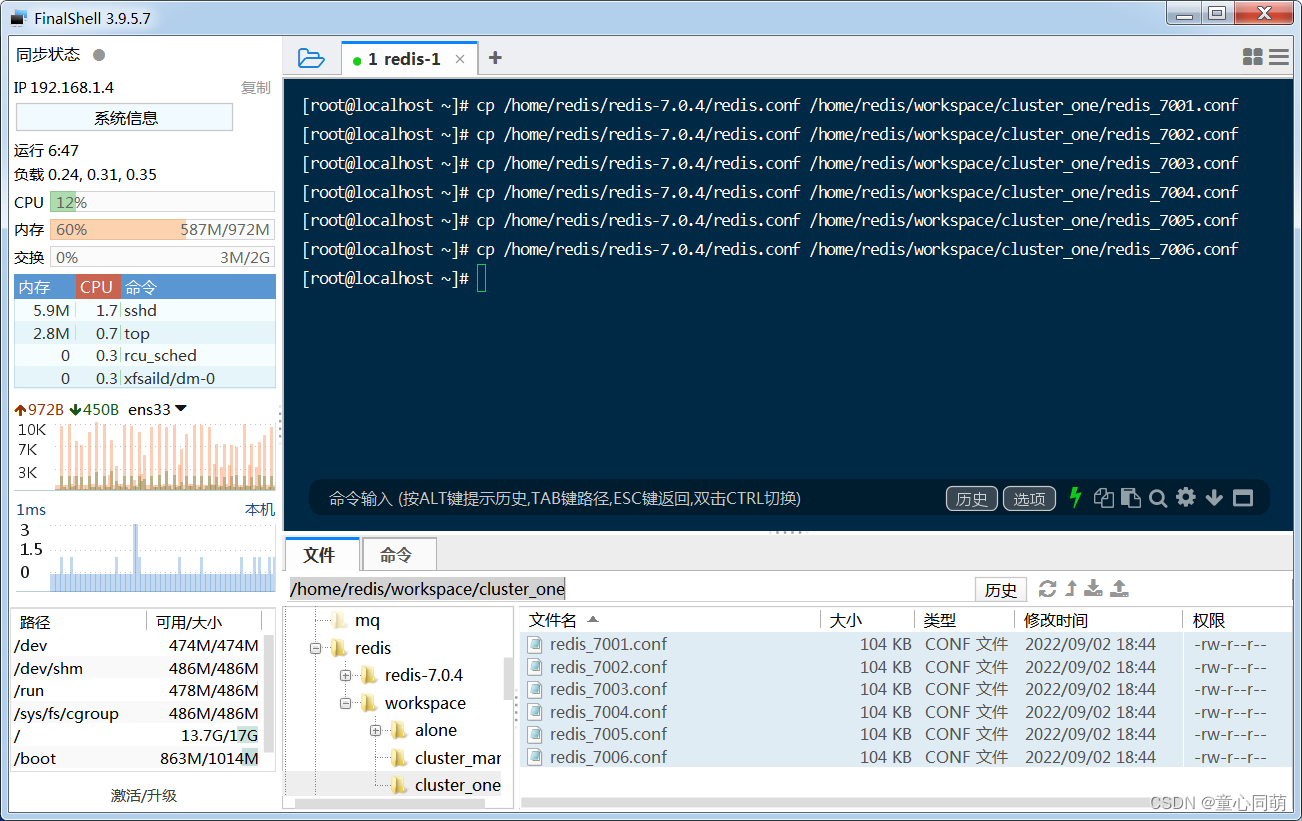
-
创建集群
1.启动redis服务
redis-server /home/redis/workspace/cluster_one/redis_7001.conf
redis-server /home/redis/workspace/cluster_one/redis_7002.conf
redis-server /home/redis/workspace/cluster_one/redis_7003.conf
redis-server /home/redis/workspace/cluster_one/redis_7004.conf
redis-server /home/redis/workspace/cluster_one/redis_7005.conf
redis-server /home/redis/workspace/cluster_one/redis_7006.conf2.创建集群
redis-cli -a 123456 --cluster create --cluster-replicas 1 192.168.1.4:7001 192.168.1.4:7002 192.168.1.4:7003 192.168.1.4:7004 192.168.1.4:7005 192.168.1.4:7006
注意:前3个为主节点,后3个为从节点,创建命令只执行一次,重启集群只需要重启redis服务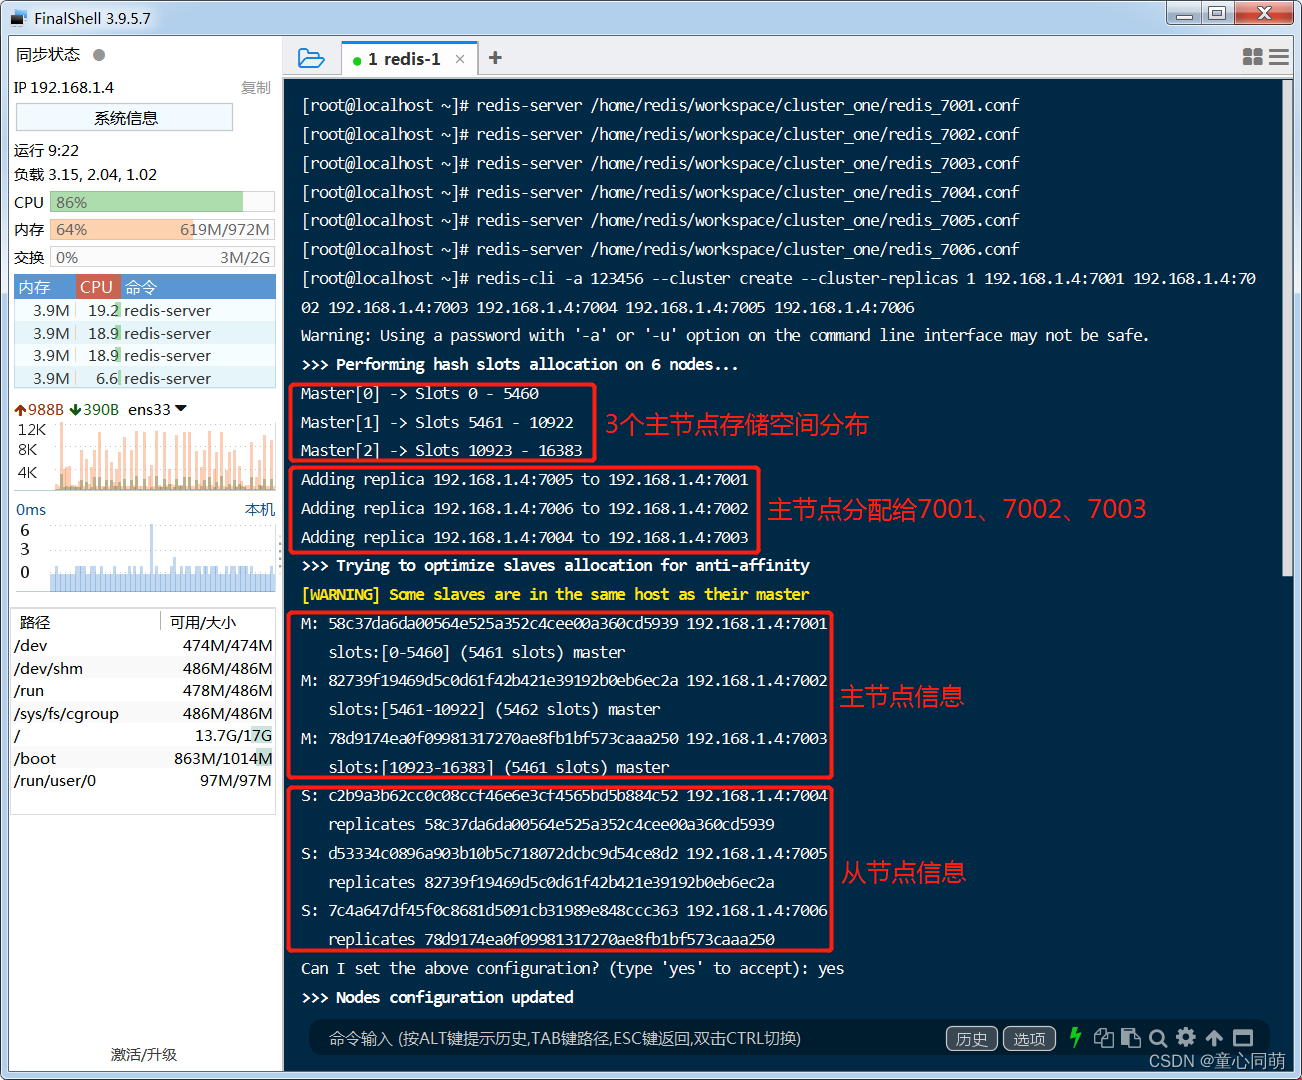
-
启动集群
redis-server /home/redis/workspace/cluster_one/redis_7001.conf
redis-server /home/redis/workspace/cluster_one/redis_7002.conf
redis-server /home/redis/workspace/cluster_one/redis_7003.conf
redis-server /home/redis/workspace/cluster_one/redis_7004.conf
redis-server /home/redis/workspace/cluster_one/redis_7005.conf
redis-server /home/redis/workspace/cluster_one/redis_7006.conf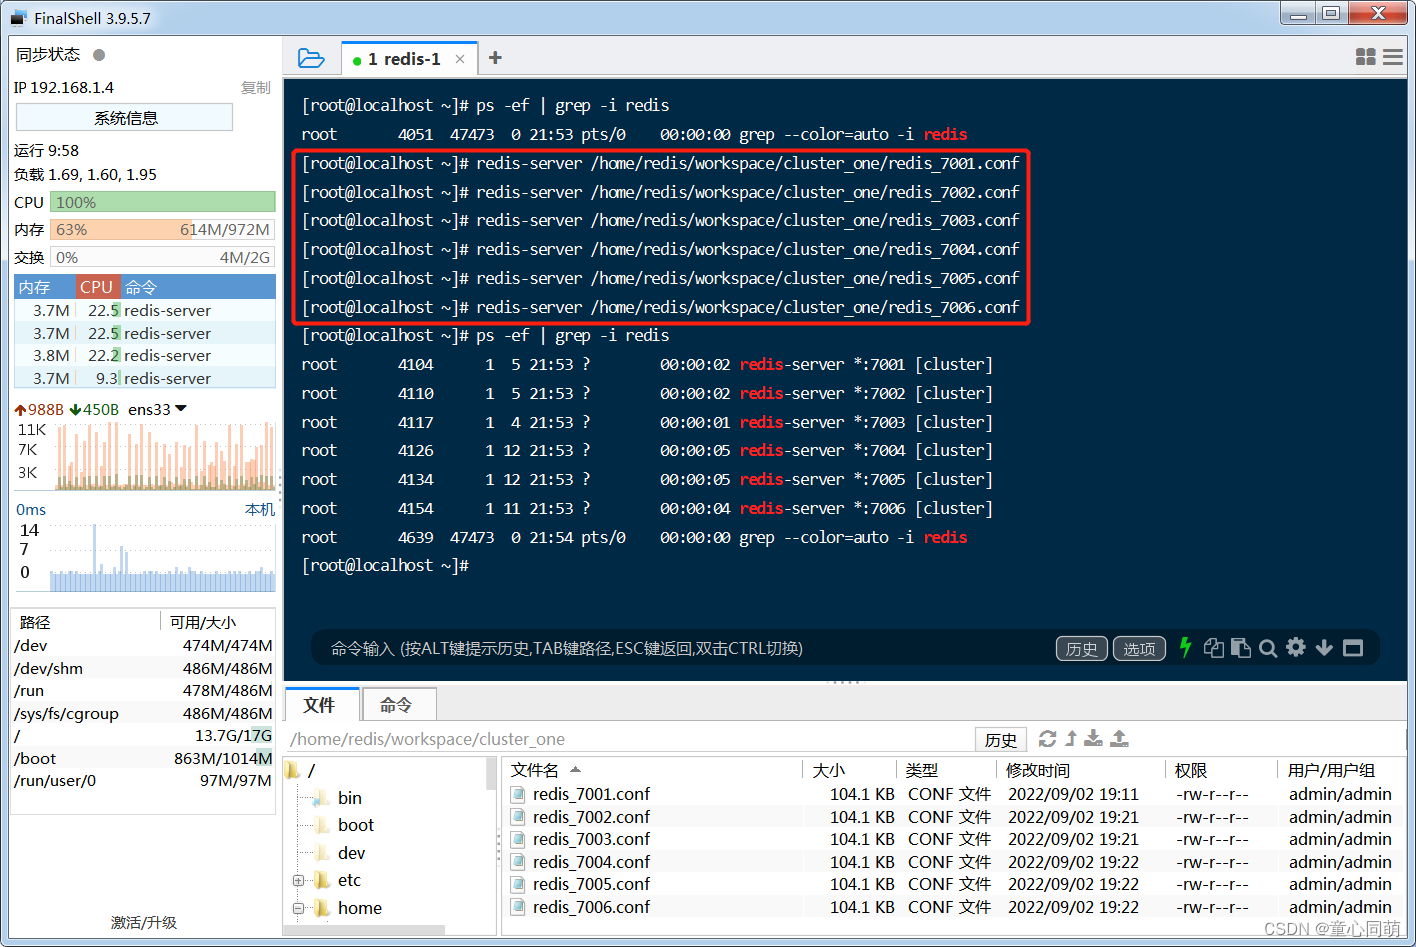
-
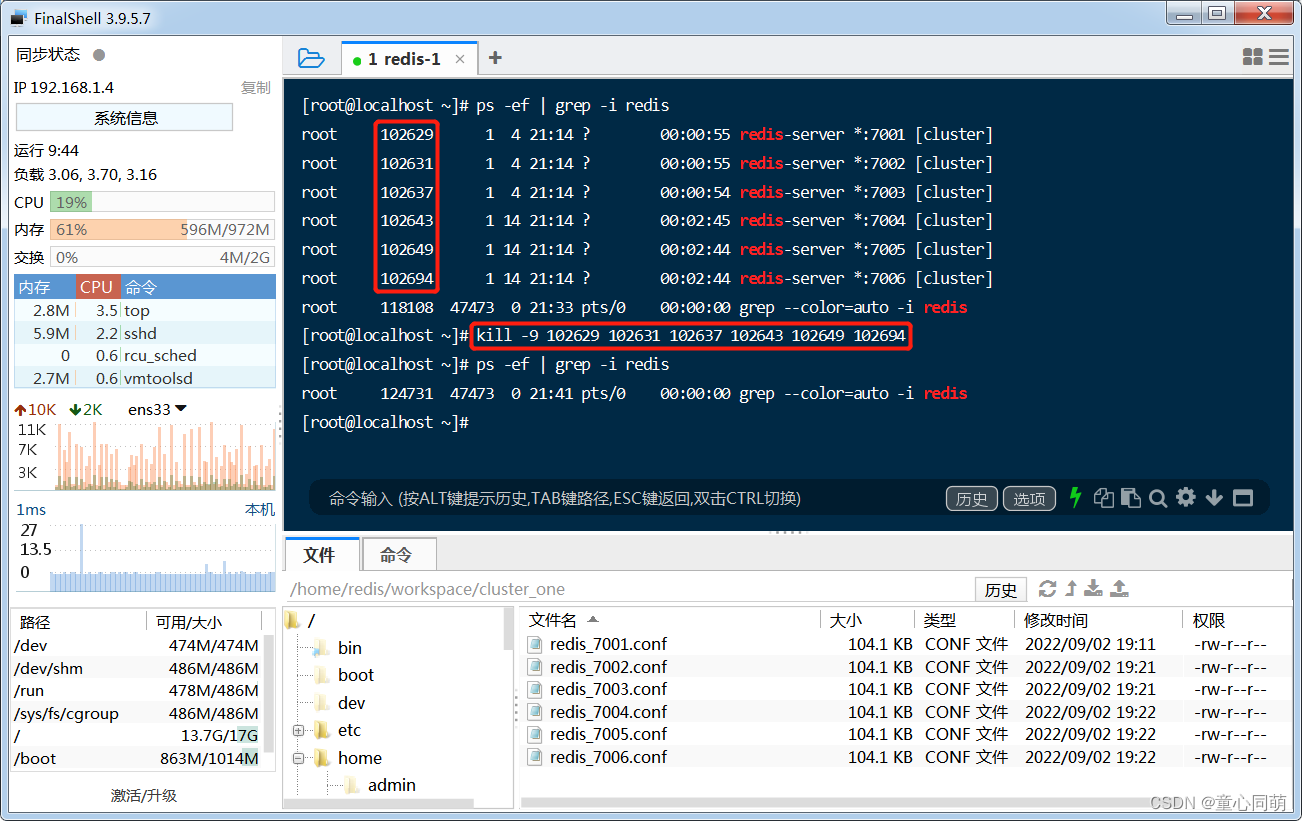
关闭集群
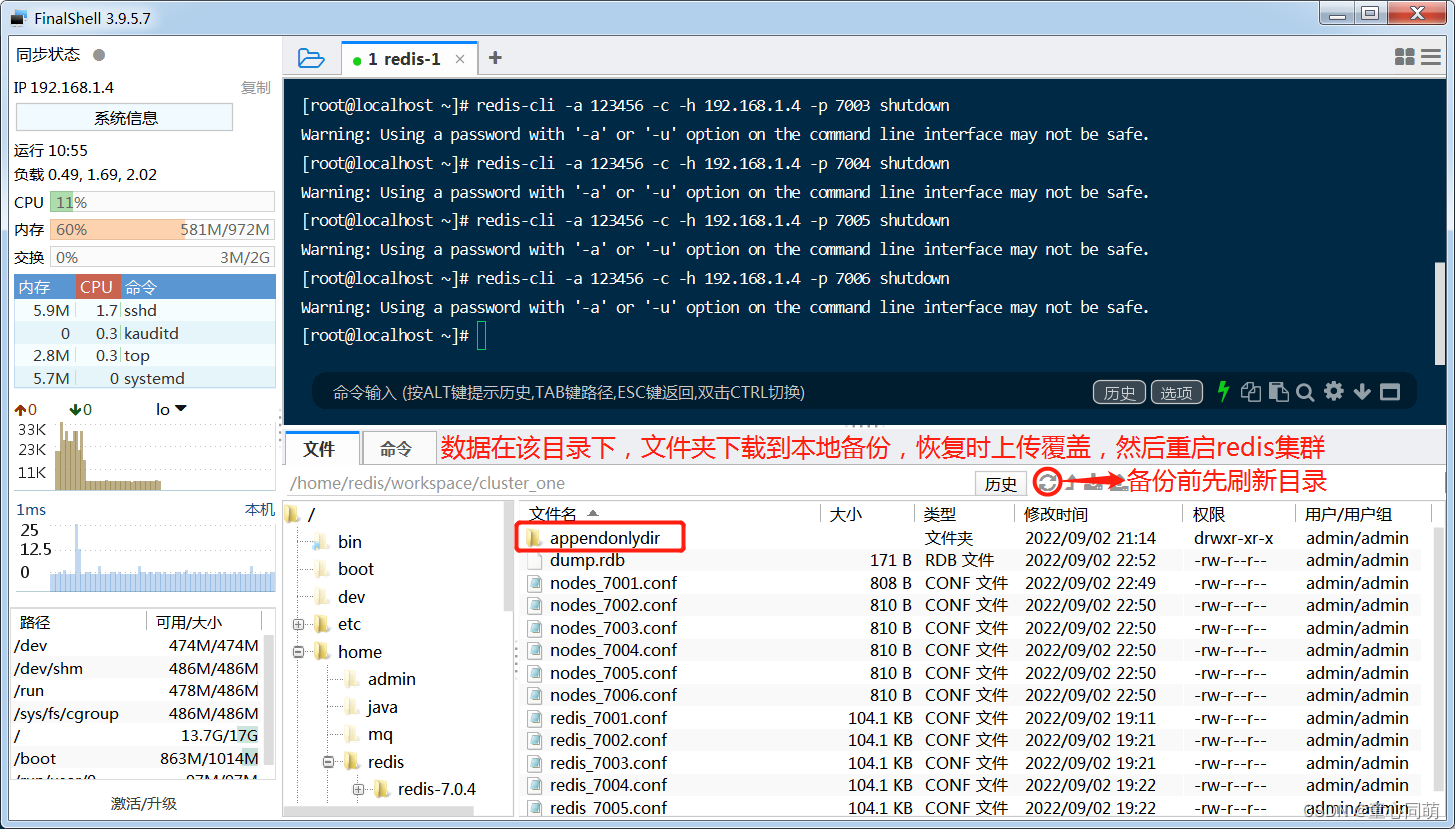
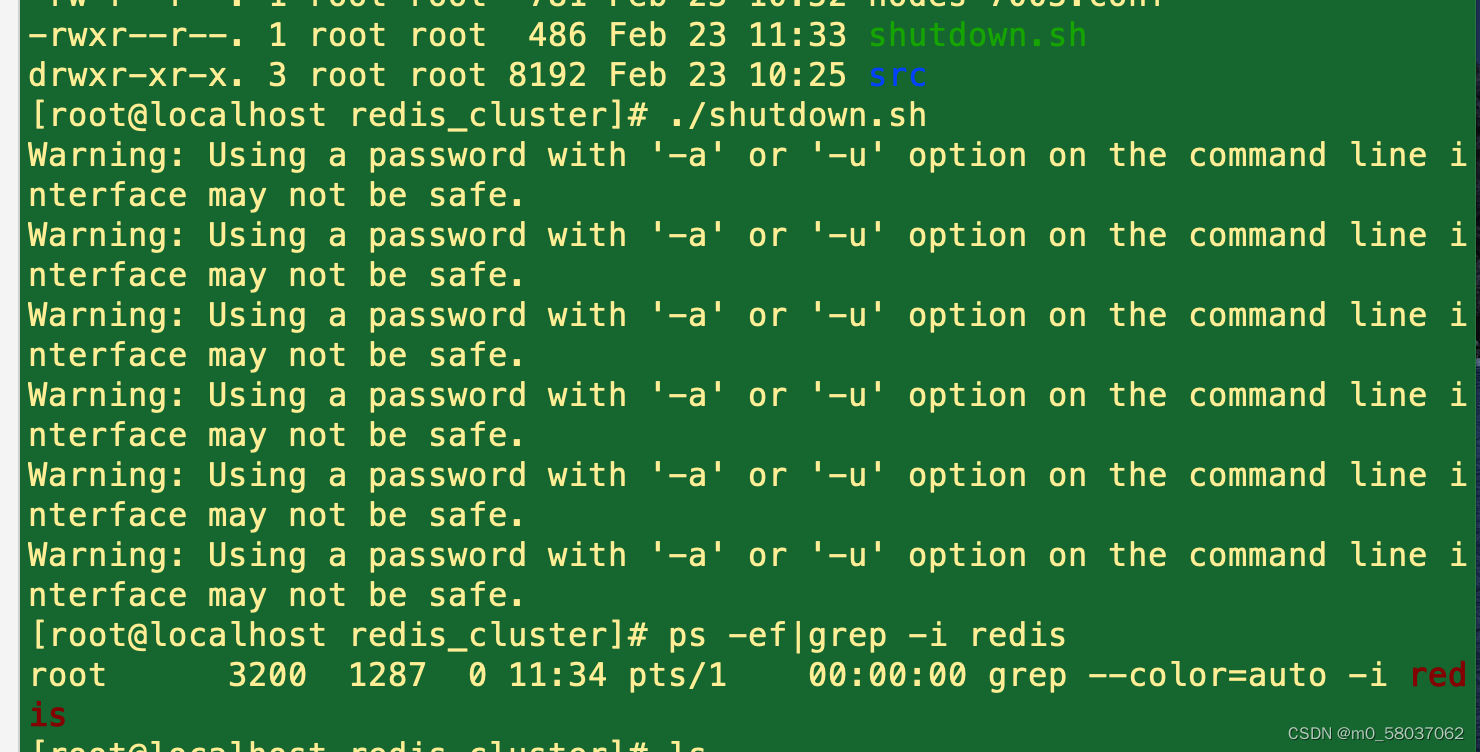
1.方式一:redis-cli命令关闭集群(推荐)
redis-cli -a 123456 -c -h 192.168.1.4 -p 7001 shutdown
redis-cli -a 123456 -c -h 192.168.1.4 -p 7002 shutdown
redis-cli -a 123456 -c -h 192.168.1.4 -p 7003 shutdown
redis-cli -a 123456 -c -h 192.168.1.4 -p 7004 shutdown
redis-cli -a 123456 -c -h 192.168.1.4 -p 7005 shutdown
redis-cli -a 123456 -c -h 192.168.1.4 -p 7006 shutdown2.方式二:根据进程号关闭集群(方便)
ps -ef | grep -i redis
kill -9 102629 102631 102637 102643 102649 102694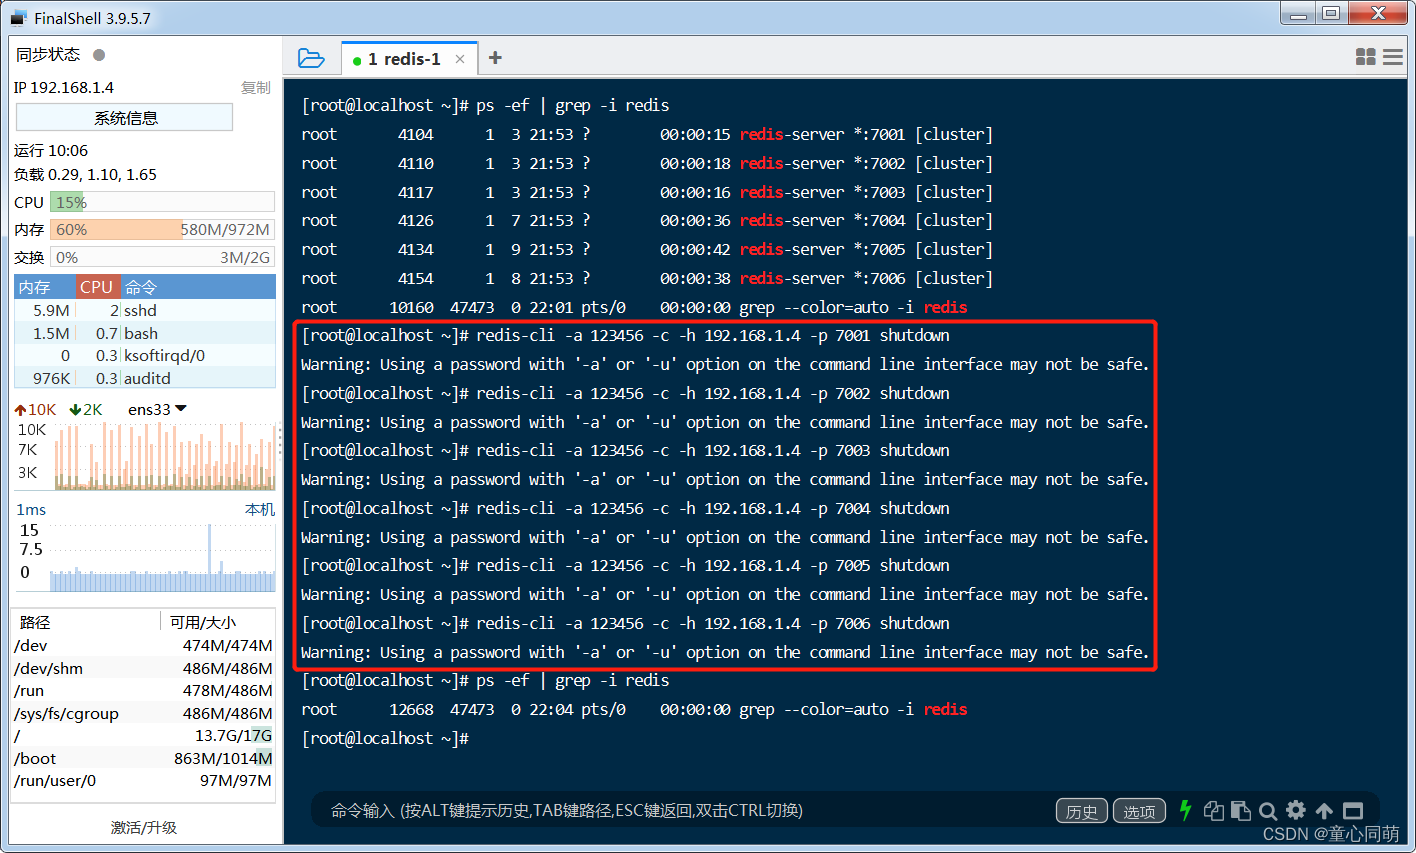
-
登录集群
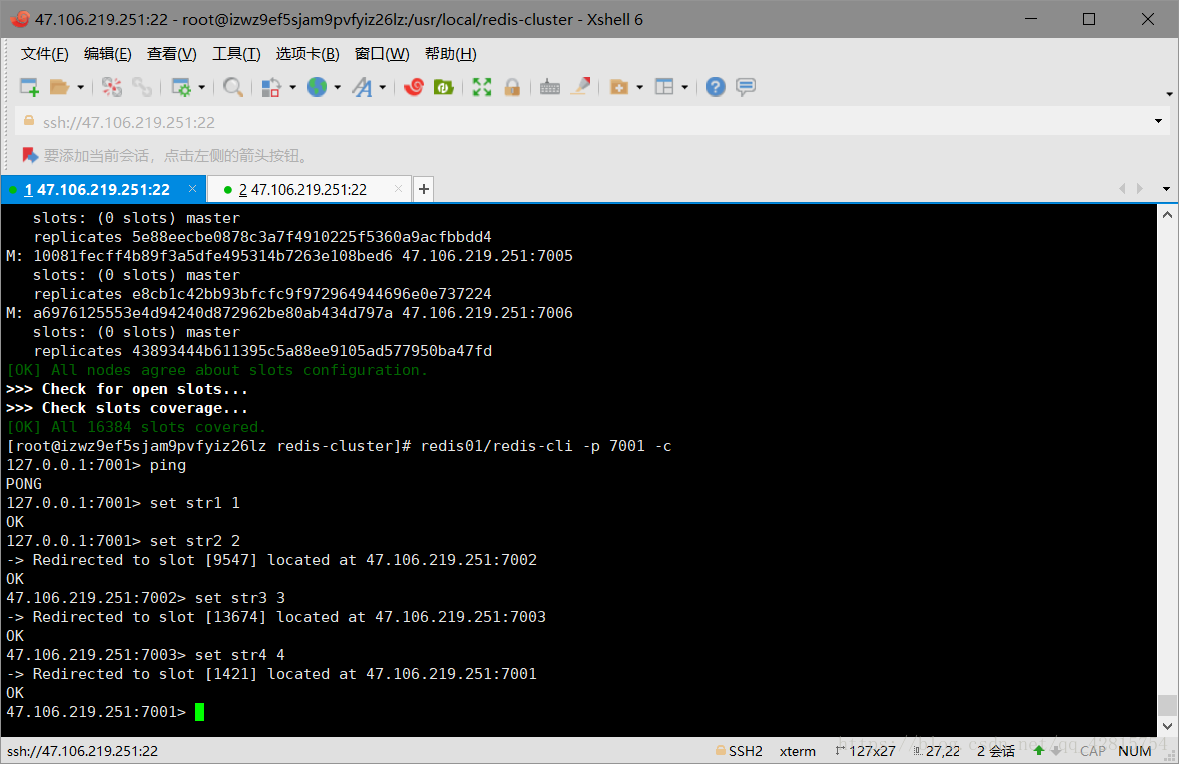
1.登录集群不同的客户端
redis-cli -a 123456 -c -h 192.168.1.4 -p 7001
redis-cli -a 123456 -c -h 192.168.1.4 -p 7002
redis-cli -a 123456 -c -h 192.168.1.4 -p 7003
redis-cli -a 123456 -c -h 192.168.1.4 -p 7004
redis-cli -a 123456 -c -h 192.168.1.4 -p 7005
redis-cli -a 123456 -c -h 192.168.1.4 -p 70062.客户端切换时需要先退出:quit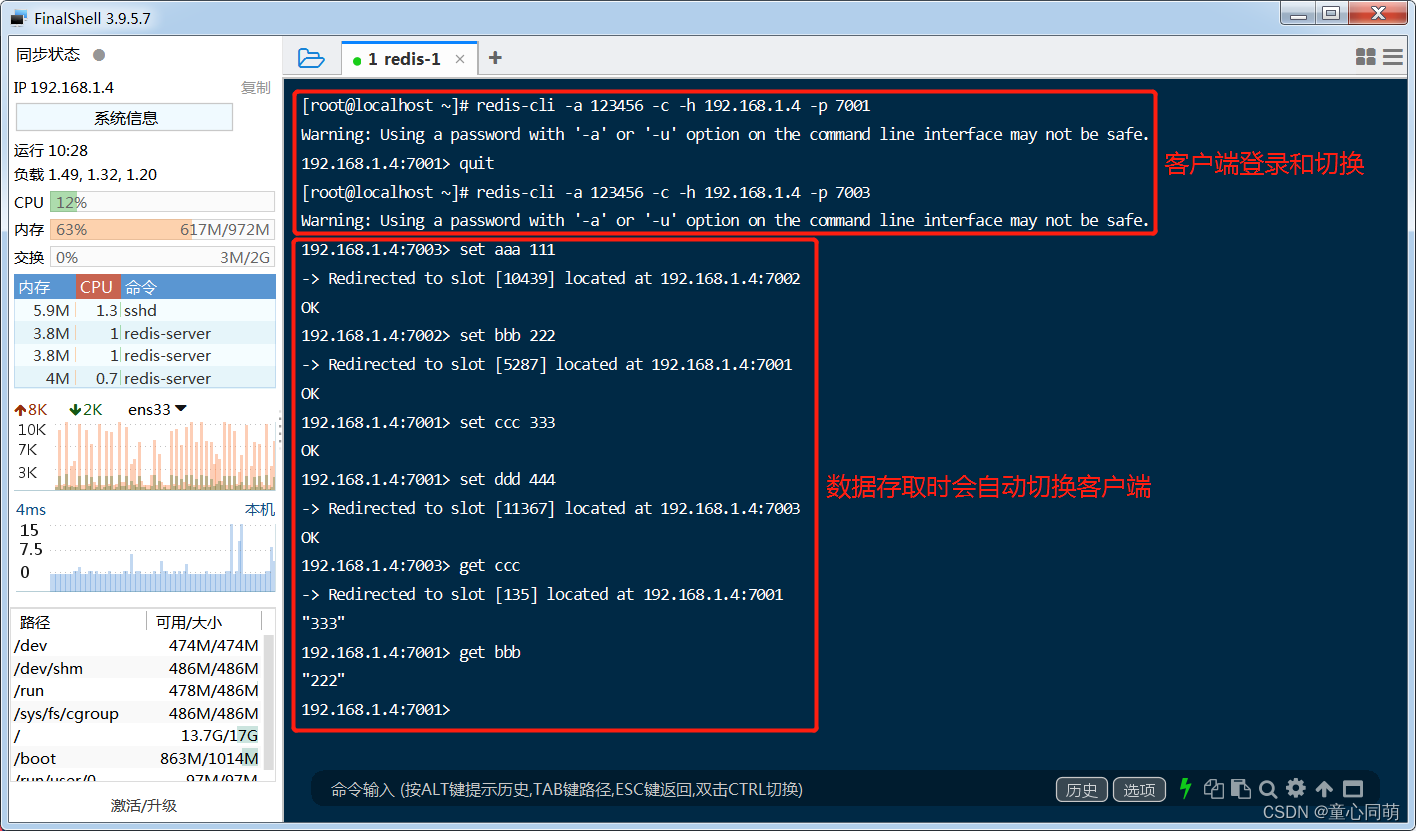
-
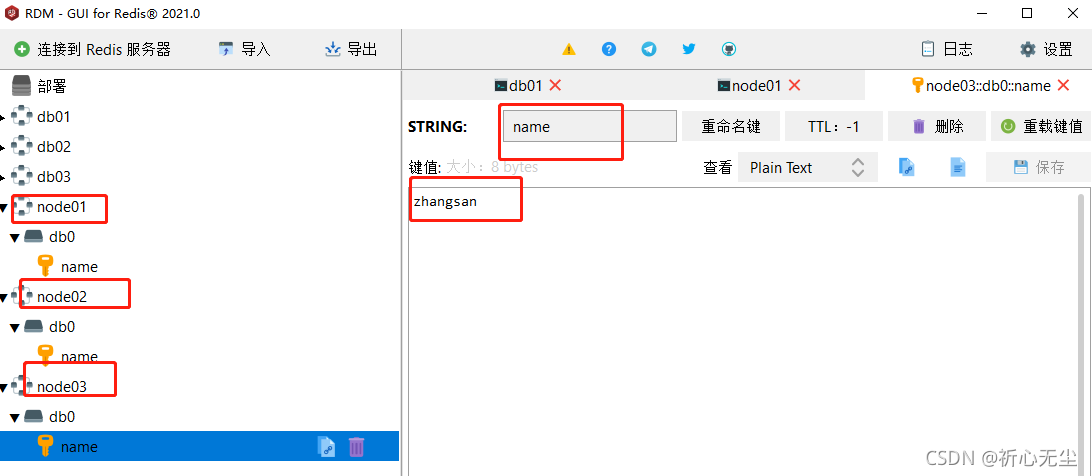
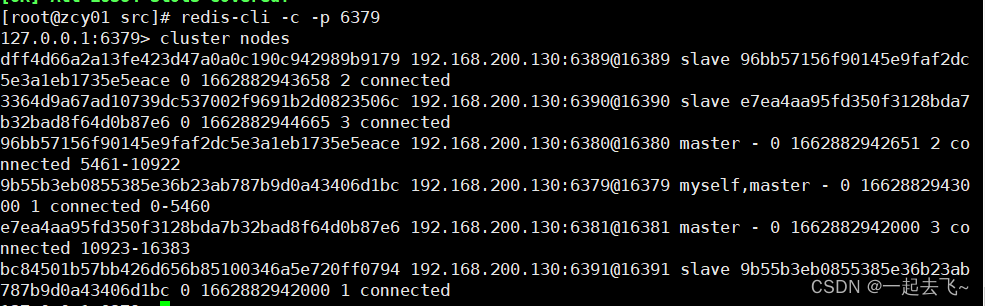
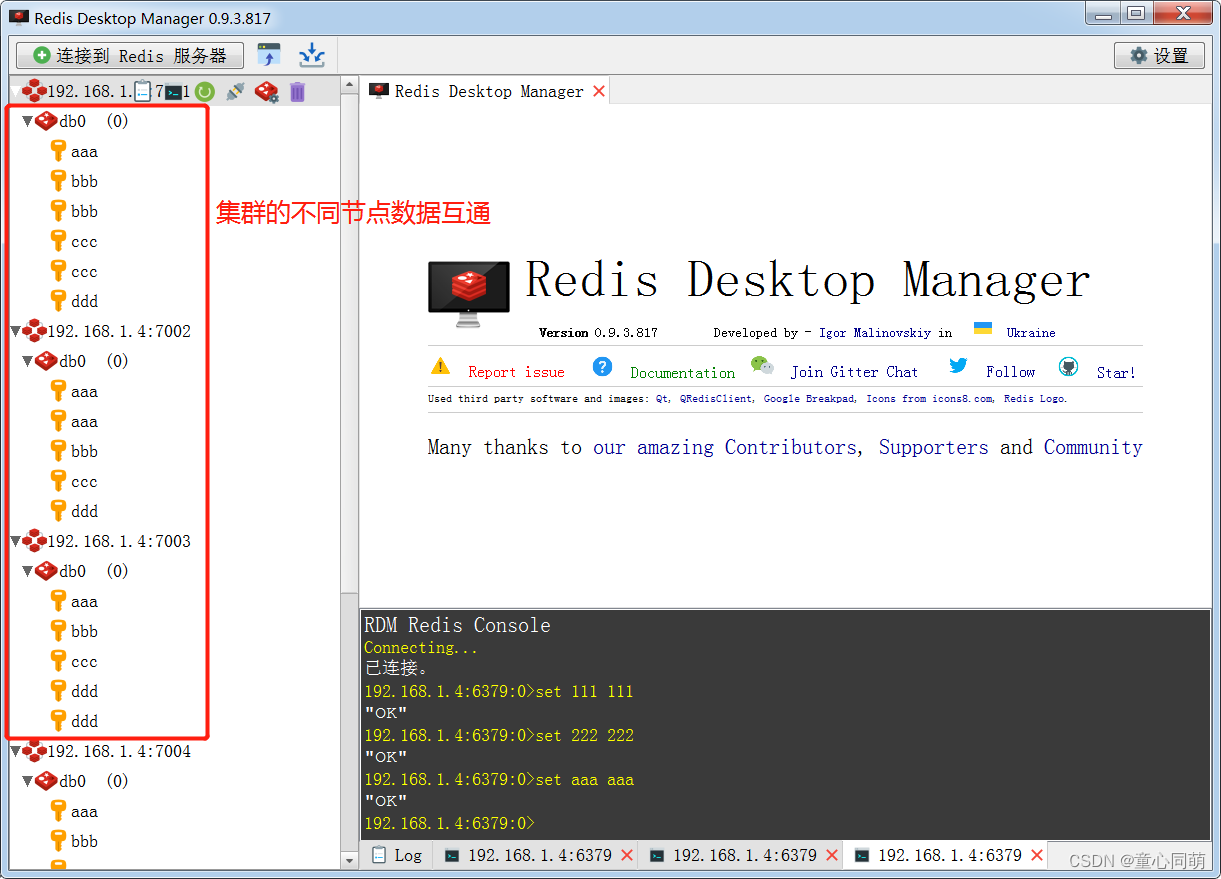
集群信息
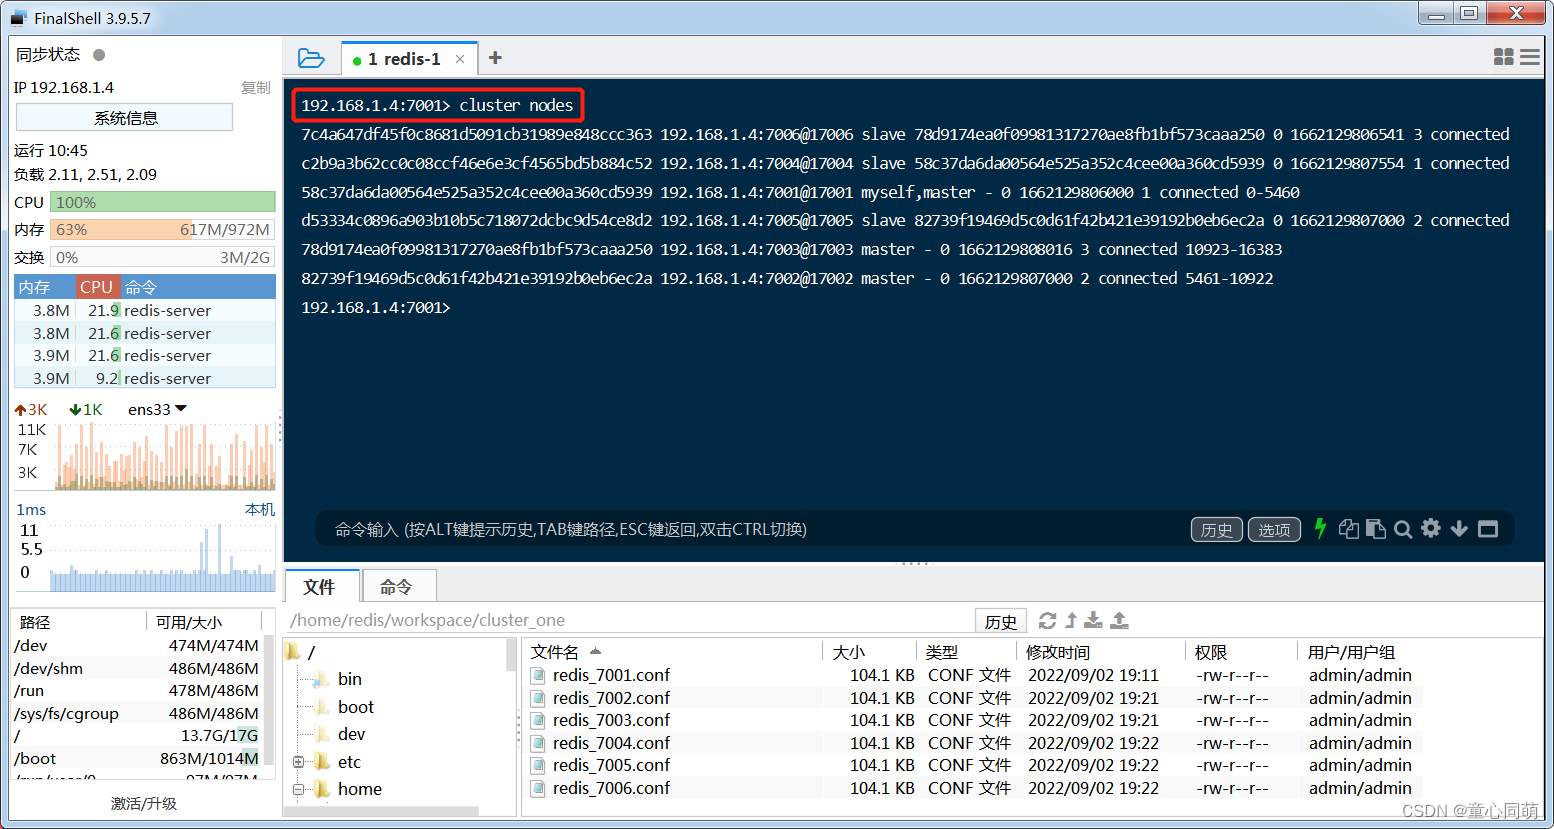
-
数据备份、恢复