前期准备
- 安装最新版的ActivePerl
- 到https://www.openssl.org 下载最新OpenSSL源码
- 到http://www.nasm.us 下载NASM汇编工具
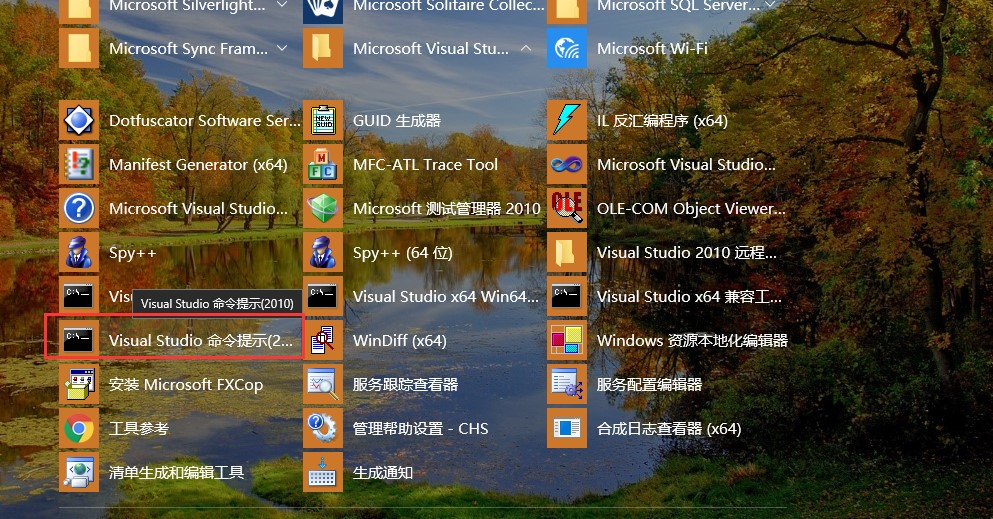
- 在开始任务栏里打开vc2010的工具文件夹,如图所示:
选择Visual Studio命令提示(如果是编译64位的openssl,应该打开的Visual Studio x64兼容工具,ps: 本人没测试)
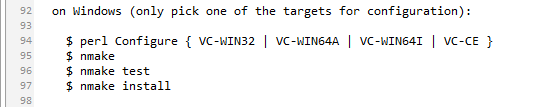
4.解压open-master.zip(我是从github上下载的),在目录下找到INSTALL文件,用记事本或其他文本工具打开,可以看到提示信息,如图所示:
编译过程及可能出现的问题
第一步:perl configure VC-WIN32 –prefix=c:\OpenSSL
第二步:nmake
第三步:nmake test 【测试目前支持的一些算法】
第四步:nmake install
on Windows (only pick one of the targets for configuration):
1. perl Configure { VC-WIN32 | VC-WIN64A | VC-WIN64I | VC-CE }
2. nmake
3. nmake test
4. nmake install
可能出现的问题:
1. 无法找到perl 或nasm 或ias等
首先确保系统环境变量里有perl的文件夹路径,在安装ActivePerl的时候,有选择 add to system path,一定要记得勾上。或者在安装完后,可以手动将路径加到系统变量里,或者在当前命令提示框里输入set PATH=%PATH%;[PERL_DIR] PERL_DIR 要换成自己电脑的实际路径该方法仅对当前有效。不是永久性的。
如果是vc相关的工具命令无法找到,那么请检查你使用的命令提示框是不是正确的。
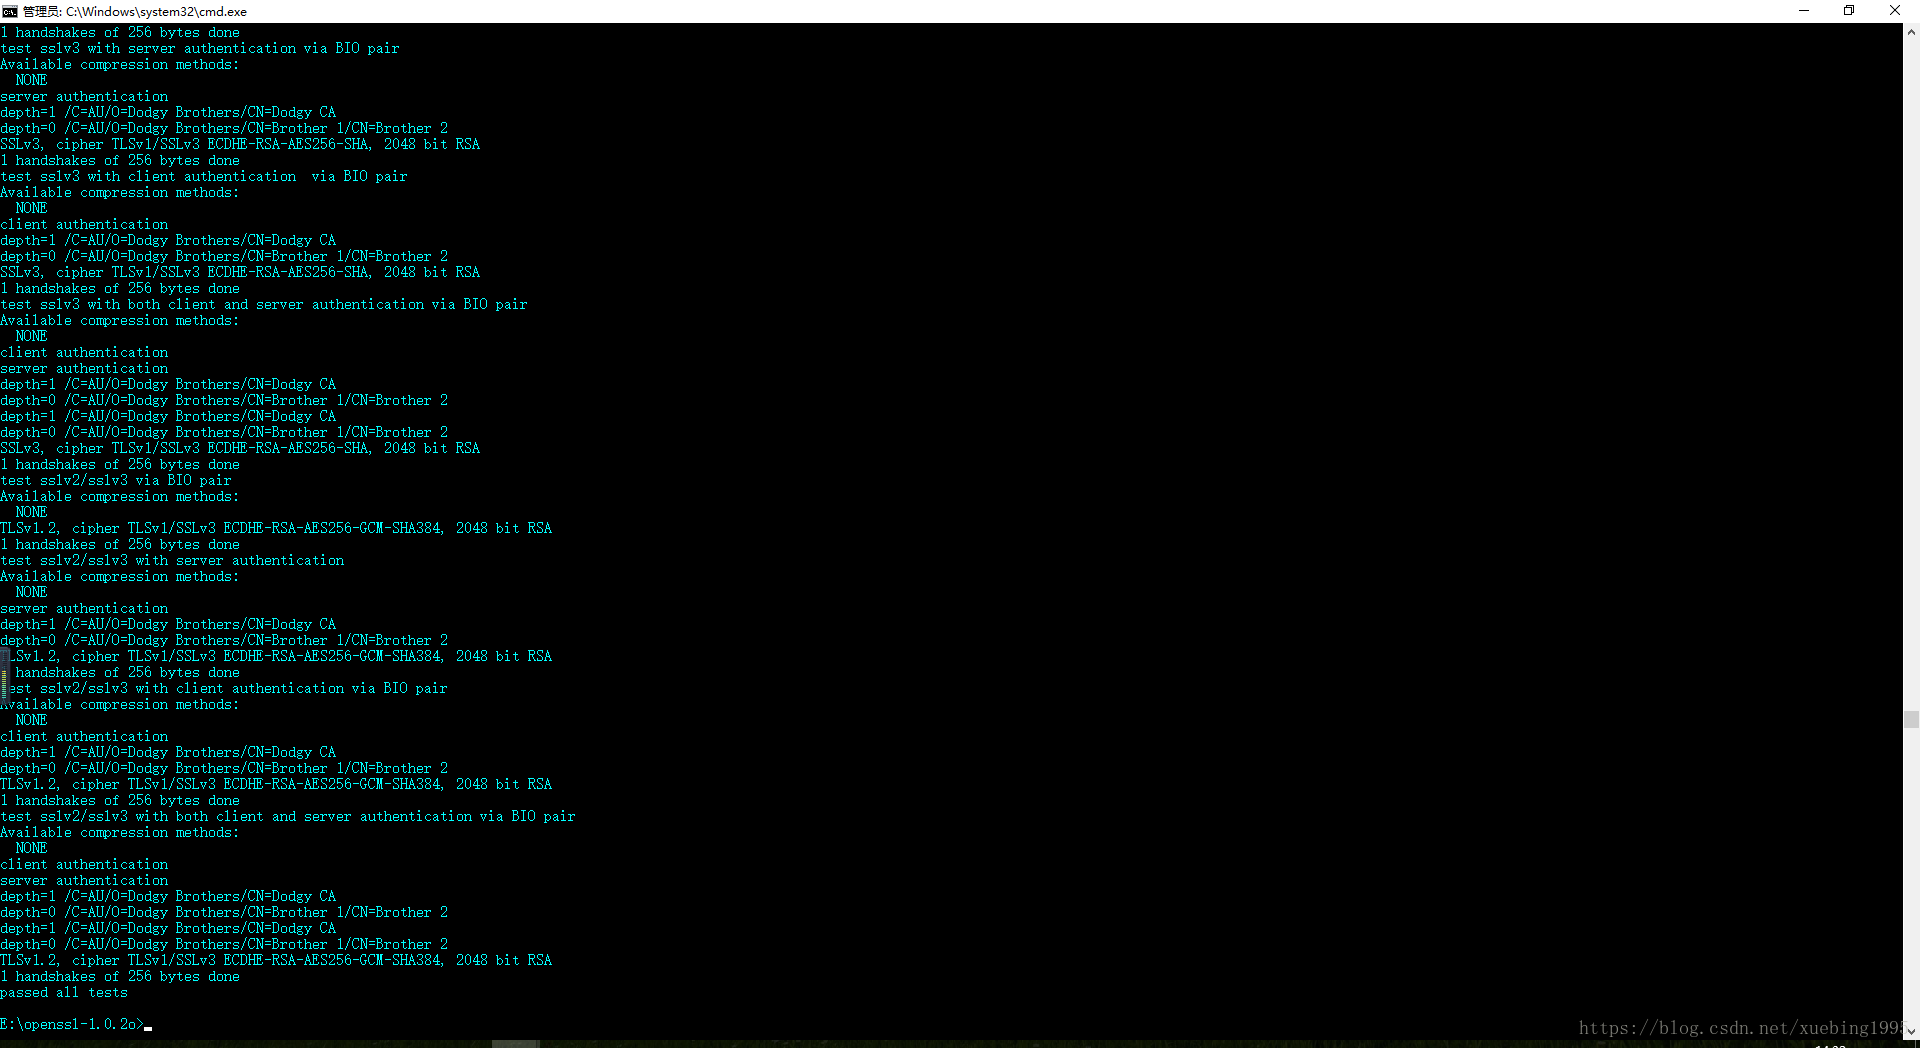
执行nmake test输出信息
运行时间比较长,耐心等待,以下是输出结果:
d:\MyFloder\openssl-master>nmake test
Microsoft (R) 程序维护实用工具 10.00.30319.01 版
版权所有(C) Microsoft Corporation。保留所有权利。
set SRCTOP=.
set BLDTOP=.
set PERL=C:\Perl64\bin\perl.exe
set OPENSSL_DEBUG_MEMORY=on
“C:\Perl64\bin\perl.exe” “.\test\run_tests.pl”
test\recipes\01-test_abort.t ………… ok
test\recipes\01-test_sanity.t ……….. ok
test\recipes\01-test_symbol_presence.t .. ok
test\recipes\02-test_ordinals.t ……… ok
test\recipes\03-test_internal.t ……… ok
test\recipes\05-test_bf.t …………… ok
test\recipes\05-test_cast.t …………. ok
test\recipes\05-test_des.t ………….. ok
test\recipes\05-test_hmac.t …………. ok
test\recipes\05-test_idea.t …………. ok
test\recipes\05-test_md2.t ………….. skipped: md2 is not supported by this OpenSSL build
test\recipes\05-test_md4.t ………….. ok
test\recipes\05-test_md5.t ………….. ok
test\recipes\05-test_mdc2.t …………. ok
test\recipes\05-test_rand.t …………. ok
test\recipes\05-test_rc2.t ………….. ok
test\recipes\05-test_rc4.t ………….. ok
test\recipes\05-test_rc5.t ………….. skipped: rc5 is not supported by this OpenSSL build
test\recipes\05-test_rmd.t ………….. ok
test\recipes\05-test_sha1.t …………. ok
test\recipes\05-test_sha256.t ……….. ok
test\recipes\05-test_sha512.t ……….. ok
test\recipes\05-test_wp.t …………… ok
test\recipes\10-test_bn.t …………… ok
test\recipes\10-test_exp.t ………….. ok
test\recipes\15-test_dh.t …………… ok
test\recipes\15-test_dsa.t ………….. ok
test\recipes\15-test_ec.t …………… ok
test\recipes\15-test_ecdh.t …………. ok
test\recipes\15-test_ecdsa.t ………… ok
test\recipes\15-test_rsa.t ………….. ok
test\recipes\20-test_enc.t ………….. ok
test\recipes\20-test_passwd.t ……….. ok
test\recipes\25-test_crl.t ………….. ok
test\recipes\25-test_d2i.t ………….. ok
test\recipes\25-test_pkcs7.t ………… ok
test\recipes\25-test_req.t ………….. ok
test\recipes\25-test_sid.t ………….. ok
test\recipes\25-test_verify.t ……….. ok
test\recipes\25-test_x509.t …………. ok
test\recipes\30-test_afalg.t ………… skipped: test_afalg not supported for this build
test\recipes\30-test_engine.t ……….. ok
test\recipes\30-test_evp.t ………….. ok
test\recipes\30-test_evp_extra.t …….. ok
test\recipes\30-test_pbelu.t ………… ok
test\recipes\30-test_pkey_meth.t …….. ok
test\recipes\40-test_rehash.t ……….. skipped: test_rehash is not available on this platform
test\recipes\70-test_asyncio.t ………. ok
test\recipes\70-test_bad_dtls.t ……… ok
test\recipes\70-test_clienthello.t …… ok
test\recipes\70-test_key_share.t …….. skipped: TLSProxy isn’t usable on MSWin32
test\recipes\70-test_packet.t ……….. ok
test\recipes\70-test_sslcbcpadding.t …. skipped: TLSProxy isn’t usable on MSWin32
test\recipes\70-test_sslcertstatus.t …. skipped: TLSProxy isn’t usable on MSWin32
test\recipes\70-test_sslextension.t ….. skipped: TLSProxy isn’t usable on MSWin32
test\recipes\70-test_sslrecords.t ……. skipped: TLSProxy isn’t usable on MSWin32
test\recipes\70-test_sslsessiontick.t … skipped: TLSProxy isn’t usable on MSWin32
test\recipes\70-test_sslskewith0p.t ….. skipped: TLSProxy isn’t usable on MSWin32
test\recipes\70-test_sslversions.t …… skipped: TLSProxy isn’t usable on MSWin32
test\recipes\70-test_sslvertol.t …….. skipped: TLSProxy isn’t usable on MSWin32
test\recipes\70-test_tlsextms.t ……… skipped: TLSProxy isn’t usable on MSWin32
test\recipes\70-test_verify_extra.t ….. ok
test\recipes\70-test_wpacket.t ………. skipped: Only supported in no-shared builds
test\recipes\80-test_ca.t …………… ok
test\recipes\80-test_cipherlist.t ……. ok
test\recipes\80-test_cms.t ………….. ok
test\recipes\80-test_ct.t …………… ok
test\recipes\80-test_dane.t …………. ok
test\recipes\80-test_dtls.t …………. ok
test\recipes\80-test_dtls_mtu.t ……… ok
test\recipes\80-test_dtlsv1listen.t ….. ok
test\recipes\80-test_ocsp.t …………. ok
test\recipes\80-test_pkcs12.t ……….. skipped: Non-Greek system locale
test\recipes\80-test_ssl_new.t ………. ok
test\recipes\80-test_ssl_old.t ………. ok
test\recipes\80-test_ssl_test_ctx.t ….. ok
test\recipes\80-test_sslcorrupt.t ……. ok
test\recipes\80-test_tsa.t ………….. ok
test\recipes\80-test_x509aux.t ………. ok
test\recipes\90-test_async.t ………… ok
test\recipes\90-test_bio_enc.t ………. ok
test\recipes\90-test_bioprint.t ……… ok
test\recipes\90-test_constant_time.t …. ok
test\recipes\90-test_external.t ……… skipped: No external tests have been detected
test\recipes\90-test_fuzz.t …………. ok
test\recipes\90-test_gmdiff.t ……….. ok
test\recipes\90-test_ige.t ………….. ok
test\recipes\90-test_memleak.t ………. ok
test\recipes\90-test_overhead.t ……… skipped: Only supported in no-shared builds
test\recipes\90-test_p5_crpt2.t ……… ok
test\recipes\90-test_secmem.t ……….. ok
test\recipes\90-test_shlibload.t …….. ok
test\recipes\90-test_srp.t ………….. ok
test\recipes\90-test_sslapi.t ……….. ok
test\recipes\90-test_threads.t ………. ok
test\recipes\90-test_tls13secrets.t ….. skipped: tls13secrets is not supported in this build
test\recipes\90-test_v3name.t ……….. ok
All tests successful.
Files=97, Tests=454, 2474 wallclock secs ( 1.59 usr + 0.39 sys = 1.98 CPU)
Result: PASS
执行nmake install 出错
Cannot create directory C:/Program Files (x86)/Common Files/SSL: No such file or directory
NMAKE : fatal error U1077: “C:\Perl64\bin\perl.exe”: 返回代码“0x2”
Stop.在 C:\rogram Files (x86)\Common Files\SSL下手动新建ssl文件夹
Cannot create directory C:/Program Files (x86)/Common Files/SSL/certs: No such file or directory
NMAKE : fatal error U1077: “C:\Perl64\bin\perl.exe”: 返回代码“0x2”在 C:\rogram Files (x86)\Common Files\SSL\下手动新建certs文件夹
依然报目录不存在的错误。
关闭当前命令提示框,在
前提准备步骤3中找到对应的命令提示,右键,选择用管理员身份打开,如图所示:
(其实调用的是D:\Program Files (x86)\Microsoft Visual Studio 10.0\VC\vcvarsall.bat,所以用管理员身份运行此程序是一样的效果)

编译成功通过,over
参考:
- 如何在Windows下编译OpenSSL?
- Win32下VC编译OpenSSl