转载:https://www.cnblogs.com/xixim/p/4589078.html
下载地址:http://pan.baidu.com/s/1kTr3Vuf
Step1:使用VS2010新建一个窗体程序项目:
Step2:添加三个类:分别是BarCodeClass.cs、DocementBase.cs、imageDocument.cs。(下一步贴出这些类的代码);;;;添加下载回来的引用zxing.dll。
》说明:
《1》 BarCodeClass.cs主要用来实现条形码和二维码的生成和解析。
《2》 DocementBase.cs、imageDocument.cs这两个类是用来实现对生成的条形码和二维码进行打印。
Step3:编写上一步的三个类的代码:
》BarCodeClass.cs
using System;
using System.Collections.Generic;
using System.Linq;
using System.Text;
using ZXing.Common;
using ZXing;
using System.Windows.Forms;
using System.Drawing;
using System.Text.RegularExpressions;
using ZXing.QrCode;
namespace BarCode
{
class BarCodeClass
{
///<summary>
///生成条形码
///</summary>
///<paramname="pictureBox1"></param>
///<paramname="Contents"></param>
public void CreateBarCode(PictureBoxpictureBox1,string Contents)
{
Regexrg = new Regex("^[0-9]{12}$");
if(!rg.IsMatch(Contents))
{
MessageBox.Show("本例子采用EAN_13编码,需要输入12位数字");
return;
}
EncodingOptionsoptions =null;
BarcodeWriterwriter =null;
options = newEncodingOptions
{
Width = pictureBox1.Width,
Height = pictureBox1.Height
};
writer = newBarcodeWriter();
writer.Format = BarcodeFormat.ITF;
writer.Options = options;
Bitmapbitmap = writer.Write(Contents);
pictureBox1.Image = bitmap;
}
///<summary>
///生成二维码
///</summary>
///<paramname="pictureBox1"></param>
///<paramname="Contents"></param>
public void CreateQuickMark(PictureBoxpictureBox1,string Contents)
{
if(Contents == string.Empty)
{
MessageBox.Show("输入内容不能为空!");
return;
}
EncodingOptionsoptions =null;
BarcodeWriterwriter =null;
options = newQrCodeEncodingOptions
{
DisableECI = true,
CharacterSet = "UTF-8",
Width = pictureBox1.Width,
Height = pictureBox1.Height
};
writer = newBarcodeWriter();
writer.Format = BarcodeFormat.QR_CODE;
writer.Options = options;
Bitmapbitmap = writer.Write(Contents);
pictureBox1.Image = bitmap;
}
///<summary>
///解码
///</summary>
///<paramname="pictureBox1"></param>
public void Decode(PictureBoxpictureBox1)
{
BarcodeReaderreader =new BarcodeReader();
Resultresult = reader.Decode((Bitmap)pictureBox1.Image);
}
}
}
》DocementBase.cs
using System;
using System.Collections.Generic;
using System.Linq;
using System.Text;
using System.Drawing.Printing;
using System.Drawing;
using System.Windows.Forms;
namespace BarCode
{
class DocementBase : PrintDocument
{
//fields
public Font Font = new Font("Verdana",10, GraphicsUnit.Point);
//预览打印
public DialogResult showPrintPreviewDialog()
{
PrintPreviewDialogdialog =new PrintPreviewDialog();
dialog.Document = this;
returndialog.ShowDialog();
}
//先设置后打印
public DialogResult ShowPageSettingsDialog()
{
PageSetupDialogdialog =new PageSetupDialog();
dialog.Document = this;
returndialog.ShowDialog();
}
}
}
》imageDocument.cs
using System;
using System.Collections.Generic;
using System.Linq;
using System.Text;
using System.Drawing;
using System.Drawing.Printing;
namespace BarCode
{
class imageDocument : DocementBase
{
privateImage _Image;
public Image Image
{
get
{
return_Image;
}
set
{
_Image = value;
if(_Image != null)
{
if(_Image.Size.Width > _Image.Size.Height)
DefaultPageSettings.Landscape = true;
else
DefaultPageSettings.Landscape = false;
}
}
}
publicimageDocument()
{
}
publicimageDocument(Image image)
{
this.Image= image;
}
protectedoverridevoidOnPrintPage(PrintPageEventArgs e)
{
if(Image == null)
{
thrownewInvalidOperationException();
}
RectanglebestFit = GetBestFitRectangle(e.MarginBounds, Image.Size);
e.Graphics.DrawImage(Image, bestFit);
e.Graphics.DrawRectangle(Pens.Black, bestFit);
e.Graphics.DrawRectangle(Pens.Black, e.MarginBounds);
}
// 保持高度比:参数为(打印边界的Rectangularle对象,图像大小的Size对象)
protectedRectangle GetBestFitRectangle(Rectangle toContain,SizeobjectSize)
{
//检查页面是水平还是竖直的。
boolcontainerLandscape =false;
if(toContain.Width > toContain.Height)
containerLandscape = true;
//高度比=图像的高/图像的宽
floataspectRatio = (float)objectSize.Height / (float)objectSize.Width;
//得到页面左上角的坐标
intmidContainerX = toContain.Left + (toContain.Width / 2);
intmidContainerY = toContain.Top + (toContain.Height / 2);
intx1 = 0, x2 = 0, y1 = 0, y2 = 0;
if(containerLandscape ==false)
{
//竖直图像
x1 = toContain.Left;
x2 = toContain.Right;
//调整之后的height
intadjustedHeight = (int)((float)toContain.Width * aspectRatio);
y1 = midContainerY -(adjustedHeight / 2);
y2 = y1 + adjustedHeight;
}
else
{
y1 = toContain.Top;
y2 = toContain.Bottom;
//调整之后的height
intadjustedWidth = (int)((float)toContain.Height/ aspectRatio);
x1 = midContainerX -(adjustedWidth / 2);
x2 = x1 + adjustedWidth;
}
returnnewRectangle(x1,y1, x2 - x1, y2 - y1);
}
}
}
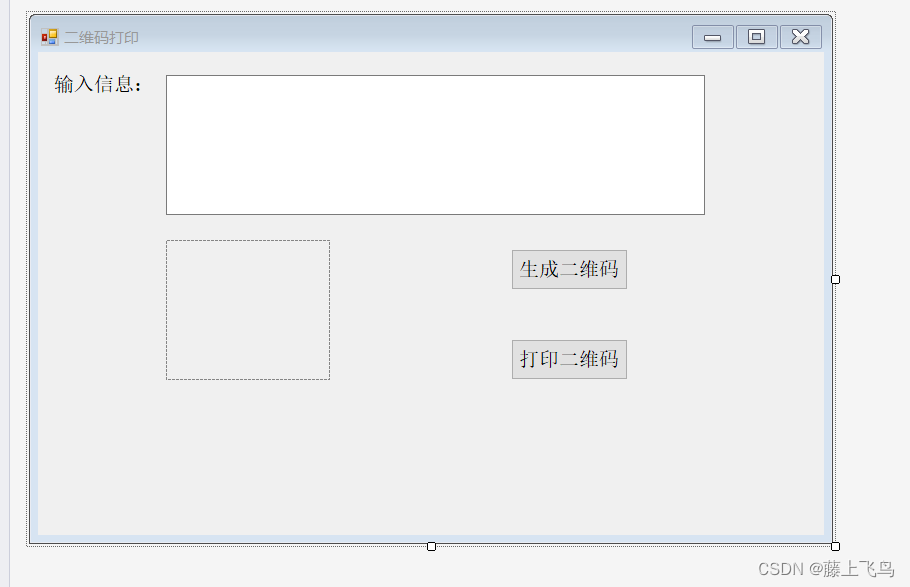
Step4:修改界面。
Step5:依次双击【生成条形码】、【生成二维码】、【解码】、【打印】等按钮,进入Click事件,编写后台代码。这里不再一一讲述如何实现。代码参照下一步:
Step6:贴出窗体的全部代码。
using System;
using System.Collections.Generic;
using System.ComponentModel;
using System.Data;
using System.Drawing;
using System.Linq;
using System.Text;
using System.Windows.Forms;
using System.Text.RegularExpressions;
using ZXing;
using ZXing.QrCode.Internal;
using ZXing.Common;
using System.IO;
using ZXing.QrCode;
namespace BarCode
{
public partial class Main : Form
{
publicMain()
{
InitializeComponent();
}
private BarCodeClass bcc = newBarCodeClass();
private DocementBase _docement;
//生成条形码
privatevoid button1_Click(objectsender,EventArgs e)
{
bcc.CreateBarCode(pictureBox1,txtMsg.Text);
}
//生成二维码
privatevoid button2_Click(objectsender,EventArgs e)
{
bcc.CreateQuickMark(pictureBox1, txtMsg.Text);
}
privatevoid Form1_Load(objectsender,EventArgs e)
{
txtMsg.Text = System.DateTime.Now.ToString("yyyyMMddhhmmss").Substring(0,12);
}
//解码
privatevoid button4_Click(objectsender,EventArgs e)
{
if(pictureBox1.Image ==null)
{
MessageBox.Show("请录入图像后再进行解码!");
return;
}
BarcodeReaderreader =new BarcodeReader();
Resultresult = reader.Decode((Bitmap)pictureBox1.Image);
MessageBox.Show(result.Text);
}
//打印
privatevoid button3_Click(objectsender,EventArgs e)
{
if(pictureBox1.Image ==null)
{
MessageBox.Show("You Must Load an Image first!");
return;
}
else
{
_docement=new imageDocument(pictureBox1.Image);
}
_docement.showPrintPreviewDialog();
}
}
}
Step7:剩下的就是演示了:本机演示结果如下:
》运行程序:点击【生成条形码】,结果如下:
》点击【解码】按钮,结果如下:
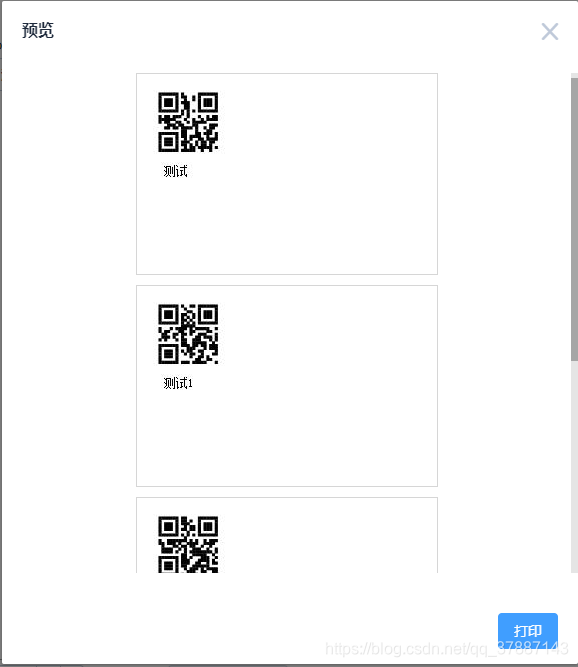
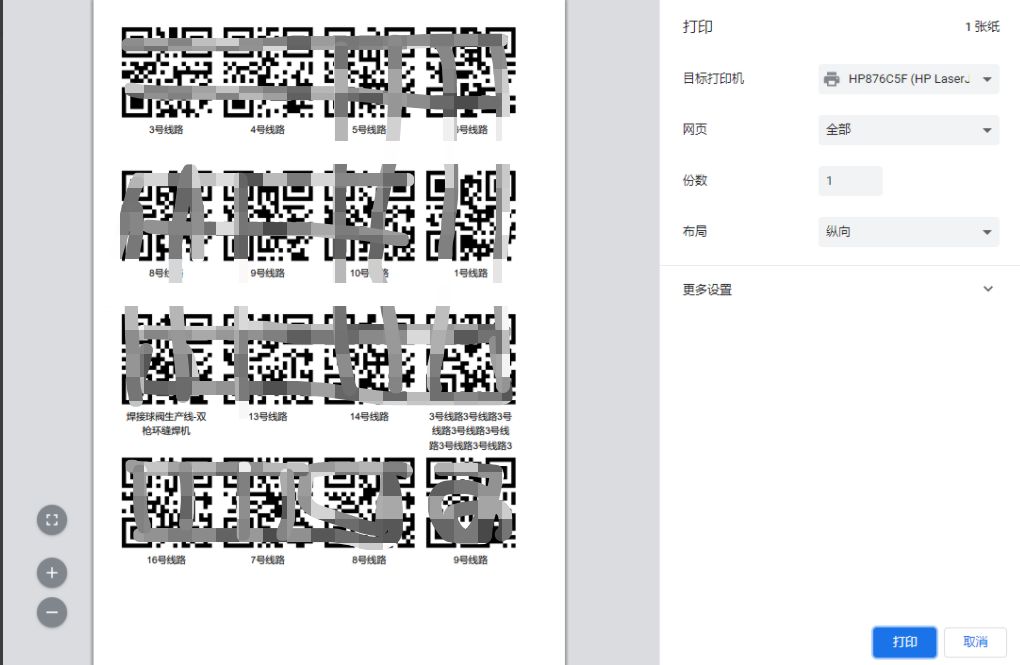
》点击《打印》按钮,结果如下:
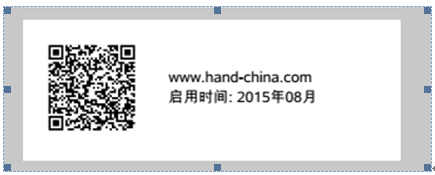
》点击【生成二维码】按钮,结果如下:
》点击【解码】按钮,结果如下:
》点击【打印】按钮,结果如下: