基于Native.js 实现的连接蓝牙打印机
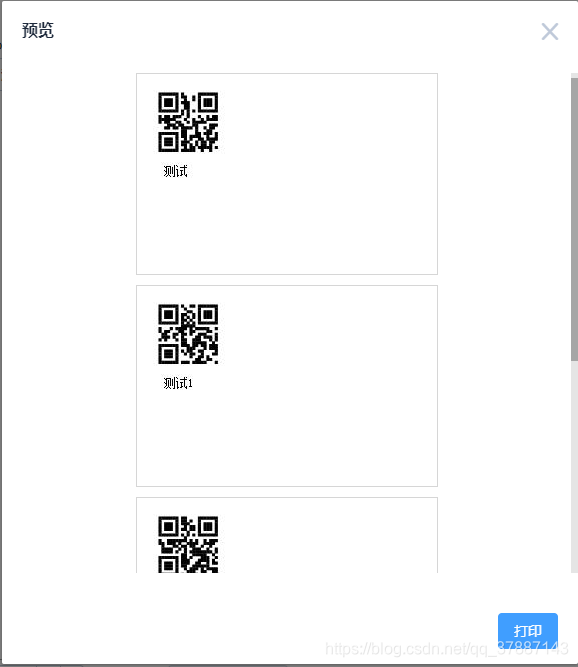
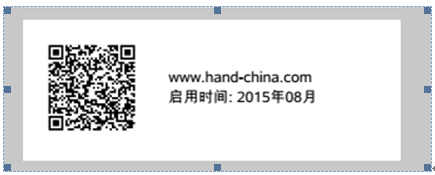
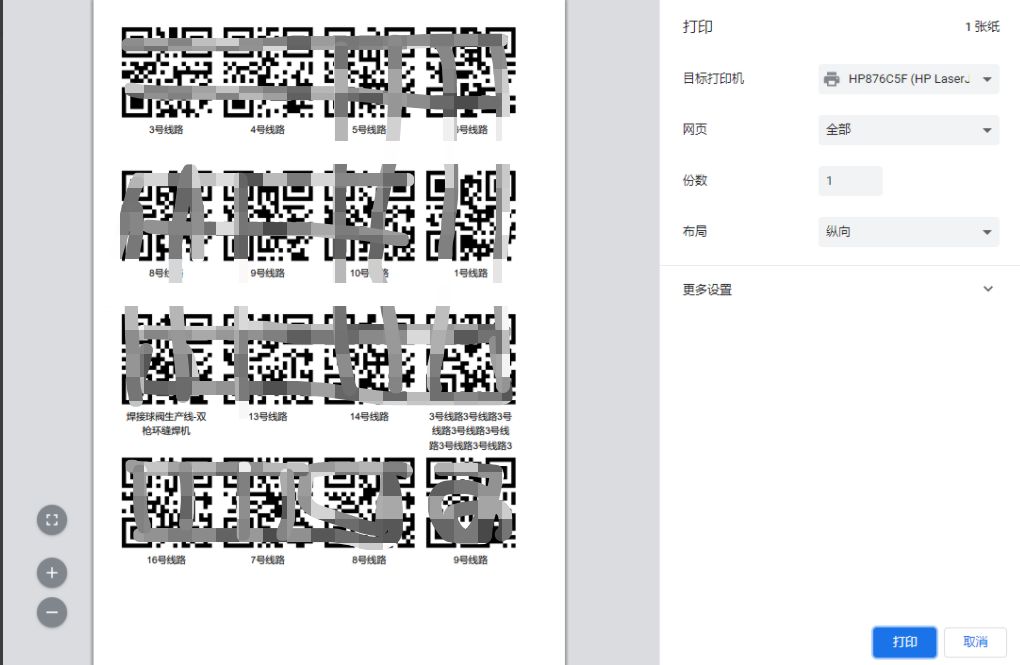
- 打印效果图
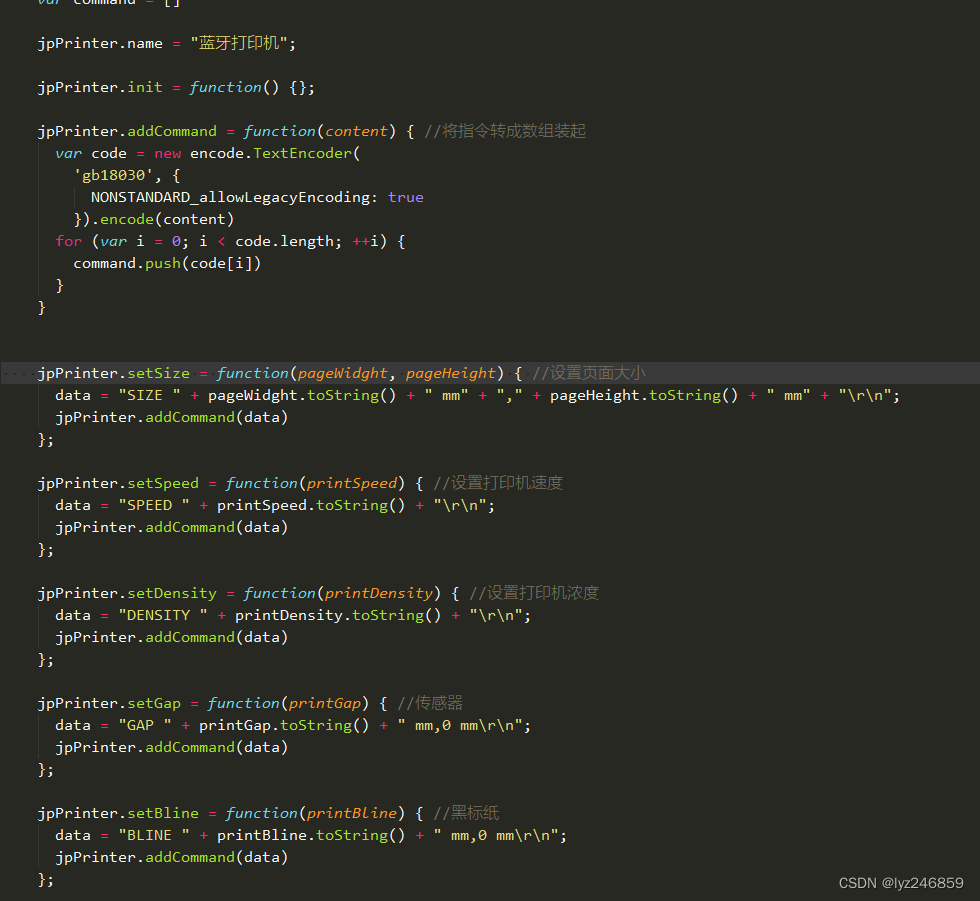
- 核心代码
- 测试代码
- 运行设备及环境
- PS:
- PPS:
- Demo
打印效果图

核心代码
/*** @Description: 蓝牙打印类  基于h5+ Native.js* @Author: EricLee* @Date: 2020-10-14 13:53:23* @Param: mod* @Return: $*/export const Bluetooth = function () {
// 全局 变量let main = null,BluetoothAdapter = null,UUID = null,uuid = null,BAdapter = null,device = null,bluetoothSocket = null,outputStream = null,OutputStreamWriter = null,writer = nullthis.status = 0  // 和设备的连接状态: 0 未连接   1 连接中 2 已连接 (可以打印) 注: ** 此状态不是 手机蓝牙和设备的配对状态 **// 初始化this.initState = function () {main = plus.android.runtimeMainActivity()BluetoothAdapter = plus.android.importClass('android.bluetooth.BluetoothAdapter')BAdapter = BluetoothAdapter.getDefaultAdapter()UUID = plus.android.importClass('java.util.UUID')uuid = UUID.fromString('00001101-0000-1000-8000-00805F9B34FB')this.status = 1this.queryBindDevice()}// 获取配对设备 mac地址this.queryBindDevice = function () {var lists = BAdapter.getBondedDevices()plus.android.importClass(lists)// var resultDiv = document.getElementById('bluetooth_list')var iterator = lists.iterator()plus.android.importClass(iterator)console.log('==> 设备列表长度', lists.size())if (lists.size() == 0) {mui.toast('连接失败!未检测到已配对成功的设备!')return}if (lists.size() > 1) {mui.toast('连接失败!检测到多个配对成功设备!')return}while (iterator.hasNext()) {var d = iterator.next()plus.android.importClass(d)console.log(d.getAddress())console.log(d.getName())this.createConnect(d.getAddress()) // 创建连接}}// 建立连接this.createConnect = function (mac) {if (!mac) {mui.toast('连接失败!未能获取设备MAC地址!')this.status = 0return}device = BAdapter.getRemoteDevice(mac) // 连接打印机plus.android.importClass(device)// 只需建立一次连接,多次调用不能正常打印 !!!bluetoothSocket = device.createInsecureRfcommSocketToServiceRecord(uuid)plus.android.importClass(bluetoothSocket)if (!bluetoothSocket.isConnected()) {console.log('断开了,需要重新连接,连接中')bluetoothSocket.connect()}mui.toast('打印机已准备就绪,可以打印!')this.status = 2// 注册打印类outputStream = bluetoothSocket.getOutputStream()plus.android.importClass(outputStream)OutputStreamWriter = plus.android.importClass('java.io.OutputStreamWriter')writer = new OutputStreamWriter(outputStream, 'GBK')plus.android.importClass(writer)}// 关闭IO 关闭连接// 关闭页面时必需调用该方法,要不下次不能正常连接设备 !!!this.closeConnect = function () {bluetoothSocket.close()outputStream.close()OutputStreamWriter.close()bluetoothSocket = nulloutputStream = nullOutputStreamWriter = nulldevice = nullthis.status = 0}// 走纸 n = 点行数this.feedPoint = function (n) {const point = n || 8writer.write(0x1B)writer.write(0x4A)writer.write(point) // 点行 8 点 = 1mmwriter.flush()}// 走纸 n = 行数this.feedLine = function (n) {const line = n || 1writer.write(0x1B)writer.write(0x64)writer.write(line) // 行数writer.flush()}//  设置左边距this.setLeftMargin = function (n, m) {writer.write(0x1D)writer.write(0x4C)writer.write(n) // 行数writer.write(m) // 行数writer.flush()}// 打印空行 linNum 行数this.printLine = function (lineNum) {for (let i = 0; i < lineNum; i++) {writer.write('\n')}writer.flush()}// 设置打印 位置 // 0 右 1 中 2 右this.setPrintPosition = function (n) {let m = n || 1writer.write(0x1B)writer.write(0x61)writer.write(m) // 0 右 1 中 2 右writer.flush()}// 设置绝对打印位置this.setPrintLocation = function (light, weight) {writer.write(0x1B)writer.write(0x24)writer.write(light)  // 0≤ light ≤ 255writer.write(weight)  // 0≤ weight ≤ 2writer.flush()}// 打印空白(一个Tab的位置,约4个汉字)this.printTabSpace = function (n) {for (let i = 0; i < n; i++) {writer.write('\t')}writer.flush()}// 设置/解除字符旋转模式// 0解除旋转模式       1设置90°顺时针旋转模式         2设置180°顺时针旋转模式        3设置270°顺时针旋转模式this.setPrintRotate = function (n) {writer.write(0x1B)writer.write(0x56)writer.write(n)writer.flush()}// 打印位图  todothis.printBitmap = function (m, data) {writer.write(0x1B)writer.write(0x2A)writer.write(m)writer.write(data)}// 字符缩放this.setCharacterScale = function (n) {// 打印倍宽高if (n == 1) {writer.write(0x1B)writer.write(0x21)writer.write(16)writer.flush()writer.write(0x1B)writer.write(0x21)writer.write(32)writer.flush()} else {writer.write(0x1B)writer.write(0x21)writer.write(0)writer.flush()}}// 打印初始化 每次打印前必须调用!!!this.initPrinter = function () {writer.write(0x1B)writer.write(0x40)writer.flush()}//  打印文字 并换行this.printTextNewLine = function (byteStr) {if (!main) {mui.toast('设备未进行配对!')return}var bytes = plus.android.invoke(byteStr, 'getBytes', 'gbk')console.log(bytes)outputStream.write(bytes)outputStream.flush()// 换行writer.write('\n')writer.flush()console.log('print ')}// 打印字符串方法 byteStr 只能是字符串this.printText = function (byteStr, l, w) {if (!main) {mui.toast('设备未进行配对!')return}var bytes = plus.android.invoke(byteStr, 'getBytes', 'gbk')console.log(bytes)outputStream.write(bytes)outputStream.flush()console.log('print ')// device = null}/*** @Description: 二维码打印* @Author: EricLee* @Date: 2020-10-15 15:16:10* @Param: byteStr {String} 要打印的内容* @Return: void*/this.printQrcode = function (byteStr) {if (!main) {mui.toast('设备未进行配对!')return}// initvar moduleSize = 8var bytes = plus.android.invoke(byteStr, 'getBytes', 'gbk')var length = bytes.lengthconsole.log(length)// 缓存二维码数据writer.write(0x1D)// initwriter.write('(k')// adjust height of barcodewriter.write(length + 3) // plwriter.write(0) // phwriter.write(49) // cnwriter.write(80) // fnwriter.write(48) //writer.write(byteStr)// 二维码纠错等级writer.write(0x1D)writer.write('(k')writer.write(3)writer.write(0)writer.write(49)writer.write(69)writer.write(48)// 设置二维码块大小writer.write(0x1D)writer.write('(k')writer.write(3)writer.write(0)writer.write(49)writer.write(67)writer.write(moduleSize)// 打印已缓存的数据二维码writer.write(0x1D)writer.write('(k')writer.write(3) // plwriter.write(0) // phwriter.write(49) // cnwriter.write(81) // fnwriter.write(48) // mwriter.flush()// 二维码打印 结束console.log('print Qrcode')}
}
测试代码
<template><div><div><Button @click="_initBluetooth">{{ statusList[status] }}</Button></div><div>
<!--      <Button @click="_printText('DC:0D:30:9B:AC:99')">打印</Button>--><Button @click="_printTest(msg)">打印</Button><br/><Button @click="_printQrcode(code)">打印二维码</Button></div><div><br/><Input v-model="line" placeholder="走纸行数" /><Button @click="feed(line)">走纸</Button></div><div><br/><Input v-model="marginNum" placeholder="定位" /><Button @click="_setPrintPosition(marginNum)">定位</Button></div><div><br/><Button @click="_setCharacterScale(1)">放大</Button><Button @click="_setCharacterScale(0)">缩小</Button></div><div><br/><Input v-model="light" placeholder="light" /><Input v-model="weight" placeholder="weight" /><Button @click="_setPrintLocation(light,weight)">绝对位置</Button></div><div><br/><Input v-model="rotateNum" placeholder="旋转" /><Button @click="_setPrintRotate(rotateNum)">旋转</Button></div><div><br/><Button @click="_closeConnect()">关闭连接</Button></div></div>
</template><script>import {Bluetooth} from '../lib/bluetooth'export default {name: 'printTest',data () {return {msg: '样品内容\n' + '101013Q73898\n' + '2020-10-10 09:33:33\n' + '张三三\n',code: '191013Q7398',mac: '',line: 8,light: 0,weight: 0,rotateNum: 0,marginNum: 1,initFlag: false,bluetoothPrinter: null,text: '配对',status: 0,statusList: ['待连接','连接中','已连接']}},mounted () {this._initBluetooth()},destroyed () {this._closeConnect()},watch: {status () {console.log('status==>', this.status)if (this.status == 2) {this._loading(false)}}},methods: {_loading (flag) {if (flag) {this.$vux.loading.show({text: 'Loading'})setTimeout(() => {this.$vux.loading.hide()}, 5000)} else {this.$vux.loading.hide()}},// 初始化并配对设备_initBluetooth () {if (!this.bluetoothPrinter) {this.bluetoothPrinter = new Bluetooth()this._loading(true)console.log(this.bluetoothPrinter.status)}this.bluetoothPrinter.initState()this.status = this.bluetoothPrinter.status},_printTest (msg) {this.bluetoothPrinter.initPrinter()this.bluetoothPrinter.setPrintPosition(1) // 居中 打印this.bluetoothPrinter.printQrcode(msg)this.bluetoothPrinter.feedPoint(20)this.bluetoothPrinter.printTextNewLine('样品111')this.bluetoothPrinter.printTextNewLine('101013Q73898')this.bluetoothPrinter.printTextNewLine('2020-10-10 09:33:33')this.bluetoothPrinter.printTextNewLine('张三三')this.bluetoothPrinter.printLine(3)},_printQrcode (msg) {this.bluetoothPrinter.initPrinter()this.bluetoothPrinter.printTabSpace(10)// this.bluetoothPrinter.setPrintPosition(2)this.bluetoothPrinter.printQrcode(msg)},feed (n) {this.bluetoothPrinter.feedPoint(n)},_closeConnect () {if (this.bluetoothPrinter) {this.bluetoothPrinter.closeConnect()}},_setPrintLocation (l, w) {this.bluetoothPrinter.setPrintLocation(l, w)},_setPrintRotate (l) {this.bluetoothPrinter.setPrintRotate(l)},_setCharacterScale (l) {this.bluetoothPrinter.setCharacterScale(l)},_setPrintPosition (l) {this.bluetoothPrinter.setPrintPosition(l)}}}
</script><style scoped></style>
运行设备及环境
IDE:Hbuilder X 2.8.13
测试机型:红米 note4 android6.0
测试打印机:科密PB8001
打印指令类型:ESC/POS ESC/POS指令参考文档
PS:
本文未提供连接蓝牙设备的方法,如有需要请点传送门 —» H5+连接蓝牙打印机
PPS:
只初始化一次即可持续打印实现
可以把 new Bluetooth() 的实例的初始化放到store中进行管理,在需要的组件注入实例。代码如下:
// store
const printer = {namespaced: true,state: {bluetoothPrinter: null},mutations: {setBluetoothPrinter (state, payload) {state.bluetoothPrinter = payload}}
}// component
export default {data () {return {pagination: {page: 0,rows: 15},bottomList: [{name: '添加', color: '#0D55A7'},{name: '提交', color: '#11C827'},{name: '标签打印', color: '#F7AC0C'}],records: [],recordsList: [],printData: [],refresh: false, // 上拉刷新loading: false, // 下拉加载finished: false, // 是否获取到了所有数据submitStatus: false,status: 0}},computed: {...mapState('printer', {bluetoothPrinter: 'bluetoothPrinter'})},watch: {status () {console.log('status==>', this.status)if (this.status == 2) {this._loading(false)}}},mounted () {this._initBluetooth()},destroyed () {console.log('destroyed!')// this._closeConnect()},methods: {_add () {this.$store.commit('steel/removeInsSteelItem')this.$jump('typeA-insScrapSteelContractEdit', {sampleCode: '添加/编辑基本信息'})},// 全选_allCheck () {if (this.records.length === this.recordsList.length) {this.records = []return}this.records = this.recordsList.map(item => item.id)},// 提交async _submitById () {if (!this.records.length) {this.$toast('至少选择一个')return}if (this.submitStatus) returnthis.submitStatus = truethis.$vux.loading.show({text: '正在提交中...'})const result = await waitInsScrapSteelSubmit(this.records)if (result) {this._resultChange('提交成功!')this.$vux.loading.hide()} else {this._resultChange('网络问题,请重新提交!')this.$vux.loading.hide()}},_resultChange (msg) {this.$toast(msg)this._onRefresh()},// 上拉刷新async _onRefresh () {this.pagination.page = 0this.recordsList = []this.printData = []await this._onLoad()this.refresh = false},// 下拉加载async _onLoad () {this.pagination.page++await this._waitInsScrapSteel()this.loading = falsereturn true},_loading (flag) {if (flag) {this.$vux.loading.show({text: '设备配对中'})setTimeout(() => {this.$vux.loading.hide()}, 5000)} else {this.$vux.loading.hide()}},// 初始化并配对设备_initBluetooth () {if (!this.bluetoothPrinter) {const obj = new Bluetooth()this._loading(true)this.$store.commit('printer/setBluetoothPrinter', obj)console.log(this.bluetoothPrinter.status)this.bluetoothPrinter.initState()this.status = this.bluetoothPrinter.status}},_closeConnect () {if (this.bluetoothPrinter) {this.bluetoothPrinter.closeConnect()}},// 待打印数据_selectData () {if (!this.records.length) {this.$toast('至少选择一个')return false} else {const {records, recordsList} = thisthis.printData = []let data = []for (let i = 0; i < records.length; i++) {for (let j = 0; j < recordsList.length; j++) {if (records[i] === recordsList[j].id) {data.push(recordsList[j])}}}this.printData = [...data]}},// 打印方法_print (data) {this.bluetoothPrinter.initPrinter()this.bluetoothPrinter.setPrintPosition(1) // 居中 打印this.bluetoothPrinter.printQrcode(data.sampleCode) // 二维码 样品编号this.bluetoothPrinter.feedPoint(20)this.bluetoothPrinter.printTextNewLine(data.name) // 物料名称this.bluetoothPrinter.printTextNewLine(data.sampleCode) // 二维码 样品编号this.bluetoothPrinter.printTextNewLine(this.$getTime(data.obtainSampleTime, true)) // 取样时间this.bluetoothPrinter.printTextNewLine(data.obtainSampler) // 取样人this.bluetoothPrinter.feedLine(4)},// 打印标签_printLabel () {this._selectData()const {printData} = thisconst len = printData.lengthfor (let i = 0; i < len; i++) {this._print(printData[i])}},_dataBack (msg) {switch (msg) {case '添加':this._add()breakcase '提交':this._submitById()breakcase '标签打印':this._printLabel()break}}}
}
Demo
github地址:H5-bluetooth