- 去down vgg_16.ckpt预训练模型
- 准备一堆你需要训练的图片,使用labelme进行标注,得到一堆json文件
json文件大致如下:
{"flags": {},"shapes": [{"label": "str","line_color": null,"fill_color": null,"points": [[91,183],[178,183],[178,231],[91,231]]}],"lineColor": [0,255,0,128],"fillColor": [255,0,0,128],"imagePath": "..\\img\\000_004.jpg","imageData": "/9..."}
- 使用如下代码将上一步生成的json文件转换成split_label.py所需要的格式
def json2txt():json_dir = r''output_dir = r''for json_name in os.listdir(json_dir):point_list = []json_file = os.path.join(json_dir, json_name)with open(json_file, 'r') as rf:info = json.load(rf)for item in info['shapes']:for point in item['points']:point_list.append(point)point_arry = np.array(point_list)point_arry = point_arry.reshape((-1, 8))output_path = os.path.join(output_dir, 'gt_' + json_name.split('.')[0] + '.txt')np.savetxt(output_path, point_arry, fmt='%s', delimiter=',')
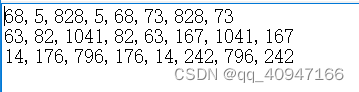
转换后的格式:
每一行为一个矩形框的4个点
91,183,178,183,178,231,91,231
191,183,401,183,401,232,191,232
503,185,605,185,605,234,503,234
616,192,747,192,747,232,616,232
769,196,832,196,832,232,769,232
847,194,925,194,925,242,847,242
936,194,1071,194,1071,240,936,240
92,234,274,234,274,272,92,272
96,287,412,287,412,327,96,327
94,338,454,338,454,391,94,391
96,400,416,400,416,443,96,443
94,452,345,452,345,498,94,498
92,511,325,511,325,563,92,563
87,569,341,569,341,616,87,616
92,627,372,627,372,676,92,676
94,691,431,691,431,731,94,731
87,751,312,751,312,776,87,776
87,776,798,776,798,834,87,834
- 修改split_label.py中的目录路径,DATA_FOLDER路径下有包含你的图片文件夹"image"和上一步生成的标签文件夹"label",OUTPUT为你的输出目录。
PS: split_label.py和utils.py主要来自于 https://github.com/eragonruan/text-detection-ctpn
# split_label.py
import os
import sysimport cv2 as cv
import numpy as np
from tqdm import tqdmsys.path.append(os.getcwd())
from utils import orderConvex, shrink_polyDATA_FOLDER = r"E:\code\OCR\data"
OUTPUT = r"E:\code\OCR\data\output"
MAX_LEN = 1200
MIN_LEN = 600im_fns = os.listdir(os.path.join(DATA_FOLDER, "image"))
im_fns.sort()if not os.path.exists(os.path.join(OUTPUT, "image")):os.makedirs(os.path.join(OUTPUT, "image"))
if not os.path.exists(os.path.join(OUTPUT, "label")):os.makedirs(os.path.join(OUTPUT, "label"))for im_fn in tqdm(im_fns):try:_, fn = os.path.split(im_fn)bfn, ext = os.path.splitext(fn)if ext.lower() not in ['.jpg', '.png']:continuegt_path = os.path.join(DATA_FOLDER, "label", 'gt_' + bfn + '.txt')img_path = os.path.join(DATA_FOLDER, "image", im_fn)img = cv.imread(img_path)img_size = img.shapeim_size_min = np.min(img_size[0:2])im_size_max = np.max(img_size[0:2])im_scale = float(600) / float(im_size_min)if np.round(im_scale * im_size_max) > 1200:im_scale = float(1200) / float(im_size_max)new_h = int(img_size[0] * im_scale)new_w = int(img_size[1] * im_scale)new_h = new_h if new_h // 16 == 0 else (new_h // 16 + 1) * 16new_w = new_w if new_w // 16 == 0 else (new_w // 16 + 1) * 16re_im = cv.resize(img, (new_w, new_h), interpolation=cv.INTER_LINEAR)re_size = re_im.shapepolys = []with open(gt_path, 'r') as f:lines = f.readlines()for line in lines:splitted_line = line.strip().lower().split(',')x1, y1, x2, y2, x3, y3, x4, y4 = map(float, splitted_line[:8])poly = np.array([x1, y1, x2, y2, x3, y3, x4, y4]).reshape([4, 2])poly[:, 0] = poly[:, 0] / img_size[1] * re_size[1]poly[:, 1] = poly[:, 1] / img_size[0] * re_size[0]poly = orderConvex(poly)polys.append(poly)# cv.polylines(re_im, [poly.astype(np.int32).reshape((-1, 1, 2))], True,color=(0, 255, 0), thickness=2)res_polys = []for poly in polys:# delete polys with width less than 10 pixelif np.linalg.norm(poly[0] - poly[1]) < 10 or np.linalg.norm(poly[3] - poly[0]) < 10:continueres = shrink_poly(poly)# for p in res:#    cv.polylines(re_im, [p.astype(np.int32).reshape((-1, 1, 2))], True, color=(0, 255, 0), thickness=1)res = res.reshape([-1, 4, 2])for r in res:x_min = np.min(r[:, 0])y_min = np.min(r[:, 1])x_max = np.max(r[:, 0])y_max = np.max(r[:, 1])res_polys.append([x_min, y_min, x_max, y_max])cv.imwrite(os.path.join(OUTPUT, "image", fn), re_im)with open(os.path.join(OUTPUT, "label", bfn) + ".txt", "w") as f:for p in res_polys:line = ",".join(str(p[i]) for i in range(4))f.writelines(line + '\n')# for p in res_polys:#    cv.rectangle(re_im,(p[0],p[1]),(p[2],p[3]),color=(0,0,255),thickness=1)# cv.imshow("demo",re_im)# cv.waitKey(0)except:print("Error processing {}".format(im_fn))
里面用到了utils.py里的功能函数,这里需要安装一个shapely的包,直接去https://www.lfd.uci.edu/~gohlke/pythonlibs/#shapely 下对应的版本安装即可
# utils.py
import numpy as np
from shapely.geometry import Polygondef pickTopLeft(poly):idx = np.argsort(poly[:, 0])if poly[idx[0], 1] < poly[idx[1], 1]:s = idx[0]else:s = idx[1]return poly[(s, (s + 1) % 4, (s + 2) % 4, (s + 3) % 4), :]def orderConvex(p):points = Polygon(p).convex_hullpoints = np.array(points.exterior.coords)[:4]points = points[::-1]points = pickTopLeft(points)points = np.array(points).reshape([4, 2])return pointsdef shrink_poly(poly, r=16):# y = kx + bx_min = int(np.min(poly[:, 0]))x_max = int(np.max(poly[:, 0]))k1 = (poly[1][1] - poly[0][1]) / (poly[1][0] - poly[0][0])b1 = poly[0][1] - k1 * poly[0][0]k2 = (poly[2][1] - poly[3][1]) / (poly[2][0] - poly[3][0])b2 = poly[3][1] - k2 * poly[3][0]res = []start = int((x_min // 16 + 1) * 16)end = int((x_max // 16) * 16)p = x_minres.append([p, int(k1 * p + b1),start - 1, int(k1 * (p + 15) + b1),start - 1, int(k2 * (p + 15) + b2),p, int(k2 * p + b2)])for p in range(start, end + 1, r):res.append([p, int(k1 * p + b1),(p + 15), int(k1 * (p + 15) + b1),(p + 15), int(k2 * (p + 15) + b2),p, int(k2 * p + b2)])return np.array(res, dtype=np.int).reshape([-1, 8])
这里会把图片resize到608*864,然后生成对应的文本框。都在你指定的OUTPUT文件夹下。
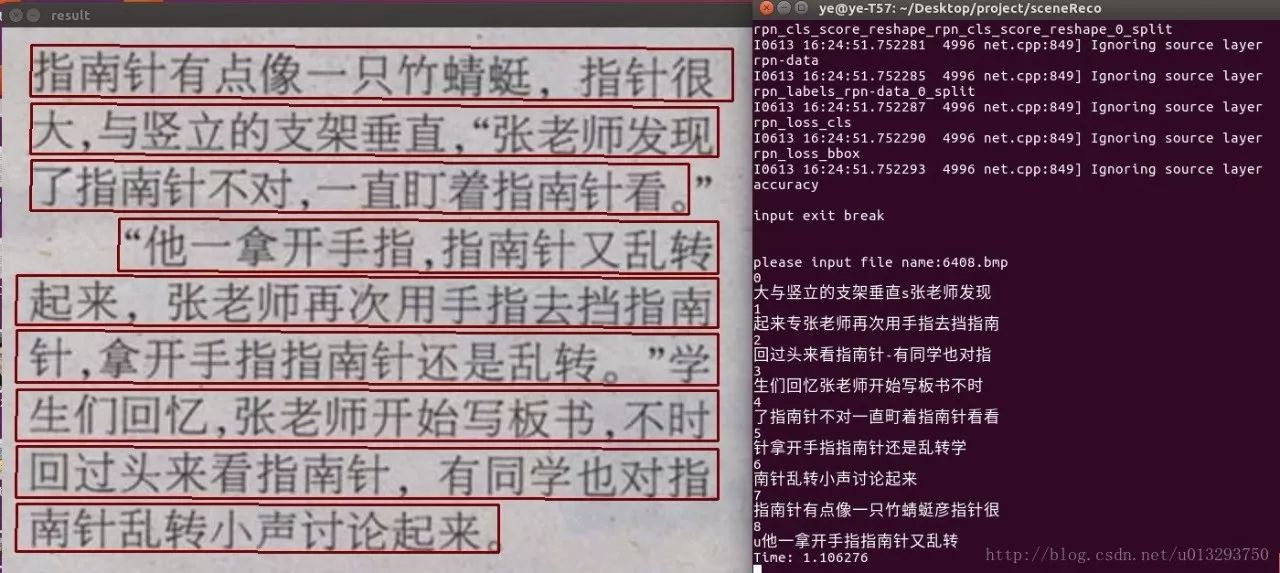
如果把生成的文本框画到相应的图片上就长这样:

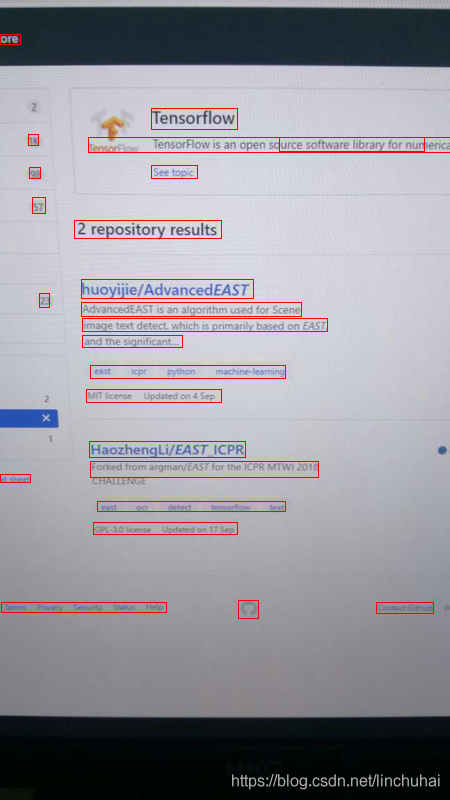
labelme中标注的是这样:

然后就可以使用OUTPUT下的image和label两个文件夹去训练咯~