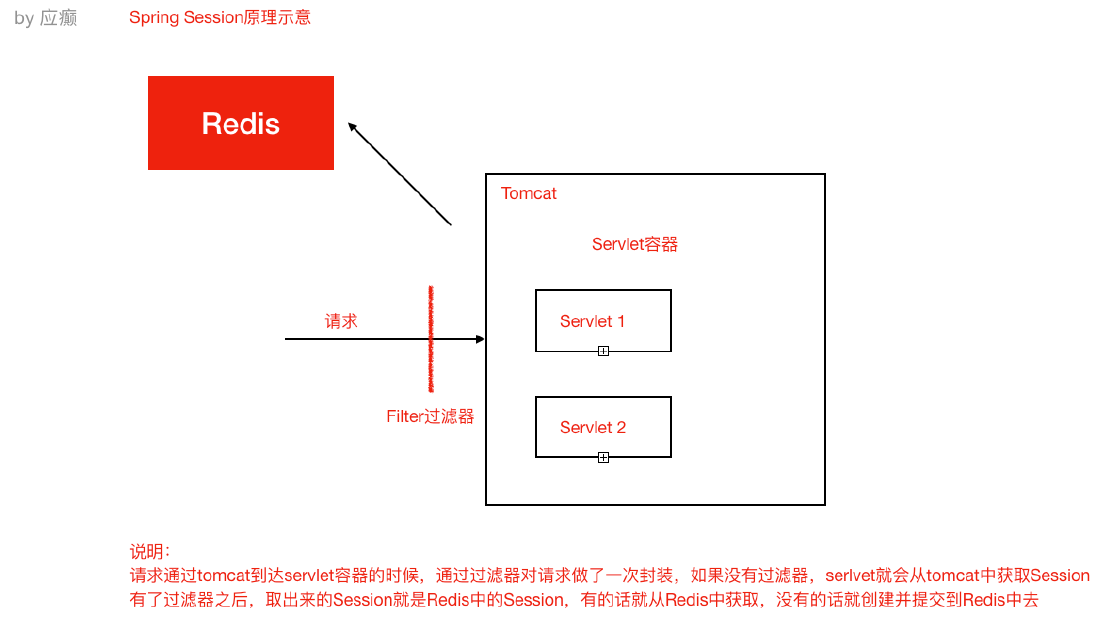
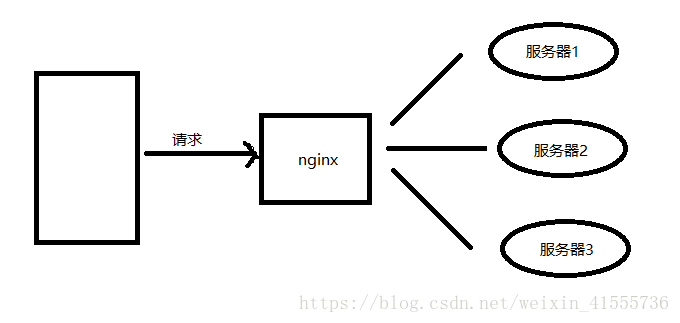
继上一遍文章,使用nginx实现负载均衡以后,新的问题又产生了,当使用负载均衡以后,我们如何实现session共享,因为session是保存在服务端的,对于单体应用来说这不是问题,因为只有一个服务器,但是在多个服务器的情况下,我们在A服务器登陆成功,session存在A服务器,下一次请求被转发到了B,但是B服务器中没有对应的用户信息,重新让用户登录肯定不合适,这个时候我们需要将该session信息放在一个公共的地方,不管后续请求被转发到了哪个服务器,我们都去从公共的位置去取,这样就实现了session共享(类似问题的解决方案有很多,比如存入数据库、配置tomcat实现session同步,使用jwt等等),今天我们使用的是spring session+redis来实现.
此处的代码基于上一篇的nginx实现负载均衡
改造而来。
1.pom文件引入相关依赖(这是我全部的依赖,贴出来方便复制粘贴)
<?xml version="1.0" encoding="UTF-8"?>
<project xmlns="http://maven.apache.org/POM/4.0.0" xmlns:xsi="http://www.w3.org/2001/XMLSchema-instance"xsi:schemaLocation="http://maven.apache.org/POM/4.0.0 https://maven.apache.org/xsd/maven-4.0.0.xsd"><modelVersion>4.0.0</modelVersion><parent><groupId>org.springframework.boot</groupId><artifactId>spring-boot-starter-parent</artifactId><version>2.7.1</version><relativePath/> <!-- lookup parent from repository --></parent><groupId>com.weige</groupId><artifactId>test-db-nginx</artifactId><version>0.0.1-SNAPSHOT</version><name>test-db-nginx</name><description>Demo project for Spring Boot</description><properties><java.version>1.8</java.version></properties><dependencies><dependency><groupId>org.springframework.boot</groupId><artifactId>spring-boot-starter-web</artifactId></dependency><dependency><groupId>org.mybatis.spring.boot</groupId><artifactId>mybatis-spring-boot-starter</artifactId><version>2.2.2</version></dependency><dependency><groupId>mysql</groupId><artifactId>mysql-connector-java</artifactId><scope>runtime</scope></dependency><dependency><groupId>org.springframework.boot</groupId><artifactId>spring-boot-starter-test</artifactId><scope>test</scope></dependency><dependency><groupId>com.alibaba</groupId><artifactId>druid-spring-boot-starter</artifactId><version>1.2.1</version></dependency><!-- https://mvnrepository.com/artifact/org.springframework.boot/spring-boot-starter-data-redis --><dependency><groupId>org.springframework.boot</groupId><artifactId>spring-boot-starter-data-redis</artifactId><version>2.6.4</version></dependency><!-- https://mvnrepository.com/artifact/org.springframework.session/spring-session-data-redis --><dependency><groupId>org.springframework.session</groupId><artifactId>spring-session-data-redis</artifactId><version>2.6.3</version></dependency></dependencies><build><finalName>bookTest86</finalName><plugins><plugin><groupId>org.springframework.boot</groupId><artifactId>spring-boot-maven-plugin</artifactId></plugin></plugins></build></project>
2.配置redis相关信息
spring.redis.host=127.0.0.1
spring.redis.port=6380
spring.redis.password=123456
3.添加一个配置类
package com.weige.config;import org.springframework.context.annotation.Configuration;
import org.springframework.session.data.redis.config.annotation.web.http.EnableRedisHttpSession;/*** Created with IntelliJ IDEA.** @Author: weige* @Date: 2022/07/13/19:41* @Description:*/
@Configuration
@EnableRedisHttpSession(maxInactiveIntervalInSeconds = 70)//session过期时间,单位为秒
public class RedisSessionConfig {}
4.添加一个模拟用户登录/注销的接口
package com.weige.controller;import com.weige.entity.User;
import com.weige.vo.RespBean;
import org.springframework.beans.factory.annotation.Value;
import org.springframework.web.bind.annotation.GetMapping;
import org.springframework.web.bind.annotation.PostMapping;
import org.springframework.web.bind.annotation.RestController;import javax.servlet.http.HttpServletRequest;
import javax.servlet.http.HttpSession;/*** Created with IntelliJ IDEA.** @Author: weige* @Date: 2022/07/13/7:59* @Description:*/
@RestController
public class UserController {@Value("${server.port}")private  String port;//登录@PostMapping("/login")public RespBean login( HttpServletRequest request){HttpSession session=request.getSession();//获取当前的sessionIdString sessionId = session.getId();//懒得传入,在这里写死的,能说明问题就行User user=new User();user.setUsername("悟空");user.setPassword("123456");user.setAddress("北京市天安门");System.out.println("登陆成功,sessionId:"+sessionId+";user===>"+user);session.setAttribute(sessionId,user);return RespBean.ok("登陆成功:"+port,user);}//获取当前用户@GetMapping("/getuser")public RespBean getuser(HttpServletRequest request){HttpSession session=request.getSession();String sessionId = session.getId();System.out.println("获取用户,sessionId==>"+sessionId);return RespBean.ok("登陆成功:"+port,session.getAttribute(sessionId));}//注销@GetMapping("/logout")public RespBean loginout(String username, HttpServletRequest request){HttpSession session=request.getSession();//这里不做查询,直接清除sessionString sessionId = session.getId();System.out.println("注销登录,sessionId==>"+sessionId+"服务端口:"+port);session.removeAttribute(sessionId);return RespBean.ok("注销成功:"+port);}
}
5.改造获取数据的接口,添加了对用户是否登录的判断
package com.weige.controller;import com.weige.entity.Book;
import com.weige.entity.User;
import com.weige.service.BookService;
import com.weige.vo.RespBean;
import org.springframework.beans.factory.annotation.Autowired;
import org.springframework.beans.factory.annotation.Value;
import org.springframework.web.bind.annotation.*;import javax.servlet.http.HttpServletRequest;
import javax.servlet.http.HttpSession;
import java.util.List;/*** Created with IntelliJ IDEA.** @Author: weige* @Date: 2022/07/11/20:57* @Description:*/
@RestController
@RequestMapping("/book")
public class BookController {@AutowiredBookService bookService;@Value("${server.port}")private  String port;@GetMapping("/")public RespBean getAllBooks(HttpSession session){//HttpSession session=request.getSession();String sessionId = session.getId();System.out.println("查询book,sessionId==>"+sessionId+"服务端口:"+port);User user= ((User) session.getAttribute(sessionId));if(user==null){return RespBean.error("用户还没登录,请先登录!服务端口:"+port);}System.out.println("我从session中拿到了User--->"+user );List<Book> books=bookService.getAllBooks();return RespBean.ok(port,books);}@PostMapping("/")public RespBean addBook(@RequestBody Book book){int ret=bookService.addBook(book);return RespBean.ok(port,ret);}@PutMapping("/")public RespBean updateBook(@RequestBody Book book){int ret=bookService.updateBook(book);return RespBean.ok(port,ret);}@DeleteMapping("/{id}")public RespBean delBook(@PathVariable Integer id){int ret=bookService.delBook(id);return RespBean.ok(port,ret);}
}
关键的信息就是这些,在获取全部book信息的时候,会根据sessionId,从当前session中获取用户信息,如果用户不存在,就提示没有登录,登录后可以正常获取,我们将项目打包,放在服务器上,以8886和8887端口启动,结合之前配置的nginx负载均衡,我们希望无论在那一台服务上登录过,都可以正常的获取book信息,这样我们session共享的需求就实现了
(1)启动8886

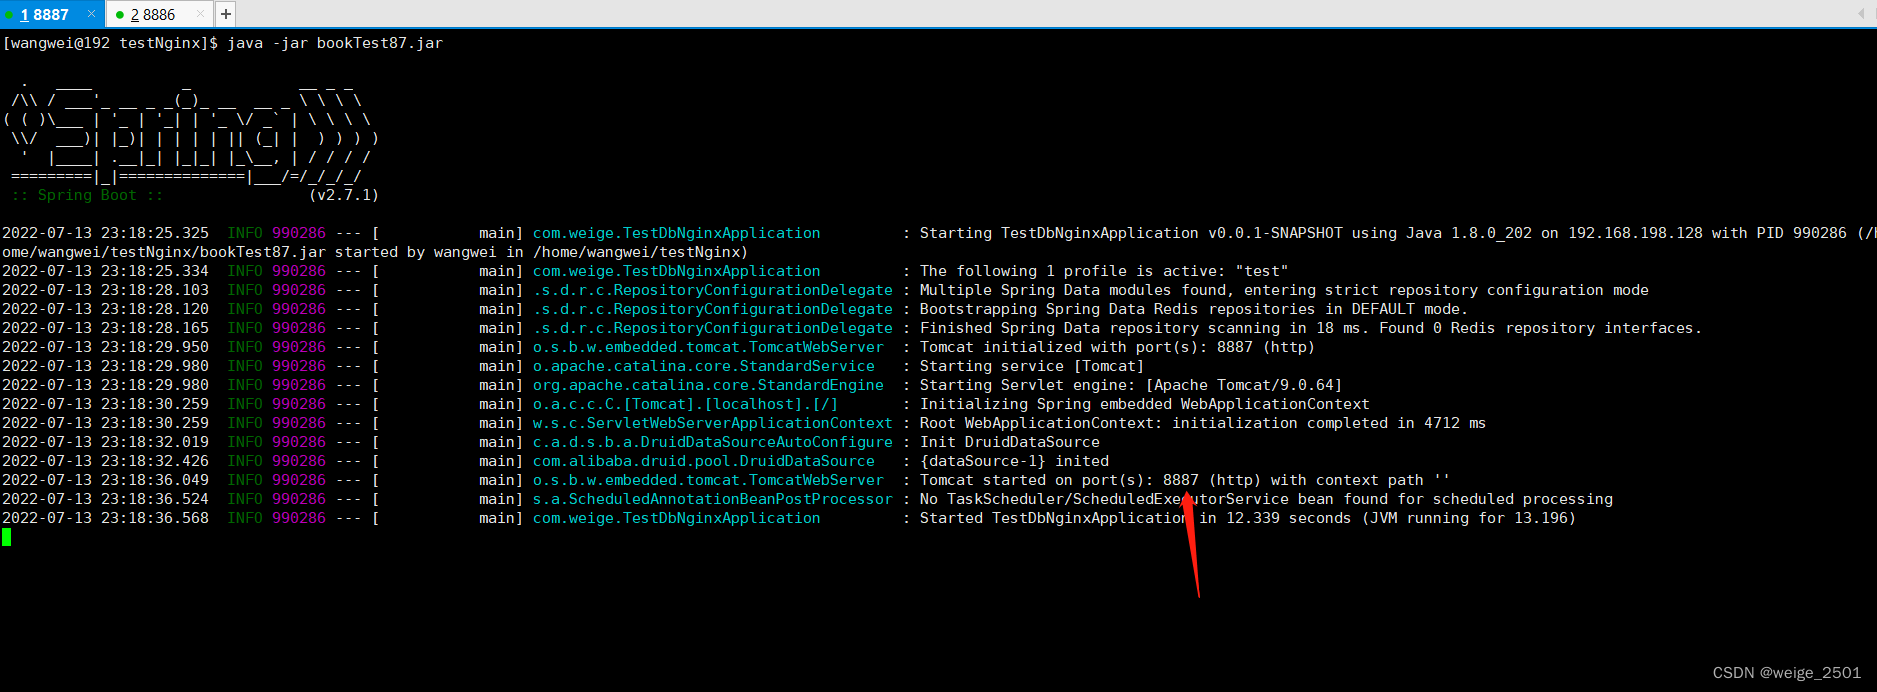
(2)启动8887
(3)请求获取book接口,提示未登录,此时提供服务的是8886

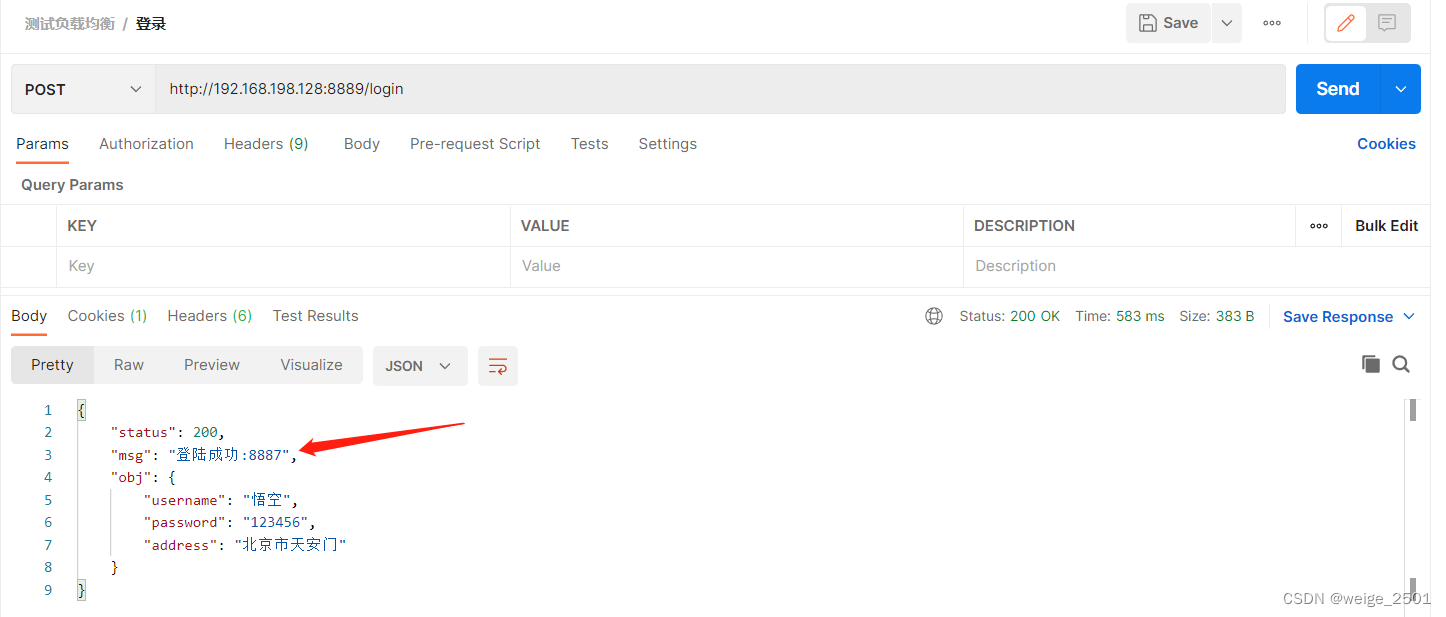
(4)请求登录接口,注意此时提供服务的是8887,多次请求,8886和8887会交替出现,这是因为我们在nginx中配置的权重
(5)再次请求获取book接口(此时提供服务的是8886)

以上说明,同一个session,我们从任意一台服务器登陆成功后,在其它服务器上都可以获取到session中的用户信息,实现了session共享。