GUI编程
- 1、简介
- 2、AWT(抽象的窗口工具)
- AWT简介
- 1、Frame的使用:
- 2、面板 panel
- 3、布局管理器
- 3.1 流式布局
- 3.2 东西南北中
- 3.3 表格布局
- 4、事件监听
- 5、文本框(TextField)的监听
- 6、制作简易计算器
- 7、画笔
- 8、鼠标监听
- 9、窗口监听
- 10、键盘监听
- 3、Swing
- 1、窗口,面板
- 2、弹窗
- 3、标签
- 4、面板
- 5、按钮
- 6、列表
- 7、文本框
组件:窗口,弹窗,面板,文本框,列表框,按钮,图片,监听事件,鼠标事件,键盘事件,破解工具。
1、简介
GUI(图形用户界面)的核心技术:Swing,AWT。
不流行:界面不美观,需要jre环境。
学习GUI:可以写一些小工具,维护swing的界面,了解MVC架构,了解监听。
2、AWT(抽象的窗口工具)
AWT简介
1.包含了很多类和接口
2.元素:窗口,按钮,文本框
3.java.awt

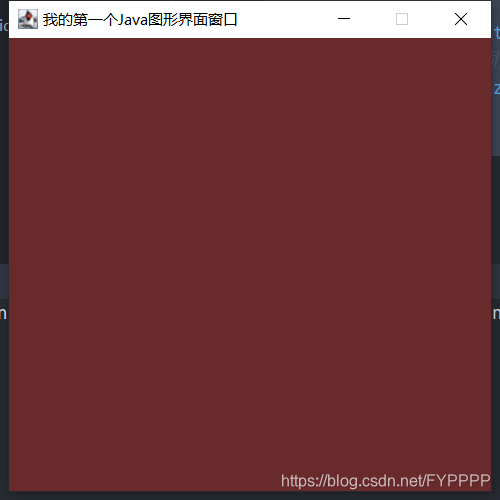
1、Frame的使用:
import java.awt.*;public class Solution {public static void main(String[] args) {//Frame.JDK  看源码Frame frame = new Frame("我的第一个Java图形界面窗口");//需要设置可见性frame.setVisible(true);//设置窗口大小frame.setSize(400, 400);//设置背景颜色frame.setBackground(new Color(104, 42, 42));//弹出初始位置frame.setLocation(200,400);//设置窗口大小固定frame.setResizable(false);}
}
问题:窗口无法关闭
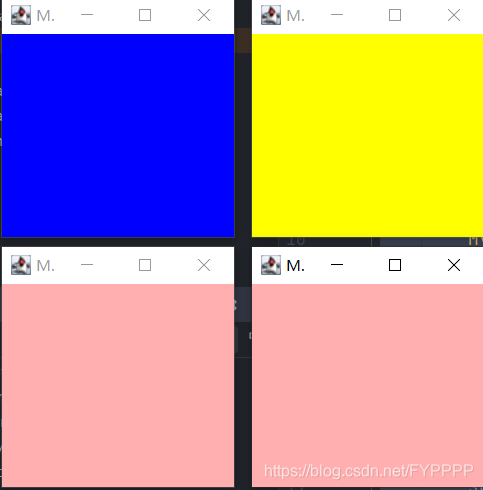
设置多个窗口:
import java.awt.*;public class Solution {public static void main(String[] args) {MyFrame myFrame1 = new MyFrame(100, 100, 200, 200, Color.blue);MyFrame myFrame2 = new MyFrame(300, 100, 200, 200, Color.yellow);MyFrame myFrame3 = new MyFrame(100, 300, 200, 200, Color.pink);MyFrame myFrame4= new MyFrame(300, 300, 200, 200, Color.pink);}
}class MyFrame extends Frame {static int id = 0;public MyFrame(int x, int y, int w, int h, Color color) {super("MyFrame" + (++id));setBounds(x, y, w, h);setBackground(color);setVisible(true);}
}
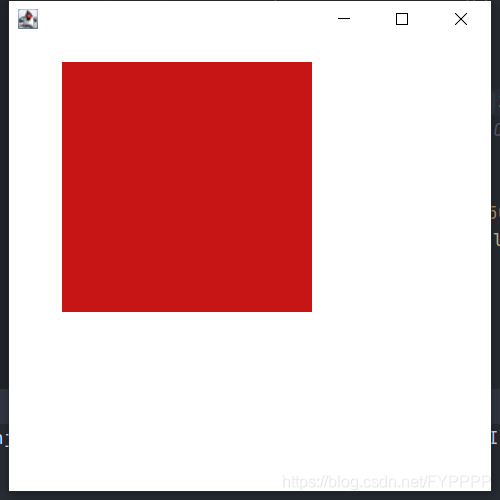
2、面板 panel
在容器里边,不能单独存在,需要放在frame上。
import java.awt.*;public class Solution {public static void main(String[] args) {Frame frame = new Frame();//布局的概念Panel panel = new Panel();//设置布局frame.setLayout(null);frame.setBounds(300, 300, 400, 400);//frame.setBackground(new Color(239, 217, 7, 119));//panel设置坐标,相对于Framepanel.setBounds(50, 50, 200, 200);panel.setBackground(new Color(199, 20, 20));frame.add(panel);frame.setVisible(true);}
}
监听事件关闭:退出
import java.awt.*;
import java.awt.event.WindowAdapter;
import java.awt.event.WindowEvent;public class Solution {public static void main(String[] args) {Frame frame = new Frame();//布局的概念Panel panel = new Panel();//设置布局frame.setLayout(null);frame.setBounds(300, 300, 400, 400);//frame.setBackground(new Color(239, 217, 7, 119));//panel设置坐标,相对于Framepanel.setBounds(50, 50, 200, 200);panel.setBackground(new Color(199, 20, 20));frame.add(panel);frame.setVisible(true);//关闭事件frame.addWindowListener(new WindowAdapter() {@Overridepublic void windowClosing(WindowEvent e) {System.exit(0);}});}
}
3、布局管理器
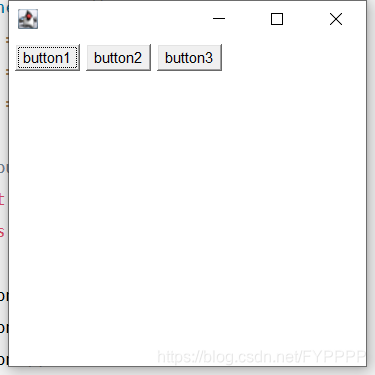
3.1 流式布局
import java.awt.*;
import java.awt.event.WindowAdapter;
import java.awt.event.WindowEvent;public class Solution {public static void main(String[] args) {Frame frame = new Frame();Button button1 = new Button("button1");Button button2 = new Button("button2");Button button3 = new Button("button3");//设置为流式布局//frame.setLayout(new FlowLayout());frame.setLayout(new FlowLayout(FlowLayout.LEFT));frame.setBounds(200, 200, 300, 300);//把按钮添加进去frame.add(button1);frame.add(button2);frame.add(button3);frame.setVisible(true);frame.addWindowListener(new WindowAdapter() {@Overridepublic void windowClosing(WindowEvent e) {System.exit(1);}});}
}
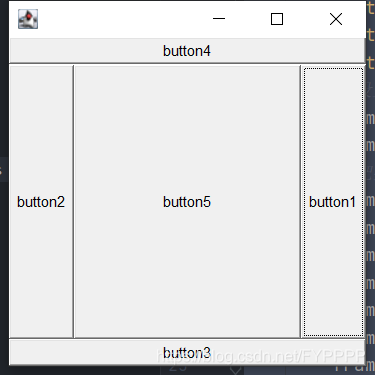
3.2 东西南北中
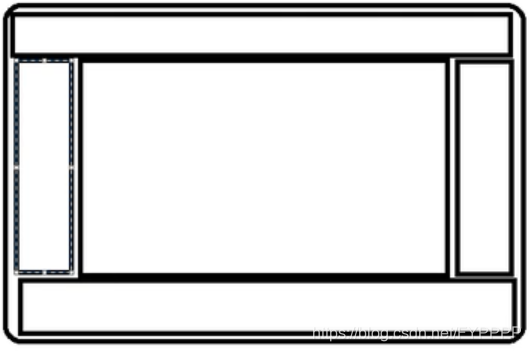
package demopacket;import java.awt.*;
import java.awt.event.WindowAdapter;
import java.awt.event.WindowEvent;public class Solution {public static void main(String[] args) {Frame frame = new Frame();Button button1 = new Button("button1");Button button2 = new Button("button2");Button button3 = new Button("button3");Button button4 = new Button("button4");Button button5 = new Button("button5");//设置为东西南北中布局frame.setLayout(new BorderLayout());frame.setBounds(200, 200, 300, 300);//把按钮添加进去frame.add(button1,BorderLayout.EAST);frame.add(button2,BorderLayout.WEST);frame.add(button3,BorderLayout.SOUTH);frame.add(button4,BorderLayout.NORTH);frame.add(button5,BorderLayout.CENTER);frame.setVisible(true);frame.addWindowListener(new WindowAdapter() {@Overridepublic void windowClosing(WindowEvent e) {System.exit(1);}});}
}
3.3 表格布局
package demopacket;import java.awt.*;
import java.awt.event.WindowAdapter;
import java.awt.event.WindowEvent;public class Solution {public static void main(String[] args) {Frame frame = new Frame();Button button1 = new Button("button1");Button button2 = new Button("button2");Button button3 = new Button("button3");Button button4 = new Button("button4");Button button5 = new Button("button5");//设置为表格布局frame.setLayout(new GridLayout(3, 2));frame.setBounds(200, 200, 300, 300);//把按钮添加进去frame.add(button1);frame.add(button2);frame.add(button3);frame.add(button4);frame.add(button5);//frame.pack();//java函数:作用 自动布局,选择一个最好的frame.setVisible(true);frame.addWindowListener(new WindowAdapter() {@Overridepublic void windowClosing(WindowEvent e) {System.exit(1);}});}
}

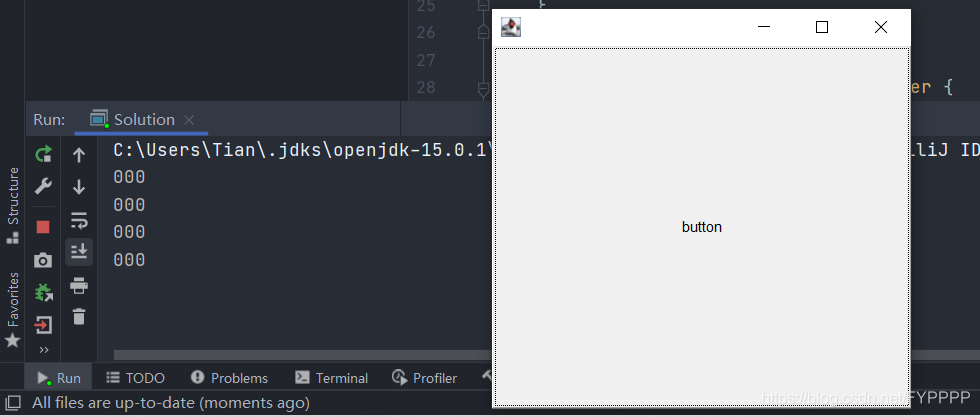
4、事件监听
当事情发生的时候,需要干什么?
package demopacket;import java.awt.*;
import java.awt.event.ActionEvent;
import java.awt.event.ActionListener;
import java.awt.event.WindowAdapter;
import java.awt.event.WindowEvent;public class Solution {public static void main(String[] args) {Frame frame = new Frame();Button button = new Button("button");button.addActionListener(new MyAction());frame.setLayout(new BorderLayout());frame.add(button, BorderLayout.CENTER);frame.pack();frame.setVisible(true);frame.addWindowListener(new WindowAdapter() {@Overridepublic void windowClosing(WindowEvent e) {System.exit(0);}});}
}class MyAction implements ActionListener {@Overridepublic void actionPerformed(ActionEvent e) {System.out.println("000");}
}
按下会打印000。
5、文本框(TextField)的监听
package demopacket;import java.awt.*;
import java.awt.event.ActionEvent;
import java.awt.event.ActionListener;public class Solution {public static void main(String[] args) {MyFrame myFrame = new MyFrame();}
}class MyFrame extends Frame {public MyFrame() {TextField textField = new TextField();add(textField);//监听这个文本框的文字,按下enter就会触发这个输入框的事件textField.addActionListener(new MyActionListener());//设置替换编码,隐藏输入内容textField.setEchoChar('*');setVisible(true);pack();}
}class MyActionListener implements ActionListener {@Overridepublic void actionPerformed(ActionEvent e) {TextField source =(TextField) e.getSource();  //获得资源,返回一个对象System.out.println(source.getText());source.setText(""); //null,enter后清空文本内容}
}
6、制作简易计算器
package demopacket;import java.awt.*;
import java.awt.event.ActionEvent;
import java.awt.event.ActionListener;public class Solution {public static void main(String[] args) {MyFrame myFrame = new MyFrame();}
}class MyFrame extends Frame {public MyFrame() {TextField textField1 = new TextField(10);TextField textField2 = new TextField(10);TextField textField3 = new TextField(20);Button button = new Button("=");Label label = new Label("+");button.addActionListener(new MyActionListener(textField1, textField2, textField3));setLayout(new FlowLayout());add(textField1);add(label);add(textField2);add(button);add(textField3);setVisible(true);pack();}
}class MyActionListener implements ActionListener {private TextField textField1, textField2, textField3;public MyActionListener(TextField textField1, TextField textField2, TextField textField3) {this.textField1 = textField1;this.textField2 = textField2;this.textField3 = textField3;}@Overridepublic void actionPerformed(ActionEvent e) {int a = Integer.parseInt(textField1.getText());int b = Integer.parseInt(textField2.getText());textField3.setText("" + (a + b));textField1.setText("");textField2.setText("");}
}
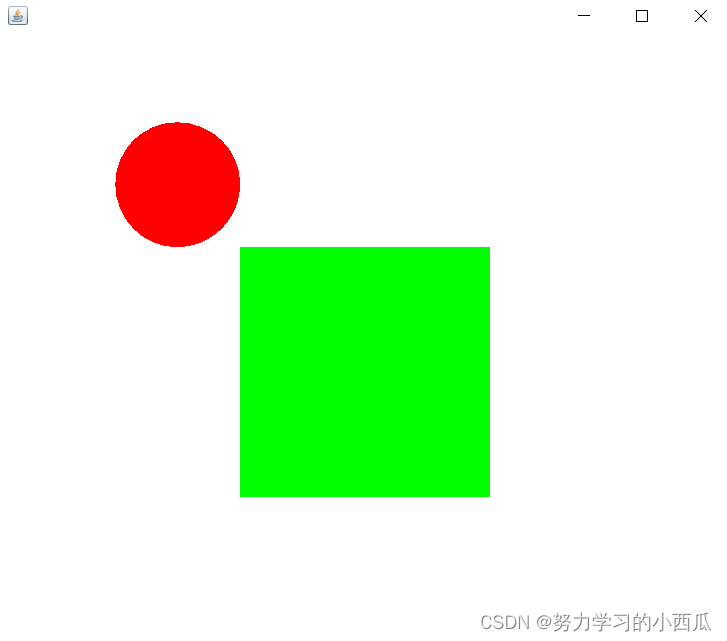
7、画笔
package demopacket;import java.awt.*;public class Solution {public static void main(String[] args) {MyPrint myPrint = new MyPrint();myPrint.loadFrame();}
}class MyPrint extends Frame {public void loadFrame() {setBounds(200, 200, 300, 300);setVisible(true);}//画笔@Overridepublic void paint(Graphics g) {//画笔需要有颜色,画笔可以画画g.setColor(Color.blue);g.fillOval(100, 100, 100, 100);}
}
8、鼠标监听
package demopacket;import java.awt.*;
import java.awt.event.MouseAdapter;
import java.awt.event.MouseEvent;
import java.util.ArrayList;
import java.util.Iterator;public class Solution {public static void main(String[] args) {MyPrint myPrint = new MyPrint("画图");}
}class MyPrint extends Frame {ArrayList points;public MyPrint(String title) {super(title);setBounds(200, 200, 300, 300);points = new ArrayList<>();//鼠标监听器,针对的是这个窗口this.addMouseListener(new MyMouseListener());setVisible(true);}//画笔@Overridepublic void paint(Graphics g) {//画笔需要有颜色,画笔可以画画,需要监听鼠标Iterator iterator = points.iterator();while (iterator.hasNext()) {Point point = (Point) iterator.next();g.setColor(Color.blue);g.fillOval(point.x, point.y, 10, 10);}}public void addPaint(Point point) {points.add(point);}private class MyMouseListener extends MouseAdapter {@Overridepublic void mousePressed(MouseEvent e) {MyPrint source = (MyPrint) e.getSource();source.addPaint(new Point(e.getX(), e.getY()));source.repaint();}}}

9、窗口监听
package demopacket;import java.awt.*;
import java.awt.event.WindowAdapter;
import java.awt.event.WindowEvent;public class Solution {public static void main(String[] args) {WindowFrame windowFrame = new WindowFrame();}static class WindowFrame extends Frame {public WindowFrame() {setBounds(100, 100, 200, 200);setBackground(Color.blue);setVisible(true);//addWindowListener(new MyWindowListener());this.addWindowListener(new WindowAdapter() {@Overridepublic void windowClosing(WindowEvent e) {System.out.println("你点击了X");System.exit(0);}});}/*class MyWindowListener extends WindowAdapter {@Overridepublic void windowClosing(WindowEvent e) {System.exit(0);}}*/}
}
10、键盘监听
package demopacket;import java.awt.*;
import java.awt.event.KeyAdapter;
import java.awt.event.KeyEvent;public class Solution {public static void main(String[] args) {KeyFrame windowFrame = new KeyFrame();}static class KeyFrame extends Frame {public KeyFrame() {setBounds(100, 100, 200, 200);setBackground(Color.blue);setVisible(true);this.addKeyListener(new KeyAdapter() {@Overridepublic void keyPressed(KeyEvent e) {System.out.println(e.getKeyCode());}});} }
}
3、Swing
1、窗口,面板
package demopacket;import javax.swing.*;public class Solution {public static void init() {JFrame jFrame = new JFrame("这是一个窗口");jFrame.setVisible(true);jFrame.setBounds(100, 100, 200, 200);JLabel jLabel = new JLabel("你好!!!");jFrame.add(jLabel);jLabel.setHorizontalAlignment(0);//居中jFrame.setDefaultCloseOperation(WindowConstants.EXIT_ON_CLOSE);//关闭事件}public static void main(String[] args) {init();}
}
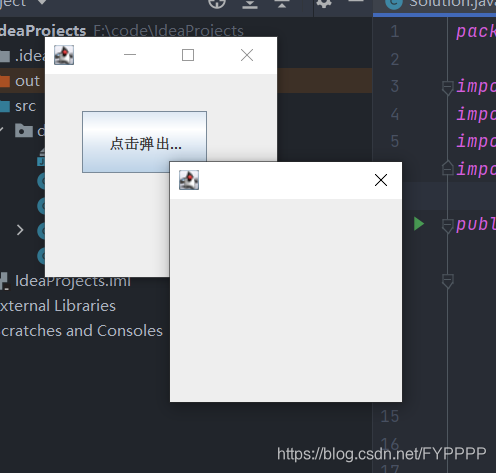
2、弹窗
package demopacket;import javax.swing.*;
import java.awt.*;
import java.awt.event.ActionEvent;
import java.awt.event.ActionListener;public class Solution extends JFrame {public Solution() {this.setVisible(true);this.setBounds(100, 100, 200, 200);this.setDefaultCloseOperation(WindowConstants.EXIT_ON_CLOSE);//关闭//JFrame 放东西需要一个容器Container container = this.getContentPane();//绝对布局container.setLayout(null);JButton jButton = new JButton("点击弹出一个对话框");jButton.setBounds(30, 30, 100, 50);//点击这个按钮的时候弹出一个弹窗container.add(jButton);jButton.addActionListener(new ActionListener() {//监听器@Overridepublic void actionPerformed(ActionEvent e) {MyDialog myDialog = new MyDialog();}});}public static void main(String[] args) {Solution solution = new Solution();}}class MyDialog extends JDialog {public MyDialog() {this.setVisible(true);this.setBounds(200, 200, 200, 200);Container container = this.getContentPane();//JFrame 放东西需要一个容器container.setLayout(null);JLabel jLabel = new JLabel("你好!!!");jLabel.setBounds(50, 50, 150, 150);container.add(jLabel);}
}
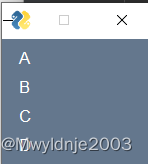
3、标签
package demopacket;import javax.swing.*;
import java.awt.*;public class Solution extends JFrame implements Icon {private int width;private int height;public Solution() {}public void init() {Solution solution = new Solution(15, 15);//图标可以放在标签上,按钮上JLabel jLabel = new JLabel("hello", solution, SwingConstants.CENTER);Container container = getContentPane();container.add(jLabel);this.setVisible(true);this.setDefaultCloseOperation(WindowConstants.EXIT_ON_CLOSE);}public Solution(int width, int height) {this.width = width;this.height = height;}public static void main(String[] args) {new Solution().init();}@Overridepublic void paintIcon(Component c, Graphics g, int x, int y) {g.fillOval(x, y, width, height);}@Overridepublic int getIconWidth() {return this.width;}@Overridepublic int getIconHeight() {return this.height;}
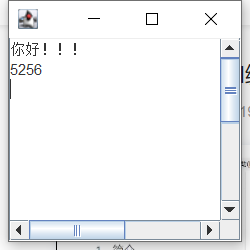
}4、面板
package demopacket;import javax.swing.*;
import java.awt.*;public class Solution extends JFrame {public Solution() {Container container = this.getContentPane();JTextArea textArea = new JTextArea(20, 30);textArea.setText("你好!!!");//scroll面板JScrollPane scrollPane = new JScrollPane(textArea);container.add(scrollPane);this.setVisible(true);this.setBounds(100, 100, 200, 200);this.setDefaultCloseOperation(WindowConstants.EXIT_ON_CLOSE);}public static void main(String[] args) {new Solution();}
}


![[java/初学者/GUI编程]GUI界面设计——界面组件类](https://img-blog.csdnimg.cn/a87bac21e313474895481edbd7c0170d.png)