AlertDialog
1.AlertDialog的6种创建模式
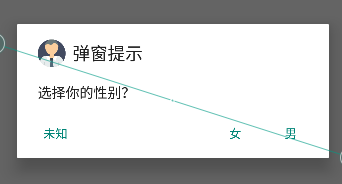
1.1setMessage
1)Java代码
//1.创建构造器AlertDialog.Builder builder=new AlertDialog.Builder(this);//2.设置参数
        builder.setTitle("弹窗提示").setIcon(R.mipmap.boy).setMessage("选择你的性别?").setPositiveButton("男",new DialogInterface.OnClickListener(){@Overridepublic void onClick(DialogInterface dialogInterface, int i) {Toast.makeText(DialogTest.this, "选中男", Toast.LENGTH_SHORT).show();}}).setNegativeButton("女",new DialogInterface.OnClickListener(){@Overridepublic void onClick(DialogInterface dialogInterface, int i) {Toast.makeText(DialogTest.this, "选中女", Toast.LENGTH_SHORT).show();}}).setNeutralButton("未知",new DialogInterface.OnClickListener(){@Overridepublic void onClick(DialogInterface dialogInterface, int i) {Toast.makeText(DialogTest.this, "选中未知", Toast.LENGTH_SHORT).show();}});

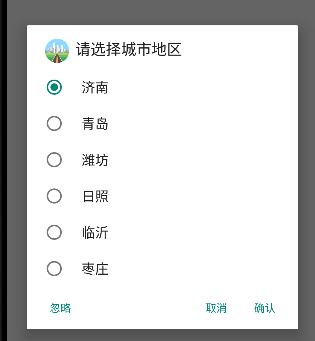
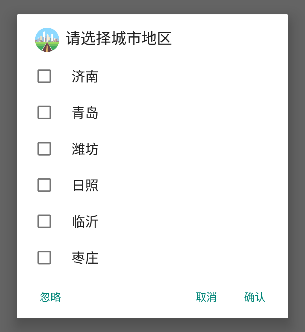
1.2setItem,设置列表项
1)Java代码
String[] citys={"济南","青岛","潍坊","日照","临沂","枣庄"};
        //1.创建构造器
        AlertDialog.Builder builder=new AlertDialog.Builder(this);
        //2.设置参数
        builder.setTitle("请选择城市地区")
                .setIcon(R.mipmap.city)
                .setItems(citys, new DialogInterface.OnClickListener() {
                    @Override
                    public void onClick(DialogInterface dialogInterface, int i) {
                        Toast.makeText(DialogTest.this, ""+citys[i], Toast.LENGTH_SHORT).show();
                    }
                })
                .setPositiveButton("确认",new DialogInterface.OnClickListener(){                    @Override
                    public void onClick(DialogInterface dialogInterface, int i) {                    }
                })
                .setNegativeButton("取消",new DialogInterface.OnClickListener(){                    @Override
                    public void onClick(DialogInterface dialogInterface, int i) {                    }
                })
                .setNeutralButton("忽略",new DialogInterface.OnClickListener(){                    @Override
                    public void onClick(DialogInterface dialogInterface, int i) {                    }                });
        //3.创建对象,显示对象
        builder.create().show();


1.3setSingleChoiceItems,设置对话框内容为单选列表项
- 可以传递数组或者是集合
String[] citys={"济南","青岛","潍坊","日照","临沂","枣庄"};//1.创建构造器AlertDialog.Builder builder=new AlertDialog.Builder(this);//2.设置参数
        builder.setTitle("请选择城市地区").setIcon(R.mipmap.city).setSingleChoiceItems(citys, 0,new DialogInterface.OnClickListener() {@Overridepublic void onClick(DialogInterface dialogInterface, int i) {Toast.makeText(DialogTest.this, ""+citys[i], Toast.LENGTH_SHORT).show();}}).setPositiveButton("确认",new DialogInterface.OnClickListener(){@Overridepublic void onClick(DialogInterface dialogInterface, int i) {}}).setNegativeButton("取消",new DialogInterface.OnClickListener(){@Overridepublic void onClick(DialogInterface dialogInterface, int i) {}}).setNeutralButton("忽略",new DialogInterface.OnClickListener(){@Overridepublic void onClick(DialogInterface dialogInterface, int i) {}});//3.创建对象,显示对象
        builder.create().show();
1.4setMultiChoiceItems设置多选
 //                设置多选
        String[] citys={"济南","青岛","潍坊","日照","临沂","枣庄"};
        //1.创建构造器
        AlertDialog.Builder builder=new AlertDialog.Builder(this);
        //2.设置参数
        builder.setTitle("请选择城市地区")
                .setIcon(R.mipmap.city)
                .setMultiChoiceItems(citys, new boolean[]{false, false, false, false, false, false}, new DialogInterface.OnMultiChoiceClickListener() {
                    @Override
                    public void onClick(DialogInterface dialogInterface, int i, boolean b) {
                        Toast.makeText(DialogTest.this, ""+citys[i]+b, Toast.LENGTH_SHORT).show();
                    }
                })
                .setPositiveButton("确认",new DialogInterface.OnClickListener(){                    @Override
                    public void onClick(DialogInterface dialogInterface, int i) {                    }
                })
                .setNegativeButton("取消",new DialogInterface.OnClickListener(){                    @Override
                    public void onClick(DialogInterface dialogInterface, int i) {                    }
                })
                .setNeutralButton("忽略",new DialogInterface.OnClickListener(){                    @Override
                    public void onClick(DialogInterface dialogInterface, int i) {                    }                });
        //3.创建对象,显示对象
        builder.create().show();

1.5setAdapter设置自定义的样式
- 需要传入一个自定义的布局
1)子布局样式
- 文本框
- 输入框
- 多选框
<?xml version="1.0" encoding="utf-8"?>
<LinearLayout xmlns:android="http://schemas.android.com/apk/res/android"
    android:orientation="vertical"
    android:layout_width="match_parent"
    android:layout_height="match_parent">    <LinearLayout
        android:layout_width="match_parent"
        android:layout_height="wrap_content"
        android:orientation="horizontal"
        >
        <TextView
            android:id="@+id/s1"
            android:layout_width="wrap_content"
            android:layout_height="wrap_content"
            android:text=""
            />
        <EditText
            android:layout_width="0dp"
            android:layout_height="wrap_content"
            android:id="@+id/s2"
            android:layout_weight="1"
            />
        <CheckBox
            android:layout_width="wrap_content"
            android:layout_height="wrap_content"
            android:id="@+id/s3"
            />
    </LinearLayout>
</LinearLayout>
2)Java代码
        //                设置多选
        String[] citys={"济南","青岛","潍坊","日照","临沂","枣庄"};
        //1.创建构造器
        AlertDialog.Builder builder=new AlertDialog.Builder(this);
        //2.设置参数
        builder.setTitle("请选择城市地区")
                .setIcon(R.mipmap.city)
                .setAdapter(new ArrayAdapter<String>(DialogTest.this, R.layout.myselect,R.id.s1,citys), new DialogInterface.OnClickListener() {
                            @Override
                            public void onClick(DialogInterface dialogInterface, int i) {                            }
                        }
                )
                .setPositiveButton("确认",new DialogInterface.OnClickListener(){                    @Override
                    public void onClick(DialogInterface dialogInterface, int i) {                    }
                })
                .setNegativeButton("取消",new DialogInterface.OnClickListener(){                    @Override
                    public void onClick(DialogInterface dialogInterface, int i) {                    }
                })
                .setNeutralButton("忽略",new DialogInterface.OnClickListener(){                    @Override
                    public void onClick(DialogInterface dialogInterface, int i) {                    }                });
        //3.创建对象,显示对象
        builder.create().show();

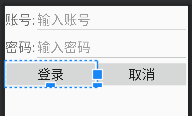
1.6setView,指定对话框为自定义的View
1)布局代码
<?xml version="1.0" encoding="utf-8"?>
<LinearLayout xmlns:android="http://schemas.android.com/apk/res/android"
    android:orientation="vertical"
    android:layout_width="match_parent"
    android:layout_height="match_parent">    <LinearLayout
        android:layout_width="match_parent"
        android:layout_height="wrap_content"
        android:orientation="horizontal"
        >
        <TextView
            android:layout_width="wrap_content"
            android:layout_height="wrap_content"
            android:text="账号:"
            android:textSize="30dp"
            />
        <EditText            android:id="@+id/account"
            android:layout_width="0dp"
            android:layout_height="wrap_content"
            android:hint="输入账号"
            android:singleLine="true"
            android:maxLength="16"
            android:layout_weight="1"
            android:textSize="30dp"
            />    </LinearLayout>
    <LinearLayout
        android:layout_width="match_parent"
        android:layout_height="wrap_content"
        android:orientation="horizontal"
        >
        <TextView
            android:layout_width="wrap_content"
            android:layout_height="wrap_content"
            android:text="密码:"
            android:textSize="30dp"
            android:inputType="textPassword"
            />
        <EditText
            android:id="@+id/password"
            android:layout_width="0dp"
            android:layout_height="wrap_content"
            android:hint="输入密码"
            android:singleLine="true"
            android:maxLength="16"
            android:layout_weight="1"
            android:textSize="30dp"
            />    </LinearLayout>
    <LinearLayout
        android:layout_width="match_parent"
        android:layout_height="wrap_content"
        android:orientation="horizontal"
        >        <Button
            android:id="@+id/lbtn1"
            android:layout_width="0dp"
            android:layout_weight="1"
            android:layout_height="wrap_content"
            android:text="登录"
            android:textSize="30dp"
            />
        <Button
            android:id="@+id/lbtn2"
            android:layout_width="0dp"
            android:layout_weight="1"
            android:layout_height="wrap_content"
            android:text="取消"
            android:textSize="30dp"
            />    </LinearLayout>
</LinearLayout>
2)Java代码
- dismiss,可以设置消失
// 6.自定义View
//1.获取布局
View view= LayoutInflater.from(this).inflate(R.layout.login,null);
//2.获取布局中的控件
EditText account=view.findViewById(R.id.account);
EditText password=view.findViewById(R.id.password);
Button lbtn1=view.findViewById(R.id.lbtn1);
Button lbtn2=view.findViewById(R.id.lbtn2); //3.创建构造器
AlertDialog.Builder builder=new AlertDialog.Builder(this);
//4.设置参数
builder.setTitle("输入指定的登录信息")
.setIcon(R.mipmap.city)
.setView(view)
.setPositiveButton("确认",new DialogInterface.OnClickListener(){ @Override
public void onClick(DialogInterface dialogInterface, int i) { }
})
.setNegativeButton("取消",new DialogInterface.OnClickListener(){ @Override
public void onClick(DialogInterface dialogInterface, int i) { }
})
.setNeutralButton("忽略",new DialogInterface.OnClickListener(){ @Override
public void onClick(DialogInterface dialogInterface, int i) { } });
//5.创建对象,
AlertDialog alertDialog=builder.create();
//6.单独设置事件监听器
lbtn1.setOnClickListener(new View.OnClickListener() {
@Override
public void onClick(View view) {
if (account.getText().toString().equals("1001")&&password.getText().toString().equals("123456")){
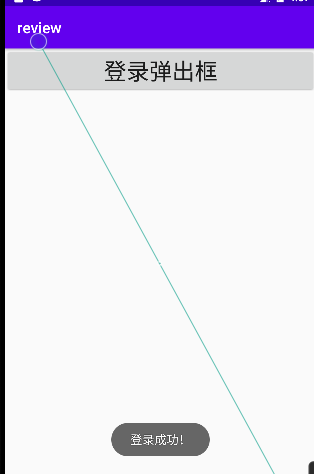
Toast.makeText(DialogTest.this, "登录成功!", Toast.LENGTH_SHORT).show();
//===设置对话框消失===
alertDialog.dismiss();
}
}
}); lbtn2.setOnClickListener(new View.OnClickListener() {
@Override
public void onClick(View view) {
Toast.makeText(DialogTest.this, "取消登录!", Toast.LENGTH_SHORT).show();
//===设置对话框消失===
alertDialog.dismiss();
}
});
//7.显示对象
alertDialog.show();
}


3)改建
public void loginAlert(View view1) {
            //        6.自定义View
            //1.获取布局
            View view= LayoutInflater.from(this).inflate(R.layout.login,null);
            //2.获取布局中的控件
            EditText account=view.findViewById(R.id.account);
            EditText password=view.findViewById(R.id.password);
            Button lbtn1=view.findViewById(R.id.lbtn1);
            Button lbtn2=view.findViewById(R.id.lbtn2);            //3.创建构造器
            AlertDialog.Builder builder=new AlertDialog.Builder(this);
            //4.设置参数
            builder.setTitle("输入指定的登录信息")
                    .setIcon(R.mipmap.city)
                    .setView(view)
                    .setPositiveButton("确认",new DialogInterface.OnClickListener(){                        @Override
                        public void onClick(DialogInterface dialogInterface, int i) {                        }
                    })
                    .setNegativeButton("取消",new DialogInterface.OnClickListener(){                        @Override
                        public void onClick(DialogInterface dialogInterface, int i) {                        }
                    })
                    .setNeutralButton("忽略",new DialogInterface.OnClickListener(){                        @Override
                        public void onClick(DialogInterface dialogInterface, int i) {                        }                    });
            //5.创建对象,
            AlertDialog alertDialog=builder.create();
            //6.单独设置事件监听器
            lbtn1.setOnClickListener(new View.OnClickListener() {
                @Override
                public void onClick(View view) {
                    if (account.getText().toString().equals("1001")&&password.getText().toString().equals("123456")){
                        Toast.makeText(DialogTest.this, "登录成功!", Toast.LENGTH_SHORT).show();
                        //===设置对话框消失===
                        alertDialog.dismiss();
                    }
                }
            });            lbtn2.setOnClickListener(new View.OnClickListener() {
                @Override
                public void onClick(View view) {
                    Toast.makeText(DialogTest.this, "取消登录!", Toast.LENGTH_SHORT).show();
                    //===设置对话框消失===
                    alertDialog.dismiss();
                }
            });
            //7.显示对象
            alertDialog.show();
        }
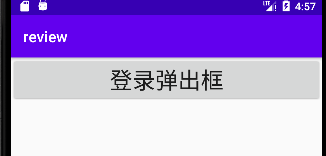
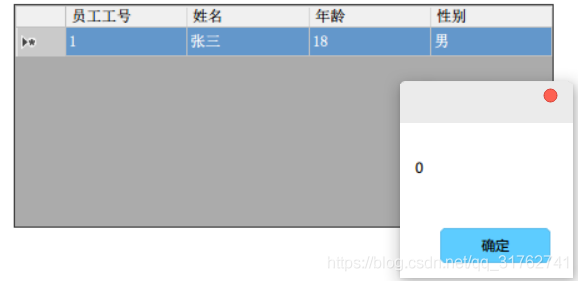
点击弹出框之后的