手写apk加固
- 加壳
- 解压原apk并加密
- 重命名dex文件
- 对壳文件操作
- 打包压缩成apk文件
- 签名
- 脱壳运行
- 解压原apk, 解密原dex文件
- 加载原dex文件
- demo下载
apk加固的目的其实就是对app的核心代码做防护工作,避免被其他人反编译;
废话不多说了,直接开始!
加壳
首先,要想对apk加固的话,需要以下几个步骤:
- 解压原apk
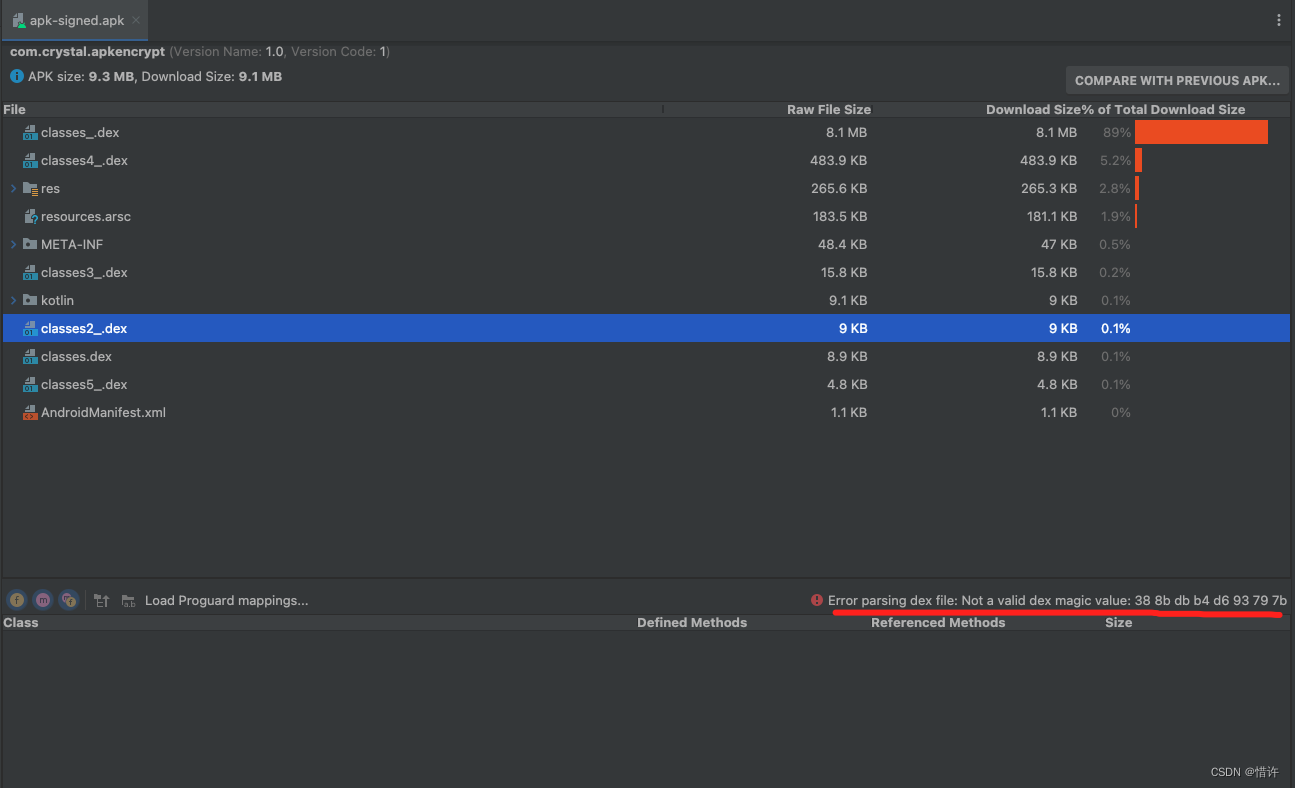
- 对原apk里面的classes.dex 进行AES加密
- 重命名classes.dex为classes_.dex
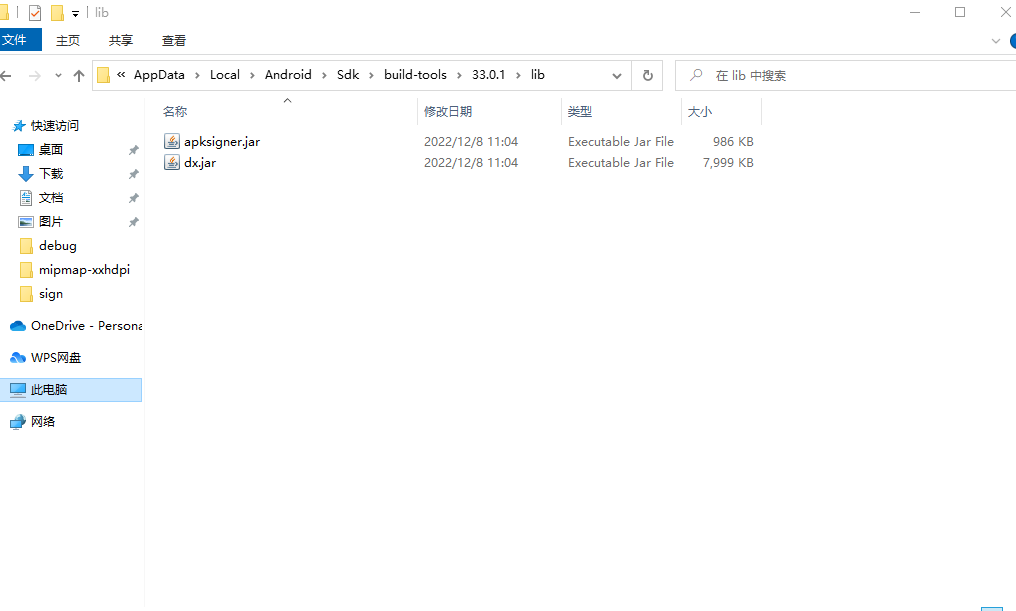
- 对壳(aar)文件解压
- 用dx工具将jar 转成classes.dex文件
- 将壳dex文件复制到原apk的解压目录下
- 打包压缩原apk为xxx.apk文件
- 对打包后的apk进行签名
解压原apk并加密
public static File encryptAPKFile(File srcAPKfile, File dstApkFile) throws Exception {if (srcAPKfile == null) {System.out.println("encryptAPKFile :srcAPKfile null");return null;}
//        File disFile = new File(srcAPKfile.getAbsolutePath() + "unzip");
//		Zip.unZip(srcAPKfile, disFile);Zip.unZip(srcAPKfile, dstApkFile);//������е�dex ����Ҫ����ְ������File[] dexFiles = dstApkFile.listFiles(new FilenameFilter() {@Overridepublic boolean accept(File file, String s) {return s.endsWith(".dex");}});File mainDexFile = null;byte[] mainDexData = null;for (File dexFile: dexFiles) {//������byte[] buffer = Utils.getBytes(dexFile);//����byte[] encryptBytes = AES.encrypt(buffer);if (dexFile.getName().endsWith("classes.dex")) {mainDexData = encryptBytes;mainDexFile = dexFile;}//д����  �滻ԭ��������FileOutputStream fos = new FileOutputStream(dexFile);fos.write(encryptBytes);fos.flush();fos.close();}return mainDexFile;}
重命名dex文件
if(newApkFile.isDirectory()){for(File newApkDirFile: Objects.requireNonNull(newApkFile.listFiles())){if(newApkDirFile.isFile()){if(newApkDirFile.getName().endsWith(".dex")){String dexName = newApkDirFile.getName();int cursor = dexName.indexOf(".dex");String reName = newApkDirFile.getParent() + File.separator + dexName.substring(0, cursor) + "_" + ".dex";System.out.println("reName value:" + reName);newApkDirFile.renameTo(new File(reName));}}}}
对壳文件操作
File aarFile = new File(AAR_FILE_DIR + File.separator + "mylibrary-debug.aar");if(aarFile.exists()){File dexFile = Dx.jar2Dex(aarFile);if(!dexFile.exists()){System.out.println("dex file no exit xxxxxxxxxxxxxx");return;}File newDexFile = new File(apkTempFileDir.getPath() + File.separator + "classes.dex");if(!newDexFile.exists()){newDexFile.createNewFile();}FileOutputStream dexStream = new FileOutputStream(newDexFile);byte[] aarBytes = Utils.getBytes(dexFile);dexStream.write(aarBytes);dexStream.flush();dexStream.close();打包压缩成apk文件
File unsignApkFile = new File(PROPATH + File.separator + "apk-unsign.apk");if(!unsignApkFile.exists()){unsignApkFile.createNewFile();}//将apk/temp目录下的文件进行打包压缩Zip.zip(apkTempFileDir, unsignApkFile);
签名
//签名Signature.signature(unsignApkFile, new File(PROPATH + File.separator + "apk-signed.apk"));
脱壳运行
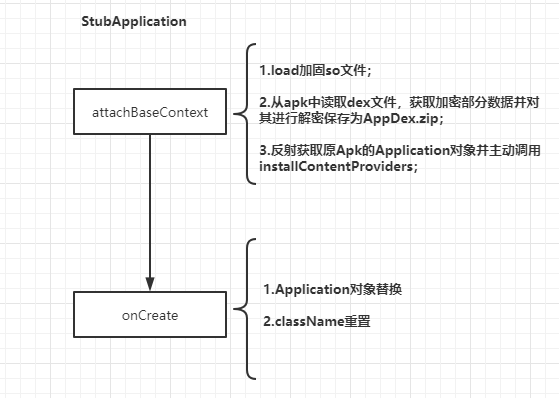
所谓的脱壳其实就是将在apk安装运行的时候先运行壳文件中的dex, 然后在壳文件中的Application里面做解密处理,解密完了之后将解密后的原dex文件用BaseDexClassLoader加载到内存中;加载原dex文件的原理是仿照的tinker 框架来做的,这里只适配的android 19版本的加载方法,其他的可参照tinker 的方法或者源码进行适配, 主要原理其实就是通过反射BaseDexClassLoader中的DexPathList变量实现的, 具体流程如下:

从图中可以看到它最终是将要加载dex文件设置到了pathList对象里面的dexElements数组变量里面,这个dexElements就是虚拟机加载dex文件的
解压原apk, 解密原dex文件
  AES.init(getPassword());File apkFile = new File(getApplicationInfo().sourceDir);//data/data/包名/files/fake_apk/File unZipFile = getDir("fake_apk", MODE_PRIVATE);File app = new File(unZipFile, "app");if (!app.exists()) {Zip.unZip(apkFile, app);File[] files = app.listFiles();for (File file : files) {String name = file.getName();if (name.equals("classes.dex")) {} else if (name.endsWith(".dex")) {try {byte[] bytes = getBytes(file);FileOutputStream fos = new FileOutputStream(file);byte[] decrypt = AES.decrypt(bytes);
//                        fos.write(bytes);fos.write(decrypt);fos.flush();fos.close();} catch (Exception e) {e.printStackTrace();}}}}List list = new ArrayList<>();Log.d("FAKE", Arrays.toString(app.listFiles()));for (File file : app.listFiles()) {if (file.getName().endsWith(".dex")) {list.add(file);}}
加载原dex文件
private static final class V19 {private V19() {}private static void install(ClassLoader loader, List<File> additionalClassPathEntries,File optimizedDirectory) throws IllegalArgumentException,IllegalAccessException, NoSuchFieldException, InvocationTargetException,NoSuchMethodException {Field pathListField = findField(loader, "pathList");Object dexPathList = pathListField.get(loader);ArrayList suppressedExceptions = new ArrayList();Log.d(TAG, "Build.VERSION.SDK_INT " + Build.VERSION.SDK_INT);if (Build.VERSION.SDK_INT >= 23) {expandFieldArray(dexPathList, "dexElements", makePathElements(dexPathList, newArrayList(additionalClassPathEntries), optimizedDirectory,suppressedExceptions));} else {expandFieldArray(dexPathList, "dexElements", makeDexElements(dexPathList, newArrayList(additionalClassPathEntries), optimizedDirectory,suppressedExceptions));}if (suppressedExceptions.size() > 0) {Iterator suppressedExceptionsField = suppressedExceptions.iterator();while (suppressedExceptionsField.hasNext()) {IOException dexElementsSuppressedExceptions = (IOException)suppressedExceptionsField.next();Log.w("MultiDex", "Exception in makeDexElement",dexElementsSuppressedExceptions);}Field suppressedExceptionsField1 = findField(loader,"dexElementsSuppressedExceptions");IOException[] dexElementsSuppressedExceptions1 = (IOException[]) ((IOException[])suppressedExceptionsField1.get(loader));if (dexElementsSuppressedExceptions1 == null) {dexElementsSuppressedExceptions1 = (IOException[]) suppressedExceptions.toArray(new IOException[suppressedExceptions.size()]);} else {IOException[] combined = new IOException[suppressedExceptions.size() +dexElementsSuppressedExceptions1.length];suppressedExceptions.toArray(combined);System.arraycopy(dexElementsSuppressedExceptions1, 0, combined,suppressedExceptions.size(), dexElementsSuppressedExceptions1.length);dexElementsSuppressedExceptions1 = combined;}suppressedExceptionsField1.set(loader, dexElementsSuppressedExceptions1);}}private static Object[] makeDexElements(Object dexPathList,ArrayList<File> files, FileoptimizedDirectory,ArrayList<IOException> suppressedExceptions) throwsIllegalAccessException, InvocationTargetException, NoSuchMethodException {Method makeDexElements = findMethod(dexPathList, "makeDexElements", newClass[]{ArrayList.class, File.class, ArrayList.class});return ((Object[]) makeDexElements.invoke(dexPathList, new Object[]{files,optimizedDirectory, suppressedExceptions}));}}
demo下载
demo下载地址