1、什么是Heatmap
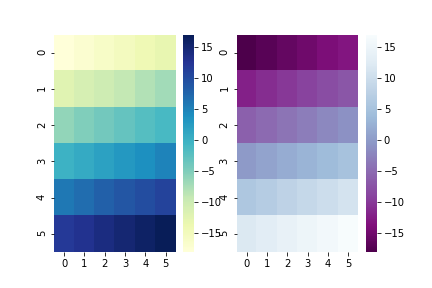
其实不用多言,需要这个的人自然知道这是什么。基于一系列点生成的热度图,放张图感受一下:
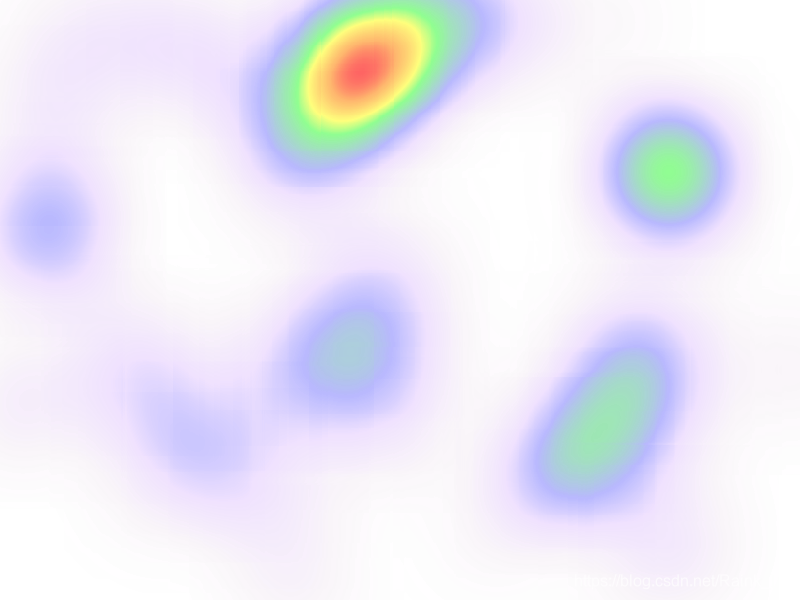
ma...大概就是这种样子。
2、生成(计算)原理
实现方式实际上是在每个点上叠加高斯矩阵。高斯矩阵就是在二维平面上的高斯(正态)分布。
高斯分布的计算公式如下:

在二维上

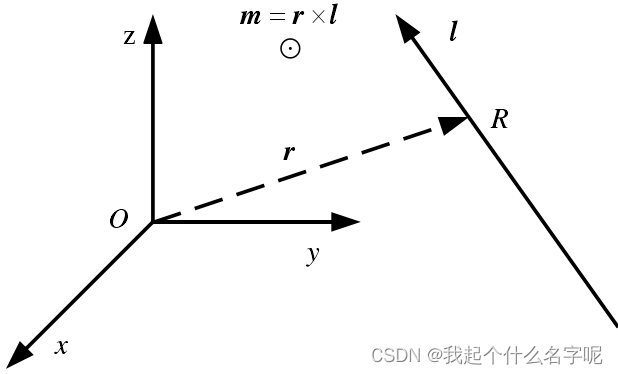
简单的理解就是像下图一样,离(u1,u2)越近的点的值越大,越远的值越小。

将这样的小矩阵,根据点的位置和权重进行叠加。然后根据叠加后的数值转换成对应的颜色就好。
3、实现源码
项目源码在github上有上传,有需要的可以直接去下载→https://github.com/RainkLH/HeatMapSharp
以下代码C#语言,通过对Bitmap类操作实现
要用到一下命名空间:
using System;
using System.Collections.Generic;
using System.Drawing;
using System.Drawing.Drawing2D;
using System.Drawing.Imaging;
3.1、主类
public class HeatMapImage
{/// <summary>/// width of img/// </summary>private int w;/// <summary>/// height of img/// </summary>private int h;/// <summary>/// gaussian kernel size/// </summary>private int gSize;/// <summary>/// gaussian kernel sigma/// </summary>private double gSigma;/// <summary>/// radius/// </summary>private int r;/// <summary>/// Two dimensional matrix corresponding to data list/// </summary>private double[,] heatVals;/// <summary>/// Color map matrix/// </summary>private byte[] ColorArgbValues;/// <summary>/// gaussian kernel/// </summary>private double[,] kernel;/// <summary>/// color numbers/// </summary>private const int NUMCOLORS = 1000;/// <summary>/// width of img/// </summary>public int W { get => w; set => w = value; }/// <summary>/// height of img/// </summary>public int H { get => h; set => h = value; }/// <summary>/// gaussian kernel/// </summary>public double[,] Kernel { get => kernel; }/// <summary>/// Two dimensional matrix corresponding to data list/// </summary>public double[,] HeatVals { get => heatVals; }/// <summary>/// construction/// </summary>/// <param name="width">image width</param>/// <param name="height">image height</param>/// <param name="gSize">gaussian kernel size</param>/// <param name="gSigma">gaussian kernel sigma</param>public HeatMapImage(int width, int height, int gSize, double gSigma){this.w = width;this.h = height;CreateColorMap();//对高斯核尺寸进行判断if (gSize < 3 || gSize > 400){throw new Exception("Kernel size is invalid");}this.gSize = gSize % 2 == 0 ? gSize + 1 : gSize;//高斯的sigma值,计算半径rthis.r = this.gSize / 2;this.gSigma = gSigma;//计算高斯核kernel = new double[this.gSize, this.gSize];this.gaussiankernel();//初始化高斯累加图heatVals = new double[h, w];}/// <summary>/// 创建一个ColorMap,用于根据数值查询颜色/// </summary>private void CreateColorMap(){ColorBlend colorBlend = new ColorBlend(8);colorBlend.Colors = new Color[8]{Color.FromArgb(0, 255, 255, 255),Color.FromArgb(10, 128, 0, 128),Color.FromArgb(30, 128, 0, 255),Color.FromArgb(70, 0, 0, 255),Color.FromArgb(110, 0, 255, 0),Color.FromArgb(130, 255, 255, 0),Color.FromArgb(145, 255, 128, 0),Color.FromArgb(155, 255, 0, 0)};colorBlend.Positions = new float[8] { 0.0f, 0.1f, 0.25f, 0.4f, 0.65f, 0.75f, 0.9f, 1.0f };Color startColor = colorBlend.Colors[0];Color endColor = colorBlend.Colors[colorBlend.Colors.Length - 1];using (Bitmap colorMapBitmap = new Bitmap(NUMCOLORS, 1, PixelFormat.Format32bppArgb)){Rectangle colorRect = new Rectangle(0, 0, colorMapBitmap.Width, colorMapBitmap.Height);using (Graphics bitmapGraphics = Graphics.FromImage(colorMapBitmap)){using (LinearGradientBrush brush = new LinearGradientBrush(colorRect, startColor, endColor, LinearGradientMode.Horizontal)){brush.InterpolationColors = colorBlend;bitmapGraphics.FillRectangle(brush, colorRect);}}BitmapData colorMapData = colorMapBitmap.LockBits(colorRect, ImageLockMode.ReadOnly, colorMapBitmap.PixelFormat);IntPtr colorPtr = colorMapData.Scan0;int colorBytes = Math.Abs(colorMapData.Stride) * colorMapBitmap.Height;ColorArgbValues = new byte[colorBytes];System.Runtime.InteropServices.Marshal.Copy(colorPtr, ColorArgbValues, 0, colorBytes);colorMapBitmap.UnlockBits(colorMapData);}}/// <summary>/// 高斯核/// </summary>private void gaussiankernel(){for (int y = -r, i = 0; i < gSize; y++, i++){for (int x = -r, j = 0; j < gSize; x++, j++){kernel[i, j] = Math.Exp(((x * x) + (y * y)) / (-2 * gSigma * gSigma)) / (2 * Math.PI * gSigma * gSigma);}}}/// <summary>/// 高斯核乘上权重/// </summary>/// <param name="weight"></param>/// <returns></returns>private double[,] MultiplyKernel(double weight){double[,] wKernel = (double[,])kernel.Clone();for (int i = 0; i < gSize; i++){for (int j = 0; j < gSize; j++){wKernel[i, j] *= weight;}}return wKernel;}/// <summary>/// 对所有权重进行归一化,压缩到颜色数量以内的值/// </summary>private void RescaleArray(){float max = 0;foreach (float value in heatVals){if (value > max){max = value;}}for (int i = 0; i < heatVals.GetLength(0); i++){for (int j = 0; j < heatVals.GetLength(1); j++){heatVals[i, j] *= (NUMCOLORS - 1) / max;if (heatVals[i, j] > NUMCOLORS - 1){heatVals[i, j] = NUMCOLORS - 1;}}}}/// <summary>/// 一次性设置一组数据/// </summary>/// <param name="datas"></param>public void SetDatas(List<DataType> datas){foreach (DataType data in datas){int i, j, tx, ty, ir, jr;int radius = gSize >> 1;int x = data.X;int y = data.Y;double[,] kernelMultiplied = MultiplyKernel(data.Weight);for (i = 0; i < gSize; i++){ir = i - radius;ty = y + ir;if (ty < 0){continue;}if (ty >= h){break;}for (j = 0; j < gSize; j++){jr = j - radius;tx = x + jr;// skip columnif (tx < 0){continue;}if (tx < w){heatVals[ty, tx] += kernelMultiplied[i, j];}}}}}/// <summary>/// 逐个数据一个一个的存入/// </summary>/// <param name="data"></param>public void SetAData(DataType data){int i, j, tx, ty, ir, jr;int radius = gSize >> 1;int x = data.X;int y = data.Y;double[,] kernelMultiplied = MultiplyKernel(data.Weight);for (i = 0; i < gSize; i++){ir = i - radius;ty = y + ir;if (ty < 0){continue;}if (ty >= h){break;}for (j = 0; j < gSize; j++){jr = j - radius;tx = x + jr;if (tx < 0){continue;}if (tx < w){heatVals[ty, tx] += kernelMultiplied[i, j];}}}}/// <summary>/// 基于存储的数据进行计算heatMap/// </summary>/// <returns></returns>public Bitmap GetHeatMap(){RescaleArray();Bitmap heatMap = new Bitmap(W, H, PixelFormat.Format32bppArgb);Rectangle rect = new Rectangle(0, 0, heatMap.Width, heatMap.Height);BitmapData heatMapData = heatMap.LockBits(rect, ImageLockMode.WriteOnly, heatMap.PixelFormat);IntPtr ptrw = heatMapData.Scan0;int wbytes = Math.Abs(heatMapData.Stride) * heatMap.Height;byte[] argbValuesW = new byte[wbytes];System.Runtime.InteropServices.Marshal.Copy(ptrw, argbValuesW, 0, wbytes);for (int i = 0; i < h; i++){for (int j = 0; j < w; j++){int colorIndex = double.IsNaN(heatVals[i, j]) ? 0 : (int)heatVals[i, j];int index = (i * heatMap.Width + j) * 4;argbValuesW[index] = ColorArgbValues[4 * colorIndex];argbValuesW[index + 1] = ColorArgbValues[4 * colorIndex + 1];argbValuesW[index + 2] = ColorArgbValues[4 * colorIndex + 2];argbValuesW[index + 3] = ColorArgbValues[4 * colorIndex + 3];}}System.Runtime.InteropServices.Marshal.Copy(argbValuesW, 0, ptrw, wbytes);heatMap.UnlockBits(heatMapData);return heatMap;}/// <summary>/// 输出查看一下颜色图谱。/// </summary>/// <returns></returns>public Bitmap CheckColorMap(){Bitmap checkColor = new Bitmap(w, h, PixelFormat.Format32bppArgb);int step = (NUMCOLORS - w) / h + 1;for (int i = 0; i < h; i++){for (int j = 0; j < w; j++){if ((i * step) + j >= NUMCOLORS){return checkColor;}Color color = Color.FromArgb(ColorArgbValues[i * step * 4],ColorArgbValues[i * step * 4 + 1],ColorArgbValues[i * step * 4 + 2],ColorArgbValues[i * step * 4 + 3]);checkColor.SetPixel(j, i, color);}}return checkColor;}
}
4.2、数据类型
类中涉及的数据类型 DataType:
public class DataType
{public int X { get; set; }public int Y { get; set; }public double Weight { get; set; }
}
4、进行测试
4.1模拟数据生成
使用Numpy在C#中的wrapper: NumSharp生成一下随机数据
using System;
using System.Collections.Generic;
using NumSharp;
using HeatMap;//省略了namespace,如果需要,请理性复制class MockDatasGen
{private DataType tPt;private int W;private int H;public MockDatasGen(int w, int h){W = w;H = h;tPt = new DataType() { X = -1, Y = -1, Weight = -1};}public List<DataType> CreateMockDatas(int nums){List<DataType> datas = new List<DataType>();for (int i = 0; i < nums; i++){if (tPt.X > 0 && tPt.Y > 0 && tPt.Weight > 0){double c = np.random.rand();int x = 0, y = 0;if (c < 0.85){int l = np.random.randint(1, 50);double d = 2 * np.random.rand() * np.pi;x = (int)(l * Math.Cos(d));y = (int)(l * Math.Sin(d));x = tPt.X + x < 0 ? 0 - x : x;y = tPt.Y + y < 0 ? 0 - y : y;x = tPt.X + x >= W ? 0 - x : x;y = tPt.Y + y >= H ? 0 - y : y;tPt.X = tPt.X + x;tPt.Y = tPt.Y + y;tPt.Weight = np.random.rand() * 10;DataType data = new DataType() { X = tPt.X, Y = tPt.Y, Weight = tPt.Weight };datas.Add(data);}else{tPt.X = np.random.randint(1, W);tPt.Y = np.random.randint(1, H);tPt.Weight = np.random.rand() * 10;DataType data = new DataType() { X = tPt.X, Y = tPt.Y, Weight = tPt.Weight };datas.Add(data);}}else{tPt.X = np.random.randint(1, W);tPt.Y = np.random.randint(1, H);tPt.Weight = np.random.rand() * 10;DataType data = new DataType() { X = tPt.X, Y = tPt.Y, Weight = tPt.Weight };datas.Add(data);}}return datas;}
}
4.2 使用模拟数据测试
const int WIDTH = 800;
const int HEIGHT = 600;
static void Main(string[] args)
{MockDatasGen datasGen;Console.WriteLine("Create some mock datas");datasGen = new MockDatasGen(WIDTH, HEIGHT);List<DataType> datas = datasGen.CreateMockDatas(100);Console.WriteLine("Set datas");HeatMapImage heatMapImage = new HeatMapImage(WIDTH, HEIGHT, 200, 50);heatMapImage.SetDatas(datas);Console.WriteLine("Calculate and generate heatmap");Bitmap img = heatMapImage.GetHeatMap();img.Save("..\\..\\..\\..\\Images\\heatmap1.png");
}
最终效果就如文章开始时放的那张图了。