目录
- 写在前面
- code
- compile&run
- result
- 参考
写在前面
1、本文内容
pcl直线拟合,生成带噪声的直线并进行直线拟合的demo
2、平台
windows, pcl1.10.0
3、转载请注明出处:
https://blog.csdn.net/qq_41102371/article/details/127147223
code
line_seg.cpp
#include <pcl/io/pcd_io.h>
#include <pcl/io/ply_io.h>
#include <pcl/sample_consensus/ransac.h>
#include <pcl/sample_consensus/sac_model_line.h>
#include <pcl/visualization/pcl_visualizer.h>
#include <pcl/filters/extract_indices.h>
#include <pcl/segmentation/sac_segmentation.h>using namespace std::chrono_literals;pcl::visualization::PCLVisualizer::Ptr
simpleVis(pcl::PointCloud<pcl::PointXYZ>::ConstPtr cloud)
{// --------------------------------------------// -----Open 3D viewer and add point cloud-----// --------------------------------------------pcl::visualization::PCLVisualizer::Ptr viewer(new pcl::visualization::PCLVisualizer("3D Viewer"));viewer->setBackgroundColor(0, 0, 0);viewer->addPointCloud<pcl::PointXYZ>(cloud, "sample cloud");viewer->setPointCloudRenderingProperties(pcl::visualization::PCL_VISUALIZER_POINT_SIZE, 3, "sample cloud");// viewer->addCoordinateSystem (1.0, "global");//viewer->initCameraParameters();return (viewer);
}pcl::PointCloud<pcl::PointXYZ>::Ptr
create_line(double x0,double y0,double z0,double a,double b,double c,double point_size = 1000,double step = 0.1)
{pcl::PointCloud<pcl::PointXYZ>::Ptr cloud_line(new pcl::PointCloud<pcl::PointXYZ>);cloud_line->width = point_size;cloud_line->height = 1;cloud_line->resize(cloud_line->width * cloud_line->height);for (std::size_t i = 0; i < cloud_line->points.size(); ++i) {cloud_line->points[i].x =x0 + a / std::pow(a * a + b * b + c * c, 0.5) * i * 0.1;cloud_line->points[i].y =y0 + b / std::pow(a * a + b * b + c * c, 0.5) * i * 0.1;cloud_line->points[i].z =z0 + c / std::pow(a * a + b * b + c * c, 0.5) * i * 0.1;}return cloud_line;
}void
fit_line(pcl::PointCloud<pcl::PointXYZ>::Ptr& cloud, double distance_threshold)
{// fit line from a point cloudpcl::ModelCoefficients::Ptr coefficients1(new pcl::ModelCoefficients);pcl::PointIndices::Ptr inliers1(new pcl::PointIndices);pcl::SACSegmentation<pcl::PointXYZ> seg;seg.setOptimizeCoefficients(true);seg.setModelType(pcl::SACMODEL_LINE);seg.setMethodType(pcl::SAC_RANSAC);seg.setMaxIterations(1000);seg.setDistanceThreshold(distance_threshold);seg.setInputCloud(cloud);seg.segment(*inliers1, *coefficients1);// line parametersdouble x0, y0, z0, a, b, c;x0 = coefficients1->values[0];y0 = coefficients1->values[1];z0 = coefficients1->values[2];a = coefficients1->values[3];b = coefficients1->values[4];c = coefficients1->values[5];std::cout << "model parameters1:"<< "   (x - " << x0 << ") / " << a << " = (y - " << y0 << ") / " << b<< " = (z - " << z0 << ") / " << c << std::endl;// extract segmentation partpcl::PointCloud<pcl::PointXYZ>::Ptr cloud_line1(new pcl::PointCloud<pcl::PointXYZ>);pcl::ExtractIndices<pcl::PointXYZ> extract;extract.setInputCloud(cloud);extract.setIndices(inliers1);extract.setNegative(false);extract.filter(*cloud_line1);// extract remain pointcloudpcl::PointCloud<pcl::PointXYZ>::Ptr cloud_remain(new pcl::PointCloud<pcl::PointXYZ>);extract.setNegative(true);extract.filter(*cloud_remain);//显示原始点云pcl::visualization::PCLVisualizer::Ptr viewer_ori;viewer_ori = simpleVis(cloud);while (!viewer_ori->wasStopped()) {viewer_ori->spinOnce(100);std::this_thread::sleep_for(100ms);}pcl::visualization::PCLVisualizer::Ptr viewer(new pcl::visualization::PCLVisualizer("3D Viewer"));viewer->setBackgroundColor(0, 0, 0);viewer->addPointCloud<pcl::PointXYZ>(cloud_remain, "cloud_remain");viewer->setPointCloudRenderingProperties(pcl::visualization::PCL_VISUALIZER_POINT_SIZE, 2, "cloud_remain");viewer->addPointCloud<pcl::PointXYZ>(cloud_line1, "cloud_line1");viewer->setPointCloudRenderingProperties(pcl::visualization::PCL_VISUALIZER_POINT_SIZE, 5, "cloud_line1");viewer->setPointCloudRenderingProperties(pcl::visualization::PCL_VISUALIZER_COLOR, 1.0, 0.5, 0.5, "cloud_line1");// auto cloud_parameter_line1 = create_line(x0, y0, z0, a, b, c);//viewer->addPointCloud<pcl::PointXYZ>(cloud_parameter_line1, "cloud_parameter_line1");//viewer->setPointCloudRenderingProperties(//    pcl::visualization::PCL_VISUALIZER_POINT_SIZE, 5, "cloud_parameter_line1");//viewer->setPointCloudRenderingProperties(//    pcl::visualization::PCL_VISUALIZER_COLOR, 1.0, 0.5, 0.5, "cloud_parameter_line1");// viewer->addLine(*coefficients1, "line1");while (!viewer->wasStopped()) {viewer->spinOnce(100);std::this_thread::sleep_for(100ms);}}void
demo()
{// line parametersdouble x0 = -2, y0 = -2, z0 = 0, a = 1, b = 1, c = 0;auto line_pcd_create = create_line(x0, y0, z0, a, b, c);pcl::PointCloud<pcl::PointXYZ>::Ptr cloud_noise(new pcl::PointCloud<pcl::PointXYZ>);std::size_t noise_points_size = line_pcd_create->points.size() / 10;cloud_noise->width = noise_points_size;cloud_noise->height = 1;cloud_noise->points.resize(cloud_noise->width * cloud_noise->height);// add noisefor (std::size_t i = 0; i < noise_points_size; ++i) {int random_num = line_pcd_create->points.size() * rand() / (RAND_MAX + 1.0f);cloud_noise->points[i].x =line_pcd_create->points[random_num].x + 10 * rand() / (RAND_MAX + 1.0f) - 5;cloud_noise->points[i].y =line_pcd_create->points[random_num].y + 10 * rand() / (RAND_MAX + 1.0f) - 5;cloud_noise->points[i].z =line_pcd_create->points[random_num].z + 10 * rand() / (RAND_MAX + 1.0f) - 5;}pcl::PointCloud<pcl::PointXYZ>::Ptr line_with_noise(new pcl::PointCloud<pcl::PointXYZ>);*line_with_noise = *cloud_noise + *line_pcd_create;//pcl::visualization::PCLVisualizer::Ptr viewer;//viewer = simpleVis(line_with_noise);//while (!viewer->wasStopped()) {//  viewer->spinOnce(100);//  std::this_thread::sleep_for(100ms);//}fit_line(line_with_noise, 1);
}int
main(int argc, char* argv[])
{if (argc < 3) {std::cout << "please input parametars:\nfilepath\ndistance_threshold" << std::endl;demo();return -1;}std::string file_path = argv[1];double distance_threshold = atof(argv[2]);pcl::PointCloud<pcl::PointXYZ>::Ptr cloud(new pcl::PointCloud<pcl::PointXYZ>);if (pcl::io::loadPLYFile(file_path, *cloud) < 0) {std::cout << "can not read file " << file_path << std::endl;return -1;}std::cout << "point size: " << cloud->points.size() << std::endl;fit_line(cloud, distance_threshold);return 0;
}
CmakeLists.txt
cmake_minimum_required(VERSION 2.8 FATAL_ERROR)project(line_fit)find_package(PCL 1.2 REQUIRED)include_directories(${PCL_INCLUDE_DIRS})
link_directories(${PCL_LIBRARY_DIRS})
add_definitions(${PCL_DEFINITIONS})add_executable (line_seg line_seg.cpp)
target_link_libraries (line_seg ${PCL_LIBRARIES})
compile&run
cmake -DCMAKE_BUILD_TYPE=Release -DPCL_DIR="YOUR_PATH/PCL 1.10.0/cmake" -S ./ -B ./build
cmake --build ./build --config Release --target ALL_BUILD
.\build\Release\line_seg.exe
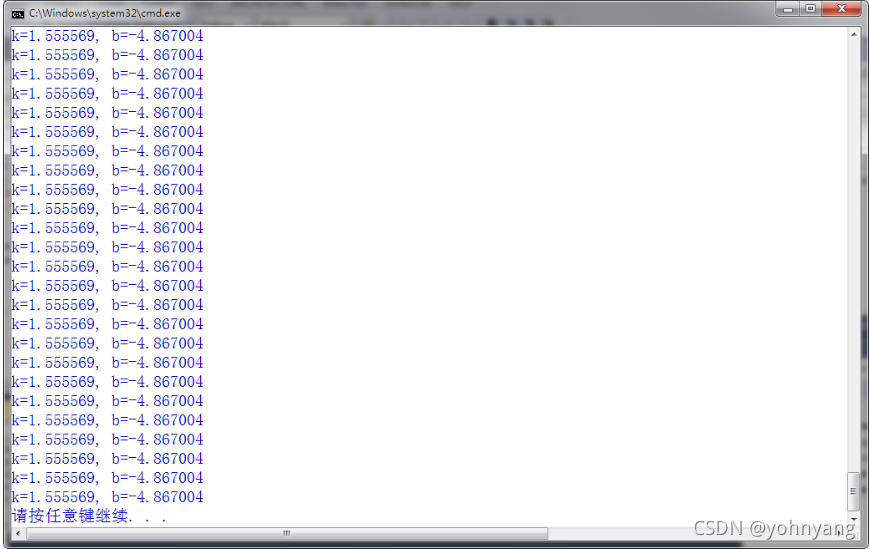
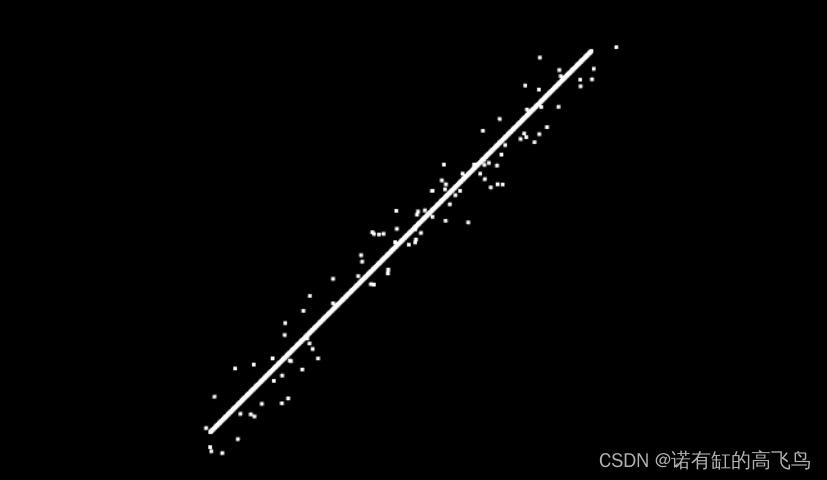
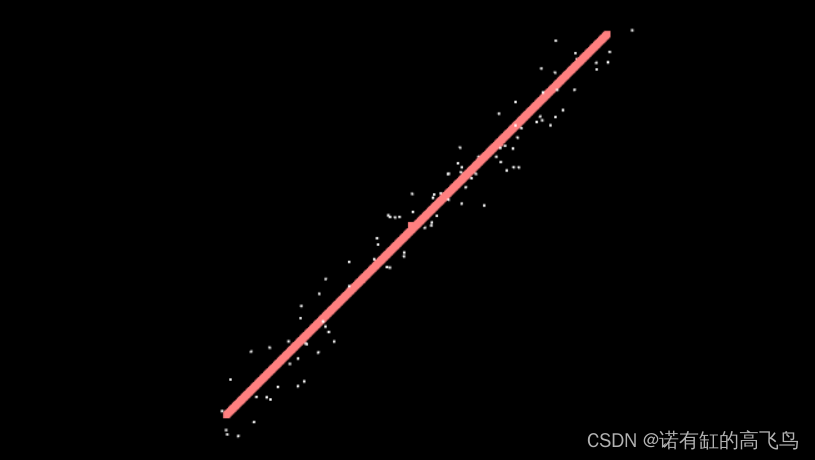
result
参考
https://blog.csdn.net/qq_39506862/article/details/124274222
https://blog.csdn.net/qq_36686437/article/details/114171317
https://blog.csdn.net/qq_41102371/article/details/121482141
https://pcl.readthedocs.io/projects/tutorials/en/pcl-1.11.0/random_sample_consensus.html