一、话说直线拟合
霍夫直线检测容易受到线段形状与噪声的干扰而失真,这个时候我们需要另辟蹊径,通过对图像进行二值分析,提取骨架,对骨架像素点拟合生成直线,这种做法在一些场景下非常有效,而且效果还比较好。前面已经讲过霍夫变换,这里就不再叙述,直接上干货。
二、距离变换
距离变换是二值图像处理与操作中常用手段,在骨架提取,图像窄化中常有应用。距离变换的结果是得到一张与输入图像类似的灰度图像,但是灰度值只出现在前景区域。并且越远离背景边缘的像素灰度值越大。OpenCV中距离变换的函数如下:
void distanceTransform( InputArray src, OutputArray dst, int distanceType, int maskSize, int dstType=CV_32F);@param src 8-bit, single-channel (binary) source image.
@param dst Output image with calculated distances. It is a 8-bit or 32-bit floating-point,single-channel image of the same size as src .
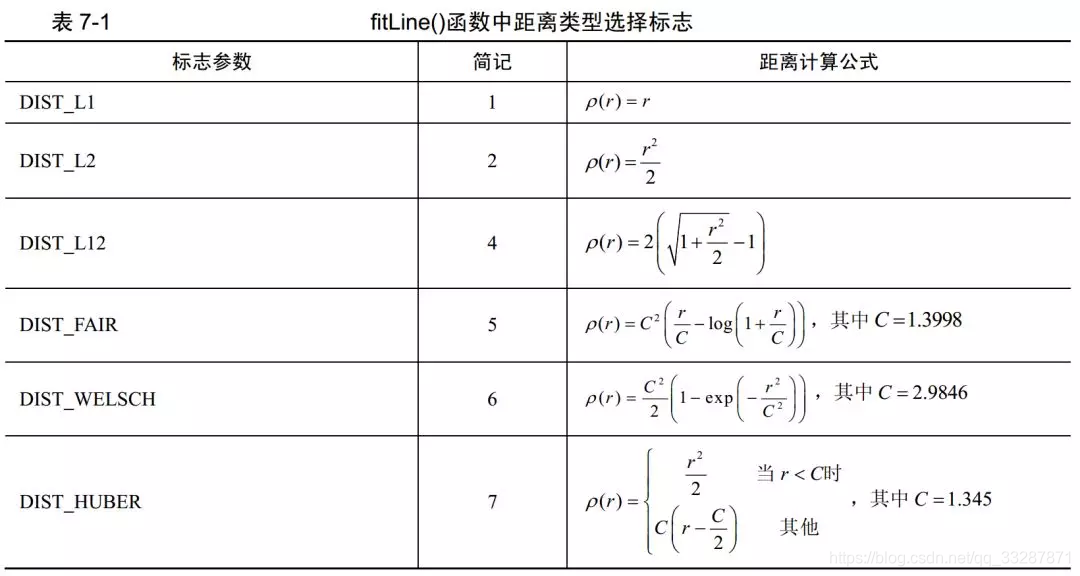
@param distanceType Type of distance, see cv::DistanceTypes
DIST_L1、DIST_L2、DIST_C计算像素距离方式如下:

其中当选择DIST_L2与DIST_MASK_PRECISE时候,OpenCV会使用TBB并行计算加速,DIST_L1与DIST_C是比较精确的距离计算方式、DIST_L2是比较快而粗糙的距离计算方式。下图是基于DIST_L2计算得到结果:

三、水平与垂直投影
关于这个OpenCV中我没有发现直接可以使用的相关API,所以我自己写了点代码,二值图像的水平或者垂直投影可以用于粘连字符分割、对象分离,发现局部极大值像素等处理,是非常重要的二值图像分析与处理手段。假设有二值图像与其像素分布如下:

其水平与垂直投影则分别如下:

四、实验
以上讲了这么多,是时候展现真正的技术了。今天看的内容大部分来源于opencv学堂,里面已经展示了部分代码,这里我将完整代码拿出来。
c++版本是自己写的:
int main()
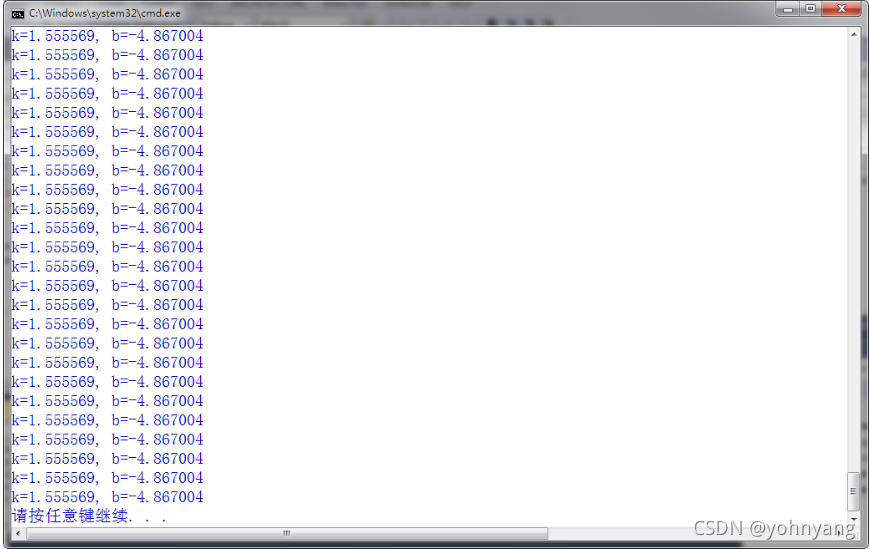
{Mat src = imread("D:\\cv_study\\Exercise\\line\\lines.jpg");Mat gray, binary, dist;Mat result = Mat::zeros(480,640, CV_8UC1);int w = src.cols;cvtColor(src, gray, CV_BGR2GRAY);threshold(gray, binary,0,255, THRESH_BINARY | THRESH_OTSU);distanceTransform(binary, dist, DIST_L1, DIST_MASK_PRECISE);dist = dist / 15;vector<Point>ypts;vector<Point>xpts;Vec4f lines;Vec4f ls;for (int row = 0; row < dist.rows; row++){int cx = 0;int cy = 0;float max_d = 0;for (int col = 0; col < dist.cols; col++){float d = dist.at<float>(row, col);if (d > max_d){max_d = d;cx = col;cy = row;}}result.at<uchar>(cy, cx) = 255;Point p(cx, cy);ypts.push_back(p);}for (int col = 0; col < gray.cols; col++){int cx = 0;int cy = 0;float max_d = 0;for (int row = 0; row < gray.rows; row++){float d = dist.at<float>(row, col);if (d > max_d){max_d = d;cx = col;cy = row;}}result.at<uchar>(cy, cx) = 255;Point p1(cx, cy);xpts.push_back(p1);}fitLine(ypts, lines, DIST_L1, 0, 0.01, 0.01);fitLine(xpts, ls, DIST_L1, 0, 0.01, 0.01);float vx = lines[0];float vy = lines[1];float x = lines[2];float y = lines[3];int y1 = int((-x*vy / vx) + y);int y2 = int((w - x)*vy / vx + y);float vxs = ls[0];float vys = ls[1];float xs = ls[2];float ys = ls[3];int y1s = int((-xs*vys / vxs) + ys);int y2s = int((w - xs)*vys / vxs + ys);line(src, Point((w - 1), y2), Point(0, y1), Scalar(255, 0, 0), 2);line(src, Point((w - 1), y2s), Point(0, y1s), Scalar(0, 0, 255), 2);waitKey();return 0;
}


整体思想就是,将图像转换为灰度图,二值化,距离变换,骨架提取,根据骨架拟合直线。
python版本:
import numpy as np
import cv2class linedetector:def __init__(self):self.lines = []def find_lines(self, frame):h, w, ch = frame.shapegray = cv2.cvtColor(frame, cv2.COLOR_BGR2GRAY)ret, binary = cv2.threshold(gray, 0, 255, cv2.THRESH_BINARY | cv2.THRESH_OTSU)cv2.imshow("binary image", binary)cv2.imwrite("D:/Python/opencv/binary.png", binary)dist = cv2.distanceTransform(binary, cv2.DIST_L1, cv2.DIST_MASK_PRECISE)cv2.imshow("distance", dist / 15)dist = dist / 15result = np.zeros((h, w), dtype=np.uint8)ypts = []for row in range(h):cx = 0cy = 0max_d = 0for col in range(w):d = dist[row][col]if d > max_d:max_d = dcx = colcy = rowresult[cy][cx] = 255ypts.append([cx, cy])xpts = []for col in range(w):cx = 0cy = 0max_d = 0for row in range(h):d = dist[row][col]if d > max_d:max_d = dcx = colcy = rowresult[cy][cx] = 255xpts.append([cx, cy])cv2.imshow("lines", result)cv2.imwrite("D:/Python/opencv/skeleton.png", result)frame = self.line_fitness(ypts, image=frame)frame = self.line_fitness(xpts, image=frame, color=(255, 0, 0))cv2.imshow("fit-lines", frame)cv2.imwrite("D:/Python/opencv/fitlines.png", frame)return self.linesdef line_fitness(self, pts, image, color=(0, 0, 255)):h, w, ch = image.shape[vx, vy, x, y] = cv2.fitLine(np.array(pts), cv2.DIST_L1, 0, 0.01, 0.01)y1 = int((-x * vy / vx) + y)y2 = int(((w - x) * vy / vx) + y)cv2.line(image, (w - 1, y2), (0, y1), color, 2)return imageif __name__ == "__main__":src = cv2.imread('D:/Python/opencv/lines.jpg')ld = linedetector()lines = ld.find_lines(src)cv2.waitKey(0)cv2.destroyAllWindows()


小编能力有限,不足之处多多谅解,今天就到这里
参考链接:点击打开链接