- 参考
- CCIE 工程师社区 - https://ccie.lol/blog/2016/07/01/gns3-iou-installation-guide/
- 皮皮的小car
- GNS3介绍及基础环境搭建 - https://www.bilibili.com/video/BV1Vq4y1v7kL/
- _sev_June
- GNS3完整安装系列① 相关软件准备 - https://www.bilibili.com/video/BV1H7411m7R9/
- GNS3完整安装系列② GNS3VM的导入 - https://www.bilibili.com/video/BV1H7411m7ub/
- GNS3完整安装系列③ 镜像的导入及使用 - https://www.bilibili.com/video/BV1H7411m7Lv/
- Sam小哥哥的奇妙冒险
- GNS3-下载安装和首次启动 - https://www.bilibili.com/video/BV1bS4y117Cr/
- GNS3-IOS镜像下载和导入(手工) - https://www.bilibili.com/video/BV1894y1Z7tA/
- GNS3-IOS镜像下载和导入(自动) - https://www.bilibili.com/video/BV1s44y1V7LZ/
- GNS3-基础命令行 - https://www.bilibili.com/video/BV1oF411u7FQ/
GNS3安装和使用教程 - https://blog.csdn.net/zhangpeterx/article/details/86407065, https://github.com/last2win/gns3-intro(大学实验指导,一堆坑只能当面跟你说的那种)


GNS3是一款具有图形化界面可以运行在多平台(windows、linux、macos)的网络虚拟软件。GNS3可以用于虚拟体验Cisco真实的IOS或者是检验将要在真实的路由器上部署实施的相关配置。
GNS能力:
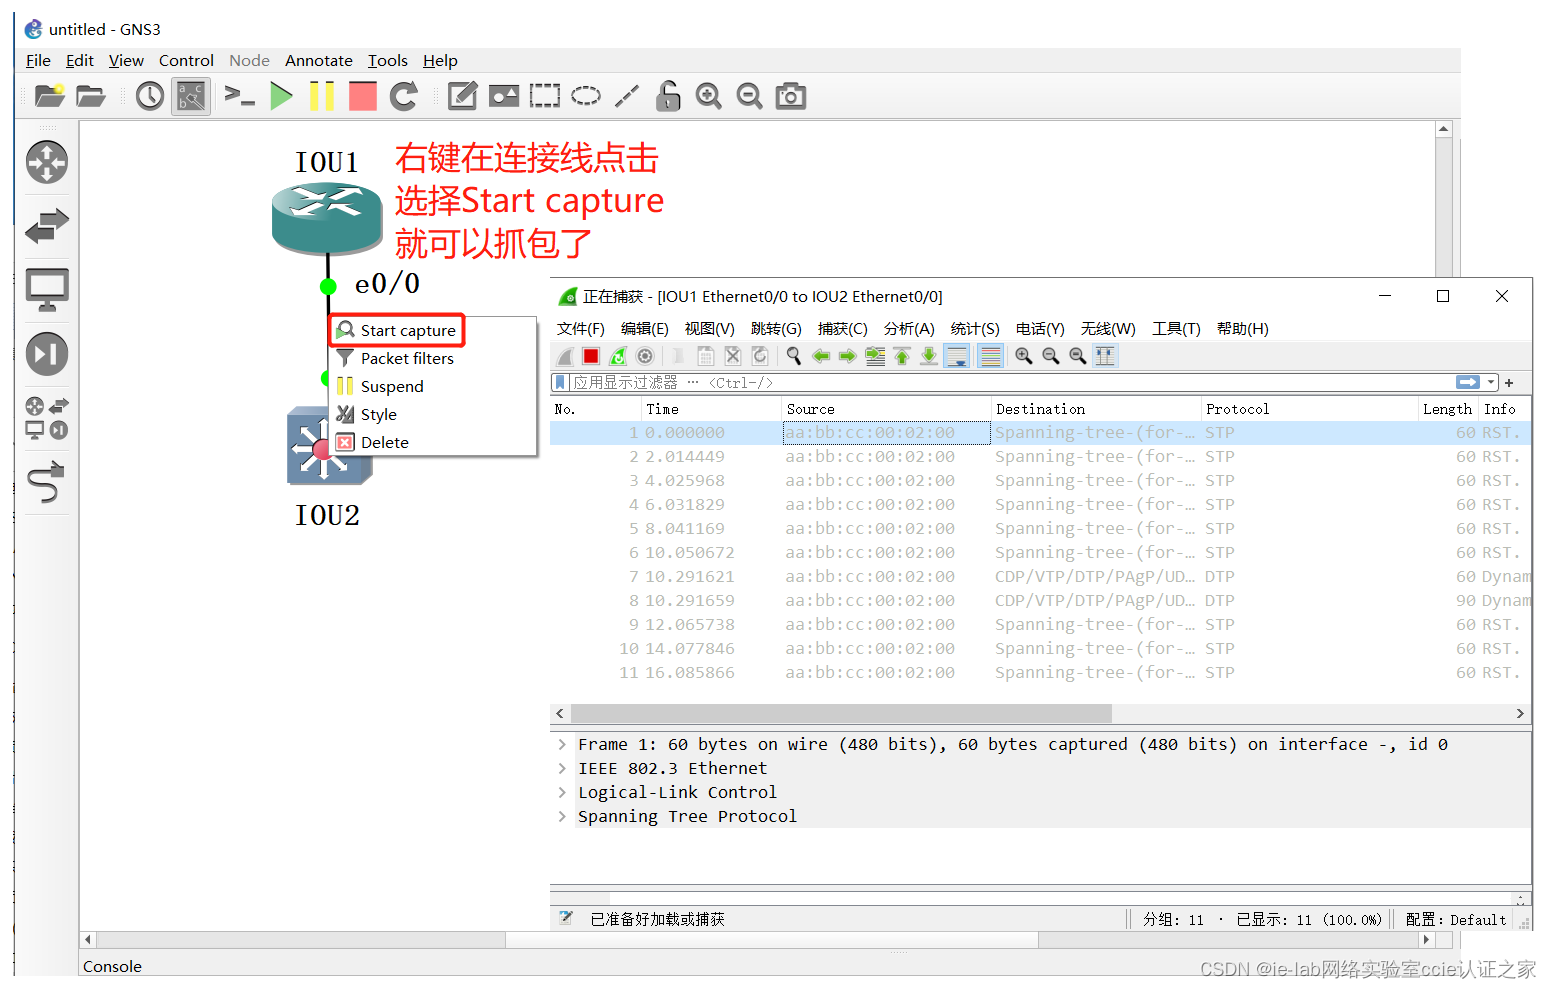
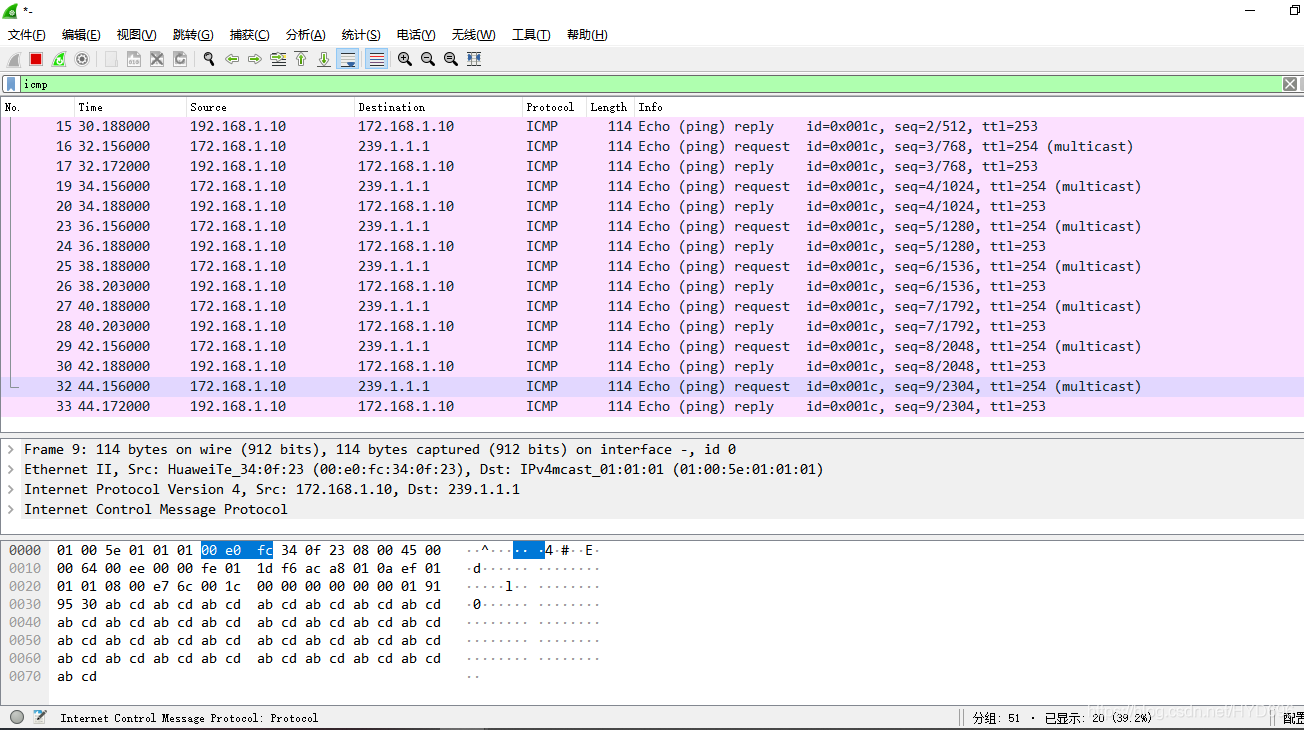
- 和wireshark配合进行抓包实验
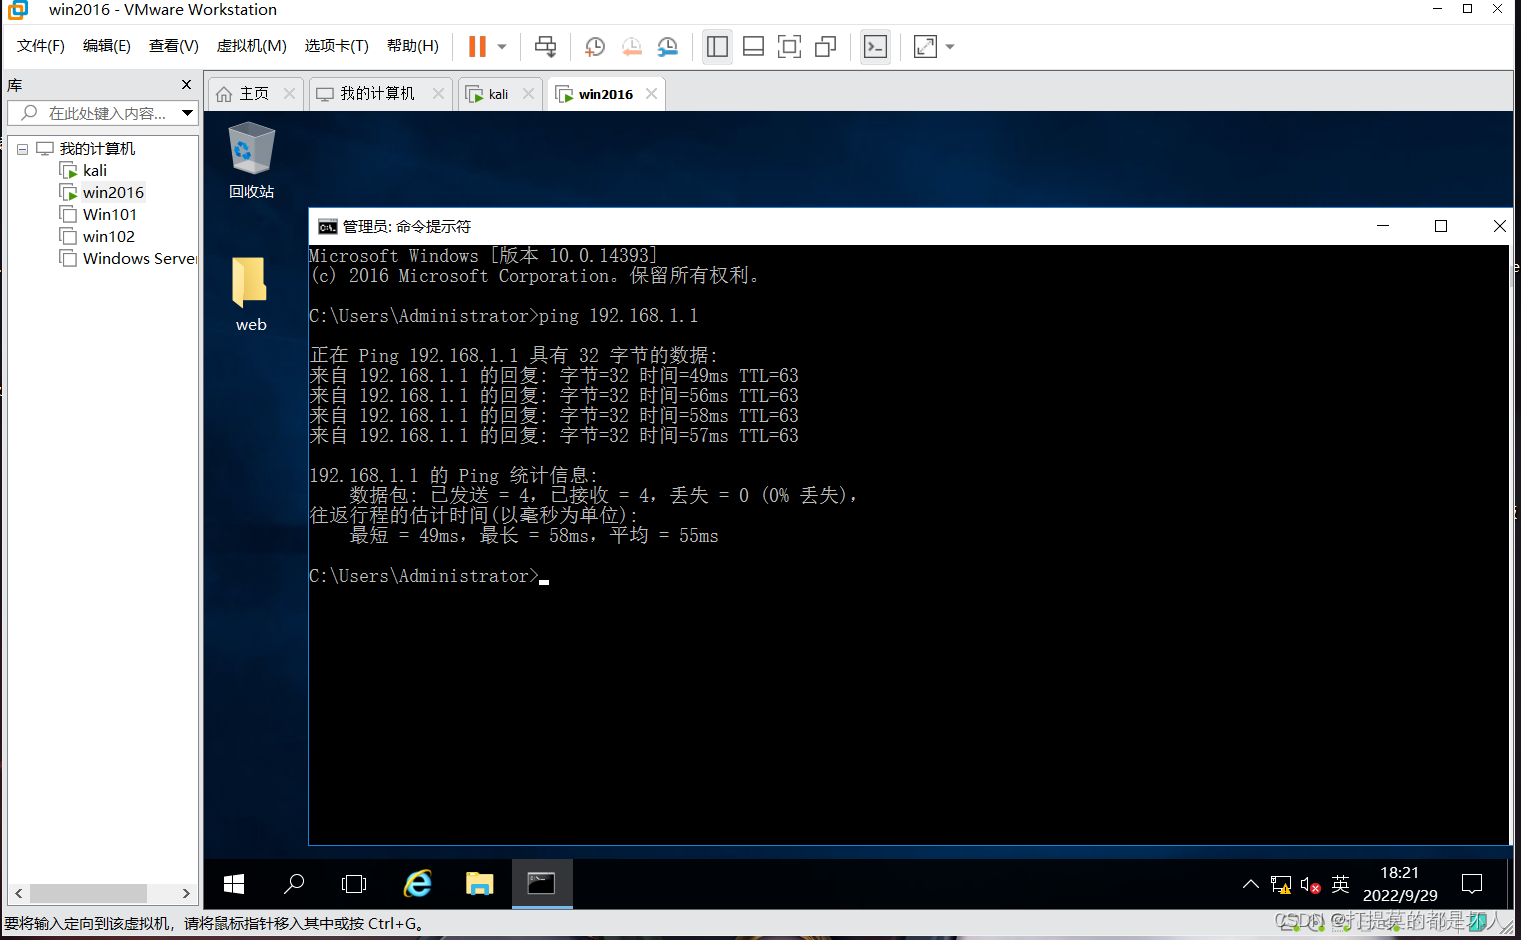
- 与虚拟机或本地机器桥接或将多台机器进行桥接,搭建大型实验环境
- 除了模拟IOS外,还支持模拟ASA,甚至模拟N9kv等
💡早期的模拟器
- Dynamips(小凡模拟器)
- packet tracer
- BOSON NETSIM
文章目录
- 安装GNS3
- 导入GNS3VM(虚拟镜像Server)
- # 添加gns3-vm服务(自动)
- # 添加gns3-vm服务(手工)
- 导入IOS/IOU
- # 添加路由器3660模板(手工)
- # 添加交换机3660模板(手工)
- # 添加路由器3745模板(自动)
- 基础命令行
- # 权限
- # 查看设备信息(show)
- # 配置模式(config)
- # do命令
- # 查看MAC地址表
- # 查看ARP缓存表
- # 查看route路由表
- # 案例
- 路由器配置
- 交换机的配置
- 连通测试
安装GNS3
💡相关软件的介绍
- 客户端 ── gns3-all-in-one https://gns3.com/software/download
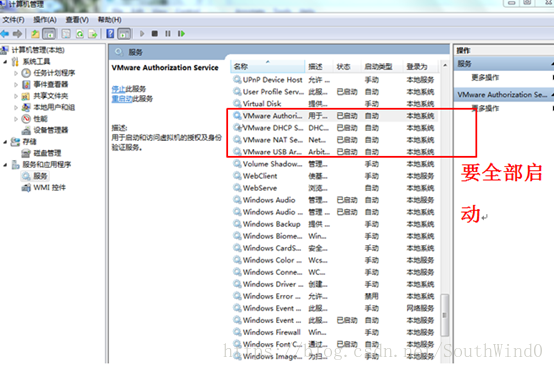
- 抓包(数据包捕获程序) ── npcap https://npcap.com/ 💡使用教程 todo
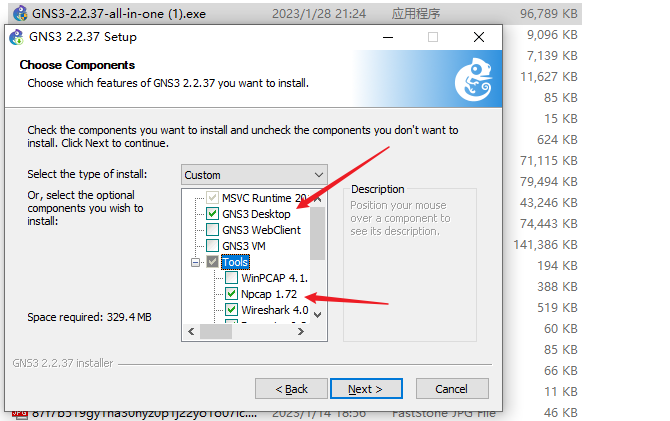
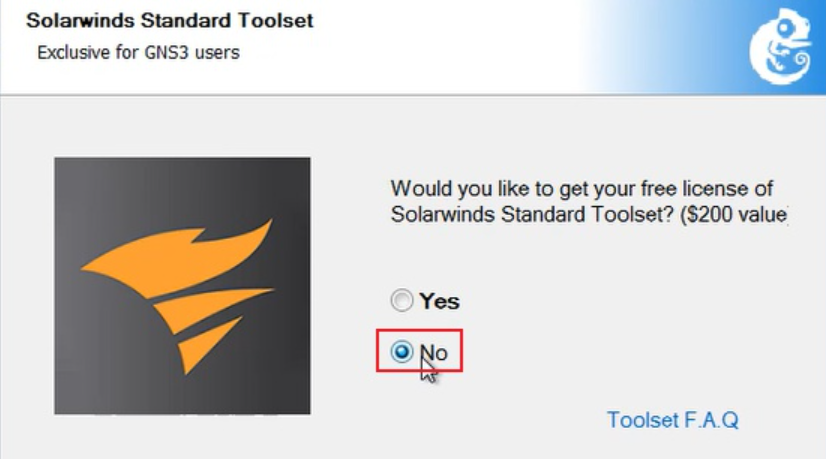
通过gns3-all-in-one安装“客户端”(desktop)、npcap。一路下一步既可。
💡这里选NO
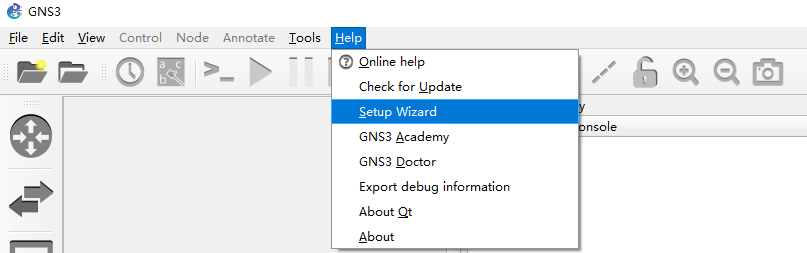
💡先不打开GNS3(有关于GNS3VM的初始化向导设置),先完成GNS3 VM设置
导入GNS3VM(虚拟镜像Server)
💡相关软件的介绍
- vm ── gns3-vm https://gns3.com/software/download-vm
- 虚拟机 ── vmware
GNS3 VM是一个专门用于网络虚拟化的操作系统的虚拟机镜像。
# 添加gns3-vm服务(自动)
- 安装vmware
- 将gns3-vm拖入vmware既可

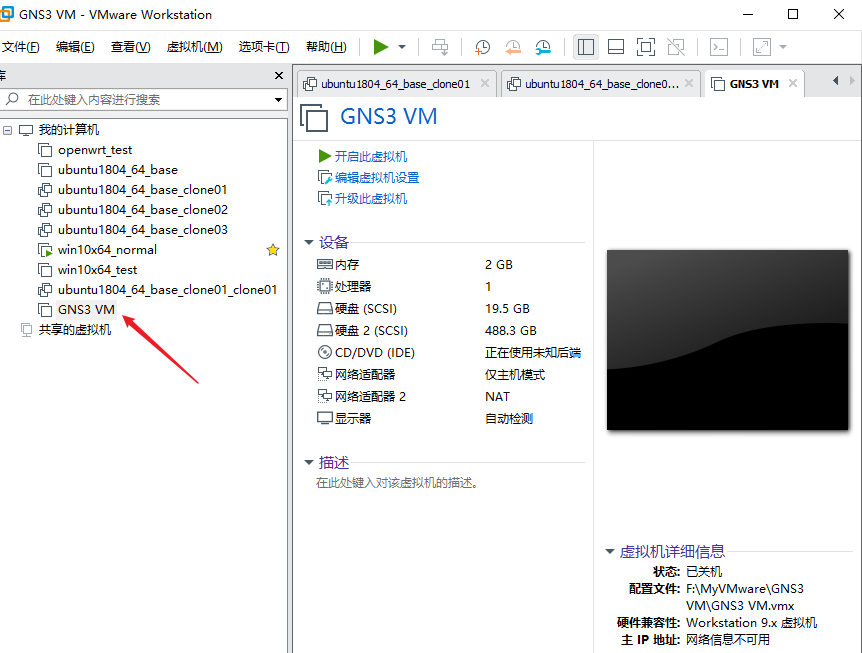
-
开机(默认nat)
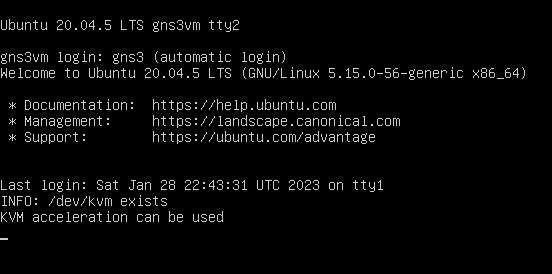
-
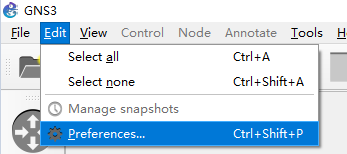
打开GNS3,进入“设置向导”
- 选择在虚拟机上运行
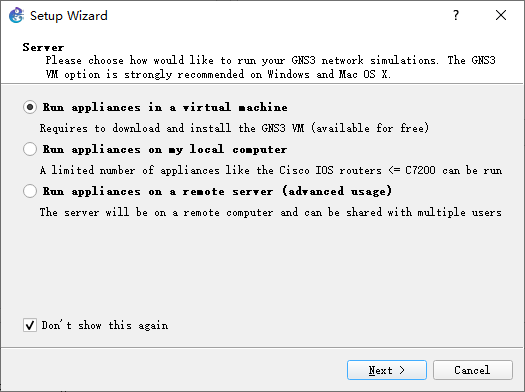
- (默认)本地服务配置

- ⚠️设置GNS3 VM。这里选中在VMware中设置号的GNS3 VM
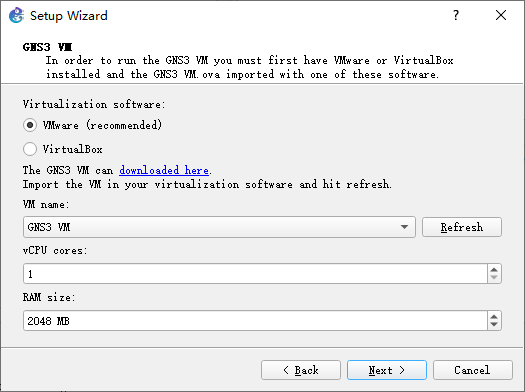
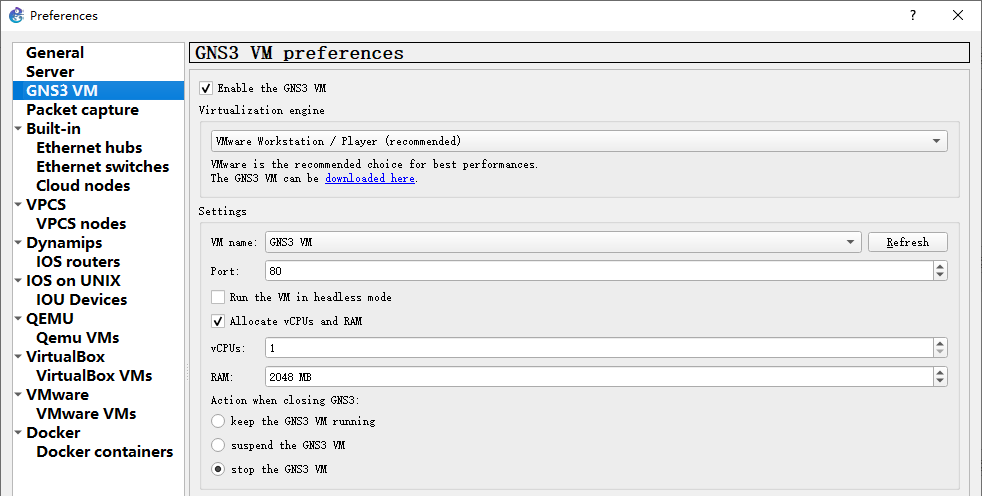
💡设置好后,可以在edit》preferences中查看
- 选择在虚拟机上运行
设置好后,GNS3 VM就会跟随GNS3启动、停止
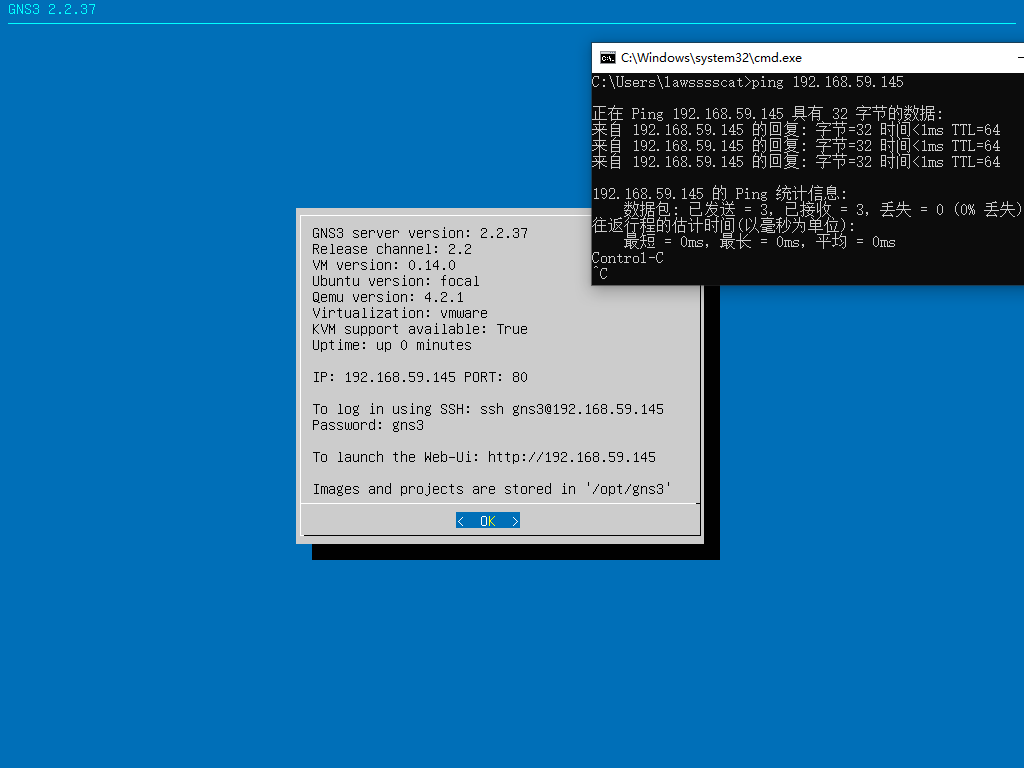
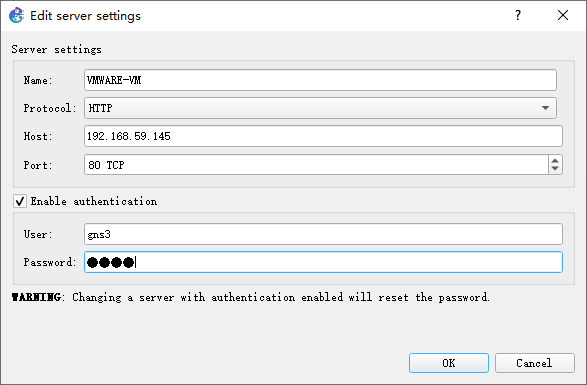
# 添加gns3-vm服务(手工)
也可以把vm当作server进行连接
- 在gun3 desktop中添加server
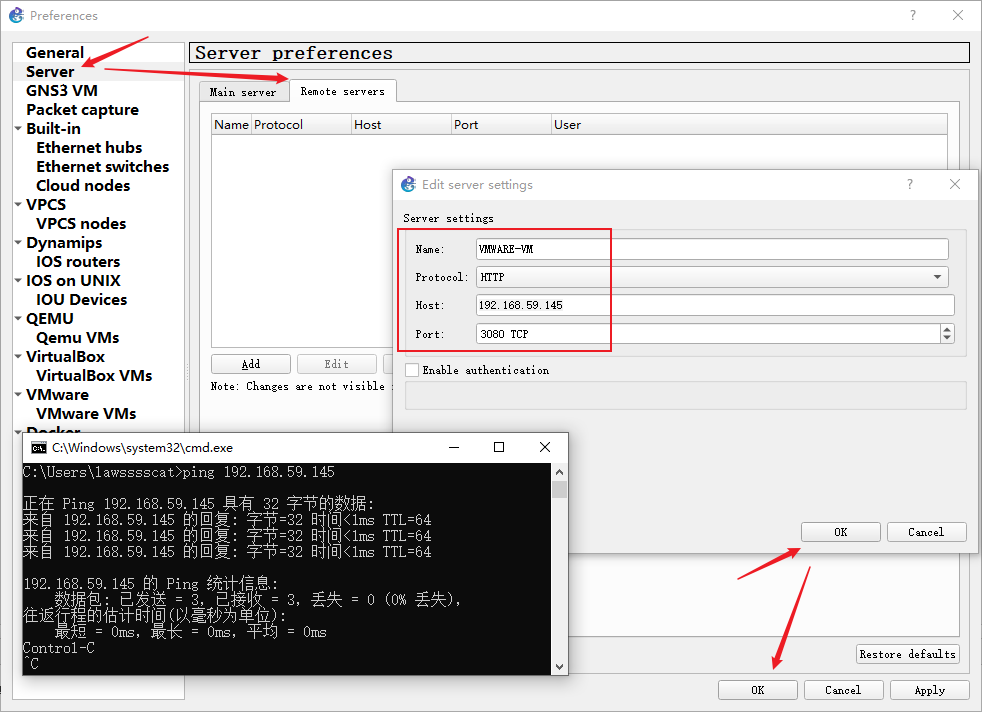
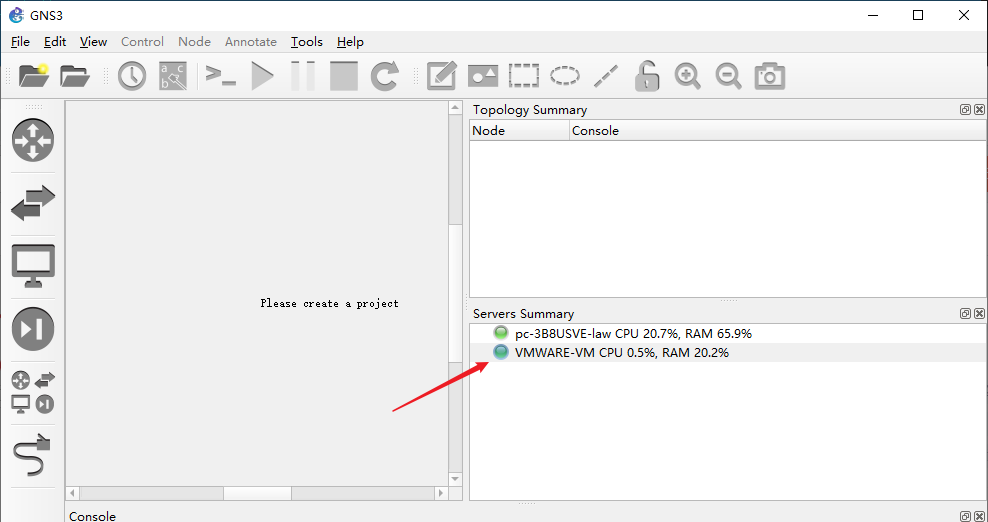
- 添加成功后可以在summary中看到
导入IOS/IOU
💡 IOS和IOU的区别
- IOS ── Internetwork Operating System(互联网操作系统)是思科公司为其网络设备开发的操作维护系统。
用户通过命令运行人机界面对网络设备进行功能设置,提供的功能大致为以下几点:
- 网络设备及连接端口的功能首选项设置
- 运行网络协议与网络功能设备之间数据传输安全管理设置
- IOU ── IOS on Unix,思科官方基于 Linux(debian) 的 IOS 操作系统,可以模拟真实交换机和路由器操作系统,一般学习交换技术或者 CCIE LAB 会用到。
💡IOS下载
IOS下载备份仓库 https://ccie.lol/blog/2016/07/03/cisco-ios-image-download/
【官方】3660版本对比 - https://www.cisco.com/c/en/us/td/docs/ios/12_2/12_2x/12_2xa/release/notes/rn3600xa.html?dtid=osscdc000283
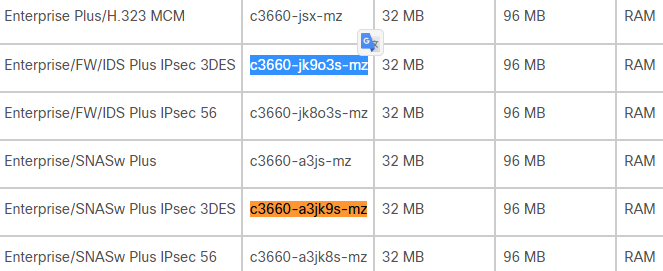
建议下载老版本,如:cisco 3660 IOS jo9o3s-mz (体积小、效率高、运行速度快、能满足一般实验需求)
Feature 解释 Enterprise 企业所需基础功能 FW 防火墙 IDS Plus IDS增强型 IPSec 3DES VPN 💡但是我看论坛上分享的都是c3660-a3jk9s-mz,那就用这个呗
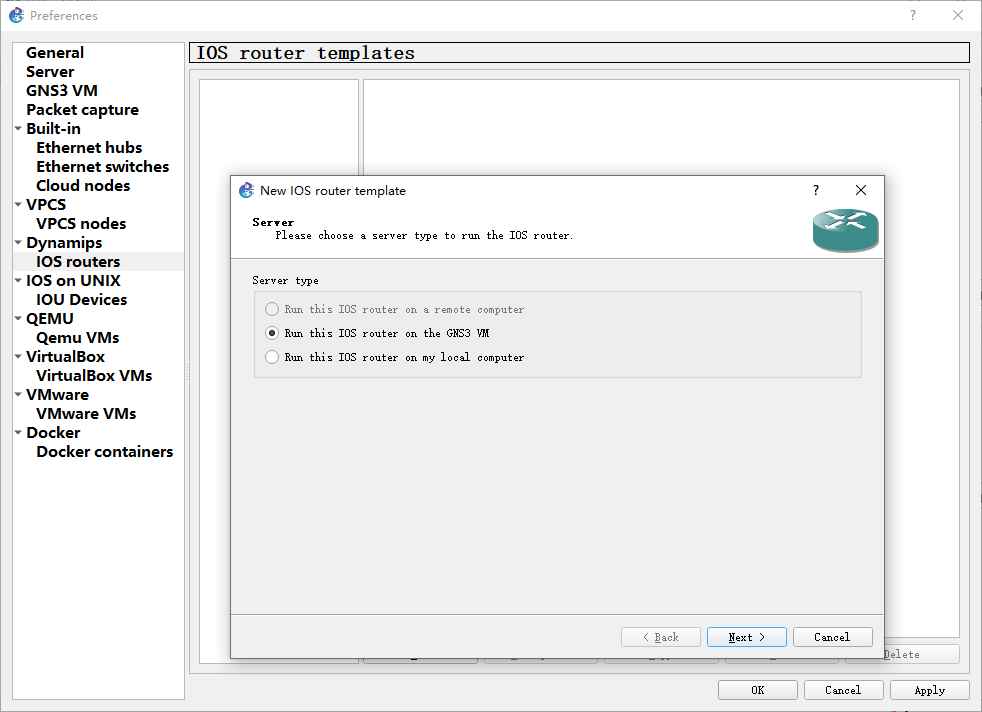
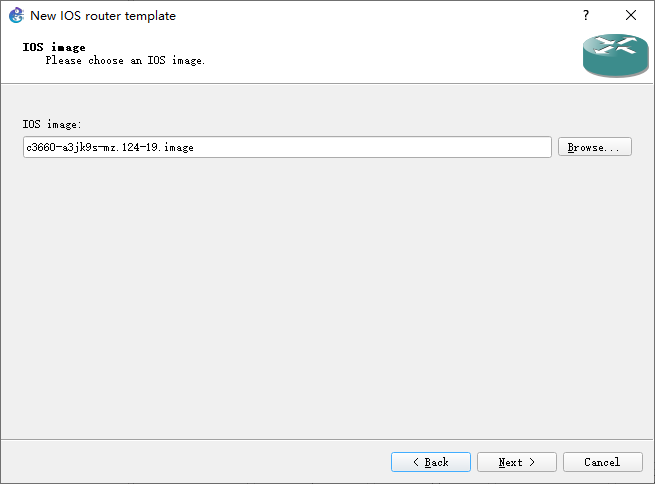
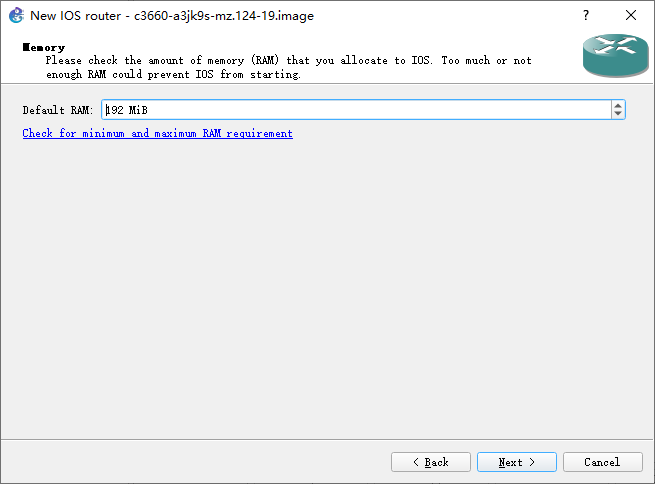
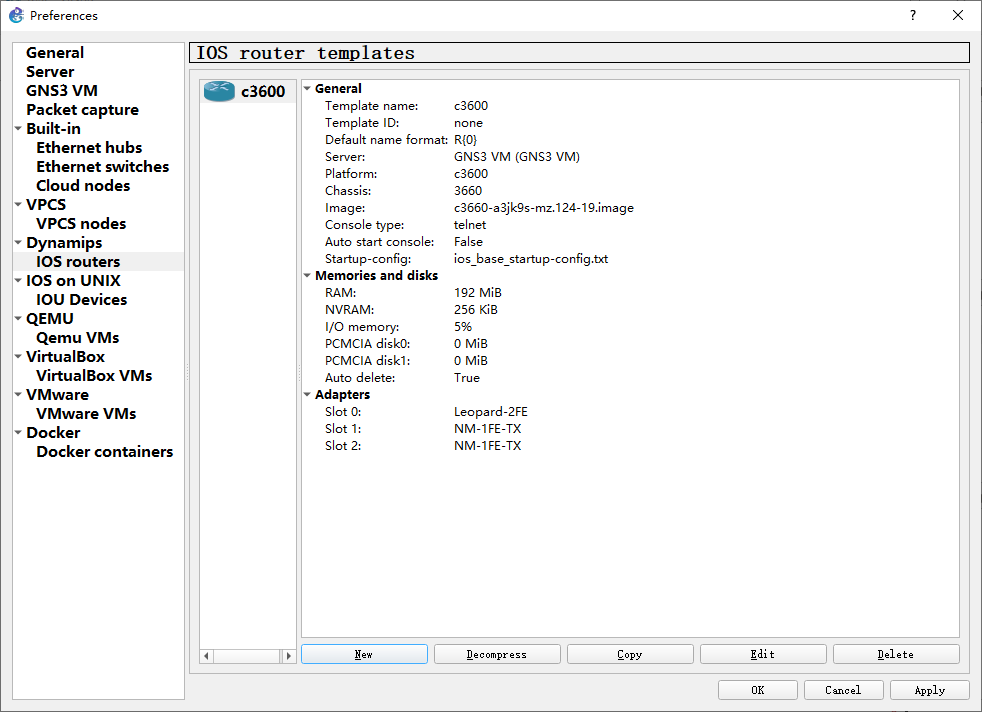
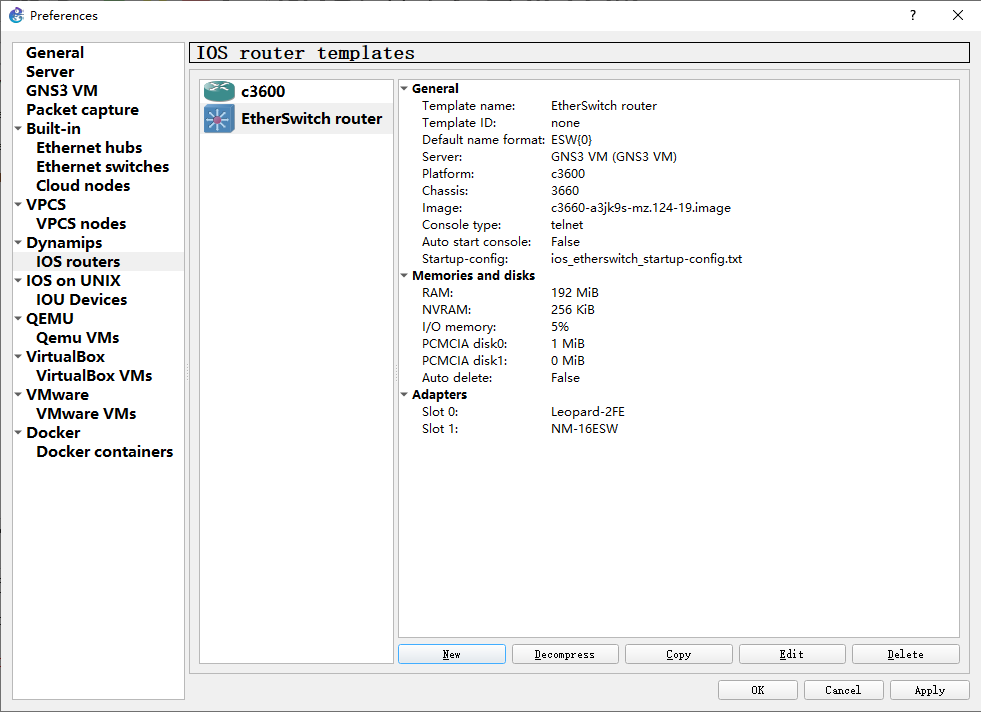
# 添加路由器3660模板(手工)
手工导入 Preference》Dynamips》IOS routers》Run this IOS router on the GNS3 VM
(💡网络设备运行在GNS3VM上会效率更高、更加稳定。这也是为啥要安装GNS3VM的原因)
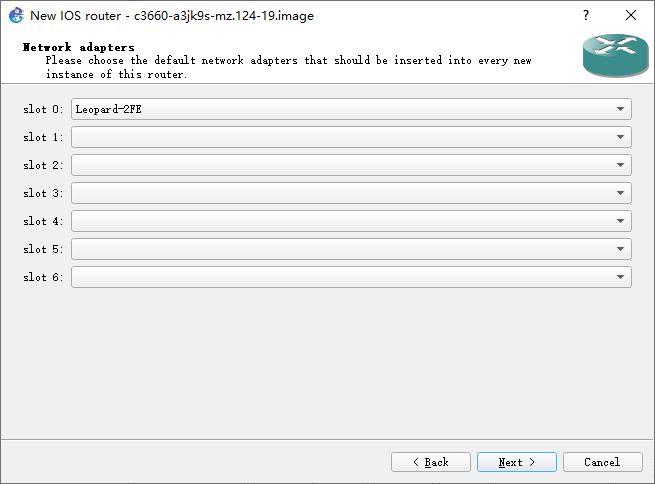
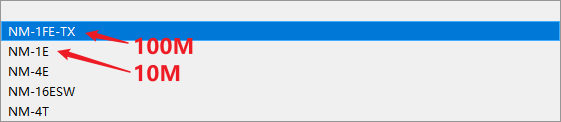
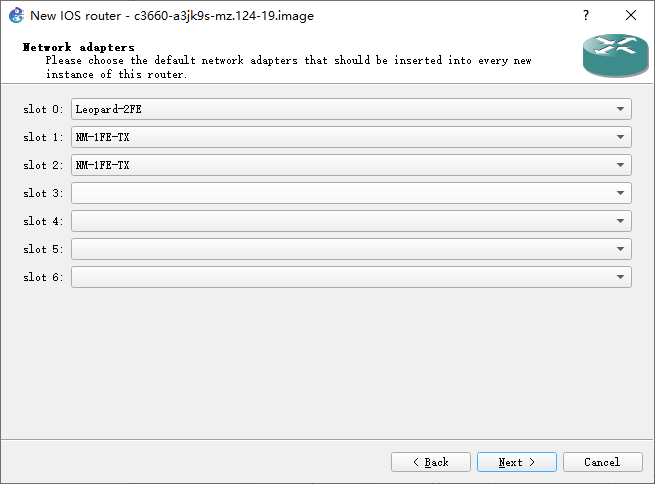
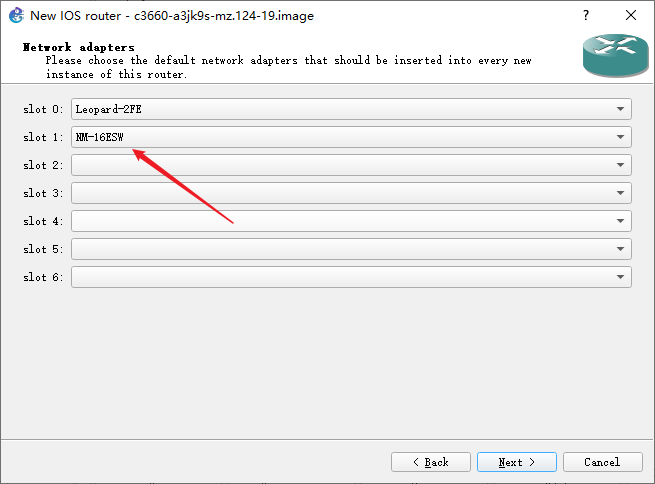
选择插槽插入的模块。通常实验中路由器至少保持4个物理接口
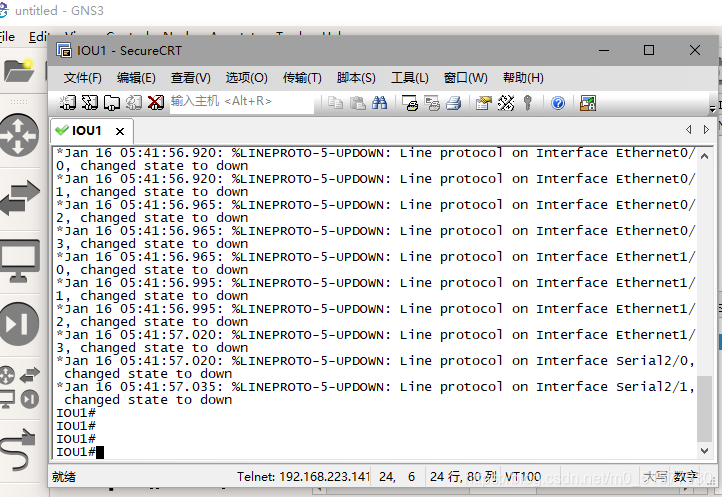
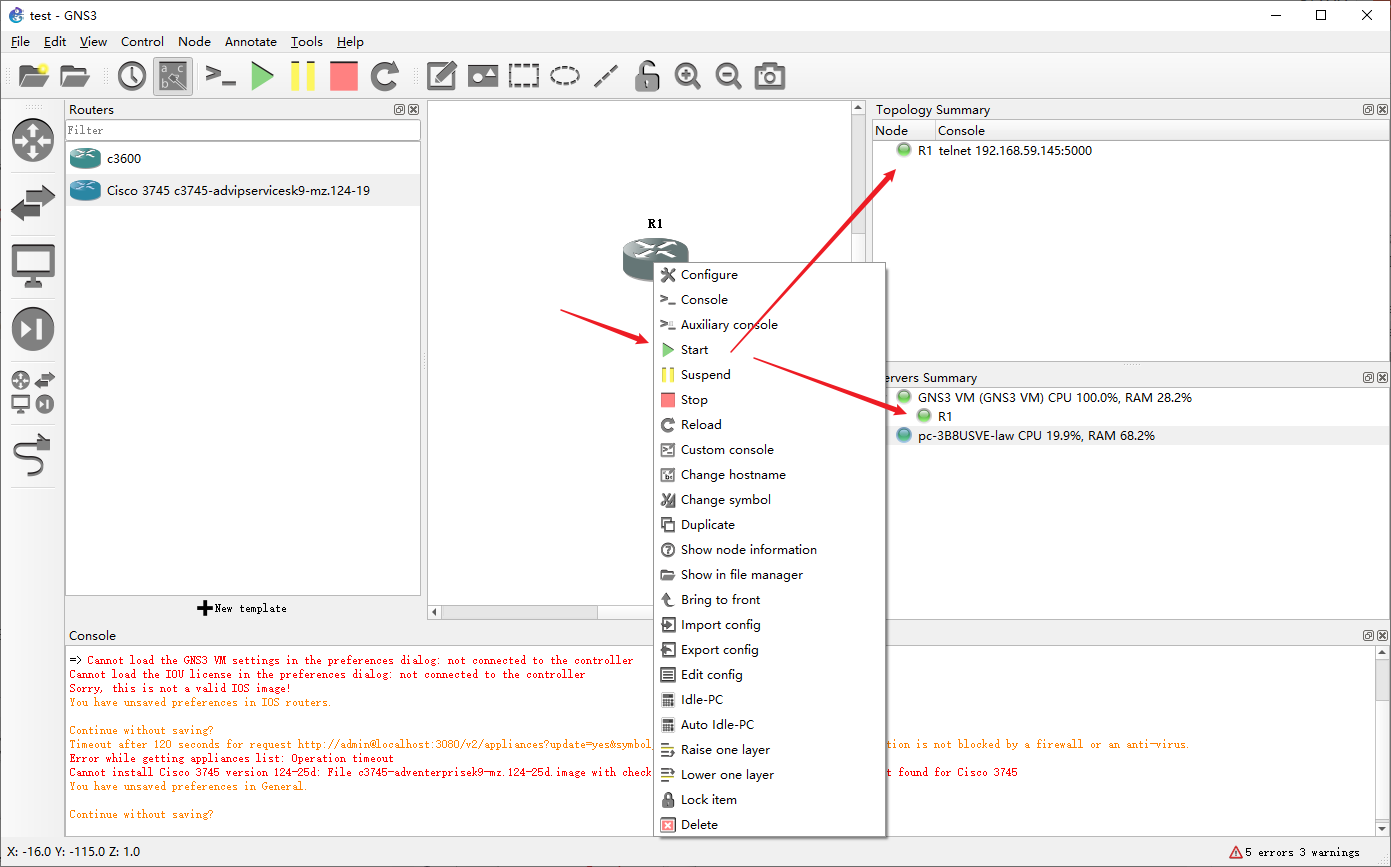
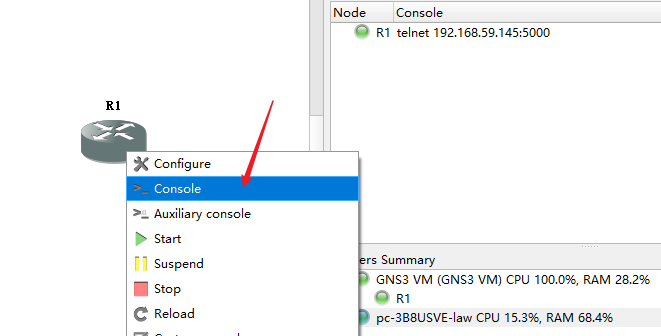
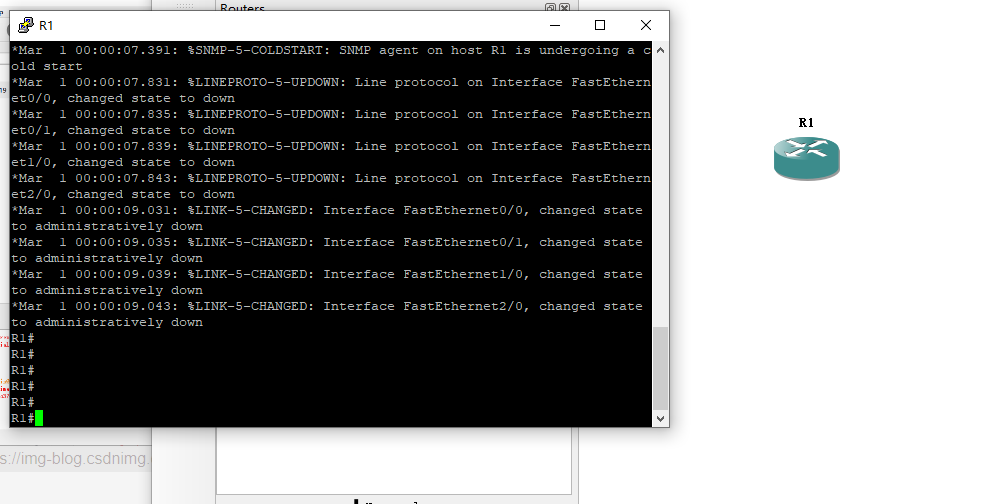
将路由器启动后,就可以进入路由器后台
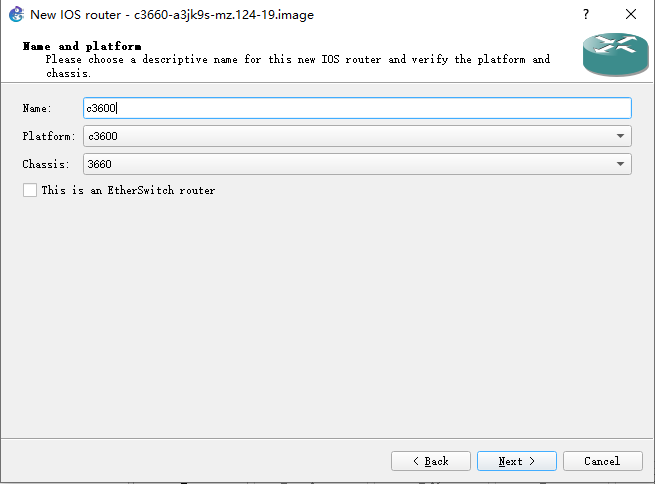
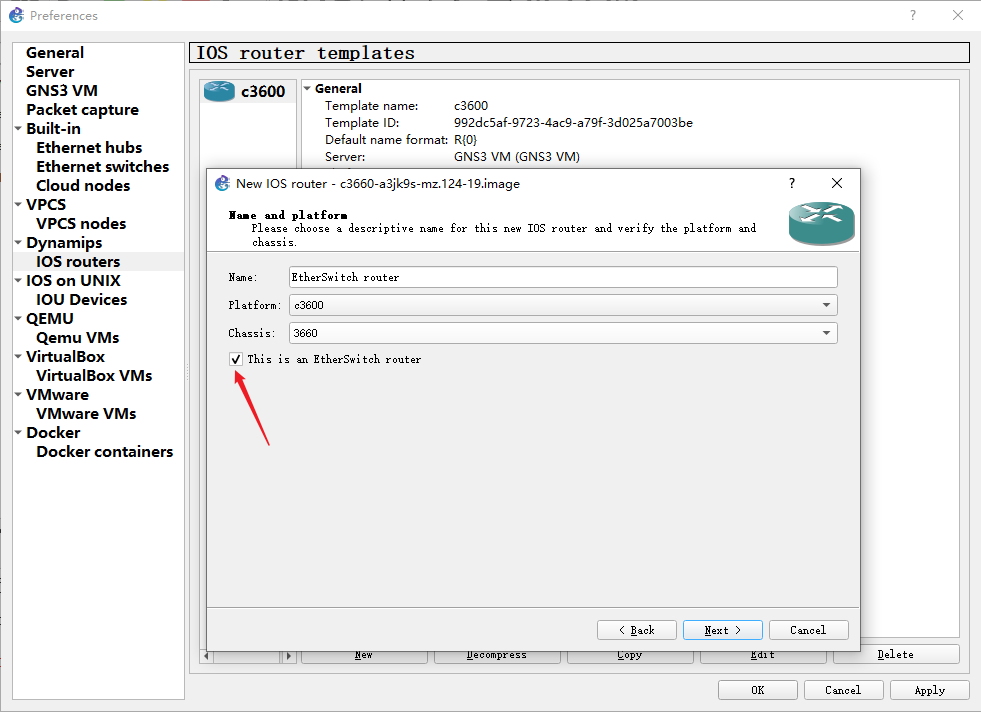
# 添加交换机3660模板(手工)
用默认的交换机模板有各种问题,因此我们用路由器模拟交换机
步骤和添加交换机模板一样。不同的是需要在设置平台的时候勾选“This is an EtherSwitch router”,把路由器当作交换机使用
在插槽中可以看到,已经自动添加了16口以太网交换机模块
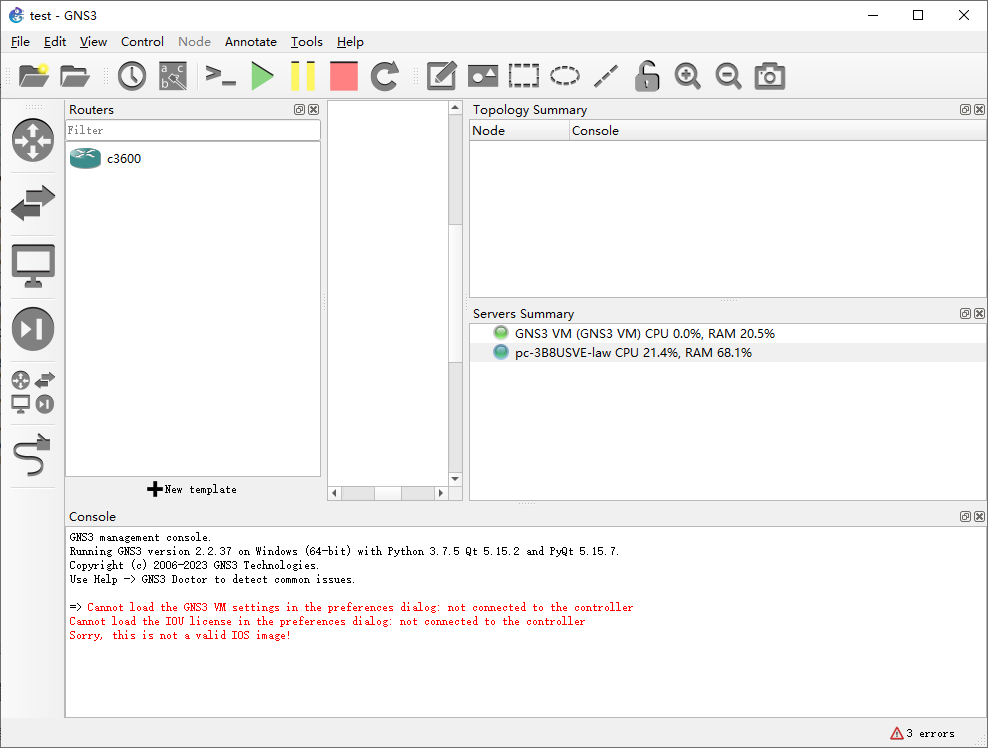
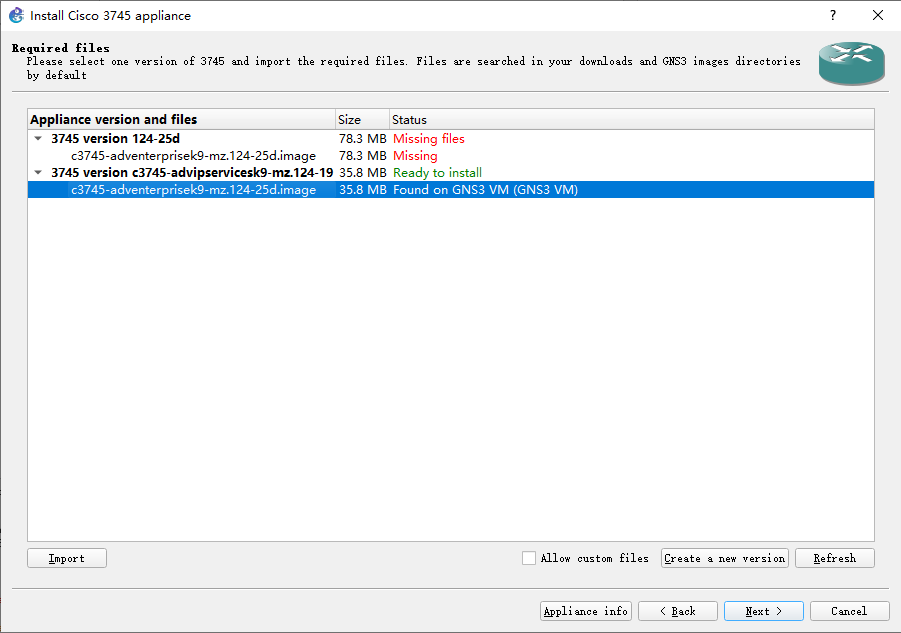
# 添加路由器3745模板(自动)
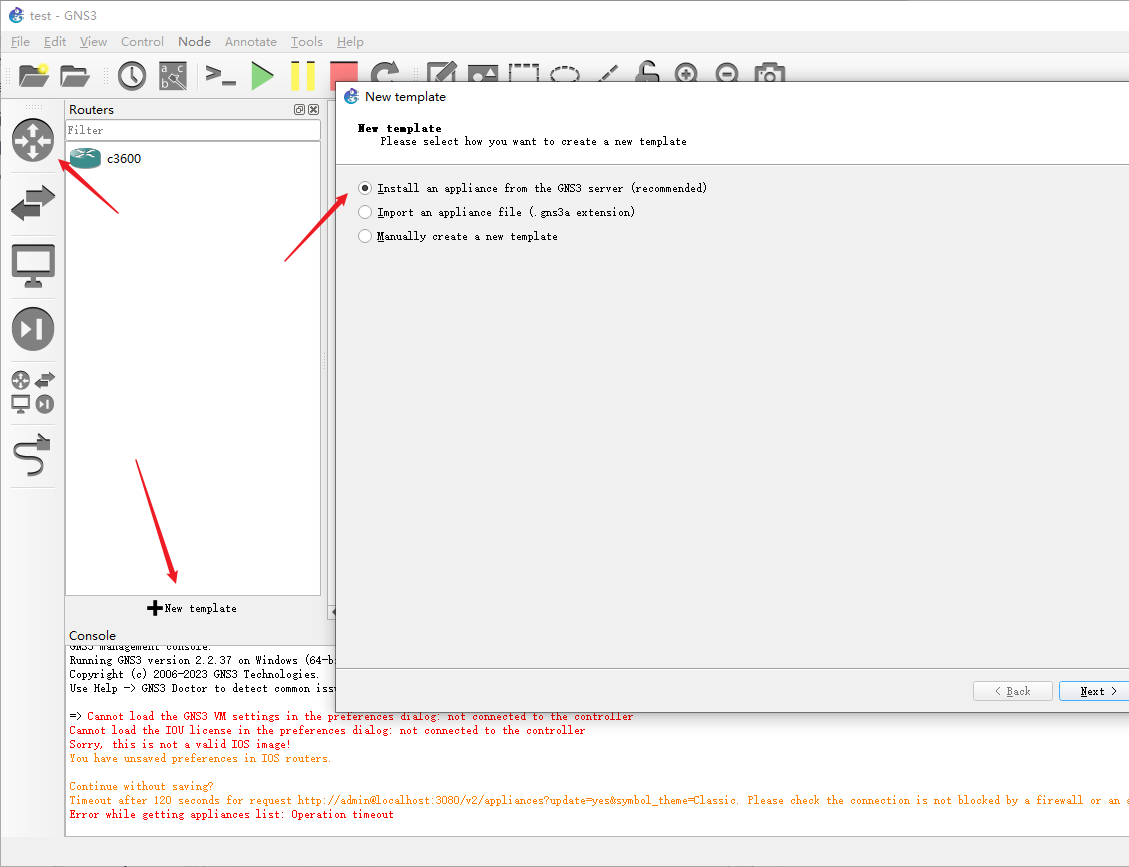
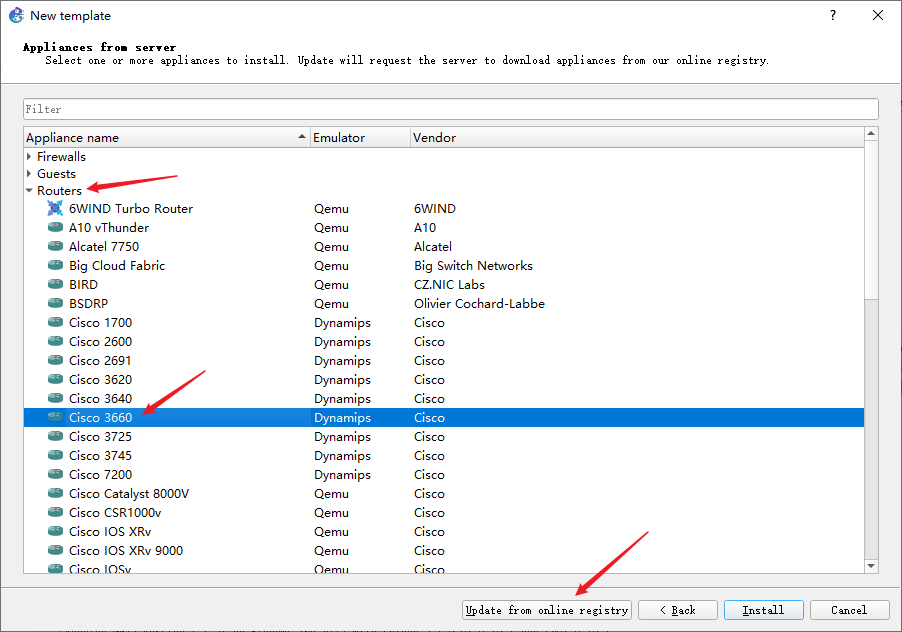

如果提示没有镜像,可以到这里下载https://ccie.lol/blog/2016/07/03/cisco-ios-image-download/
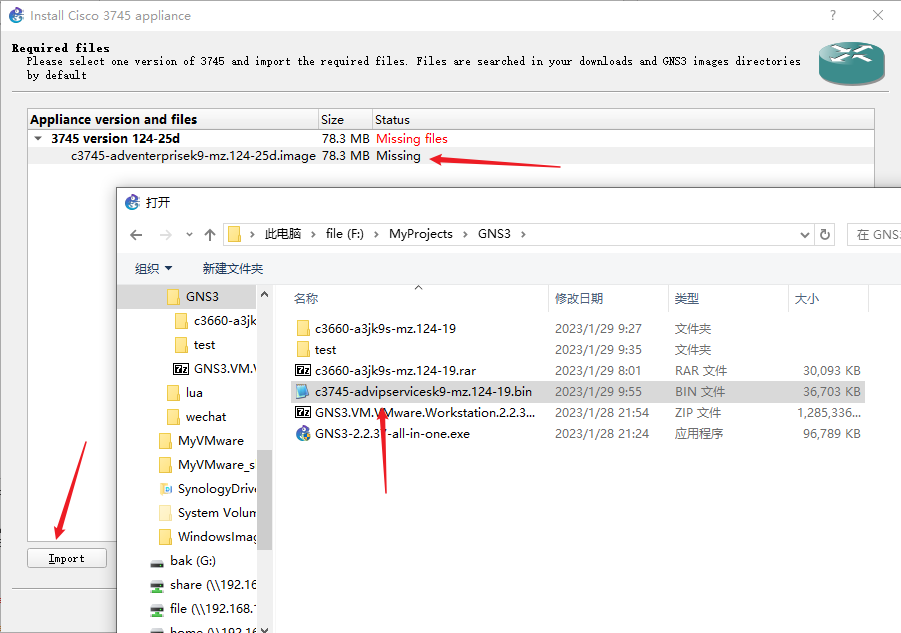
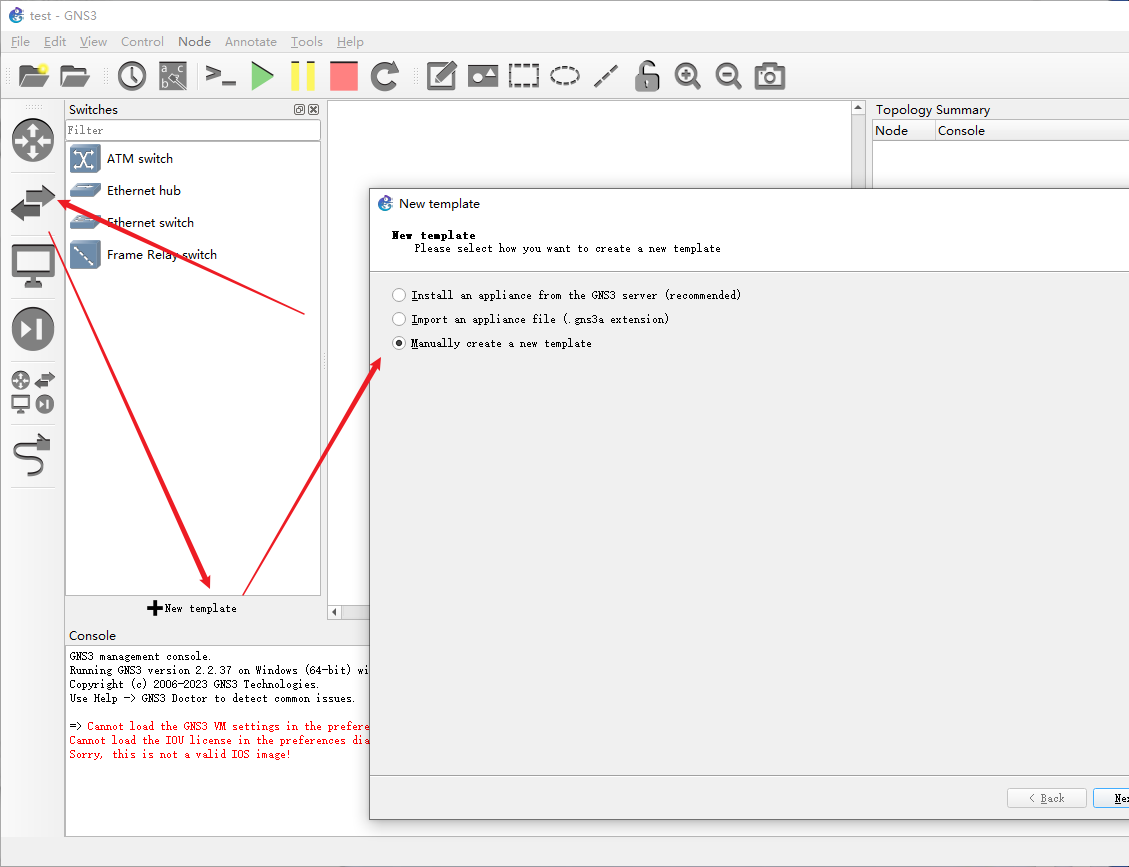
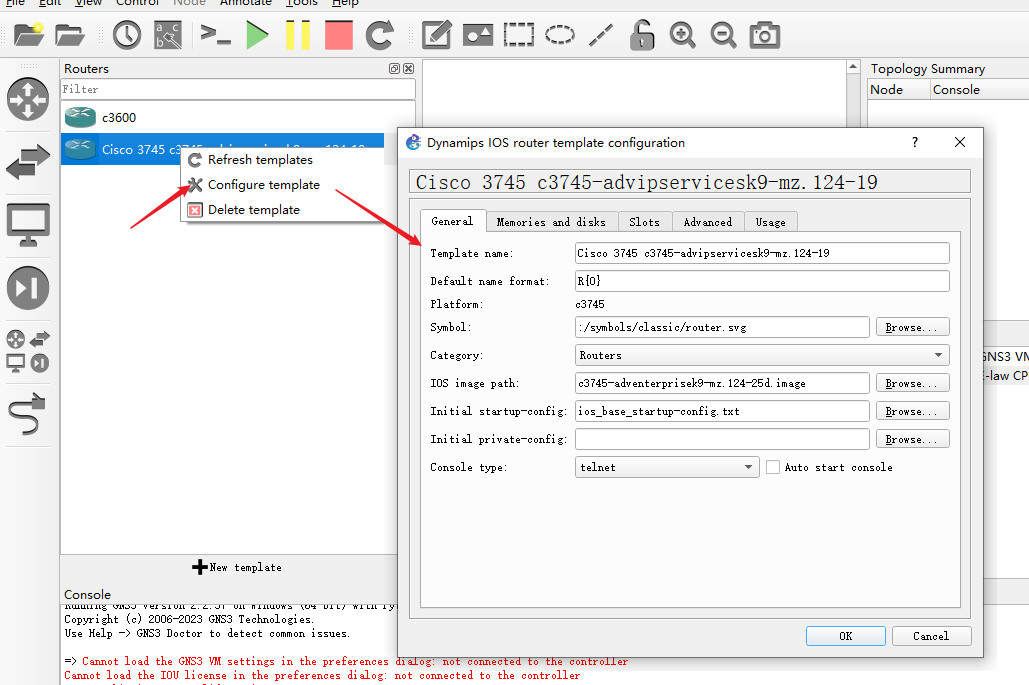
(如果没有默认模板镜像文件)或者可以导入一个新模板
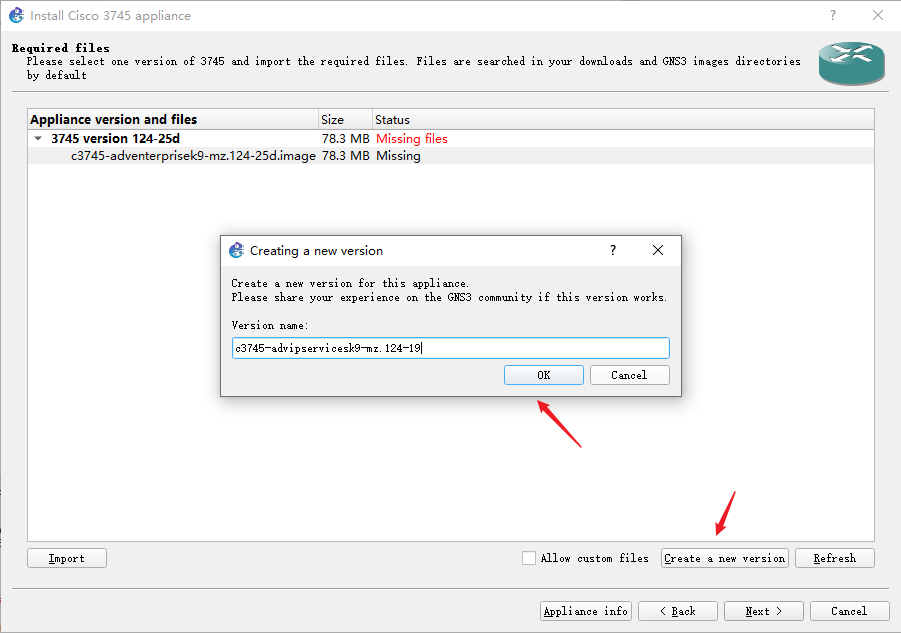
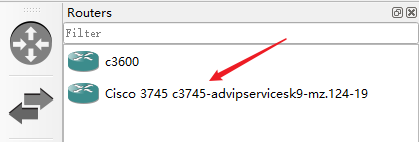
名字可以右键在“Configure template”中修改
基础命令行
# 权限
# ── root权限
> ── 普通用户,通过“enable”命令提升权限
💡在控制台中,任何命令都可以使用前缀简写,e.g. interface可简写为int(前提是前缀唯一)
# 查看设备信息(show)
show xx xxe.g. R1#show ip interface
FastEthernet0/0 is administratively down, line protocol is downInternet protocol processing disabled
FastEthernet0/1 is administratively down, line protocol is downInternet protocol processing disabled
FastEthernet1/0 is administratively down, line protocol is downInternet protocol processing disabled
FastEthernet2/0 is administratively down, line protocol is downInternet protocol processing disabledR1#show ip interface brief
Interface                  IP-Address      OK? Method Status                Protocol
FastEthernet0/0            unassigned      YES unset  administratively down down
FastEthernet0/1            unassigned      YES unset  administratively down down
FastEthernet1/0            unassigned      YES unset  administratively down down
FastEthernet2/0            unassigned      YES unset  administratively down down
# 配置模式(config)
# 进入配置模式
configure terminal
# 进入配置模式(简写)
conf t
# 退出
exit
end# 进入接口(interface)配置
# R1 ── 设备名
# config ── 配置模式
# # ── 标识root权限,这个符号后的才是命令
# interface ──
R1(config)#interface fastEthernet 0/0
# do命令
# 使命令在特权模式下运行
do <命令>e.g.# 在config模式下,使用#特权模式的命令
R1(config)#show ip int^
% Invalid input detected at '^' marker.R1(config)#do show ip int
FastEthernet0/0 is administratively down, line protocol is downInternet protocol processing disabled
FastEthernet0/1 is administratively down, line protocol is downInternet protocol processing disabled
FastEthernet1/0 is administratively down, line protocol is downInternet protocol processing disabled
FastEthernet2/0 is administratively down, line protocol is downInternet protocol processing disabled
# 查看MAC地址表
💡 Linux 路由表(RIB表、FIB表)、ARP表、MAC表整理 - https://zhuanlan.zhihu.com/p/415032187
查看mac表 (数据链路层、单位=数据帧)
💡mac表在交换机上
show mace.g.# 💡cisco交换机
ESW1#show mac
Destination Address  Address Type  VLAN  Destination Port
-------------------  ------------  ----  --------------------
cc02.7fd7.0000          Self          1     Vlan1
cc01.754c.0000          Dynamic      12     FastEthernet1/10
cc01.754c.0001          Dynamic      13     FastEthernet1/11
cc05.803b.0000          Dynamic      12     FastEthernet1/12
cc04.061f.f100          Dynamic       1     FastEthernet1/2
cc04.061f.f101          Dynamic       1     FastEthernet1/3
cc04.061f.f102          Dynamic       1     FastEthernet1/0
cc04.061f.f103          Dynamic       1     FastEthernet1/0解释
vlan ── 区分不同主机到不同群组
address ── mac地址
dynamic ── 非静态配置,是数据帧进来时动态配置的
port ── 数据帧进来时的端口
# 查看ARP缓存表
💡arp cache表在路由器、终端(pc)上
# 💡cisco路由器
show arpe.g.R1#show arp
Protocol  Address          Age (min)  Hardware Addr   Type   Interface
Internet  13.13.13.1              -   cc01.754c.0001  ARPA   FastEthernet0/1
Internet  12.12.12.1              -   cc01.754c.0000  ARPA   FastEthernet0/0
Internet  13.13.13.3            167   cc06.805b.0000  ARPA   FastEthernet0/1
Internet  12.12.12.2            168   cc05.803b.0000  ARPA   FastEthernet0/0
R1## 💡windows
C:\Users\lawsssscat>arp -a接口: 169.254.82.62 --- 0x5Internet 地址         物理地址              类型169.254.255.255       ff-ff-ff-ff-ff-ff     静态224.0.0.22            01-00-5e-00-00-16     静态224.0.0.251           01-00-5e-00-00-fb     静态224.0.0.252           01-00-5e-00-00-fc     静态239.255.255.250       01-00-5e-7f-ff-fa     静态255.255.255.255       ff-ff-ff-ff-ff-ff     静态接口: 192.168.206.1 --- 0xcInternet 地址         物理地址              类型192.168.206.254       00-50-56-e4-a8-27     动态192.168.206.255       ff-ff-ff-ff-ff-ff     静态224.0.0.22            01-00-5e-00-00-16     静态224.0.0.251           01-00-5e-00-00-fb     静态224.0.0.252           01-00-5e-00-00-fc     静态239.255.255.250       01-00-5e-7f-ff-fa     静态255.255.255.255       ff-ff-ff-ff-ff-ff     静态接口: 192.168.1.130 --- 0x16Internet 地址         物理地址              类型192.168.1.21          01-e0-61-9b-01-92     动态192.168.1.24          88-c3-22-45-31-3c     动态192.168.1.61          90-09-44-64-81-63     动态192.168.1.110         e8-a0-cd-3c-98-68     动态192.168.1.186         04-ed-33-e8-b4-67     动态192.168.1.255         ff-ff-ff-ff-ff-ff     静态224.0.0.22            01-00-5e-00-00-16     静态224.0.0.251           01-00-5e-00-00-fb     静态224.0.0.252           01-00-5e-00-00-fc     静态239.255.255.250       01-00-5e-7f-ff-fa     静态255.255.255.255       ff-ff-ff-ff-ff-ff     静态# 💡ubuntu
$ arp
Address                  HWtype  HWaddress           Flags Mask            Iface
192.168.1.130            ether   04:ed:33:e8:b4:67   C                     ens33
192.168.1.2              ether   88:c3:97:45:59:3c   C                     ens33
smartdns                 ether   00:e0:66:9b:34:92   C                     ens33
$ arp -a
? (192.168.1.130) at 04:ed:33:e8:b4:67 [ether] on ens33
? (192.168.1.2) at 88:c3:97:45:59:3c [ether] on ens33
smartdns (192.168.1.1) at 00:e0:66:9b:34:92 [ether] on ens33
# 查看route路由表
# 💡cisco路由器
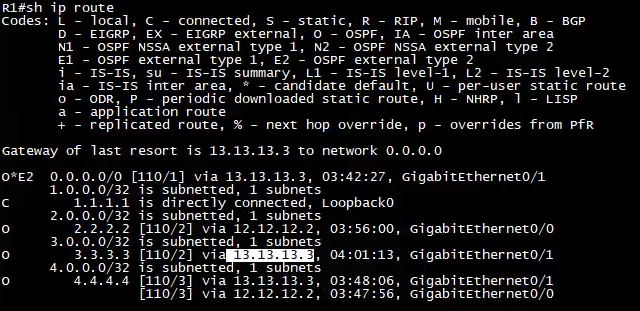
R1#show ip route
Codes: C - connected, S - static, R - RIP, M - mobile, B - BGPD - EIGRP, EX - EIGRP external, O - OSPF, IA - OSPF inter areaN1 - OSPF NSSA external type 1, N2 - OSPF NSSA external type 2E1 - OSPF external type 1, E2 - OSPF external type 2i - IS-IS, su - IS-IS summary, L1 - IS-IS level-1, L2 - IS-IS level-2ia - IS-IS inter area, * - candidate default, U - per-user static routeo - ODR, P - periodic downloaded static routeGateway of last resort is not set1.0.0.0/32 is subnetted, 1 subnets
C 1.1.1.1 is directly connected, Loopback012.0.0.0/24 is subnetted, 1 subnets
C 12.12.12.0 is directly connected, FastEthernet0/013.0.0.0/24 is subnetted, 1 subnets
C 13.13.13.0 is directly connected, FastEthernet0/1# openwrt路由器
$ route
Kernel IP routing table
Destination Gateway Genmask Flags Metric Ref Use Iface
default 172.10.3.4 0.0.0.0 UG 0 0 0 pppoe-wan
172.10.3.4 * 255.255.255.255 UH 0 0 0 pppoe-wan
192.168.1.0 * 255.255.255.0 U 0 0 0 br-lan# 案例
R1、R2、R3分别以三种形式连接
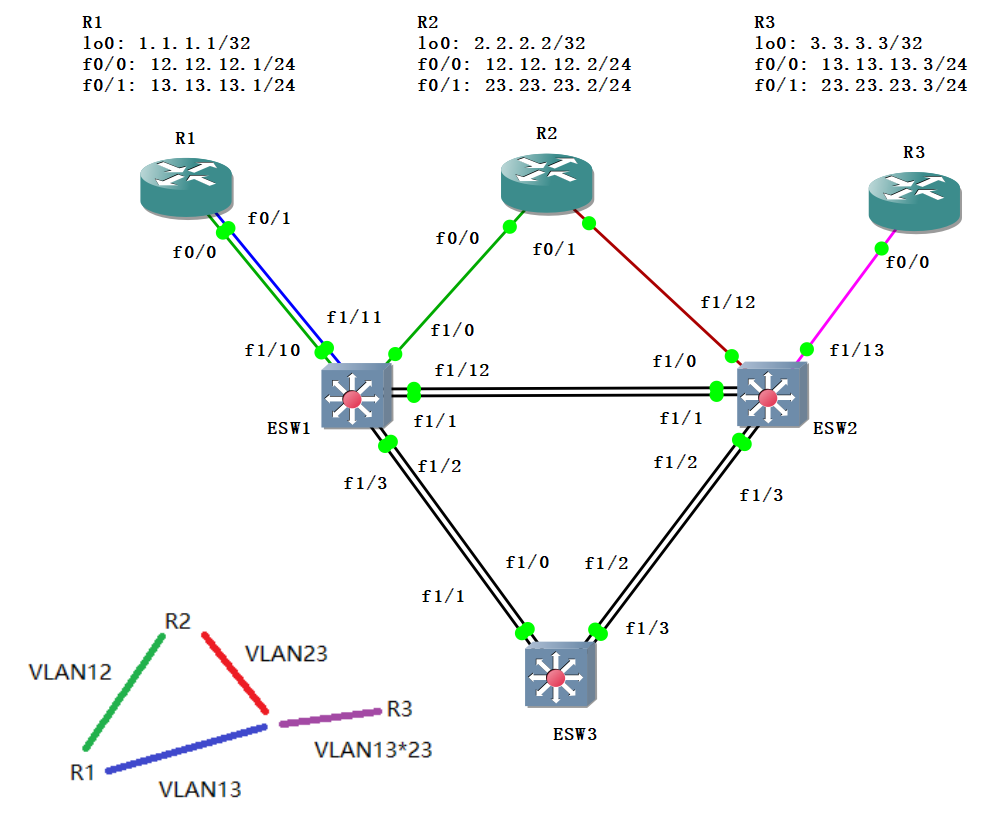
💡做链路捆绑,所以交换机上一个方向接两跳线
💡交换机用路由器模拟的,0号模块是路由模块,1号没模块才是交换机模块,所有交换机从1号模块开始连接
路由器配置
配置R1
# ============================ 初始状态R1#show ip interface brief
Interface                  IP-Address      OK? Method Status                Protocol
FastEthernet0/0            unassigned      YES unset  administratively down down
FastEthernet0/1            unassigned      YES unset  administratively down down
FastEthernet1/0            unassigned      YES unset  administratively down down
FastEthernet2/0            unassigned      YES unset  administratively down down# ============================ 配置回环地址 lo0: 1.1.1.1/32R1#configure
Configuring from terminal, memory, or network [terminal]?
Enter configuration commands, one per line.  End with CNTL/Z.
R1(config)#interface loopback 0
R1(config-if)#
*Mar  1 00:07:02.683: %LINEPROTO-5-UPDOWN: Line protocol on Interface Loopback0, changed state to up
R1(config-if)#do ip interface brief
ip interface brief^
% Invalid input detected at '^' marker.R1(config-if)#do show  ip interface brief
Interface                  IP-Address      OK? Method Status                Protocol
FastEthernet0/0            unassigned      YES unset  administratively down down
FastEthernet0/1            unassigned      YES unset  administratively down down
FastEthernet1/0            unassigned      YES unset  administratively down down
FastEthernet2/0            unassigned      YES unset  administratively down down
Loopback0                  unassigned      YES unset  up                    up
R1(config-if)#ip address 1.1.1.1 255.255.255.255
R1(config-if)#exit
R1(config)#do show ip int br
Interface                  IP-Address      OK? Method Status                Protocol
FastEthernet0/0            unassigned      YES unset  administratively down down
FastEthernet0/1            unassigned      YES unset  administratively down down
FastEthernet1/0            unassigned      YES unset  administratively down down
FastEthernet2/0            unassigned      YES unset  administratively down down
Loopback0                  1.1.1.1         YES manual up                    up
R1(config)#do ping ip 1.1.1.1Type escape sequence to abort.
Sending 5, 100-byte ICMP Echos to 1.1.1.1, timeout is 2 seconds:
!!!!!
Success rate is 100 percent (5/5), round-trip min/avg/max = 1/2/4 ms# ============================ 配置 f0/0: 12.12.12.1/24R1(config)#interface fastEthernet 0/0
R1(config-if)#ip address 12.12.12.1 255.255.255.0
R1(config-if)#do show ip int br
Interface                  IP-Address      OK? Method Status                Protocol
FastEthernet0/0            12.12.12.1      YES manual administratively down down ⚠️ip有了,但状态还是down
FastEthernet0/1            unassigned      YES unset  administratively down down
FastEthernet1/0            unassigned      YES unset  administratively down down
FastEthernet2/0            unassigned      YES unset  administratively down down
Loopback0                  1.1.1.1         YES manual up                    up
R1(config-if)#no shutdown
R1(config-if)#
*Mar  1 00:42:36.803: %LINK-3-UPDOWN: Interface FastEthernet0/0, changed state to up
*Mar  1 00:42:37.803: %LINEPROTO-5-UPDOWN: Line protocol on Interface FastEthernet0/0, changed state to up
R1(config-if)#do show ip int br
Interface                  IP-Address      OK? Method Status                Protocol
FastEthernet0/0            12.12.12.1      YES manual up                    up
FastEthernet0/1            unassigned      YES unset  administratively down down
FastEthernet1/0            unassigned      YES unset  administratively down down
FastEthernet2/0            unassigned      YES unset  administratively down down
Loopback0                  1.1.1.1         YES manual up                    up  # ============================ 配置 f0/1: 13.13.13.1/24R1(config-if)#int f0/1
R1(config-if)#ip add 13.13.13.1 255.255.255.0
R1(config-if)#no shutdown
*Mar  1 00:44:27.867: %LINK-3-UPDOWN: Interface FastEthernet0/1, changed state to up
*Mar  1 00:44:28.867: %LINEPROTO-5-UPDOWN: Line protocol on Interface FastEthernet0/1, changed state to up
R1(config-if)#do show ip int br
Interface                  IP-Address      OK? Method Status                Protocol
FastEthernet0/0            12.12.12.1      YES manual up                    up
FastEthernet0/1            13.13.13.1      YES manual up                    up
FastEthernet1/0            unassigned      YES unset  administratively down down
FastEthernet2/0            unassigned      YES unset  administratively down down
Loopback0                  1.1.1.1         YES manual up                    up  # ============================ 检查配置R1(config-if)#exit
R1(config)#exit
R1#
*Mar  1 00:47:28.835: %SYS-5-CONFIG_I: Configured from console by console
R1#sh running-config | ?append    Append redirected output to URL (URLs supporting append operationonly)begin     Begin with the line that matchesexclude   Exclude lines that matchinclude   Include lines that matchredirect  Redirect output to URLsection   Filter a section of outputtee       Copy output to URL
R1#sh running-config | section FastE
interface FastEthernet0/0ip address 12.12.12.1 255.255.255.0duplex autospeed auto
interface FastEthernet0/1ip address 13.13.13.1 255.255.255.0duplex autospeed auto
interface FastEthernet1/0no ip addressshutdownduplex autospeed auto
interface FastEthernet2/0no ip addressshutdownduplex autospeed auto
R1#sh running-config | section Loop
interface Loopback0ip address 1.1.1.1 255.255.255.255# ============================ ⚠️写入配置R1#write
Building configuration...
[OK]
R1#
同理,配置R2、R3
R2
conf t
int lo0
ip add 2.2.2.2 255.255.255.255
int f0/0
ip add 12.12.12.2 255.255.255.0
no shut
int f0/1
ip add 23.23.23.2 255.255.255.0
no shut
end
wr
R2
conf t
int lo0
ip add 2.2.2.2 255.255.255.255
int f0/0
ip add 12.12.12.2 255.255.255.0
no shut
int f0/1
ip add 23.23.23.2 255.255.255.0
no shut
end
wr
R3
💡 R3比较特殊,有两个子接口(子接口用“.”标识)。而且是模拟trunk的口,所以要告诉这个子接口匹配什么样的802.1q的vlan标签,所以要指定一个encapsulation(封装)命令
R3#show ip interface  brief
Interface                  IP-Address      OK? Method Status                Protocol
FastEthernet0/0            unassigned      YES unset  administratively down down
FastEthernet0/1            unassigned      YES unset  administratively down down
FastEthernet1/0            unassigned      YES unset  administratively down down
FastEthernet2/0            unassigned      YES unset  administratively down down
R3#configure terminal
Enter configuration commands, one per line.  End with CNTL/Z.# ======================== 配置 f0/0.13R3(config)#interface fastEthernet 0/0.13
R3(config-subif)#?
Interface configuration commands:
...encapsulation   Set encapsulation type for an interface
...
R3(config-subif)#encapsulation ?dot1Q  IEEE 802.1Q Virtual LANisl    Inter Switch Link - Virtual LAN encapsulation
R3(config-subif)#do show ip inter brie
Interface                  IP-Address      OK? Method Status                Protocol
FastEthernet0/0            unassigned      YES unset  administratively down down
FastEthernet0/0.13         unassigned      YES unset  administratively down down
FastEthernet0/1            unassigned      YES unset  administratively down down
FastEthernet1/0            unassigned      YES unset  administratively down down
FastEthernet2/0            unassigned      YES unset  administratively down down
R3(config-subif)#ip add 13.13.13.3 255.255.255.0
R3(config-subif)#do show ip inter brie
Interface                  IP-Address      OK? Method Status                Protocol
FastEthernet0/0            unassigned      YES unset  administratively down down
FastEthernet0/0.13         13.13.13.3      YES manual administratively down down
FastEthernet0/1            unassigned      YES unset  administratively down down
FastEthernet1/0            unassigned      YES unset  administratively down down
FastEthernet2/0            unassigned      YES unset  administratively down down
R3(config-subif)#no shutdown ⚠️在只接口上开启接口是不生效的,需要到主接口上开启
R3(config-subif)#do show ip inter brie
Interface                  IP-Address      OK? Method Status                Protocol
FastEthernet0/0            unassigned      YES unset  administratively down down
FastEthernet0/0.13         13.13.13.3      YES manual administratively down down
FastEthernet0/1            unassigned      YES unset  administratively down down
FastEthernet1/0            unassigned      YES unset  administratively down down
FastEthernet2/0            unassigned      YES unset  administratively down down# ======================== 配置 f0/0.23int f0/0.23
encapsulation dot1Q 23
no shutdown
ip add 23.23.23.3 255.255.255.0# ======================== 开启接口 f0/0R3(config-subif)#int f0/0
R3(config-if)#no shut
R3(config-if)#do show ip inter brie
*Mar  1 04:00:07.739: %LINK-3-UPDOWN: Interface FastEthernet0/0, changed state to up
*Mar  1 04:00:08.739: %LINEPROTO-5-UPDOWN: Line protocol on Interface FastEthernet0/0, changed state to up
R3(config-if)#do show ip inter brie
Interface                  IP-Address      OK? Method Status                Protocol
FastEthernet0/0            unassigned      YES unset  up                    up
FastEthernet0/0.13         13.13.13.3      YES manual up                    up
FastEthernet0/0.23         23.23.23.3      YES manual up                    up
FastEthernet0/1            unassigned      YES unset  administratively down down
FastEthernet1/0            unassigned      YES unset  administratively down down
FastEthernet2/0            unassigned      YES unset  administratively down down# ======================== 开启回环接口R3(config-if)#int lo0
R3(config-if)#
*Mar  1 04:01:58.294: %LINEPROTO-5-UPDOWN: Line protocol on Interface Loopback0, changed state to up
R3(config-if)#ip  add 3.3.3.3 255.255.255.255# ======================== 写出
R3#show ip int brief
Interface                  IP-Address      OK? Method Status                Protocol
FastEthernet0/0            unassigned      YES unset  up                    up
FastEthernet0/0.13         13.13.13.3      YES manual up                    up
FastEthernet0/0.23         23.23.23.3      YES manual up                    up
FastEthernet0/1            unassigned      YES unset  administratively down down
FastEthernet1/0            unassigned      YES unset  administratively down down
FastEthernet2/0            unassigned      YES unset  administratively down down
Loopback0                  3.3.3.3         YES manual up                    up
R3#write
Building configuration...
[OK]
交换机的配置
- 三个交换机之间是互联的
- 它们之间用trunk连接
- 每个交换机都有若干个接口和路由器对接
💡我们知道,GNS3的交换机是用路由器上的交换机模块模拟出来的,所以其配置和标准的交换机略微不同
首先,我们在设备中将vlan创建
SW1
# ========================= 设置vlanESW1#vlan database
ESW1(vlan)#vlan 12
VLAN 12 added:Name: VLAN0012
ESW1(vlan)#vlan 13
VLAN 13 added:Name: VLAN0013
ESW1(vlan)#vlan 23
VLAN 23 added:Name: VLAN0023
ESW1(vlan)#exit
APPLY completed.
Exiting....
ESW1## ========================= 设置vlan连接ESW1#configure t
Enter configuration commands, one per line.  End with CNTL/Z.
ESW1(config)#int f1/10
ESW1(config-if)#switchport access vlan 12
ESW1(config-if)#int f1/11
ESW1(config-if)#switchport access vlan 13
ESW1(config-if)#int f1/12
ESW1(config-if)#switchport access vlan 12# ========================= 查看修改的配置ESW1(config-if)#do sh run interface f1/10
Building configuration...Current configuration : 85 bytes
!
interface FastEthernet1/10switchport access vlan 12duplex fullspeed 100
end⚠️上面命令等于“sh running-config | section 1/10”,但是更快
ESW1(config-if)#do sh running-config | section 1/10
interface FastEthernet1/10switchport access vlan 12duplex fullspeed 100# ========================= 设置其他连线为trunkESW1(config-if)#do sh run int f1/0
Building configuration...Current configuration : 57 bytes
!
interface FastEthernet1/0duplex fullspeed 100
endESW1(config-if)#int f1/0
ESW1(config-if)#switchport mode trunk
ESW1(config-if)#do sh run int f1/0
Building configuration...Current configuration : 80 bytes
!
interface FastEthernet1/0switchport mode trunkduplex fullspeed 100
end# ==== 批量设置ESW1(config-if)#int range f1/1 - 3
ESW1(config-if-range)#switchport mode trunk
ESW1(config-if-range)#
*Mar  1 04:43:44.334: %DTP-5-TRUNKPORTON: Port Fa1/1 has become dot1q trunk
*Mar  1 04:45:03.118: %DTP-5-TRUNKPORTON: Port Fa1/2 has become dot1q trunk# ========================= 查看vlan配置情况
ESW1#show vlan-switchVLAN Name                             Status    Ports
---- -------------------------------- --------- -------------------------------
1    default                          active    Fa1/4, Fa1/5, Fa1/6, Fa1/7Fa1/8, Fa1/9, Fa1/13, Fa1/14Fa1/15
12   VLAN0012                         active    Fa1/10, Fa1/12
13   VLAN0013                         active    Fa1/11
23   VLAN0023                         active
1002 fddi-default                     active
1003 token-ring-default               active
1004 fddinet-default                  active
1005 trnet-default                    activeVLAN Type  SAID       MTU   Parent RingNo BridgeNo Stp  BrdgMode Trans1 Trans2
---- ----- ---------- ----- ------ ------ -------- ---- -------- ------ ------
1    enet  100001     1500  -      -      -        -    -        1002   1003
12   enet  100012     1500  -      -      -        -    -        0      0
13   enet  100013     1500  -      -      -        -    -        0      0
23   enet  100023     1500  -      -      -        -    -        0      0
1002 fddi  101002     1500  -      -      -        -    -        1      1003
1003 tr    101003     1500  1005   0      -        -    srb      1      1002
1004 fdnet 101004     1500  -      -      1        ibm  -        0      0
1005 trnet 101005     1500  -      -      1        ibm  -        0      0# ========================= 查看trunk配置情况ESW1#show interfaces trunkPort      Mode         Encapsulation  Status        Native vlan
Fa1/0     on           802.1q         trunking      1
Fa1/1     on           802.1q         trunking      1
Fa1/2     on           802.1q         trunking      1
Fa1/3     on           802.1q         trunking      1Port      Vlans allowed on trunk
Fa1/0     1-1005
Fa1/1     1-1005
Fa1/2     1-1005
Fa1/3     1-1005Port      Vlans allowed and active in management domain
Fa1/0     1,12-13,23
Fa1/1     1,12-13,23
Fa1/2     1,12-13,23
Fa1/3     1,12-13,23Port      Vlans in spanning tree forwarding state and not pruned
Fa1/0     1,12-13,23
Fa1/1     1,12-13,23
Fa1/2     1,12-13,23
Fa1/3     1,12-13,23ESW2#write
Building configuration...
[OK]
SW2
vlan database
vlan 12
vlan 13
vlan 23
exitconfigure t
int f1/12
switchport access vlan 23
int f1/13
switchport mode trunkint range f1/0 - 3
switchport mode trunk
end
write
SW3
int range f1/0 - 3
switchport mode trunk
end
write
连通测试
路由器、交换机都配置好了,就应该可以ping通了
R1#ping ip 12.12.12.2Type escape sequence to abort.
Sending 5, 100-byte ICMP Echos to 12.12.12.2, timeout is 2 seconds:
.!!!!
Success rate is 80 percent (4/5), round-trip min/avg/max = 16/28/40 msR1#ping ip 13.13.13.3Type escape sequence to abort.
Sending 5, 100-byte ICMP Echos to 13.13.13.3, timeout is 2 seconds:
.!!!!
Success rate is 80 percent (4/5), round-trip min/avg/max = 12/35/88 ms
R2#ping ip 23.23.23.3Type escape sequence to abort.
Sending 5, 100-byte ICMP Echos to 23.23.23.3, timeout is 2 seconds:
.!!!!
Success rate is 80 percent (4/5), round-trip min/avg/max = 12/19/24 ms