Mean shift filter
目录
Mean shift filter
一、算法原理
二、练手实现的算法代码如下:
三、实现结果
一、算法原理
在OpenCV中,meanshift filter函数为 pyrMeanShiftFiltering, 它的函数调用格式如下:
C++: void pyrMeanShiftFiltering(InputArray src, OutputArray dst, double sp, double sr, int maxLevel=1, TermCriteriatermcrit=TermCriteria( TermCriteria::MAX_ITER+TermCriteria::EPS,5,1) )
Parameters:
- src – The source 8-bit, 3-channel image. //三通道的输入图像
- dst – The destination image of the same format and the same size as the source. //相同尺寸格式输出图像
- sp – The spatial window radius. //空间域半径
- sr – The color window radius. //颜色域半径
- maxLevel – Maximum level of the pyramid for the segmentation. //分割用金字塔的最大层数
- termcrit – Termination criteria: when to stop meanshift iterations. //迭代终止的条件
算法的描述大致如下:
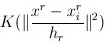
对于输入图像的每个像素点(X,Y) ,在它的半径为sp的空间域,执行meanshift迭代算法,
![]()
像素点(X,Y)的颜色值为(R,G,B), 它的空间邻域点(x,y)的颜色值为(r,g,b),如果点(x,y)的到(X,Y)的颜色距离小于sr,则满足条件,最终我们求得满足条件点的平均空间坐标(X’,Y’)以及平均颜色向量(R',G',B'),并把它们作为下一次迭代的输入。
![]()
迭代结果后,我们把最初输入位置的颜色值用最终迭代的颜色值代替。
![]()
二、练手实现的算法代码如下:
#include"cv.h"
#include"highgui.h"
#include"cxcore.h"
#include<stdio.h>
#include<stdlib.h>
#include"types.h"void ToYIQ(IplImage *img,IplImage *YIQ_img)
{int i,j;float Y,I,Q;uchar R,G,B;for(i = 0 ;i < img->height;i++){for(j = 0; j < img->width;j++){B = ((uchar*)(img->imageData+i*img->widthStep))[j*img->nChannels+0];G = ((uchar*)(img->imageData+i*img->widthStep))[j*img->nChannels+1];R = ((uchar*)(img->imageData+i*img->widthStep))[j*img->nChannels+2];Y = 0.299*R +0.587*G +0.114*B;I = 0.5957*R-0.2744*G-0.3212*B;Q = 0.2114*R-0.5226*G+0.3111*B;((float*)(YIQ_img->imageData+i*YIQ_img->widthStep))[j*YIQ_img->nChannels+0] = Y;((float*)(YIQ_img->imageData+i*YIQ_img->widthStep))[j*YIQ_img->nChannels+1] = I;((float*)(YIQ_img->imageData+i*YIQ_img->widthStep))[j*YIQ_img->nChannels+2] = Q;}}
}void Mean_Shift_Filter(IplImage *img, IplImage *YIQ_img, IplImage *mean_shift_img,int rad,int colordis )
{float shift,Yc,Ic,Qc,YcOld,IcOld,QcOld,Y2,I2,Q2,dY,dI,dQ,mY,mI,mQ,num_;int i,j,ry,rx,y2,x2,xc,yc,xcOld,ycOld,num,dx,dy,iters,mx,my;uchar R,G,B;shift  = 0;iters  = 0;for(i = 0; i < img->height;i++){for(j = 0; j < img->width;j++){yc = i;xc = j;Yc = ((float*)(YIQ_img->imageData+yc*YIQ_img->widthStep))[xc*YIQ_img->nChannels+0];Ic = ((float*)(YIQ_img->imageData+yc*YIQ_img->widthStep))[xc*YIQ_img->nChannels+1];Qc = ((float*)(YIQ_img->imageData+yc*YIQ_img->widthStep))[xc*YIQ_img->nChannels+2];iters = 0;do{ycOld = yc;xcOld = xc;YcOld = Yc;IcOld = Ic;QcOld = Qc;mx = 0;my = 0;mY = 0;mI = 0;mQ = 0;num = 0;
/*///
假若是rad= 3,则其邻域范围为:其中#为包含在内需要计算的像素点***#*****###***#####*#######*#####***###*****#***
///*/for(ry = - rad;ry <= rad;ry++){y2 = yc+ry;if(y2 >= 0 && y2 < img->height){for(rx = -rad;rx <= rad;rx++){x2 = xc+rx;if(x2 >= 0 && x2 < img->width){if(ry*ry+rx*rx <= rad*rad){Y2 = ((float*)(YIQ_img->imageData+y2*YIQ_img->widthStep))[x2*YIQ_img->nChannels+0];I2 = ((float*)(YIQ_img->imageData+y2*YIQ_img->widthStep))[x2*YIQ_img->nChannels+1];Q2 = ((float*)(YIQ_img->imageData+y2*YIQ_img->widthStep))[x2*YIQ_img->nChannels+2];dY = Yc-Y2;dI = Ic- I2;dQ = Qc- Q2;if(dY*dY + dI*dI+dQ*dQ <= colordis)//当前像素比周围邻域像素相差比较大的时候,在rad半径内(一个菱形领域),只有当前像素满足此条件,所以最后替换当前像素还是自己本身{mx += x2;my += y2;mY += Y2;mI += I2;mQ += Q2;num++;}}}}}}num_ = 1.0/num;Yc = mY*num_;Ic = mI*num_;Qc = mQ*num_;xc = (int)(mx*num_+0.5);yc = (int)(my*num_+0.5);dx = xc - xcOld;dy = yc -ycOld;dY = Yc - YcOld;dI = Ic- IcOld;dQ = Qc - QcOld;shift = dx*dx+dy*dy+dY*dY+dI*dI+dQ*dQ;iters++;}while(shift> 3 && iters < 100);R = CLIP((int)(Yc+0.9653*Ic+0.6210*Qc),0,255);G = CLIP((int)(Yc-0.2721*Ic-0.6473*Qc),0,255);B = CLIP((int)(Yc-1.1070*Ic+1.7046*Qc),0,255);((uchar*)(mean_shift_img->imageData+i*mean_shift_img->widthStep))[j*mean_shift_img->nChannels+0] = B;((uchar*)(mean_shift_img->imageData+i*mean_shift_img->widthStep))[j*mean_shift_img->nChannels+1] = G;((uchar*)(mean_shift_img->imageData+i*mean_shift_img->widthStep))[j*mean_shift_img->nChannels+2] = R;	}}}
int main(void)
{int w,h;CvSize img_size;IplImage *src,*mean_shift_img,*YIQ_img;src = cvLoadImage("lg-image4.bmp",-1);if(src == NULL){printf("Please insert image\n");return 0;}img_size = cvGetSize(src);w = img_size.width;h = img_size.height;YIQ_img = cvCreateImage(img_size,IPL_DEPTH_32F,3);mean_shift_img = cvCreateImage(img_size,IPL_DEPTH_8U,3);if((mean_shift_img == NULL) || (YIQ_img==NULL))printf("malloc for image memory failure!\n");cvZero(YIQ_img);cvZero(mean_shift_img);cvNamedWindow("Show original image",0);cvShowImage("Show original image",src);ToYIQ(src,YIQ_img);Mean_Shift_Filter(src, YIQ_img, mean_shift_img,5,15*15 );cvNamedWindow("Mean Shift image",0);cvShowImage("Mean Shift image",mean_shift_img);cvSaveImage("lg-image4_Mean_Shift_filter.bmp",mean_shift_img);cvWaitKey(0);cvDestroyWindow("Mean Shift image");cvDestroyWindow("Show original image");printf("done\n");cvReleaseImage(&YIQ_img);cvReleaseImage(&mean_shift_img);return 0;
}
三、实现结果


但是针对椒盐噪声,其效果基本无效: