实验室同学需要做仿真数据的采集实验,为记录以下整个采集过程。方便未来进行类似数据采集时减少写代码的时间。
采集数据要求:
控制一辆车,从a点到b点。然后在路侧架设一个lidar,采集车辆通过激光lidar区域时的数据。
一、首先确定a点和b点。
地图选取的是carla的town03。
具体区域是这里:

首先确定选择的a点:start_point;b点:end_point。
这里使用draw_string函数,将确定的点在地图中显示出来,方便之后的路径确定:
源码如下:
import carladef show_point(world, point_location):world.debug.draw_string(point_location, 'X', draw_shadow=False,color=carla.Color(r=0, g=255, b=0), life_time=50,persistent_lines=True)def main():client = carla.Client('localhost', 2000)client.set_timeout(2.0)world = client.get_world()start_point = carla.Location(229, 116, 2)end_point = carla.Location(20,194,2)show_point(world, start_point)show_point(world, end_point)main()地图显示:
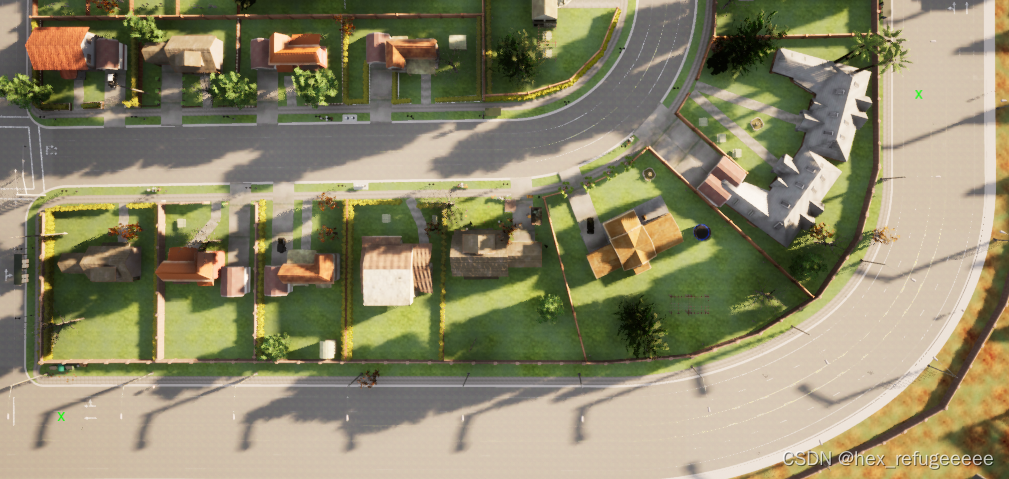
图中两个绿色的x就是分别确定的start_point和end_point。
这里有几个点需要注意:
1.注意区分carla.Location和carla.Transform之间的关系。
2.注意在使用系统提供的函数的时候,它的参数的格式要求,尤其是spawn_vehicle函数。
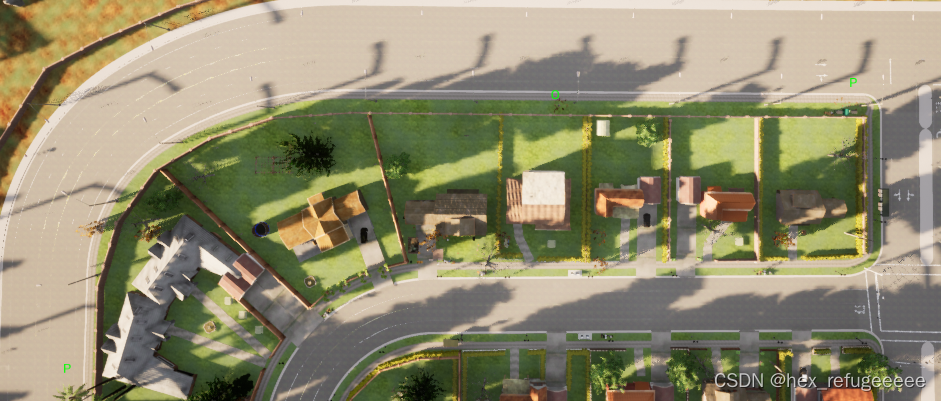
怎么才好知道点的坐标呢?
可以使用这个函数测试。首先确定原点,然后确定x轴正向,再确定y轴正向。就可以将地图的坐标系确定出来。好久没有使用carla了,当时在这一步卡了好久,主要原因就是对于相关的函数的数据格式不熟悉了,解决报错问题花了快一个小时。。。
下面是源码:
import carladef show_point(world, point_location):world.debug.draw_string(point_location, 'P', draw_shadow=False,color=carla.Color(r=0, g=255, b=0), life_time=50,persistent_lines=True)def show_x_point(world, point_location):world.debug.draw_string(point_location, 'X', draw_shadow=False,color=carla.Color(r=0, g=255, b=0), life_time=50,persistent_lines=True)def show_y_point(world, point_location):world.debug.draw_string(point_location, 'Y', draw_shadow=False,color=carla.Color(r=0, g=255, b=0), life_time=50,persistent_lines=True)def show_O_point(world, point_location):world.debug.draw_string(point_location, 'O', draw_shadow=False,color=carla.Color(r=0, g=255, b=0), life_time=50,persistent_lines=True)def main():client = carla.Client('localhost', 2000)client.set_timeout(2.0)world = client.get_world()start_point = carla.Location(229, 116, 2)end_point = carla.Location(20,194,2)origin_point = carla.Location(0,0,0)x_axis = carla.Location(10, 0, 0)y_axis = carla.Location(0, 10, 0)show_point(world, start_point)show_point(world, end_point)show_O_point(world, origin_point)show_x_point(world, x_axis)show_y_point(world, y_axis)main()
地图显示:
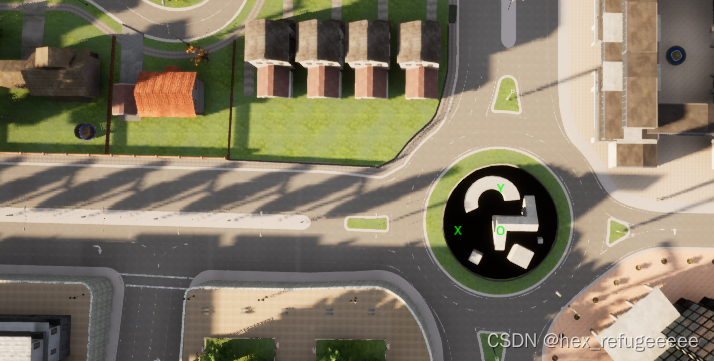
二、选择lidar点
和第一步类似,使用draw函数来找点。
源码就将上面的简单修改就可以了。
地图显示如下:
O为架设lidar的坐标。
三、实现vehilce从a点到b点
主要调用的是agent里面的set_destination函数。
参考小飞大佬的源码,自己改了一下:
# -*- coding: utf-8 -*-import os
import random
import sysimport carlafrom agents.navigation.behavior_agent import BehaviorAgentdef main():try:client = carla.Client('localhost', 2000)client.set_timeout(2.0)world = client.get_world()origin_settings = world.get_settings()settings = world.get_settings()settings.synchronous_mode = Truesettings.fixed_delta_seconds = 0.05world.apply_settings(settings)blueprint_library = world.get_blueprint_library()# 确定起点和终点p1 = carla.Location(229, 116, 2)p2 = carla.Location(20, 194, 2)start_point = carla.Transform(p1, carla.Rotation(0,0,0))end_point = carla.Transform(p2, carla.Rotation(0, 0, 0))# 创建车辆ego_vehicle_bp = blueprint_library.find('vehicle.lincoln.mkz2017')ego_vehicle_bp.set_attribute('color', '0, 0, 0')vehicle = world.spawn_actor(ego_vehicle_bp, start_point)world.tick()# 设置车辆的驾驶模式agent = BehaviorAgent(vehicle, behavior='normal')# 核心函数agent.set_destination(agent.vehicle.get_location(), end_point.location, clean=True)while True:agent.update_information(vehicle)world.tick()if len(agent._local_planner.waypoints_queue)<1:print('======== Success, Arrivied at Target Point!')break# 设置速度限制speed_limit = vehicle.get_speed_limit()agent.get_local_planner().set_speed(speed_limit)control = agent.run_step(debug=True)vehicle.apply_control(control)finally:world.apply_settings(origin_settings)vehicle.destroy()if __name__ == '__main__':try:main()except KeyboardInterrupt:print(' - Exited by user.')
比较简单,看注释就好。
四、生成lidar并采集数据
将生成lidar的部分加入到第三章里面的源码中。
# -*- coding: utf-8 -*-import os
import carlafrom agents.navigation.behavior_agent import BehaviorAgentdef main():try:client = carla.Client('localhost', 2000)client.set_timeout(2.0)world = client.get_world()origin_settings = world.get_settings()settings = world.get_settings()settings.synchronous_mode = Truesettings.fixed_delta_seconds = 0.05world.apply_settings(settings)blueprint_library = world.get_blueprint_library()# 设置储存位置output_path = 'lidar_data'# 确定起点和终点p1 = carla.Location(229, 116, 2)p2 = carla.Location(20, 194, 2)start_point = carla.Transform(p1, carla.Rotation(0,0,0))end_point = carla.Transform(p2, carla.Rotation(0, 0, 0))# 创建车辆ego_vehicle_bp = blueprint_library.find('vehicle.lincoln.mkz2017')ego_vehicle_bp.set_attribute('color', '0, 0, 0')vehicle = world.spawn_actor(ego_vehicle_bp, start_point)# 创建lidar,设置lidar的参数lidar_bp = blueprint_library.find('sensor.lidar.ray_cast')lidar_bp.set_attribute('channels', str(32))lidar_bp.set_attribute('points_per_second', str(90000))lidar_bp.set_attribute('rotation_frequency', str(40))lidar_bp.set_attribute('range', str(20))# 设置lidar架设的点lidar_location = carla.Location(100, 190, 2)lidar_rotation = carla.Rotation(0, 0, 0)lidar_transform = carla.Transform(lidar_location, lidar_rotation)        # 生成lidar并采集数据lidar = world.spawn_actor(lidar_bp, lidar_transform)lidar.listen(lambda point_cloud: point_cloud.save_to_disk(os.path.join(output_path, '%06d.ply' % point_cloud.frame)))       world.tick()# 设置车辆的驾驶模式agent = BehaviorAgent(vehicle, behavior='normal')# 核心函数agent.set_destination(agent.vehicle.get_location(), end_point.location, clean=True)while True:agent.update_information(vehicle)world.tick()if len(agent._local_planner.waypoints_queue)<1:print('======== Success, Arrivied at Target Point!')break# 设置速度限制speed_limit = vehicle.get_speed_limit()agent.get_local_planner().set_speed(speed_limit)control = agent.run_step(debug=True)vehicle.apply_control(control)finally:world.apply_settings(origin_settings)vehicle.destroy()if __name__ == '__main__':try:main()except KeyboardInterrupt:print(' - Exited by user.')
比较简单,整个实验采集都比较简单。在这里记录一下,方便未来做类似工作是可以直接代码服用。


![【仿真】Carla介绍与使用 [1] (附代码手把手讲解)](https://img-blog.csdnimg.cn/20210507211438258.png)


![[carla入门教程]-1 安装carla环境](https://img-blog.csdnimg.cn/e2786b708614436782c033adcb0486c6.png)