最近学长安排了新的任务,开始学习Carla仿真软件。这个软件之前在自己电脑安装一次,各种坑,坑到我怀疑人生,大概装了两三天才装上,之后因为毕设就没动过了,时隔小一年又重新开始学。。。(后续有时间打算重新装一边最新版本的Carla,感觉之前装的有很多问题,虽然可以运行)
毕竟自己英语不好,本科也不是计算机专业的,学起来还是比较困难的,在这里记录一下学习过程,避免忘了hhh
核心概念
基础
1 world和client
客户端:请求信息或者更改仿真的模块,一个客户端在一个IP和特定的端口下运行。通过终端和服务器进行通信,可以有多个客户端同时运行。
世界:仿真的对象表示。它充当一个抽象层,其中包含生成角色,更改天气,获取当前状态等主要方法。每个仿真中只有一个世界。 更改地图后,它将被销毁并替换为新的地图。
2 actors和blueprints
actor:仿真中的角色,车辆、行人、传感器、交通标志、信号灯、旁观者。
blueprints:是生成角色所需的已经完成的角色布局。模型包含一定的动画和属性,一些属性是可以由用户定义的。
3 maps和navigation
maps:通俗意义的地图。道路车道和路口由Python API管理,可从客户端访问。 它们与waypoint一起使用,为车辆提供导航路径。
交通标志作为作为carla.Landmark对象使用,其中包含有关其OpenDRIVE定义的信息。 此外,在运行时,模拟器会使用OpenDRIVE文件上的信息自动生成停车和交通信号灯对象。 这些在道路上放置了边界框, 一旦进入边界框,车辆就会意识到它们。
4 sensors和data
传感器等待事件发生并且从仿真中收集信息。他们需要一个定义如何管理数据的函数。 取决于种类,传感器检索不同类型的传感器数据。
传感器是连接到车辆上的actor。他跟随车辆收集周围的信息,由蓝图库中可用的蓝图定义。
相机(RGB、深度和语义分割)
碰撞检测器
Gnss(全球卫星导航系统)传感器
IMU(惯性测量单元)传感器
雷达
车道进入检测器
障碍物探测器
激光雷达
RSS传感器
高级
- OpenDRIVE standalone mode:制作道路网格
- PTV-Vissim:交通仿真器协同仿真
- recorder:记录仿真过程,重现仿真
- rendering options:可选off-screen渲染和无渲染
- RSS:集成了C ++责任敏感安全性库,可以通过安全检查来修改车辆的轨迹。
- SUMO:协同仿真
- Traffic manager:创建自动驾驶的车辆模拟真实世界
World和Client
创建客户端
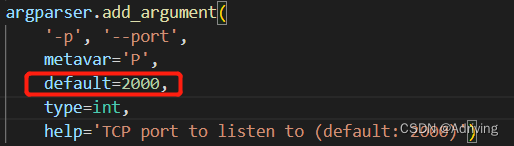
需要IP地址和两个TCP端口:
client = carla.Client('localhost', 2000)
然后设置连接超时时间:
client.set_timeout(10.0) # seconds
客户端连接当前世界:
world = client.get_world()
或者连接指定世界:
world = client.load_world('Town01')
Commands可以使用批命令,对同时间操作很多元素很有用,例如销毁车辆:
client.apply_batch([carla.command.DestroyActor(x) for x in vehicles_list])
客户端还有其他的特性:Traffic manager和Recorder
World
很多信息和通用设置可以通过这个类访问。
![[外链图片转存失败,源站可能有防盗链机制,建议将图片保存下来直接上传(img-uiX0yjKG-1600950774382)(/home/wj/Documents/MdImage/image-20200923193155302.png)]](https://img-blog.csdnimg.cn/20200924203353362.png?x-oss-process=image/watermark,type_ZmFuZ3poZW5naGVpdGk,shadow_10,text_aHR0cHM6Ly9ibG9nLmNzZG4ubmV0L3dlaXhpbl80MTgyMzE4OA==,size_16,color_FFFFFF,t_70#pic_center)
world可以寻找actor,寻找创建actor的合适位置、访问蓝图等。
天气是一组参数,可以这样设定:
weather = carla.WeatherParameters(cloudiness=80.0,precipitation=30.0,sun_altitude_angle=70.0)world.set_weather(weather)print(world.get_weather())
还有预设的环境可以直接使用:
world.set_weather(carla.WeatherParameters.WetCloudySunset)
还可以使用两个py脚本设置天气:environment.py和dynamic_weather.py
灯(路灯、建筑物灯也可以设置)
# Get the light manager and lights
lmanager = world.get_light_manager()
mylights = lmanager.get_all_lights()# Custom a specific light
light01 = mylights[0]
light01.turn_on()
light01.set_intensity(100.0)
state01 = carla.LightState(200.0,red,carla.LightGroup.Building,True)
light01.set_light_state(state01)# Custom a group of lights
my_lights = lmanager.get_light_group(carla.LightGroup.Building)
lmanager.turn_on(my_lights)
lmanager.set_color(my_lights,carla.Color(255,0,0))
lmanager.set_intensities(my_lights,list_of_intensities)
车辆的灯光需要用户控制
# Turn on position lights
current_lights = carla.VehicleLightState.NONE
current_lights |= carla.VehicleLightState.Position
vehicle.set_light_state(current_lights)
灯光也可以通过environment.py实时设置。
World snapshots
在单个帧中包含模拟中每个参与者的状态。 一种带有时间参考的静止图像。 即使在异步模式下,信息也来自相同的仿真步骤。
# Retrieve a snapshot of the world at current frame.
world_snapshot = world.get_snapshot()
可以得到timesnapshot和actorsnapshot:
timestamp = world_snapshot.timestamp # Get the time reference for actor_snapshot in world_snapshot: # Get the actor and the snapshot informationactual_actor = world.get_actor(actor_snapshot.id)actor_snapshot.get_transform()actor_snapshot.get_velocity()actor_snapshot.get_angular_velocity()actor_snapshot.get_acceleration() actor_snapshot = world_snapshot.find(actual_actor.id) # Get an actor's snapshot
Actor和Blueprints
Blueprints
蓝图已经建模了actor的动画和其他的一些特性,一些特性可以修改,另一些不可以修改。
world对象可以访问蓝图:
blueprint_library = world.get_blueprint_library()
利用得到的blueprint_library可以得到某个actor的蓝图:
# Find a specific blueprint.
collision_sensor_bp = blueprint_library.find('sensor.other.collision')
# Choose a vehicle blueprint at random.
vehicle_bp = random.choice(blueprint_library.filter('vehicle.*.*'))
此外, 可以得到或设定actor蓝图的特性:
is_bike = [vehicle.get_attribute('number_of_wheels') == 2]
if(is_bike)vehicle.set_attribute('color', '255,0,0')
对于可以修改的属性,有推荐属性可以选择:
for attr in blueprint:if attr.is_modifiable:blueprint.set_attribute(attr.id, random.choice(attr.recommended_values))
Actor的生命周期
世界对象负责产生actor并跟踪这些actor。
world有两种不同的方法生成actorspawn_actor() 和try_spawn_actor(),生成actor需要提供blueprint和transform,后者指定位置和旋转(rotation):
transform = Transform(Location(x=230, y=195, z=40), Rotation(yaw=180))
actor = world.spawn_actor(blueprint, transform)
不合适的生成点会导致生成失败,可以利用map.get_spawn_points()获取合适的车辆生成点:
spawn_points = world.get_map().get_spawn_points()
随即设置行人的位置:
spawn_point = carla.Transform()
spawn_point.location = world.get_random_location_from_navigation()
actor可以和其他actor连接起来,这对于snesor很有用,例如车载相机:(rigid表示是否可以移动)
transform是相对位置!
camera = world.spawn_actor(camera_bp, relative_transform, attach_to=my_vehicle, carla.AttachmentType.Rigid)
actor生成后,加入list,而后可以检索:
actor_list = world.get_actors()
# Find an actor by id.
actor = actor_list.find(id)
# Print the location of all the speed limit signs in the world.
for speed_sign in actor_list.filter('traffic.speed_limit.*'):print(speed_sign.get_location())
actor大多包含set和get方法:
print(actor.get_acceleration())
print(actor.get_velocity())location = actor.get_location()
location.z += 10.0
actor.set_location(location)
可以禁用actor的物理性质,固定在某个位置:
actor.set_simulate_physics(False)
在脚本运行结束后actor不会销毁,必须手动销毁:
destroyed_sucessfully = actor.destroy() # Returns True if successful
actor的种类
这个例子表示相机附着在车辆上,并且将收集的图像保存到磁盘中:(传感器监听数据,受到数据后调用Lambda函数)
camera_bp = blueprint_library.find('sensor.camera.rgb')
camera = world.spawn_actor(camera_bp, relative_transform, attach_to=my_vehicle)
camera.listen(lambda image: image.save_to_disk('output/%06d.png' % image.frame))
观众(spectator):有UE放置,可以移动仿真视角窗口,如:
spectator = world.get_spectator()
transform = vehicle.get_transform()
spectator.set_transform(carla.Transform(transform.location + carla.Location(z=50),
carla.Rotation(pitch=-90)))
交通标志和交通灯:
交通标志有BBox来影响其中的车辆:
#Get the traffic light affecting a vehicle
if vehicle_actor.is_at_traffic_light():traffic_light = vehicle_actor.get_traffic_light()
交通等有单独ID,也有group ID:pole。设置红绿灯:
#Change a red traffic light to green
if traffic_light.get_state() == carla.TrafficLightState.Red:traffic_light.set_state(carla.TrafficLightState.Green)traffic_light.set_set_green_time(4.0)
车辆
四种方式控制车辆:
carla.VehicleControl
vehicle.apply_control(carla.VehicleControl(throttle=1.0, steer=-1.0))
carla.VehiclePhysicsControl
vehicle.apply_physics_control(carla.VehiclePhysicsControl(max_rpm = 5000.0, center_of_mass = carla.Vector3D(0.0, 0.0, 0.0), torque_curve=[[0,400],[5000,400]]))
为了检测碰撞,引入车辆BBox:
box = vehicle.bounding_box
print(box.location)         # Location relative to the vehicle.
print(box.extent)           # XYZ half-box extents in meters.
其他特性:
自动驾驶
vehicle.set_autopilot(True)
车灯
# Turn on position lights
current_lights = carla.VehicleLightState.NONE
current_lights |= carla.VehicleLightState.Position
vehicle.set_light_state(current_lights)
行人
类似于车辆,carla.WalkerControl和carla.WalkerBoneControl 。
行人可以被AI控制,在其连接的actor周围移动:
walker_controller_bp = world.get_blueprint_library().find('controller.ai.walker')
world.SpawnActor(walker_controller_bp, carla.Transform(), parent_walker)
每个AI controller需要初始化:
ai_controller.start()
ai_controller.go_to_location(world.get_random_location_from_navigation())
ai_controller.set_max_speed(1 + random.random())  # Between 1 and 2 m/s (default is 1.4 m/s).
...
ai_controller.stop()
可以使用batches产生大量行人并行走,可见This recipe。
Maps和navigation
map
每一个map都是基于OpenDRIVE文件。
改变map:reload_world()和load_world()
world = client.load_world('Town01')
可用地图:
print(client.get_available_maps())
landmarks
OpenDRIVE文件中定义的交通标志将转换为CARLA作为可从API查询的地标对象。 为了促进它们的操纵,已经对其进行了一些补充。(此处没列)
Lanes
OpenDRIVE标准定义的通道类型将转换为carla.LaneType中的API,作为一系列枚举值。
# Get the lane type where the waypoint is.
lane_type = waypoint.lane_type# Get the type of lane marking on the left.
left_lanemarking_type = waypoint.left_lane_marking.type()# Get available lane changes for this waypoint.
lane_change = waypoint.lane_change
Junctions
此类中最出色的方法是在交叉路口内的每个车道返回一对waypoints。 每对位于交界处的起点和终点。
waypoints_junc = my_junction.get_waypoints()
Waypoints
包含了一些lane的信息
# Examples of a waypoint accessing to lane information
inside_junction = waypoint.is_junction()
width = waypoint.lane_width
right_lm_color = waypoint.right_lane_marking.color
Navigation in CARLA
Navigating through waypoints
有一套与其他人建立联系并建立道路的方法。 所有这些方法都遵循交通规则,仅确定车辆可以行驶的地方。
# Disable physics, in this example the vehicle is teleported.
vehicle.set_simulate_physics(False)
while True:# Find next waypoint 2 meters ahead.waypoint = random.choice(waypoint.next(2.0))# Teleport the vehicle.vehicle.set_transform(waypoint.transform)
Generating a map navigation
Get recommended spawn points for vehiclespointed by developers. There is no ensurance that these spots will be free.
spawn_points = world.get_map().get_spawn_points()
Get the closest waypoint to a specific location or to a certain road_id, lane_id and s in OpenDRIVE.
# Nearest waypoint on the center of a Driving or Sidewalk lane.
waypoint01 = map.get_waypoint(vehicle.get_location(),project_to_road=True, lane_type=(carla.LaneType.Driving | carla.LaneType.Sidewalk))#Nearest waypoint but specifying OpenDRIVE parameters.
waypoint02 = map.get_waypoint_xodr(road_id,lane_id,s)
Generate a collection of waypoints to visualize the city lanes. Creates waypoints all over the map, for every road and lane. All of them will be an approximate distance apart.
waypoint_list = map.generate_waypoints(2.0)
Generate road topology. Returns a list of pairs (tuples) of waypoints. For each pair, the first element connects with the second one and both define the starting and ending point of each lane in the map.
waypoint_tuple_list = map.get_topology()
Convert simulation point to geographical coordinates. Transforms a certain location to a carla.GeoLocation with latitude and longitude values.
my_geolocation = map.transform_to_geolocation(vehicle.transform)
Save road information. Converts the road information to OpenDRIVE format, and saves it to disk.
info_map = map.to_opendrive()
CARLA maps
内置了8个不同的map,每种都有不同的特性,例如高速公路或者城镇道路。
Sensors和data
每个sensor都有listen()方法检索数据。
Setting
找到蓝图并设置属性,如仪表盘高清摄像头:
# Find the blueprint of the sensor.
blueprint = world.get_blueprint_library().find('sensor.camera.rgb')
# Modify the attributes of the blueprint to set image resolution and field of view.
blueprint.set_attribute('image_size_x', '1920')
blueprint.set_attribute('image_size_y', '1080')
blueprint.set_attribute('fov', '110')
# Set the time in seconds between sensor captures
blueprint.set_attribute('sensor_tick', '1.0')
Spawning
依附其他actor,有两种依附形式Rigid attachment和**SpringArm attachment.**位置相对于依附对象。
transform = carla.Transform(carla.Location(x=0.8, z=1.7))
sensor = world.spawn_actor(blueprint, transform, attach_to=my_vehicle)
Listening
listen()函数的回调参数为lanbda函数,它决定了如何处理检索到的数据。
# do_something() will be called each time a new image is generated by the camera.
sensor.listen(lambda data: do_something(data))...# This collision sensor would print everytime a collision is detected.
def callback(event):for actor_id in event:vehicle = world_ref().get_actor(actor_id)print('Vehicle too close: %s' % vehicle.type_id)sensor02.listen(callback)
Data
大多数传感器数据对象都具有将信息保存到磁盘的功能。 这将使其可以在其他环境中使用。
传感器数据的属性:frame、timestamp、transform。
传感器种类
相机:深度、RGB、语义分割
Detectors:Collision、Lane invasion、Obstacle事件触发时检测
其他:雷达、激光雷达等。
![[外链图片转存失败,源站可能有防盗链机制,建议将图片保存下来直接上传(img-vVyQeELY-1600950774386)(/home/wj/Documents/MdImage/image-20200923225036189.png)]](https://img-blog.csdnimg.cn/20200924203407434.png?x-oss-process=image/watermark,type_ZmFuZ3poZW5naGVpdGk,shadow_10,text_aHR0cHM6Ly9ibG9nLmNzZG4ubmV0L3dlaXhpbl80MTgyMzE4OA==,size_16,color_FFFFFF,t_70#pic_center)

![【仿真】Carla介绍与使用 [1] (附代码手把手讲解)](https://img-blog.csdnimg.cn/20210507211438258.png)


![[carla入门教程]-1 安装carla环境](https://img-blog.csdnimg.cn/e2786b708614436782c033adcb0486c6.png)