1. 多窗口
1.1 栈
Android7.0开始支持多窗口,多窗口分为三种,画中画,分屏,自由窗口,多窗口的核心原理其实就是分栈和设置栈边界,
分栈即把不同窗口模式下的Activity放在不同的ActivityStack中,Android7.0为区分不同ActivityStack定义了不同stackId:
/** First static stack ID. */public static final int FIRST_STATIC_STACK_ID = 0;/** Home activity stack ID. */public static final int HOME_STACK_ID = FIRST_STATIC_STACK_ID;/** ID of stack where fullscreen activities are normally launched into. */public static final int FULLSCREEN_WORKSPACE_STACK_ID = 1;/** ID of stack where freeform/resized activities are normally launched into. */public static final int FREEFORM_WORKSPACE_STACK_ID = FULLSCREEN_WORKSPACE_STACK_ID + 1;/** ID of stack that occupies a dedicated region of the screen. */public static final int DOCKED_STACK_ID = FREEFORM_WORKSPACE_STACK_ID + 1;/** ID of stack that always on top (always visible) when it exist. */public static final int PINNED_STACK_ID = DOCKED_STACK_ID + 1;
但在Android10.0中已经不是用stackId来分栈了,而是使用ActivityStack父类提供的getWindowingMode()方法来获取窗口模式进而区分不同ActivityStack,具体的windowingMode定义在WindowConfiguration中:
/** Windowing mode is currently not defined. */public static final int WINDOWING_MODE_UNDEFINED = 0;//普通全屏窗口public static final int WINDOWING_MODE_FULLSCREEN = 1;//画中画public static final int WINDOWING_MODE_PINNED = 2;//分屏主窗口public static final int WINDOWING_MODE_SPLIT_SCREEN_PRIMARY = 3;//分屏副窗口public static final int WINDOWING_MODE_SPLIT_SCREEN_SECONDARY = 4;/*** Alias for {@link #WINDOWING_MODE_SPLIT_SCREEN_SECONDARY} that makes it clear that the usage* points for APIs like {@link ActivityOptions#setLaunchWindowingMode(int)} that the container* will launch into fullscreen or split-screen secondary depending on if the device is currently* in fullscreen mode or split-screen mode.*/public static final int WINDOWING_MODE_FULLSCREEN_OR_SPLIT_SCREEN_SECONDARY =WINDOWING_MODE_SPLIT_SCREEN_SECONDARY;//自有窗口public static final int WINDOWING_MODE_FREEFORM = 5;
1.2 Android对Activity的组织方式
Android对Activity的组织方式通过容器分级存储,容器分为AMS侧和WMS侧,AMS这边顶级容器为ConfigurationContainer,WMS这边顶级容器可以简单认为是WindowContainer(WindowContainer其实也是继承ConfigurationContainer的),接着AMS这边依次为:
ActivityDisplay->ActivityStack->TaskRecord->ActivityRecord
WMS这边仅针对Activity这种类型窗口来说也可以依次分为:
DisplayContent(TaskStackContainer)->TaskStack->Task->AppWindowToken
这种分级存储有利于对Activity的管理,AMS这边管理的是Activity,WMS这边管理的是Window.
1.2 栈边界
不同的窗口模式有不同的ActivityStack,而不同的ActivityStack有自己的边界,ActivityStack中的Activity只能显示在ActivityStack边界内,所以只要设置好ActivityStack的边界,其内部的Activity大小就确定了,设置边界的核心是setBounds方法:
// ActivityStack.java@Overridepublic int setBounds(Rect bounds) {return super.setBounds(!inMultiWindowMode() ? null : bounds);}
可以看到在设置ActivityStack栈边界时会有判断,只有当前ActivityStack处于多窗口模式时才能设置边界:
//ConfigurationContainer.java/*** Returns true if this container is currently in multi-window mode. I.e. sharing the screen* with another activity.*/public boolean inMultiWindowMode() {/*@WindowConfiguration.WindowingMode*/ int windowingMode =mFullConfiguration.windowConfiguration.getWindowingMode();return windowingMode != WINDOWING_MODE_FULLSCREEN&& windowingMode != WINDOWING_MODE_UNDEFINED;}
2. 分屏模式
2.1 进入分屏
Android原生的分屏入口在SystemUI的最近任务界面,对于车机来说没有最近任务界面,但其实要进去分屏模式非常简单,前面说了多窗口核心原理其实就是分栈和设置栈边界,所以要进去分屏只需要将当前应用所在的ActivityStack设置为分屏的栈,即设置其windowmode为WINDOWING_MODE_SPLIT_SCREEN_PRIMARY,然后设置其分屏之后的栈的边界就行了,核心方法两个,ActivityTaskManagerService中的setTaskWindowingModeSplitScreenPrimary和resizeDockedStack,这两个方法是支持Binder调用的,SystemUI就是用的这两个方法,我这边直接在Framework中调用之后测试结果如下:

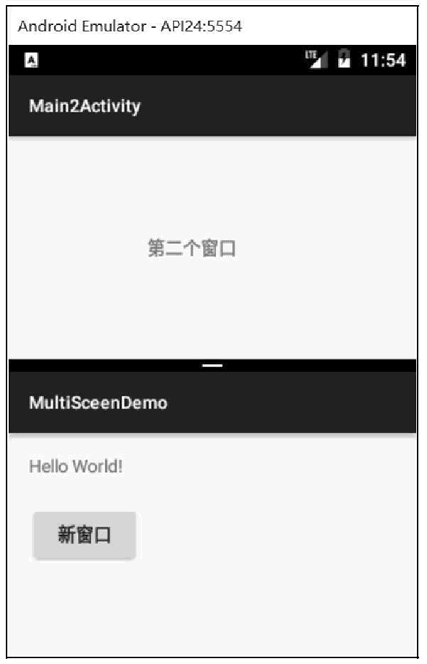
很简单就实现了分屏。
2.2 设置分屏模式
/**参数:taskId:进入分屏的Activity所在的task的IDcreateMode:进入分屏的Activity显示在上面还是下面,如果是横屏则是左边或者右边initialBounds:进入分屏的Activity的大小toTop:进入分屏的Activity是否移动到顶部*/@Overridepublic boolean setTaskWindowingModeSplitScreenPrimary(int taskId, int createMode,boolean toTop, boolean animate, Rect initialBounds, boolean showRecents) {enforceCallerIsRecentsOrHasPermission(MANAGE_ACTIVITY_STACKS,"setTaskWindowingModeSplitScreenPrimary()");synchronized (mGlobalLock) {final long ident = Binder.clearCallingIdentity();try {//根据taskId拿到TaskRecordfinal TaskRecord task = mRootActivityContainer.anyTaskForId(taskId,MATCH_TASK_IN_STACKS_ONLY);if (task == null) {Slog.w(TAG, "setTaskWindowingModeSplitScreenPrimary: No task for id=" + taskId);return false;}if (DEBUG_STACK) Slog.d(TAG_STACK,"setTaskWindowingModeSplitScreenPrimary: moving task=" + taskId+ " to createMode=" + createMode + " toTop=" + toTop);if (!task.isActivityTypeStandardOrUndefined()) {throw new IllegalArgumentException("setTaskWindowingMode: Attempt to move"+ " non-standard task " + taskId + " to split-screen windowing mode");}mWindowManager.setDockedStackCreateState(createMode, initialBounds);final int windowingMode = task.getWindowingMode();final ActivityStack stack = task.getStack();if (toTop) {//将Activity所在的task所在的ActivityStack移到最顶部stack.moveToFront("setTaskWindowingModeSplitScreenPrimary", task);}//核心:设置当前ActivityStack的windowMode为WINDOWING_MODE_SPLIT_SCREEN_PRIMARY//这里进入分屏的应用并不会新建栈,而是复用当前栈,然后修改栈的windowMode就行了,对比画中画//和自由窗口是不一样的。stack.setWindowingMode(WINDOWING_MODE_SPLIT_SCREEN_PRIMARY, animate, showRecents,false /* enteringSplitScreenMode */, false /* deferEnsuringVisibility */,false /* creating */);return windowingMode != task.getWindowingMode();} finally {Binder.restoreCallingIdentity(ident);}}}
setTaskWindowingModeSplitScreenPrimary方法核心其实就是将当前要进入分屏的应用所在的ActivityStack的windowMode修改为WINDOWING_MODE_SPLIT_SCREEN_PRIMARY,修改了模式后面在设置栈边界时才能生效。
2.3 设置栈边界
@Overridepublic void resizeDockedStack(Rect dockedBounds, Rect tempDockedTaskBounds,Rect tempDockedTaskInsetBounds,Rect tempOtherTaskBounds, Rect tempOtherTaskInsetBounds) {enforceCallerIsRecentsOrHasPermission(MANAGE_ACTIVITY_STACKS, "resizeDockedStack()");long ident = Binder.clearCallingIdentity();try {synchronized (mGlobalLock) {mStackSupervisor.resizeDockedStackLocked(dockedBounds, tempDockedTaskBounds,tempDockedTaskInsetBounds, tempOtherTaskBounds, tempOtherTaskInsetBounds,PRESERVE_WINDOWS);}} finally {Binder.restoreCallingIdentity(ident);}}
ActivityStackSupervisor.resizeDockedStackLocked:
void resizeDockedStackLocked(Rect dockedBounds, Rect tempDockedTaskBounds,Rect tempDockedTaskInsetBounds, Rect tempOtherTaskBounds, Rect tempOtherTaskInsetBounds,boolean preserveWindows) {resizeDockedStackLocked(dockedBounds, tempDockedTaskBounds, tempDockedTaskInsetBounds,tempOtherTaskBounds, tempOtherTaskInsetBounds, preserveWindows,false /* deferResume */);}
resizeDockedStackLocked:
void resizeDockedStackLocked(Rect dockedBounds, Rect tempDockedTaskBounds,Rect tempDockedTaskInsetBounds, Rect tempOtherTaskBounds, Rect tempOtherTaskInsetBounds,boolean preserveWindows, boolean deferResume) {//是否允许StackResizeif (!mAllowDockedStackResize) {// Docked stack resize currently disabled.return;}//获取当前系统中处于分屏模式的ActivityStackfinal ActivityStack stack =mRootActivityContainer.getDefaultDisplay().getSplitScreenPrimaryStack();if (stack == null) {Slog.w(TAG, "resizeDockedStackLocked: docked stack not found");return;}if (mDockedStackResizing) {mHasPendingDockedBounds = true;mPendingDockedBounds = copyOrNull(dockedBounds);mPendingTempDockedTaskBounds = copyOrNull(tempDockedTaskBounds);mPendingTempDockedTaskInsetBounds = copyOrNull(tempDockedTaskInsetBounds);mPendingTempOtherTaskBounds = copyOrNull(tempOtherTaskBounds);mPendingTempOtherTaskInsetBounds = copyOrNull(tempOtherTaskInsetBounds);}Trace.traceBegin(TRACE_TAG_ACTIVITY_MANAGER, "am.resizeDockedStack");//通知WMS延迟布局mWindowManager.deferSurfaceLayout();try {// 防止重复调用mAllowDockedStackResize = false;//获取分屏ActivityStack中的顶部ActivityActivityRecord r = stack.topRunningActivityLocked();//设置ActivityStack大小stack.resize(dockedBounds, tempDockedTaskBounds, tempDockedTaskInsetBounds);if (stack.getWindowingMode() == WINDOWING_MODE_FULLSCREEN|| (dockedBounds == null && !stack.isAttached())) {moveTasksToFullscreenStackLocked(stack, ON_TOP);// stack shouldn't contain anymore activities, so nothing to resume.r = null;} else {//遍历Display下所有ActivityStack,final ActivityDisplay display = mRootActivityContainer.getDefaultDisplay();final Rect otherTaskRect = new Rect();for (int i = display.getChildCount() - 1; i >= 0; --i) {final ActivityStack current = display.getChildAt(i);if (!current.inSplitScreenSecondaryWindowingMode()) {continue;}if (!current.affectedBySplitScreenResize()) {continue;}if (mDockedStackResizing && !current.isTopActivityVisible()) {// Non-visible stacks get resized once we're done with the resize// interaction.continue;}//对分屏副窗口计算大小以及位置,位置分为上下,横屏为左右current.getStackDockedModeBounds(dockedBounds,tempOtherTaskBounds /* currentTempTaskBounds */,tempRect /* outStackBounds */,otherTaskRect /* outTempTaskBounds */);mRootActivityContainer.resizeStack(current,!tempRect.isEmpty() ? tempRect : null,!otherTaskRect.isEmpty() ? otherTaskRect : tempOtherTaskBounds,tempOtherTaskInsetBounds, preserveWindows,true /* allowResizeInDockedMode */, deferResume);}}if (!deferResume) {stack.ensureVisibleActivitiesConfigurationLocked(r, preserveWindows);}} finally {mAllowDockedStackResize = true;mWindowManager.continueSurfaceLayout();Trace.traceEnd(TRACE_TAG_ACTIVITY_MANAGER);}}
重点看分屏副窗口的大小计算,分屏主窗口大小一般由调用者提供,
getStackDockedModeBounds:
void getStackDockedModeBounds(Rect dockedBounds, Rect currentTempTaskBounds,Rect outStackBounds, Rect outTempTaskBounds) {if (mTaskStack != null) {mTaskStack.getStackDockedModeBoundsLocked(getParent().getConfiguration(), dockedBounds,currentTempTaskBounds, outStackBounds, outTempTaskBounds);} else {outStackBounds.setEmpty();outTempTaskBounds.setEmpty();}}
TaskStack.getStackDockedModeBoundsLocked:
void getStackDockedModeBoundsLocked(Configuration parentConfig, Rect dockedBounds,Rect currentTempTaskBounds, Rect outStackBounds, Rect outTempTaskBounds) {outTempTaskBounds.setEmpty();if (dockedBounds == null || dockedBounds.isEmpty()) {// Calculate the primary docked bounds.final boolean dockedOnTopOrLeft = mWmService.mDockedStackCreateMode== SPLIT_SCREEN_CREATE_MODE_TOP_OR_LEFT;getStackDockedModeBounds(parentConfig,true /* primary */, outStackBounds, dockedBounds,mDisplayContent.mDividerControllerLocked.getContentWidth(), dockedOnTopOrLeft);return;}//计算分屏副窗口的位置,上或者下,横屏左或者右,计算规则比较简单,首先判断当前设备处于横屏还是竖屏,//横屏则比较屏幕和分屏主窗口x坐标,竖屏则比较屏幕和分屏主窗口y坐标final int dockedSide = getDockSide(parentConfig, dockedBounds);......final boolean dockedOnTopOrLeft = dockedSide == DOCKED_TOP || dockedSide == DOCKED_LEFT;//计算分屏副窗口边界大小getStackDockedModeBounds(parentConfig,false /* primary */, outStackBounds, dockedBounds,mDisplayContent.mDividerControllerLocked.getContentWidth(), dockedOnTopOrLeft);}
计算分屏副窗口边界方法getStackDockedModeBounds中传了个很重要的参数, mDisplayContent.mDividerControllerLocked.getContentWidth()这个参数得到的是分屏中间的DividerView的宽度,就是那条分割屏幕的线,由下面方法计算得到:
int getContentWidth() {return mDividerWindowWidth - 2 * mDividerInsets;}mDividerWindowWidth = context.getResources().getDimensionPixelSize(com.android.internal.R.dimen.docked_stack_divider_thickness);mDividerInsets = context.getResources().getDimensionPixelSize(com.android.internal.R.dimen.docked_stack_divider_insets);mDividerWindowWidth和mDividerInsets定义在frameworks/base/core/res/res/values/dimens.xml中,调整DividerView的宽度测试效果如下:

TaskStack.getStackDockedModeBounds:
private void getStackDockedModeBounds(Configuration parentConfig, boolean primary,Rect outBounds, Rect dockedBounds, int dockDividerWidth,boolean dockOnTopOrLeft) {//参数parentConfig是Display的配置,所以这里getBounds得到的是屏幕的边界(Rect(400, 0 - 800, 400))final Rect displayRect = parentConfig.windowConfiguration.getBounds();//是否水平分屏final boolean splitHorizontally = displayRect.width() > displayRect.height();outBounds.set(displayRect);//分屏主窗口if (primary) {......return;}// 分屏主窗口不在上或者左,if (!dockOnTopOrLeft) {//横屏分屏if (splitHorizontally) {//分屏副窗口right = 分屏主窗口的left减去分屏分割线的宽度outBounds.right = dockedBounds.left - dockDividerWidth;} else {//竖屏分屏//分屏副窗口bottom = 分屏主窗口的top减去分屏分割线的宽度outBounds.bottom = dockedBounds.top - dockDividerWidth;}} else {//分屏主窗口在上或者左,计算方法类似if (splitHorizontally) {outBounds.left = dockedBounds.right + dockDividerWidth;} else {outBounds.top = dockedBounds.bottom + dockDividerWidth;}}//确认计算得到的边界是有效的DockedDividerUtils.sanitizeStackBounds(outBounds, !dockOnTopOrLeft);}
分屏副窗口的边界计算很简单,核心就是分屏主窗口与分屏分割线做加减。
分屏副窗口边界计算完成之后,会调用RootActivityContainer的resizeStack方法设置边界:
RootActivityContainer.resizeStack:
void resizeStack(ActivityStack stack, Rect bounds, Rect tempTaskBounds,Rect tempTaskInsetBounds, boolean preserveWindows, boolean allowResizeInDockedMode,boolean deferResume) {//stack是否是分屏主窗口if (stack.inSplitScreenPrimaryWindowingMode()) {mStackSupervisor.resizeDockedStackLocked(bounds, tempTaskBounds,tempTaskInsetBounds, null, null, preserveWindows, deferResume);return;}//系统当前是否存在分屏栈final boolean splitScreenActive = getDefaultDisplay().hasSplitScreenPrimaryStack();//基本判断,是否允许栈Resizeif (!allowResizeInDockedMode&& !stack.getWindowConfiguration().tasksAreFloating() && splitScreenActive) {return;}//延迟布局mWindowManager.deferSurfaceLayout();try {if (stack.affectedBySplitScreenResize()) {if (bounds == null && stack.inSplitScreenWindowingMode()) {// 计算出来的分屏副窗口边界为空的情况则将分屏副窗口所在的栈windowMode设置为WINDOWING_MODE_FULLSCREENstack.setWindowingMode(WINDOWING_MODE_FULLSCREEN);} else if (splitScreenActive) {//当前处于分屏状态则将分屏副窗口的windowMode设置为WINDOWING_MODE_SPLIT_SCREEN_SECONDARYstack.setWindowingMode(WINDOWING_MODE_SPLIT_SCREEN_SECONDARY);}}//将之前计算出来的分屏副窗口边界保存下来,Rect(0, 0 - 360, 480)stack.resize(bounds, tempTaskBounds, tempTaskInsetBounds);if (!deferResume) {stack.ensureVisibleActivitiesConfigurationLocked(stack.topRunningActivityLocked(), preserveWindows);}} finally {mWindowManager.continueSurfaceLayout();Trace.traceEnd(TRACE_TAG_ACTIVITY_MANAGER);}}
ActivityStack.resize:
void resize(Rect bounds, Rect tempTaskBounds, Rect tempTaskInsetBounds) {if (!updateBoundsAllowed(bounds)) {return;}// Update override configurations of all tasks in the stack.final Rect taskBounds = tempTaskBounds != null ? tempTaskBounds : bounds;for (int i = mTaskHistory.size() - 1; i >= 0; i--) {final TaskRecord task = mTaskHistory.get(i);if (task.isResizeable()) {task.updateOverrideConfiguration(taskBounds, tempTaskInsetBounds);}}//核心:保存栈的边界setBounds(bounds);}
setBounds是AMS和WMS容器的顶级父类ConfigurationContainer中的方法,最终的边界值会保存到WindowConfiguration中,从类名可以看出来这个类其实是来存储窗口的配置信息的,包括之前的WindowMode也是保存在这里。
2.4 分屏Activity Resume
分屏主窗口和分屏副窗口的边界计算完成之后,会更新分屏主窗口Activity的Configuration,然后让分屏主窗口所在的栈的顶部Activity resume,重点看resume部分:
RootActivityContainer.resumeFocusedStacksTopActivities:
//分屏流程上调这个方法时传的三个参数都为null
boolean resumeFocusedStacksTopActivities(ActivityStack targetStack, ActivityRecord target, ActivityOptions targetOptions) {//targetStack == null,  target == null,   targetOptions == null// .....    //遍历所有Displayfor (int displayNdx = mActivityDisplays.size() - 1; displayNdx >= 0; --displayNdx) {boolean resumedOnDisplay = false;final ActivityDisplay display = mActivityDisplays.get(displayNdx);//遍历所有ActivityStackfor (int stackNdx = display.getChildCount() - 1; stackNdx >= 0; --stackNdx) {final ActivityStack stack = display.getChildAt(stackNdx);//每个ActivityStack中的顶部正在运行着的Activityfinal ActivityRecord topRunningActivity = stack.topRunningActivityLocked();//isFocusableAndVisible方法返回栈顶部Activity可见并且有焦点if (!stack.isFocusableAndVisible() || topRunningActivity == null) {continue;}if (stack == targetStack) {resumedOnDisplay |= result;continue;}//分屏主窗口的栈是否在Display顶部 并且 其栈顶部的Activity是否已经是RESUMED状态if (display.isTopStack(stack) && topRunningActivity.isState(RESUMED)) {//直接执行栈转换动画stack.executeAppTransition(targetOptions);} else {//否则修改Activity的状态resumedOnDisplay |= topRunningActivity.makeActiveIfNeeded(target);}}if (!resumedOnDisplay) {....}}return result;}
此方法核心是调用makeActiveIfNeeded修改当前Activity的状态,
ActivityRecord.makeActiveIfNeeded:
boolean makeActiveIfNeeded(ActivityRecord activeActivity) {//修改Activity状态为resumeif (shouldResumeActivity(activeActivity)) {if (DEBUG_VISIBILITY) {Slog.v("TAG_VISIBILITY", "Resume visible activity, " + this);}return getActivityStack().resumeTopActivityUncheckedLocked(activeActivity /* prev */,null /* options */);} else if (shouldPauseActivity(activeActivity)) { //修改Activity状态为pause......}return false;}
仅关注resume流程
ActivityStack.resumeTopActivityUncheckedLocked:
boolean resumeTopActivityUncheckedLocked(ActivityRecord prev, ActivityOptions options) { //传过来的prev和options都为空//当前是否正在resume中,防止重复调用if (mInResumeTopActivity) {// Don't even start recursing.return false;}boolean result = false;try {// Protect against recursion.mInResumeTopActivity = true;result = resumeTopActivityInnerLocked(prev, options);......return result;}
ActivityStack.resumeTopActivityInnerLocked:
private boolean resumeTopActivityInnerLocked(ActivityRecord prev, ActivityOptions options) {...ActivityRecord next = topRunningActivityLocked(true /* focusableOnly */);final boolean hasRunningActivity = next != null;.....final ActivityDisplay display = getDisplay();if (mResumedActivity == next && next.isState(RESUMED状态)&& display.allResumedActivitiesComplete()) {// 如果当前分屏主窗口Activity已经是RESUMED状态,仅执行窗口动画executeAppTransition(options);if (DEBUG_STATES) Slog.d(TAG_STATES,"resumeTopActivityLocked: Top activity resumed " + next);return false;}//.....省略一些判断条件//当前要resume的Activity有可能正在stop或者sleep,所以需要从对应集合移除mStackSupervisor.mStoppingActivities.remove(next);mStackSupervisor.mGoingToSleepActivities.remove(next);next.sleeping = false;// 如果当前有正在pause的Activity,则跳过此次resumeif (!mRootActivityContainer.allPausedActivitiesComplete()) {if (DEBUG_SWITCH || DEBUG_PAUSE || DEBUG_STATES) Slog.v(TAG_PAUSE,"resumeTopActivityLocked: Skip resume: some activity pausing.");//分屏主窗口Activity首次会走这里,因为要先等Launcher进入pause之后才能resumereturn false;}mStackSupervisor.setLaunchSource(next.info.applicationInfo.uid);//省略大段代码...........boolean anim = true;final DisplayContent dc = getDisplay().mDisplayContent;if (prev != null) {//这里prev是launcher,if (prev.finishing) {//如果launcher正在finishingif (mStackSupervisor.mNoAnimActivities.contains(prev)) {anim = false;//没有动画dc.prepareAppTransition(TRANSIT_NONE, false);} else {//有动画就开始准备窗口转换的动画,如果prev和next处于同一task,则准备Activity close动画,否则准备Task close动画dc.prepareAppTransition(prev.getTaskRecord() == next.getTaskRecord() ? TRANSIT_ACTIVITY_CLOSE: TRANSIT_TASK_CLOSE, false);}prev.setVisibility(false);} else {//如果launcher没有finishingif (mStackSupervisor.mNoAnimActivities.contains(next)) {anim = false;//没有动画dc.prepareAppTransition(TRANSIT_NONE, false);} else {//有动画就开始准备窗口转换的动画,如果prev和next处于同一task,则准备Activity 打开动画,否则准备Task 打开动画dc.prepareAppTransition(prev.getTaskRecord() == next.getTaskRecord() ? TRANSIT_ACTIVITY_OPEN: next.mLaunchTaskBehind ? TRANSIT_TASK_OPEN_BEHIND: TRANSIT_TASK_OPEN, false);}}} else {//这里prev为空的情况,if (mStackSupervisor.mNoAnimActivities.contains(next)) {anim = false//没有动画dc.prepareAppTransition(TRANSIT_NONE, false);} else {//直接准备Activity打开动画dc.prepareAppTransition(TRANSIT_ACTIVITY_OPEN, false);}}if (anim) {next.applyOptionsLocked();} else {next.clearOptionsLocked();}mStackSupervisor.mNoAnimActivities.clear();//分屏主窗口Activity所在的进程是否已经创建if (next.attachedToProcess()) {final boolean lastActivityTranslucent = lastFocusedStack != null&& (lastFocusedStack.inMultiWindowMode()|| (lastFocusedStack.mLastPausedActivity != null&& !lastFocusedStack.mLastPausedActivity.fullscreen));if (!next.visible || next.stopped || lastActivityTranslucent) {//设置分屏主窗口为可见next.setVisibility(true);}......//设置分屏主窗口Activity状态为RESUMEDnext.setState(RESUMED, "resumeTopActivityInnerLocked");.....//这个方法里面又有一堆条件判断是否可见if (shouldBeVisible(next)) {// We have special rotation behavior when here is some active activity that// requests specific orientation or Keyguard is locked. Make sure all activity// visibilities are set correctly as well as the transition is updated if needed// to get the correct rotation behavior. Otherwise the following call to update// the orientation may cause incorrect configurations delivered to client as a// result of invisible window resize.// TODO: Remove this once visibilities are set correctly immediately when// starting an activity.notUpdated = !mRootActivityContainer.ensureVisibilityAndConfig(next, mDisplayId,true /* markFrozenIfConfigChanged */, false /* deferResume */);}......//后面就是执行Activity生命周期了.......//通过ResumeActivityItem到APP进程去执行Activity resume的流程transaction.setLifecycleStateRequest(ResumeActivityItem.obtain(next.app.getReportedProcState(),getDisplay().mDisplayContent.isNextTransitionForward()));//执行Activity resumemService.getLifecycleManager().scheduleTransaction(transaction);} catch (Exception e) {......return true;}// From this point on, if something goes wrong there is no way// to recover the activity.try {//Activity完成resume的通知,包括修改各种状态等next.completeResumeLocked();} catch (Exception e) {return true;}} else {......}return true;}
这个方法实在太复杂了,省略了大段细节代码,需要关注的核心就是分屏主窗口Activity的状态被修改为了RESUME,然后到分屏应用进程去执行其Activity的生命周期。
总结下来分屏在AMS这边流程可以归纳为:设置分屏栈->计算分屏主副窗口的边界大小->将分屏应用放到前台来。
而真正窗口大小变化和动画会交给WMS来做。