版权声明:本文为博主原创文章,未经博主允许不得转载。
TWR_MPC8309调试日志
--------By Moresung Chan , At 12:00 ,Sep 16,2012
一、软硬件:
PC机操作系统:Microsoft Windows Server 2003 R2
开发板:TWR_MPC8309、网线、USB下载线、USB_TAP、光盘
工具软件:超级终端或者ZOC、Tftpd32
超级终端下载地址:http://digitizor.com/2009/08/29/install-winxp-hyperterminal-client-on-windows-vista-or-windows-7-free/ (windows XP系统自带有这个软件,其它系统需要自行下载)
Tftpd32软件下载地址:http://tftpd32.jounin.net/tftpd32_download.html
二、步骤:
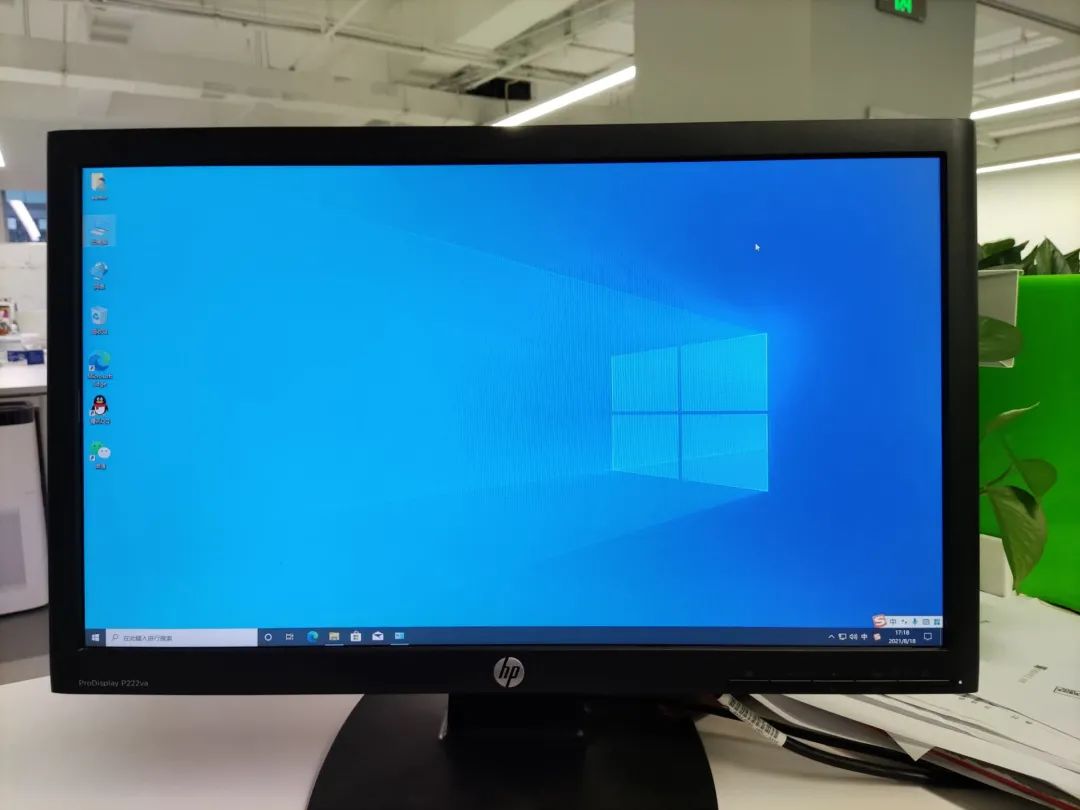
1. 刚买的开发板没有加载操作系统(见下图),因此需要自己移植操作系统。好消息是开发板已经固化了U-Boot,所以这样我们就可以在U-Boot下面进行移植。(参考文档:TWRMPC8309UM_rev1_20110720.pdf)

2. 用USB下载线将开发板和PC机连接起来,默认是上电就启动开发板的,这个时候打开超级终端,出现以下U-Boot调试信息:
/************************************************/
U-Boot 2010.06 (Feb 28 2012 - 11:25:33)MPC83XX
Reset StaIn: vga
Out: vga
Err: vga
MMC: FSL_ESDHC: 0
Net: FSL UEC0, FSL UEC1, FSL UEC2
USB RESET
Register 10011 NbrPorts 1
USB EHCI 1.00
The USB ULPI VIEWPORT reg value is 40000001
The USB ULPI VIEWPORT reg value is 8
Hit any key to stop autoboot: 3
## Please select the number of the optionitems
## Timeout will default to the option item1.
0: Boot Configuration
1: Linux-run bootLinux
2: MQX-run bootMQ
Hit any key to stop autoboot: 0
Wrong Image Format forbootm command
ERROR: can't get kernelimage!
/************************************************/
如果按下3种启动方式都不能提示出现以上红色提示信息,那么表示没有操作系统或者说没有配置好操作系统地址。(一般来说是没有下载操作系统的原因)
3. 不用担心,U-Boot是个很好的工具,它的命令行模式已经非常接近linux下的shell了,而且功能也很强大,输入help命令可以查看它支持的命令:
/************************************************/
=> help
? - alias for 'help'
askenv - get environment variables from stdin
base - print or set address offset
bdinfo - print Board Info structure
boot - boot default, i.e., run 'bootcmd'
bootd - boot default, i.e., run 'bootcmd'
bootm - boot application image from memory
bootmenu- Multiple boot selection. Pleaseselect the number of the menu item
bootoption- Multiple boot selection. Pleaseselect the number of the option item
bootp - boot image via network using BOOTP/TFTP protocol
clocks - print clock configuration
cmp - memory compare
coninfo - print console devices andinformation
cp - memory copy
crc32 - checksum calculation
diag_mpc8309_twr- perform board diagnostics
echo - echo args to console
editenv - edit environment variable
eeprom - EEPROM sub-system
erase - erase FLASH memory
exit - exit script
ext2load- load binary file from a Ext2filesystem
ext2ls - list files in a directory (default /)
false - do nothing, unsuccessfully
fatinfo - print information aboutfilesystem
fatload - load binary file from a dosfilesystem
fatls - list files in a directory (default /)
fdt - flattened device tree utility commands
flinfo - print FLASH memory information
fsinfo - print information about filesystems
fsload - load binary file from a filesystem image
Go - start application at address 'addr'
help - print command description/usage
i2c - I2Csub-system
iminfo - print header information for application image
imls - list all images found in flash
imxtract- extract a part of a multi-image
itest - return true/false on integer compare
loadb - load binary file over serial line (kermit mode)
loads - load S-Record file over serial line
loady - load binary file over serial line (ymodem mode)
loop - infinite loop on address range
ls - list files in a directory (default /)
md - memory display
mii - MII utility commands
mm - memory modify (auto-incrementing address)
mmc - MMC sub system
mmcinfo - mmcinfo <dev num>-- displayMMC info
mtest - simple RAM read/write test
mw - memory write (fill)
nfs - boot image via network using NFS protocol
nm - memory modify (constant address)
pci - list and access PCI Configuration Space
ping - send ICMP ECHO_REQUEST to network host
printenv- print environment variables
protect - enable or disable FLASH writeprotection
qe - QUICC Engine commands
rarpboot- boot image via network usingRARP/TFTP protocol
reset - Perform RESET of the CPU
run - run commands in an environment variable
saveenv - save environment variables topersistent storage
setenv - set environment variables
showvar - print local hushshell variables
sleep - delay execution for some time
source - run script from memory
sspi - SPI utility commands
test - minimal test like /bin/sh
tftpboot- boot image via network using TFTPprotocol
true - do nothing, successfully
usb - USB sub-system
usbboot - boot from USB device
version - print monitor version
/************************************************/
4. 详细的介绍以及操作可以查看一下文档:
http://blog.csdn.net/ghostyu/article/details/6968681
5. 有了U-Boot的基本知识以后,我们就可以进行移植操作系统了。
在U-Boot下面移植操作系统可以采取很多方式:U盘、SD卡、NFS、TFTP等等都可以。开发板光盘里面提供了tftp方式移植的文档,那么我们就按照这个方式来移植操作系统吧。
1)用网线连接开发板和PC机(此时PC机要断网),然后设置PC机IP地址(这个地址只需要和开发板的地址在一个网段就行了,可以不按照教程中的设置),然后就可以按照Info_tftpd32.pdf这个文档里面的操作进行设置。

2)这一步告诉你怎么通过tftp服务将PC机中的相应文件加载到开发板的nor flash当中去。
参考文档:TWR-MPC8309_Linux_BSP_User_Manual.pdf
里面有一段是这样的:

(由于我是直接将二进制文件放入TFTP_Root文件夹,所以下面的命令中不会有/mpc8309twr/目录)
我的目录如下:

看过U-Boot命令之后,相信对这个命令行模式的命令有了一定的了解吧。
3)这一步就可以按照顺序来加载文件了:
按照下面的分区地址来进行加载
下面贴上我的命令行模式的命令顺序:
- tftp 2000000 u-boot.bin //将u-boot.bin加载到RAM中去
- echo $filesize
- protect off all //解除nor flash的保护
- erase fe000000 fe09ffff //擦除相应的分区
- cp.b 2000000 fe000000 $filesize //将内存中0x2000000开始的内容复制到nor flash中相应的地址去
- cmp.b 2000000 fe000000 $filesize //下载完 还应该验证一下
- tftp 2000000 rootfs.ext2.gz.uboot
- echo $filesize
- protect off all
- erase fe800000 feffffff
- cp.b 2000000 fe800000 $filesize
- cmp.b 2000000 fe800000 $filesize
- tftp 2000000 mpc8309twr.dtb
- echo $filesize
- protect off all
- erase fe0e0000 fe0fffff
- cp.b 2000000 fe0e0000 $filesize
- cmp.b 2000000 fe0e0000 $filesize
- tftp 2000000 mpc8309twr/uImage
- echo $filesize
- protect off all
- erase fe100000 fe3fffff
- cp.b 2000000 fe100000 $filesize
- cmp.b 2000000 fe100000 $filesize
- protect on all //对nor flash写保护
- saveenv
最后重启就可以了。
接下来就会出现下面神气的现象:
U-Boot 2010.06-00077-gd1e0776 (Dec 27 2011- 19:51:03) MPC83XX
Reset Status: Software Hard,External/Internal Hard
CPU: e300c3, MPC8309E, Rev:1.1 at 400 MHz, CSB: 133.333 MHz
Board: Freescale MPC8309_twr
I2C: ready
SPI: ready
DRAM: 128 MiB
FLASH: 32 MiB
Firmware 'Microcode version 0.0.0for MPC8309 r1.0' for 8309 V1.0
QE: uploading microcode 'Microcode forMPC8309 r1.0'
*** Warning - bad CRC, using defaultenvironment
In: vga
Out: vga
Err: vga
MMC: FSL_ESDHC: 0
Net: FSL UEC0, FSL UEC1
USB RESET
Register 10011 NbrPorts 1
USB EHCI 1.00
The USB ULPI VIEWPORT reg value is 40000001
The USB ULPI VIEWPORT reg value is 8
Hit any key to stop autoboot: 0
## Please select the number of the menuitems
0: NOR Flash or External LCS_B0
1: SD Card
2: USB
3: FEC
4: SPI
5: I2C
6: UART
7: External LCS_B3
0
=> bootmenu
## Please select the number of the menuitems
0: NOR Flash or External LCS_B0
1: SD Card
2: USB
3: FEC
4: SPI
5: I2C
6: UART
7: External LCS_B3
0
## Booting kernel from Legacy Image atfe100000 ...
Image Name: Linux-2.6.33.7.2-rt30-00077-gd1e
Image Type: PowerPC Linux KernelImage (gzip compressed)
Data Size: 2000361 Bytes = 1.9MiB
Load Address: 00000000
Entry Point: 00000000
Verifying Checksum ... OK
## Loading init Ramdisk from Legacy Imageat fe800000 ...
Image Name: uboot ext2 ramdiskrootfs
Image Type: PowerPC LinuxRAMDisk Image (gzip compressed)
Data Size: 6372600 Bytes = 6.1MiB
Load Address: 00000000
Entry Point: 00000000
Verifying Checksum ... OK
## Flattened Device Tree blob at fe0e0000
Booting using the fdt blob at 0xfe0e0000
Uncompressing Kernel Image ... OK
Loading Ramdisk to 078af000, end 07ec2cf8 ... OK
Loading Device Tree to 007fb000, end 007ffacd ... OK
Using MPC8309 TWR machine description
Linux version 2.6.33.7.2-rt30-00077-gd1e0776(kon@linux-fwjn) (gcc version 4.1.2) #1 PREEMPT RT Tue Dec 27 19:56:29 EST 2011
Found initrd at 0xc78af000:0xc7ec2cf8
bootconsole [udbg0] enabled
setup_arch: bootmem
mpc8309_twr_setup_arch()
Found FSL PCI host bridge at0x00000000e0008500. Firmware bus number: 0->0
PCI host bridge /pci@e0008500 (primary)ranges:
MEM0x0000000080000000..0x000000008fffffff -> 0x0000000080000000 Prefetch
MEM0x0000000090000000..0x000000009fffffff -> 0x0000000090000000
IO0x00000000d0000000..0x00000000d3ffffff -> 0x00000000d0000000
arch: exit
Zone PFN ranges:
DMA 0x00000000 ->0x00008000
Normal 0x00008000 -> 0x00008000
Movable zone start PFN for each node
early_node_map[1] active PFN ranges
0: 0x00000000 -> 0x00008000
Built 1 zonelists in Zone order, mobilitygrouping on. Total pages: 32512
Kernel command line: root=/dev/ramramdisk_size=90000 rw ip=172.20.3.88:172.20.3.100:172.20.1.254::mpc8309_twr:eth0:offconsole=ttyS0,115200
PID hash table entries: 512 (order: -1,2048 bytes)
Dentry cache hash table entries: 16384(order: 4, 65536 bytes)
Inode-cache hash table entries: 8192(order: 3, 32768 bytes)
Memory: 119292k/131072k available (3888kkernel code, 11620k reserved, 224k data, 105k bss, 168k init)
Kernel virtual memory layout:
*0xfffdf000..0xfffff000 : fixmap
*0xfcef7000..0xfe000000 : early ioremap
*0xc9000000..0xfcef7000 : vmalloc &ioremap
Real-Time Preemption Support (C) 2004-2007Ingo Molnar
Experimental preemptable hierarchical RCUimplementation.
NR_IRQS:512
IPIC (128 IRQ sources) at c9000700
clocksource: timebase mult[7800001]shift[22] registered
Mount-cache hash table entries: 512
NET: Registered protocol family 16
PCI: Probing PCI hardware
bio: create slab <bio-0> at 0
vgaarb: loaded
SCSI subsystem initialized
usbcore: registered new interface driverusbfs
usbcore: registered new interface driverhub
usbcore: registered new device driver usb
cfg80211: Calling CRDA to update worldregulatory domain
Switching to clocksource timebase
NET: Registered protocol family 2
IP route cache hash table entries: 1024(order: 0, 4096 bytes)
TCP established hash table entries: 4096(order: 3, 32768 bytes)
TCP bind hash table entries: 4096 (order:4, 114688 bytes)
TCP: Hash tables configured (established4096 bind 4096)
TCP renoregistered
UDP hash table entries: 64 (order: 0, 4096bytes)
UDP-Lite hash table entries: 64 (order: 0,4096 bytes)
NET: Registered protocol family 1
RPC: Registered udp transport module.
RPC: Registered tcp transport module.
RPC: Registered tcp NFSv4.1 backchanneltransport module.
Trying to unpack rootfs image asinitramfs...
rootfs image is not initramfs (no cpiomagic); looks like an initrd
Freeing initrd memory: 6223k freed
mpc8309twr_rwbuffer_init
Read buffer = 0xe0ff
Write buffer with 0xeeff
JFFS2 version 2.2. (NAND) © 2001-2006 RedHat, Inc.
msgmni has been set to 245
alg: No test for stdrng (krng)
io scheduler noop registered
io scheduler deadline registered
io scheduler cfq registered (default)
ssd1289_init
ssd1289 ssd1289.0: ssd1289_probe: unknownsignature 0x4000
Serial: 8250/16550 driver, 4 ports, IRQsharing disabled
serial8250.0: ttyS0 at MMIO 0xe0004500 (irq= 16) is a 16550A
console [ttyS0] enabled, bootconsoledisabled
console [ttyS0] enabled, bootconsoledisabled
brd: module loaded
loop: module loaded
fe000000.flash: Found 1 x16 devices at 0x0 in 16-bit bank
NOR chip too large to fit in mapping.Attempting to cope...
Amd/Fujitsu Extended Query Table at 0x0040
fe000000.flash: CFI does not contain bootbank location. Assuming top.
number of CFI chips: 1
Reducing visibility of 32768KiB chip to8192KiB
RedBoot partition parsing not available
Creating 4 MTD partitions on "fe000000.flash":
0x000000000000-0x000000100000 :"u-boot"
0x000000100000-0x000000500000 :"fs"
0x000000500000-0x000000700000 :"kernel"
0x000000700000-0x000000800000 :"dtb"
mpc8xxx_spi e0007000.spi: at 0xc9074000(irq = 17), CPU mode
Fixed MDIO Bus: probed
ucc_geth: QE UCC Gigabit EthernetController
ucc_geth: UCC1 at 0xe0102000 (irq = 18)
ucc_geth: UCC2 at 0xe0103000 (irq = 19)
Freescale PowerQUICC MII Bus: probed
usbmon: debugfs is not available
ehci_hcd: USB 2.0 'Enhanced' HostController (EHCI) Driver
fsl-ehci fsl-ehci.0: Freescale On-Chip EHCIHost Controller
fsl-ehci fsl-ehci.0: new USB busregistered, assigned bus number 1
fsl-ehci fsl-ehci.0: irq 38, io base0xe0023000
fsl-ehci fsl-ehci.0: USB 2.0 started, EHCI1.00
hub 1-0:1.0: USB hub found
hub 1-0:1.0: 1 port detected
Initializing USB Mass Storage driver...
usbcore: registered new interface driverusb-storage
USB Mass Storage support registered.
i2c/dev entries driver
sdhci: Secure Digital Host ControllerInterface driver
sdhci: Copyright(c) Pierre Ossman
Registered led device: mmc0::
mmc0: SDHCI controller on e002e000.sdhci[e002e000.sdhci] using DMA
TCP cubic registered
NET: Registered protocol family 17
MPR121 Touchkey Init
mpr121_touchkey 1-005a: mpr_touchkey_probe: addr=0x5a irq=48 name=mpr121_touchkey
mpr121_touchkey 1-005a: i2cwrite error: -5
mpr121_touchkey 1-005a: Failed to init register
mpr121_touchkey: probe of 1-005a failed with error -5
mmcblk0: mmc0:e624 SD04G 3.69 GiB
mmcblk0: p1
IP-Config: Guessing netmask 255.255.0.0
IP-Config: Complete:
device=eth0, addr=172.20.3.88, mask=255.255.0.0, gw=172.20.1.254,
host=mpc8309_twr, domain=, nis-domain=(none),
bootserver=172.20.3.100, rootserver=172.20.3.100, rootpath=
RAMDISK: gzip image found at block 0
VFS: Mounted root (ext2 filesystem) ondevice 1:0.
Freeing unused kernel memory: 168k init
Mounting /proc and /sys
Starting the hotplug events dispatcherudevd
Synthesizing initial hotplug events
Setting the hostname to mpc8309twr
Mounting filesystems
mount: mounting /dev/sda1 on /mnt/usbflashfailed: No such file or directory
Running sysctl
Setting up networking on loopback device:
Setting up networking on eth0:
Setting up networking on eth1:
Starting inetd:
Welcome to the LTIB Embedded Linux Environment
!!!!! WARNING !!!!!!!
The default password for the root accountis: root
please change this password using the'passwd' command
and then edit this message (/etc/issue) toremove this message
mpc8309twr login: root (automatic login)
login[1666]: root login on 'ttyS0'
Run TWR-MPC8309 Demo
ls: /dev/fb0: No such file or directory
Can not find LCD display /dev/fb0
ls:/mnt/mmc/TWR-MPC8309_Demo/textural/demo_txt.sh: No such file or directory
ls: /mnt/usbflash/TWR-MPC8309_Demo/textural/demo_txt.sh:No such file or directory
Display text file from directory/root/TWR-MPC8309_Demo/textural
dos2unix: converting file demo_txt.sh toUnix format ...
TWR-MPC8309 Tower System
Industrial Development Platform
P O W E R
on
T O W E R
Elevate your design to new heights with
Power Architecture
build your industrial Powerhouse today
^C //此处按下ctrl+C进入文件系统命令行模式
[root@mpc8309twr root]# ls
TWR-MPC8309_Demo keypad_test test_setkey
can mma8451_test
diskinit-1.2.sh sdflashinit-1.1.sh
[root@mpc8309twr root]# cd ../
[root@mpc8309twr /]#
[root@mpc8309twr /]#
[root@mpc8309twr /]# ls
bin home lost+found proc sys var
dev lib mnt root tmp
etc linuxrc opt sbin usr
[root@mpc8309twr /]# cd mnt/
cdrom floppy mmc nfs rwfs src usbflash
![DWM1000 测距原理简单分析 之 SS-TWR代码分析2 -- [蓝点无限]](https://img2018.cnblogs.com/blog/149290/201811/149290-20181119213011345-441600695.png)


![DWM1000 测距原理简单分析 之 SS-TWR代码分析1 -- [蓝点无限]](https://img2018.cnblogs.com/blog/149290/201811/149290-20181119212300721-444635258.png)