请求参数传json对象,后端采用(pojo)接收的前提条件:
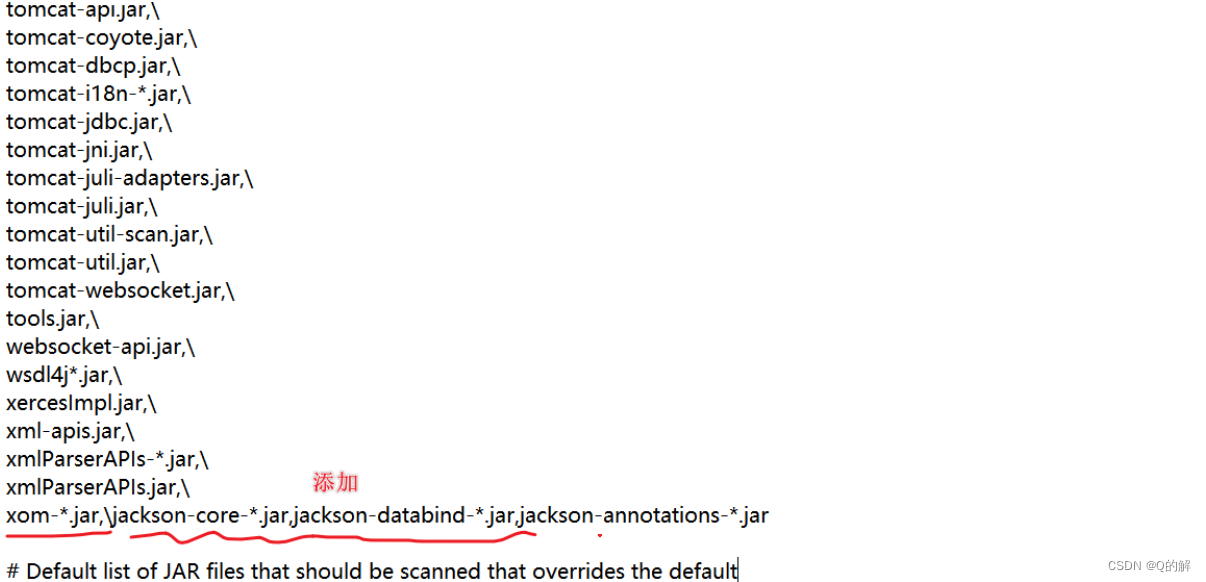
1.pom.xml文件加入坐标依赖:jackson-databind
2.Spring Boot 的启动类加注解:@EnableWebMvc
3.Spring Boot 的Controller接受参数采用:@RequestBody
4.postman入参采用json格式
1.pom.xml文件加入坐标:
<dependency><groupId>com.fasterxml.jackson.core</groupId><artifactId>jackson-databind</artifactId><version>2.9.8</version>
</dependency>
2.Spring Boot 启动类:加注解:@EnableWebMvc
import org.springframework.boot.SpringApplication;
import org.springframework.boot.autoconfigure.SpringBootApplication;
import org.springframework.cloud.openfeign.EnableFeignClients;
import org.springframework.context.annotation.Bean;
import org.springframework.http.client.ClientHttpRequestFactory;
import org.springframework.http.client.SimpleClientHttpRequestFactory;
import org.springframework.web.client.RestTemplate;
import org.springframework.web.servlet.config.annotation.EnableWebMvc;@SpringBootApplication
@EnableWebMvc
@EnableFeignClients(basePackages = {"com.itheima.platform.common.feign.services.home","com.itheima.bcg.service.fegin","com.itheima.platform.common.feign.services.paperTask","com.itheima.platform.common.feign.services.problem","com.itheima.platform.common.feign.services.auth","com.itheima.platform.common.feign.services.bpmn"})
public class Application {public static void main(String[] args) {SpringApplication.run(Application.class, args);}@Beanpublic RestTemplate restTemplate() {//复杂构造函数的使用SimpleClientHttpRequestFactory requestFactory = new SimpleClientHttpRequestFactory();requestFactory.setConnectTimeout(300000);// 设置超时requestFactory.setReadTimeout(300000);RestTemplate restTemplate = new RestTemplate();restTemplate.setRequestFactory(requestFactory);return restTemplate;}@Beanpublic ClientHttpRequestFactory simpleClientHttpRequestFactory() {SimpleClientHttpRequestFactory factory = new SimpleClientHttpRequestFactory();factory.setConnectTimeout(150000);factory.setReadTimeout(50000);return factory;}
}
POJO类:
import lombok.Data;@Data
public class Config {private int seqId;private int sortId;private String interfaceType;private String dicNameFirst;private int dicValueFirst;private String dicNameSecond;private int dicValueSecond;private String dicType;private String isEnable;
}
3.Controller接受参数采用:@RequestBody
Controller类:
备注:为了便于测试:Controller类只写了一个接口(实际开发可不要这样写噢)
/** 请求参数传json对象(POJO)**/@PostMapping(value = "/addTest")@AuthInterceptor("mg:get:addTest")public Result addTest(@RequestBody Config config) {try {return xxxListService.addTest(config);} catch (Exception e) {log.error("Controller addTest is error===:" + e.getMessage(), e);return Result.failure("测试成功");}}Service类:
Result addTest(Config config);
ServiceImpl类:
@Overridepublic Result addTest(Config config) {List<Map<String, Object>> res = new ArrayList<>();String interfaceType = config.getInterfaceType();if(interfaceType.equals("add")){xxxListMapper.addTest(config);}else if(interfaceType.equals("del")){xxxListMapper.delTest(config);}else if(interfaceType.equals("modify")){xxxListMapper.modifyTest(config);}else if(interfaceType.equals("sel")){res = xxxListMapper.selTest(config);}return Result.success().result(res);}Mapper类:
//新增void addTest(Config config);//删除void delTest(Config config);//修改void modifyTest(Config config);//查询List<Map<String, Object>> selTest(Config config);Mapper.xml类
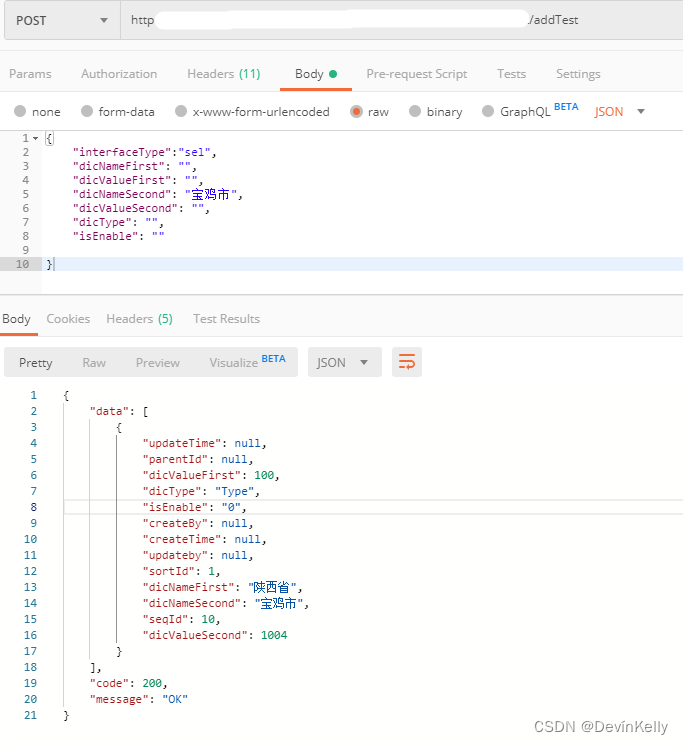
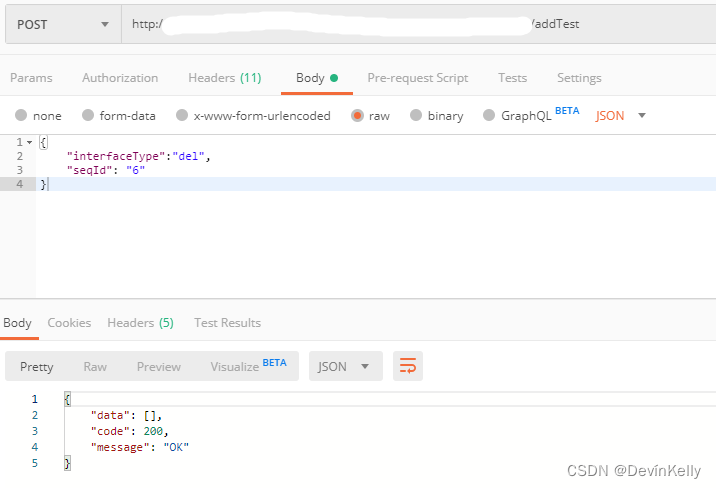
<!-- 新增 --><insert id="addTest">INSERT IGNORE INTO xxx_other_list_dic(dicNameFirst,dicValueFirst,dicNameSecond,dicValueSecond,dicType,isEnable)VALUES(#{dicNameFirst},#{dicValueFirst},#{dicNameSecond},#{dicValueSecond},#{dicType},#{isEnable})</insert><!-- 删除 --><select id="delTest">deleteFROM xxx_other_list_dic where<if test = "null != seqId and '' != seqId">seqId = #{seqId}</if></select><!-- 修改 --><update id="modifyTest">update xxx_other_list_dic<set><if test = "null != sortId and '' != sortId">sortId = #{sortId},</if><if test = "null != isEnable and '' != isEnable">isEnable = #{isEnable}</if></set>where<if test = "null != seqId and '' != seqId">seqId = #{seqId}</if></update><!-- 查询 --><select id="selTest" resultType="map">SELECT *FROM xxx_other_list_dic where 1 = 1<if test="null != dicNameFirst and '' != dicNameFirst">and dicNameFirst = #{dicNameFirst}</if><if test="null != dicValueFirst and '' != dicValueFirst">and dicValueFirst = #{dicValueFirst}</if><if test="null != dicNameSecond and '' != dicNameSecond">and dicNameSecond = #{dicNameSecond}</if><if test="null != dicValueSecond and '' != dicValueSecond">and dicValueSecond = #{dicValueSecond}</if><if test="null != dicType and '' != dicType">and dicType = #{dicType}</if><if test="null != isEnable and '' != isEnable">and isEnable = #{isEnable}</if>order by sortId</select>4.postman入参采用json格式
postman 接口测试:
新增:


修改:


查询:
删除:


![[ARM+Linux] 基于wiringPi库的串口通信](https://img-blog.csdnimg.cn/9ee83239c1034c5f90b6f223c348f377.png)