wiringOP-master/examples/serialTest.c中,wiringPi库中自带的串口程序:
#include <stdio.h>
#include <string.h>
#include <errno.h>#include <wiringPi.h>
#include <wiringSerial.h>int main ()
{int fd ;int count ;unsigned int nextTime ;if ((fd = serialOpen ("/dev/ttyS2", 115200)) < 0)//打开在/dev.ttyS2路径下的文件,波特率配置成115200,如果返回值为-1说明打开失败{fprintf (stderr, "Unable to open serial device: %s\n", strerror (errno)) ;return 1 ;}if (wiringPiSetup () == -1)//初始化wiringPi库{fprintf (stdout, "Unable to start wiringPi: %s\n", strerror (errno)) ;return 1 ;}nextTime = millis () + 300 //这个函数返回 一个 从你的程序执行 wiringPiSetup 初始化函数(或者wiringPiSetupGpio ) 到 当前时间 经过的 毫秒数。返回类型是unsigned int,最大可记录 大约49天的毫秒时长。for (count = 0 ; count < 256 ; ){if (millis () > nextTime){printf ("\nOut: %3d: ", count) ;fflush (stdout) ;//fflush(stdout)刷新标准输出缓冲区,把输出缓冲区里的东西打印到标准输出设备上。serialPutchar (fd, count) ;//将字符输出到串口nextTime += 300 ;++count ;}delay (3) ;while (serialDataAvail (fd)){printf (" -> %3d", serialGetchar (fd)) ;//获取串口的数据fflush (stdout) ;}}printf ("\n") ;return 0 ;
(90条消息) fflush(stdio)、fflush(stdout)详解_hanxp001的博客-CSDN博客
根据官方的wiringPi库修改接收和发送串口数据
#include <stdio.h>
#include <string.h>
#include <errno.h>
#include <pthread.h>
#include <wiringPi.h>
#include <wiringSerial.h>
#include <stdlib.h>
#include <unistd.h>
int fd ;void* SendHandler()
{char *SendBuf;SendBuf = (char *)malloc(32*sizeof(32));while(1){memset(SendBuf,'\0',32);scanf("%s",SendBuf);while(*SendBuf != NULL){serialPutchar(fd, *SendBuf++);}}
}void* RevHandler()
{while(1){while (serialDataAvail(fd)){printf ("%c", serialGetchar(fd)) ;fflush (stdout) ;}}}int main ()
{int count ;unsigned int nextTime ;pthread_t idsend;//定义线程标识符pthread_t idrev;//定义线程标识符if ((fd = serialOpen ("/dev/ttyS5", 115200)) < 0){fprintf (stderr, "Unable to open serial device: %s\n", strerror (errno)) ;return 1 ;}pthread_create(&idsend,NULL,SendHandler,NULL);//创建线程1发送数据pthread_create(&idrev,NULL,RevHandler,NULL);//创建线程2接收数据if (wiringPiSetup () == -1){fprintf (stdout, "Unable to start wiringPi: %s\n", strerror (errno)) ;return 1 ;}while(1){sleep(10);}printf ("\n") ;return 0 ;
}
修改过后通过创建线程来接收和发送串口数据
pthread_create(&idsend,NULL,SendHandler,NULL);//创建线程1发送数据
pthread_create(&idrev,NULL,RevHandler,NULL);//创建线程2接收数据(90条消息) Linux 线程_TX564的博客-CSDN博客
接收数据通过调用wiringPi库自带函数 serialGetchar(fd)来获取上位机通过串口发送的数据
通过scanf获取来自键盘输入的数据再通过serialPutchar(fd, *SendBuf++);发送数据
(90条消息) wiringPI库_LEO-max的博客-CSDN博客


基于C库的原生开发串口主要是靠一个结构体实现所有的启动位,停止位,数据位,奇偶校验,波特率

根据wiringPi库自己写一个串口
先在桌面新建一个UartTool.c文件然后拖入Source Insight中编写
UartTool.c
#include <stdio.h>
#include <stdlib.h>
#include <stdint.h>
#include <stdarg.h>
#include <string.h>
#include <termios.h>
#include <unistd.h>
#include <fcntl.h>
#include <sys/ioctl.h>
#include <sys/types.h>
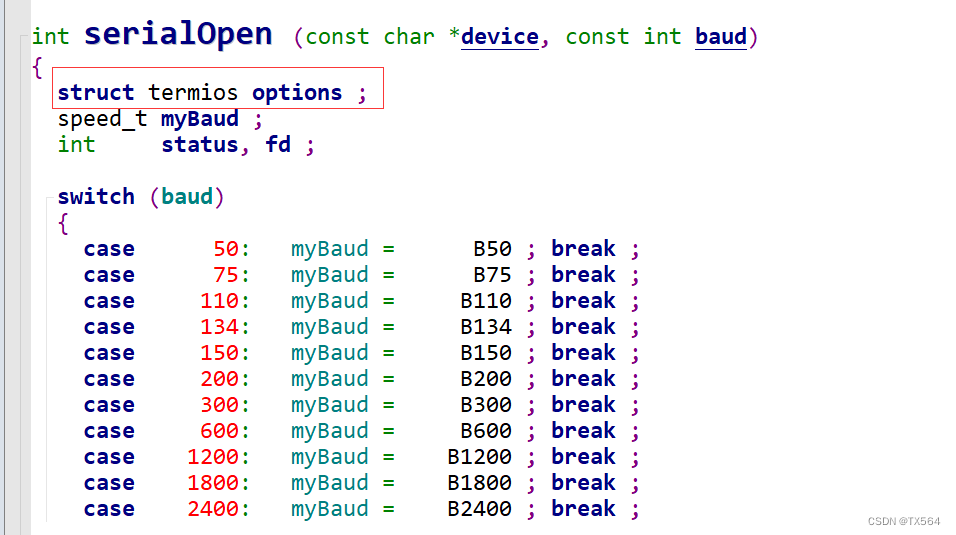
#include <sys/stat.h>#include "wiringSerial.h"int MyserialOpen (const char *device, const int baud)
{struct termios options ;speed_t myBaud ;int status, fd ;switch(baud){case 9600: myBaud = B9600;break;case 115200: myBaud = B115200;break;}if ((fd = open (device, O_RDWR | O_NOCTTY | O_NDELAY | O_NONBLOCK)) == -1)//打开设备return -1 ;// Get and modify current options:tcgetattr (fd, &options) ;cfmakeraw (&options) ;cfsetispeed (&options, myBaud) ;//波特率设置,进波特率cfsetospeed (&options, myBaud) ;//波特率设置,出波特率options.c_cflag |= (CLOCAL | CREAD) ;options.c_cflag &= ~PARENB ;//设置奇偶校验位options.c_cflag &= ~CSTOPB ;//停止位options.c_cflag &= ~CSIZE ;options.c_cflag |= CS8 ;//数据位,8位options.c_lflag &= ~(ICANON | ECHO | ECHOE | ISIG) ;options.c_oflag &= ~OPOST ;options.c_cc [VMIN] = 0 ;options.c_cc [VTIME] = 100 ; // Ten seconds (100 deciseconds)tcsetattr (fd, TCSANOW, &options) ;ioctl (fd, TIOCMGET, &status);status |= TIOCM_DTR ;status |= TIOCM_RTS ;ioctl (fd, TIOCMSET, &status);usleep (10000) ; // 10mSreturn fd ;
}void serialSendstring (const int fd, const char *s)
{int ret;ret = write (fd, s, strlen (s));if (ret < 0)printf("Serial Puts Error\n");}int serialGetstring(const int fd,char*buffer)
{int n_read;n_read = read(fd,buffer,32);return n_read;
}int serialDataAvail (const int fd)
{int result ;if (ioctl (fd, FIONREAD, &result) == -1)return -1 ;return result ;
}UartTool.h
int MyserialOpen (const char *device, const int baud);void serialSendstring (const int fd, const char *s);int serialGetstring(const int fd,char*buffer);int serialDataAvail (const int fd);
UartTest.c
#include <stdio.h>
#include <stdlib.h>
#include <stdint.h>
#include <stdarg.h>
#include <string.h>
#include <termios.h>
#include <unistd.h>
#include <fcntl.h>
#include <sys/ioctl.h>
#include <sys/types.h>
#include <sys/stat.h>
#include <pthread.h>
#include "UartTool.h"
#include <unistd.h>
#include <string.h>int fd;void* readSerial()
{char buffer[32] = {'\0'};while(1){while(serialDataAvail(fd))//从串口读取一个字节(没有可用数据会等待10s)如果有的话返回数据,没有的话返回-1{memset(buffer,'\0',sizeof(buffer));serialGetstring(fd,buffer);printf("GET->%s\n",buffer);}}
}void* sendSerial()
{char buffer[32] = {'\0'};while(1){memset(buffer,'\0',sizeof(buffer));scanf("%s",buffer);serialSendstring(fd,buffer);}
}int main(int argc,char** argv)
{char deviceName[32] = {'\0'};pthread_t readt;pthread_t sendt;if(argc < 2){printf("uage:%s /dev/ttyS?\n",argv[0]);return -1;}strcpy(deviceName,argv[1]);if((fd =MyserialOpen(deviceName,115200)) == -1){printf("open %s error!\n",deviceName);return -1;}pthread_create(&readt,NULL,readSerial,NULL);pthread_create(&sendt,NULL,sendSerial,NULL);while(1){sleep(10);}
}
通过以上操作就可以摆脱wiringPi库了
核心就是打开某个设备(文件),将参数配置好传给内核,内核驱动根据给的各个参数去配置硬件的寄存器,向串口写数据其实就是写文件操作,读数据其实就是读文件操作
基于串口开发一个小项目:用语音控制抖音上滑下滑点赞锁屏

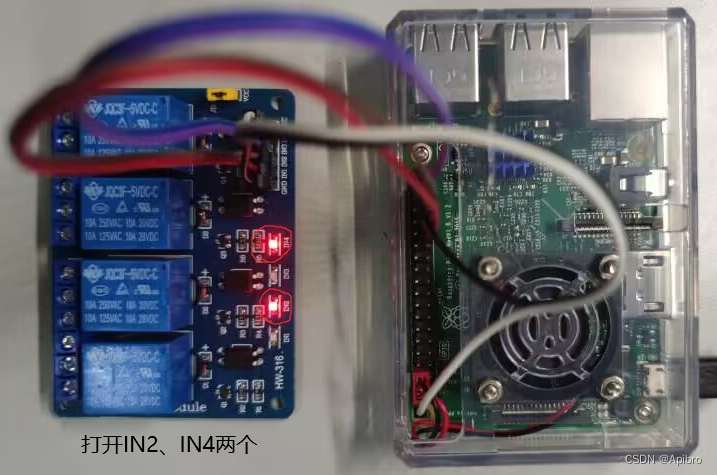
接线按照以上图示接线
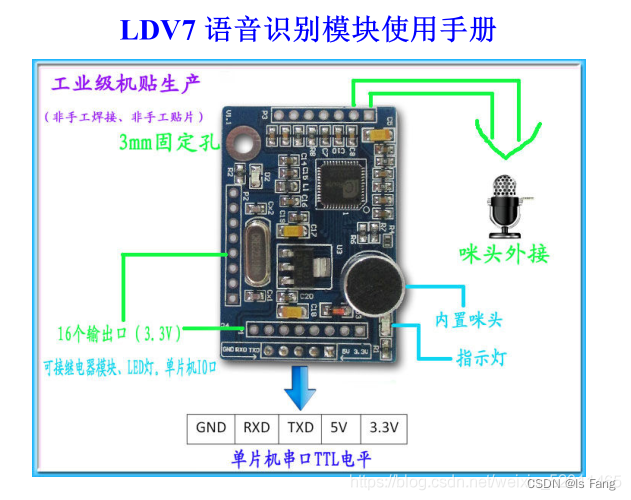
语音模块配置,语音模块用的是SU-03T
1. 进入语音模块官网 http://www.smartpi.cn/#/ ,配置词条和识别后的串口输出指令,具体根据视频教程


将手机用usb接口插入开发板
a . 把手机接入开发板b . 安装 adb 工具,在终端输入 adb 安装指令: sudo apt - get install adbc . dmeg 能查看到手机接入的信息,但是输入 adb devices 会出现提醒dinsufficient permissions for device : user in plugdev group ; are your udevrules wrong ?d . 配置文件,以支持 USB 设备的热拔插,支持 UDEV 的机制在 / etc / udev / rules . d 文件夹下创建规则文件cd / etc / udev / rules . d /sudo vim 51 - android . rules在文件中添加内容 SUBSYSTEM == "usb" , ENV { DEVTYPE } == "usb_device" , MODE = "0666"e . 在手机开发者选项中,打开 USB 调试,重新拔插手机f . 手机弹出调试提醒,点确认手机调试模式(92条消息) adb devices后显示List of devices attached/unauthorized问题解决_踩坑记的博客-CSDN博客
模拟手上下滑动,双击和锁屏的shell脚本
adb shell input swipe 540 1300 540 500 100 向下滑动 540 是水平的, 1300 是竖直方向,下 是500adb shell input swipe 540 500 540 1300 100 向上滑动adb shell "seq 3 | while read i;do input tap 350 1050 & input tap 350 1050 &sleep 0.01;done;" 点赞adb shell input keyevent 26 锁屏
代码实现
#include <stdio.h>
#include <stdlib.h>
#include <stdint.h>
#include <stdarg.h>
#include <string.h>
#include <termios.h>
#include <unistd.h>
#include <fcntl.h>
#include <sys/ioctl.h>
#include <sys/types.h>
#include <sys/stat.h>
#include <unistd.h>
#include <pthread.h>
#include "uartTool.h"
int fd;
void* readSerial()
{char cmd;while(1){cmd = myserialGetchar(fd);switch(cmd){case 'N':printf("next\n");system("adb shell input swipe 540 1300 540 500 100");break;case 'P':printf("pre\n");system("adb shell input swipe 540 500 540 1300 100");break;case 'Z':printf("zan\n");system("adb shell \"seq 3 | while read i;do input tap 350 1050 &input tap 350 1050 & sleep 0.01;done;\"");break;case 'Q':printf("qu\n");system("adb shell input keyevent 26");break;}}
}
int main(int argc, char **argv)
{char deviceName[32] = {'\0'};pthread_t readt;if(argc < 2){printf("uage:%s /dev/ttyS?\n",argv[0]);return -1;}strcpy(deviceName, argv[1]);if( (fd = myserialOpen(deviceName, 115200)) == -1){printf("open %s error\n",deviceName);return -1;}pthread_create(&readt, NULL, readSerial,NULL);while(1){sleep(10);}
}
UartTool.c UartTool.h参考上面的代码