文章预览:
- 0. bert简介
- 1. bert结构
- 1. bert中文分类模型训练
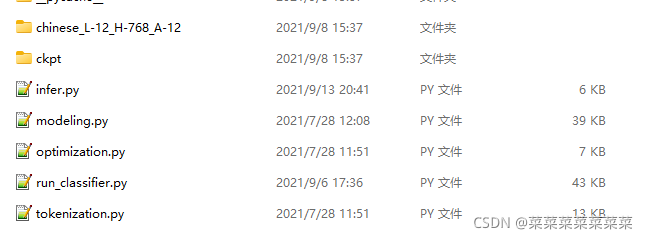
- 1 下载bert项目代码
- 代码结构
- 2 下载中文预训练模型
- 3 制作中文训练数据集
- 2. bert模型推理
- 1.tensorflow推理
- 2. onnxruntime推理
- 1. checkpoint格式转换为saveModel格式
- 2. saveModel格式转换为onnx格式
- 3. 使用onnxruntime推理onnx格式模型
0. bert简介
- BERT(Bidirectional Encoder Representation from Transformers)是google-research在2018年10月提出的一种预训练模型,在11种不同NLP测试中创出SOTA表现,成为NLP发展史上里程碑式的模型成就。
- 本篇文章从实践入手,带领大家进行Bert的中文文本分类模型的训练和推理的使用教程。
1. bert结构
1. bert中文分类模型训练
bert训练主要分为两个阶段:预训练阶段和 Fine-tuning 阶段。
什么是预训练?
BERT是一个预训练的模型,那么什么是预训练呢?举例子进行简单的介绍
假设已有A训练集,先用A对网络进行预训练,在A任务上学会网络参数,然后保存以备后用,当来一个新的任务B,采取相同的网络结构,网络参数初始化的时候可以加载A学习好的参数,其他的高层参数随机初始化,之后用B任务的训练数据来训练网络,当加载的参数保持不变时,称为"frozen",当加载的参数随着B任务的训练进行不断的改变,称为“fine-tuning”,即更好地把参数进行调整使得更适合当前的B任务
优点:当任务B的训练数据较少时,很难很好的训练网络,但是获得了A训练的参数,会比仅仅使用B训练的参数更优
预训练
预训练阶段与 Word2Vec,ELMo 等类似,是在大型数据集上根据一些预训练任务训练得到。预训练需要巨大的运算资源,google官方预训练一个语言模型,需要在 4 到 16 个 Cloud TPU 训练四天的时间,幸运的是,google官方开源了许多预训练模型,包括中文预训练模型。大多数 NLP 研究人员永远不需要从头开始预训练他们自己的模型。
微调
Fine-tuning 阶段是后续用于一些下游任务的时候,在预训练模型基础之上进行微调,例如文本分类,词性标注,问答系统等,BERT 无需调整结构就可以在不同的任务上进行微调。
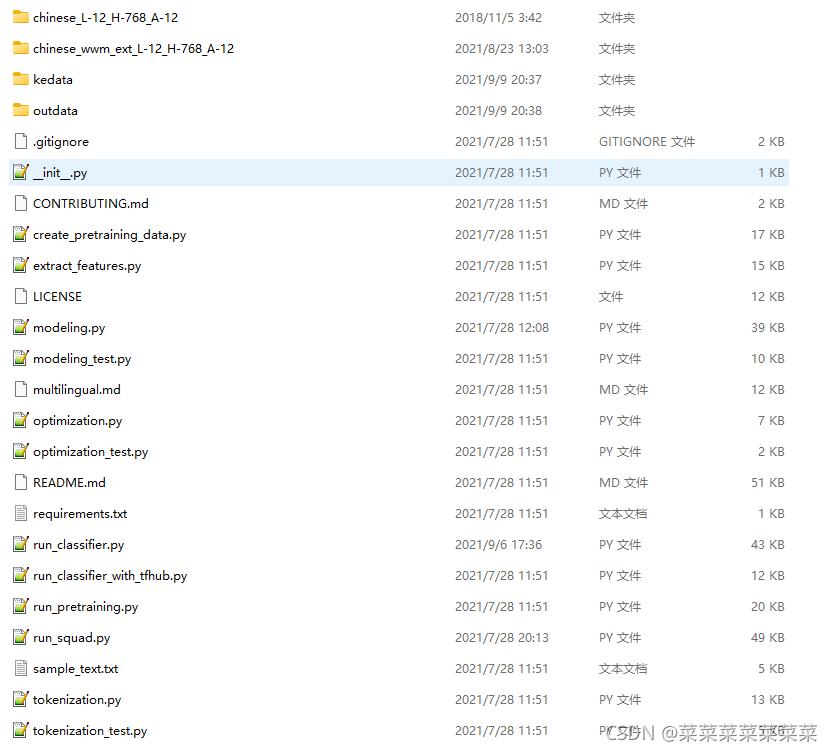
1 下载bert项目代码
https://github.com/google-research/bert
代码结构
- 预训练
在开源的代码中,预训练的入口是在run_pretraining.py。 - 微调
而微调的入口针对不同的任务分别在run_classifier.py和run_squad.py。
其中run_classifier.py用于文本分类任务的训练。
而run_squad.py用于阅读理解任务的训练。
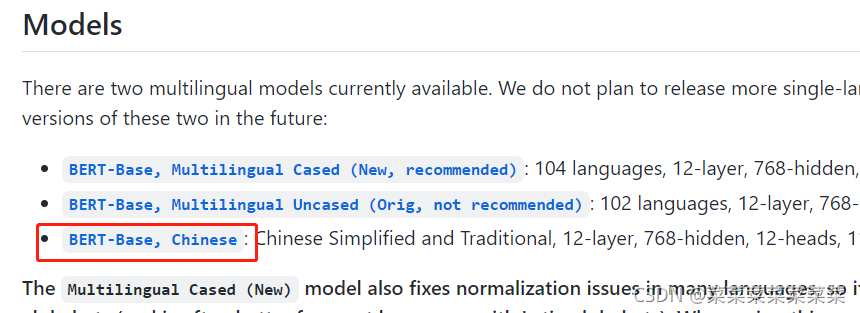
2 下载中文预训练模型
对于中文而言,google公布了一个参数较小的BERT预训练模型。
- 模型下载地址
https://github.com/google-research/bert/blob/master/multilingual.md
- 进入下载页面,选择:BERT-Base, Chinese进行下载。
-
下载完成后,解压至与run_classifier.py同一级目录。
-
模型文件说明
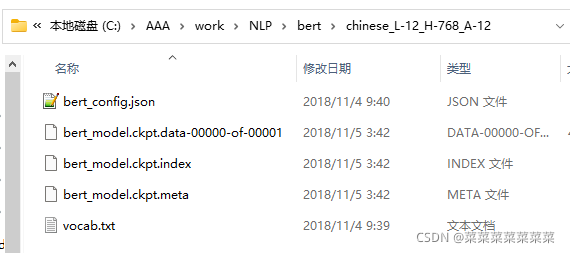
bert_model.ckpt:存储得模型变量
vocab.txt:中文文本采用的字典,
bert_config.json:是bert在训练时,可选调整的一些配置参数。
3 制作中文训练数据集
对中文文本数据进行分类模型的训练,需要编写程序对训练数据进行处理,使其按照要求传入bert模型进行训练,而BERT代码中processor类就是负责对模型的输入数据进行处理。
们以分类任务为例,介绍如何修改processor类来运行自己数据集上的fine-tune。在run_classsifier.py文件中我们可以看到,google对于一些公开数据集已经写了一些processor,如XnliProcessor,MnliProcessor,MrpcProcessor和ColaProcessor。这给我们提供了一个很好的示例,指导我们如何针对自己的数据集来写processor。
class kedataProcessor(DataProcessor):"""Processor for the XNLI data set."""def get_train_examples(self, data_dir):return self._create_examples(self._read_tsv(os.path.join(data_dir, "train.tsv")), "train")def get_dev_examples(self, data_dir):return self._create_examples(self._read_tsv(os.path.join(data_dir, "dev.tsv")), "dev")def get_test_examples(self, data_dir):return self._create_examples(self._read_tsv(os.path.join(data_dir, "test.tsv")), "test")def get_labels(self):# 这里返回的为具体的你的分类的类别labelf = open(FLAGS.data_dir+'\label.csv', 'r', newline='', encoding = 'gb2312')labeldata = csv.reader(labelf, delimiter="\t")labelList=[]for line in labeldata:label=line[1]labelList.append(label)return labelListdef _create_examples(self, lines, set_type):"""Creates examples for the training and dev sets."""examples = []for (i, line) in enumerate(lines):guid = "%s-%s" % (set_type, i)text_a = tokenization.convert_to_unicode(line[1])label = tokenization.convert_to_unicode(line[0])# print('guid:',guid," text:",text_a,' label:',label)examples.append(InputExample(guid=guid, text_a=text_a, text_b=None, label=label))return examples自定义的processor里需要继承DataProcessor,并重载获取label的get_labels和获取单个输入的get_train_examples,get_dev_examples和get_test_examples函数。其分别会在main函数的FLAGS.do_train、FLAGS.do_eval和FLAGS.do_predict阶段被调用。
这三个函数的内容是相差无几的,区别只在于需要指定各自读入文件的地址。
以get_train_examples为例,函数需要返回一个由InputExample类组成的list。InputExample类是一个很简单的类,只有初始化函数,需要传入的参数中guid是用来区分每个example的,可以按照train-%d’%(i)的方式进行定义。text_a是一串字符串,text_b则是另一串字符串。在进行后续输入处理后(BERT代码中已包含,不需要自己完成) text_a和text_b将组合成[CLS] text_a [SEP] text_b [SEP]的形式传入模型。最后一个参数label也是字符串的形式,label的内容需要保证出现在get_labels函数返回的list里。
举一个例子,假设我们想要处理一个能够判断句子相似度的模型,现在在data_dir的路径下有一个名为train.csv的输入文件,如果我们现在输入文件的格式如下csv形式:
肯定	嗯,对,是。
求职状态_已找到工作	呃,我有工作了谢谢。
中性	哦,你您说吧。
询问岗位地址	嗯那,那你们就是上班的话,是就近安排吗,我看有很多你们那个
肯定	在听得见我说话吗。
中性	啊,你说你说。
智能助理	的用户暂时无法接听你的电话,短信通知请挂机语音留言,请按一如需人工帮助,请按零
没听清什么事	干啥呀什么事情?
在忙	哦,等会我现在在去面试的路上。
否定	嗯,现在没有了,不好意思啊。
label.csv
0	打错了	226
1	打过电话	127
2	拒绝来电	177
3	电话号码获取	19
4	反问听见与否	55
5	非机主	285
6	否定	4477
7	福利_其他	15
8	福利_食宿	47
9	福利_五险一金	83
10	岗位_年龄要求	58
修改processor字典
修改完成processor后,需要在在原本main函数的processor字典里,加入修改后的processor类,即可在运行参数里指定调用该processor。
processors = {"cola": ColaProcessor,"mnli": MnliProcessor,"mrpc": MrpcProcessor,"xnli": XnliProcessor,"kedata": kedataProcessor,}
运行run_classifier.py
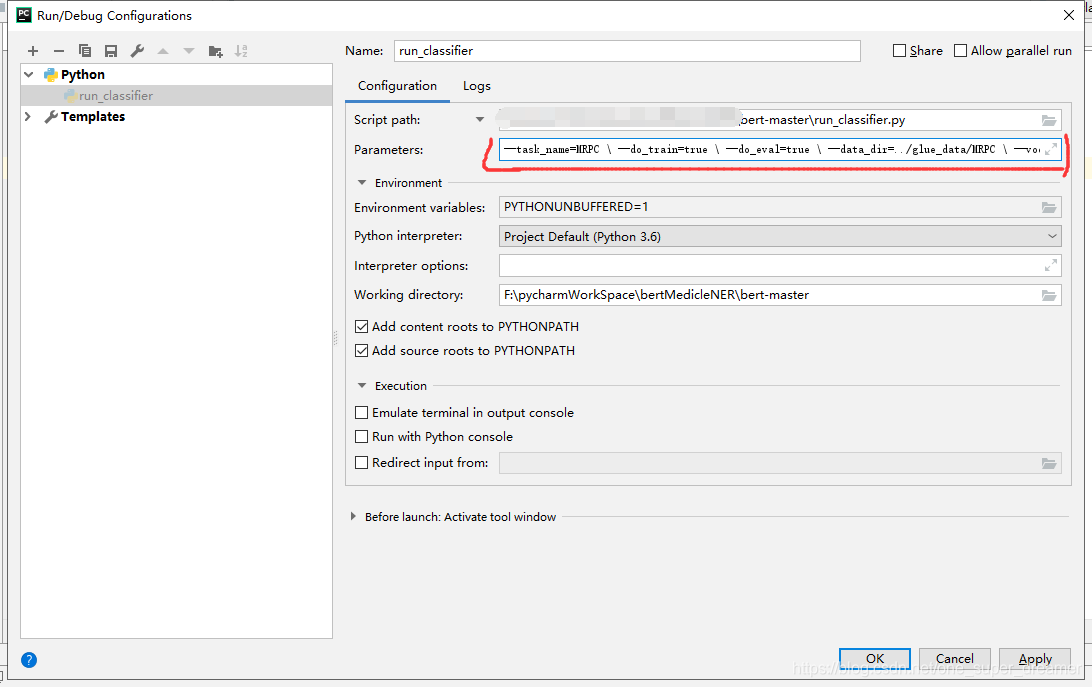
之后就可以直接运行run_classsifier.py进行模型的训练。在运行时需要制定一些参数,一个较为完整的运行参数如下所示:
BERT_BASE_DIR=/path/to/bert/chinese_L-12_H-768_A-12 #全局变量 下载的预训练bert地址
MY_DATASET=/path/to/kedata #全局变量 数据集所在地址python run_classifier.py \--task_name=kedata \ #自己添加processor在processors字典里的key名--do_train=true \--do_eval=true \--dopredict=true \--data_dir=$MY_DATASET \--vocab_file=$BERT_BASE_DIR/vocab.txt \--bert_config_file=$BERT_BASE_DIR/bert_config.json \--init_checkpoint=$BERT_BASE_DIR/bert_model.ckpt \--max_seq_length=128 \ #模型参数--train_batch_size=32 \--learning_rate=5e-5 \--num_train_epochs=2.0 \--output_dir=/tmp/selfsim_output/ #模型输出路径
2. bert模型推理
1.tensorflow推理
- 问题:
用Estimater.predict总是把模型重新load一遍,这样工程业务根本没法用。 - 解决方案:
- 使用python的生成器,让程序“误以为”有很多序列需要预测,这里构造yield形式即可;
- 利用tf.data.Dataset.from_generator,加载生成器,声明好数据结构和类型;
- 利用class类的实例变量self的全局性,通过self.inputs把数据“喂给到”生成器内部,这样就保证了数据的“源源不断”;
- 程序需要close的机制,用于保证停掉生成器的工作。
from tokenization import FullTokenizer, validate_case_matches_checkpoint
from modeling import BertConfig
from run_classifier import model_fn_builder
import tensorflow as tf
from tensorflow.python.estimator.estimator import Estimator
from tensorflow.python.estimator.run_config import RunConfig
from run_classifier import FLAGS,InputExample,convert_single_example
import csv
import os
import numpy as npclass model(object):def __init__(self, labelfile,vocabfile,bert_config_file,init_checkpoint,ckptdir,max_seq_length):self.label = self.loadLabel(labelfile)self.closed = Falseself.first_run = Trueself.bert_config_file=bert_config_fileself.ckptdir=ckptdirself.tokenizer = FullTokenizer(vocab_file=vocabfile,do_lower_case=True)self.init_checkpoint = init_checkpointself.seq_length = max_seq_lengthself.text = Noneself.num_examples = Noneself.predictions = Noneself.estimator = self.get_estimator()def loadLabel(sel, labelfile):labelf = open(labelfile, 'r', newline='', encoding='gbk')labeldata = csv.reader(labelf, delimiter="\t")labelList = []for line in labeldata:label = line[1]labelList.append(label)return labelListdef get_estimator(self):validate_case_matches_checkpoint(True, self.init_checkpoint)bert_config = BertConfig.from_json_file(self.bert_config_file)  # 载入bert自定义配置if FLAGS.max_seq_length > bert_config.max_position_embeddings:  # 验证配置信息准确性raise ValueError("Cannot use sequence length %d because the BERT pre_model ""was only trained up to sequence length %d" %(self.seq_length, bert_config.max_position_embeddings))run_config = RunConfig(model_dir=self.ckptdir,save_checkpoints_steps=FLAGS.save_checkpoints_steps,session_config=None)model_fn = model_fn_builder(  # 估计器函数,提供Estimator使用的model_fn,内部使用EstimatorSpec构建的bert_config=bert_config,num_labels=len(self.label),init_checkpoint=self.init_checkpoint,learning_rate=FLAGS.learning_rate,num_train_steps=0,num_warmup_steps=0,use_tpu=FLAGS.use_tpu,use_one_hot_embeddings=FLAGS.use_tpu)estimator = Estimator(  # 实例化估计器model_fn=model_fn,config=run_config,warm_start_from=self.init_checkpoint  # 新增预热)return estimatordef get_feature(self, index, text):example = InputExample(f"text_{index}", text, None, self.label[0])feature = convert_single_example(index, example, self.label, self.seq_length, self.tokenizer)return feature.input_ids, feature.input_mask, feature.segment_ids, feature.label_iddef create_generator(self):"""构建生成器"""while not self.closed:self.num_examples = len(self.text)features = (self.get_feature(*f) for f in enumerate(self.text))yield dict(zip(("input_ids", "input_mask", "segment_ids", "label_ids"), zip(*features)))def input_fn_builder(self):"""用于预测单独对预测数据进行创建,不基于文件数据"""dataset = tf.data.Dataset.from_generator(self.create_generator,output_types={'input_ids': tf.int32,'input_mask': tf.int32,'segment_ids': tf.int32,'label_ids': tf.int32},output_shapes={'label_ids': (None),'input_ids': (None, None),'input_mask': (None, None),'segment_ids': (None, None)})return datasetdef predict(self, text):self.text = textif self.first_run:self.predictions = self.estimator.predict(input_fn=self.input_fn_builder, yield_single_examples=True)self.first_run = Falseprobabilities = next(self.predictions)# 获取最大值索引index = np.argmax(probabilities["probabilities"])label = self.label[index]# return [self.label[i] for i in probabilities["probabilities"].argmax(axis=1)]return labeldef close(self):self.closed = True
pythonfile=os.path.realpath(os.path.realpath(__file__))
pardir=os.path.abspath(os.path.join(pythonfile,os.path.pardir))
labelfile=os.path.join(pardir,'ckpt/label.csv')
init_checkpoint=os.path.join(pardir,'chinese_L-12_H-768_A-12/bert_model.ckpt')
vocabfile=os.path.join(pardir,'chinese_L-12_H-768_A-12/vocab.txt')
bert_config_file=os.path.join(pardir,'chinese_L-12_H-768_A-12/bert_config.json')
ckptdir=os.path.join(pardir,'ckpt/')
max_seq_length=128
def getModel():bert = model(labelfile,vocabfile,bert_config_file,init_checkpoint,ckptdir,max_seq_length)bert.predict([""])return bertif __name__=="__main__":bert=getModel()for i in range(1000):label=bert.predict(["打错了"])
2. onnxruntime推理
ONNX Runtime是一个高性能的机器学习模型推理引擎。它与PyTorch、TensorFlow以及许多其他支持ONNX标准的框架和工具兼容。ONNX Runtime设计了一个开放和可扩展的体系结构,通过利用内置的图形优化和跨CPU、GPU和边缘设备的各种硬件加速功能,可以轻松地优化和加速推理。ONNX Runtime可以很容易地插入到你的技术堆栈中,因为它可以在Linux、Windows、Mac和Android上工作,并且为Python、c#、c++、C和Java提供了方便的api。
为加快bert的推理时间,部署到服务器上,可食用onnxruntime进行推理加速。
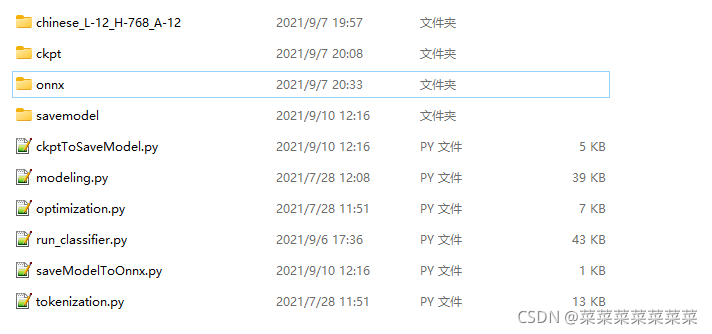
1. checkpoint格式转换为saveModel格式
from tokenization import FullTokenizer, validate_case_matches_checkpoint
from modeling import BertConfig
from run_classifier import model_fn_builder
import tensorflow as tf
from tensorflow.python.estimator.estimator import Estimator
from tensorflow.python.estimator.run_config import RunConfig
from run_classifier import FLAGS
import csvclass Fast(object):def __init__(self, labelfile,vocabfile,bert_config_file,init_checkpoint,ckptdir):self.label = self.loadLabel(labelfile)self.closed = Falseself.first_run = Trueself.bert_config_file=bert_config_fileself.ckptdir=ckptdirself.tokenizer = FullTokenizer(vocab_file=vocabfile,do_lower_case=True)self.init_checkpoint = init_checkpoint# self.seq_length = FLAGS.max_seq_lengthself.seq_length = 128self.text = Noneself.num_examples = Noneself.predictions = Noneself.estimator = self.get_estimator()def loadLabel(sel, labelfile):labelf = open(labelfile, 'r', newline='', encoding='gbk')labeldata = csv.reader(labelf, delimiter="\t")labelList = []# for i in range(60):#    labelList.append(i)for line in labeldata:label = line[1]labelList.append(label)return labelListdef get_estimator(self):validate_case_matches_checkpoint(True, self.init_checkpoint)print("FLAGS.bert_config_file:",FLAGS.bert_config_file)bert_config = BertConfig.from_json_file(self.bert_config_file)  # 载入bert自定义配置if FLAGS.max_seq_length > bert_config.max_position_embeddings:  # 验证配置信息准确性raise ValueError("Cannot use sequence length %d because the BERT pre_model ""was only trained up to sequence length %d" %(self.seq_length, bert_config.max_position_embeddings))print("FLAGS.save_checkpoints_steps:",FLAGS.save_checkpoints_steps)run_config = RunConfig(model_dir=self.ckptdir,save_checkpoints_steps=FLAGS.save_checkpoints_steps,session_config=None)model_fn = model_fn_builder(  # 估计器函数,提供Estimator使用的model_fn,内部使用EstimatorSpec构建的bert_config=bert_config,num_labels=len(self.label),init_checkpoint=self.init_checkpoint,learning_rate=FLAGS.learning_rate,num_train_steps=0,num_warmup_steps=0,use_tpu=FLAGS.use_tpu,use_one_hot_embeddings=FLAGS.use_tpu)print("model_fn:",model_fn)estimator = Estimator(  # 实例化估计器model_fn=model_fn,config=run_config,warm_start_from=self.init_checkpoint  # 新增预热)print("estimator.params:",estimator.params)print("estimator:",estimator)return estimatordef serving_input_fn(self):receiver_tensors = {'input_ids': tf.compat.v1.placeholder(dtype=tf.int64, shape=[None, self.seq_length], name='input_ids'),'input_mask': tf.compat.v1.placeholder(dtype=tf.int64, shape=[None, self.seq_length], name='input_mask'),'segment_ids': tf.compat.v1.placeholder(dtype=tf.int64, shape=[None, self.seq_length], name='segment_ids'),'label_ids': tf.compat.v1.placeholder(dtype=tf.int64, shape=[None], name="label_ids")}return tf.estimator.export.ServingInputReceiver(features= receiver_tensors ,receiver_tensors=receiver_tensors)def transModel(self):self.estimator.export_saved_model('./savemodel',self.serving_input_fn)labelfile='./ckpt/label.csv'
init_checkpoint='./chinese_L-12_H-768_A-12/bert_model.ckpt'
vocabfile='./chinese_L-12_H-768_A-12/vocab.txt'
bert_config_file='./chinese_L-12_H-768_A-12/bert_config.json'
ckptdir='./ckpt/'
model = Fast(labelfile,vocabfile,bert_config_file,init_checkpoint,ckptdir)
model.transModel()
2. saveModel格式转换为onnx格式
import ospbdir="1631247382"
onnxname="model.onnx"
cmdstr="python -m tf2onnx.convert --saved-model ./savemodel/{pbdir} --output ./onnx/{onnxname}".format(pbdir=pbdir,onnxname=onnxname)os.system(cmdstr)
3. 使用onnxruntime推理onnx格式模型

import onnxruntime as ort
from tokenization import FullTokenizer
from run_classifier import convert_single_example
from run_classifier import InputExample
import time
import numpy as np
import csvimport osclass model(object):def __init__(self, vocab_file,labelfile,modelfile,max_seq_length):self.closed = Falseself.first_run = Trueself.tokenizer = FullTokenizer(vocab_file=vocab_file,do_lower_case=True)self.seq_length = max_seq_lengthself.label = self.loadLabel(labelfile)so = ort.SessionOptions()#so.execution_mode = ort.ExecutionMode.ORT_SEQUENTIAL# so.execution_mode = ort.ExecutionMode.ORT_PARALLELso.graph_optimization_level = ort.GraphOptimizationLevel.ORT_ENABLE_ALL#self.model = ort.InferenceSession(modelfile,sess_options=so,providers=['CPUExecutionProvider'])self.model = ort.InferenceSession(modelfile,sess_options=so,providers=['CUDAExecutionProvider'])#self.model.set_providers(['CUDAExecutionProvider'], [{'device_id': device_id,"gpu_mem_limit" :  3  *  1024  *  1024  *  1024}])# self.model.set_providers(['CUDAExecutionProvider'], [{'device_id': device_id }])def loadLabel(sel,labelfile):labelf = open(labelfile, 'r', newline='',encoding='gbk')labeldata = csv.reader(labelf, delimiter="\t")labelList = []#for i in range(60):#    labelList.append(i)for line in labeldata:label = line[1]labelList.append(label)return labelListdef get_feature(self, index, text):example = InputExample(f"text_{index}", text, None, self.label[0])feature = convert_single_example(index, example, self.label, self.seq_length, self.tokenizer)return feature.input_ids, feature.input_mask, feature.segment_ids, feature.label_iddef predict(self, text):dataList=[]input_ids_L=[]input_mask_L=[]segment_ids_L=[]label_ids_L=[]for i in range(len(text)):input_ids,input_mask,segment_ids,label_ids=self.get_feature(i,text[i])input_ids_L.append(input_ids)input_mask_L.append(input_mask)segment_ids_L.append(segment_ids)label_ids_L.append(label_ids)data = {"input_ids:0": np.array(input_ids_L, dtype=np.int64),"input_mask:0": np.array(input_mask_L, dtype=np.int64),"label_ids:0": np.array(label_ids_L, dtype=np.int64),"segment_ids:0": np.array(segment_ids_L, dtype=np.int64)}dataList.append(data)result = self.model.run(output_names=["loss/Softmax:0"], input_feed=data)label_l=[]for i in range(len(text)):# 获取最大值索引maxProbabilities=max(result[0][i])index=np.argmax(result[0][i])label=self.label[index]item={"label":label,"score":maxProbabilities}label_l.append(label)return label_lpythonfile=os.path.realpath(os.path.realpath(__file__))
pardir=os.path.abspath(os.path.join(pythonfile,os.path.pardir))
datadir=os.path.join(pardir,'zhaopin')labelfile=os.path.join(datadir,'label.csv')
modelfile=os.path.join(datadir,'model.onnx')
vocabfile=os.path.join(pardir,'vocab.txt')
max_seq_length=128def getModel():bert = model(vocabfile,labelfile,modelfile ,max_seq_length)return bertif __name__=="__main__":bert=getModel()for i in range(1000):time1=time.time()bert.predict(["已经打过电话了"])


![Pytorch教程[10]完整模型训练套路](https://img-blog.csdnimg.cn/d71a67469c3e4770901343d7cc1c1330.png#pic_center)