前言
ButterKnife又称黄油刀,是一款快速绑定Android视图中字段和方法的注解框架,也是Android开发中比较常用的一款快速注解框架,通过ButterKnife的合理运用,我们可以避免重复地书写findViewById,在各种场合下快速地绑定view中的多种事件,大大提高开发的效率,它具有如下几点主要的功能:
- 通过
@BindView注解消除findViewById的使用 - 将多个
view组成一个列表或者数组,使用action、setter、properties一次性地操作被分到一组的view - 通过
@OnClick注解来消除设置监听器(Listenter)时书写的各种匿名内部类 - 通过为字段添加注解,消除了手动对资源的查找
接下来,我将首先向大家介绍ButterKnife的用法,然后针对ButterKnife的核心源码展开分析,从源码级别带大家了解ButterKnife的原理和结构,本文结构如下:
基本使用
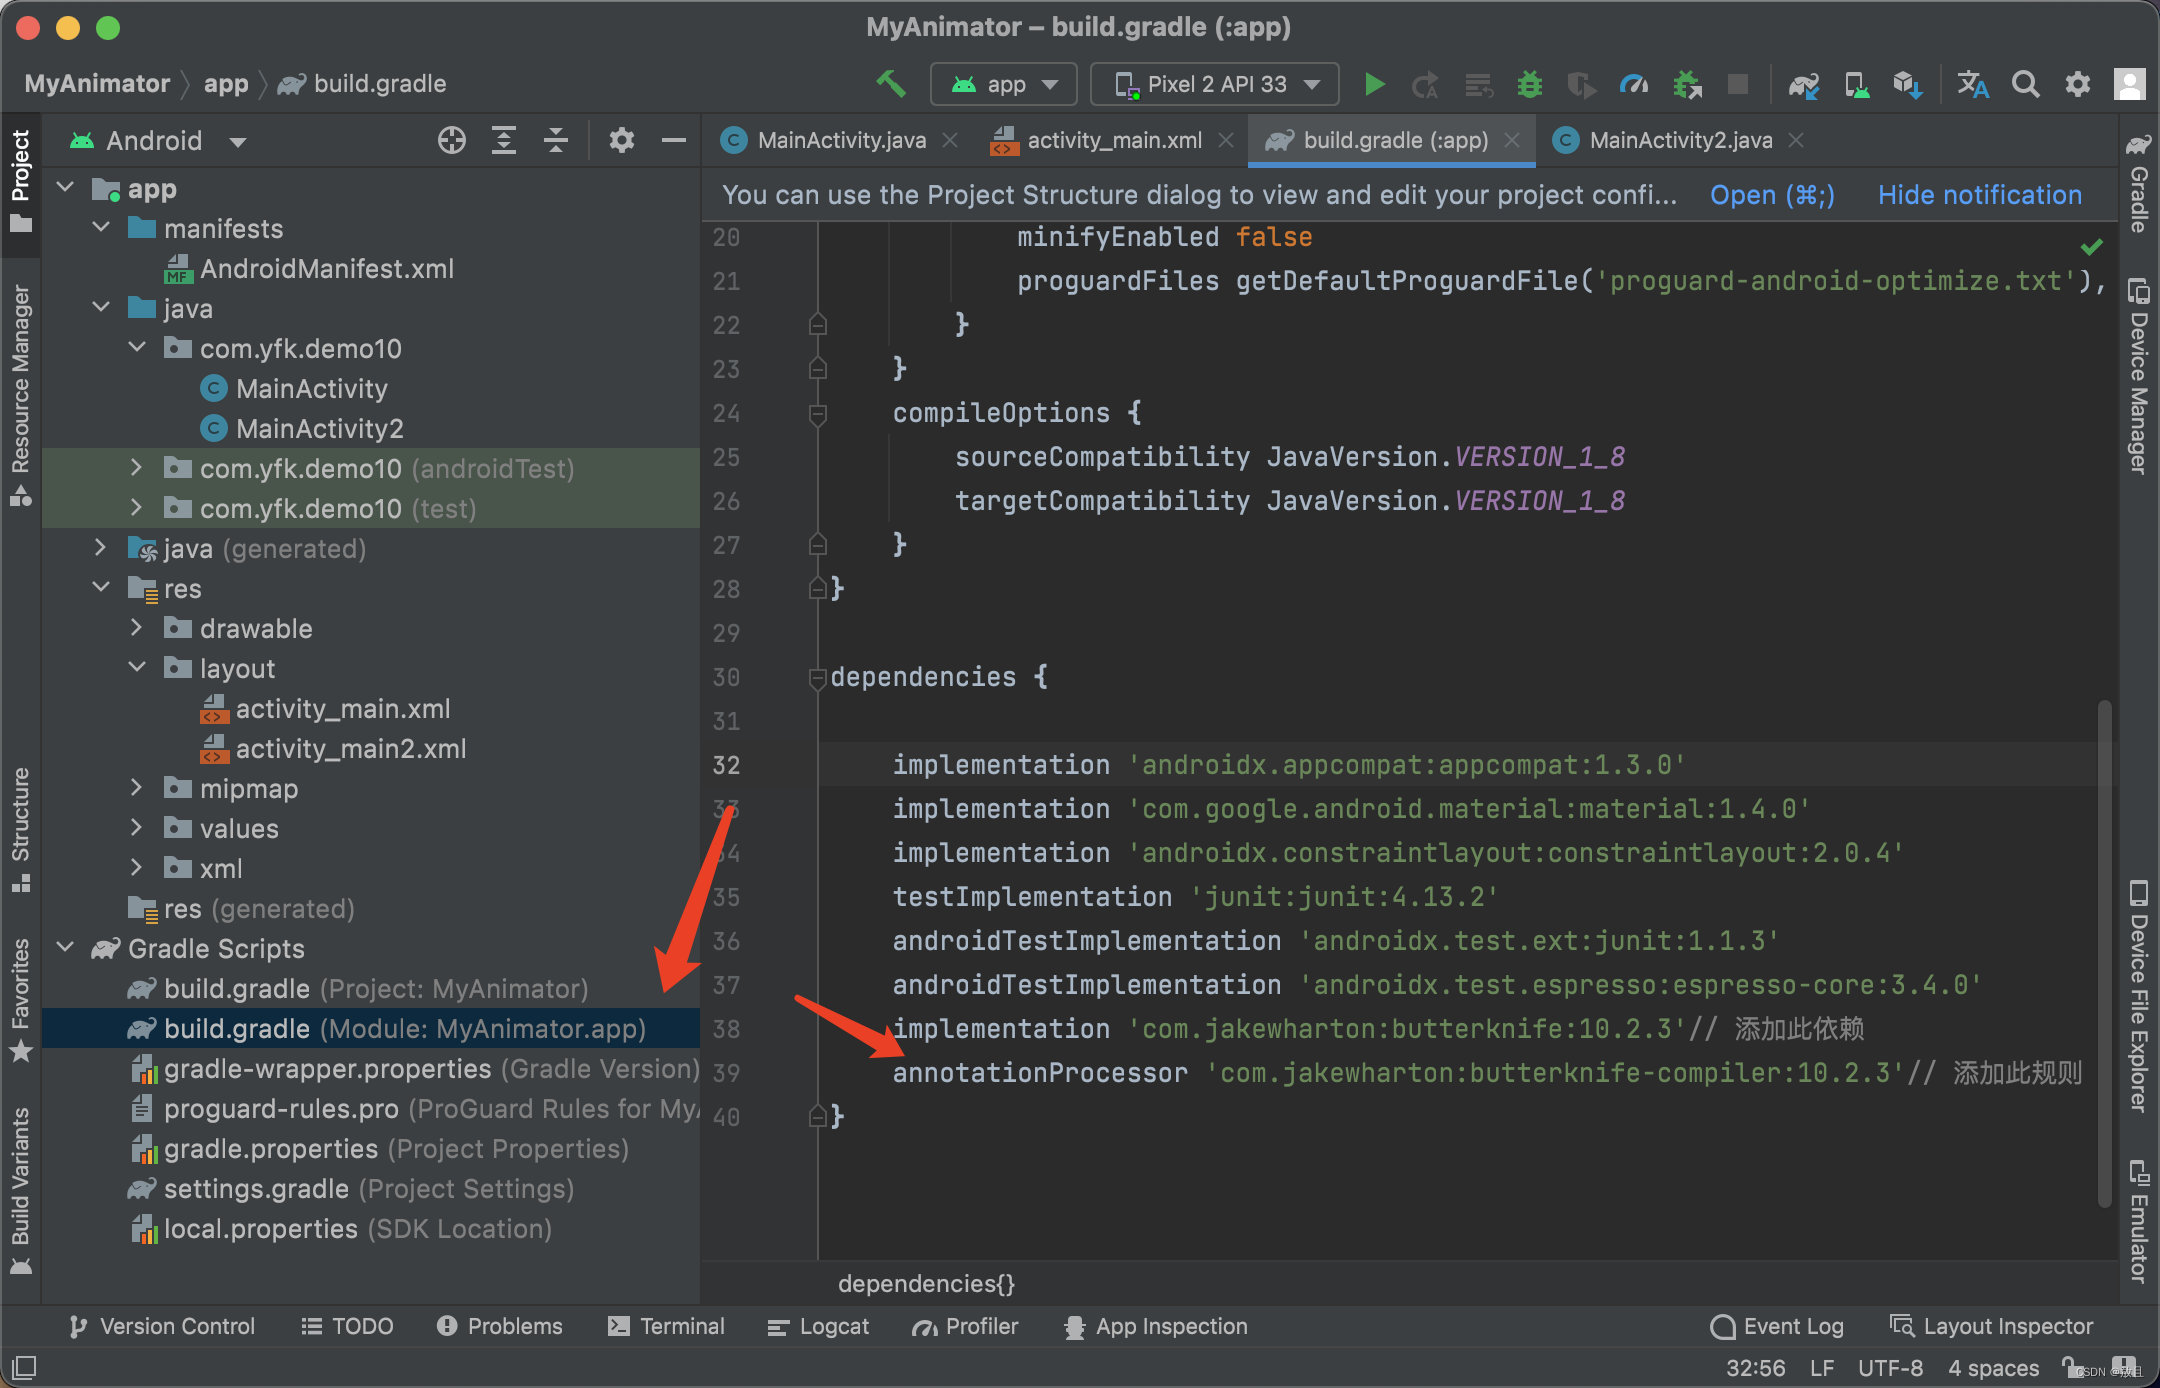
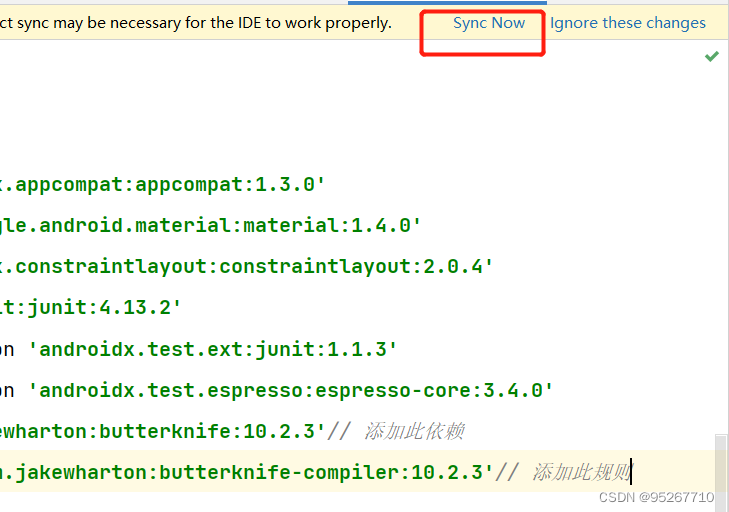
在使用ButterKnife之前,我们需要先在项目中添加ButterKnife的依赖,打开你项目的build.gradle文件,添加如下代码:
android {...// Butterknife requires Java 8.compileOptions {sourceCompatibility JavaVersion.VERSION_1_8targetCompatibility JavaVersion.VERSION_1_8}
}dependencies {implementation 'com.jakewharton:butterknife:10.1.0'annotationProcessor 'com.jakewharton:butterknife-compiler:10.1.0'//如果你使用的是kotlin,把这里的annotationProcessor替换成kapt即可
}
然后我们就可以开始代码的编写了。
视图绑定(View binding)
我们本例针对下图这样一个登录/注册的场景向大家说明我们应该如何通过ButterKnife进行视图绑定:
图中一共有4个View,分别是用户名输入框(EditText)、密码输入框(EditText)、登录按钮(Button)、注册提示(TextView),如果按照传统的视图绑定的方法,我们至少需要写4个findViewById(id)来将视图与字段进行绑定,通过ButterKnife,我们就可以这样:
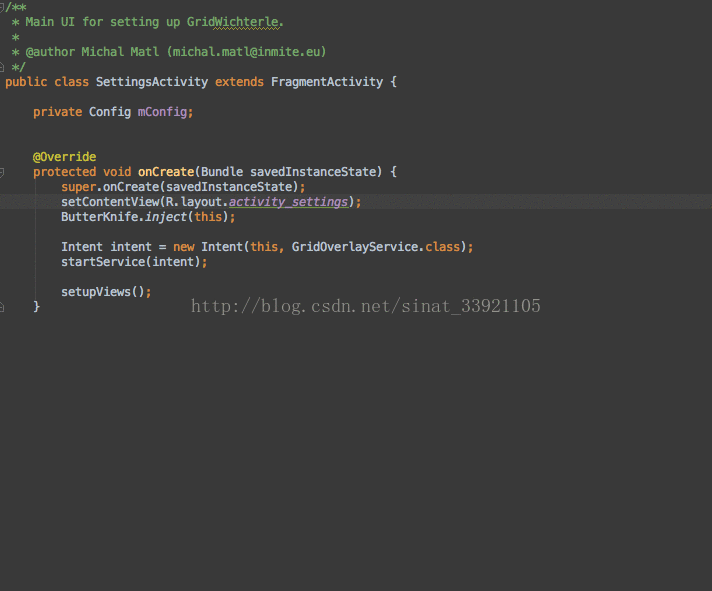
public class MyActivity extends Activity {@BindView(R.id.et_username)EditText mEtUsername;@BindView(R.id.et_password)EditText mEtPassword;@BindView(R.id.bt_login)Button mBtLogin;@BindView(R.id.tx_signup)TextView mTxSignUp;@Overrideprotected void onCreate(Bundle savedInstanceState) {super.onCreate(savedInstanceState);setContentView(R.layout.activity_my);ButterKnife.bind(this);}
}
可以看到,我们只需要为每一个字段添加一个@BindView(viewId)注解,然后在Activity的onCreate()方法中进行ButterKnife.bind(this)即可,ButterKnife会在编译期间为我们进行自动代码生成,基于上面的注解,ButterKnife会在编译期间为我们生成类似如下代码:
public void bind(MyActivity activity) {activity.mEtUsername = (android.widget.TextView) activity.findViewById(2130968578);activity.mEtPassword = (android.widget.TextView) activity.findViewById(2130968579);activity.mBtLogin = (android.widget.TextView) activity.findViewById(2130968577);activity.mTxSignUp = (android.widget.TextView) activity.findViewById(2130968567);
}
可以发现,ButterKnife其实是将我们的注解翻译为了findViewById这样的语句,然后为我们进行了自动代码生成,从而使我们可以通过更简单的代码完成原来的需求。
资源绑定(Resource binding)
我们可以使用@ BindBool,@ LabelColor,@ LabelDimen,@ LabelDrawable,@ LabelInt,@ StickString绑定预定义的资源,将R.bool.ID,R.Color.ID...(或您指定的类型)绑定到其对应的字段,比如:
public class MyActivity extends Activity {//将mUserName字段和string资源文件中的user_name绑定到一起@BindString(R.string.user_name)String mUserName;//将mBackground字段与drawable资源文件中的login_signup_background绑定到一起@BindDrawable(R.drawable.login_signup_background)Drawable mBackground;@Overrideprotected void onCreate(Bundle savedInstanceState) {super.onCreate(savedInstanceState);setContentView(R.layout.activity_my);ButterKnife.bind(this);}
}
没有Activity的绑定(Non-Activity binding)
上面的例子我们都是在Activity中进行的绑定,ButterKnife也支持我们在任意对象中进行绑定,只要提供一个根view即可,比如:
public class FancyFragment extends Fragment {@BindView(R.id.button1) Button button1;@BindView(R.id.button2) Button button2;@Override public View onCreateView(LayoutInflater inflater, ViewGroup container, Bundle savedInstanceState) {View view = inflater.inflate(R.layout.fancy_fragment, container, false);//提供了一个根视图:view,将this与视图view进行了绑定ButterKnife.bind(this, view);// TODO Use fields...return view;}
}
或者我们也可以在list的adapter中对view holder进行绑定:
public class MyAdapter extends BaseAdapter {@Override public View getView(int position, View view, ViewGroup parent) {ViewHolder holder;if (view != null) {holder = (ViewHolder) view.getTag();} else {view = inflater.inflate(R.layout.whatever, parent, false);holder = new ViewHolder(view);view.setTag(holder);}holder.name.setText("John Doe");// etc...return view;}static class ViewHolder {@BindView(R.id.title) TextView name;@BindView(R.id.job_title) TextView jobTitle;public ViewHolder(View view) {ButterKnife.bind(this, view);}}
}
总之,ButterKnife.bind可以在任何可以调用findViewById的地方被调用,除此之外,ButterKnife还提供了一些其他的关于绑定的API:
- 将
activity作为根视图绑定任意对象,如果你使用类似MVC的项目架构,你可以使用ButterKnife.bind(this, activity)将activity绑定到其对应的controller - 使用
ButterKnife.bind(this)将View的子View绑定到字段上。比如在layout中使用<merge>标记并在自定义View的构造函数中进行inflate,则可以在inflate之后立即调用ButterKnife.bind(this)。或者,从XML中inflate的自定义视图类型可以在onFinishInflate()回调中使用ButterKnife.bind(this)。
视图列表(View list)
你可以将一组view组合成一个列表或者数组,比如:
@BindViews({ R.id.first_name, R.id.middle_name, R.id.last_name })
List<EditText> nameViews;
apply方法允许您一次对列表中的所有视图执行操作:
ButterKnife.apply(nameViews, DISABLE);
ButterKnife.apply(nameViews, ENABLED, false);
Action和Setter接口允许你进行简单的操作:
static final ButterKnife.Action<View> DISABLE = new ButterKnife.Action<View>() {@Override public void apply(View view, int index) {view.setEnabled(false);}
};
static final ButterKnife.Setter<View, Boolean> ENABLED = new ButterKnife.Setter<View, Boolean>() {@Override public void set(View view, Boolean value, int index) {view.setEnabled(value);}
};
也可以在apply方法中使用Android的一些属性(property):
ButterKnife.apply(nameViews, View.ALPHA, 0.0f);
监听器绑定(Listenter binding)
可以使用如下方法自动地进行监听器的配置:
@OnClick(R.id.submit)
public void submit(View view) {// TODO submit data to server...
}
监听器中方法的参数都是可选的:
@OnClick(R.id.submit)
public void submit() {// TODO submit data to server...
}
定义一个特殊的类型,他会被自动转换(cast):
@OnClick(R.id.submit)
public void sayHi(Button button) {button.setText("Hello!");
}
在单个绑定中可以指定多个ID以进行常见事件处理:
@OnClick({ R.id.door1, R.id.door2, R.id.door3 })
public void pickDoor(DoorView door) {if (door.hasPrizeBehind()) {Toast.makeText(this, "You win!", LENGTH_SHORT).show();} else {Toast.makeText(this, "Try again", LENGTH_SHORT).show();}
}
自定义的View可以绑定到他们自己的监听器(不需要指定的id):
public class FancyButton extends Button {@OnClickpublic void onClick() {// TODO do something!}
}
清除绑定(Binding reset)
Fragment比activity具有更多的生命周期,当在Fragment的onCreateView()方法中进行绑定之后,应该在onDestroyView()方法中将veiw的值设置为null,在ButterKnife中,当你调用bind()方法时,ButterKnife会返回一个Unbinder对象,你可以在合适的生命周期的回调方法中调用Unbinder.unbind()以进行视图的重设,比如:
public class FancyFragment extends Fragment {@BindView(R.id.button1) Button button1;@BindView(R.id.button2) Button button2;private Unbinder unbinder;@Override public View onCreateView(LayoutInflater inflater, ViewGroup container, Bundle savedInstanceState) {View view = inflater.inflate(R.layout.fancy_fragment, container, false);unbinder = ButterKnife.bind(this, view);// TODO Use fields...return view;}@Override public void onDestroyView() {super.onDestroyView();unbinder.unbind();}
}
可选绑定(Optional binding)
默认情况下,@Bind以及监听器绑定都是需要的,当找不到目标view的时候,ButterKnife将会抛出一个异常,为了避免这种情况的发生,也为了创建一个可选的绑定,可以为字段添加一个@Nullable注解或者为方法添加一个@Optional注解:
@Nullable @BindView(R.id.might_not_be_there) TextView mightNotBeThere;@Optional @OnClick(R.id.maybe_missing) void onMaybeMissingClicked() {// TODO ...
}
注意,推荐使用Android's "support-annotations" library中的@Nullable。
多方法的监听器(Multil-method listenter)
对应监听器有多个回调方法的注解可以绑定到这多个回调方法中的任意一个,每个注解都有一个绑定的默认回调,使用callback参数指定备用项:
@OnItemSelected(R.id.list_view)
void onItemSelected(int position) {// TODO ...
}@OnItemSelected(value = R.id.maybe_missing, callback = NOTHING_SELECTED)
void onNothingSelected() {// TODO ...
}
源码分析
按照官方的说法,ButterKnife的代码分为两部分,一部分是编译期间会被执行的,核心代码是ButterKnifeProcessor类中的代码,另一部分是在运行期间会被执行的,主要涉及ButterKnife类中的代码,整个业务逻辑如下图所示:
接下来我将以上图为基础,从源码角度详细地分析ButterKnife的实现。
编译期间
在现阶段的Android开发中,注解按照被处理时期的不同,分为两种类型,一种是运行时注解,另一种是编译时注解,运行时注解由于性能问题被一些人所诟病。编译时注解的核心依赖APT(Annotation Processing Tools)实现,原理是在某些代码元素上(如类型、函数、字段等)添加注解,在编译时编译器会检查AbstractProcessor的子类,并且调用该类型的process函数,然后将添加了注解的所有元素都传递到process方法中,使得开发人员可以在编译器进行相应的处理,我们这里所要分析的ButterKnife也不例外,其是利用Java API提供的扫描源码并解析注解的框架AbstractProcessor,自定义继承自AbstractProcessor类的ButterKnifeProcessor类来实现自己解析注解并生成相关代码的逻辑,我们现在就来看一下ButterKnifeProcessor的核心源码即ButterKnifeProcessor.process()方法,这个方法会在编译期间被Java api调用,并且传入所有添加了注解的元素:
public final class ButterKnifeProcessor extends AbstractProcessor {...@Override public boolean process(Set<? extends TypeElement> elements, RoundEnvironment env) {Map<TypeElement, BindingSet> bindingMap = findAndParseTargets(env);for (Map.Entry<TypeElement, BindingSet> entry : bindingMap.entrySet()) {TypeElement typeElement = entry.getKey();BindingSet binding = entry.getValue();JavaFile javaFile = binding.brewJava(sdk, debuggable);try {javaFile.writeTo(filer);} catch (IOException e) {error(typeElement, "Unable to write binding for type %s: %s", typeElement, e.getMessage());}}return false;}...
}可以发现,首先调用了findAndParseTargets(env),我们深入其源码分析一下(这部分源码较多,我将重要步骤都写在注释中):
public final class ButterKnifeProcessor extends AbstractProcessor {...private Map<TypeElement, BindingSet> findAndParseTargets(RoundEnvironment env) {//定义一个Map    Map<TypeElement, BindingSet.Builder> builderMap = new LinkedHashMap<>();//定义一个SetSet<TypeElement> erasedTargetNames = new LinkedHashSet<>();// 遍历所有被@BindAnim注解修饰的元素for (Element element : env.getElementsAnnotatedWith(BindAnim.class)) {//判断元素是否合法,SuperficialValidation.validateElement(element)是谷歌提高的apiif (!SuperficialValidation.validateElement(element)) continue;try {//解析Animation类型(被@BindAnim注解修饰)的元素parseResourceAnimation(element, builderMap, erasedTargetNames);} catch (Exception e) {logParsingError(element, BindAnim.class, e);}}// 遍历所有被@BindArray注解修饰的元素for (Element element : env.getElementsAnnotatedWith(BindArray.class)) {//判断元素是否合法,SuperficialValidation.validateElement(element)是谷歌提高的apiif (!SuperficialValidation.validateElement(element)) continue;try {//解析BindArray类型(被@BindArray注解修饰)的元素parseResourceArray(element, builderMap, erasedTargetNames);} catch (Exception e) {logParsingError(element, BindArray.class, e);}}// 遍历被@BindBitmap 注解修饰的元素for (Element element : env.getElementsAnnotatedWith(BindBitmap.class)) {//逻辑同上,不再赘述if (!SuperficialValidation.validateElement(element)) continue;try {parseResourceBitmap(element, builderMap, erasedTargetNames);} catch (Exception e) {logParsingError(element, BindBitmap.class, e);}}// 遍历被@BindBool注解修饰的元素for (Element element : env.getElementsAnnotatedWith(BindBool.class)) {//逻辑同上,不再赘述if (!SuperficialValidation.validateElement(element)) continue;try {parseResourceBool(element, builderMap, erasedTargetNames);} catch (Exception e) {logParsingError(element, BindBool.class, e);}}// 遍历被@BindColor注解修饰的元素 for (Element element : env.getElementsAnnotatedWith(BindColor.class)) {if (!SuperficialValidation.validateElement(element)) continue;try {parseResourceColor(element, builderMap, erasedTargetNames);} catch (Exception e) {logParsingError(element, BindColor.class, e);}}// 遍历被@BindDimen注解修饰的元素for (Element element : env.getElementsAnnotatedWith(BindDimen.class)) {if (!SuperficialValidation.validateElement(element)) continue;try {parseResourceDimen(element, builderMap, erasedTargetNames);} catch (Exception e) {logParsingError(element, BindDimen.class, e);}}//遍历被@BindDrawable注解修饰的元素 for (Element element : env.getElementsAnnotatedWith(BindDrawable.class)) {if (!SuperficialValidation.validateElement(element)) continue;try {parseResourceDrawable(element, builderMap, erasedTargetNames);} catch (Exception e) {logParsingError(element, BindDrawable.class, e);}}//遍历被@BindFloat注解修饰的元素  for (Element element : env.getElementsAnnotatedWith(BindFloat.class)) {//逻辑同上,不再赘述if (!SuperficialValidation.validateElement(element)) continue;try {parseResourceFloat(element, builderMap, erasedTargetNames);} catch (Exception e) {logParsingError(element, BindFloat.class, e);}}// 遍历被@BindFont注解修饰的元素  for (Element element : env.getElementsAnnotatedWith(BindFont.class)) {if (!SuperficialValidation.validateElement(element)) continue;try {parseResourceFont(element, builderMap, erasedTargetNames);} catch (Exception e) {logParsingError(element, BindFont.class, e);}}// 遍历被@BindInt注解修饰的元素  for (Element element : env.getElementsAnnotatedWith(BindInt.class)) {if (!SuperficialValidation.validateElement(element)) continue;//逻辑同上,不再赘述try {parseResourceInt(element, builderMap, erasedTargetNames);} catch (Exception e) {logParsingError(element, BindInt.class, e);}}// 遍历被@BindString注解修饰的元素 for (Element element : env.getElementsAnnotatedWith(BindString.class)) {if (!SuperficialValidation.validateElement(element)) continue;try {parseResourceString(element, builderMap, erasedTargetNames);} catch (Exception e) {logParsingError(element, BindString.class, e);}}// 遍历被@BindView注解修饰的元素for (Element element : env.getElementsAnnotatedWith(BindView.class)) {// 这里没有使用SuperficialValidation.validateElement(element)对元素的合法性进行验证所以之后的处理逻辑可能生成不能解析的Viewtry {parseBindView(element, builderMap, erasedTargetNames);} catch (Exception e) {logParsingError(element, BindView.class, e);}}// 遍历被@BindFloat注解修饰的元素  Process each @BindViews element.for (Element element : env.getElementsAnnotatedWith(BindViews.class)) {// 这里没有使用SuperficialValidation.validateElement(element)对元素的合法性进行验证所以之后的处理逻辑可能生成不能解析的Viewtry {parseBindViews(element, builderMap, erasedTargetNames);} catch (Exception e) {logParsingError(element, BindViews.class, e);}}/**LISTENERS的声明如下:private static final List<Class<? extends Annotation>> LISTENERS = Arrays.asList(//OnCheckedChanged.class, //OnClick.class, //OnEditorAction.class, //OnFocusChange.class, //OnItemClick.class, //OnItemLongClick.class, //OnItemSelected.class, //OnLongClick.class, //OnPageChange.class, //OnTextChanged.class, //OnTouch.class //);*/for (Class<? extends Annotation> listener : LISTENERS) {findAndParseListener(env, listener, builderMap, erasedTargetNames);}// 将父类binder与其子类binder关联起来,这是一个基于队列的树遍历,它从根(超类)开始,然后遍历叶子(子类)。//将上面的builderMap中的键值对转化到一个队列中Deque<Map.Entry<TypeElement, BindingSet.Builder>> entries =new ArrayDeque<>(builderMap.entrySet());//声明一个MapMap<TypeElement, BindingSet> bindingMap = new LinkedHashMap<>();//遍历while (!entries.isEmpty()) {//将队首元素取出并删除,得到当前entry(键值对)Map.Entry<TypeElement, BindingSet.Builder> entry = entries.removeFirst();//取得当前键值对的键(TypeElement)TypeElement type = entry.getKey();//取得当前键值对的值(BindingSet.Builder)BindingSet.Builder builder = entry.getValue();//寻找当前type的父类TypeElement parentType = findParentType(type, erasedTargetNames);if (parentType == null) {//如果当前type的父类为null,即说明当前type类为树的根节点,直接加入到bindingMap中即可bindingMap.put(type, builder.build());} else {//尝试从bindingMap中取以parentType为键的值BindingSet parentBinding = bindingMap.get(parentType);if (parentBinding != null) {//如果取到的值不为null,说明当前type的父类已经被加入到map里面过,也说明parentType类已经是树的根节点了//将builder的根节点设置为parentBindingbuilder.setParent(parentBinding);//将type,builder.build()加入bindingMapbindingMap.put(type, builder.build());} else {// Has a superclass binding but we haven't built it yet. Re-enqueue for later.//如果取到的值为null,说明当前type的父类没有被加入到过map里面,也说明parentType类不是是树的根节点,所以将entry加入到队列的尾端,等待后面进行处理entries.addLast(entry);}}}//将bindingMap返回return bindingMap;}...
}
可以看到,这里针对不同的注解类型执行了很多形如parseXX()的方法,作用都是解析特定类型的注解元素,由于篇幅原因这里以parseBindView()为例进行分析:
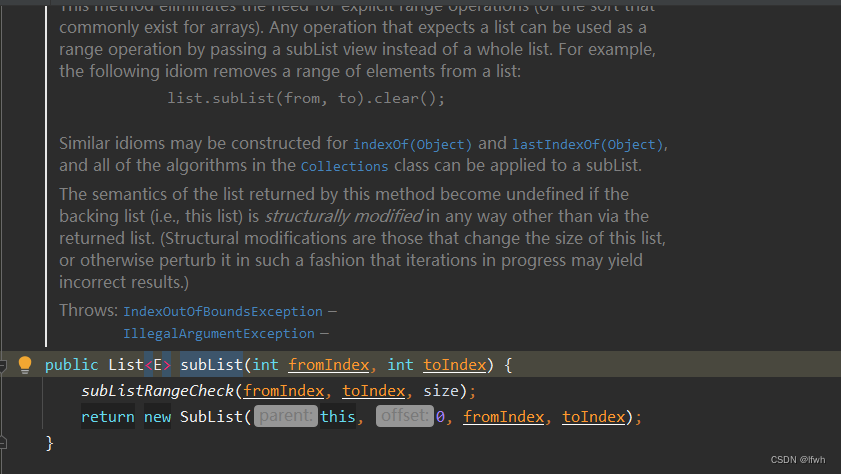
public final class ButterKnifeProcessor extends AbstractProcessor {.../*** @param element:被解析的当前元素(被@BindView修饰的元素)* @param builderMap:一个Map* @param erasedTargetNames:一个Set*/private void parseBindView(Element element, Map<TypeElement, BindingSet.Builder> builderMap,Set<TypeElement> erasedTargetNames) {/**element.getEnclosingElement()返回包含element的父element,例如像下面这段代码:package com.lu.aptdemo;import com.lu.annotation.AAAAA;@AAAAA("this is a class")public class Test<T> {@AAAAA("this is a field")String hello;@AAAAA("this is a method")public String say(@AAAAA("this is a parameter") String arg1) {return "hello world";}}则有:"Test.getEnclosingElement(): aptdemo";"hello.getEnclosingElement(): Test";"say.getEnclosingElement(): Test";"arg1.getEnclosingElement(): say";*/TypeElement enclosingElement = (TypeElement) element.getEnclosingElement();// 对element做合法性验证boolean hasError = isInaccessibleViaGeneratedCode(BindView.class, "fields", element)|| isBindingInWrongPackage(BindView.class, element);// element.asType()返回的是element的类型信息,包括包名,类(或方法,或参数)名/类TypeMirror elementType = element.asType();//elementType.getKind()返回element的类型,TypeKind.TYPEVAR表示泛型,即判断当前element元素是否是泛型类型的if (elementType.getKind() == TypeKind.TYPEVAR) {TypeVariable typeVariable = (TypeVariable) elementType;//获取此类型变量的上边界elementType = typeVariable.getUpperBound();}//包含完整的包名路径Name qualifiedName = enclosingElement.getQualifiedName();//获取名字,不带包名Name simpleName = element.getSimpleName();if (!isSubtypeOfType(elementType, VIEW_TYPE) && !isInterface(elementType)) {//如果当前element不是View的子类且当前element不是一个接口类if (elementType.getKind() == TypeKind.ERROR) {//如果当前element是Error类note(element, "@%s field with unresolved type (%s) "+ "must elsewhere be generated as a View or interface. (%s.%s)",BindView.class.getSimpleName(), elementType, qualifiedName, simpleName);} else {//否则返回(通过设置 hasError = true)error(element, "@%s fields must extend from View or be an interface. (%s.%s)",BindView.class.getSimpleName(), qualifiedName, simpleName);hasError = true;}}if (hasError) {//返回return;}// 获取该element上的@BindView注解中给定的值int id = element.getAnnotation(BindView.class).value();//尝试从builderMap中获取以enclosingElement(当前element的父元素)为键的值BindingSet.Builder builder = builderMap.get(enclosingElement);//根据当前element以及给定的值获取resourceIdId resourceId = elementToId(element, BindView.class, id);if (builder != null) {//map中获取的值不为null//从BindingSet.Builder中的缓存map中查找是否已经存在以resourceId为键的值String existingBindingName = builder.findExistingBindingName(resourceId);if (existingBindingName != null) {//已经存在,返回error(element, "Attempt to use @%s for an already bound ID %d on '%s'. (%s.%s)",BindView.class.getSimpleName(), id, existingBindingName,enclosingElement.getQualifiedName(), element.getSimpleName());return;}} else {//从builderMap中获取(如果存在)或者创建一个builder(如果是创建了一个builder,将这个builder也要put进builderMap中)builder = getOrCreateBindingBuilder(builderMap, enclosingElement);}String name = simpleName.toString();TypeName type = TypeName.get(elementType);boolean required = isFieldRequired(element);//完善builder的信息builder.addField(resourceId, new FieldViewBinding(name, type, required));// 将当前元素的父element添加到erasedTargetNames这个集合中erasedTargetNames.add(enclosingElement);}private BindingSet.Builder getOrCreateBindingBuilder(Map<TypeElement, BindingSet.Builder> builderMap, TypeElement enclosingElement) {//尝试从builderMap中获取BindingSet.Builder builder = builderMap.get(enclosingElement);if (builder == null) {//如果获取到的为null,进行创建builder = BindingSet.newBuilder(enclosingElement);//将创建的builder 放进builderMap中builderMap.put(enclosingElement, builder);}return builder;}....
}这里我单独将BindingSet.newBuilder(enclosingElement)方法拎出来分析一下:
final class BindingSet {......static Builder newBuilder(TypeElement enclosingElement) {TypeMirror typeMirror = enclosingElement.asType();boolean isView = isSubtypeOfType(typeMirror, VIEW_TYPE);boolean isActivity = isSubtypeOfType(typeMirror, ACTIVITY_TYPE);boolean isDialog = isSubtypeOfType(typeMirror, DIALOG_TYPE);TypeName targetType = TypeName.get(typeMirror);if (targetType instanceof ParameterizedTypeName) {targetType = ((ParameterizedTypeName) targetType).rawType;}String packageName = getPackage(enclosingElement).getQualifiedName().toString();String className = enclosingElement.getQualifiedName().toString().substring(packageName.length() + 1).replace('.', '$');//这里将bindingClassName设为className + "_ViewBinding",所以后面在运行期间也应该到className + "_ViewBinding"这个文件中取读取生成的代码ClassName bindingClassName = ClassName.get(packageName, className + "_ViewBinding");boolean isFinal = enclosingElement.getModifiers().contains(Modifier.FINAL);return new Builder(targetType, bindingClassName, isFinal, isView, isActivity, isDialog);}......
}
重点是知道bindingClassName最后被设置为了className + "_ViewBinding"。
继续看ButterKnifeProcessor.process()的源码:
public final class ButterKnifeProcessor extends AbstractProcessor {...@Override public boolean process(Set<? extends TypeElement> elements, RoundEnvironment env) {Map<TypeElement, BindingSet> bindingMap = findAndParseTargets(env);//遍历bindingMapfor (Map.Entry<TypeElement, BindingSet> entry : bindingMap.entrySet()) {TypeElement typeElement = entry.getKey();//键BindingSet binding = entry.getValue();//值JavaFile javaFile = binding.brewJava(sdk, debuggable);try {javaFile.writeTo(filer);} catch (IOException e) {error(typeElement, "Unable to write binding for type %s: %s", typeElement, e.getMessage());}}return false;}...
}brewJava()方法方法主要是对javapoet做一系列配置,方便下一步进行代码生成:
JavaFile brewJava(int sdk, boolean debuggable) {//调用createType(int sdk, boolean debuggable) 生成类配置TypeSpec bindingConfiguration = createType(sdk, debuggable);return JavaFile.builder(bindingClassName.packageName(), //设置包名bindingConfiguration).addFileComment("Generated code from Butter Knife. Do not modify!").build();}
private TypeSpec createType(int sdk, boolean debuggable) {//设置类名为bindingClassName.simpleName()即className + "_ViewBinding"(在上面分析BindingSet.newBuilder()的时候分析过bindingClassName的值)TypeSpec.Builder result = TypeSpec.classBuilder(bindingClassName.simpleName()).addModifiers(PUBLIC);if (isFinal) {result.addModifiers(FINAL);}if (parentBinding != null) {result.superclass(parentBinding.bindingClassName);} else {result.addSuperinterface(UNBINDER);}//其他对于方法、字段的配置,主要是javapoet的使用,不是本文的重点,这里不展开讲解
}
主要逻辑是借助javapoet库实现了代码的生成,详细配置信息都在createType()方法中,由于本文重点不是javapoet,所以这里不展开赘述,大家只要明确,createType()方法的作用是根据当前元素的信息将ButterKnife注解翻译成java代码(生成一些类似findViewById的代码),将这些java代码集成到className + "_ViewBinding"这个类中,以便运行时通过反射查找到生成的代码。
执行完JavaFile javaFile = binding.brewJava(sdk, debuggable)之后执行了javaFile.writeTo(filer)即将生成的代码写为了文件形式,至此,编译期间的代码生成工作已经完成。
运行期间
我们发现,不管是为字段添加绑定还是为方法添加绑定,我们一定要调用ButterKnife.bind()方法才能在运行期间让绑定生效,这个方法有多种重载形式:
public static Unbinder bind(@NonNull Activity target)
public static Unbinder bind(@NonNull View target)
public static Unbinder bind(@NonNull Dialog target)
public static Unbinder bind(@NonNull Object target, @NonNull Activity source)
public static Unbinder bind(@NonNull Object target, @NonNull Dialog source)
public static Unbinder bind(@NonNull Object target, @NonNull View source)
一一分析一下源码:
bind(@NonNull Activity target) :
@NonNull
@UiThread
public static Unbinder bind(@NonNull Activity target) {//获取目标Activity的根ViewView sourceView = target.getWindow().getDecorView();//调用bind(@NonNull Object target, @NonNull View source)return bind(target, sourceView);
}
可以发现最后调用了:
public static Unbinder bind(@NonNull Object target, @NonNull View source)
再分析一下bind(@NonNull View target):
@NonNull
@UiThread
public static Unbinder bind(@NonNull View target) {//调用bind(@NonNull Object target, @NonNull View source)return bind(target, target);
}
可以发现最后调用了:
public static Unbinder bind(@NonNull Object target, @NonNull View source)
再分析一下bind(@NonNull Dialog target):
@NonNull
@UiThread
public static Unbinder bind(@NonNull Dialog target) {//获取target的根ViewView sourceView = target.getWindow().getDecorView();//调用bind(@NonNull Object target, @NonNull View source)return bind(target, sourceView);
}
可以发现最后调用了:
public static Unbinder bind(@NonNull Object target, @NonNull View source)
再看一下bind(@NonNull Object target, @NonNull Activity source):
@NonNull
@UiThread
public static Unbinder bind(@NonNull Object target, @NonNull Activity source) {//首先获取source的根ViewView sourceView = source.getWindow().getDecorView();//调用bind(@NonNull Object target, @NonNull View source)return bind(target, sourceView);
}
可以发现最后调用了:
public static Unbinder bind(@NonNull Object target, @NonNull View source)
再看一下bind(@NonNull Object target, @NonNull Dialog source):
@NonNull
@UiThread
public static Unbinder bind(@NonNull Object target, @NonNull Dialog source) {//获取根ViewView sourceView = source.getWindow().getDecorView();//调用bind(@NonNull Object target, @NonNull View source)return bind(target, sourceView);
}
可以发现最后调用了:
public static Unbinder bind(@NonNull Object target, @NonNull View source)
所以我们发现,虽然bind()有6种重载的方法,但是前5种重载形式最终都是调用第6种重载方法完成的核心操作,即:
所以我们重点分析bind(@NonNull Object target, @NonNull View source)方法,我直接将将核心步骤以注释的形式写在代码中,方便大家阅读:
@NonNull @UiThreadpublic static Unbinder bind(@NonNull Object target, @NonNull View source) {Class<?> targetClass = target.getClass();if (debug) Log.d(TAG, "Looking up binding for " + targetClass.getName());//获取编译期间生成findViewById之类操作的宿主类的构造方法(类名为className + "_ViewBinding")Constructor<? extends Unbinder> constructor = findBindingConstructorForClass(targetClass);if (constructor == null) {return Unbinder.EMPTY;}//noinspection TryWithIdenticalCatches Resolves to API 19+ only type.try {实例化编译期间生成findViewById之类操作的宿主类(类名为className + "_ViewBinding"),注意,当该类的构造方法被执行时,会执行生成的findViewById之类的操作return constructor.newInstance(target, source);} catch (IllegalAccessException e) {throw new RuntimeException("Unable to invoke " + constructor, e);} catch (InstantiationException e) {throw new RuntimeException("Unable to invoke " + constructor, e);} catch (InvocationTargetException e) {Throwable cause = e.getCause();if (cause instanceof RuntimeException) {throw (RuntimeException) cause;}if (cause instanceof Error) {throw (Error) cause;}throw new RuntimeException("Unable to create binding instance.", cause);}}可以发现,bind(@NonNull Object target, @NonNull View source)方法的核心是findBindingConstructorForClass(targetClass),我们跟进去看看:
@Nullable @CheckResult @UiThreadprivate static Constructor<? extends Unbinder> findBindingConstructorForClass(Class<?> cls) {//先从map中找,BINDINGS的声明为:static final Map<Class<?>, Constructor<? extends Unbinder>> BINDINGS = new LinkedHashMap<>();Constructor<? extends Unbinder> bindingCtor = BINDINGS.get(cls);if (bindingCtor != null || BINDINGS.containsKey(cls)) {//找到了,直接返回if (debug) Log.d(TAG, "HIT: Cached in binding map.");return bindingCtor;}//类名String clsName = cls.getName();//筛选,跳过以android.,java.,androidx.开头的类(即非用户编写的类,这样可以加快速度)if (clsName.startsWith("android.") || clsName.startsWith("java.")|| clsName.startsWith("androidx.")) {if (debug) Log.d(TAG, "MISS: Reached framework class. Abandoning search.");return null;}try {//加载在编译期间生成的类,类名为className + "_ViewBinding",这一点我在介绍编译期间的BindingSet.newBuilder(TypeElement enclosingElement) 方法时已经介绍过Class<?> bindingClass = cls.getClassLoader().loadClass(clsName + "_ViewBinding");//获取bindingClass类的含有target.class和View.class两个参数的构造方法bindingCtor = (Constructor<? extends Unbinder>) bindingClass.getConstructor(cls, View.class);if (debug) Log.d(TAG, "HIT: Loaded binding class and constructor.");} catch (ClassNotFoundException e) {if (debug) Log.d(TAG, "Not found. Trying superclass " + cls.getSuperclass().getName());//如果没有找到按照当前target的信息合成的类名对应的类,则递归按照当前target类的父类进行查找bindingCtor = findBindingConstructorForClass(cls.getSuperclass());} catch (NoSuchMethodException e) {throw new RuntimeException("Unable to find binding constructor for " + clsName, e);}//放进map,下一次不用再生成BINDINGS.put(cls, bindingCtor);//返回return bindingCtor;}
可以发现,这个方法其实就是根据传入的target以及ButterKnife编译期间生成代码时类名的命名规则利用反射区加载ButterKnife在编译期间生成的类,并将构造方法返回。
至此,我们就分析完了ButterKnife的核心源码,我们再回过头来看一下ButterKnife的核心业务逻辑图:
可以看到,ButterKnife的主要原理是:
- 编译期间分析注解,根据注解类型生成代码
- 运行期间利用反射加载编译期间生成的代码并执行
总结
本文首先介绍了ButterKnife的基本使用,然后从源码角度分析了ButterKnife的实现原理和机制,希望大家通过本文可以对ButterKnife有一个更加深入的了解和认识,如果觉得本文不错,请点个关注吧~

![android[butterKnife(黄油刀)史诗详细使用方法]](https://img-blog.csdnimg.cn/93a67b009cba4e24b84bc6d8fdd33c98.png)