前言
在开局配置Nginx时有可能会配置错误,报各种错误代码。看不懂或者懒得去看这个报错时,其实最简单的方式是卸载并重装咯。今天就带大家一起学习下,如何彻底卸载nginx程序。
一、卸载NGINX
卸载nginx程序的详细步骤
1、停止Nginx软件
/usr/local/nginx/sbin/nginx -s stop
如果不知道nginx安装路径,可以通过执行ps命令找到nginx程序的PID,然后kill其PID

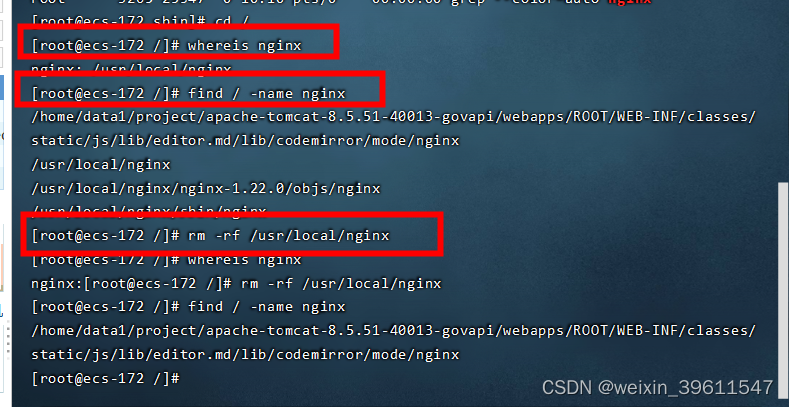
2、查找根下所有名字包含nginx的文件
sudo find / -name nginx*

3、执行命令删除nignx安装的相关文件
说明:全局查找往往会查出很多相关文件,但是前缀基本都是相同,后面不同的部分可以用*代替,以便快速删除~
[root@qll251 ~]# rm -rf /usr/local/sbin/nginx
[root@qll251 ~]# rm -rf /usr/local/nginx
[root@qll251 ~]# rm -rf /usr/src/nginx-1.11.1
[root@qll251 ~]# rm -rf /usr/local/nginx*
4、其他设置
如果设置了Nginx开机自启动的话,可能还需要下面两步
chkconfig nginx off
rm -rf /etc/init.d/nginx
5、卸载nginx依赖
yum remove nginx
删除之后,便可重新安装nginx了
二、开始安装NGINX
安装所需插件
1、安装gcc
gcc是linux下的编译器在此不多做解释,感兴趣的小伙伴可以去查一下相关资料,它可以编译 C,C++,Ada,Object C和Java等语言
命令:查看gcc版本
gcc -v
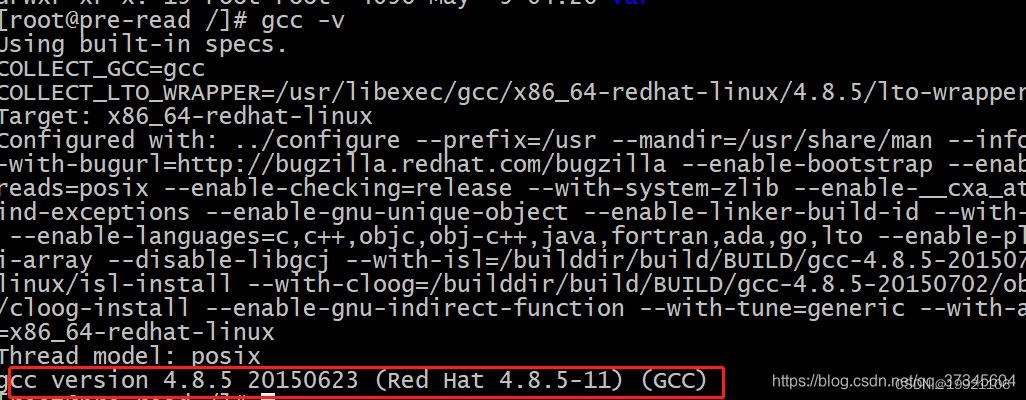
一般阿里云的centOS7里面是都有的,没有安装的话会提示命令找不到,
安装命令:
yum -y install gcc
2、pcre、pcre-devel安装
pcre是一个perl库,包括perl兼容的正则表达式库,nginx的http模块使用pcre来解析正则表达式,所以需要安装pcre库。
安装命令:
yum install -y pcre pcre-devel

3、zlib安装
zlib库提供了很多种压缩和解压缩方式nginx使用zlib对http包的内容进行gzip,所以需要安装
安装命令:
yum install -y zlib zlib-devel
4、安装openssl
openssl是web安全通信的基石,没有openssl,可以说我们的信息都是在裸奔。。。。。。
安装命令:
yum install -y openssl openssl-devel
安装nginx
1、下载nginx安装包
wget http://nginx.org/download/nginx-1.9.9.tar.gz
2、把压缩包解压到usr/local/java
tar -zxvf nginx-1.9.9.tar.gz
3、切换到cd /usr/local/java/nginx-1.9.9/下面
执行三个命令:
./configure --prefix=/usr/local/nginx --with-http_stub_status_module --with-http_ssl_module
make
make install
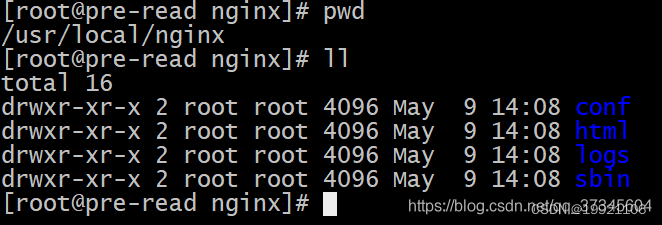
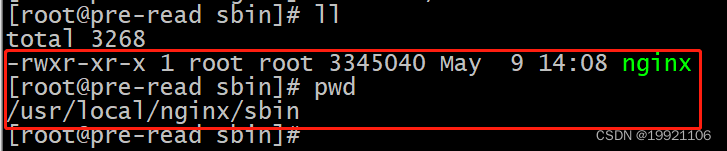
4、切换到/usr/local/nginx安装目录
5、配置nginx的配置文件nginx.conf文件,主要也就是端口
#user  nobody;
worker_processes  4;
worker_rlimit_nofile 65535;#error_log  logs/error.log;
#error_log  logs/error.log  notice;
#error_log  logs/error.log  info;#pid        logs/nginx.pid;events {worker_connections  65535;#use epoll;#accept_mutex off;#multi_accept off;
}http {include       mime.types;default_type  application/octet-stream;#log_format  main  '$remote_addr - $remote_user [$time_local] "$request" '#                  '$status $body_bytes_sent "$http_referer" '#                  '"$http_user_agent" "$http_x_forwarded_for"';#access_log  logs/access.log  main;sendfile       on;#tcp_nopush     on;#tcp_nodelay    on;#keepalive_timeout  0;keepalive_timeout  65;#send_timeout 10s;#types_hash_max_size 2048;#client_header_buffer_size 4k;#client_max_body_size 8m;proxy_connect_timeout 300;proxy_send_timeout 300;proxy_read_timeout 300;proxy_buffer_size 64k;proxy_buffers 4 64k;proxy_busy_buffers_size 128k;proxy_temp_file_write_size 128k;#gzip  on;upstream test123456 {ip_hash;server 192.168.0.192:8081;server 192.168.0.144:8081;server 192.168.0.203:8081;}upstream testjk123456 {#ip_hash;server 192.168.0.192:8081;server 192.168.0.144:8081;server 192.168.0.203:8081;}# another virtual host using mix of IP-, name-, and port-based configuration##server {#    listen       8000;#    listen       somename:8080;#    server_name  somename  alias  another.alias;#    location / {#        root   html;#        index  index.html index.htm;#    }#}# HTTPS server##server {#    listen       443 ssl;#    server_name  localhost;#    ssl_certificate      cert.pem;#    ssl_certificate_key  cert.key;#    ssl_session_cache    shared:SSL:1m;#    ssl_session_timeout  5m;#    ssl_ciphers  HIGH:!aNULL:!MD5;#    ssl_prefer_server_ciphers  on;#    location / {#        root   html;#        index  index.html index.htm;#    }#}server {listen       443 ssl;server_name  test.jjtech.cn;ssl_certificate      /usr/local/java/ng.crt;ssl_certificate_key  /usr/local/java//ng.key;ssl_session_cache    shared:SSL:1m;ssl_session_timeout  5m;#ssl_ciphers  HIGH:!aNULL:!MD5;ssl_prefer_server_ciphers  on;ssl_protocols TLSv1 TLSv1.1 TLSv1.2;ssl_ciphers ECDH+AESGCM:ECDH+AES256:ECDH+AES128:ECDH+3DES:RSA+AESGCM:RSA+AES:RSA+3DES:!aNULL:!eNULL:!MD5:!DSS:!EXP:!ADH:!LOW:!MEDIUM;proxy_ssl_server_name on;#charset koi8-r;charset utf-8;#access_log  logs/host.access.log  main;#rewrite ^(.*)$ https://${server_name}$1 permanent;location /h5 {root   /usr/local/java;index  index.html index.htm;}location ~ ^/h5.*\.(css|jpeg|jpg|gif|js)$ {root   /usr/local/java;}location /bz {proxy_pass http://test123456/;proxy_send_timeout 18000;proxy_read_timeout 18000;proxy_connect_timeout 18000;proxy_set_header Upgrade $http_upgrade;proxy_set_header Connection  "upgrade";}location /api {proxy_pass http://testjk123456/;proxy_send_timeout 18000;proxy_read_timeout 18000;proxy_connect_timeout 18000;proxy_set_header Upgrade $http_upgrade;proxy_set_header Connection  "upgrade";}location / {proxy_pass http://test123456/$request_uri;proxy_set_header Upgrade $http_upgrade;proxy_set_header Connection  "upgrade";}location /apilogin {proxy_pass http://test123456/$request_uri;proxy_set_header Upgrade $http_upgrade;proxy_set_header Connection  "upgrade";}#error_page  404              /404.html;# redirect server error pages to the static page /50x.html#error_page   500 502 503 504  /50x.html;location = /50x.html {root   html;}# proxy the PHP scripts to Apache listening on 127.0.0.1:80##location ~ \.php$ {#    proxy_pass   http://127.0.0.1;#}# pass the PHP scripts to FastCGI server listening on 127.0.0.1:9000##location ~ \.php$ {#    root           html;#    fastcgi_pass   127.0.0.1:9000;#    fastcgi_index  index.php;#    fastcgi_param  SCRIPT_FILENAME  /scripts$fastcgi_script_name;#    include        fastcgi_params;#}# deny access to .htaccess files, if Apache's document root# concurs with nginx's one##location ~ /\.ht {#    deny  all;#}}}
可以按照自己服务器的端口使用情况来进行配置
ESC键,wq!强制保存并退出
6、启动nginx服务
切换目录到/usr/local/nginx/sbin下面
启动nginx命令:
./nginx指定配置文件启动
/usr/local/nginx/sbin/nginx -c /usr/local/nginx/conf/nginx.conf
重启
/usr/local/nginx/sbin/nginx -s reload -c /usr/local/nginx/conf/nginx.conf
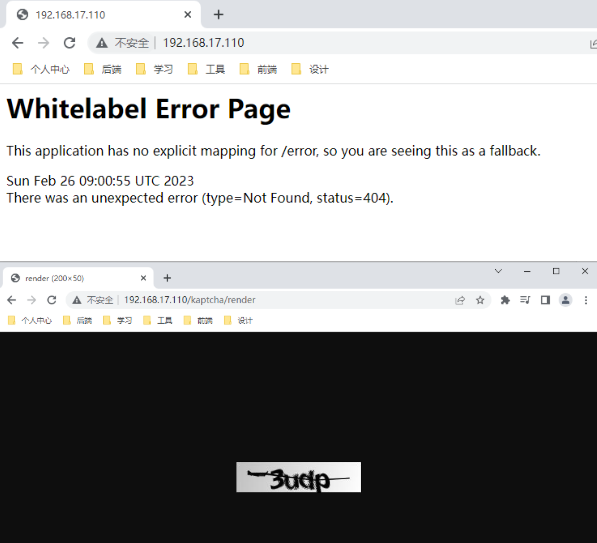
7、访问你的服务器IP
显示
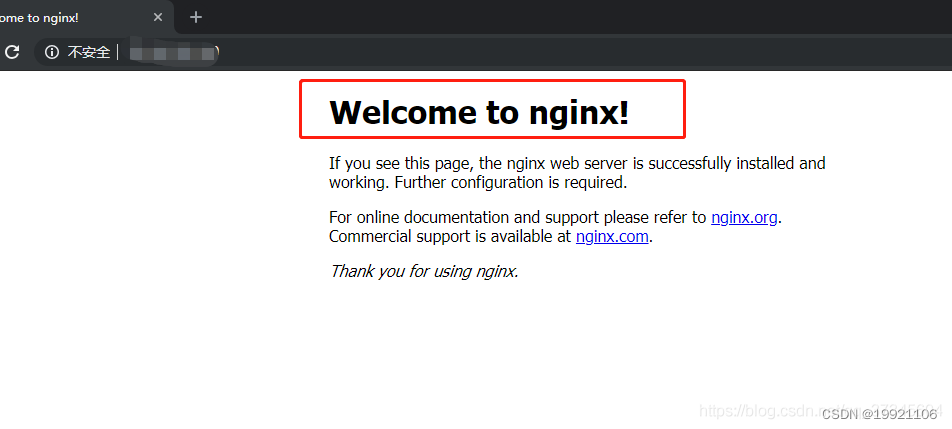
说明安装和配置都没问题OK了
8、nginx常用命令
1.启动nginx命令:./nginx
2.重启nginx命令:./nginx -s reload
3.停止nginx命令:./nginx -s stop  或 ./nginx -s quit优雅关闭(不接受新的连接请求,等待旧的连接请求处理完毕再关闭):nginx -s quit 或者 kill -QUIT 主进程号
4.关闭nginx进程:ps -ef|grep nginxkill -9 8725 (进程号 上面的)   则关闭nginx