博客自动增加阅读量
- 目的
- 步骤
- 准备条件
- 编写基础类
- 注意
- 解决
- 后续
目的
用HttpClient包进行Get请求,从而增加博客的阅读量
步骤
1 拿到所有博客的URL:
我们的博客都是
https://blog.csdn.net/用户ID/article/details/ 文章ID(8位)
用户ID很好拿,而所有文章ID可以通过列表的方式查找:
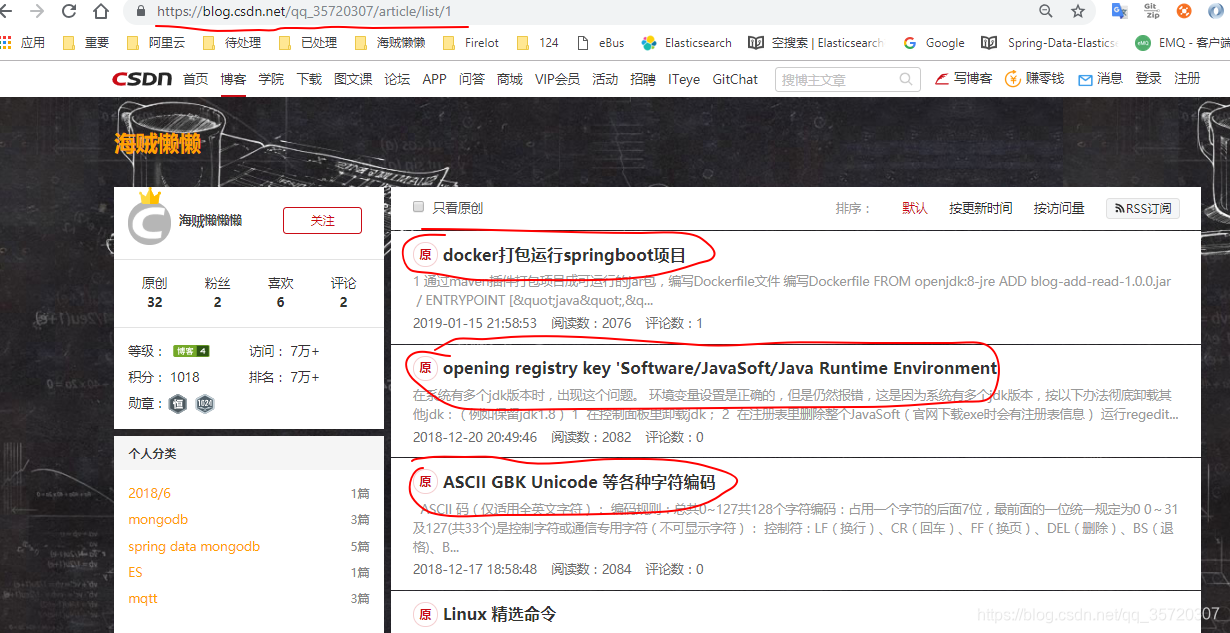
我们可以通过GET请求拿到这一页的HTML,然后遍历查找出以
https://blog.csdn.net/用户ID/article/details/ 开头的所有URL
准备条件
pom.xml :
<dependency><groupId>org.springframework.boot</groupId><artifactId>spring-boot-starter</artifactId></dependency><!--http工具包,模拟Get,Post等请求--><dependency><groupId>org.apache.httpcomponents</groupId><artifactId>httpmime</artifactId></dependency><!--fastjson--><dependency><groupId>com.alibaba</groupId><artifactId>fastjson</artifactId><version>1.2.46</version></dependency>
编写基础类
public class HttpUtils {private static final RequestConfig defaultConfig;// 获取返回的cookie(访问Url前塞进HttpClient)private static  BasicCookieStore cookieStore = new BasicCookieStore();static {// 设置超时时间等配置defaultConfig = RequestConfig.custom().setSocketTimeout(10000).setConnectTimeout(10000).setConnectionRequestTimeout(10000).build();}/*** 获取client** @return*/public static CloseableHttpClient getClient() {// 采用默认方式获取client,默认方式会通过连接池建立连接,并且设置CooikeCloseableHttpClient client = HttpClients.custom().setDefaultCookieStore(cookieStore).build();return client;}/*** http post请求,json格式传输参数** @param map 参数对* @param url url地址* @return*/public static String postWithHttp(Map<String, Object> map, String url) {HttpPost httpPost = new HttpPost(url);httpPost.setConfig(defaultConfig);StringEntity stringEntity = new StringEntity(JSON.toJSONString(map), Consts.UTF_8);stringEntity.setContentEncoding("UTF-8");stringEntity.setContentType("application/json");httpPost.setEntity(stringEntity);return execute(httpPost);}/*** 执行请求并响应** @param httpPost httpPost* @return 结果流字符串*/public static String getWithHttp( String url) {HttpGet httpGet = new HttpGet(url);httpGet.setConfig(defaultConfig);return execute(httpGet);}private static String execute(HttpRequestBase httpPost) {if (httpPost == null) {return "";}try {CloseableHttpResponse response = getClient().execute(httpPost);if (response.getStatusLine().getStatusCode() == HttpStatus.SC_OK) {
//                 打印cookieList<Cookie> cookies = cookieStore.getCookies();if (cookies.isEmpty()) {System.out.println("Cookie is None");} else {for (int i = 0; i < cookies.size(); i++) {System.out.println("- " + cookies.get(i).toString());}}HttpEntity resEntity = response.getEntity();return EntityUtils.toString(resEntity);}} catch (Exception e) {e.printStackTrace();log.error("请求出错,", e);}return "";}}
// Springboot启动后运行
@Component
@Slf4j
public class ApplicationRunnerImpl implements ApplicationRunner {@Overridepublic void run(ApplicationArguments args) throws Exception {// 解决需要登陆的情况//        Map<String,Object> map = new HashMap<>();
//        map.put("loginType","1");
//        map.put("pwdOrVerifyCode","xxx");
//        map.put("userIdentification","xxx");
//        System.out.println(HttpUtils.postWithHttp(map, "https://passport.csdn.net/v1/register/pc/login/doLogin"));int count = 0 ;List<String> urls = new ArrayList<>();// 几个文章列表List<String> listurl = new ArrayList<>();listurl.add("https://blog.csdn.net/qq_35720307/article/list/1");listurl.add("https://blog.csdn.net/qq_35720307/article/list/2");listurl.add("https://blog.csdn.net/qq_35720307/article/list/3");// 拿到每个列表页面的所有博客URLfor (String s : listurl) {String content = HttpUtils.getWithHttp(s);System.out.println(content);int start = 0;int end = 0;String searchKey = "https://blog.csdn.net/qq_35720307/article/details/";while (content.indexOf(searchKey, start) != -1) {start = content.indexOf(searchKey, start);end = start + searchKey.length() + 8;String url = content.substring(start, end);urls.add(url);start = end;}}// 启动几个线程跑  ExecutorService threadPool = Executors.newFixedThreadPool(5);while (true) {try {urls.forEach(url -> {threadPool.execute(() -> {HttpUtils.getWithHttp(url);});});log.info("循环次数"+ ++count);Thread.sleep(40000);} catch (InterruptedException e) {log.error("error message :", e);}}}
}
注意
问题一:同一个IP下,一分钟内,一篇文章点击多次只会增加一次阅读量
问题二:大概1个多小时后,这个IP将会被屏蔽,该IP访问任何博客都一定会跳到登录页
解决
问题一 这个我们设置一分钟左右读取一次
问题二 所有请求我们带上登陆的所有Cookie
登陆的URL,是个POST请求,URL是
https://passport.csdn.net/v1/register/pc/login/doLogin
需要传参的格式是JSON:
{
“loginType”:“1”,
“pwdOrVerifyCode”:“你的账户密码”,
“userIdentification”:“你的账户用户名”
}
具体代码在上面注释里面,先请求后,Cookie会在每次访问URL时都会带上
后续
怎么拿到这个URL:F12后,用正确的用户名和错误的密码登陆,这个请求URL将会出来,如果是正确的密码,将会自动跳转,找不着这个POST请求了
CSDN的防护:每次登陆,有一个GET请求先验证用户名和密码,正确就会去请求真正的POST登陆,错误三次左右就会出现验证码,完成验证码才会请求真正的POST登陆
具体项目Git地址:https://github.com/TomZhangY/blogAddRead