目录
- 一、安卓Socket客户端
- 二、安卓Socket客户端优化(小车遥控器拓展)
- 三、Android非UI线程修改空间程序崩溃问题
- 一种新的解决办法:Handler类(倒计时软件)
- 四、Android网络接收数据并刷新界面(综合练习)
- 五、WebView控件之自制浏览器APP
一、安卓Socket客户端
.java
package com.example.ycy;import java.io.IOException;
import java.io.InputStream;
import java.io.OutputStream;
import java.net.Socket;
import java.util.Scanner;import android.app.Activity;
import android.os.Bundle;
import android.view.Menu;
import android.view.View;public class MainActivity extends Activity {@Overrideprotected void onCreate(Bundle savedInstanceState) {super.onCreate(savedInstanceState);setContentView(R.layout.activity_main);}@Overridepublic boolean onCreateOptionsMenu(Menu menu) {// Inflate the menu; this adds items to the action bar if it is present.getMenuInflater().inflate(R.menu.main, menu);return true;}public void handlerMessage(){try {//1.创建客户端套接字,填充ip地址和端口号Socket client = new Socket("192.168.0.15",8888);//2.获取输出流,用来发送数据OutputStream out = client.getOutputStream();String message = "message from Andriod";//4.发送数据//用getBytes()方法将字符串转化为字节数组out.write(message.getBytes());} catch (IOException e) {// TODO Auto-generated catch blocke.printStackTrace();}}public void sendMessage(View v){new Thread(new Runnable() {		//网络线程不能跑在主线程,需要再创建一个线程@Overridepublic void run() {// TODO Auto-generated method stubhandlerMessage();}}).start();}}
.xml
<RelativeLayout xmlns:android="http://schemas.android.com/apk/res/android"xmlns:tools="http://schemas.android.com/tools"android:layout_width="match_parent"android:layout_height="match_parent"android:paddingBottom="@dimen/activity_vertical_margin"android:paddingLeft="@dimen/activity_horizontal_margin"android:paddingRight="@dimen/activity_horizontal_margin"android:paddingTop="@dimen/activity_vertical_margin"tools:context=".MainActivity" ><Button android:layout_width="wrap_content"android:layout_height="wrap_content"android:onClick="sendMessage"android:text="发送消息"/></RelativeLayout>效果显示:
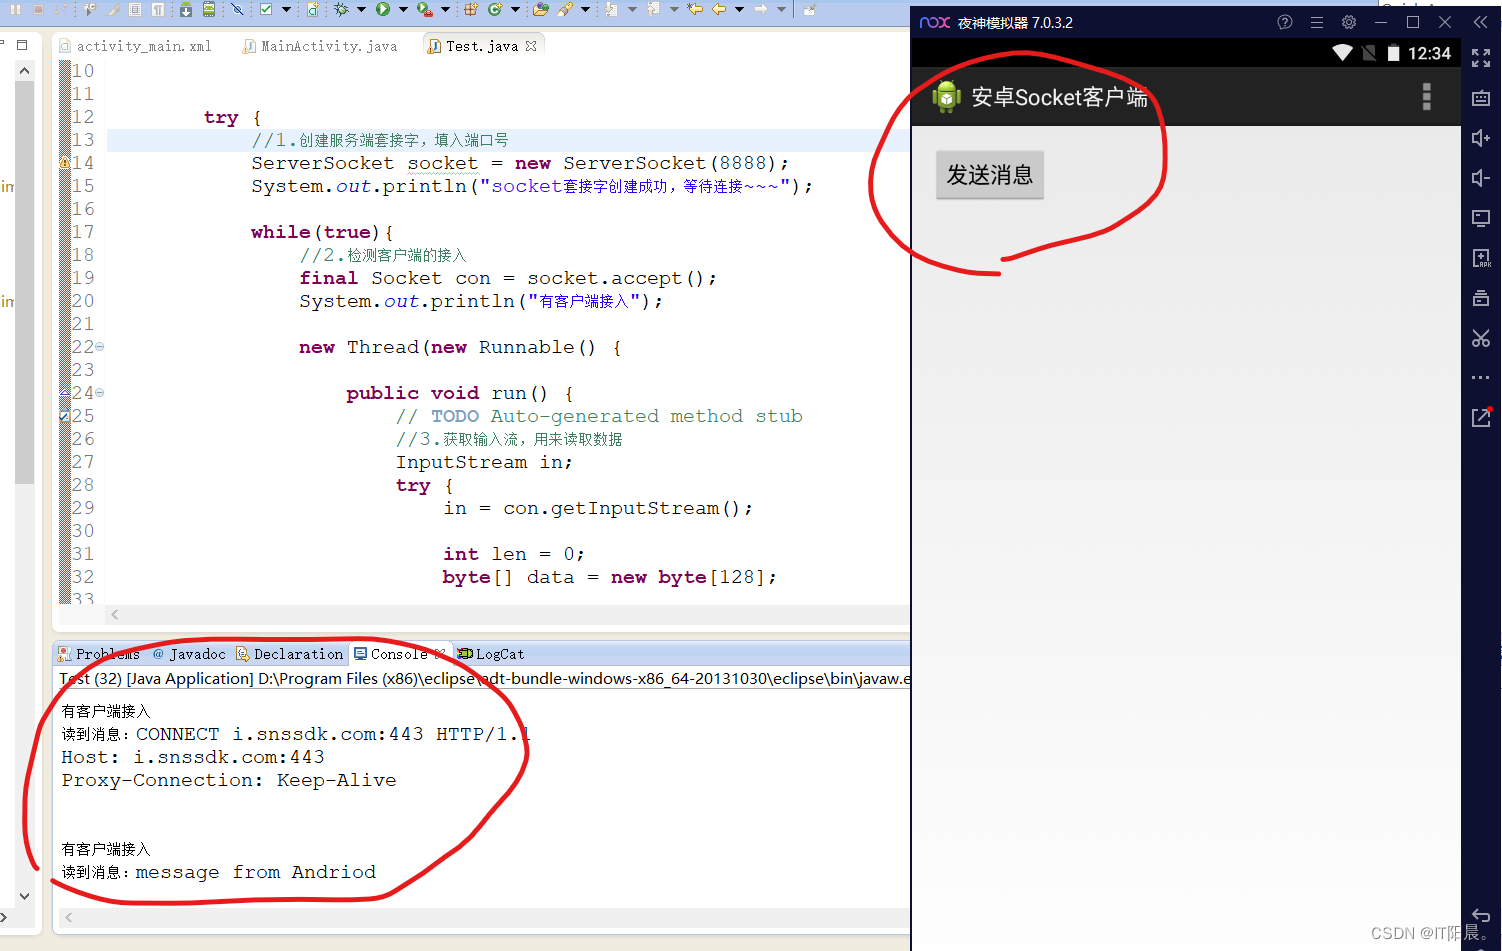
注意:
网络访问不能在主线程(UI线程)中进行,否则程序会崩溃,要创建线程来发起网络访问。
二、安卓Socket客户端优化(小车遥控器拓展)
代码:
package com.example.ycy;import java.io.IOException;
import java.io.InputStream;
import java.io.OutputStream;
import java.net.Socket;
import java.util.Scanner;import android.app.Activity;
import android.os.Bundle;
import android.view.Menu;
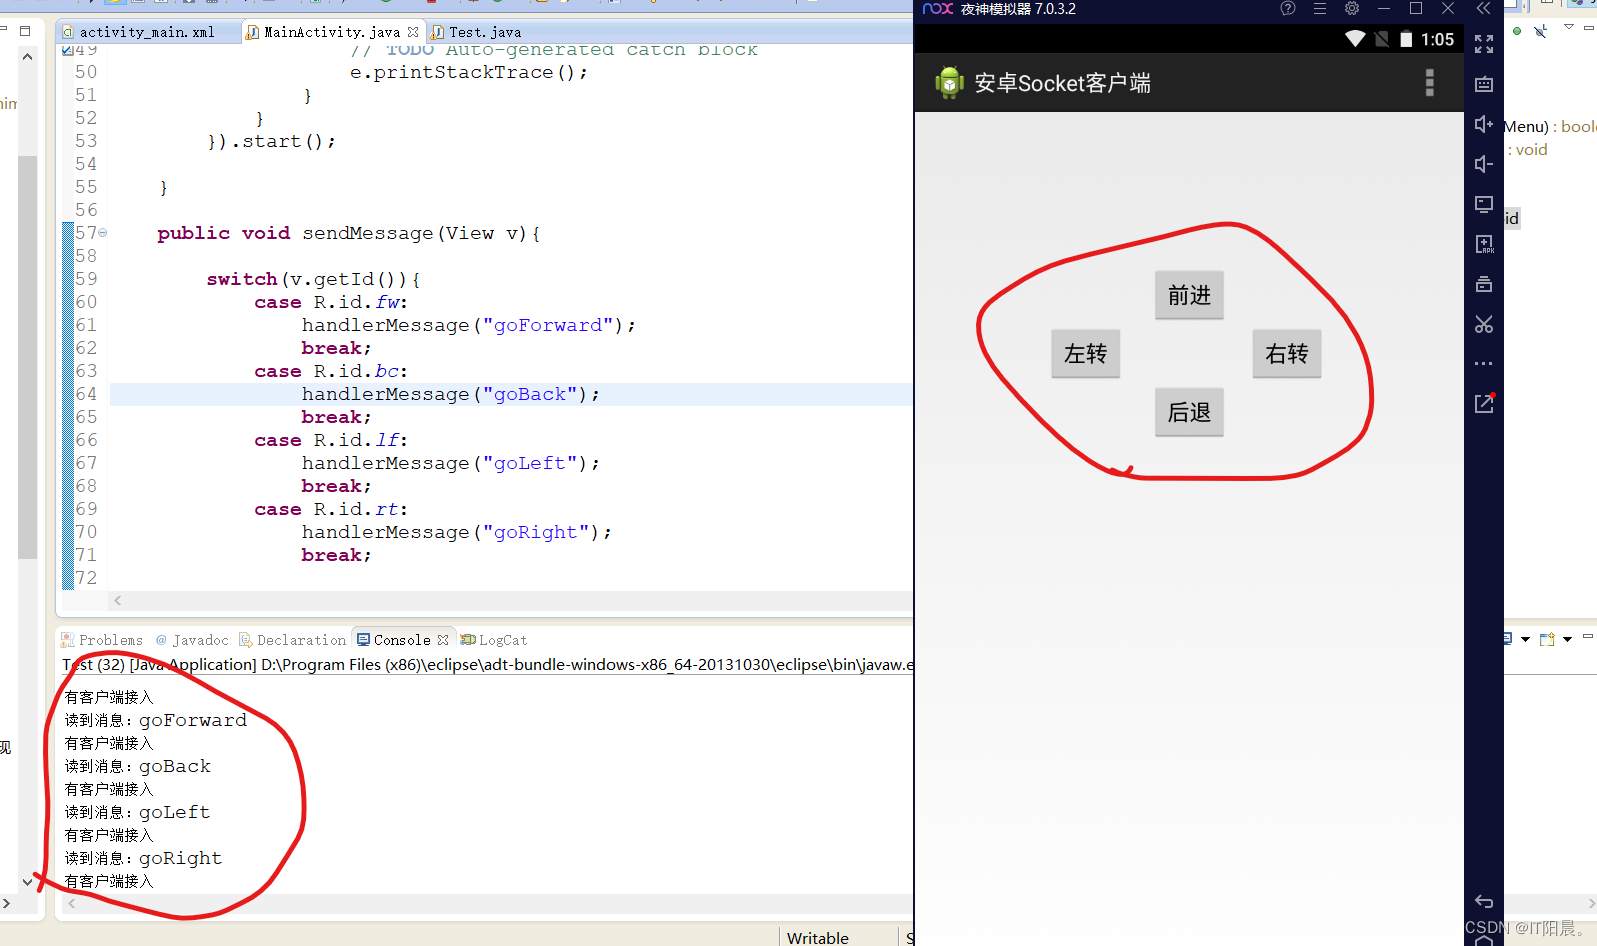
import android.view.View;public class MainActivity extends Activity {@Overrideprotected void onCreate(Bundle savedInstanceState) {super.onCreate(savedInstanceState);setContentView(R.layout.activity_main);}@Overridepublic boolean onCreateOptionsMenu(Menu menu) {// Inflate the menu; this adds items to the action bar if it is present.getMenuInflater().inflate(R.menu.main, menu);return true;}public void handlerMessage(final String message){new Thread(new Runnable() {@Overridepublic void run() {// TODO Auto-generated method stubtry {//1.创建客户端套接字,填充ip地址和端口号Socket client = new Socket("192.168.0.15",8888);//2.获取输出流,用来发送数据OutputStream out = client.getOutputStream(); //4.发送数据//用getBytes()方法将字符串转化为字节数组out.write(message.getBytes()); } catch (IOException e) {// TODO Auto-generated catch blocke.printStackTrace();} }}).start();}public void sendMessage(View v){switch(v.getId()){case R.id.fw:handlerMessage("goForward");break;case R.id.bc:handlerMessage("goBack");break;case R.id.lf:handlerMessage("goLeft");break;case R.id.rt:handlerMessage("goRight");break;}}
}
效果显示:
三、Android非UI线程修改空间程序崩溃问题
如果我们想要不断刷新修改一个控件(比如文本控件)的内容,我们应该如何做呢?
既然要刷新,就必然会用到 sleep() 方法去睡眠等待刷新时间,但是在之前我们曾经出错过,sleep() 方法不能出现在 UI 线程里,否则程序会崩溃,那么我们就再创建一个线程来刷新修改控件内容:
.java
package com.example.ycy;import android.app.Activity;
import android.os.Bundle;
import android.view.View;
import android.widget.TextView;public class MainActivity extends Activity {public TextView textView;	//关联TextView控件@Overrideprotected void onCreate(Bundle savedInstanceState) {super.onCreate(savedInstanceState);setContentView(R.layout.activity_main);textView = (TextView) findViewById(R.id.textView);	//关联TextView控件}public void changeText(View v){new Thread(new Runnable() {@Overridepublic void run() {// TODO Auto-generated method stubfor (int i = 0; i < 10; i++) {textView.setText("yangchenyanghandsome");try {Thread.sleep(3000);} catch (InterruptedException e) {// TODO Auto-generated catch blocke.printStackTrace();}}}}).start();}}
.xml
<RelativeLayout xmlns:android="http://schemas.android.com/apk/res/android"xmlns:tools="http://schemas.android.com/tools"android:layout_width="match_parent"android:layout_height="match_parent"android:paddingBottom="@dimen/activity_vertical_margin"android:paddingLeft="@dimen/activity_horizontal_margin"android:paddingRight="@dimen/activity_horizontal_margin"android:paddingTop="@dimen/activity_vertical_margin"tools:context=".MainActivity" ><TextViewandroid:id="@+id/textView"android:layout_width="wrap_content"android:layout_height="wrap_content"android:text="@string/hello_world" /><Buttonandroid:id="@+id/button1"android:layout_width="wrap_content"android:layout_height="wrap_content"android:layout_alignLeft="@+id/textView"android:layout_below="@+id/textView"android:layout_marginTop="34dp"android:onClick="changeText"android:text="修改文本" /></RelativeLayout>
运行结果:
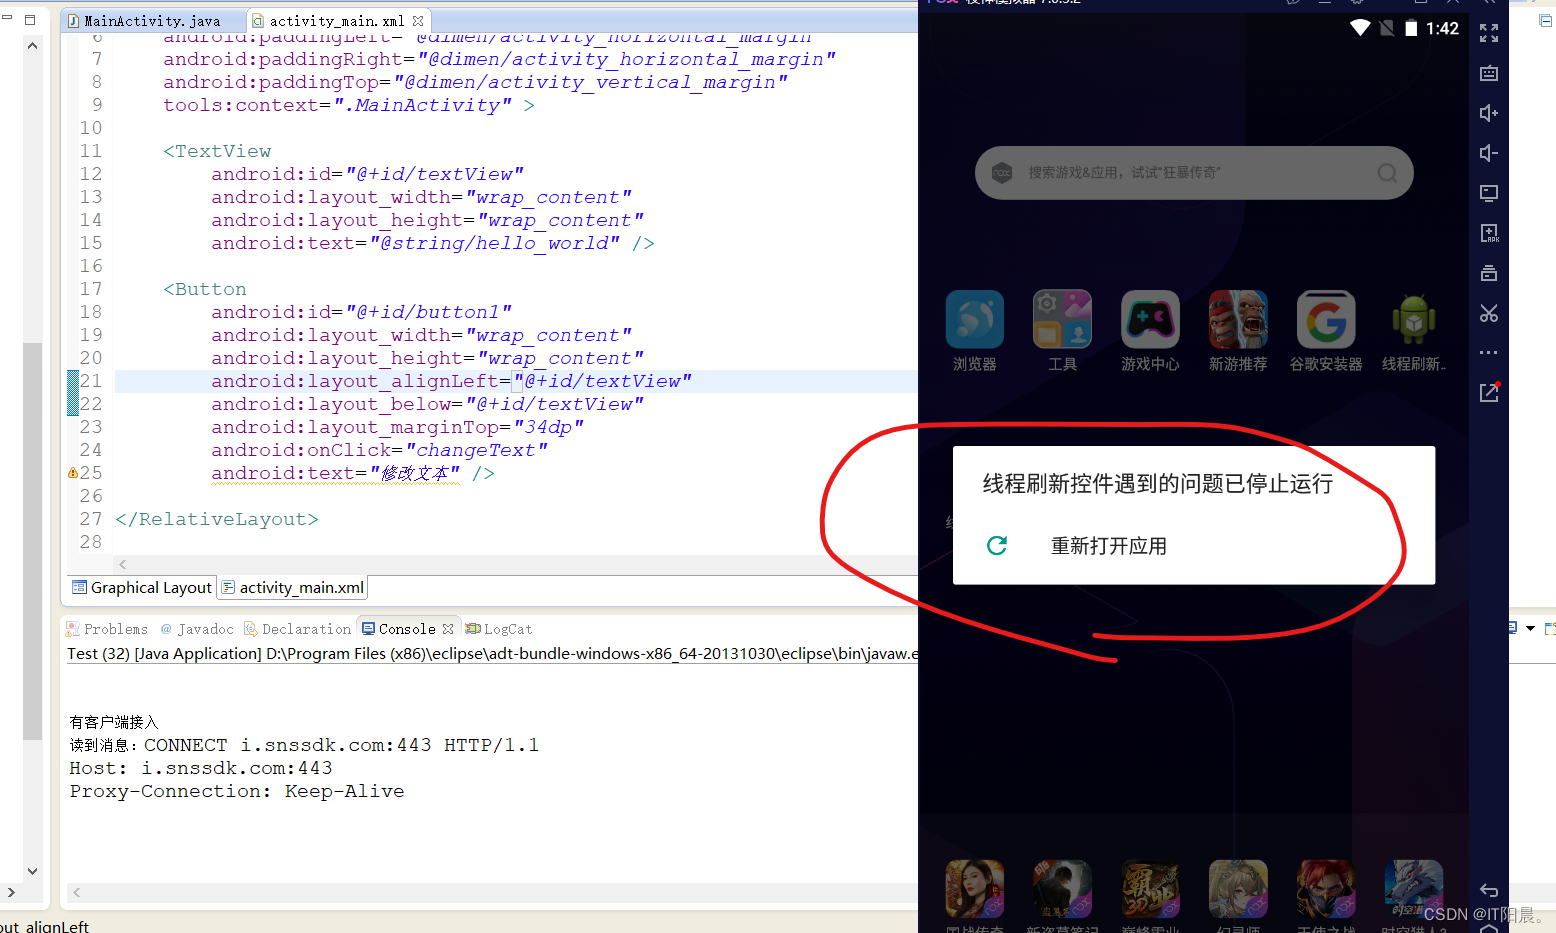
我们可以看到,程序又崩溃了。怎么办呢?
一种新的解决办法:Handler类(倒计时软件)
既然再新线程内不能修改控件,那么我们利用 Handler类 去处理 UI 线程和新线程无法处理的业务,就是在新线程中,我们将新线程不能处理的业务封装在重写了的 Handler类 中的 handleMessage() 方法中, 当在新线程中需要执行响应业务的时候,我们通过给 Handler 类的对象发送消息,触发这个事件,让handleMessage() 方法去处理响应的业务,这样就能解决这个问题,这里我们通过应用 Handler类 将以上功能修改为倒计时软件:
.java
package com.example.ycy;import android.app.Activity;
import android.content.Intent;
import android.os.Bundle;
import android.os.Handler;
import android.os.Message;
import android.view.View;
import android.widget.TextView;public class MainActivity extends Activity {public TextView textView;	//关联TextView控件public Handler h;@Overrideprotected void onCreate(Bundle savedInstanceState) {super.onCreate(savedInstanceState);setContentView(R.layout.activity_main);textView = (TextView) findViewById(R.id.textView);	//关联TextView控件h = new Handler(){	//匿名内部类,UI主线程的家里的电话,接到电话去处理一些其他进程无法处理的事件@Overridepublic void handleMessage(Message msg) {	//区分事件类型// TODO Auto-generated method stubsuper.handleMessage(msg);textView.setText(msg.what+"s");}};}public void changeText(View v){new Thread(new Runnable() {@Overridepublic void run() {// TODO Auto-generated method stubfor (int i = 10; i >= 0; i--) {Message msg = new Message();	//为了传递参数imsg.what = i;//打电话把UI线程不能处理的事情交给UI线程的Handler去做h.sendMessage(msg);try {Thread.sleep(1000);} catch (InterruptedException e) {// TODO Auto-generated catch blocke.printStackTrace();}}}}).start();}}
.xml
<RelativeLayout xmlns:android="http://schemas.android.com/apk/res/android"xmlns:tools="http://schemas.android.com/tools"android:layout_width="match_parent"android:layout_height="match_parent"android:paddingBottom="@dimen/activity_vertical_margin"android:paddingLeft="@dimen/activity_horizontal_margin"android:paddingRight="@dimen/activity_horizontal_margin"android:paddingTop="@dimen/activity_vertical_margin"tools:context=".MainActivity"android:background="#000000"><TextViewandroid:id="@+id/textView"android:layout_width="wrap_content"android:layout_height="wrap_content"android:layout_centerInParent="true"android:textSize="50dp"android:textColor="#ffffff"android:text="10s" /><Buttonandroid:id="@+id/button1"android:layout_width="match_parent"android:layout_height="wrap_content"android:layout_centerHorizontal="true"android:onClick="changeText"android:background="#ffffff"android:text="Begin" /></RelativeLayout>
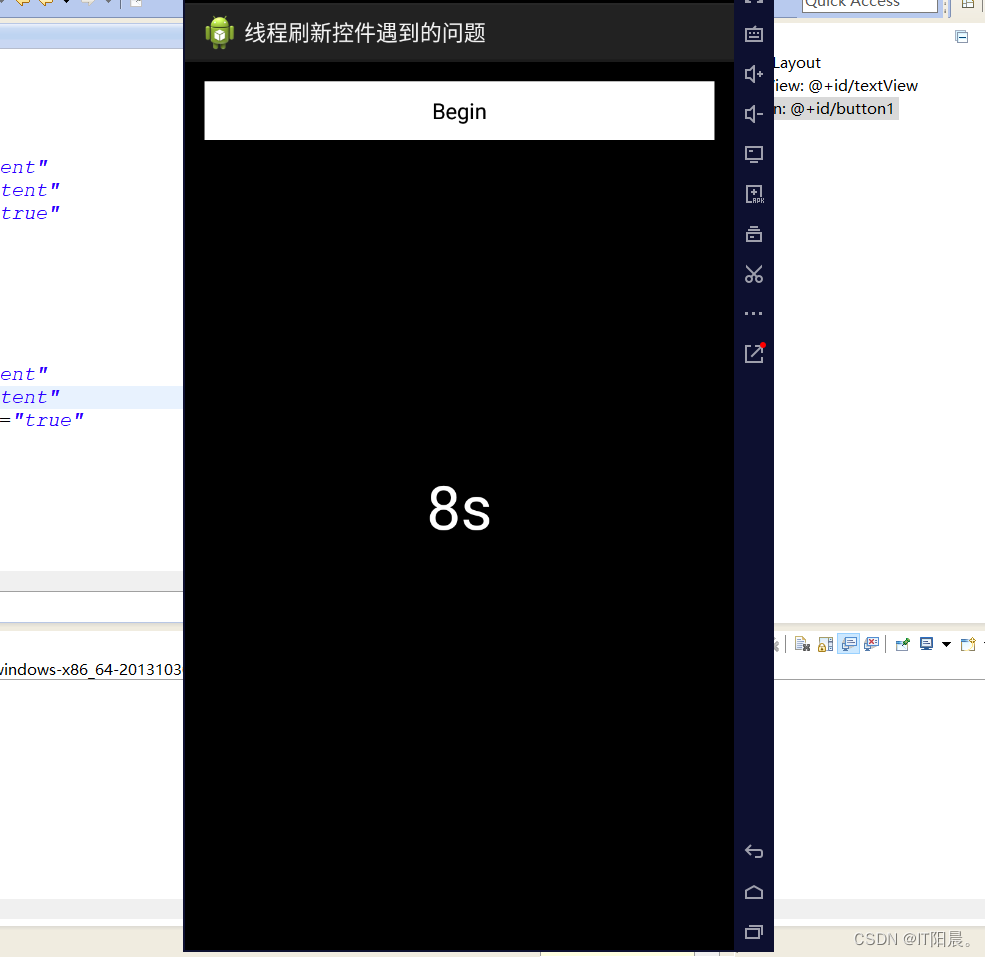
效果显示:
点击 Begin 前:

点击 Begin 后:
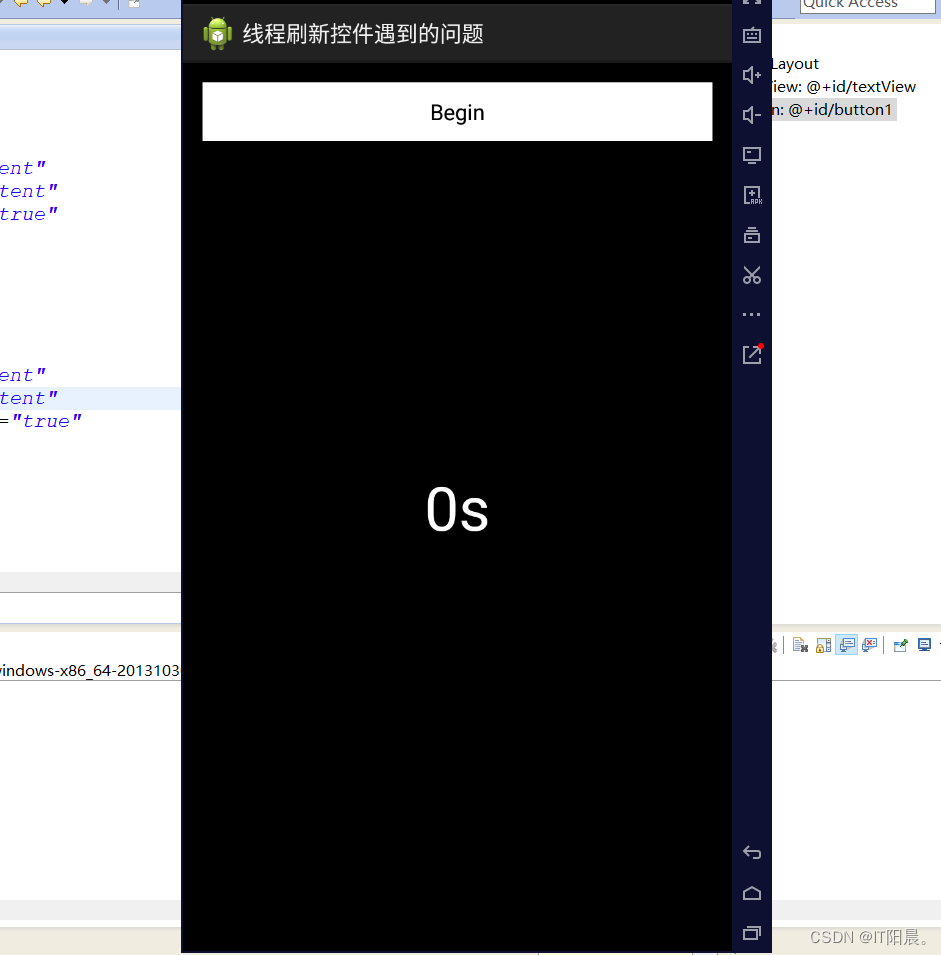
倒计时完毕:
四、Android网络接收数据并刷新界面(综合练习)
.java
package com.example.ycy;import java.io.IOException;
import java.io.InputStream;
import java.io.OutputStream;
import java.net.Socket;import android.app.Activity;
import android.os.Bundle;
import android.os.Handler;
import android.os.Message;
import android.view.View;
import android.widget.TextView;public class MainActivity extends Activity {Handler handler;TextView tx;@Overrideprotected void onCreate(Bundle savedInstanceState) {super.onCreate(savedInstanceState);setContentView(R.layout.activity_main);tx = (TextView) findViewById(R.id.tx);//这里是关于Handler处理文本框变化的代码handler = new Handler(){@Overridepublic void handleMessage(Message msg) {// TODO Auto-generated method stubsuper.handleMessage(msg);Bundle b = msg.getData();	//先把Bundle获取String string = b.getString("msg");		//再把b中的msg读出来tx.setText(string);}};}public void handlerMessage(final String message, final Handler h){new Thread(new Runnable() {@Overridepublic void run() {// TODO Auto-generated method stubtry {//1.创建客户端套接字,填充IP地址和端口号Socket client = new Socket("192.168.0.15",8880);//2.获取输出流,用来发送数据OutputStream out = client.getOutputStream();						//4.发送数据//用getBytes()方法将字符串转化为字节数组out.write(message.getBytes());		//5.接收数据InputStream in = client.getInputStream();byte[] data = new byte[128];int len = 0;len = in.read(data);String str = new String(data, 0, len);Message msg = new Message();	Bundle b = new Bundle();b.putString("msg", str);msg.setData(b);		//把b放在msg中h.sendMessage(msg);		//触发Handler处理机制} catch (IOException e) {// TODO Auto-generated catch blocke.printStackTrace();}					}}).start();}public void sendMessage(View v){switch(v.getId()){case R.id.fw:handlerMessage("goForward",handler);break;} 	}
}
.xml
<RelativeLayout xmlns:android="http://schemas.android.com/apk/res/android"xmlns:tools="http://schemas.android.com/tools"android:layout_width="match_parent"android:layout_height="match_parent"android:background="#000000"tools:context=".MainActivity" ><Buttonandroid:id="@+id/fw"android:layout_width="match_parent"android:layout_height="wrap_content"android:onClick="sendMessage" android:textColor="#ffffff"android:text="发起网络请求" /><TextView android:id="@+id/tx"android:layout_width="wrap_content"android:layout_height="wrap_content"android:textSize="35dp"android:layout_centerInParent="true"android:textColor="#ffffff"/></RelativeLayout>
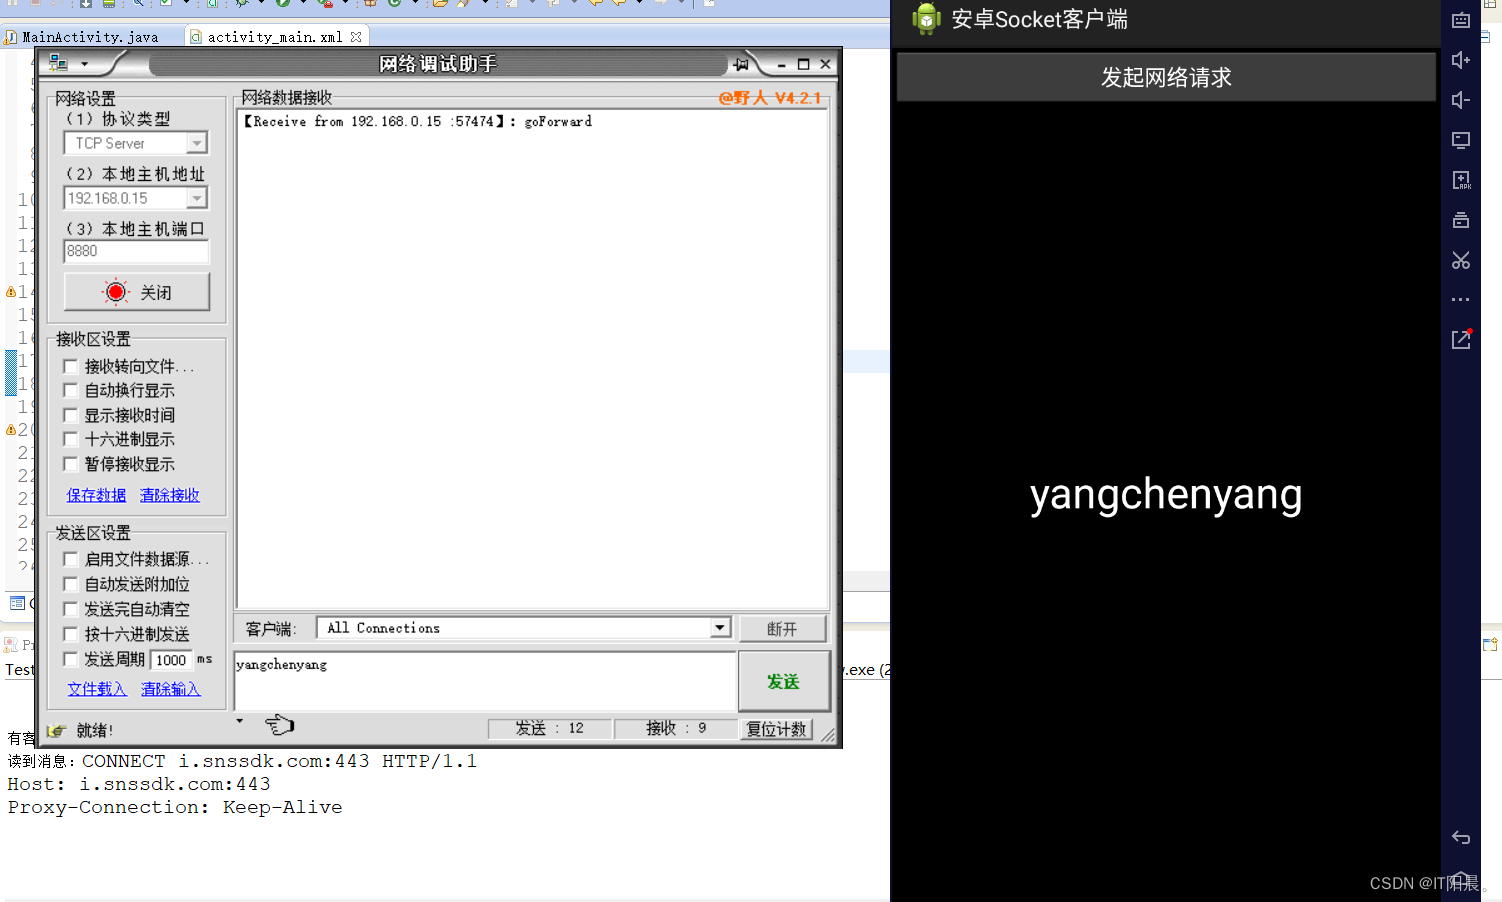
效果显示:
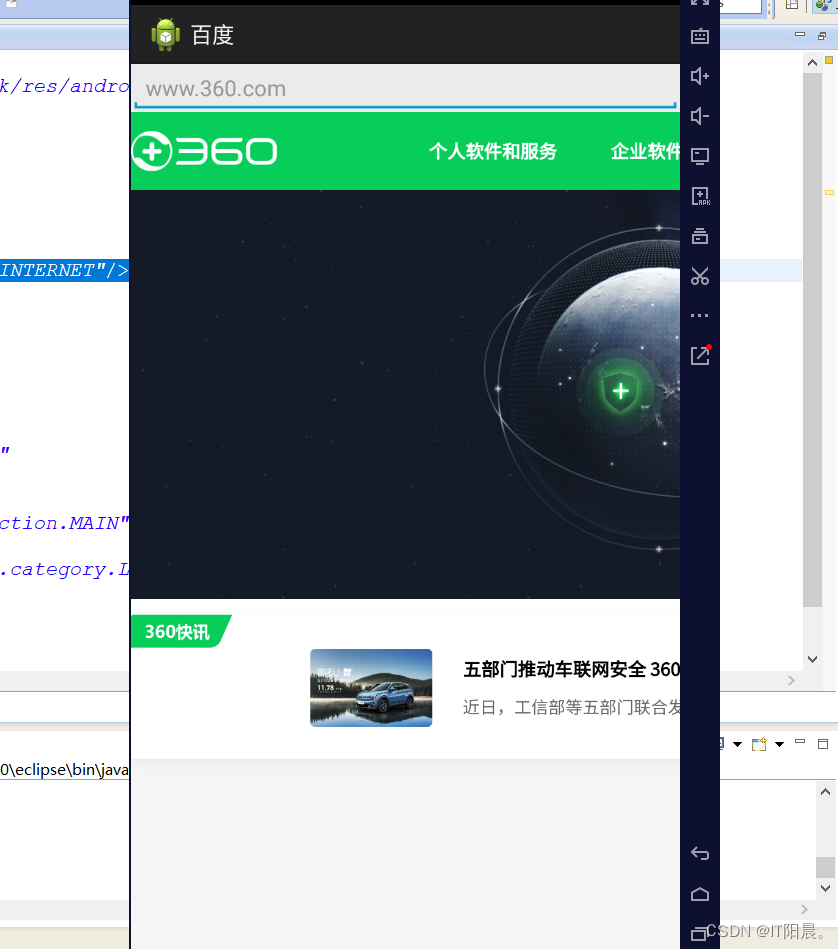
五、WebView控件之自制浏览器APP
.java
package com.example.ycy;import android.os.Bundle;
import android.app.Activity;
import android.view.KeyEvent;
import android.view.Menu;
import android.webkit.WebView;
import android.webkit.WebViewClient;
import android.widget.EditText;
import android.widget.TextView;public class MainActivity extends Activity {@Overrideprotected void onCreate(Bundle savedInstanceState) {super.onCreate(savedInstanceState);        setContentView(R.layout.activity_main);//关联浏览器控件final WebView wb = (WebView) findViewById(R.id.webView1);//关联输入框控件final EditText ed = (EditText) findViewById(R.id.ed);//创建浏览器客户端,防止页面访问浏览器发生跳转wb.setWebViewClient(new WebViewClient());//输入框调用动作监听方法ed.setOnEditorActionListener(new TextView.OnEditorActionListener() {@Override//重写动作监听条件public boolean onEditorAction(TextView arg0, int arg1, KeyEvent event) {// TODO Auto-generated method stub//获取输入框中的内容并转化为字符串String str = ed.getText().toString();//浏览页面wb.loadUrl(str);//如果监听到回车,返回truereturn (event.getKeyCode() == KeyEvent.KEYCODE_ENTER);}});           }
}
.xml
<RelativeLayout xmlns:android="http://schemas.android.com/apk/res/android"xmlns:tools="http://schemas.android.com/tools"android:layout_width="match_parent"android:layout_height="match_parent"tools:context=".MainActivity" ><LinearLayout android:id="@+id/ll"android:layout_width="match_parent"android:layout_height="wrap_content"><EditText android:id="@+id/ed"android:layout_width="match_parent"android:layout_height="match_parent"android:hint="请输入网址" /> </LinearLayout><WebViewandroid:layout_below="@id/ll"android:id="@+id/webView1"android:layout_width="match_parent"android:layout_height="match_parent"/></RelativeLayout>
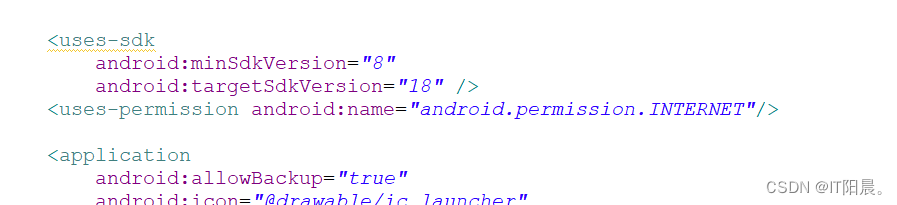
注意要在 AndroidMainfest 中加上网络访问权限:
<uses-permission android:name="android.permission.INTERNET"/>
效果显示: