一、安装nginx
#安装nginx
brew install nginx#查看nginx版本
nginx -Vcd /usr/local/etc/nginxls -l#如果没有nginx.conf执行下面命令
sudo cp nginx.conf.default nginx.conf#启动nginx服务
brew services start nginx//查看nginx是否启动成功
ps aux|grep nginx
nginx启动成功,以后常用的命令
sudo nginx    #启动nginx服务
sudo nginx -s reload    #重新载入配置文件
sudo nginx -s stop    #停止nginx服务
二、配置PHP
系统通常已经默认有安装php了,执行命令查看
#查看php版本
php -v#配置文件
sudo cp /private/etc/php-fpm.conf.default /private/etc/php-fpm.conf
修改错误日志路径
#编辑配置文件
sudo vim php-fpm.conf#在配置文件里面;error_log下面增加一行
error_log = /usr/local/var/log/php-fpm.log
三、配置nginx
打开配置文件
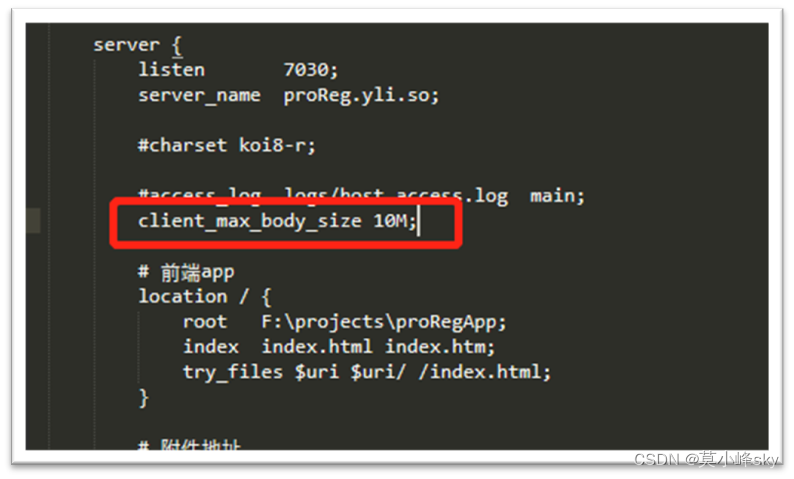
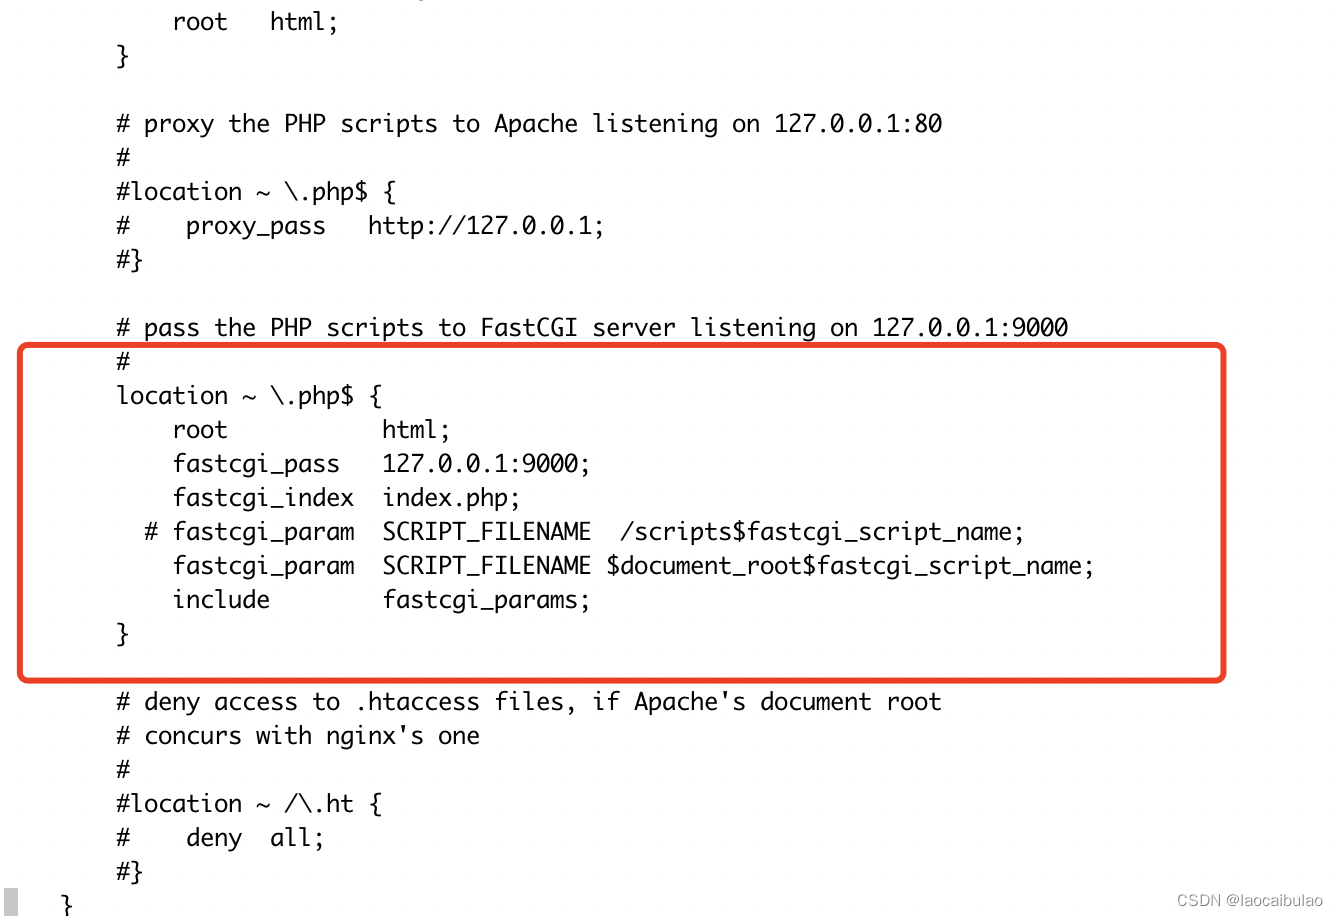
vim /usr/local/etc/nginx/nginx.conf找到server , 在location 下增加index.php, 例如
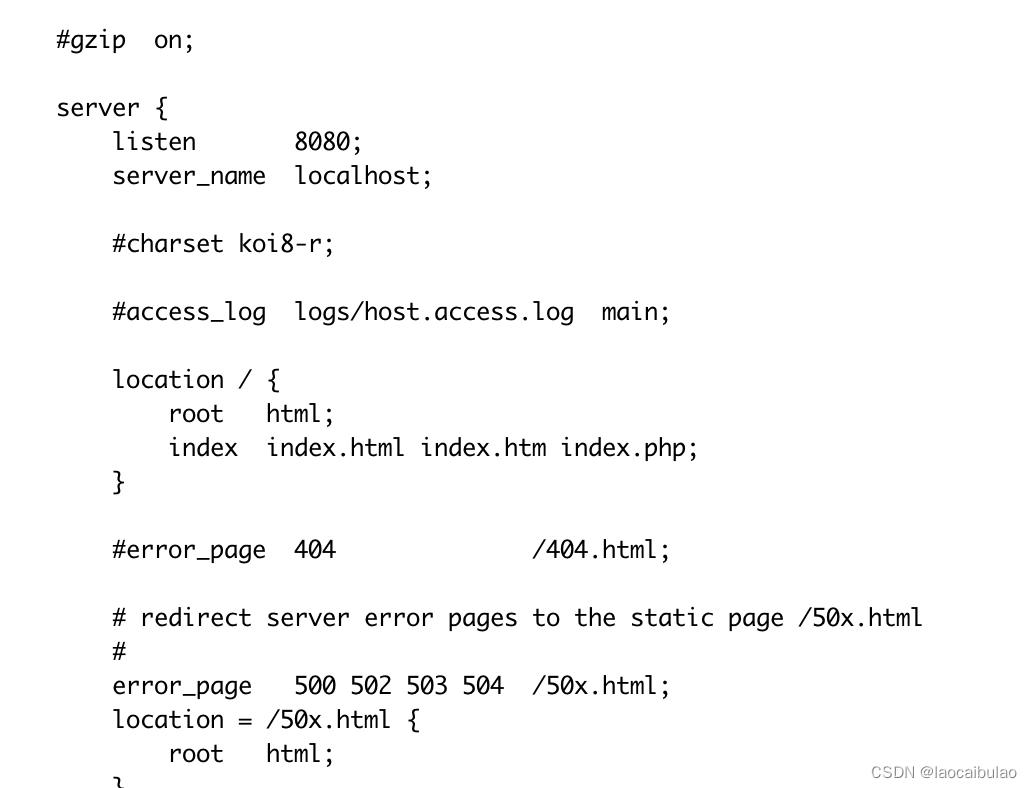

开启FastCGI server
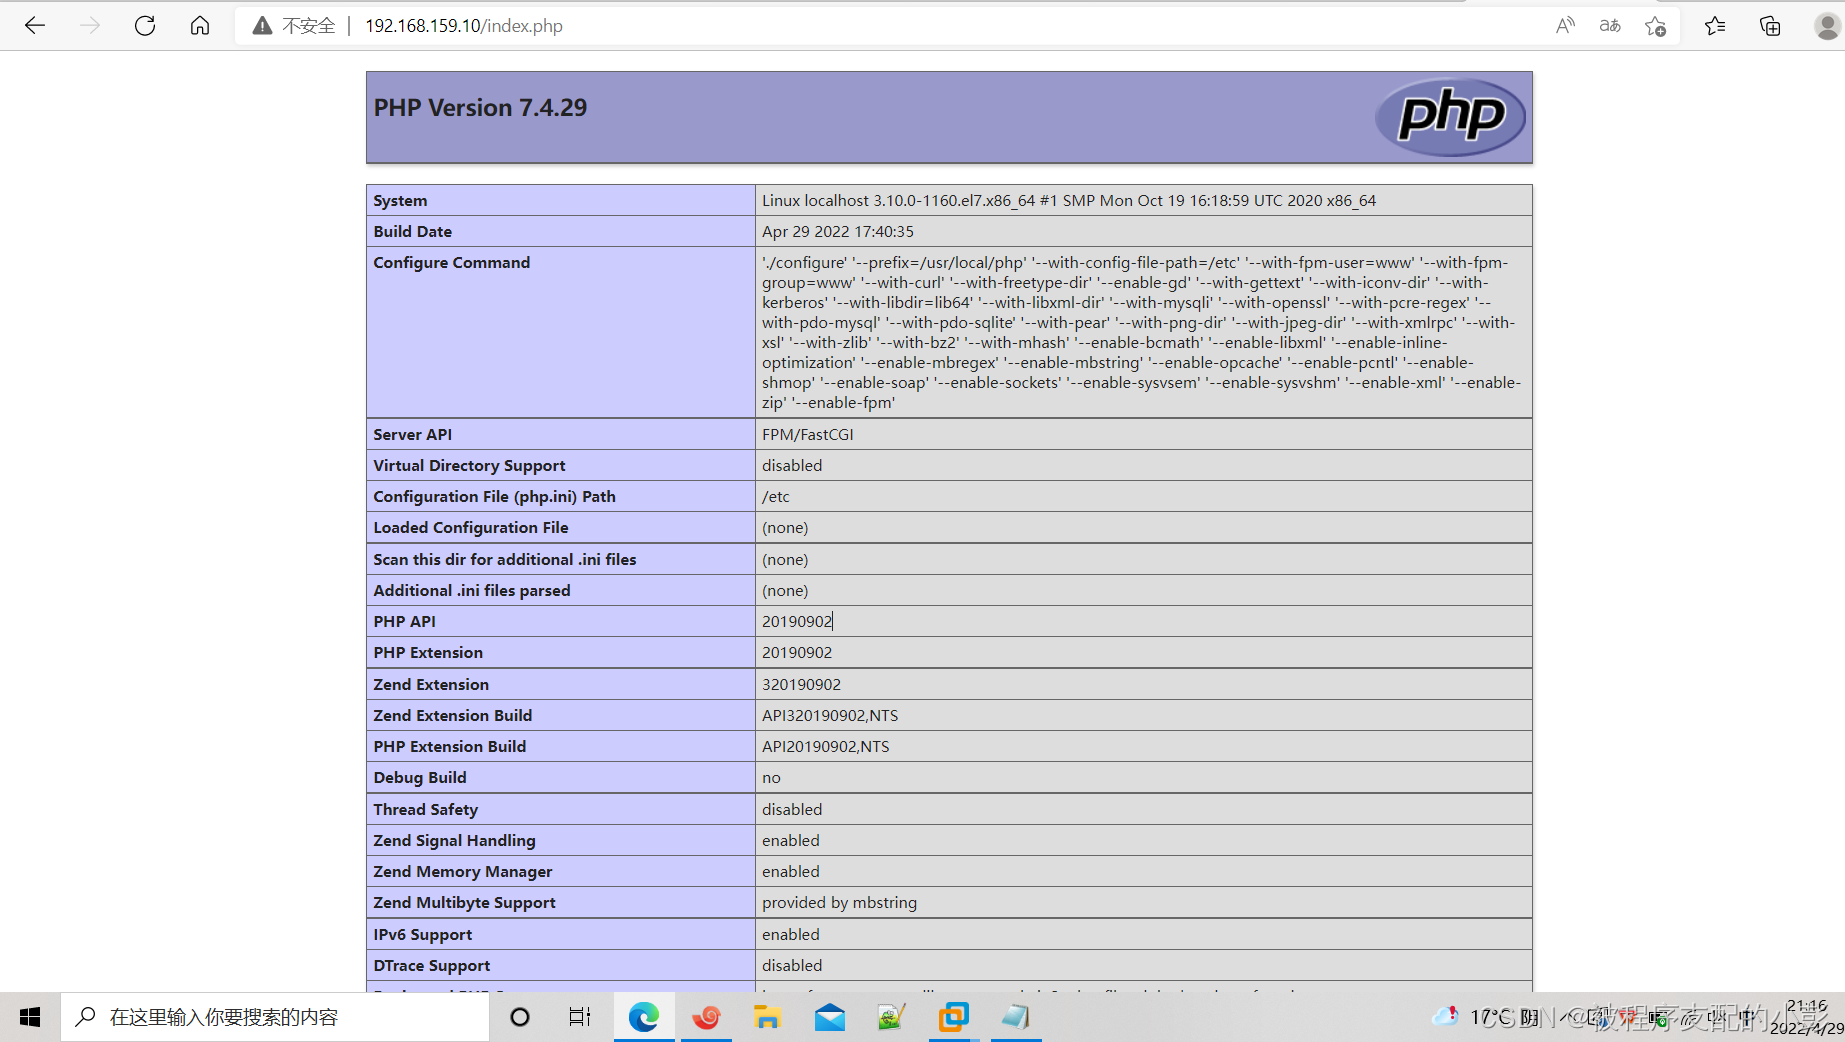
在根目录下新增文件 vim /usr/local/var/www/index.php
内容编辑echo phpinfo();
访问:http://localhost:8080/index.php
--------------------------------------截止到上面,基本配置已经完成----------------------
后续新增站点配置可以在
目录/usr/local/etc/nginx/servers/ 增加配置文件
vim /usr/local/etc/nginx/servers/www.myphp8.com#内容
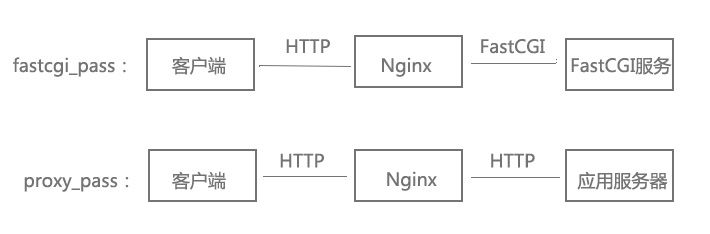
server {listen 80;server_name www.myphp8.com;location / {root /Users/boolean/myphp/www.myphp8.com;index index.html index.htm index.php;}#error_page 404 /404.html;error_page 500 502 503 504 /50x.html;location = /50x.html {root html;}#location ~ \.php$ {root /Users/boolean/myphp/www.myphp8.com;fastcgi_pass 127.0.0.1:9000;fastcgi_index index.php;fastcgi_param SCRIPT_FILENAME $document_root$fastcgi_script_name;include fastcgi_params;}
}添加完配置,重载一下nginx配置
sudo nginx -s reloadvim /etc/hosts
#解析域名
127.0.0.1 www.myphp8.com
总结:
1、nginx配置文件目录: /usr/local/etc/nginx
2、后续新增站点配置文件的目录: /usr/local/etc/nginx/servers
3、php文件:/private/etc/php-fpm.conf
4、启动nginx:sudo nginx
5、新增配置站点后重载nginx:sudo nginx -s reload
6、启动php:sudo php-fpm
---------------------------------------------------------------------------------------------------------
以上参考博文
mac安装nginx+php_larance的博客-CSDN博客