环境
虚拟机:VMware 16.2.4
OS:centos 7.6
远程连接工具:Xshell 7
nginx版本: nginx-1.14.2
php版本:php-7.2.12
一、nginx安装准备
1.将压缩包上传到指定目录并解压 
2.进入解压后生成的nginx目录
3.创建worker进程运行用户
useradd -M -s /sbin/nologin www4.安装依赖
yum -y install pcre-devel zlib-devel openssl-devel二、配置安装
1.编写配置脚本
1|vim mynginx.sh./configure --prefix=/usr/local/nginx \
--user=www --group=www \
--with-http_ssl_module \
--with-http_stub_status_module \
--with-http_realip_module
保存退出
2.为脚本赋予执行权限并执行
1|chmod +x mynginx.sh
2|./mynginx.sh
3.编译安装
make -j2 && make install三、后续配置
1.nginx源码包默认没有服务启动脚本,可以去社区下载,然后上传到/etc/init.d/目录下并赋予执行权限
2. 添加到开机启动项
1|chkconfig --add nginx
2|chkconfig nginx on
四、php安装
1.安装依赖
1|cd /opt/php-7.2.12
2|yum -y install libxml2-devel \
libjpeg-devel libpng-devel freetype-devel \
curl-devel openssl-devel
2.编写配置脚本
1|vim myphp.sh
./configure --prefix=/usr/local/php --with-config-file-path=/usr/local/php/etc \
--enable-fpm --with-fpm-user=www --with-fpm-group=www \
--with-mysqli=mysqlnd --with-pdo-mysql=mysqlnd --with-iconv-dir \
--with-freetype-dir --with-jpeg-dir --with-png-dir \
--with-zlib --with-libxml-dir --enable-xml --disable-rpath \
--enable-bcmath --enable-shmop --enable-sysvsem \
--enable-inline-optimization --with-curl --enable-mbregex \
--enable-mbstring --enable-ftp --with-gd --with-openssl --with-mhash \
--enable-pcntl --enable-sockets --with-xmlrpc --with-libzip \
--enable-soap --without-pear --with-gettext --disable-fileinfo \
--enable-maintainer-zts
3.为脚本赋予执行权限并执行
1|chmod +x myphp.sh
2|./myphp.sh
4.编译安装
make -j2 && make install五、php后续配置
1.使用php-fpm管理php服务,需要两个配置文件
| php.ini | php默认配置文件 |
| php-fpm.conf | php-fpm配置文件 |
拷贝自带的模板:
1|cp /usr/local/php/etc/php-fpm.conf.default /usr/local/php/etc/php-fpm.conf
2|cp /usr/local/php/etc/php-fpm.d/www.conf.default /usr/local/php/etc/php-fpm.d/www.conf
3|cp /opt/php-7.2.12/php.ini-development /usr/local/php/etc/php.ini
2.添加到service服务管理和开机启动项
1|cp /opt/php-7.2.12/sapi/fpm/init.d.php-fpm /etc/init.d/php-fpm
2|chmod +x /etc/init.d/php-fpm
3|chkconfig --add php-fpm
3.添加到环境变量
1|echo 'PATH=/usr/local/php/bin:$PATH' >> /etc/profile
2|source /etc/profile
六、nginx+php-fpm配置
1.启动php-fpm
service php-fpm start2.编写测试文件
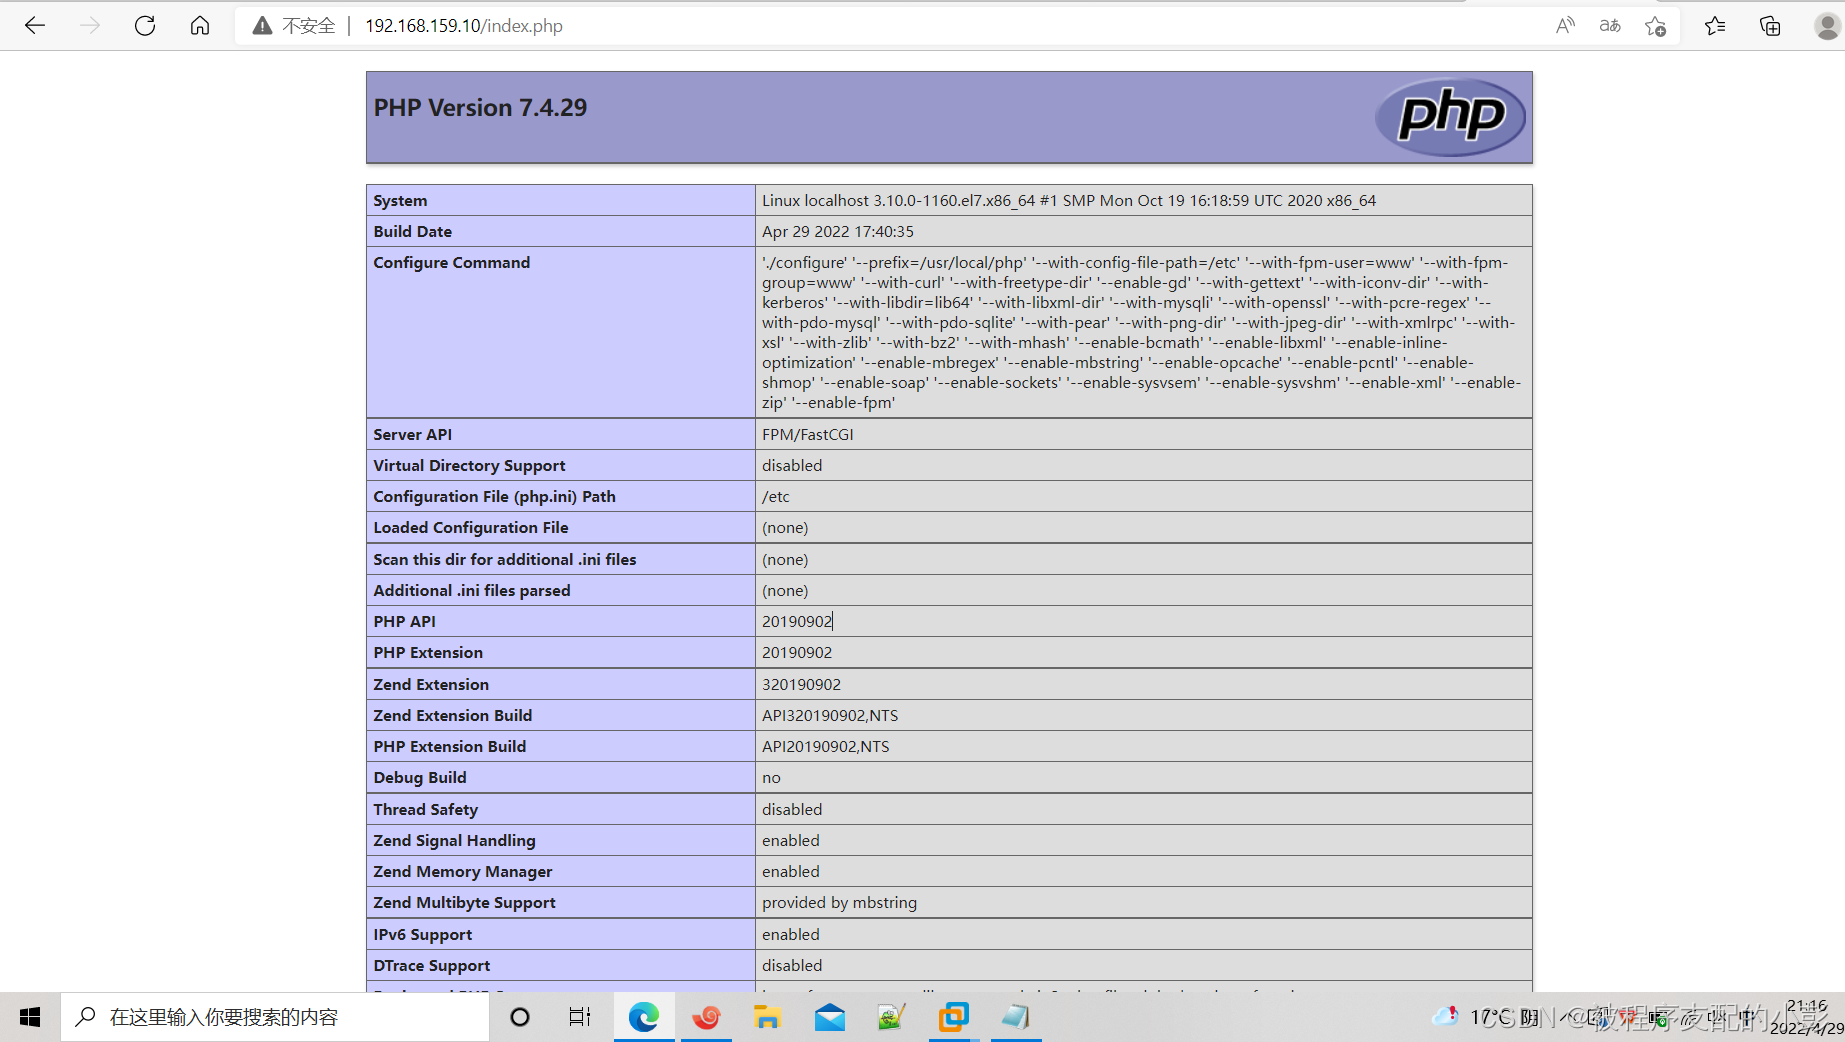
1|vim /usr/local/nginx/html/index.php
<?phpphpinfo();
保存退出
3.修改nginx配置文件
1|vim /usr/local/nginx/conf/nginx.conf#找到location / 段,修改为如下内容root html;location / {#root html;index index.html index.htm;
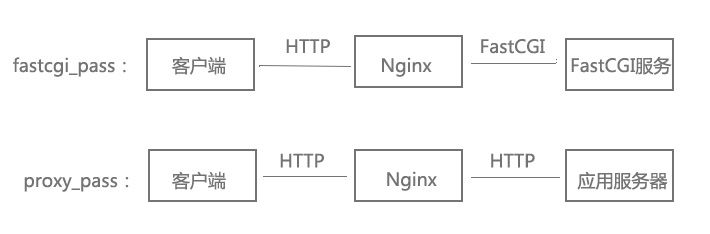
}#找到location ~\.php$ 段,修改为如下内容location ~ \.php$ { #告知nginx如果接收到.php结尾的请求,交由给php-fpm进行处理root html;fastcgi_pass 127.0.0.1:9000;fastcgi_index index.php;fastcgi_param SCRIPT_FILENAME $document_root$fastcgi_script_name;include fastcgi_params;
}保存退出
4.启动nginx服务
service nginx start5.浏览器访问测试

七、nginx的使用
平滑升级
| 旧版本 | nginx-1.14.2 |
| 新版本 | nginx-1.16.0 |
1.将新版本的源码包上传到指定目录
2.解压并进入解压后生成的目录
3.配置 && 编译 && 安装
1|./configure  --prefix=/usr/local/nginx --user=www --group=www \
--with-http_ssl_module --with-http_stub_status_module --with-http_realip_module
2|make -j2 && make install
平滑升级的两种方式
第一种:
1.查看nginx的进程号
ps aux | grep nginx2.平滑升级nginx
1|kill -USR2 6918 #平滑的升级nginx二进制文件  拉起一个新的主进程  旧主进程不停止
2|kill -WINCH 6918 #优雅地关闭worker进程
3|kill -QUIT 6918 #优雅地退出,执行完当前的请求后退出
第二种:
1.使用nginx默认提供的平滑升级指令
make install && make upgrade 查看软件包版本 
升级成功