本文章是油管上CodeMonkey的一个unity项目KitchenChaos的笔记整理,学习并整理这个项目主要是因为终于看到了一个比较完整地用到了unity的各种功能、风格较为清爽的、代码结构清晰的同时比较新的项目。在学习之后也确实有很大的收获,首先通过该教程第一次走完了一个小游戏的全部流程,之前也零零散散地学过一些unity教程和渲染方面的东西,但是流程一直都不太完整:有些项目的视觉表现实在不太感兴趣,看到了拖沓的动画和过时的画面就没有想学的欲望;有些项目不注重代码的扩展性,导致只能停留在一个小demo的层次;有些项目在游戏逻辑上很复杂,导致学到一半自己已经不太能跟得上。但是本教程在工程上比较讲究,注重代码的整理和解耦,在游戏逻辑上并没有那么复杂,在一些功能的实现上拥抱引擎提供的工具,我个人认为很适合学习
任何教程都有前置知识,视频中在前面也有提及,如果想要学习本项目,还是需要了解unity的基本操作和c#基础,我个人觉得这个教程首先需要有面向对象语言的基础,然后特别地要理解C#中委托和事件的使用,比较浅比较直接的理解可以去看CodeMonkey的C#的事件和委托的讲解,但是如果想要知道委托实际上类似于函数指针、事件模型有各种组成部分和实现形式等更深的知识推荐看刘铁猛老师的C#课程
另外该文章只是一些大概的笔记,具体操作还要去跟原教程去学习,但是和视频不同的是,写成图文的形式可以让别人在学习前能大概浏览一下这个项目都干了什么,并且能够在学习过后很方便地回顾某一步具体干了什么,希望对大家有帮助
1 项目初始设置
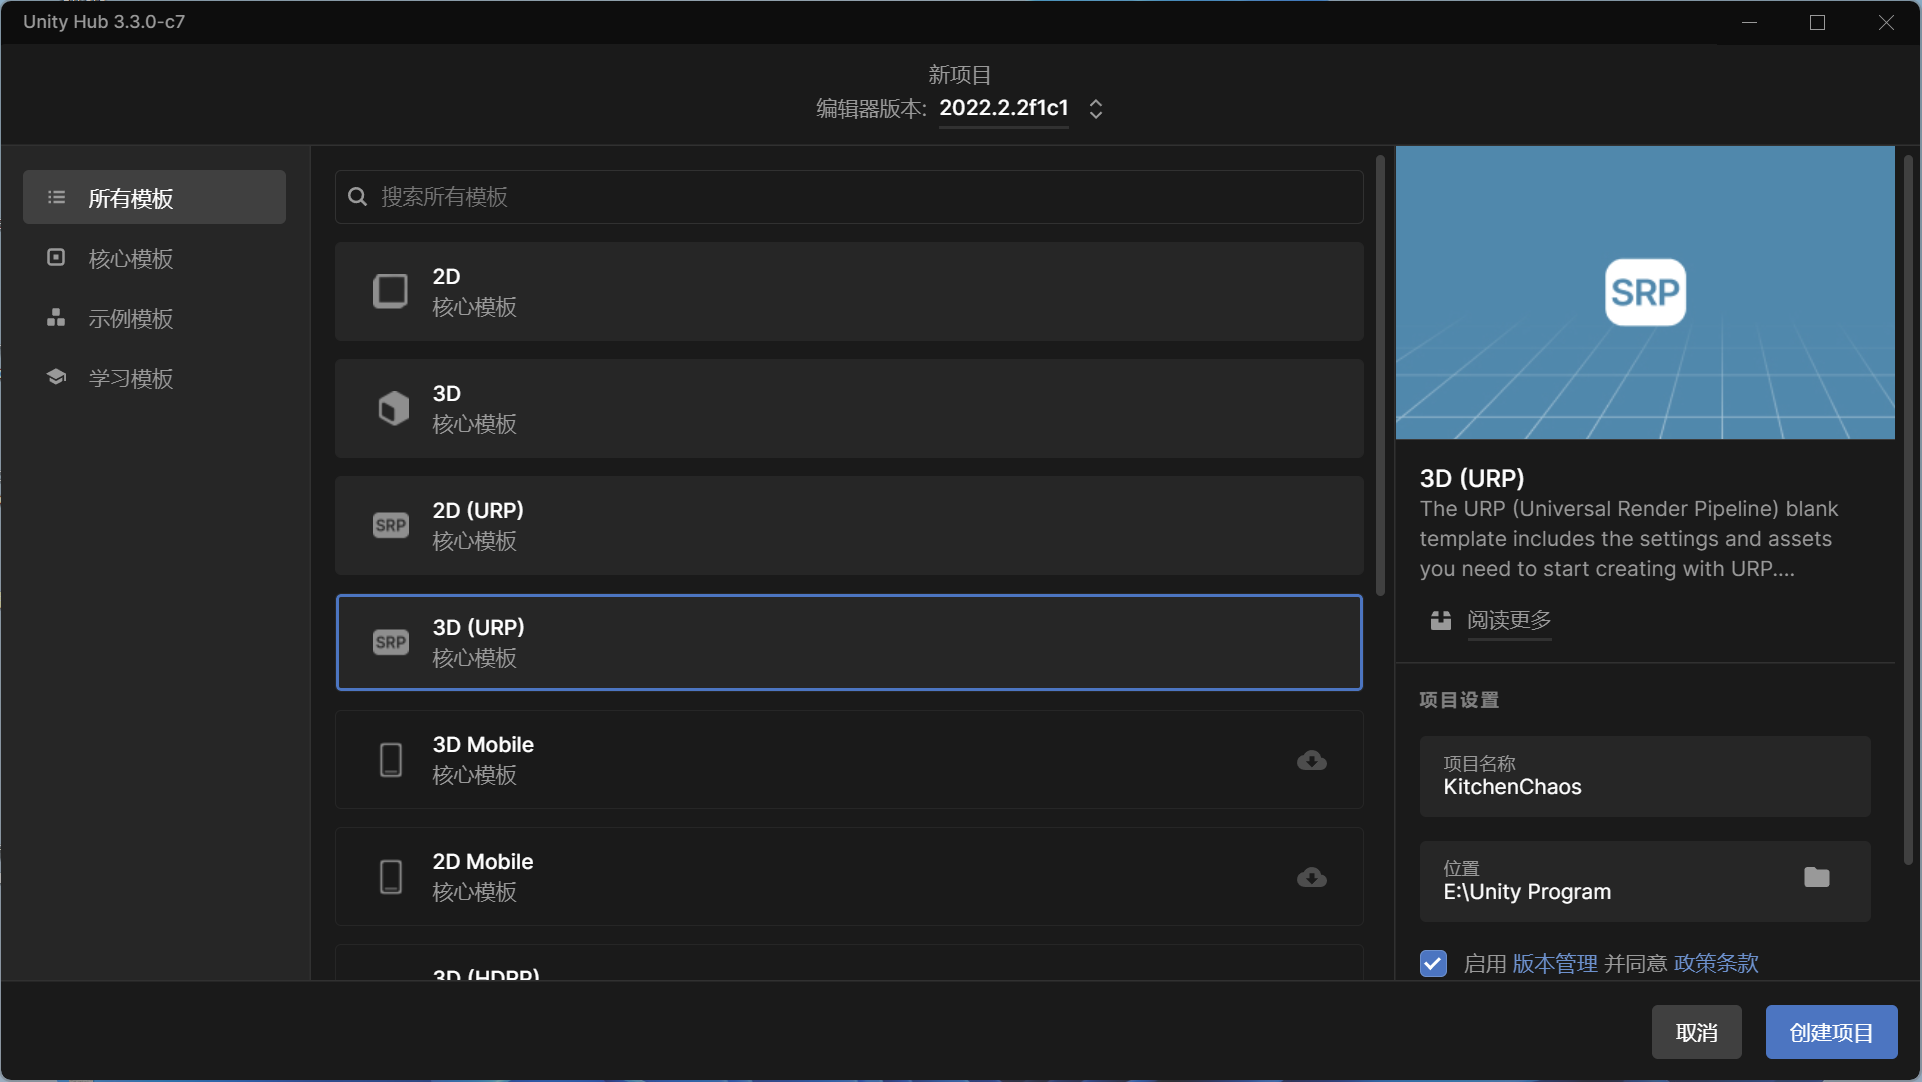
该项目使用的unity 2022.2.2f1c1的3d(urp)模板进行创建
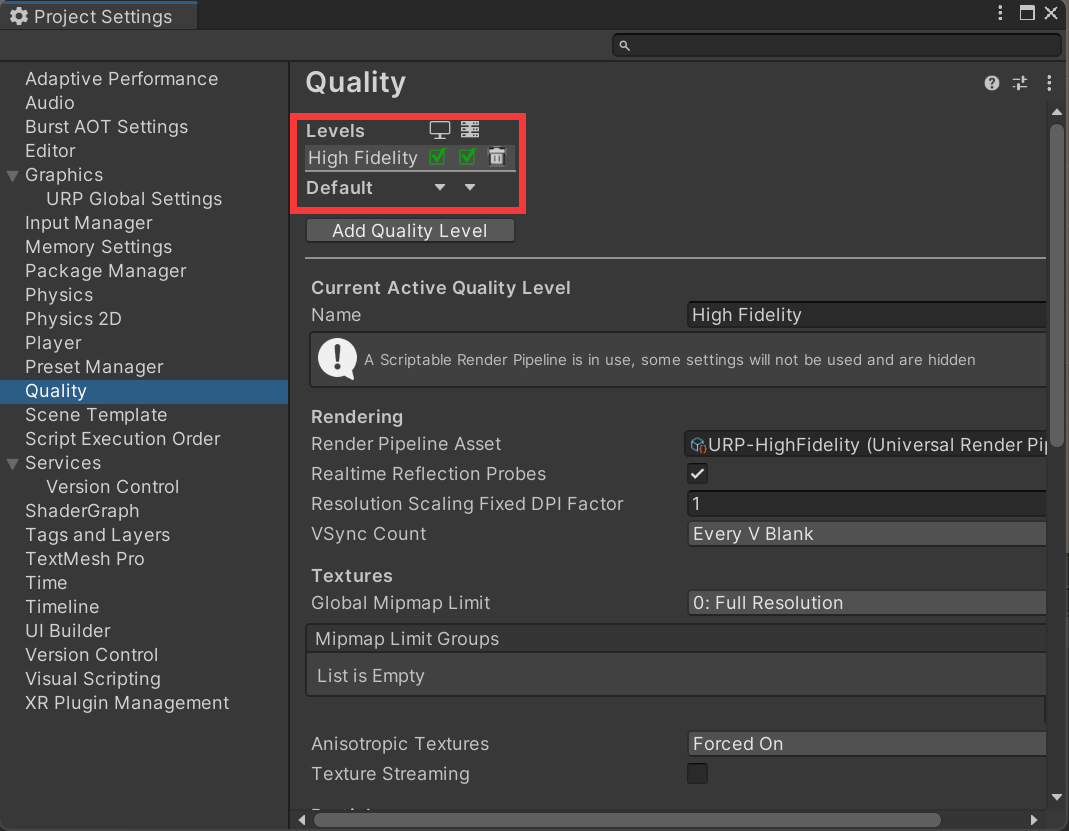
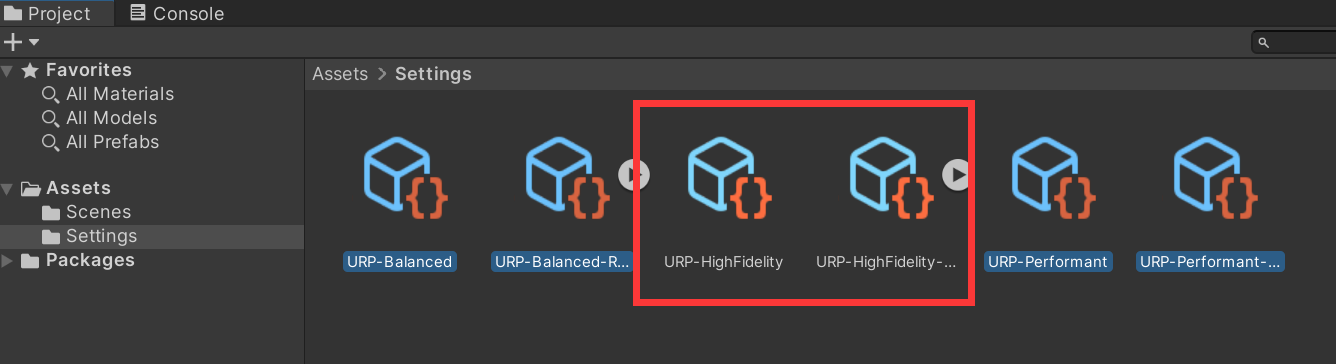
在Project Setting中Quality面板只保留High Fidelity等级,同时项目Setting目录中也只保留High Fidelity的设置
下载提供的素材后双击或拖入unity编辑器导入
目前为止的工程文件
2 后处理 Post Processing
一般在开发时在应该在中后期再添加后处理,但在本课中为了一开始就有比较好的视觉效果,所以第一步就先进行了后处理
我们会使用自动创建好的SampleScene作为最终游戏场景,所以将其重命名为GameScene
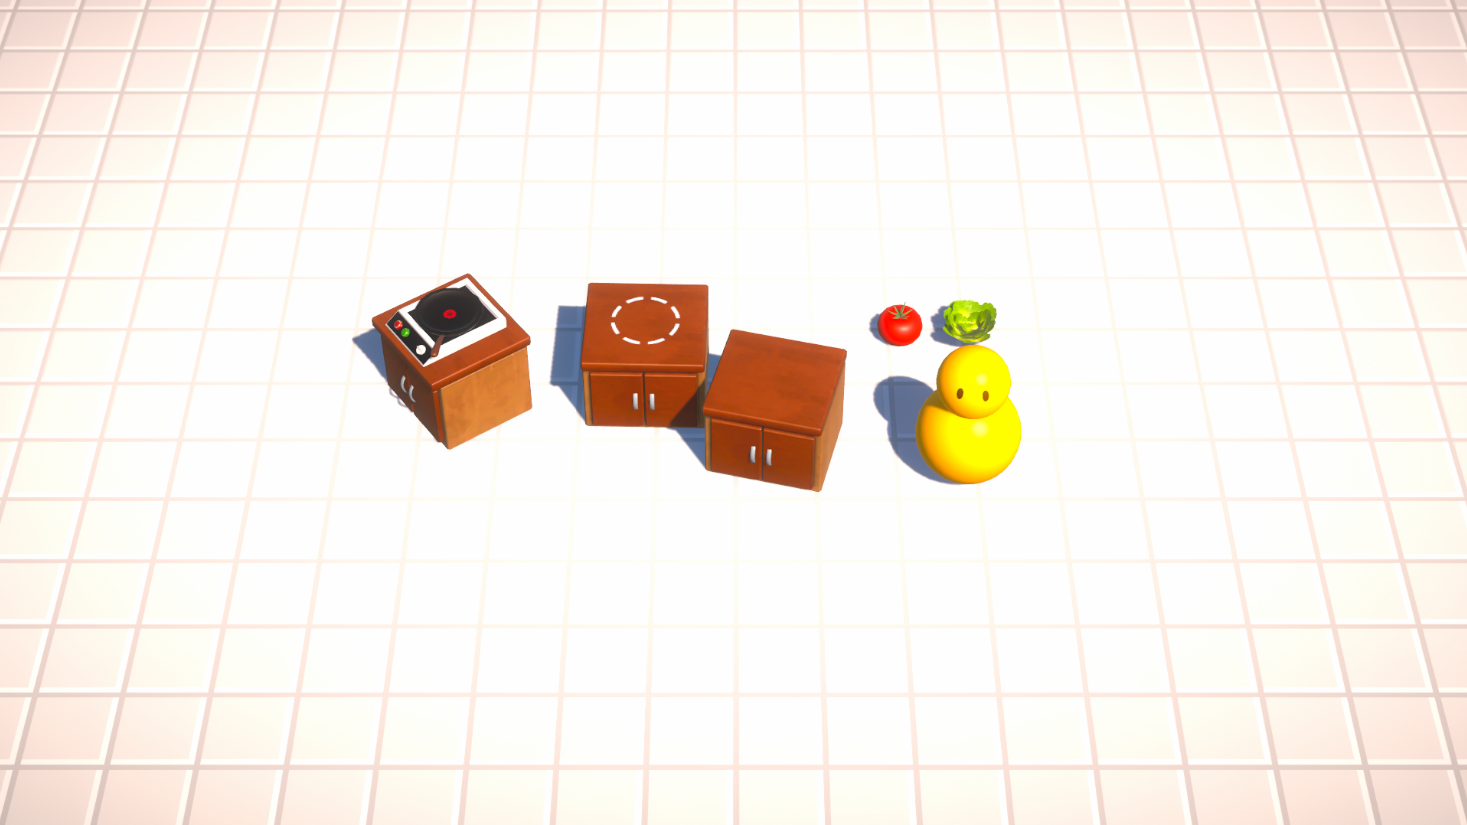
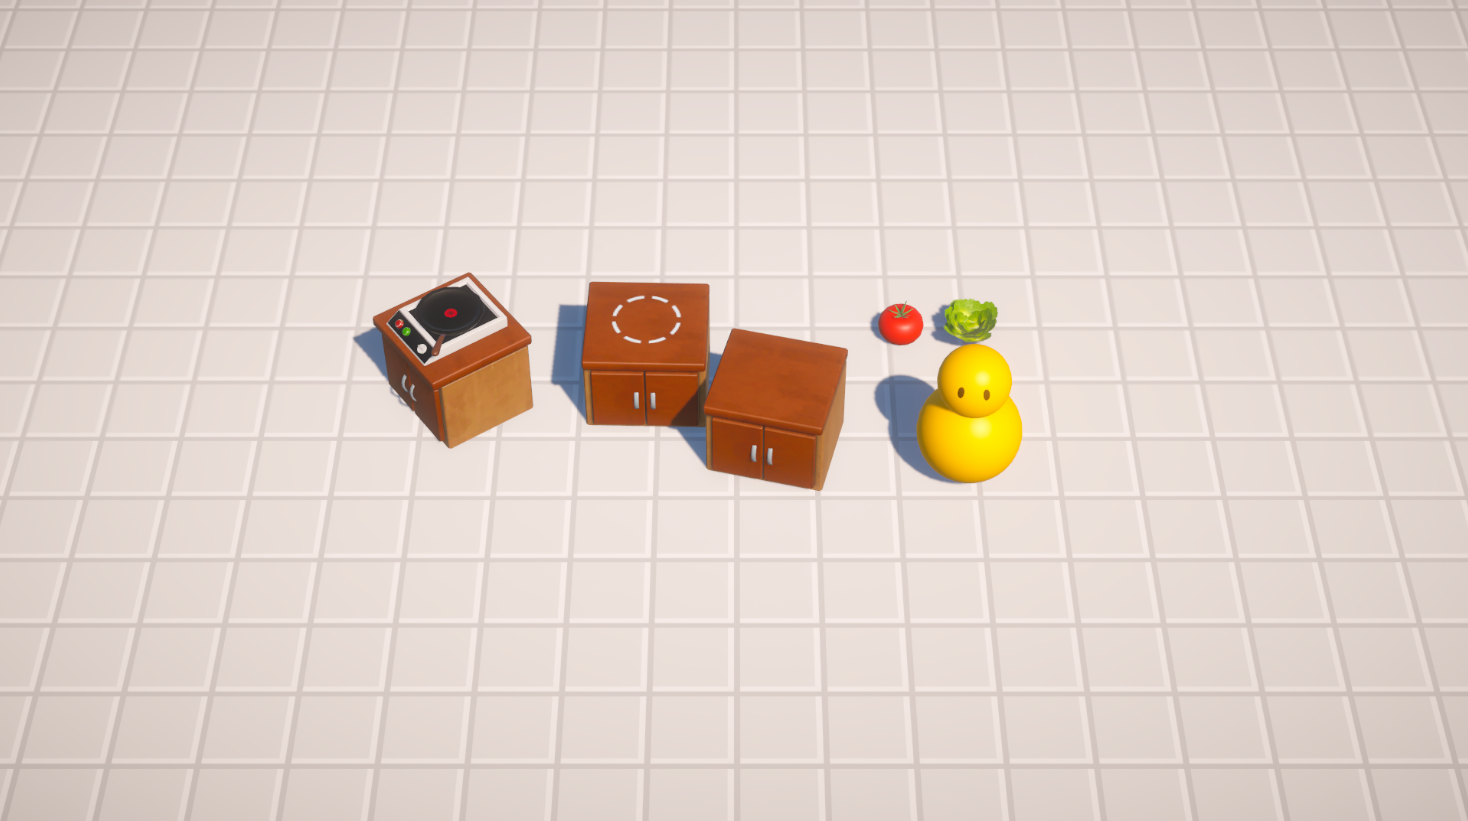
添加地面、人物和一些游戏物品,调整相机位置,进入Game窗口,在Global Volume上添加override,依次添加Tonemapping、Color Adjustments、Bloom、Vignette,调整后的配置被保存在了Global Volume Profile中,可以点击右方的clone保存文件

在Main Camera中可以设置anti-aliasing,同时在Setting/URP-HighFidelity中也可以设置MSAA,这里设置为MSAA 8x
URP-HighFidelity-Renderer中自带了一个Screen Space Ambient Occlusion的render feature,这里保留并稍作调整
Window->Rendering->Lighting可以调出来Lighting面板调整关于灯光的参数,这里保留默认
目前为止的工程文件
3 角色控制器与动画 Character Controller & Animations
3.1 旧的角色控制方法
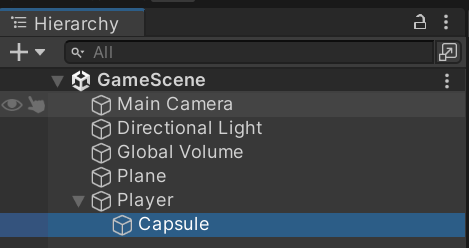
如果想要组织好一个游戏,应该永远将视觉效果与逻辑分开,在创建角色时,我们不直接创建一个胶囊体然后修改缩放、偏移等属性,三轴不相等的缩放或一些位置的偏移可能会让原本的代码逻辑出现问题,所以这里我们创建一个空物体,之后会在空物体上写逻辑,然后在空物体之下再创建一个胶囊体作为我们的角色,之后会在这个子物体上做视觉的修改
接下来开始代码的编写,创建Scripts文件夹,创建Player.cs
目前Unity中有两种实现角色控制的方法,一个是旧的input manager,一个是新的input system,旧的input manager很易用,适合做原型开发,但是复杂的项目最好用新的input system来做,在这个项目中我们会先用旧的input manager做出原型,然后替换为新的input system
// Player.cs中
public class Player : MonoBehaviour
{[SerializeField] private float moveSpeed = 7f;private void Update(){Vector2 inputVector = new Vector2(0, 0);// getkey会一直返回true,而getkeydown只会在按下的一帧返回trueif (Input.GetKey(KeyCode.W)){inputVector.y += 1;}if (Input.GetKey(KeyCode.S)){inputVector.y -= 1;}if (Input.GetKey(KeyCode.A)){inputVector.x -= 1;}if (Input.GetKey(KeyCode.D)){inputVector.x += 1;}inputVector = inputVector.normalized;Vector3 moveDir = new Vector3(inputVector.x, 0f, inputVector.y);transform.position += moveDir * Time.deltaTime * moveSpeed;}
}
将素材文件中的人物模型PlayerVisual放到空物体Player下面,删除之前的胶囊体,这时再操控角色可以正常移动,但是角色的朝向不会变,只需要在上面的脚本中最后加上以下代码即可实现(使用slerp球形插值处理转向角度变化)
float rotateSpeed = 10f;
transform.forward = Vector3.Slerp(transform.forward, moveDir, Time.deltaTime * rotateSpeed);
目前为止的工程文件
3.2 角色动画
接下来开始添加动画,创建Animations文件夹,创建一个animator,挂载到PlayerVisual上
首先创建Idle.anim,拖入Animator面板,右击Entry->Make Transition指向Idle;打开Animation面板,做出角色的头部上下移动的动画
然后创建Walk.anim,同样拖入Animator面板,右击Idle->Make Transition指向Walk,取消勾选Has Exit Time,Parameters中添加IsWalking参数,同时Conditions中将IsWalking设为True,同样地,右击Walk->Make Transition指向Ilde,取消Has Exit Time,oCnditions中设置IsWalking为False,Walk动画在Idle的基础上添加身体的上下移动,同时加快速度

接下来我们创建PlayerAnimator.cs脚本管理角色的动画,添加到PlayerVisual上;在Player.cs中设置IsWalking的值,当角色移动向量不为0时则为true;在Player.Animator.cs中更新Animator中设置的参数
// Player.cs中
...
public class Player : MonoBehaviour
{private bool isWalking;...private void Update(){...isWalking = (inputVector != Vector2.zero);...}public bool IsWalking(){return isWalking;}
}
// PlayerAnimator.cs中
using UnityEngine;public class PlayerAnimator : MonoBehaviour
{private const string IS_WALKING = "IsWalking";[SerializeField] private Player player;private Animator animator;private void Awake(){animator = GetComponent<Animator>();}private void Update(){animator.SetBool(IS_WALKING, player.IsWalking());}
}
目前为止的工程文件
3.3 Cinemachine
接着我们使用Cinemachine在角色移动的时候添加一些简单的摄像机动画,首先在Package Manager里安装Cinemachine的包,然后GameObject->Cinemachine->Virtual Camera创建一个摄像机,这样创建一个Virtual Camera会在Main Camera上加上一个CinemachineBrain组件,我们需要在Virtual Camera中去控制相机
在Virtual Camera的Inspector面板中,将Body->Binding Mode设为World Space,将Follow和Look At都设为之前创建的Player,调整Follow Offset,就可以得到一个简单的跟随相机(还可以创建多个Cinemachine,通过设置priority确定相机控制权,如果控制权从一个相机到了另一个相机,Cinemachine还会自动对相机位置进行插值)
目前为止的工程文件
3.4 使用新的input system进行重构
首先将处理玩家输入得到移动向量的部分代码分离
创建GameInput.cs,并在Hierachy创建一个GameInput对象,将脚本挂载到对象上;将原先Player.cs中处理输入的部分拿出来,放到GameInput.cs中,调整完的代码如下
// Player.cs中
using UnityEngine;public class Player : MonoBehaviour
{[SerializeField] private float moveSpeed = 7f;[SerializeField] private GameInput gameInput;private bool isWalking;private void Update(){Vector2 inputVector = gameInput.GetMovementVectorNormalized();Vector3 moveDir = new Vector3(inputVector.x, 0f, inputVector.y);transform.position += moveDir * Time.deltaTime * moveSpeed;isWalking = (inputVector != Vector2.zero);float rotateSpeed = 10f;transform.forward = Vector3.Slerp(transform.forward, moveDir, Time.deltaTime * rotateSpeed);}public bool IsWalking(){return isWalking;}
}
// GameInput.cs中
using UnityEngine;public class GameInput : MonoBehaviour
{public Vector2 GetMovementVectorNormalized(){Vector2 inputVector = new Vector2(0, 0);if (Input.GetKey(KeyCode.W)){inputVector.y += 1;}if (Input.GetKey(KeyCode.S)){inputVector.y -= 1;}if (Input.GetKey(KeyCode.A)){inputVector.x -= 1;}if (Input.GetKey(KeyCode.D)){inputVector.x += 1;}inputVector = inputVector.normalized;return inputVector;}
}
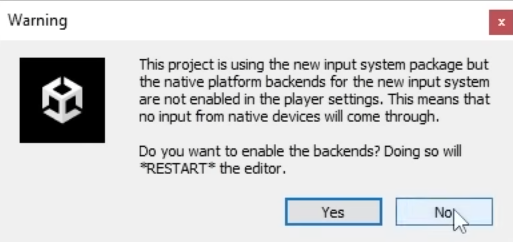
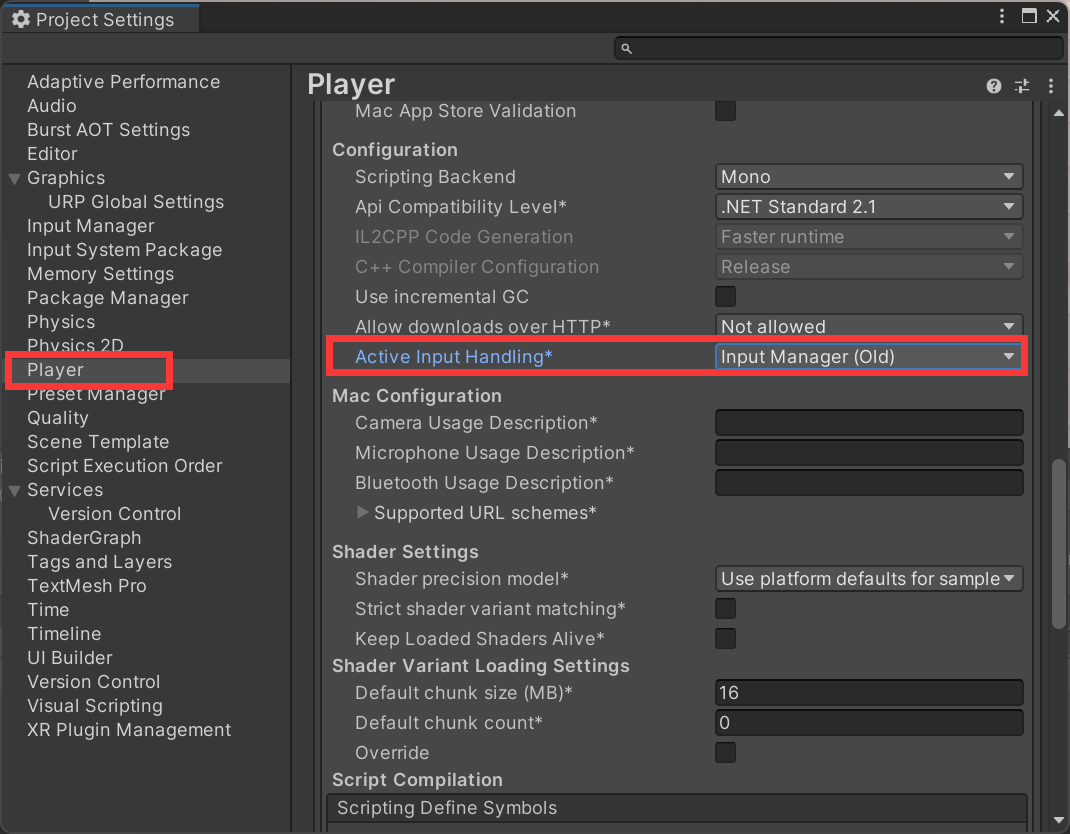
接下来去Package Manager中安装Input System,安装完后会提示我们激活input system,我们可以选择no然后在Edit->Project Setting->Player->Other Settings手动激活,我们在下拉菜单中选择Both
在Settings文件夹下右键->Create->Input Actions创建PlayerInputActions.inputactions
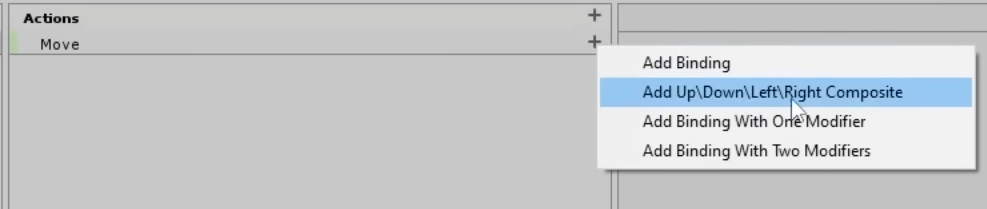
双击打开该窗口,创建一个Action Map,创建一个Move Action,将Action Type改为Value,Control Type改为Vector2,删除Move下面的<No Binding>,点击右边的加号选择Add Up\Down\Left\Right Composite
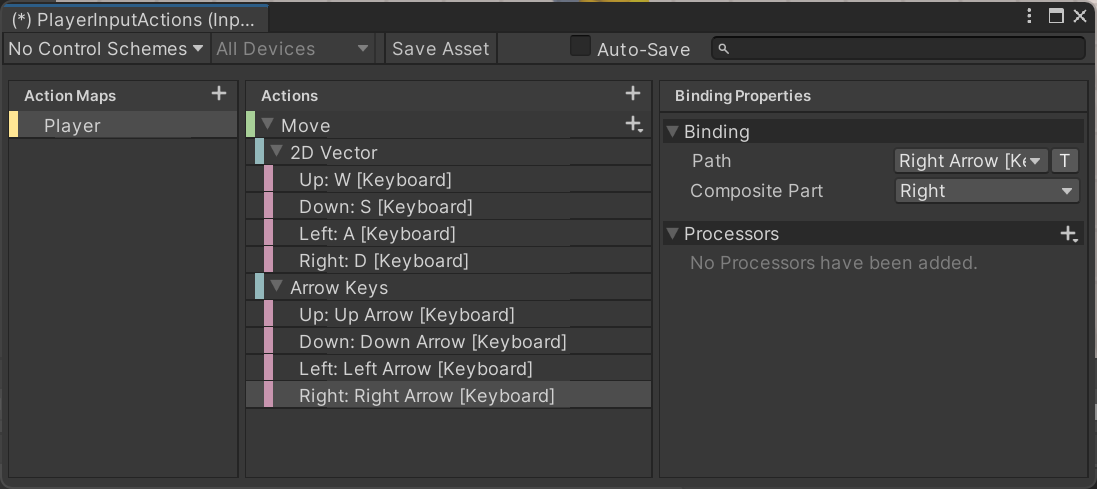
依次修改下方的四个方向绑定的事件,可以选择listen然后按下对应按键

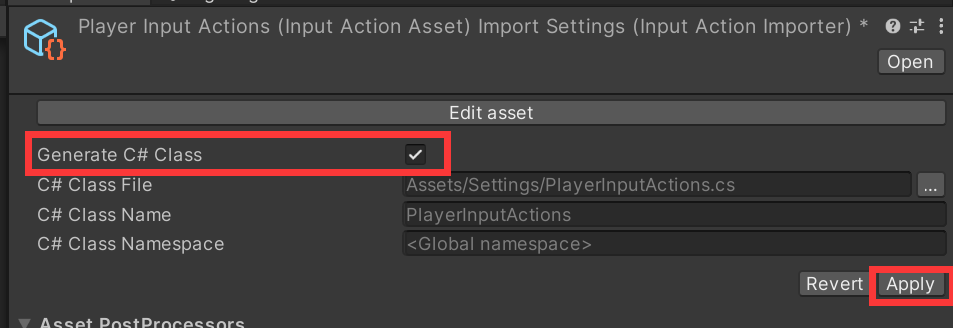
Input System可以通过Add Component添加对应的脚本,但是这里我们选择用代码的方式使用。选中PlayerInputAction.inputactions,在Inspector面板中勾选Generate C# Class,然后Apply
修改GameInput.cs,替换为将原来的方法替换为使用Input System(归一化的操作也可以在.inputactions文件中添加processor)
// GameInput.cs中
using UnityEngine;public class GameInput : MonoBehaviour
{private PlayerInputActions playerInputActions;private void Awake(){playerInputActions = new PlayerInputActions();playerInputActions.Player.Enable();}public Vector2 GetMovementVectorNormalized(){// Vector2 inputVector = new Vector2(0, 0);// if (Input.GetKey(KeyCode.W))// {//     inputVector.y += 1;// }// if (Input.GetKey(KeyCode.S))// {//     inputVector.y -= 1;// }// if (Input.GetKey(KeyCode.A))// {//     inputVector.x -= 1;// }// if (Input.GetKey(KeyCode.D))// {//     inputVector.x += 1;// }//Vector2 inputVector = playerInputActions.Player.Move.ReadValue<Vector2>();inputVector = inputVector.normalized;return inputVector;}
}
想要添加其他的输入方式,可以在.inputactions文件面板添加新的Action,比如这里添加了一个用方向键控制移动的Action
目前为止的工程文件
3.5 碰撞检测 Collision Detection
我们可以先使用Physics.Raycast()方法做一个简单的碰撞检测
在场景中放置一个Cube,确保这个Cube带有Box Collider组件。在控制角色位置发生变化的脚本Player.cs中,从角色的原点出发,向移动方向发出一条射线,射线长度大于角色的大小时才可以移动
// Player.cs中
...
public class Player : MonoBehaviour
{...private void Update(){...float playerRadius = .7f;bool canMove = !Physics.Raycast(transform.position, moveDir, playerRadius);if (canMove){transform.position += moveDir * Time.deltaTime * moveSpeed;}...}...
}
这样在对着正方体移动时确实正确处理了碰撞,但是由于我们只从原点发射了一条射线,有且情况还是会发生穿模,所以我们需要使用Physics.CapsuleCast()方法

Physics.CapsuleCast()方法的六个参数分别定义了胶囊体的底部、顶部、半径、射线发射方向、射线最大距离
// Player.cs中
...
float moveDistance = moveSpeed * Time.deltaTime;
float playerRadius = .7f;
float playerHeight = 2f;
bool canMove = !Physics.CapsuleCast(transform.position, transform.position + Vector3.up * playerHeight, playerRadius, moveDir, moveDistance);
...
使用Physics.CapsuleCast()方法后,即是在边缘也能发生碰撞了,但是如果在一个面前有墙的地方同时按住向上移动和向右移动的方向键,角色也不会移动,但通常在游戏中这种情况通常会让角色朝右移动
我们可以多增加一些逻辑来让角色有其他方向的速度向量时仍然移动
// Player.cs中
...
float moveDistance = moveSpeed * Time.deltaTime;
float playerRadius = .7f;
float playerHeight = 2f;
bool canMove = !Physics.CapsuleCast(transform.position, transform.position + Vector3.up * playerHeight, playerRadius, moveDir, moveDistance);if (!canMove)
{// 当不能向moveDir方向移动时// 尝试沿x轴移动Vector3 moveDirX = new Vector3(moveDir.x, 0f, 0f).normalized; // 归一化让速度和直接左右移动相同canMove = !Physics.CapsuleCast(transform.position, transform.position + Vector3.up * playerHeight, playerRadius, moveDirX, moveDistance);if (canMove){// 可以沿x轴移动moveDir = moveDirX;} else{// 不能向x轴方向移动,尝试向z轴方向移动Vector3 moveDirZ = new Vector3(0f, 0f, moveDir.z).normalized; // 归一化让速度和直接左右移动相同canMove = !Physics.CapsuleCast(transform.position, transform.position + Vector3.up * playerHeight, playerRadius, moveDirZ, moveDistance);if (canMove){// 可以向z轴方向移动moveDir = moveDirZ;} else{// 不能朝任何方向移动}}
}if (canMove)
{transform.position += moveDir * Time.deltaTime * moveSpeed;
}
...
进行一些调整之后,我们就可以正常移动了
目前为止的工程文件
在原视频4:24:00处作者进行了一些改进,现在如果我们垂直向墙体走动,由于当不能向moveDir方向移动时我们限制住了moveDir,所以垂直向墙体走动的时候moveDir为(0, 0, 0),而我们的动画是当前角色朝向往moveDir方向插值的,所以我们的角色在垂直向墙体走动的时候不会向墙体转向,效果如下

要解决这个问题,需要改动以下语句(注意这里moveDir.x != 0和moveDir.z != 0的加入也给更后面的手柄输入带来了一定问题,在最后的时候作者改为了(moveDir.x < -0.5f || moveDir.x > 0.5f)和`(moveDir.z < -0.5f || moveDir.z > 0.5f))
// Player.cs中
...
if (!canMove)
{...// canMove = !Physics.CapsuleCast(transform.position, transform.position + Vector3.up * playerHeight, playerRadius, moveDirX, moveDistance);canMove = moveDir.x != 0 && !Physics.CapsuleCast(transform.position, transform.position + Vector3.up * playerHeight, playerRadius, moveDirX, moveDistance);...if (canMove){...} else{...// canMove = !Physics.CapsuleCast(transform.position, transform.position + Vector3.up * playerHeight, playerRadius, moveDirZ, moveDistance);canMove = moveDir.z != 0 && !Physics.CapsuleCast(transform.position, transform.position + Vector3.up * playerHeight, playerRadius, moveDirZ, moveDistance);...if (canMove){...} else{...}}
}
改动之后,就能够在垂直朝墙体走动时正常转向了
4 创建空的柜台 Clear Counter
4.1 添加柜台
首先在场景中创建一个空物体,命名为ClearCounter,在_Assets/PrefabsVisuals/CountersVisuals下找到ClearCounter_Visual拖动到ClearCounter下,在ClearCounter上添加一个Box Collider组件,调整到合适大小,现在角色就可以和柜台发生碰撞了
我们需要把设置好碰撞体积的柜台变为一个prefab,这样每次只要使用这个prefab就可以了,新建文件夹,命名为Prefabs,然后将需要制作prefab的物体从Hierachy窗口拖入文件夹
4.2 利用Raycast处理角色与柜台的交互
然后我们在Player.cs中开始写角色与柜台交互的代码,首先先将原代码进行整理,将处理移动的代码放入到一个函数中去
// Player.cs中
public class Player : MonoBehaviour
{...private void Update(){HandleMovement();HandleInteractions()}public bool IsWalking(){return isWalking;}private void HandleInteractions(){}private void HandleMovement(){// 之前Update中的代码全放在这里}...
}
Physics.Raycast()有一个构造函数可以填入一个参数用来返回被射线击中位置的属性,这里用raycastHit.transform来返回被击中的物体信息,我们可以在这里测试一下,当在可交互距离内击中则返回物体名称,未击中则返回"-",使用lastInteractDir保存上一次操作时移动的方向,防止当移动速度为0时moveDir为(0, 0, 0)而无法确定是否可以与柜台交互
// Player.cs中...private Vector3 lastInteractDir;...private void HandleInteractions(){Vector2 inputVector = gameInput.GetMovementVectorNormalized();Vector3 moveDir = new Vector3(inputVector.x, 0f, inputVector.y);if (moveDir != Vector3.zero){lastInteractDir = moveDir;}float interactDistance = 2f;if (Physics.Raycast(transform.position, lastInteractDir, out RaycastHit raycastHit, interactDistance)){Debug.Log(raycastHit.transform);} else{Debug.Log("-");} }...
接下来开始给柜台添加脚本,在Scripts文件夹新建ClearCounter.cs,将脚本添加到ClearCounter.prefab上
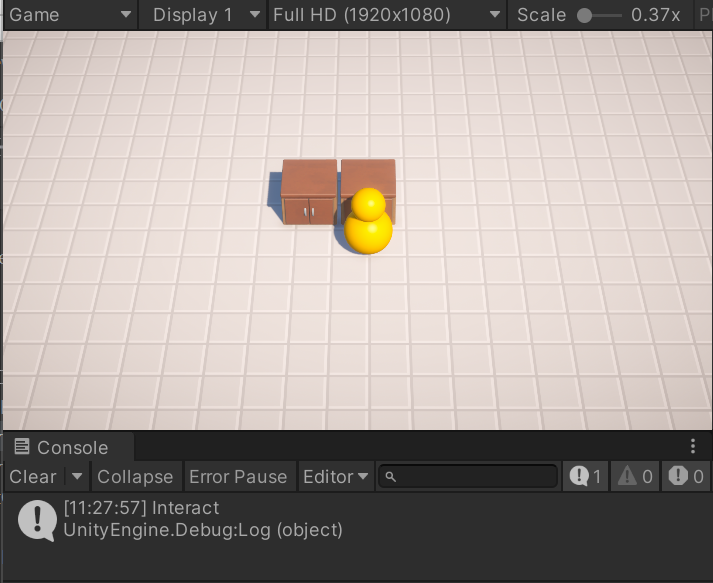
// ClearCounter.cs中
using UnityEngine;public class ClearCounter : MonoBehaviour
{public void Interact(){Debug.Log("Interact");}
}
为了处理角色与柜台间的交互,我们同样需要在Player.cs中添加代码
// Player.cs中...private void HandleInteractions(){Vector2 inputVector = gameInput.GetMovementVectorNormalized();Vector3 moveDir = new Vector3(inputVector.x, 0f, inputVector.y);if (moveDir != Vector3.zero){lastInteractDir = moveDir;}float interactDistance = 2f;if (Physics.Raycast(transform.position, lastInteractDir, out RaycastHit raycastHit,interactDistance)){if (raycastHit.transform.TryGetComponent(out ClearCounter clearCounter)){// 线击中的物体拥有ClearCounter.cs脚本clearCounter.Interact();}// 使用TryGetComponent()方法和使用下面的代码相同,会检测到是否有ClearCounter.cs// ClearCounter clearCounter = raycastHit.transform.GetComponent<ClearCounter>();// if (clearCounter != null)// {// // Has clearCounter.cs// }} else{Debug.Log("-");}}...
4.3 Layermask
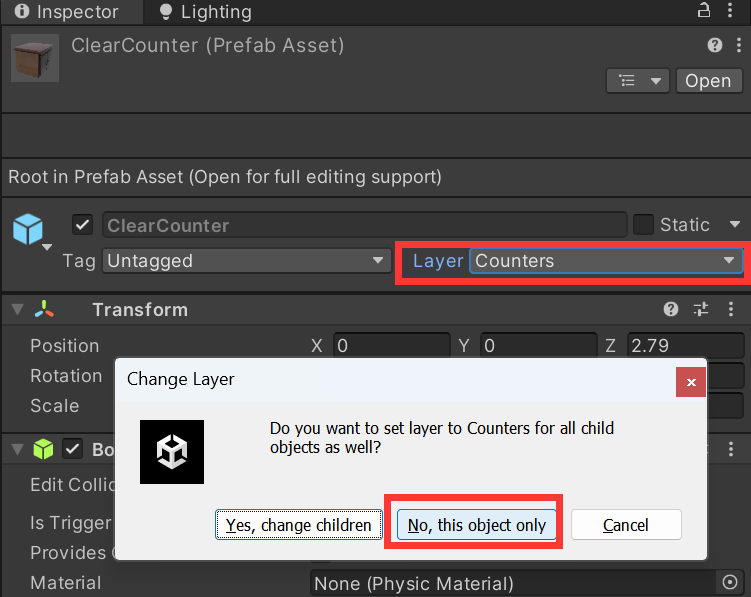
现在我们的代码还有一个问题,如果有其他东西挡在了角色与柜台之间,射线就不会打到柜台,所以我们可以将ClearCounter.prefab单独设置在一个Layer中(要手动添加一个Layer),然后在Player.cs使用Physics.Raycast的其中的一个构造函数,最后一个参数可以传入一个layermask
// Player.cs中...[SerializeField] private LayerMask countersLayerMask;...private void HandleInteractions(){...if (Physics.Raycast(transform.position, lastInteractDir, out RaycastHit raycastHit,interactDistance, countersLayerMask)){if (raycastHit.transform.TryGetComponent(out ClearCounter clearCounter)){// Has ClearCounter.csclearCounter.Interact();}} else{Debug.Log("-");}}...
目前为止的工程文件
5 处理Interact输入的C#事件 Interact Action C# Events
5.1 添加Interact Action
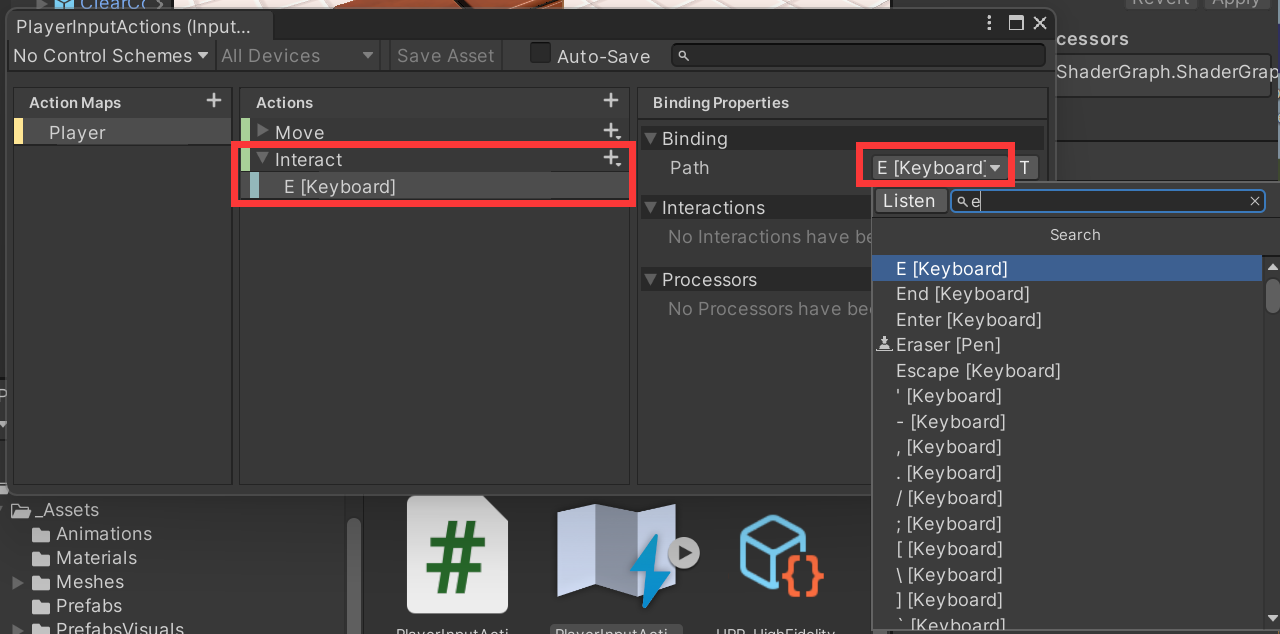
打开PlayerInputActions.inputactions,添加一个Action,命名为Interact,绑定E键
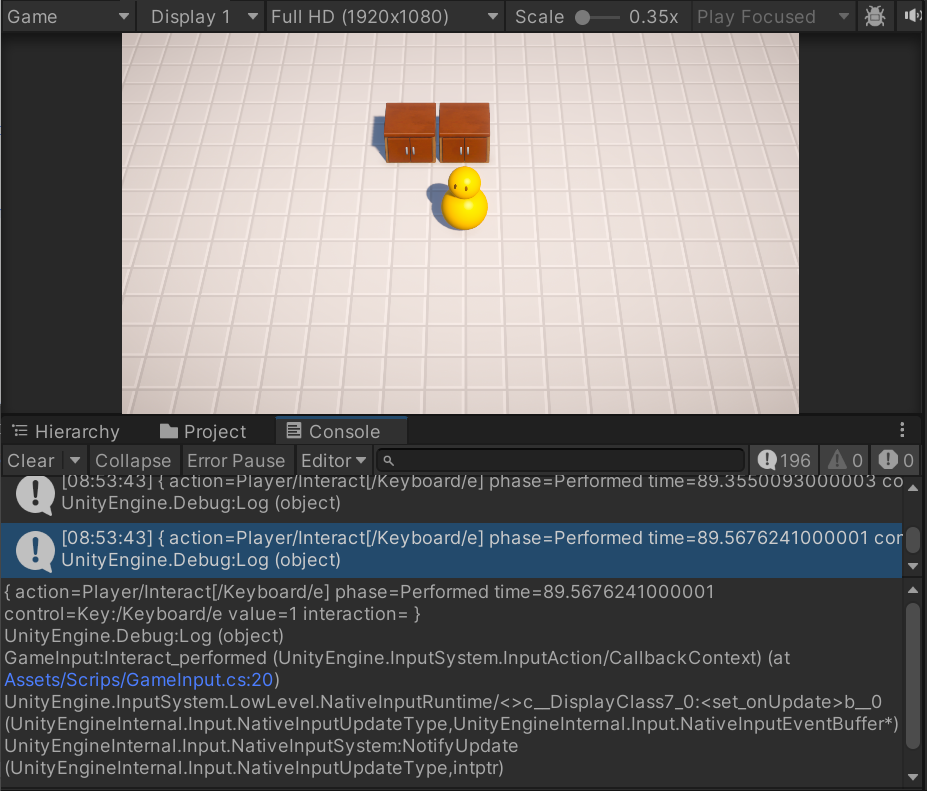
在GameInput.cs中,我们使用委托为这个Interact Action添加一个调用的函数Interact_performed(),我们先来测试一下,使用Debug.log(obj)在控制台输出一下调用的函数本身
// GameInput.cs中
using UnityEngine;public class GameInput : MonoBehaviour
{private PlayerInputActions playerInputActions;private void Awake(){playerInputActions = new PlayerInputActions();playerInputActions.Player.Enable();playerInputActions.Player.Interact.performed += Interact_performed;}private void Interact_performed(UnityEngine.InputSystem.InputAction.CallbackContext obj){Debug.Log(obj);}public Vector2 GetMovementVectorNormalized(){Vector2 inputVector = playerInputActions.Player.Move.ReadValue<Vector2>();inputVector = inputVector.normalized;return inputVector;}
}
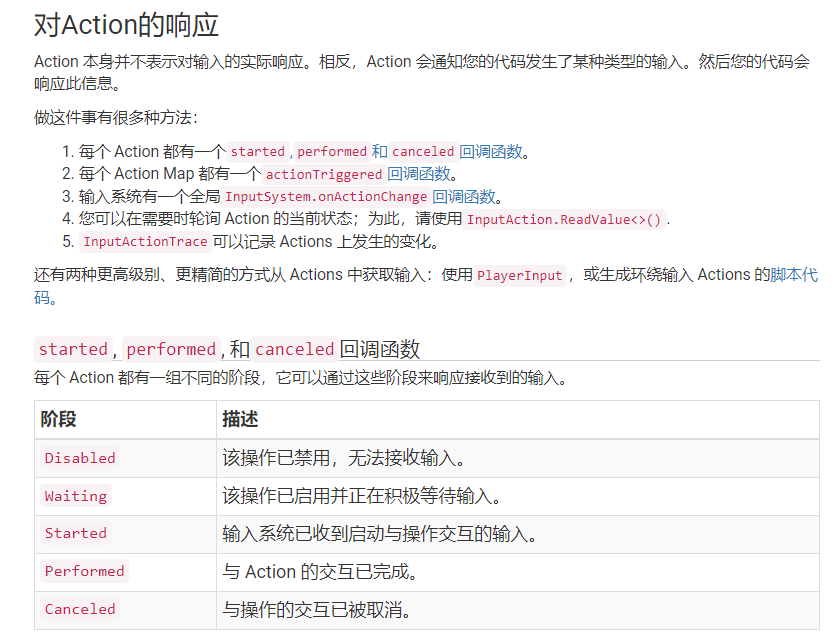
Unity Input System文档
启动游戏,按下E键,可以看到控制台输出了我们的按下对应按键的相关信息
5.2 使用EventHandler委托将交互逻辑写在Player.cs
接下来在Interact Action调用的函数Interact_performed()中添加EventHandler委托,在Player.cs中为该委托添加具体的交互行为
// GameInput.cs中
using System;
using UnityEngine;public class GameInput : MonoBehaviour
{public event EventHandler OnInteractAction; // 新添加private PlayerInputActions playerInputActions;private void Awake(){playerInputActions = new PlayerInputActions();playerInputActions.Player.Enable();playerInputActions.Player.Interact.performed += Interact_performed;}private void Interact_performed(UnityEngine.InputSystem.InputAction.CallbackContext obj){OnInteractAction?.Invoke(this, EventArgs.Empty); // 新添加// 这里使用了"?"运算符,与下面的代码相同// if (OnInteractAction != null)// {//     OnInteractAction(this, EventArgs.Empty);// }}public Vector2 GetMovementVectorNormalized(){Vector2 inputVector = playerInputActions.Player.Move.ReadValue<Vector2>();inputVector = inputVector.normalized;return inputVector;}
}
这里可以在GameInput_OnInteractAction()中先放上之前HandleInteractions()的代码测试一下
// Player.cs中
...private void Start(){gameInput.OnInteractAction += GameInput_OnInteractAction;}private void GameInput_OnInteractAction(object sender, EventArgs e){//将原先HandleInteractions()中的内容暂时放到了这里,并且暂时不再调用HandleInteractions()中的clearCounter.Interact()Vector2 inputVector = gameInput.GetMovementVectorNormalized();Vector3 moveDir = new Vector3(inputVector.x, 0f, inputVector.y);if (moveDir != Vector3.zero){lastInteractDir = moveDir;}float interactDistance = 2f;if (Physics.Raycast(transform.position, lastInteractDir, out RaycastHit raycastHit,interactDistance, countersLayerMask)){if (raycastHit.transform.TryGetComponent(out ClearCounter clearCounter)){// Has ClearCounter.csclearCounter.Interact();}}}...
这时运行游戏按E进行交互,可以得到显示Interact(我们先前在clearCounter.Interact()中定义了输出"Interact")
个人解释:使用
playerInputActions.Player.Interact.performed += Interact_performed;是为该控制器触发的委托添加了一个会调用的函数,在这个函数中,我们写具体的按下按键发生的事情,这里我们想把具体的交互行为写在Player.cs中,所以我们在这个函数中去触发一个叫OnInteractAction的Eventhandler委托,这个委托添加的会调用的函数写在了Player.cs中,使用gameInput.OnInteractAction += GameInput_OnInteractAction;添加了GameInput_OnInteractAction()这个具体处理输入逻辑函数
关于委托和事件的讲解可以看刘铁猛老师的C#课程和CodeMonkey讲C#的相关课程
目前为止的工程文件
6 选中柜台的视觉效果与单例模式 Select Counter Visual Singleton Pattern
6.1 添加带有选中效果的模型
我们可以将柜台视觉效果的改变写在Player.cs中最后clearCounter.Interact()中,然而这样在写角色逻辑的代码中处理柜台的视觉效果,会使视觉效果与交互逻辑的代码耦合,所以这里我们要使用其他的方法去改变柜台的视觉效果
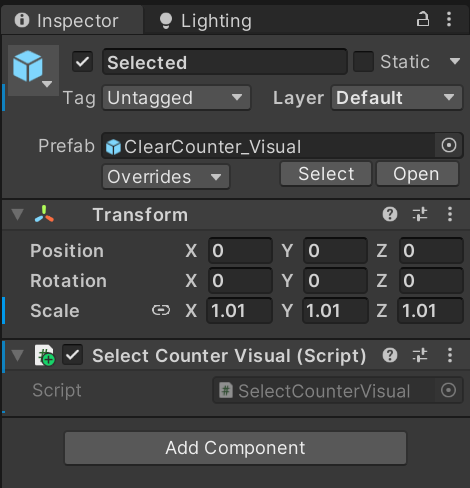
在ClearCounter.perfab中,复制ClearCounter_Visual并重命名为Selected,选择下面的模型,将Material换为CounterSelected,在Scripts文件夹中新建SelectCounterVisual.cs并将该脚本添加到Selected上,这样当我们在打开Selected的显示时就能得到一个选中效果的柜台

像这样两个网格重叠时,可能会形成闪烁的效果,为了避免这种情况,我们可以将选中效果的柜台稍微放大一些,例如这里将所有轴的缩放改为1.01
6.2 为柜台增加选中的效果
我们在Player.cs中增加一个selectedCounter变量,用于获取当前被选中的柜台,在HandleInteractions()中随着投射出的光线击中的物体改变而改变当前selectedCounter为哪一个柜台,然后在GameInput_OnInteractAction()中调用selectedCounter.Interact()实现交互
// Player.cs中
...
public class Player : MonoBehaviour
{...private ClearCounter selectedCounter;private void Start(){gameInput.OnInteractAction += GameInput_OnInteractAction;}private void GameInput_OnInteractAction(object sender, EventArgs e){if (selectedCounter != null){selectedCounter.Interact();}}private void Update(){HandleMovement();HandleInteractions();}...private void HandleInteractions(){...if (Physics.Raycast(transform.position, lastInteractDir, out RaycastHit raycastHit,interactDistance, countersLayerMask)){if (raycastHit.transform.TryGetComponent(out ClearCounter clearCounter)){// 射线击中的物体拥有ClearCounter.cs脚本// 如果当前交互的柜台不是上一次选中的柜台,就把选中的clearCounter设置为当前的柜台if (clearCounter != selectedCounter){selectedCounter = clearCounter;} } else{// 射线击中的物体没有ClearCounter.cs脚本selectedCounter = null;}} else{// 没有射线碰撞到任何东西selectedCounter = null;}Debug.Log(selectedCounter);}...
}
现在运行游戏,我们就可以在靠近柜台时看到Debug.Log(selectedCounter)信息显示出我们当前选中的柜台
接下来我们处理选中的视觉效果,这里我们有两种思路可以选择。一种是让当前selectedCounter发送选中的事件,在处理视觉表现的脚本中订阅该事件写选中时视觉效果的变化,也就是在ClearCounter.cs中发送事件,在SeletedCounterVisual.cs中订阅该事件;另一种思路是让当前操作的角色发送事件,在处理视觉表现的脚本中订阅该事件写选中时视觉效果的变化。
第一种方式的好处是SeletedCounterVisual.cs只会订阅当前选中柜台的事件,并且如果我们需要选中时添加其他效果也可以很方便地添加,坏处是控制视觉效果的代码又经过了专门处理逻辑的ClearCounter.cs的脚本中,会造成代码的耦合
第二种方式的好处是它更加方便,控制视觉效果的代码不会经过处理逻辑的脚本,坏处是可能会存在性能问题,因为所有的柜台都在订阅由角色发送的事件,但是我们的项目体量比较小,这样的方法并不会带来性能瓶颈,所以我们选择使用这一种方法。并且由于我们要完成的游戏只有一个角色,使用这一种方法还可以使用单例模式
在Player.cs中,添加一个EventHandler委托,并使用EventArgs传递选中的柜台信息,在Update()中触发事件,这里由于要使用到多次OnSelectedCounterChanged,所以这里把它单独放在了一个函数中
// Player.cs中
...
public class Player : MonoBehaviour
{...public event EventHandler<OnSelectedCounterChangedEventArgs> OnSelectedCounterChanged;public class OnSelectedCounterChangedEventArgs : EventArgs{public ClearCounter selectedCounter;}...private void Update(){...HandleInteractions();}...private void HandleInteractions(){...if (Physics.Raycast(transform.position, lastInteractDir, out RaycastHit raycastHit,interactDistance, countersLayerMask)){if (raycastHit.transform.TryGetComponent(out ClearCounter clearCounter)){// 射线击中的物体拥有ClearCounter.cs脚本// 如果当前交互的柜台不是上一次选中的柜台,就把选中的clearCounter设置为当前的柜台if (clearCounter != selectedCounter){SetSelectedCounter(clearCounter);} } else{// 射线击中的物体没有ClearCounter.cs脚本SetSelectedCounter(null);}} else{// 没有射线碰撞到任何东西SetSelectedCounter(null);}}...private void SetSelectedCounter(ClearCounter selectedCounter){this.selectedCounter = selectedCounter;OnSelectedCounterChanged?.Invoke(this, new OnSelectedCounterChangedEventArgs{selectedCounter = selectedCounter});}
}
我们需要在SelectCounterVisual.cs中订阅该事件,由于我们只有一个Player,所以我们可以使用单例模式
依然是在Player.cs中,我们定义一个public的、static的Player的实例,并且设置为只读(public是为了其他类能够访问到,static是让该实例与类无关,让程序中只有始终只有一个Player实例),我们必须确保游戏中只有一个Player,所以我们需要在Awake()中进行检查
// Player.cs中
...
public class Player : MonoBehaviour
{public static Player Instance { get; private set; }...private void Awake(){if (Instance != null){Debug.LogError("There is more than one Player instance");}Instance = this;}...
}
...
在SelectCounterVisual.cs中,订阅这个实例上的事件控制选中效果模型的显示与隐藏,由于我们在Player.cs中使用了Awake()设置了单例模式中的实例,而Awake()会在Start()之前执行,所以程序可以正常运行,如果我们这里也使用Awake(),则可能会导致单例设置前该脚本就已经执行(如果都使用Awake(),还可以在Edit->Project Settings->Script Execution Order中规定脚本的执行顺序)
// SelectCounterVisual.cs中
using UnityEngine;public class SelectCounterVisual : MonoBehaviour
{[SerializeField] private ClearCounter clearCounter;[SerializeField] private GameObject visualGameObject;private void Start(){Player.Instance.OnSelectedCounterChanged += Player_OnSelectedCounterChanged;}private void Player_OnSelectedCounterChanged(object sender, Player.OnSelectedCounterChangedEventArgs e){if (e.selectedCounter == clearCounter){show();}else{hide();}}private void show(){visualGameObject.SetActive(true);}private void hide(){visualGameObject.SetActive(false);}
}
现在,我们就实现了物品的选中效果
目前为止的工程文件
7 放置物品与Scriptable Objects
7.1 按E在柜台上生成物品
我们先来实现按E在柜台上生成番茄的效果
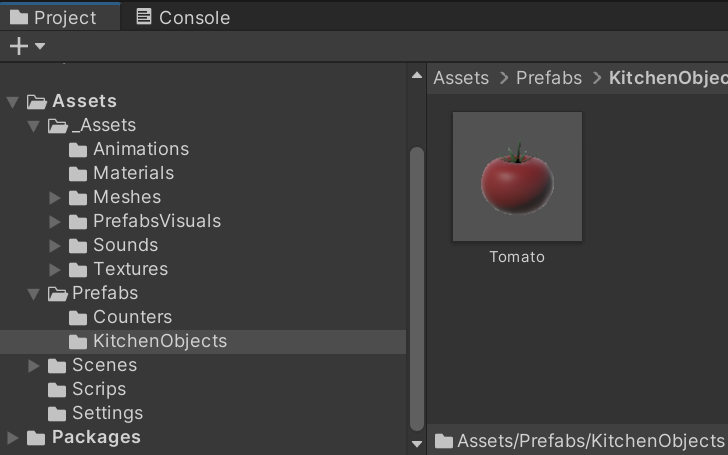
首先要创建番茄的prefab,在场景中创建一个空物体命名为Tomato,在_Assets/PrefabVisuals/KitchenObjects下找到Tomato_Visual,拖动到空物体下,将该带着番茄模型的空物体再拖回Prefabs中创建prefab(为了之后分类方便,这里视频中在Prefab文件夹下分为了Counters文件夹和KitchenObjects文件夹,番茄放到了KitchenObjects中),创建完prefab后,删除场景中的番茄
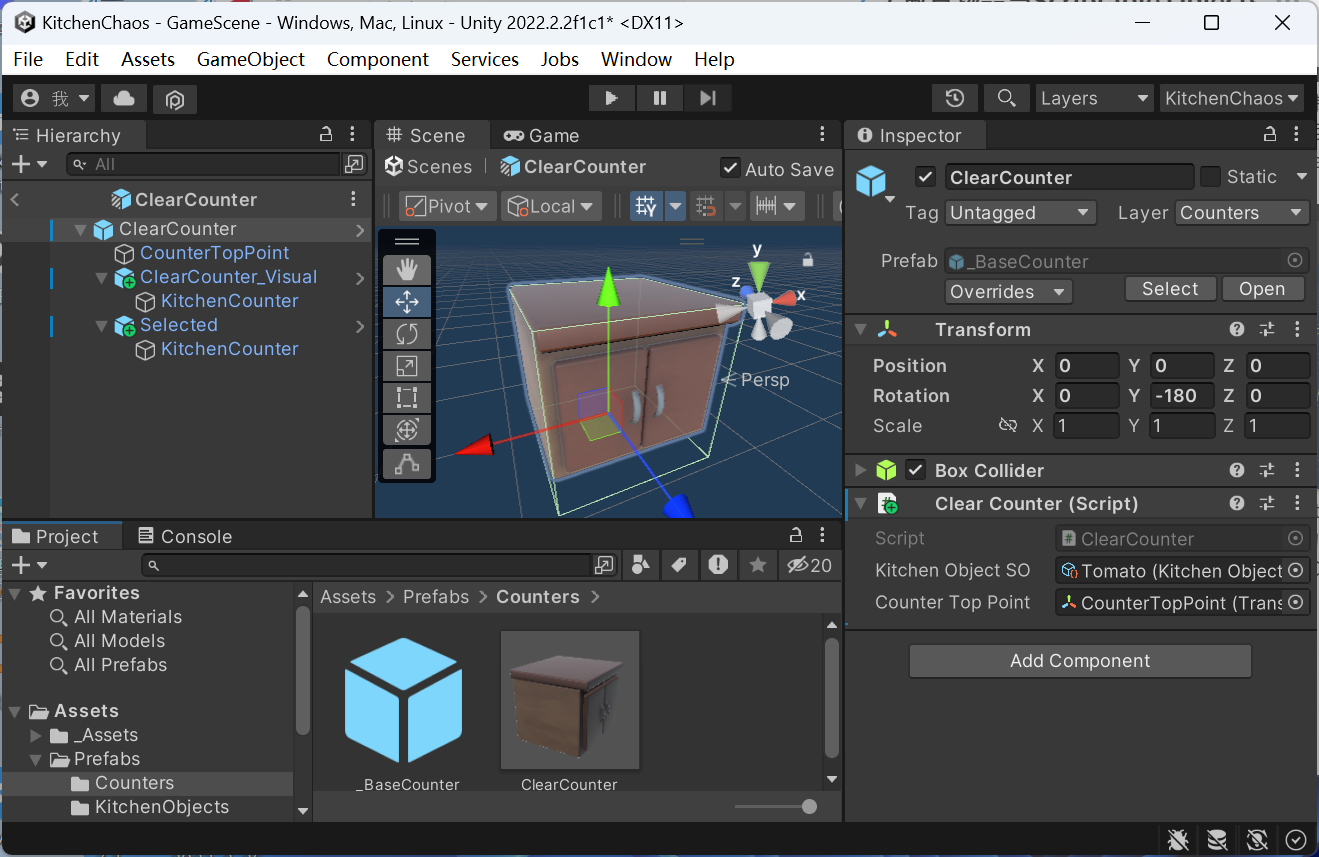
为了定位番茄生成的位置,我们需要在ClearCounter.prefab中创建一个空物体,重命名为CounterTopPoint,移动到柜台的正上方

接下来在ClearCounter.cs中,接收tomatoPrefab与counterTopPoint,并在Interact()中实例化一个番茄
// ClearCounter.cs中
using UnityEngine;public class ClearCounter : MonoBehaviour
{[SerializeField] private Transform tomatoPrefab;[SerializeField] private Transform counterTopPoint;public void Interact(){Debug.Log("Interact");Transform tomatoTransform = Instantiate(tomatoPrefab, counterTopPoint);tomatoTransform.localPosition = Vector3.zero;}
}
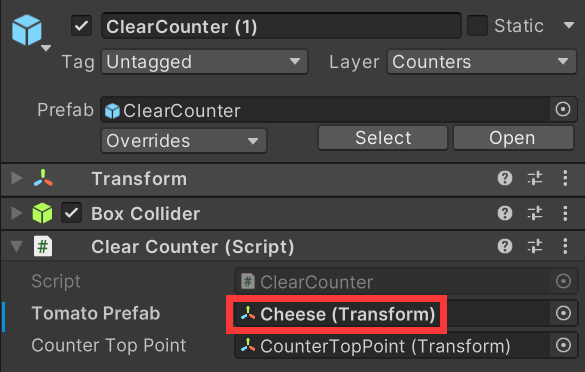
现在运行游戏,当柜子高亮,按下E即可放置番茄,现在我们测试一下其他物体,复制Tomato.prefab,重命名为Cheese.prefab,将其中的Tomato_Visual换为CheeseBlock_Visual,拖动Cheese.prefab到其中一个柜台的脚本下
运行游戏,按E即可放置番茄与奶酪
7.2 Scriptable Objects
Scriptable Object可以很方便地定义一个类的多种不同实例,如多种武器、多种装备、多种食物等等
首先在Scripts文件夹新建KitchenObjectSO.cs,注意这里不是继承自MonoBehaviour,而是ScriptableObject,要创建Scriptable Object,还需要在类前面加上Unity为我们准备的[CreateAssetMenu()],这样我们就可以在Unity编辑器中使用这个脚本创建对象
// KitchenObjectSO.cs中
using UnityEngine;[CreateAssetMenu()]
public class KitchenObjectSO : ScriptableObject
{public Transform prefab;public Sprite sprite;public string objectName;
}
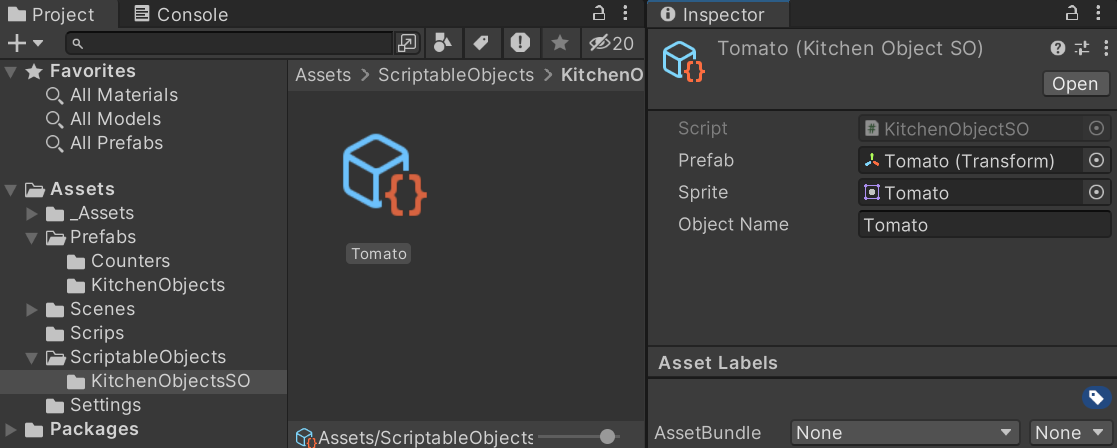
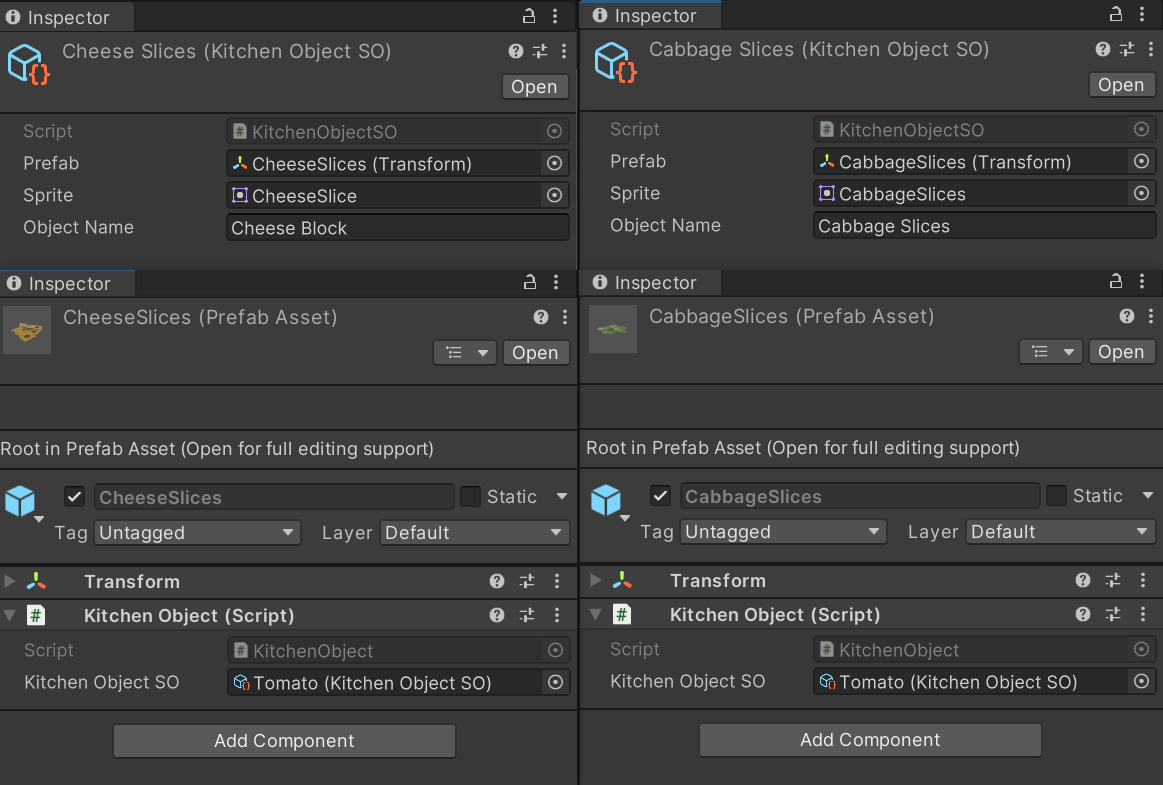
创建文件夹ScriptableObjects/KitchenObjectSO(截图里多加了个s,后面我改了),右键create,点击最上方的Kitchen Object SO新建文件,重命名为Tomato.asset,并在Inspector面板中将prefab、Sprite、Object Name填好
在ClearCounter.cs中,修改对应部分,使其通过kitchenObjectSO对象调用对应prefab
// ClearCounter.cs中
using UnityEngine;public class ClearCounter : MonoBehaviour
{// [SerializeField]private Transform tomatoPrefab;[SerializeField] private KitchenObjectSO kitchenObjectSO;[SerializeField] private Transform counterTopPoint;public void Interact(){// Transform tomatoTransform = Instantiate(tomatoPrefab, counterTopPoint);Transform kitchenObjectTransform = Instantiate(kitchenObjectSO.prefab, counterTopPoint);// tomatoTransform.localPosition = Vector3.zero;kitchenObjectTransform.localPosition = Vector3.zero;}
}
在场景中挂载了ClearCounter.cs脚本的ClearCounter上,将Kitchen Object SO设置为Tomato,开始游戏,可以正常交互,同时可以通过Script Object创建另一个CheeseBlock.asset,将另一个柜台的Kitchen Object SO设置为CheeseBlock,开始游戏,得到和之前相同的效果
我们需要让柜台知道在其上方放置的物品是什么,但是由于Script Object不是继承自Monobehaviour的类,所以不能作为一个组件添加到物体上,所以我们需要在Scripts文件夹下创建一个KitchenObject.cs,将它添加到我们已经创建的两个prefab上并将对应的Tomato.asset和CheeseBlock.asset拖动到脚本上
// KitchenObject.cs中
using UnityEngine;public class KitchenObject : MonoBehaviour
{[SerializeField] private KitchenObjectSO kitchenObjectSO;public KitchenObjectSO GetKitchenObjectSO(){return kitchenObjectSO;}
}
然后在ClearCounter.cs中获取放置物品信息
// ClearCounter.cs中
...
public class ClearCounter : MonoBehaviour
{...public void Interact(){...Debug.Log(kitchenObjectTransform.GetComponent<KitchenObject>().GetKitchenObjectSO());}
}
现在运行游戏,就能在控制台看到放置物品时的信息了
目前为止的工程文件
7.3 Kitchen Object Parent
现在我们只能在特定的柜子上放特定的物品,而最后游戏应该是物品可以放置到其他柜子上的,所以我们需要一直改变Kitchen Object的父级,这意味着我们需要让Kitchen Object知道自己在哪个Counter上,Counter也能知道哪个Kitchen Object在放置在了自己身上,以便接下来移动Kitchen Object到其他位置
在KitchenObject.cs中,用变量clearCounter保存当前物品放置在的柜子,增加可以设置和获取当前放置在的柜子的方法
// KitchenObject.cs中
using UnityEngine;public class KitchenObject : MonoBehaviour
{[SerializeField] private KitchenObjectSO kitchenObjectSO;private ClearCounter clearCounter;public KitchenObjectSO GetKitchenObjectSO(){return kitchenObjectSO;}public void SetClearCounter(ClearCounter clearCounter){this.clearCounter = clearCounter;}public ClearCounter GetClearCounter(){return clearCounter;}
}
在ClearCounter.cs中,用变量kitchenObject来保存当前柜子上放置的物品,并用if else避免柜子上放置多个物体
// ClearCounter.cs中
using UnityEngine;public class ClearCounter : MonoBehaviour
{[SerializeField] private KitchenObjectSO kitchenObjectSO;[SerializeField] private Transform counterTopPoint;private KitchenObject kitchenObject;public void Interact(){if (kitchenObject == null){Transform kitchenObjectTransform = Instantiate(kitchenObjectSO.prefab, counterTopPoint);kitchenObjectTransform.localPosition = Vector3.zero;kitchenObject = kitchenObjectTransform.GetComponent<KitchenObject>();kitchenObject = SetClearCounter(this);} else  {  Debug.Log(kitchenObject.GetClearCounter());  }}
}
接下来我们先来测试一下如何改变物体的父级,最终我们要让物品可以成为成为任意柜子的子级,也可以成为角色的子级,我们先来实现按T键物品就可以从一个柜子的子级变为另一个柜子的子级,并且位置从一个柜子移动到另一个柜子上的逻辑
在ClearCounter.cs中,增加secondClearCounter参数获取另一个柜子,增加叫testing的布尔值方便测试,在Update()中检测如果按下了T键则将当前柜子上的物品的父级设为另一个柜子,为了将位置也移动过去,我们新增了一个GetKitchenObjectFollowTransform()方法用来获取柜子上放置物品的位置,并在KitchenObject.cs中的SetClearCounter()中加上设置位置的代码
// ClearCounter.cs中
using UnityEngine;public class ClearCounter : MonoBehaviour
{[SerializeField] private KitchenObjectSO kitchenObjectSO;[SerializeField] private Transform counterTopPoint;[SerializeField] private ClearCounter secondClearCounter;[SerializeField] private bool testing;private KitchenObject kitchenObject;private void Update(){if (testing && Input.GetKeyDown(KeyCode.T)){if (kitchenObject != null){kitchenObject.SetClearCounter(secondClearCounter);}}}public void Interact(){if (kitchenObject == null){Transform kitchenObjectTransform = Instantiate(kitchenObjectSO.prefab, counterTopPoint);kitchenObjectTransform.localPosition = Vector3.zero;kitchenObject = kitchenObjectTransform.GetComponent<KitchenObject>();kitchenObject.SetClearCounter(this);} else{Debug.Log(kitchenObject.GetClearCounter());}}public Transform GetKitchenObjectFollowTransform(){return counterTopPoint;}
}
// KitchenObject.cs中
...
public class KitchenObject : MonoBehaviour
{...public KitchenObjectSO GetKitchenObjectSO(){...}public void SetClearCounter(ClearCounter clearCounter){this.clearCounter = clearCounter;transform.parent = clearCounter.GetKitchenObjectFollowTransform();transform.localPosition = Vector3.zero;}public ClearCounter GetClearCounter(){...}
}
这时调整好相应参数,运行游戏,按下T键时发现在Hierachy中番茄确实从当前柜子跑到了另一个柜子上,并且位置也发生了改变

然而这样操作时我们的两个ClearCounter物体中的KitchenObject变量并没有改变,第一个柜子的KitchenObject依然是Tomato,第二个柜子的KitchenObject依然是None(private的变量可以通过右上角三个点打开debug模式查看)
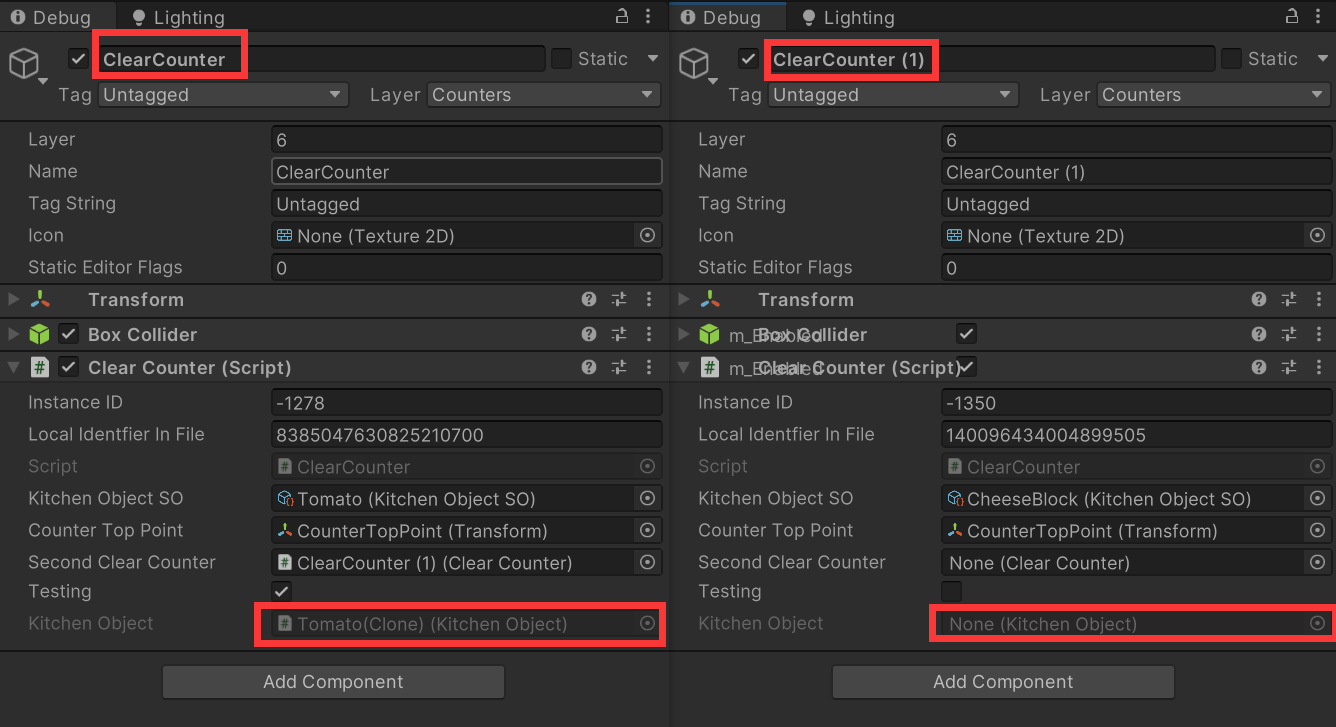
我们有两个途径可以解决这个问题,第一种是在ClearCounter.cs中设置kitchenObject的父级后让新的父级去更新一下对应变量,第二种是在KitchenObject.cs中当该物体被设置到新的父级上时自己去更新父级,这里教程中用了第二种,作者认为让物体去更新父级的代码写在物体对应的脚本中更合理一些
为了在KitchenObject.cs中更新父级,还需要在ClearCounter.cs中增加获取、设置、清空当前柜子下物体和判断当前柜子上是否有物体的方法,然后在KitchenObject.cs的SetClearCounter()中更新父级,当我们把更新父级的逻辑写在KitchenObject.cs的SetClearCounter()后,原来KitchenObject.cs的Interact()中的逻辑就可以不用了,直接SetKitchenObjectParent()即可
// ClearCounter.cs中
public class ClearCounter : MonoBehaviour
{...public void Interact(){if (kitchenObject == null){Transform kitchenObjectTransform = Instantiate(kitchenObjectSO.prefab, counterTopPoint);// kitchenObjectTransform.localPosition = Vector3.zero;// kitchenObject = kitchenObjectTransform.GetComponent<KitchenObject>();// kitchenObject.SetKitchenObjectParent(this);kitchenObjectTransform.GetComponent<KitchenObject>().SetKitchenObjectParent(this);} else{Debug.Log(kitchenObject.GetClearCounter());}}...public void SetKitchenObject(KitchenObject kitchenObject){this.kitchenObject = kitchenObject;}public KitchenObject GetKitchenObject(){return kitchenObject;}public void ClearKitchenObject(){kitchenObject = null;}public bool HasKitchenObject(){return kitchenObject != null;}
}
// KitchenObject.cs中
...
public class KitchenObject : MonoBehaviour
{...public void SetClearCounter(ClearCounter clearCounter){if (this.clearCounter != null) // 这里的this.clearCounter指的是之前的clearCounter{this.clearCounter.ClearKitchenObject();}this.clearCounter = clearCounter;if (clearCounter.HasKitchenObject()) // 这里clearCounter指的是现在的、作为传入的clearCounter{  Debug.LogError("ClearCounter already has a KitchenObject!");  }clearCounter.SetKitchenObject(this);transform.parent = clearCounter.GetKitchenObjectFollowTransform();transform.localPosition = Vector3.zero;}...
}
再次运行游戏,可以看到按下T键之后变量可以被正确更改了

目前为止的工程文件
8 角色拿取物品与C#接口 Player Pick Up&C# Interfaces
我们已经实现了物品从一个柜子上转移到另一个柜子上,同时切换了物品的父级,我们同样也可以将物品从一个柜子上转移到角色身上,同时切换物品的父级为角色,然而,我们现有的逻辑都是针对ClearCounter类写的,因此我们可以把这部分逻辑抽象成一个接口,让Player类与ClearCounter都继承自这个接口,这部分基本上是提取接口、修改变量名的过程,所以笔记就简单写了
接口类似于一个“合约”,只要继承了这个接口,就必须实现其中的方法
我们可以抽象出来接口IkitchenObjectParent,让所有可以成为物品父级的对象都继承自这个接口,这个接口中要实现的方法就和之前ClearCounter.cs中的获取、设置、删除物品等方法相同,在Scripts文件夹新建c#脚本,重命名为IkitchenObjectParent.cs
// IkitchenObjectParent.cs中
using UnityEngine;public interface IKitchenObjectParent
{public Transform GetKitchenObjectFollowTransform();public void SetKitchenObject(KitchenObject kitchenObject);public KitchenObject GetKitchenObject();public void ClearKitchenObject();public bool HasKitchenObject();
}
在ClearCounter.cs中,我们要继承接口实现方法,并且要实现让Inertct()方法实现“当按下交互键时,如果柜子上有物品,就将物品转移到角色上”的逻辑,所以需要传入Player类的实例作为参数,在else部分调用SetKitchenObjectParent(player)实现转移的逻辑,以下是实现了对应逻辑并且根据接口进行改名的脚本
// ClearCounter.cs中
using UnityEngine;public class ClearCounter : MonoBehaviour, IKitchenObjectParent
{[SerializeField] private KitchenObjectSO kitchenObjectSO;[SerializeField] private Transform counterTopPoint;private KitchenObject kitchenObject;public void Interact(Player player){if (kitchenObject == null){Transform kitchenObjectTransform = Instantiate(kitchenObjectSO.prefab, counterTopPoint);kitchenObjectTransform.GetComponent<KitchenObject>().SetKitchenObjectParent(this);} else{// 将物品转到角色下,成为角色的子级kitchenObject.SetKitchenObjectParent(player);}}public Transform GetKitchenObjectFollowTransform(){return counterTopPoint;}public void SetKitchenObject(KitchenObject kitchenObject){this.kitchenObject = kitchenObject;}public KitchenObject GetKitchenObject(){return kitchenObject;}public void ClearKitchenObject(){kitchenObject = null;}public bool HasKitchenObject(){return kitchenObject != null;}
}
在Player.cs中,同样需要继承接口实现方法,并且由于调用了Interact(),经过上面的修改之后Interact()需要传入参数,所以调用的时候要传入this
// Player.cs
...
public class Player : MonoBehaviour, IKitchenObjectParent
{...private void GameInput_OnInteractAction(object sender, EventArgs e){if (selectedCounter != null){selectedCounter.Interact(this);}}...    public Transform GetKitchenObjectFollowTransform(){return kitchenObjectHoldPoint;}public void SetKitchenObject(KitchenObject kitchenObject){this.kitchenObject = kitchenObject;}public KitchenObject GetKitchenObject(){return kitchenObject;}public void ClearKitchenObject(){kitchenObject = null;}public bool HasKitchenObject(){return kitchenObject != null;}
}
在KitchenObject.cs中,需要将ClearCounter相关的全都改为kitchenObjectParent相关的名称
// KitchenObject.cs
using UnityEngine;public class KitchenObject : MonoBehaviour
{[SerializeField] private KitchenObjectSO kitchenObjectSO;private IKitchenObjectParent kitchenObjectParent;public KitchenObjectSO GetKitchenObjectSO(){return kitchenObjectSO;}public void SetKitchenObjectParent(IKitchenObjectParent kitchenObjectParent){if (this.kitchenObjectParent != null){this.kitchenObjectParent.ClearKitchenObject();}this.kitchenObjectParent = kitchenObjectParent;if (kitchenObjectParent.HasKitchenObject()){Debug.LogError("IKitchenObjectParent already has a KitchenObject!");}kitchenObjectParent.SetKitchenObject(this);transform.parent = kitchenObjectParent.GetKitchenObjectFollowTransform();transform.localPosition = Vector3.zero;}public IKitchenObjectParent GetKitchenObjectParent(){return kitchenObjectParent;}
}
目前为止的工程文件
9 创建容器柜台 Container Counter
9.1 柜台预制件变体 Prefab Viriant
容器柜台和空柜台都是柜台,因此我们可以直接复制ClearCounter.prefab然后更改一些东西,但是unity为我们提供了一个叫prefab variant的东西,我们这里就创建一个基本柜台的prefab,然后使用prefab variant来创建不同的柜台
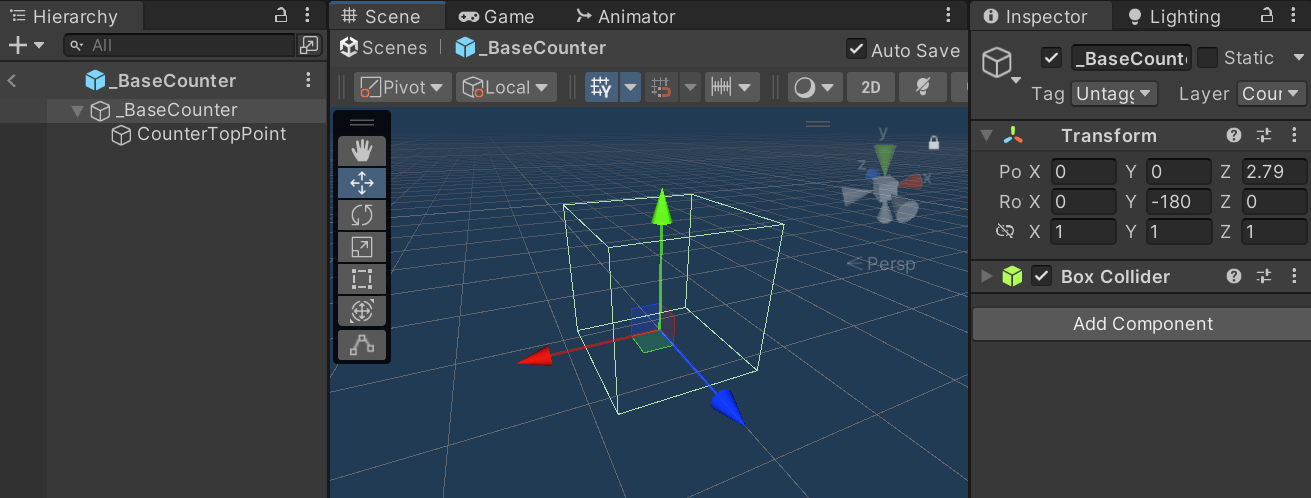
复制ClearCounter.prefab,重命名为_BaseCounter.prefab,作为基类,该基类除了要保留Box Collider组件和空物体CounterTopPoint,其余全部删除
在Project窗口中右键_BaseCounter.prefab->Create->Prefab Variant基于这个基类创建一个prefab,将之前ClearCounter.prefab中的内容复制到这个新创建的prefab上,并把脚本都设置好,然后删除之前的ClearCounter.prefab,将新的prefab命名为ClearCounter.prefab
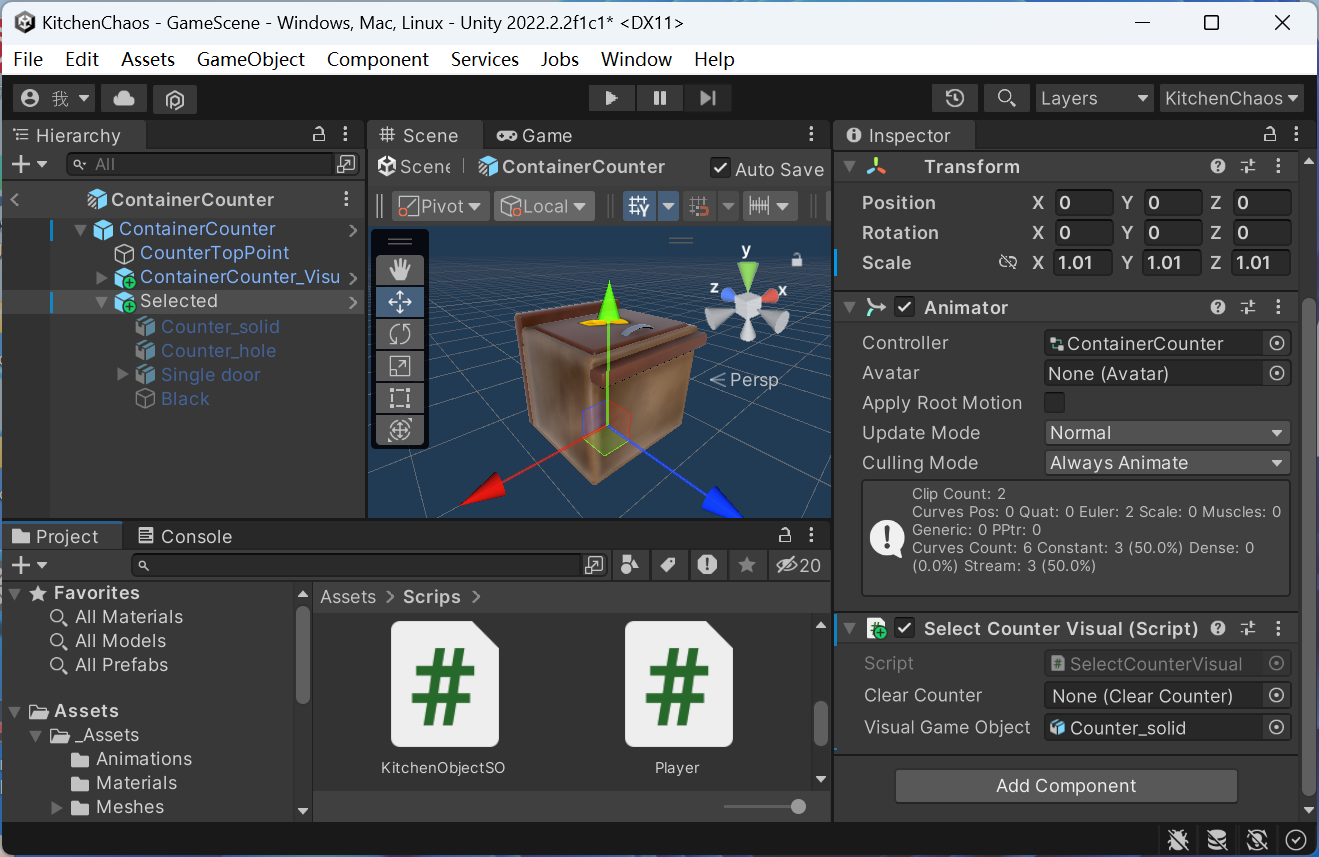
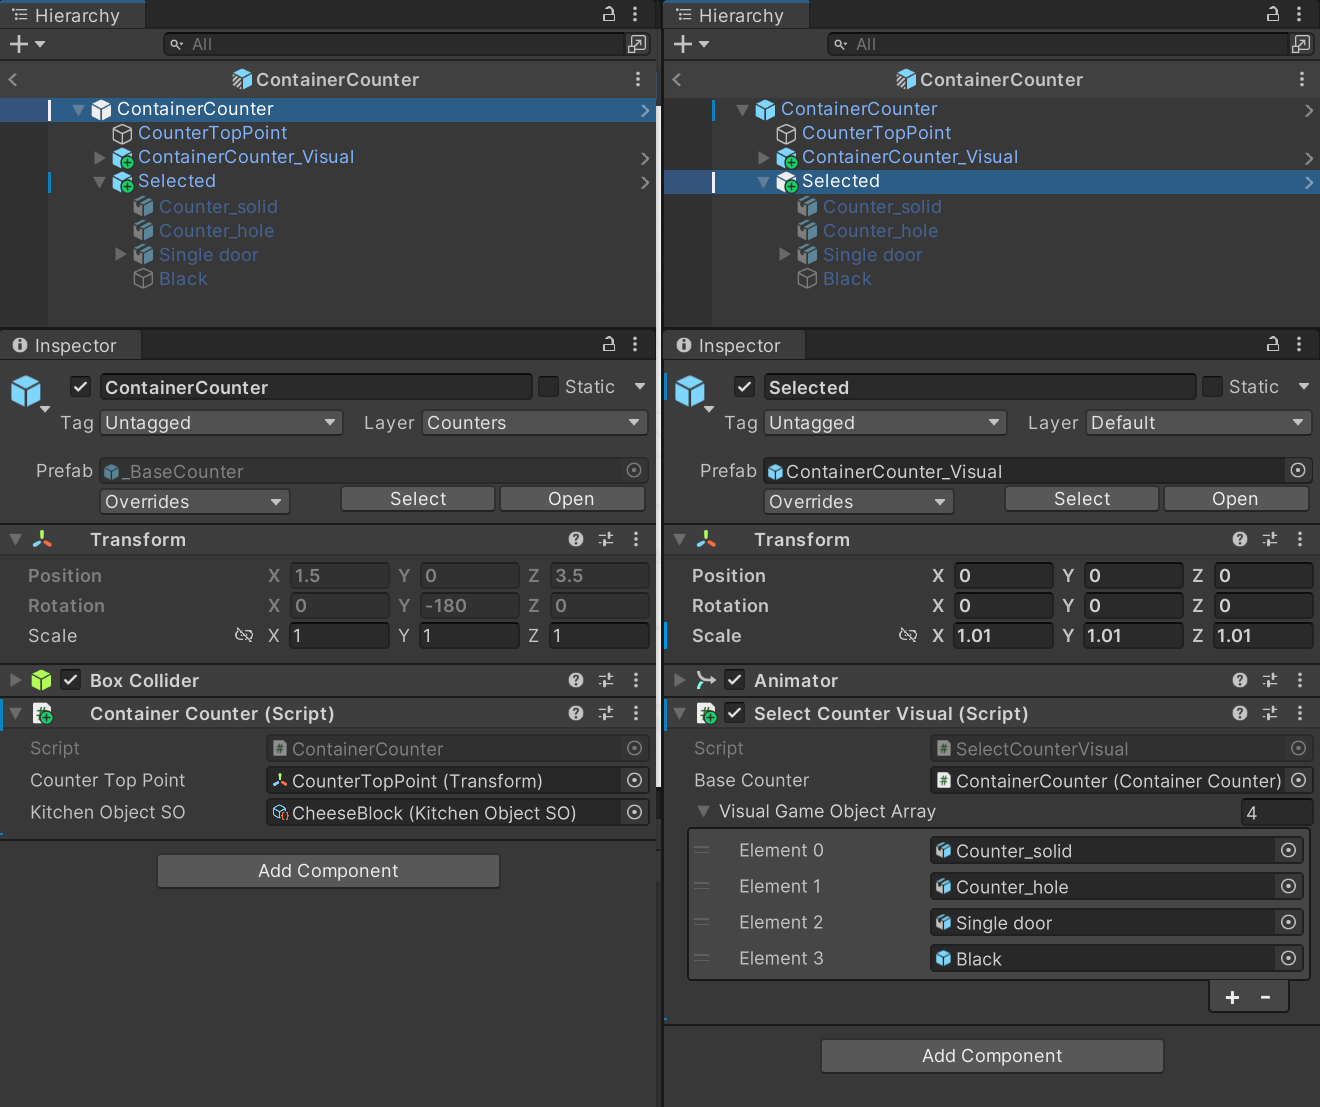
再次右键_BaseCounter.prefab->Create->Prefab Variant基于这个基类创建ContainerCounter.prefab,将ContainerCounter_Visual拖到ContainerCounter下面作为它的子级,复制一份ContainerCounter_Visual重命名为Selected,将Selected下的模型的材质都改为CounterSelected并默认隐藏,将Selected缩放均改为1.01,添加SelectedCounterVisual.cs组件
9.2 继承自柜台基类创建ClearCounter与ContainerCounter
接下来我们在Scripts文件夹下创建ContainerCounter.cs,我们可以让这个脚本中的内容和ClearCounter.cs中的内容一致来进行测试,原教程中先尝试了这么做,但是在写完之后容器柜台并不能正常与角色交互,这时因为在Player.cs中我们进行Raycast的时候检测的就是射线是否与ClearCounter类的实例碰撞,我们当然可以让它也检测射线与ContainerCounter类的实例是否碰撞,但是ContainerCounter与ClearCounter的行为很类似,我们可以写一个基类BaseCounter,将所有柜台都需要实现的逻辑放在基类中,然后其他柜台类都继承自这个类,我们在检测射线与BaseCounter类的实例是否碰撞时,所有柜台就都能被检测到了,通过继承,我们也能够更好地组织代码
在Scripts文件夹下新建BaseCounter.cs,在这个基类中,我们可以写一个虚方法public virtual void Interact(Player player),所有继承自该基类的类都需要使用override重写这个方法,并且由于所有柜台类都有counterTopPoint,都实现了IKitchenObjectParent接口,我们也把这两部分都放到这个基类中
// BaseCounter.cs中
using UnityEngine;public class BaseCounter : MonoBehaviour, IKitchenObjectParent
{[SerializeField] private Transform counterTopPoint;private KitchenObject kitchenObject;public virtual void Interact(Player player){Debug.Log("BaseCounter.Interact()");}public Transform GetKitchenObjectFollowTransform(){return counterTopPoint;}public void SetKitchenObject(KitchenObject kitchenObject){this.kitchenObject = kitchenObject;}public KitchenObject GetKitchenObject(){return kitchenObject;}public void ClearKitchenObject(){kitchenObject = null;}public bool HasKitchenObject(){return kitchenObject != null;}
}
在ClearCounter.cs中,改为角色放置和拾取物品的逻辑
// ClearCounter.cs中
using UnityEngine;public class ClearCounter : BaseCounter
{[SerializeField] private KitchenObjectSO kitchenObjectSO;public override void Interact(Player player){if (!HasKitchenObject()){// 柜子上没有物品if (player.HasKitchenObject()){// 角色有物品,放置物品player.GetKitchenObject().SetKitchenObjectParent(this);} else{// 角色没有物品}} else{// 柜子上有物品if (player.HasKitchenObject()){// 角色有物品} else{// 角色没有物品,拾取物品GetKitchenObject().SetKitchenObjectParent(player);}}}
}
在ContainerCounter.cs中,只需要实现按下交互按键时该容器柜子对应的物品出现在角色手上的逻辑
// ContainerCounter.cs中
using UnityEngine;public class ContainerCounter : BaseCounter
{[SerializeField] private KitchenObjectSO kitchenObjectSO;if (!player.HasKitchenObject()){// 角色没有物品,拾取物品Transform kitchenObjectTransform = Instantiate(kitchenObjectSO.prefab);kitchenObjectTransform.GetComponent<KitchenObject>().SetKitchenObjectParent(player);}
}
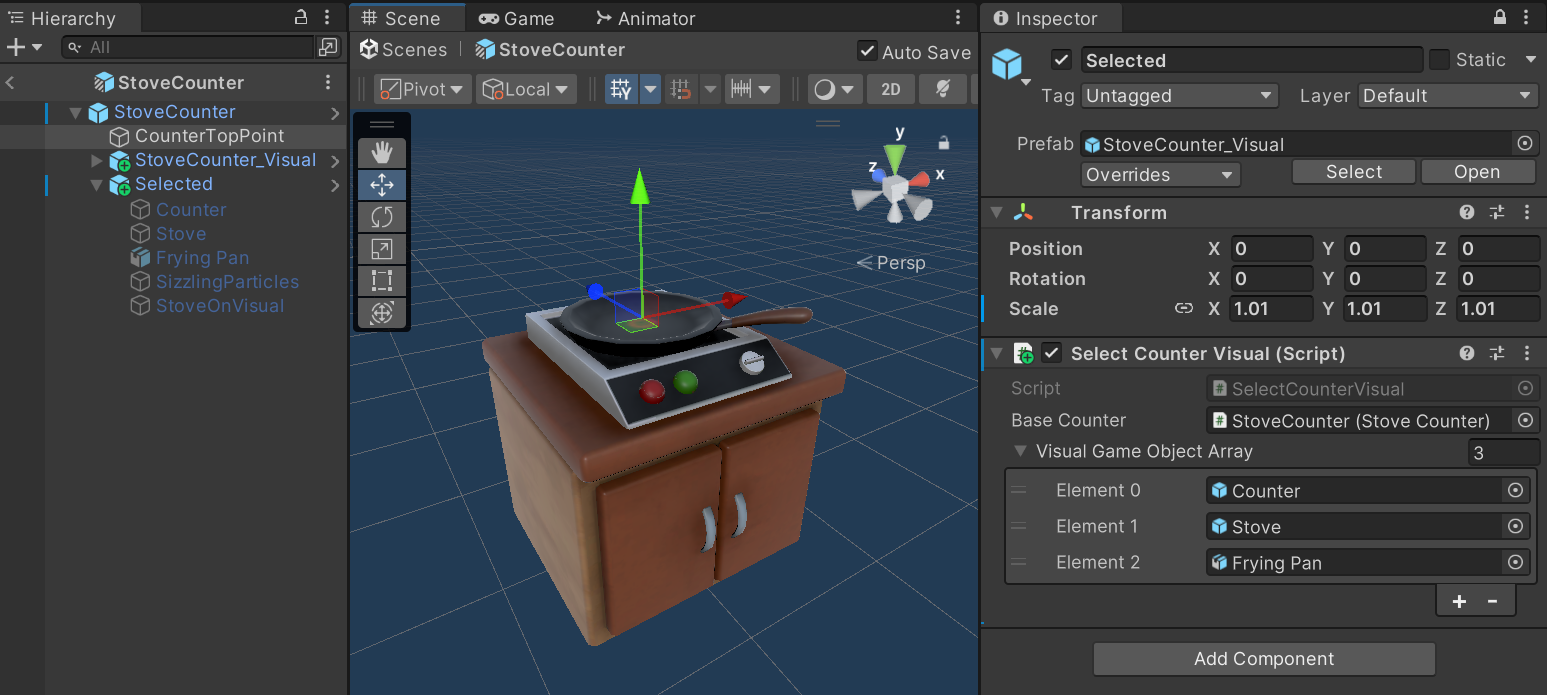
在SelectCounterVisual.cs中,我们之前使用的是ClearCounter类的实例,这样ContainerCounter是无法被正确选中的,现在要换成BaseCounter,同时我们的ContainerCounter模型有好几部分组成,因此在设置选中效果的模型时,我们需要传入一个数组,遍历这个数组将其中所有的对象设为显示或隐藏(注释部分是修改之前的代码)
// SelectCounterVisual.cs中
using UnityEngine;public class SelectCounterVisual : MonoBehaviour
{// [SerializeField] private ClearCounter clearCounter;[SerializeField] private BaseCounter baseCounter;// [SerializeField] private GameObject visualGameObject;[SerializeField] private GameObject[] visualGameObjectArray;private void Start(){Player.Instance.OnSelectedCounterChanged += Player_OnSelectedCounterChanged;}private void Player_OnSelectedCounterChanged(object sender, Player.OnSelectedCounterChangedEventArgs e){// if (e.selectedCounter == clearCounter)if (e.selectedCounter == baseCounter){show();}else{hide();}}private void show(){// visualGameObject.SetActive(true);foreach (GameObject visualGameObject in visualGameObjectArray){visualGameObject.SetActive(true);}}private void hide(){// visualGameObject.SetActive(false);foreach (GameObject visualGameObject in visualGameObjectArray){visualGameObject.SetActive(false);}}
}
代码之外,在ContainerCounter.prefab上挂载上对应的脚本
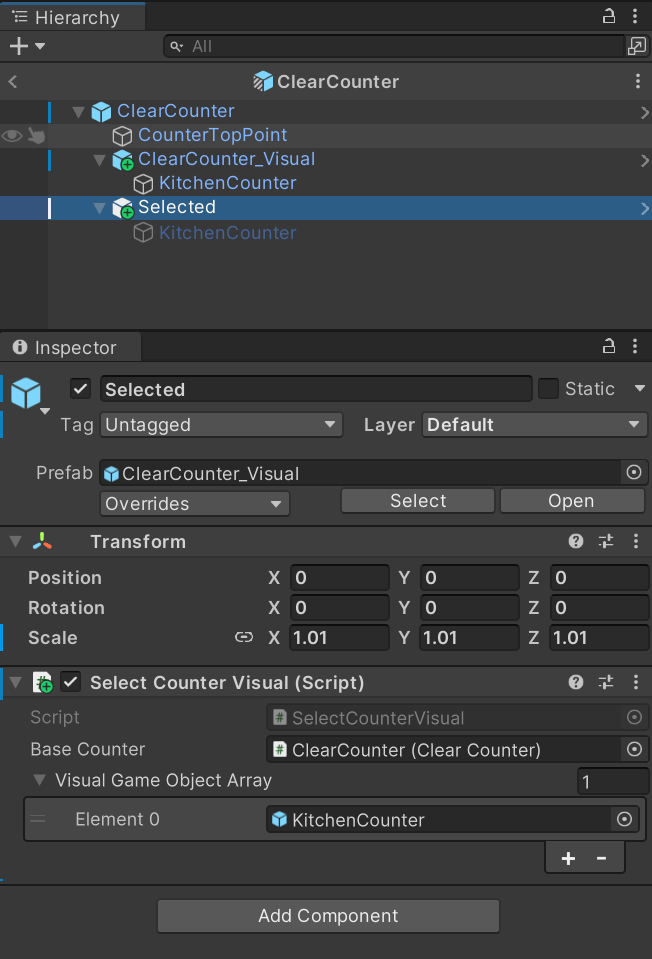
由于我们改变了SelectCounterVisual.cs这个脚本,原先的ClearCounter上的相应组件也要重新设置一下
在场景中放置两个ContainerCounter,其中一个将上面的Sprite改为番茄,将这个柜台的CountainerCounter组件中的SkitchenObjectSO也改为Tomato,让我们能够从中拿取番茄

现在运行游戏,我们就可以从对应的柜台中获取对应的物品了
[外链图片转存失败,源站可能有防盗链机制,建议将图片保存下来直接上传(img-PBJpwN3u-1678443896125)(null)]
9.3 容器柜台的动画
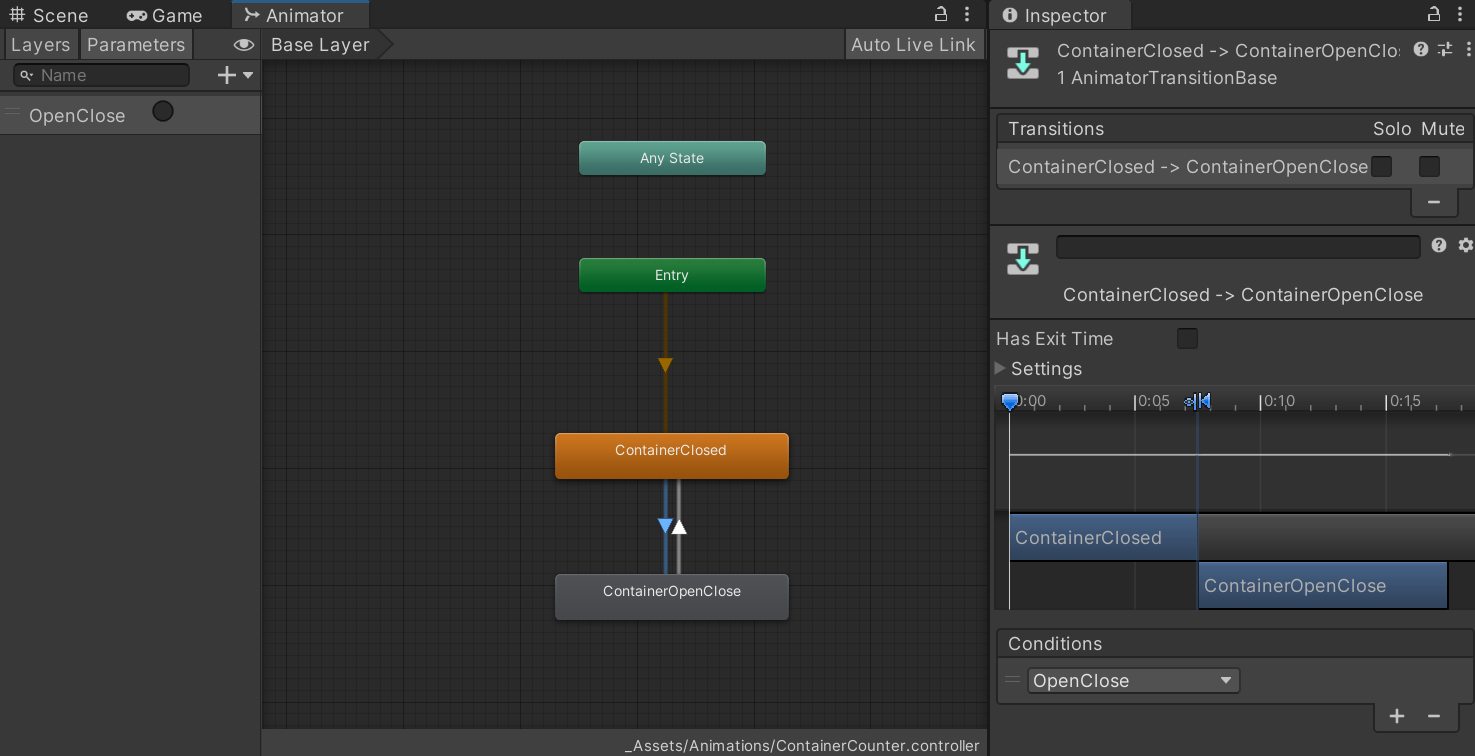
我们的ContainerCounter素材实际上已经包含了一个打开柜子的动画,直接双击ContainerCounter_Visual上Animator组件的Controller部分,可以看到Animator面板中已经设置好的状态机,这些动画通过OpenClose这个参数来控制开关
在Scripts文件夹新建ContainerCounterVisual.cs,在ContainerCounter.cs中触发事件,在ContainerCounterVisual.cs中订阅事件
// ContainerCounter.cs中
using System;
using UnityEngine;public class ContainerCounter : BaseCounter
{public event EventHandler OnPlayerGrabbedObject;[SerializeField] private KitchenObjectSO kitchenObjectSO;public override void Interact(Player player){if (!player.HasKitchenObject()){// 角色没有物品,拾取物品Transform kitchenObjectTransform = Instantiate(kitchenObjectSO.prefab);kitchenObjectTransform.GetComponent<KitchenObject>().SetKitchenObjectParent(player);OnPlayerGrabbedObject?.Invoke(this, EventArgs.Empty);}}
}
// ContainerCounterVisual.cs中
using System;
using UnityEngine;public class ContainerCounterVisual : MonoBehaviour
{private const string OPEN_CLOSE = "OpenClose";[SerializeField] private ContainerCounter containerCounter;private Animator animator;private void Awake(){animator = GetComponent<Animator>();}private void Start(){containerCounter.OnPlayerGrabbedObject += ContainerCounter_OnPlayerGrabbedObject;}private void ContainerCounter_OnPlayerGrabbedObject(object sender, EventArgs e){animator.SetTrigger(OPEN_CLOSE);}
}
再次运行游戏,就可以看到对应的动画了

9.4 容器柜台预制件变体
之前我们是通过复制容器柜台然后更改上面的Sprite创建新的容器柜台的,为了方便起见我们也应该以容器柜台为基类去创建Prefab Viriant
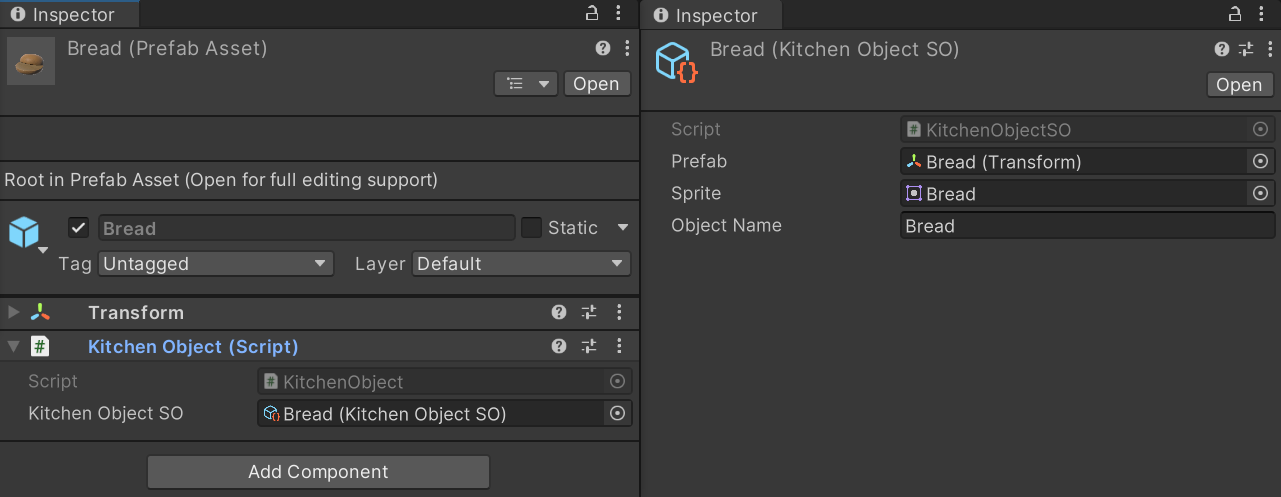
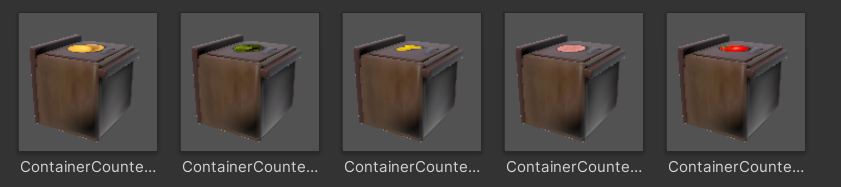
通过Script Object给其他食材物品创建对象(Bread、Cabbage、MeatPattyUncooked),复制现有的食材的Prefab,替换组件中的KitchenObjectSO项,然后将模型更改为KitchenObjectsVisuals中对应的模型,如Bread.prefab和Bread.asset更改后如下
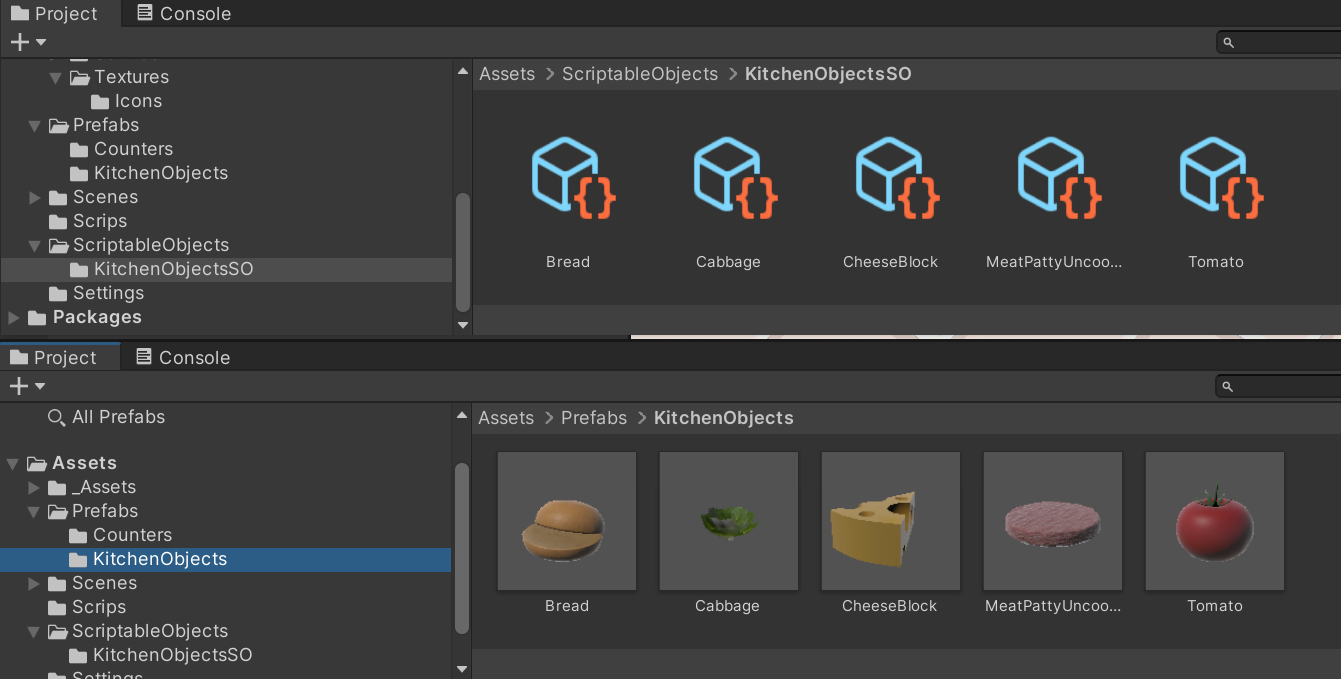
所有食材物品创建好后应该如下所示
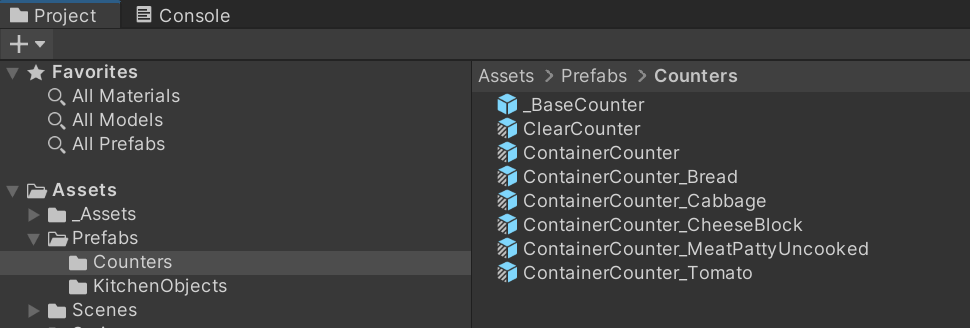
然后右键ContainerCounter.prefab->Create->Prefab Viriant给对应食材创建对应容器柜台的Prefab Viriant,更改每个Prefab Viriant组件中的KitchenObjectSO项与Sprite
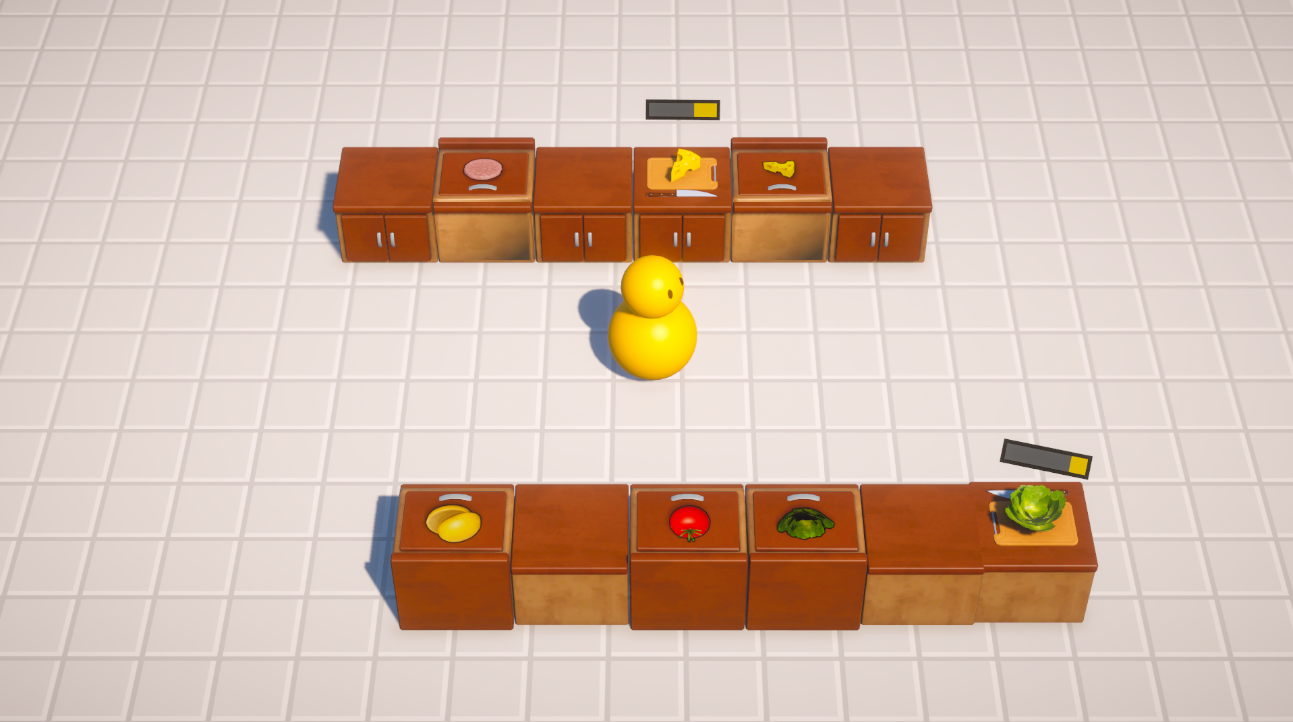
将各种柜台摆放在场景中,运行游戏,我们就能够从各个容器柜台中拿取对应的食材了
目前为止的工程文件)
10 创建切菜台 Cutting Counter
10.1 继承自柜台基类创建 CuttingCounter
右键_BaseCounter.prefab->Create->Prefab Variant创建一个新的prefab,重命名为CuttingCounter.prefab,从_Assets/PrefabsVisuals/CounterVisuals找到CuttingCounter_Visual,拖动到CuttingCounter.prefab下,复制一个重命名为Selected,像之前一样给Selected加上SelectedCounterVisual.cs组件,将其中的模型材质换为CounterSelected,将Selected的缩放改为1.01

在Scripts创建CuttingCounter.cs,同样要继承自BaseCounter基类,暂时先放上与ClearCounter.cs相同的交互逻辑
// CuttingCounter.cs中
using UnityEngine;public class CuttingCounter : BaseCounter
{public override void Interact(Player player){if (!HasKitchenObject()){// 柜子上没有物品if (player.HasKitchenObject()){// 角色有物品,放置物品player.GetKitchenObject().SetKitchenObjectParent(this);} else{// 角色没有物品}} else{// 柜子上有物品if (player.HasKitchenObject()){// 角色有物品} else{// 角色没有物品,拾取物品GetKitchenObject().SetKitchenObjectParent(player);}}}
}
在CuttingCounter上添加CuttingCounter.cs组件,将CuttingCounter拖动到Selected的组件中的BaseCounter项上,开始游戏,就可以看到实现了和ClearCounter相同的交互效果
10.2 CutKitchenObject与简单的切菜交互
要实现切菜交互的效果,我们需要删除放在切菜台上的食材,替换为切片的相应的食材的模型,然后播放切菜的循环动画,这里我们先来实现按下相应按键番茄替换为番茄切片的简单效果,为此我们需要创建相应的ScriptableObject与prefab
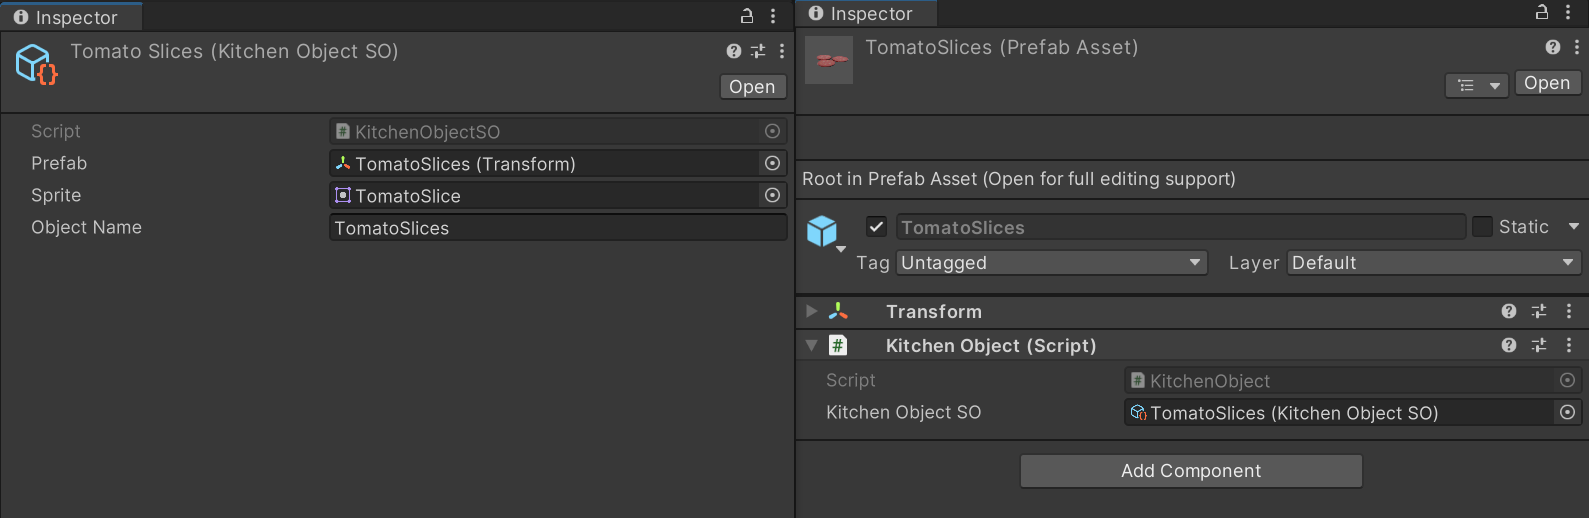
先来做一个番茄的切片素材的ScriptableObject与prefab,在ScriptableObjects/KitchenObjectsSO下右键->Create->Kitchen Object SO,重命名为TomatoSlices
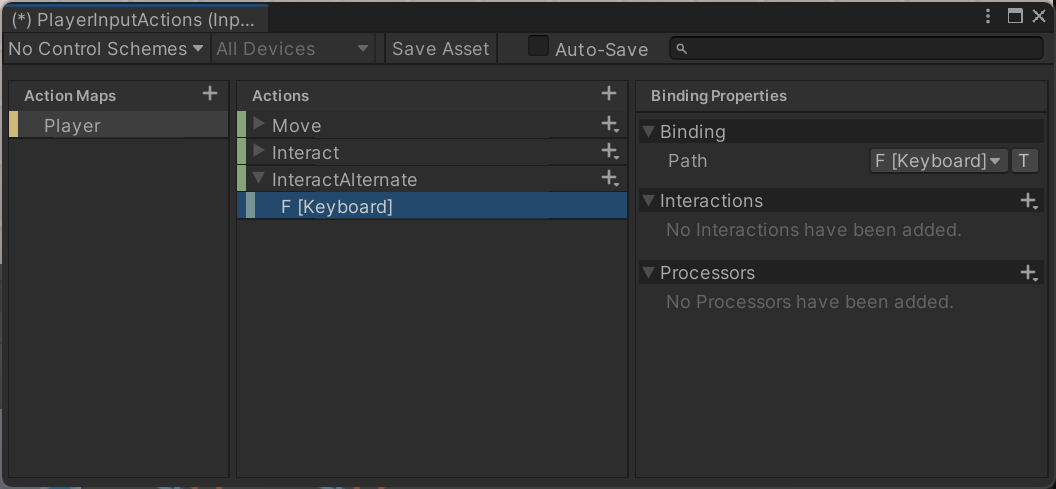
在Setting/PlayInputActions.inputactions中,添加一个Action,绑定F按键
要实现按下F键物体替换为物体切片的效果,先要实现按下F键删除原物体的效果,可以按照写上一个Interact的Action差不多的方式去完成。我们在BaseCounter.cs这个基类中写了一个InteractAlternate()的接口,在CuttingCounter.cs中实现了该接口。在GameInput.cs中添加按下F键将会触发的函数,这里这个函数中我们触发一个EventHandler委托,在Player.cs中在该委托上添加会调用的函数GameInput_OnInteractAlternateAction(),在函数中使用selectedCounter.InteractAlternate(this)调用具体方法。
// BaseCounter.cs中
...
public class BaseCounter : MonoBehaviour, IKitchenObjectParent
{...public virtual void InteractAlternate(Player player){Debug.LogError("BaseCounter.InteractAlternate()"); // 不是所有的柜台都有这个交互,所以不应该输出Error信息,一开始作者是输出的,但是在后面改了}...
}
// CuttingCounter.cs中
...
public class CuttingCounter : BaseCounter
{[SerializeField] private KitchenObjectSO cutKitchenObjectSO;public override void Interact(Player player){...}public override void InteractAlternate(Player player){if (HasKitchenObject()){// 柜子上有物品,开始切菜GetKitchenObject().DetroySelf();}}
}
// GameInput.cs中
public class GameInput : MonoBehaviour
{...public event EventHandler OnInteractAlternateAction;...private void Awake(){...playerInputActions.Player.InteractAlternate.performed += InteractAlternate_performed;}... private void InteractAlternate_performed(UnityEngine.InputSystem.InputAction.CallbackContext obj){OnInteractAlternateAction?.Invoke(this, EventArgs.Empty);}...
}
// Player.cs中
...
public class Player : MonoBehaviour, IKitchenObjectParent
{...private void Start(){...gameInput.OnInteractAlternateAction += GameInput_OnInteractAlternateAction;}...private void GameInput_OnInteractAlternateAction(object sender, EventArgs e){if (selectedCounter != null){selectedCounter.InteractAlternate(this);}}...
}
接下来我们还要实现对应的物品切片模型出现的效果,我们在KitchenObject.cs中写一个SpawnKitchenObject()方法,然后在CuttingCounter.cs的InteractAlternate()方法中调用
// KitchenObject.cs中
...
public class KitchenObject : MonoBehaviour
{...public static KitchenObject SpawnKitchenObject(KitchenObjectSO kitchenObjectSO, IKitchenObjectParent kitchenObjectParent){Transform kitchenObjectTransform = Instantiate(kitchenObjectSO.prefab);KitchenObject kitchenObject = kitchenObjectTransform.GetComponent<KitchenObject>();kitchenObject.SetKitchenObjectParent(kitchenObjectParent);return kitchenObject;}
}
// CuttingCounter.cs中
...
public class CuttingCounter : BaseCounter
{[SerializeField] private KitchenObjectSO cutKitchenObjectSO;public override void Interact(Player player){...}public override void InteractAlternate(Player player){if (HasKitchenObject()){// 柜子上有物品,开始切菜GetKitchenObject().DetroySelf();KitchenObject.SpawnKitchenObject(cutKitchenObjectSO, this);}}
}
至于要出现的切片模型我们先来往场景拖一个CuttingCounter.prefab然后规定死测试一下,就用上面做好的番茄切片

目前为止的工程文件
10.3 CuttingRecipeSO
为了使我们的代码更易扩展,我们可以给把这些表示物品对象到对应物体切片对象的信息用ScriptableObject储存
首先先把几个物品切片的ScriptbaleObject创建好,在KitchenObjectSO下右键->Create->Kitchen Object SO创建CabbageSlices.asset、CheeseSlices.asset,并在Prefab/KitchenObjects中创建相应的Prefab填好信息
我们还需要知道正常物品与切片物品的对应关系,在Scripts文件夹下新建CuttingRecipeSO.cs,其中我们需要两个ScriptableObject,一个表示正常的物品对象,一个表示该物品对应的物品切片对象
// CuttingRecipeSO.cs
using UnityEngine;[CreateAssetMenu()]
public class CuttingRecipeSO : ScriptableObject
{public KitchenObjectSO input;public KitchenObjectSO output;
}
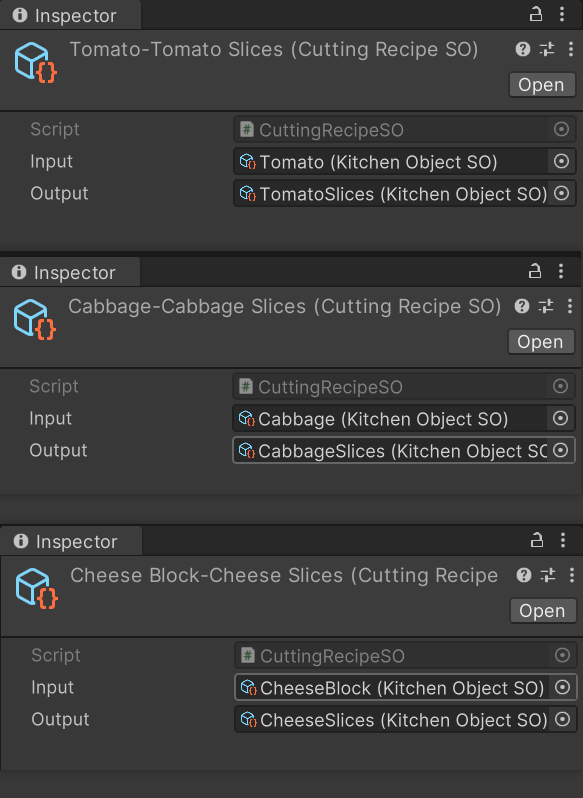
在ScriptableObjects文件夹下新建CuttingRecipeSO,在该文件夹下右键->Create->Cutting Recipe SO,创建Tomato-TomatoSilices.asset、Cabbage-CabbageSlices.asset、CheeseBlock-CheeseSlices.asset并设置好相应的变量
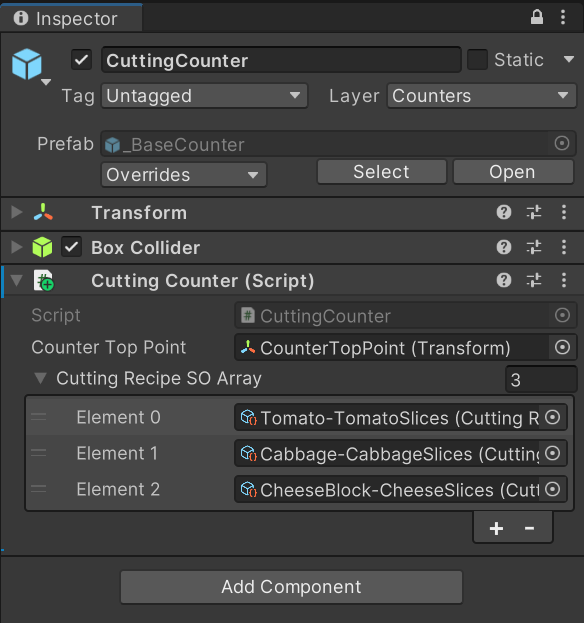
在CuttingCounter.cs中,我们使用一个数组来保存CuttingRecipeSO对象的实例,然后写一个GetOutputForInput()方法用foreach来获取对应输入物体的切片版本
// CuttingCounter.cs中
...
public class CuttingCounter : BaseCounter
{// [SerializeField] private KitchenObjectSO cutKitchenObjectSO;[SerializeField] private CuttingRecipeSO[] cuttingRecipeSOArray;...public override void InteractAlternate(Player player){if (HasKitchenObject()){// 柜子上有物品,开始切菜KitchenObjectSO outputKitchenObjectSO = GetOutputForInput(GetKitchenObject().GetKitchenObjectSO());GetKitchenObject().DetroySelf();KitchenObject.SpawnKitchenObject(outputKitchenObjectSO, this);}}private KitchenObjectSO GetOutputForInput(KitchenObjectSO inputKitchenObjectSO){foreach (CuttingRecipeSO cuttingRecipeSO in cuttingRecipeSOArray){if (cuttingRecipeSO.input == inputKitchenObjectSO){return cuttingRecipeSO.output;}}return null;}
}
设置CuttingCounter组件对应变量
运行游戏,可以看到当按下F键时,我们可以将对应物品切片了
然而,并不是所有的物品都可以被切片,如果遇到不能被切片的物品或者已经被切过的切片我们按下F键就会报错,我们在CuttingCounter.cs中添加一个HasRecipeInput()方法来检查对应物品是否有切片形式,在Interact()和InteractAlternate()中角色放置物品时进行检查
// CuttingCounter.cs
using UnityEngine;public class CuttingCounter : BaseCounter
{[SerializeField] private CuttingRecipeSO[] cuttingRecipeSOArray;public override void Interact(Player player){if (!HasKitchenObject()){// 柜子上没有物品if (player.HasKitchenObject()){// 角色有物品,放置物品if (HasRecipeWithInput(player.GetKitchenObject().GetKitchenObjectSO())){// 角色拿着的物品可以被切片player.GetKitchenObject().SetKitchenObjectParent(this);}} else{// 角色没有物品}} else{// 柜子上有物品...}}public override void InteractAlternate(Player player){// if (HasKitchenObject())if (HasKitchenObject() && HasRecipeWithInput(GetKitchenObject().GetKitchenObjectSO())){// 柜子上有物品,开始切菜...}}private bool HasRecipeWithInput(KitchenObjectSO inputKitchenObjectSO){foreach (CuttingRecipeSO cuttingRecipeSO in cuttingRecipeSOArray){if (cuttingRecipeSO.input == inputKitchenObjectSO){return true;}}return false;}...
}
目前为止,我们就不能在切菜台上放置不能切的物品,并且不能切已经切过的物品了
目前为止的工程文件
10.4 使用Canvas绘制切菜进度条
现在我们的菜一下就切好了,我们希望不同的食材需要按不同次F键才能被切成片,在CuttingRecipeSO.cs中,增加一个变量cuttingProgressMax保存这种食材应该切的次数
// CuttingRecipeSO.cs中
using UnityEngine;[CreateAssetMenu()]
public class CuttingRecipeSO : ScriptableObject
{public KitchenObjectSO input;public KitchenObjectSO output;public int cuttingProgressMax;
}
在CuttingCounter.cs中,我们用cuttingProgress保存切菜的按键数量,该数量在每次在Interact()方法被调用时重置为0,在每次调用InteractAlternate()方法时+1,由于我们需要频繁获取每样物品的对应的ScriptObject,这里将GetCuttingRecipeSOWithInput()这个方法抽象了出来
// CuttingCounter.cs中
using UnityEngine;public class CuttingCounter : BaseCounter
{[SerializeField] private CuttingRecipeSO[] cuttingRecipeSOArray;private int cuttingProgress;public override void Interact(Player player){if (!HasKitchenObject()){// 柜子上没有物品if (player.HasKitchenObject()){// 角色有物品,放置物品if (HasRecipeWithInput(player.GetKitchenObject().GetKitchenObjectSO())){// 角色拿着的物品可以被切片...cuttingProgress = 0;...}} else{...}} else{...}}public override void InteractAlternate(Player player){if (HasKitchenObject() && HasRecipeWithInput(GetKitchenObject().GetKitchenObjectSO())){// 柜子上有物品,开始切菜cuttingProgress++;if (cuttingProgress >= GetCuttingRecipeSOWithInput(GetKitchenObject().GetKitchenObjectSO()).cuttingProgressMax){KitchenObjectSO cutKitchenObjectSO = GetOutputForInput(GetKitchenObject().GetKitchenObjectSO());GetKitchenObject().DetroySelf();KitchenObject.SpawnKitchenObject(cutKitchenObjectSO, this);}}}private bool HasRecipeWithInput(KitchenObjectSO inputKitchenObjectSO){CuttingRecipeSO cuttingRecipeSO = GetCuttingRecipeSOWithInput(inputKitchenObjectSO);return cuttingRecipeSO != null;}private KitchenObjectSO GetOutputForInput(KitchenObjectSO inputKitchenObjectSO){CuttingRecipeSO cuttingRecipeSO = GetCuttingRecipeSOWithInput(inputKitchenObjectSO);if (cuttingRecipeSO != null){return cuttingRecipeSO.output;} else{return null;}}private CuttingRecipeSO GetCuttingRecipeSOWithInput(KitchenObjectSO inputKitchenObjectSO){foreach (CuttingRecipeSO cuttingRecipeSO in cuttingRecipeSOArray){if (cuttingRecipeSO.input == inputKitchenObjectSO){return cuttingRecipeSO;}}return null;}
}
在编辑器中,为三个CuttingRecipeSO的CuttingProgressMax赋予不同的值,比如这里将番茄与奶酪设置为5,卷心菜设置为3

加上一点控制台输出,现在启动游戏就能看到不同食材需要切不同次数了
接下来来使用World Canvas将切菜的进度用进度条绘制出来
进入CuttingCounter.prefab的编辑界面,Hierachy窗口右键->UI->Canvas创建一个Canvas对象,重命名为ProgressBarUI,将Canvas组件下的Render Mode改为World Space,然后调整位置到柜台上方并将长宽设置为0用于定位;在ProgressBarUI下新建Cavans,重命名为Bar,在Bar中调整大小、设置Image组件中的Color、Source Image、Fill Method,滑动调整Fill Amount的值即可看到场景中进度条的变化;复制Bar,重命名为Background,放在Bar上方以确保渲染顺序正确,添加Outline组件并设置Effect Color的Alpha值为0,调整Effect Distance到合适值,将Image组件中的Color改为深灰色。

新建完Canvas,我们需要一个写一个脚本来根据切菜的进度来控制进度条。在Scripts文件夹下新建ProgressBarUI.cs,挂载到Prefab中的ProgressBarUI上,在CuttingCounter.cs中添加EventHandler委托,在每一次切菜时触发事件并传递归一化后的进度值,在ProgressBarUI.cs中写用这个进度值控制fillAmount值的逻辑与进度条隐藏显示的逻辑
// CuttingCounter.cs中
...
public class CuttingCounter : BaseCounter
{public event EventHandler<OnProgressChangedEventArgs> OnProgressChanged;public class OnProgressChangedEventArgs : EventArgs{public float progressNormalized;}...public override void Interact(Player player){if (!HasKitchenObject()){// 柜子上没有物品if (player.HasKitchenObject()){// 角色有物品,放置物品if (HasRecipeWithInput(player.GetKitchenObject().GetKitchenObjectSO())){// 角色拿着的物品可以被切片...CuttingRecipeSO cuttingRecipeSO = GetCuttingRecipeSOWithInput(GetKitchenObject().GetKitchenObjectSO());OnProgressChanged?.Invoke(this, new OnProgressChangedEventArgs{progressNormalized = (float)cuttingProgress / cuttingRecipeSO.cuttingProgressMax});}} else{...}} else{...}}public override void InteractAlternate(Player player){if (HasKitchenObject() && HasRecipeWithInput(GetKitchenObject().GetKitchenObjectSO())){// 柜子上有物品,开始切菜...OnProgressChanged?.Invoke(this, new OnProgressChangedEventArgs{CuttingRecipeSO cuttingRecipeSO = GetCuttingRecipeSOWithInput(GetKitchenObject().GetKitchenObjectSO());progressNormalized = (float)cuttingProgress / cuttingRecipeSO.cuttingProgressMax});...}}...
}
// ProgressBarUI.cs中
using UnityEngine;
using UnityEngine.UI;public class ProgressBarUI : MonoBehaviour
{[SerializeField] private CuttingCounter cuttingCounter;[SerializeField] private Image barImage;private void Start(){cuttingCounter.OnProgressChanged += CuttingCounter_OnProgressChanged;barImage.fillAmount = 0;Hide();}private void CuttingCounter_OnProgressChanged(object sender, CuttingCounter.OnProgressChangedEventArgs e){barImage.fillAmount = e.progressNormalized;if (e.progressNormalized == 0f || e.progressNormalized == 1){Hide();} else{Show();}}private void Show(){gameObject.SetActive(true);}private void Hide(){gameObject.SetActive(false);}
}
目前为止运行游戏就可以看到带有进度条的切菜台了
10.5 切菜台的动画
目前为止运行游戏我们已经能够在将物品放到切菜台上按下F键时看到进度条了,另外素材中还有一个切菜的动画,其中CuttingCouterCut为刀切菜的动画,CuttingCounterIdle为静止状态
打开Animations/CuttingCounter.controller,在Animator面板可以看到,动画由AnyState通过一个Trigger进入CuttingCounterCut状态,然后执行完该动画后就会再次回到Idle状态
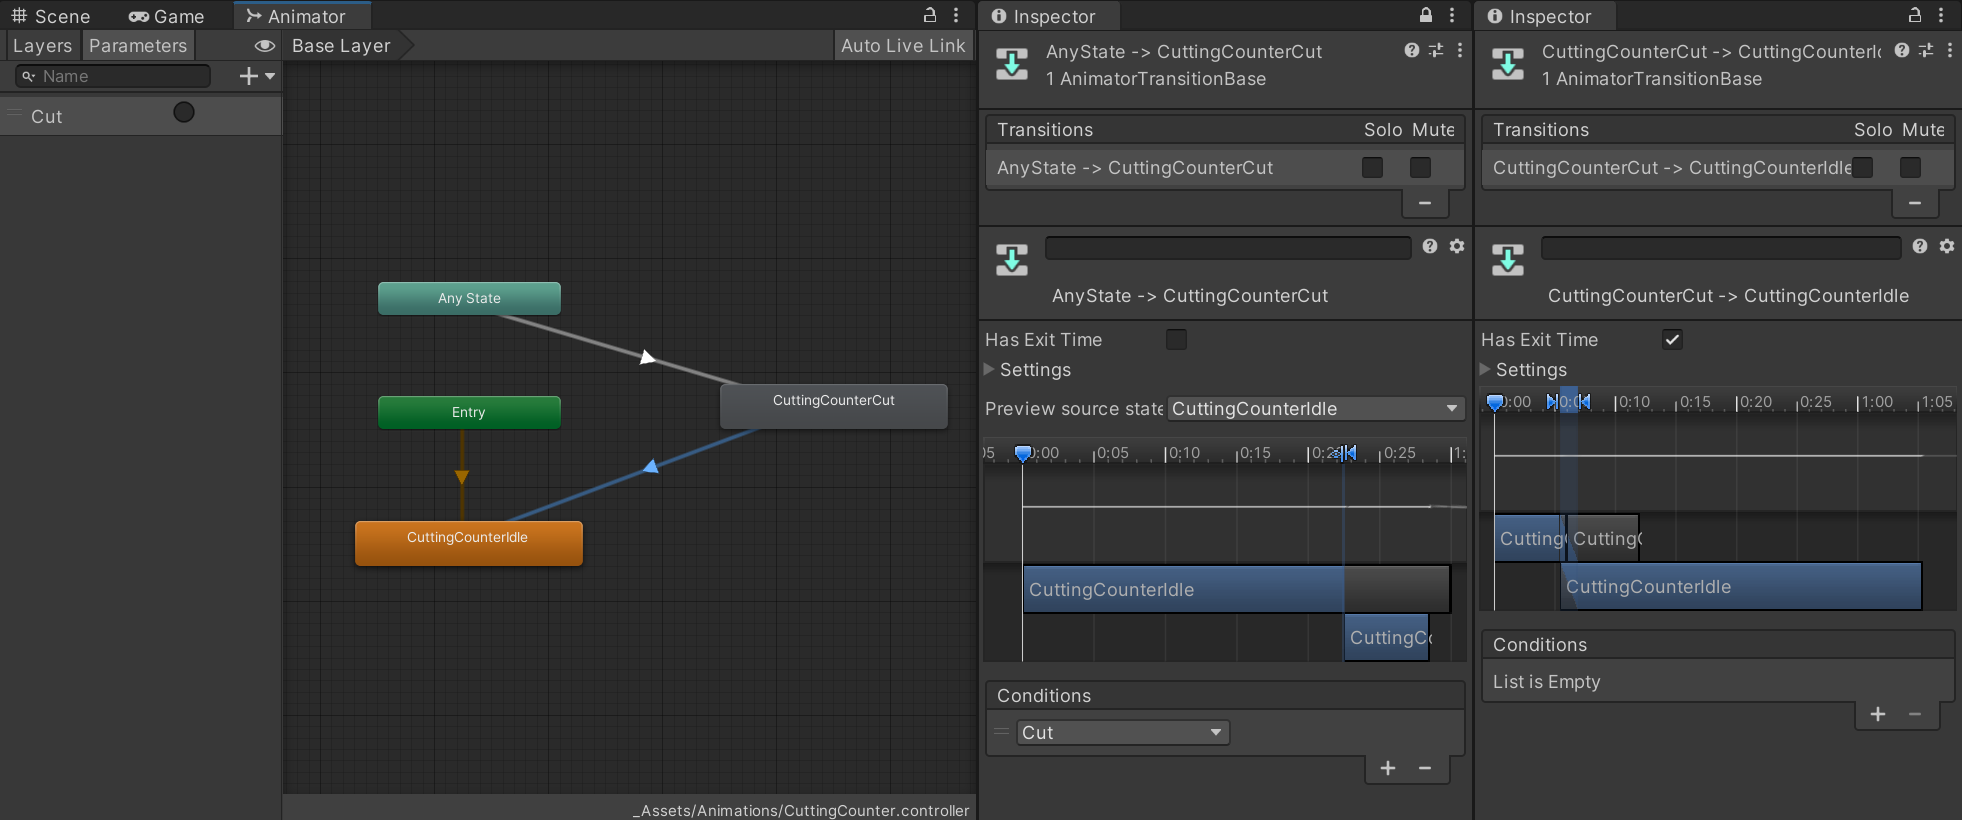
在Scripts文件夹新建CuttingCounterVisual.cs,在CuttingCounter.cs中添加EventHandler委托,该委托在开始切菜时触发,委托执行的函数CuttingCounter_OnCut()写在CuttingCounterVisual.cs中,该函数将触发控制动画的Trigger
// CuttingCounter.cs
...
public class CuttingCounter : BaseCounter
{...public event EventHandler OnCut;...   public override void InteractAlternate(Player player){if (HasKitchenObject() && HasRecipeWithInput(GetKitchenObject().GetKitchenObjectSO())){// 柜子上有物品,开始切菜...OnCut?.Invoke(this, EventArgs.Empty);...}}...
}
// CuttingCounterVisual.cs中
using System;
using UnityEngine;public class CuttingCounterVisual : MonoBehaviour
{private const string CUT = "Cut";[SerializeField] private CuttingCounter cuttingCounter;private Animator animator;private void Awake(){animator = GetComponent<Animator>();}private void Start(){cuttingCounter.OnCut += CuttingCounter_OnCut;}private void CuttingCounter_OnCut(object sender, EventArgs e){animator.SetTrigger(CUT);}
}
运行游戏,就可以看到带有动画和进度条的切菜台了
目前为止的工程文件
10.6 切菜进度条朝向摄像机
目前我们的切菜台的进度条还有一个问题,如果我们180度旋转该柜台,我们的UI也会跟着旋转,我们会从背面看到进度条,进度条会呈现从右向左的状态

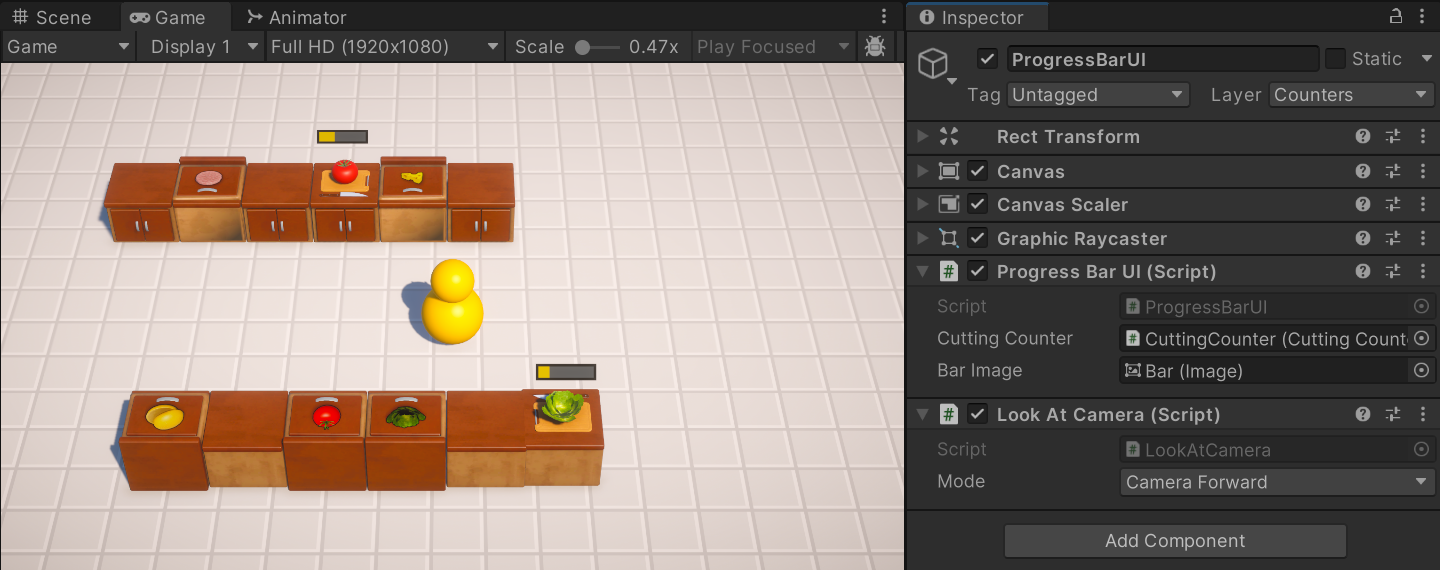
为了解决这个问题我们可以创建一个脚本,让进度条始终面朝摄像机。在Scripts文件夹新建LookAtCamera.cs,添加到CuttingCounter.prefab的ProgressBarUI上,其中LateUpdate()会在所有Update()调用后被调用
// LookAtCamera.cs中
using UnityEngine;public class LookAtCamera : MonoBehaviour
{private void LateUpdate(){transform.LookAt(Camera.main.transform);}
}
运行游戏,发现进度条确实朝向了摄像机,但是有两个问题,一个是我们的Canvas其实默认是背面朝摄像机的,使用LookAt函数会导致进度条变为从右向左的样式,另一个问题是,由于它朝向了摄像机,所以在画面中并不是完全水平的,而是会随着摄像机的左右移动而左右倾斜
上面的效果具体要哪种是个人偏好问题,我们可以使用枚举类型和switch语句设置一些选项供我们在编辑器中选择,其中进度条左右翻转的问题通过看向完全相反的位置修复,左右倾斜的问题通过看向摄像机朝向方向修复
// LookAtCamera.cs中
using UnityEngine;public class LookAtCamera : MonoBehaviour
{private enum Mode{LookAt,LookAtInverted,CameraForward,CameraForwardInverted}[SerializeField] private Mode mode;private void LateUpdate(){switch (mode){case Mode.LookAt:transform.LookAt(Camera.main.transform);break;case Mode.LookAtInverted:Vector3 dirFromCamera = transform.position - Camera.main.transform.position;transform.LookAt(transform.position + dirFromCamera);break;case Mode.CameraForward:transform.forward = Camera.main.transform.forward;break;case Mode.CameraForwardInverted:transform.forward = -Camera.main.transform.forward;break;}}
}
这里选择CameraForward模式来得到从左到右的、水平的进度条
目前为止的工程文件
11 创建垃圾箱 Trash Counter
垃圾箱的逻辑很简单,只需要按下交互按键时销毁角色手上的物品即可
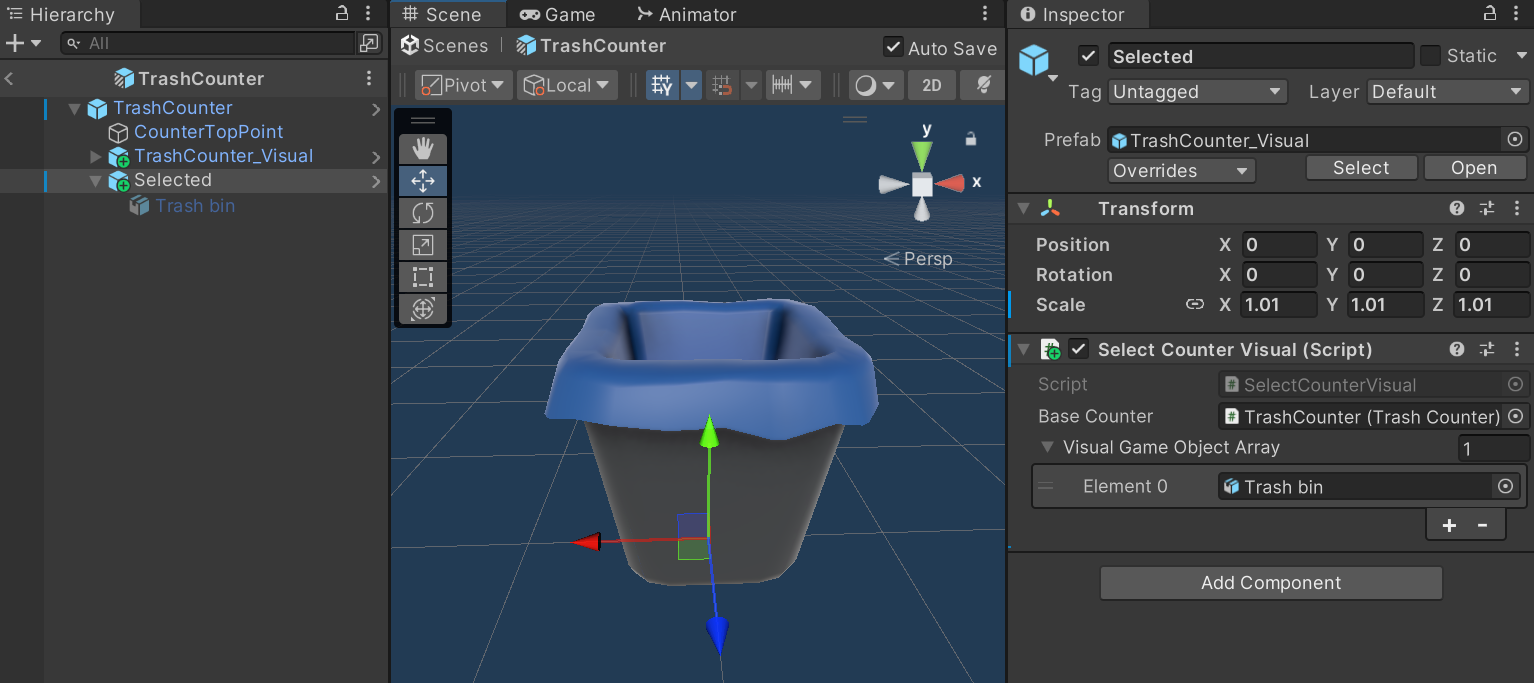
右键_BaseCounter.prefab->Create->Prefab Variant创建一个新的prefab,重命名为TrashCounter.prefab,从_Assets/PrefabsVisuals/CounterVisuals找到TrashCounter_Visual,拖动到TrashCounter.prefab下,复制一个重命名为Selected,像之前一样给Selected加上SelectedCounterVisual.cs组件,将其中的模型材质换为CounterSelected,将Selected的缩放改为1.01
在Scripts创建TrashCounter.cs,同样要继承自BaseCounter基类,当按下交互键时检查如果角色手上有物品则销毁
// CuttingCounter.cs中
public class TrashCounter : BaseCounter
{public override void Interact(Player player){if (player.HasKitchenObject()){player.GetKitchenObject().DetroySelf();}}
}
顺便可以把Scripts文件夹下的文件整理一下,创建Counters文件夹和ScriptableObjets文件夹,将相应的文件分类放好
在TrashCounter上添加TrashCounter.cs组件,将TrashCounter拖动到Selected的组件中的BaseCounter项上,开始游戏,就可以看到实现了垃圾箱的效果
目前为止的工程文件
12 创建炉灶台 Stove Counter
12.1 继承自柜台基类创建StoveCounter与简单的计时器
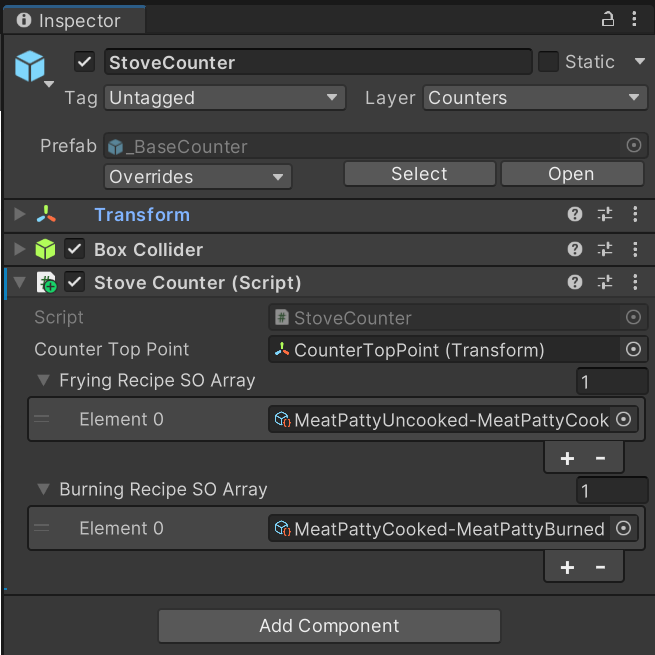
与上面创建其他Counter相同,从_BaseCounter.prefab创建PrefabVariant、复制一个Selected,改缩放,将CounterTopPoint移动到炉灶台上锅的中心处,在Scripts文件夹下新建StoveCounter.cs继承自BaseCounter,挂载好对应脚本
我们需要将要经过炉灶台的生的食材变成熟的,这个转换关系也可以用Scriptable Object来存储。在Scripts文件夹下新建FryingRecipeSO.cs
// FryingRecipeSO.cs
using UnityEngine;[CreateAssetMenu()]
public class FryingRecipeSO : ScriptableObject
{public KitchenObjectSO input;public KitchenObjectSO output;public float fryingTimerMax;
}
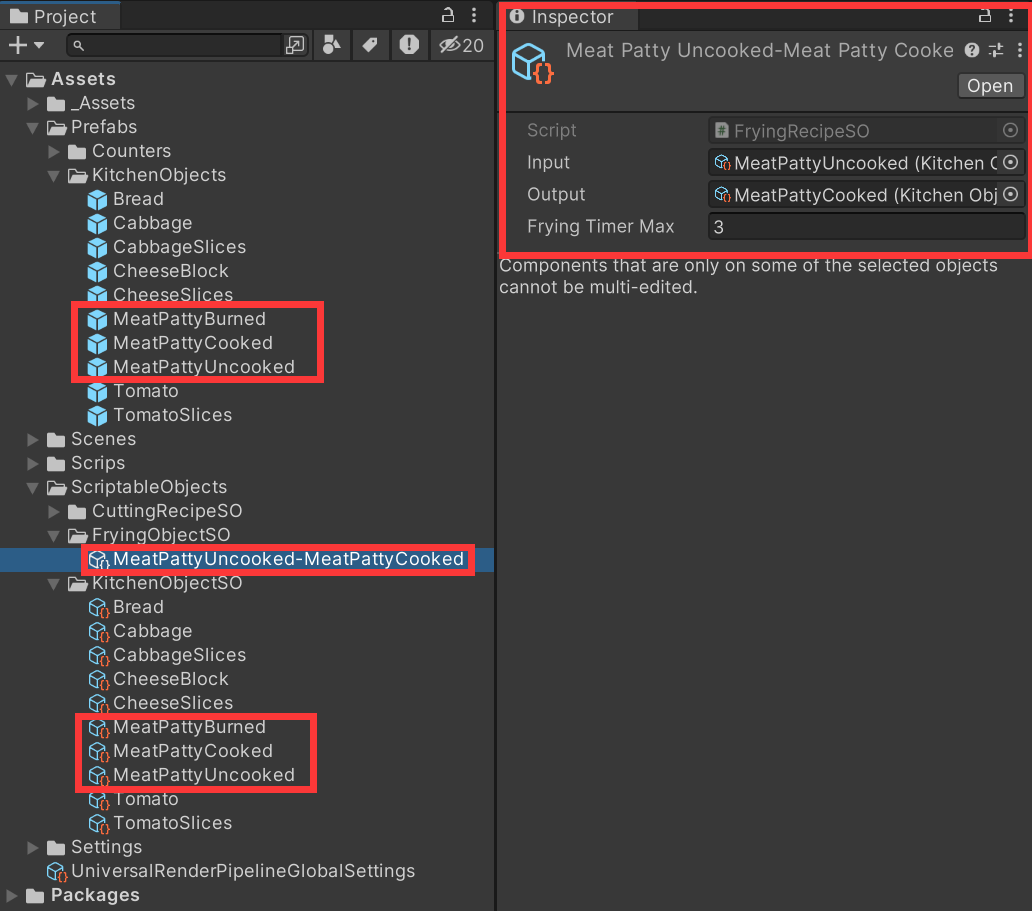
在Scriptbale Object文件夹下新建FryingObjectSO文件夹,在这个文件夹下右键->Create->Frying Recipe SO,新建MeatPattyUncooked-MeatPattyCooked.asset,将MeatPattyCooked和MeatPattyBurned的Prefab和KitchenObjectSO都创建好,将所有要设置的参数都设置好
在StoveCounter.cs中,我们仿照CuttingCouter.cs写出Interact()、HasRecipeWithInput()、GetOutputForInput()、GetFryingRecipeSOWithInput()几个函数,然后声明一个fryingTimer,在Update()中随时间增加,一旦到达了设定的值就会销毁原物品生成被煎好的版本(这里计时器也可以使用协程写,但是作者更喜欢直接声明变量)
// StoveCounter.cs中
using UnityEngine;public class StoveCounter : BaseCounter
{[SerializeField] private FryingRecipeSO[] fryingRecipeSOArray;private float fryingTimer;private FryingRecipeSO fryingRecipeSO;private void Update(){if (HasKitchenObject()){fryingTimer += Time.deltaTime;if (fryingTimer > fryingRecipeSO.fryingTimerMax){// 煎好了fryingTimer = 0f;Debug.Log("Fried!");GetKitchenObject().DetroySelf();KitchenObject.SpawnKitchenObject(fryingRecipeSO.output, this);}Debug.Log(fryingTimer);}}public override void Interact(Player player){if (!HasKitchenObject()){// 柜子上没有物品if (player.HasKitchenObject()){// 角色有物品,放置物品if (HasRecipeWithInput(player.GetKitchenObject().GetKitchenObjectSO())){// 角色拿着的物品可以被煎player.GetKitchenObject().SetKitchenObjectParent(this);fryingRecipeSO = GetFryingRecipeSOWithInput(GetKitchenObject().GetKitchenObjectSO());}} else{// 角色没有物品}} else{// 柜子上有物品if (player.HasKitchenObject()){// 角色有物品} else{// 角色没有物品,拾取物品GetKitchenObject().SetKitchenObjectParent(player);}}}private bool HasRecipeWithInput(KitchenObjectSO inputKitchenObjectSO){FryingRecipeSO fryingRecipeSO = GetFryingRecipeSOWithInput(inputKitchenObjectSO);return fryingRecipeSO != null;}private KitchenObjectSO GetOutputForInput(KitchenObjectSO inputKitchenObjectSO){FryingRecipeSO fryingRecipeSO = GetFryingRecipeSOWithInput(inputKitchenObjectSO);if (fryingRecipeSO != null){return fryingRecipeSO.output;} else{return null;}}private FryingRecipeSO GetFryingRecipeSOWithInput(KitchenObjectSO inputKitchenObjectSO){foreach (FryingRecipeSO fryingRecipeSO in fryingRecipeSOArray){if (fryingRecipeSO.input == inputKitchenObjectSO){return fryingRecipeSO;}}return null;}
}
这样运行游戏还有一些bug,比如我们在计时器到了之后便会重新开始计时,等到第二次计时器到了后会生成第二个被煎好的食材,不过我们已经能看到被煎熟的效果,下面会通过一个状态机来实现正确的效果
12.2 使用状态机控制食物状态
为了实现煎糊的效果,我们还需要创建一个ScriptableObject用来保存煎熟的和煎糊的食材间的对应关系,在Scripts/ScriptableObjects中,新建BurningRecipeSO.cs
// BurningRecipeSO.cs中
using UnityEngine;[CreateAssetMenu()]
public class BurningRecipeSO : ScriptableObject
{public KitchenObjectSO input;public KitchenObjectSO output;public float burningTimerMax;
}
在ScriptableObjects下新建BurningRecipeSO文件夹,在该文件夹下新建MeatPattyCooked-MeatPattyBurned.asset,设置对应变量

接下来我们要用状态机来实现食物在一开始被放到炉灶台上时间到了会被煎熟,等再过了一段时间后会被煎糊的效果,使用一个枚举类型的变量State保存各个状态,在Start()中初始化状态为Idle,在Update()中用一个switch语句写下各个状态的行为,在Interact()中写下当角色把食材放到炉灶台上重置计时器与设置状态为Frying、当角色拿取物品设置状态为Idle的逻辑
// StoveCounter.cs中
...
public class StoveCounter : BaseCounter
{public enum State{Idle,Frying,Fried,Burned}[SerializeField] private FryingRecipeSO[] fryingRecipeSOArray;[SerializeField] private BurningRecipeSO[] burningRecipeSOArray;private State state;private float fryingTimer;private FryingRecipeSO fryingRecipeSO;private float burningTimer;private BurningRecipeSO burningRecipeSO;private void Start(){state = State.Idle;}private void Update(){if (HasKitchenObject()){switch (state){case State.Idle:break;case State.Frying:fryingTimer += Time.deltaTime;if (fryingTimer > fryingRecipeSO.fryingTimerMax){// 煎好了fryingTimer = 0f;GetKitchenObject().DetroySelf();KitchenObject.SpawnKitchenObject(fryingRecipeSO.output, this);Debug.Log("Object fried!");state = State.Fried;burningTimer = 0f;burningRecipeSO = GetBurningRecipeSOWithInput(GetKitchenObject().GetKitchenObjectSO());}break;case State.Fried:burningTimer += Time.deltaTime;if (burningTimer > burningRecipeSO.burningTimerMax){// 煎好了fryingTimer = 0f;GetKitchenObject().DetroySelf();KitchenObject.SpawnKitchenObject(burningRecipeSO.output, this);Debug.Log("Object burned!");state = State.Burned;}break;case State.Burned:break;}Debug.Log(state);}}public override void Interact(Player player){if (!HasKitchenObject()){// 柜子上没有物品if (player.HasKitchenObject()){// 角色有物品,放置物品if (HasRecipeWithInput(player.GetKitchenObject().GetKitchenObjectSO())){// 角色拿着的物品可以被煎...state = State.Frying;fryingTimer = 0f;}} else{// 角色没有物品}} else{// 柜子上有物品if (player.HasKitchenObject()){// 角色有物品} else{// 角色没有物品,拾取物品... state = State.Idle;}}}...private BurningRecipeSO GetBurningRecipeSOWithInput(KitchenObjectSO inputKitchenObjectSO){foreach (BurningRecipeSO burningRecipeSO in burningRecipeSOArray){if (burningRecipeSO.input == inputKitchenObjectSO){return burningRecipeSO;}}return null;}
}
挂载好相应的组件并设置变量
运行游戏,就能看到将肉饼放到炉灶台上由生变熟变糊的过程
12.3 简单的特效
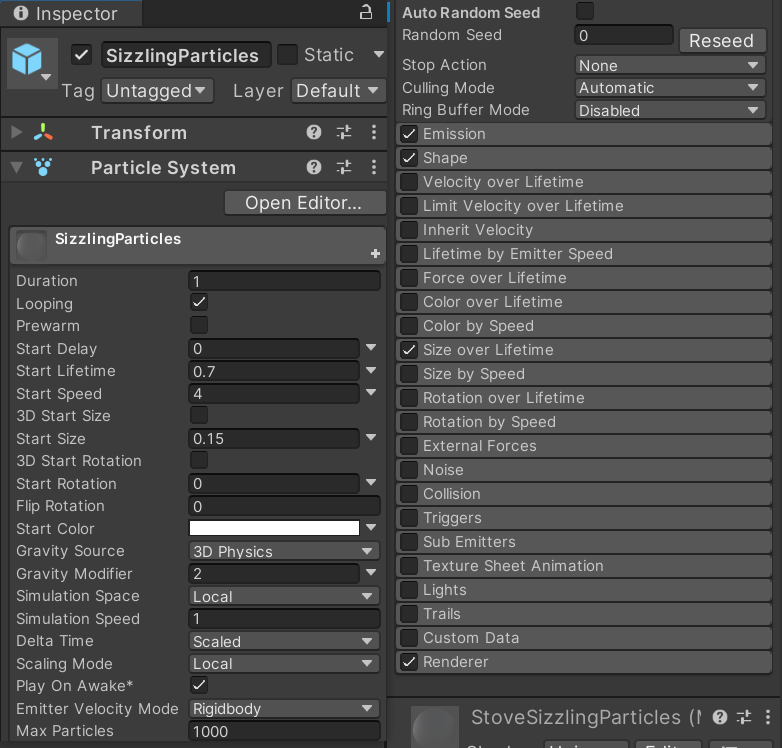
在所给的StoveCounter_Visual素材中有两个简单的效果,一个是SizzlingParticles像火花的粒子效果,一个是StoveOnVisual红色的自发光面片,这两个加上之后就有一种烹饪的感觉,我们希望在Frying和Fried状态出现这个效果
粒子效果主要调整了Gravity Source、Size over Lifetime的曲线让粒子发射出来逐渐受力落下变小
在Scripts/Counters文件夹新建StoveCounterVisual.cs,在StoveCounter.cs中添加EventHandler委托,在每一处状态改变的代码后触发该委托并传递当前状态作为参数,在StoveCounterVisual.cs中写在Frying和Fried状态才会出现上面两个视觉效果的逻辑
// StoveCounter.cs中
...
state = State.Fried;
OnStateChanged?.Invoke(this, new OnStateChangedEventArgs
{state = state
});
...
state = State.Burned;
OnStateChanged?.Invoke(this, new OnStateChangedEventArgs
{state = state
});
...
state = State.Frying;
OnStateChanged?.Invoke(this, new OnStateChangedEventArgs
{state = state
});
...
state = State.Idle;
OnStateChanged?.Invoke(this, new OnStateChangedEventArgs
{state = state
});
...
// StoveCounterVisual.cs中
using UnityEngine;public class StoveCounterVisual : MonoBehaviour
{[SerializeField] private StoveCounter stoveCounter;[SerializeField] private GameObject stoveGameObject;[SerializeField] private GameObject particlesGameObject;private void Start(){stoveCounter.OnStateChanged += StoveCounter_OnStateChanged;}private void StoveCounter_OnStateChanged(object sender, StoveCounter.OnStateChangedEventArgs e){bool showVisual = e.state == StoveCounter.State.Frying || e.state == StoveCounter.State.Fried;stoveGameObject.SetActive(showVisual);particlesGameObject.SetActive(showVisual);}
}
将StoveCounterVisual.cs挂载到StoveCounter_Visual上,设置好变量,运行游戏,即可看到煎肉的特效
12.4 使用接口重构进度条组件用在炉灶台上
我们在切菜台上使用的进度条组件ProgressBarUI.cs只接受CuttingCounter类的实例,但是我们想要实现一个更通用的进度条组件,之后其他需要表示进度的物品都可以用上,所以我们需要修改一下ProgressBarUI.cs,使它接受一个实现了IHasProgress接口的类的实例
将CuttingCounter.prefab下的ProgressBarUI对象拖动到到Prefabs文件夹,在Scripts文件夹新建IHasProgress.cs,在这个脚本中我们定义一个接口,这个接口拥有一个可以传递已经归一化了的进度的EventHandler委托
// IHasProgress.cs中
using System;public interface IHasProgress
{public event EventHandler<OnProgressChangedEventArgs> OnProgressChanged;public class OnProgressChangedEventArgs : EventArgs{public float progressNormalized;}
}
在ProgressBarUI.cs中,我们将原来使用CuttingCounter类的实例的方法与其定义的委托的地方替换为实现了IHasProgress接口的类的实例的方法与其定义的委托,但是Unity并不支持我们在编辑器面板显示Interface,所以我们先声明了一个GameObject对象,在Start()中再确定实现了该接口的对象
// ProgressBarUI.cs中
...
public class ProgressBarUI : MonoBehaviour
{// [SerializeField] private CuttingCounter cuttingCounter;[SerializeField] private GameObject hasProgressGameObject;...private IHasProgress hasProgress;private void Start(){hasProgress = hasProgressGameObject.GetComponent<IHasProgress>();if (hasProgress == null){Debug.LogError("Game Object " + hasProgressGameObject + " does not have a component that implements IHasProgress!");}// cuttingCounter.OnProgressChanged += CuttingCounter_OnProgressChanged;hasProgress.OnProgressChanged += HasProgress_OnProgressChanged;...}// private void CuttingCounter_OnProgressChanged(object sender, CuttingCounter.OnProgressChangedEventArgs e)private void HasProgress_OnProgressChanged(object sender, IHasProgress.OnProgressChangedEventArgs e){...}...
}
我们先来修复CuttingCounter.cs,我们需要让该类继承自IHasProgress接口,然后改动所有使用OnProgressChanged这个委托的地方,注释处是改动前
// CuttingCounter.cs中
...
public class CuttingCounter : BaseCounter, IHasProgress
{
// public event EventHandler<OnProgressChangedEventArgs> OnProgressChanged;
// public class OnProgressChangedEventArgs : EventArgs
// {
//     public float progressNormalized;
// }public event EventHandler<IHasProgress.OnProgressChangedEventArgs> OnProgressChanged;...// OnProgressChanged?.Invoke(this, new OnProgressChangedEventArgsOnProgressChanged?.Invoke(this, new IHasProgress.OnProgressChangedEventArgs{...});...// OnProgressChanged?.Invoke(this, new OnProgressChangedEventArgsOnProgressChanged?.Invoke(this, new IHasProgress.OnProgressChangedEventArgs{...});
}
...
运行游戏,可以正常切菜
然后来处理在StoveCounter上的进度条显示,首先进到StoveCounter,将Prefab文件夹下的ProgressBarUI.prefab拖动到StoveCounter下,设置好组件中相应变量,在StoveCounter.cs中,在Interact()中角色将物品放至炉灶台上时、Frying状态中、Fried状态中触发OnProgressChanged委托设置归一化进度值,在计时器跑完Fried变为Burned状态时和角色中途拿起物品时同样触发OnProgressChanged委托,将归一化进度值设置为0
// StoveCounter.cs中
...
public class StoveCounter : BaseCounter, IHasProgress
{public event EventHandler<IHasProgress.OnProgressChangedEventArgs> OnProgressChanged;...private void Update(){switch (state){if (HasKitchenObject()){case State.Idle:break;case State.Frying:...OnProgressChanged?.Invoke(this, new IHasProgress.OnProgressChangedEventArgs{progressNormalized = fryingTimer / fryingRecipeSO.fryingTimerMax});if (fryingTimer > fryingRecipeSO.fryingTimerMax){// 煎好了...}break;case State.Fried:...OnProgressChanged?.Invoke(this, new IHasProgress.OnProgressChangedEventArgs{progressNormalized = burningTimer / burningRecipeSO.burningTimerMax});if (burningTimer > burningRecipeSO.burningTimerMax){// 煎好了...OnProgressChanged?.Invoke(this, new IHasProgress.OnProgressChangedEventArgs{progressNormalized = 0f});}break;case State.Burned:break;}}}public override void Interact(Player player){if (!HasKitchenObject()){// 柜子上没有物品if (player.HasKitchenObject()){// 角色有物品,放置物品if (HasRecipeWithInput(player.GetKitchenObject().GetKitchenObjectSO())){// 角色拿着的物品可以被煎...OnProgressChanged?.Invoke(this, new IHasProgress.OnProgressChangedEventArgs{progressNormalized = fryingTimer / fryingRecipeSO.fryingTimerMax});}} else{// 角色没有物品}} else{// 柜子上有物品if (player.HasKitchenObject()){// 角色有物品} else{// 角色没有物品,拾取物品...OnProgressChanged?.Invoke(this, new IHasProgress.OnProgressChangedEventArgs {progressNormalized = 0f});}}}
}
运行游戏,可以看到炉灶台的进度条正常运行
目前为止的工程文件
13 创建盘子存放台 Plates Counter
13.1 继承自柜台基类创建PlatesCounter与自动生成盘子
与上面创建其他Counter相同,从_BaseCounter.prefab右键->Create->PrefabVariant、复制一个Selected,改缩放,在Scripts文件夹下新建PlatesCounter.cs继承自BaseCounter,挂载好对应脚本
在ScriptableObjects/KitchenObjectSO下右键->Create->KitchenObjectSO新建Plate.asset,在Prefabs/KitchenObjects文件夹下复制一个prefab改为Plate.prefab并放进去对应模型,将各个中的组件的相应变量填好
我们希望盘子存放台可以每隔几秒生成一个盘子,当存放台上的盘子到达一定数量时不再生成盘子,然而,我们的_BaseCounter在设计之初并没有考虑过一个Counter上放置多个KitchenObject实例的情况,所以,我们并不会真的去生成KitchenObject实例,而是生成盘子的模型KitchenObject_Visual,当角色想要取盘子时我们再调用SpawnKitchenObject()方法去生成KitchenObject实例交给角色
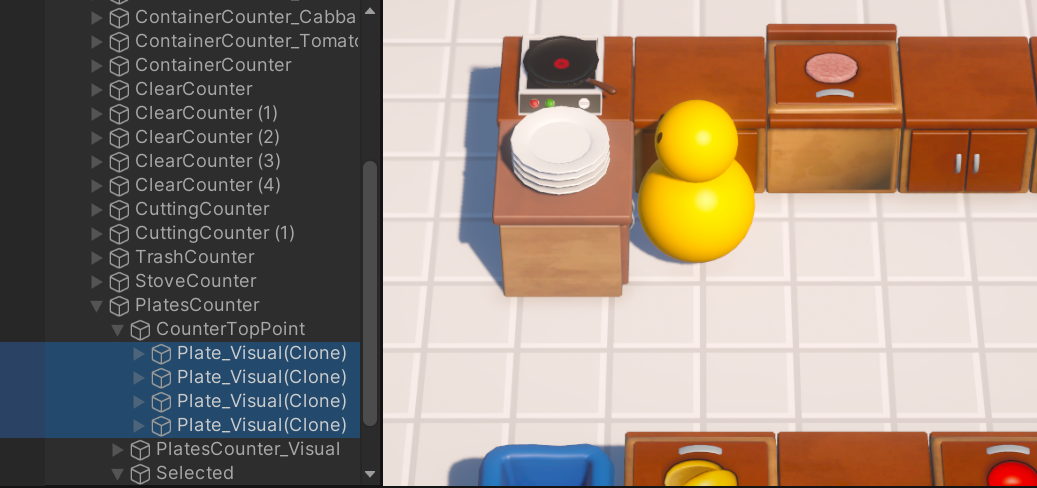
在PlatesCounter.cs中,规定生成盘子所需的时间、最大盘子数,在计时器到时时触发EventHandler委托,在PlatesCounterVisual.cs中我们用一个List保存生成的KitchenObject_Visual,并实现堆在柜子上的效果
// PlatesCounter.cs
using UnityEngine;
using System;public class PlatesCounter : BaseCounter
{public event EventHandler OnPlateSpawned;private float spawnPlateTimer;private float spawnPlateTimerMax = 4f;private int platesSpawnedAmount;private int platesSpawnedAmountMax = 4;private void Update(){spawnPlateTimer += Time.deltaTime;if (spawnPlateTimer > spawnPlateTimerMax){spawnPlateTimer = 0f;if (platesSpawnedAmount < platesSpawnedAmountMax){platesSpawnedAmount++;OnPlateSpawned?.Invoke(this, EventArgs.Empty);}}}
}
// PlatesCounterVisual.cs
using System;
using System.Collections.Generic;
using UnityEngine;public class PlatesCounterVisual : MonoBehaviour
{[SerializeField] private PlatesCounter platesCounter;[SerializeField] private Transform counterTopPoint;[SerializeField] private Transform plateVisualPrefab;private List<GameObject> plateVisualGameObjectsList;private void Awake(){plateVisualGameObjectsList = new List<GameObject>();}private void Start(){platesCounter.OnPlateSpawned += PlatesCounter_OnPlateSpawned;}private void PlatesCounter_OnPlateSpawned(object sender, EventArgs e){Transform plateVisualTransform = Instantiate(plateVisualPrefab, counterTopPoint);float plateOffsetY = 0.1f;plateVisualTransform.localPosition = new Vector3(0f, plateOffsetY * plateVisualGameObjectsList.Count, 0f);plateVisualGameObjectsList.Add(plateVisualTransform.gameObject);}
}
运行游戏,我们就能看到每隔我们设置的4秒,就会出现一个盘子,且最多能达到4个盘子
接下来让角色可以拿起来盘子,我们需要在PlatesCounter.cs中实现一下Interact()接口,当角色拿起盘子符合条件时将盘子Spawn给角色,同时触发EventHandler委托,该委托调用的函数写在PlateCounterVisual.cs中,该函数移除掉存放Plater_Visual的List的最后一个对象
// PlatesCounter.cs
...
public class PlatesCounter : BaseCounter
{...public event EventHandler OnPlateRemoved;...[SerializeField] private KitchenObjectSO plateKitchenObjectSO;...public override void Interact(Player player){if (!player.HasKitchenObject()){// 角色手上没有东西if (platesSpawnedAmount > 0){// 盘子存放台上有盘子platesSpawnedAmount--;KitchenObject.SpawnKitchenObject(plateKitchenObjectSO, player);OnPlateRemoved?.Invoke(this, EventArgs.Empty);}}}
}
// PlateCounterVisual.cs中
...
public class PlatesCounterVisual : MonoBehaviour
{...private void Start(){...platesCounter.OnPlateRemoved += PlatesCounter_OnPlateRemoved;}...private void PlatesCounter_OnPlateRemoved(object sender, EventArgs e){if (plateVisualGameObjectsList.Count > 0){GameObject plateGameObject = plateVisualGameObjectsList[plateVisualGameObjectsList.Count - 1];plateVisualGameObjectsList.Remove(plateGameObject);Destroy(plateGameObject);}}
}
运行游戏,我们就可以拿起盘子了

目前为止的工程文件
13.2 使用盘子装物品
首先我们先在ClearCounter上实现装物品的效果,在之前ClearCounter.cs的Interact()中,当柜子上有物品而角色也有物品时,我们没有写任何逻辑,这里我们可以在角色拿的物品是盘子的时候将桌子上的物品装到盘子里,为了保存盘子里装的东西已经方便实现对应方法,我们在Script文件夹新建PlateKitchenObject.cs,这个类继承自KitchenObject,使用一个List保存装的东西
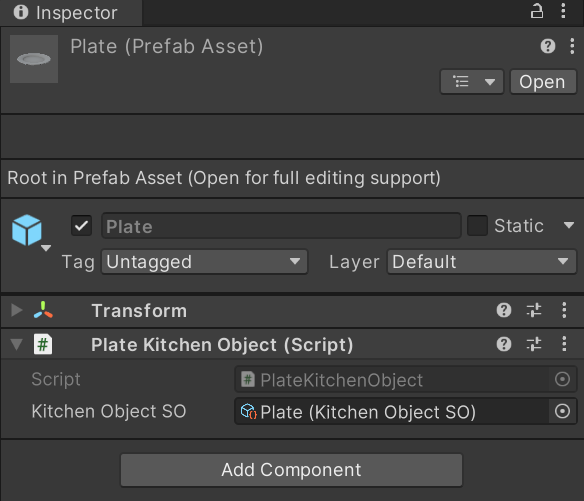
// PlateKitchenObject.cs中
using System.Collections.Generic;public class PlateKitchenObject : KitchenObject
{private List<KitchenObjectSO> kitchenObjectSOList;private void Awake(){kitchenObjectSOList = new List<KitchenObjectSO>();}public void AddIngredient(KitchenObjectSO kitchenObjectSO){kitchenObjectSOList.Add(kitchenObjectSO);}
}
在Plate.prefab上添加PlateKitchenObject组件,移除KitchenObject组件
在ClearCounter.cs中写上在角色拿的物品是盘子的时候将桌子上的物品添加到List中的逻辑
// ClearCounter.cs中
...
public class ClearCounter : BaseCounter
{...public override void Interact(Player player){if (!HasKitchenObject()){// 柜子上没有物品if (player.HasKitchenObject()){// 角色有物品,放置物品...} else{// 角色没有物品}} else{// 柜子上有物品if (player.HasKitchenObject()){// 角色有物品if (player.GetKitchenObject() is PlateKitchenObject){// 角色拿的是盘子PlateKitchenObject plateKitchenObject = player.GetKitchenObject() as PlateKitchenObject;plateKitchenObject.AddIngredient(GetKitchenObject().GetKitchenObjectSO());GetKitchenObject().DetroySelf();}} else{// 角色没有物品,拾取物品...}}}
}
运行游戏,将物品放到空的柜台上,在Inspector面板右上角三个点切换为Debug模式,就能在角色进行交互时将物品添加到我们想要加入的List中了
在最终游戏中,我们的盘子中并不能装一切东西,并且盘子中也不会装两种相同种类的物品,我们通过一个List存放可以被装在盘子的物品,每次装盘时检查该物品是否在List中,并且判断是否盘子中已经有了相同种类的物品
// PlateKitchenObject.cs中
...
public class PlateKitchenObject : KitchenObject
{[SerializeField] private List<KitchenObjectSO> validKitchenObjectSOList;private List<KitchenObjectSO> kitchenObjectSOList;...public bool TryAddIngredient(KitchenObjectSO kitchenObjectSO){if (!validKitchenObjectSOList.Contains(kitchenObjectSO)){// 盘子中不能放这种物品return false;}if (kitchenObjectSOList.Contains(kitchenObjectSO)){// 盘子中已经有了这种物品return false;} else{kitchenObjectSOList.Add(kitchenObjectSO);return true;}}
}
在Plate.prefab上设置可以被装盘的物品列表

为了以后检查一个KitchenObject是否为盘子更加方便,我们在KitchenObject.cs中写一个TryGetPlate()判断是否为盘子,如果是则传回PlateKitchenObject类的版本
// KitchenObject.cs中
...
public class KitchenObject : MonoBehaviour
{...public bool TryGetPlate(out PlateKitchenObject plateKitchenObject){if (this is PlateKitchenObject){plateKitchenObject = this as PlateKitchenObject;return true;} else{plateKitchenObject = null;return false;}}...
}
在ClearCounter.cs中替换相关的实现,在CuttingCounter.cs、StoveCounter.cs中相同位置添加上用盘子装物品的相关代码,由于StoveCounter.cs中有状态设置的代码,所以在写了用盘子装上物品的逻辑后还要设置相关状态
// ClearCounter.cs与CuttingCounter.cs中的相同位置
...
// 柜子上有物品
if (player.HasKitchenObject())
{// 角色有物品// if (player.GetKitchenObject() is PlateKitchenObject)if (player.GetKitchenObject().TryGetPlate(out PlateKitchenObject plateKitchenObject)){// 角色拿的是盘子// PlateKitchenObject plateKitchenObject = player.GetKitchenObject() as PlateKitchenObject;if (plateKitchenObject.TryAddIngredient(GetKitchenObject().GetKitchenObjectSO())){GetKitchenObject().DetroySelf();}}
}
...
// StoveCounter.cs中
...
// 柜子上有物品
if (player.HasKitchenObject())
{// 角色有物品if (player.GetKitchenObject().TryGetPlate(out PlateKitchenObject plateKitchenObject)){// 角色拿的是盘子if (plateKitchenObject.TryAddIngredient(GetKitchenObject().GetKitchenObjectSO())){GetKitchenObject().DetroySelf();state = State.Idle;OnStateChanged?.Invoke(this, new OnStateChangedEventArgs{state = state});OnProgressChanged?.Invoke(this, new IHasProgress.OnProgressChangedEventArgs {progressNormalized = 0f});}}
}
...
启动游戏,在Inspector面板打开Debug模式,就能看到被装到盘子的物品的List了
接下来我们要实现相反的效果,我们希望角色拿着相应的食材来装到盘子了,由于只有在空的柜子上才能放盘子,我们只用在ClearCounter.cs中实现相关逻辑
// ClearCounter.cs中
...
// 柜子上有物品
if (player.HasKitchenObject())
{// 角色有物品if (player.GetKitchenObject().TryGetPlate(out PlateKitchenObject plateKitchenObject)){...} else {// 角色拿的不是盘子,而是别的东西if (GetKitchenObject().TryGetPlate(out plateKitchenObject)){if (plateKitchenObject.TryAddIngredient(player.GetKitchenObject().GetKitchenObjectSO()) ){player.GetKitchenObject().DetroySelf();}}}
}
...
运行游戏,可以将物品向空柜台上的盘子里装东西
目前为止的工程文件
13.3 装盘效果
我们要实现的装盘效果用了比较简单的方式,可以看到在_Assets/PrefabsVisuals下有一个PlateCompleteVisual.prefab的汉堡模型,由六个不同的部分组成,要做成不同搭配的菜只需要让对应物品显示,其余物品隐藏即可
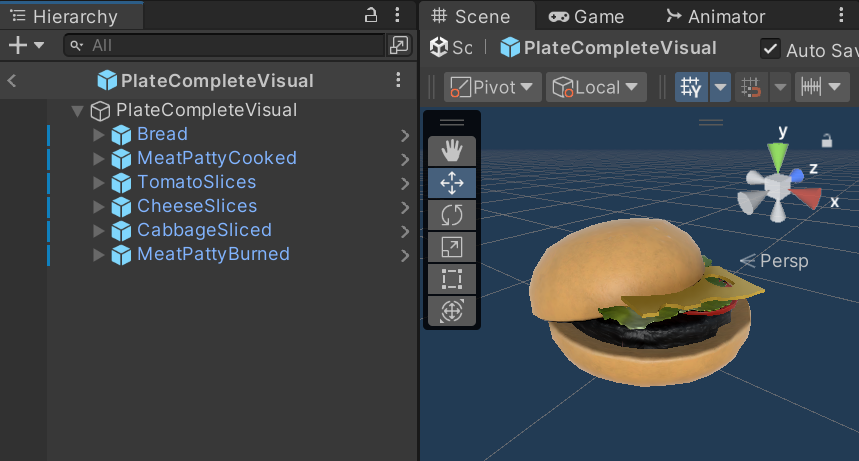
在上一个小节我们已经可以将放进盘子的物品保存到一个List了,只要根据List中有哪些物品去显示和隐藏物品即可,我们可以通过tranform.Find()通过名字来找到对应的物品,但是直接使用string并不是一个很好的方式,因此我们需要建立KitchenObjectSO类的实例与GameObject类的实例之间的对应关系,要找到这个对应关系,我们可以定义一个包含这两个变量的struct,用一个List保存所有的struct的实例,也就是所有的对应关系
在Scripts文件夹新建PlateCompleteVisual.cs,添加到PlateCompleteVisual.prefab上,在PlateKitchenObject.cs中添加一个EventHandler委托,在将物品放置到盘子中时触发该委托并传递,委托调用的函数写在PlateCompleteVisual.cs中,遍历盘子中物体的List,显示和隐藏对应物品
// PlateKitchenObject.cs中
...
public class PlateKitchenObject : KitchenObject
{public event EventHandler<OnIngredientAddedEventArgs> OnIngredientAdded;public class OnIngredientAddedEventArgs : EventArgs{public KitchenObjectSO kitchenObjectSO;}...public bool TryAddIngredient(KitchenObjectSO kitchenObjectSO){if (!validKitchenObjectSOList.Contains(kitchenObjectSO)){// 盘子中不能放这种物品return false;}if (kitchenObjectSOList.Contains(kitchenObjectSO)){// 盘子中已经有了这种物品return false;} else{kitchenObjectSOList.Add(kitchenObjectSO);OnIngredientAdded?.Invoke(this, new OnIngredientAddedEventArgs{kitchenObjectSO = kitchenObjectSO});return true;}}
}
在unity序列化class或一个struct的实例需要在这个struct或类前加上[Serializable]
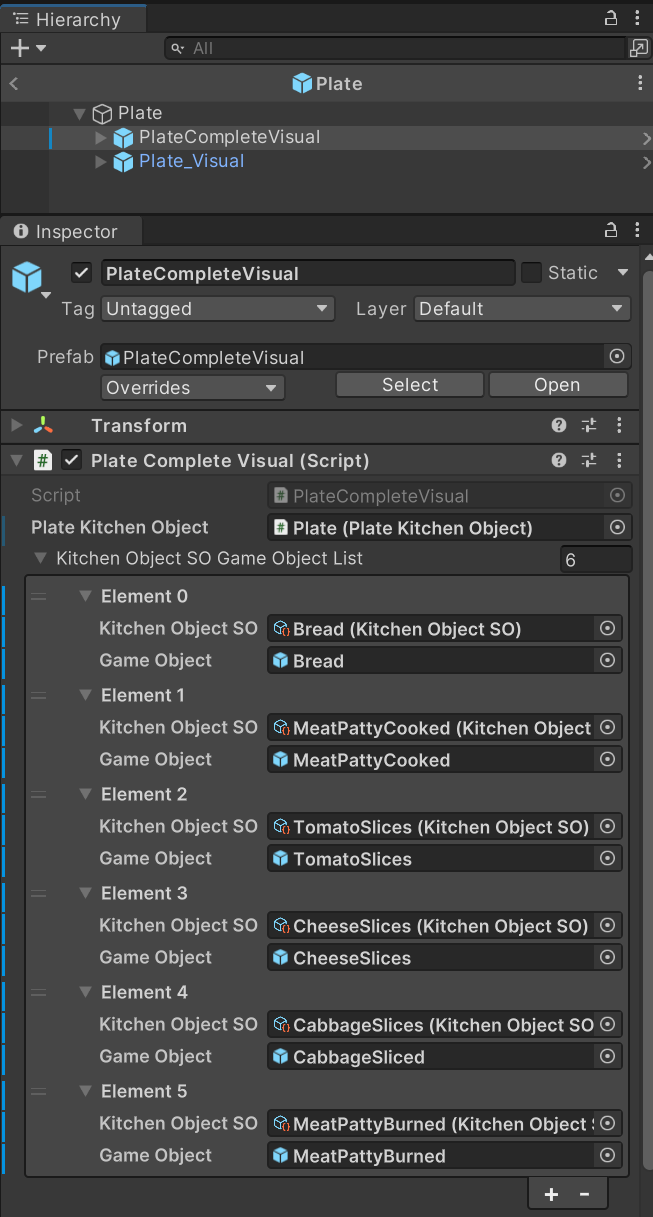
// PlateCompleteVisual.cs中
using System;
using System.Collections.Generic;
using UnityEngine;public class PlateCompleteVisual : MonoBehaviour
{[Serializable]public struct KitchenObjectSO_GameObject{public KitchenObjectSO kitchenObjectSO;public GameObject gameObject;    }[SerializeField] private PlateKitchenObject plateKitchenObject;[SerializeField] private List<KitchenObjectSO_GameObject> kitchenObjectSOGameObjectList;private void Start(){plateKitchenObject.OnIngredientAdded += PlateKitchenObject_OnIngredientAdded;foreach (KitchenObjectSO_GameObject kitchenObjectSOGameObject in kitchenObjectSOGameObjectList){kitchenObjectSOGameObject.gameObject.SetActive(false);}}private void PlateKitchenObject_OnIngredientAdded(object sender, PlateKitchenObject.OnIngredientAddedEventArgs e){foreach (KitchenObjectSO_GameObject kitchenObjectSOGameObject in kitchenObjectSOGameObjectList){if (kitchenObjectSOGameObject.kitchenObjectSO == e.kitchenObjectSO){kitchenObjectSOGameObject.gameObject.SetActive(true);}}}
}
将PlateCompleteVisual.prefab添加到Plate.prefab下,设置好相应的变量
现在运行游戏,就能够正确装盘了
目前为止的工程文件
13.4 显示盘子中物品的UI
接下来我们做一个显示一个盘子中都放了哪些物品的UI
首先在Package Manager中下载2D Sprite

在Plate.prefab中右键->UI->Canvas新建一个Canvas重命名为PlateIconsUI,调整位置大小添加一个GridLayoutGroup组件;在PlateIconsUI下新建空物体重命名为Icon Template,在这个Icon Template下右键->UI->Image,重命名为Background,Source Image设置为下载的包里的Circle素材(记得点开Source Image右上角显示隐藏项);复制一份重命名为Icon,Source Image放一个Bread;我们可以多复制几个Icon Template看看效果
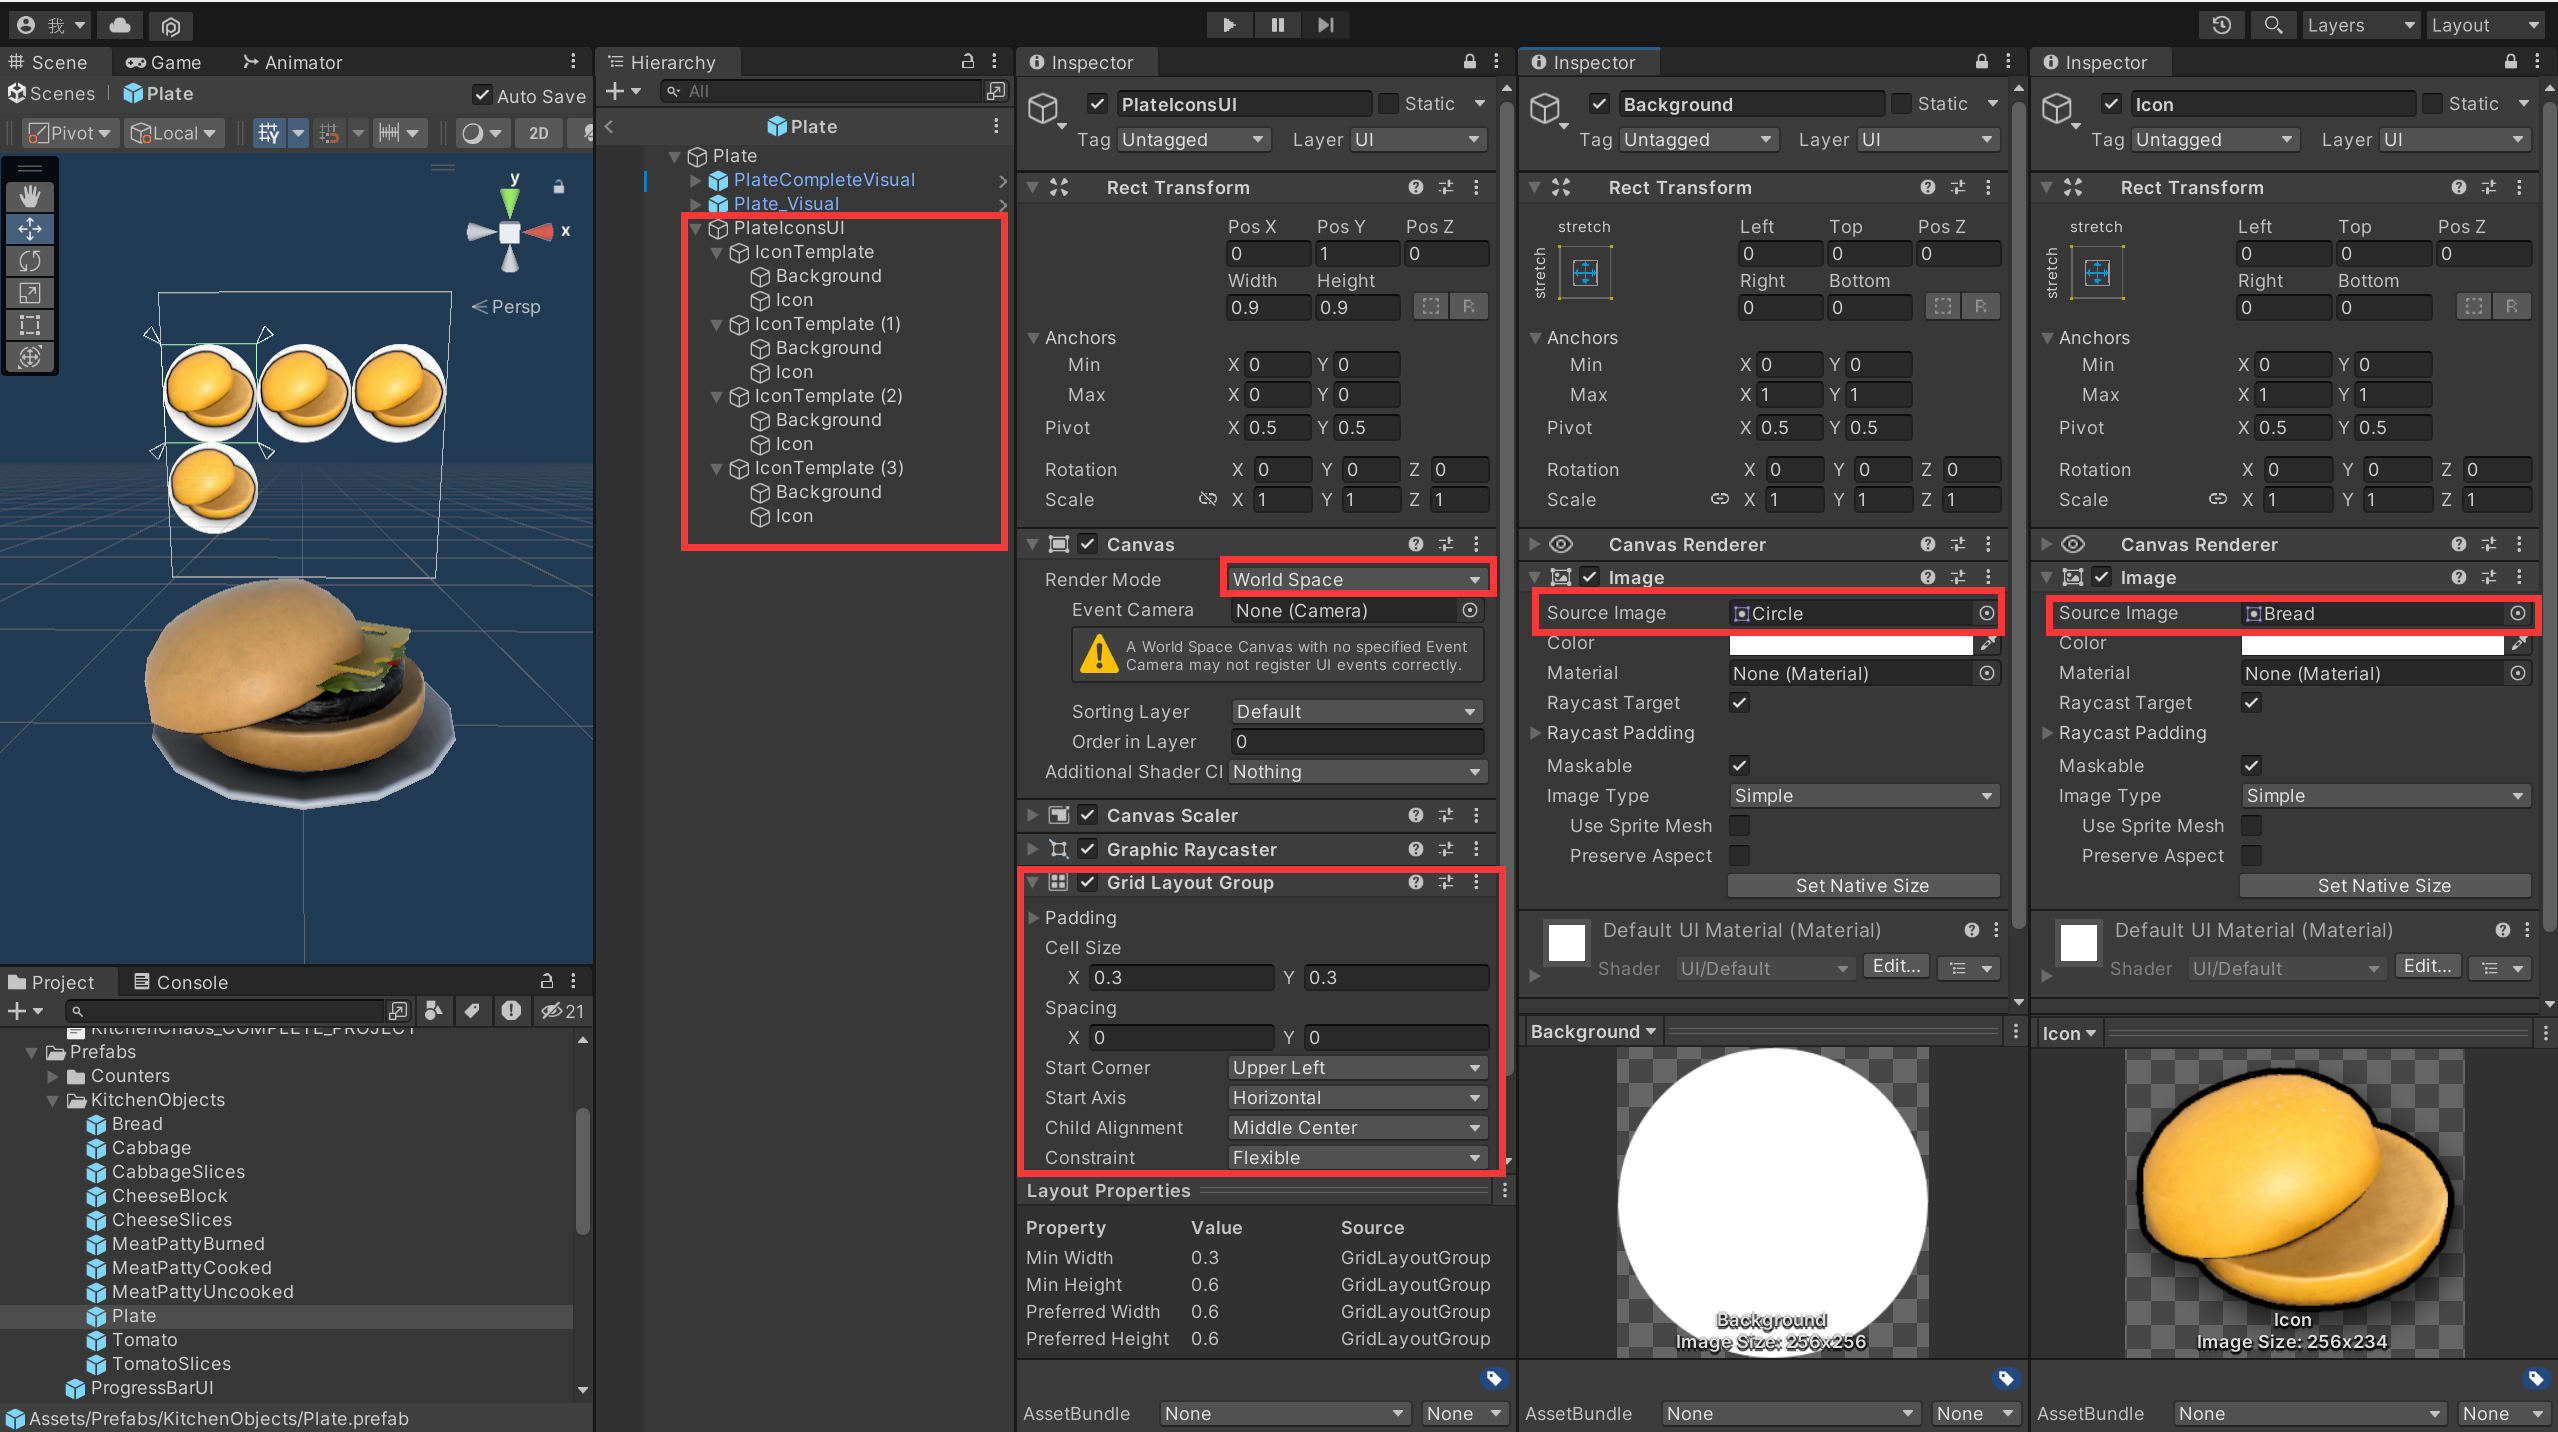
我们可以给不同物品的UI都做成prefab,但是作者认为这样做会有很多prefab,文件会很乱,所以我们接下来写的脚本就挂载到PlateIconsUI对象上然后复制和删除下面的IconTemplate就行了
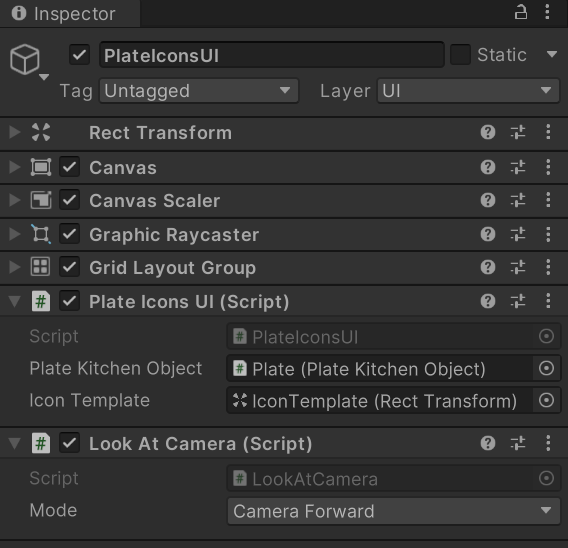
我们要给PlateIconsUI添加一个新的脚本PlateIconsUI.cs,在这个脚本中写生成IconTemplate的方法并在物品放上去时调用,我们希望不同的物品放到盘子时会有不同的Icon,为此我们可以用比较"脏"的方式,生成IconTemplate后Find(“Icon”)找到Icon对象然后改变Image组件的Sprite属性,但是代码里最好不要用string来找一个对象,为此我们又在IconTemplate上添加了一个新的脚本PlateIconsSingleUI.cs用来获取Icon对象更改Sprite属性
// PlateIconsSingleUI.cs中
using UnityEngine;
using UnityEngine.UI;public class PlateIconsSingleUI : MonoBehaviour
{[SerializeField] private Image image;public void SetKitchenObjectSO(KitchenObjectSO kitchenObjectSO){image.sprite = kitchenObjectSO.sprite;}
}
在上面的教程中,我们已经在PlateKitchenObjectSO.cs中添加过了一个叫做OnIngredientAdded的EventHandler委托,该委托在物品放入盘子时触发,并且当前放入盘中的物品的ScriptableObject存在了一个List中,我们需要在PlateKitchenObjectSO.cs添加一个方法获取这个List,然后在PlateIconsUI.cs中为这个委托添加调用的函数和一些刷新UI的逻辑即可
// PlateKitchenObjectSO.cs中
...
public class PlateKitchenObject : KitchenObject
{...public List<KitchenObjectSO> GetKitchenObjectSOList(){return kitchenObjectSOList;}
}
// PlateIconsUI.cs中
using UnityEngine;public class PlateIconsUI : MonoBehaviour
{[SerializeField] private PlateKitchenObject plateKitchenObject;[SerializeField] private Transform iconTemplate;private void Awake(){iconTemplate.gameObject.SetActive(false);}private void Start(){plateKitchenObject.OnIngredientAdded += PlateKitchenObject_OnIngredientAdded;}private void PlateKitchenObject_OnIngredientAdded(object sender, PlateKitchenObject.OnIngredientAddedEventArgs e){UpdateVisual();}private void UpdateVisual(){foreach (Transform child in transform){if (child == iconTemplate) continue;Destroy(child.gameObject);}foreach (KitchenObjectSO kitchenObjectSO in plateKitchenObject.GetKitchenObjectSOList()){Transform iconTransform = Instantiate(iconTemplate, transform);iconTransform.gameObject.SetActive(true);iconTransform.GetComponent<PlateIconsSingleUI>().SetKitchenObjectSO(kitchenObjectSO);}}
}
这个UI也用到了Canvas,所以同样也有根据视角不同会看到相反方向的UI的情况,不过还好我们在做进度条UI时已经写了一个LookAtCamera.cs组件解决这个问题,只需要把这个组件放到PlateIconsUI上即可
运行游戏,即可看到盘子的UI正常运行
目前为止的工程文件
14 创建送餐台 Delivery Counter
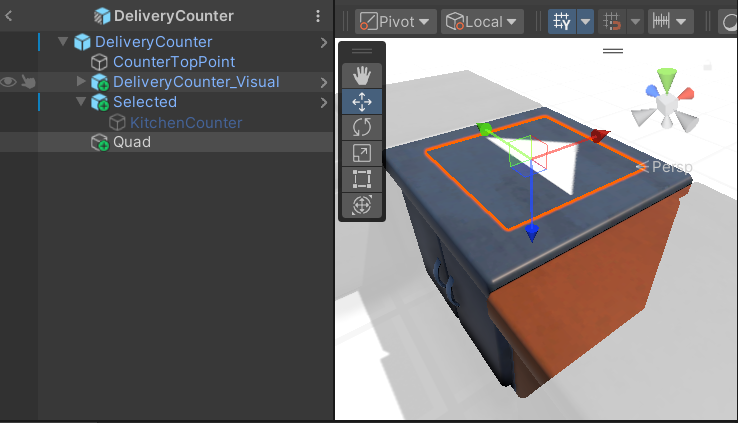
与上面创建其他Counter相同,从_BaseCounter.prefab右键->Create->PrefabVariant、复制一个Selected,改缩放,在Scripts文件夹下新建DeliveryCounter.cs继承自BaseCounter,挂载好对应脚本,目前DeliveryCounter只需要销毁玩家装在盘子里送过来的菜即可
// DeliveryCounter.cs中
public class DeliveryCounter : BaseCounter
{public override void Interact(Player player){if (player.HasKitchenObject()){if (player.GetKitchenObject().TryGetPlate( out PlateKitchenObject plateKitchenObject)){player.GetKitchenObject().DetroySelf();}}}
}
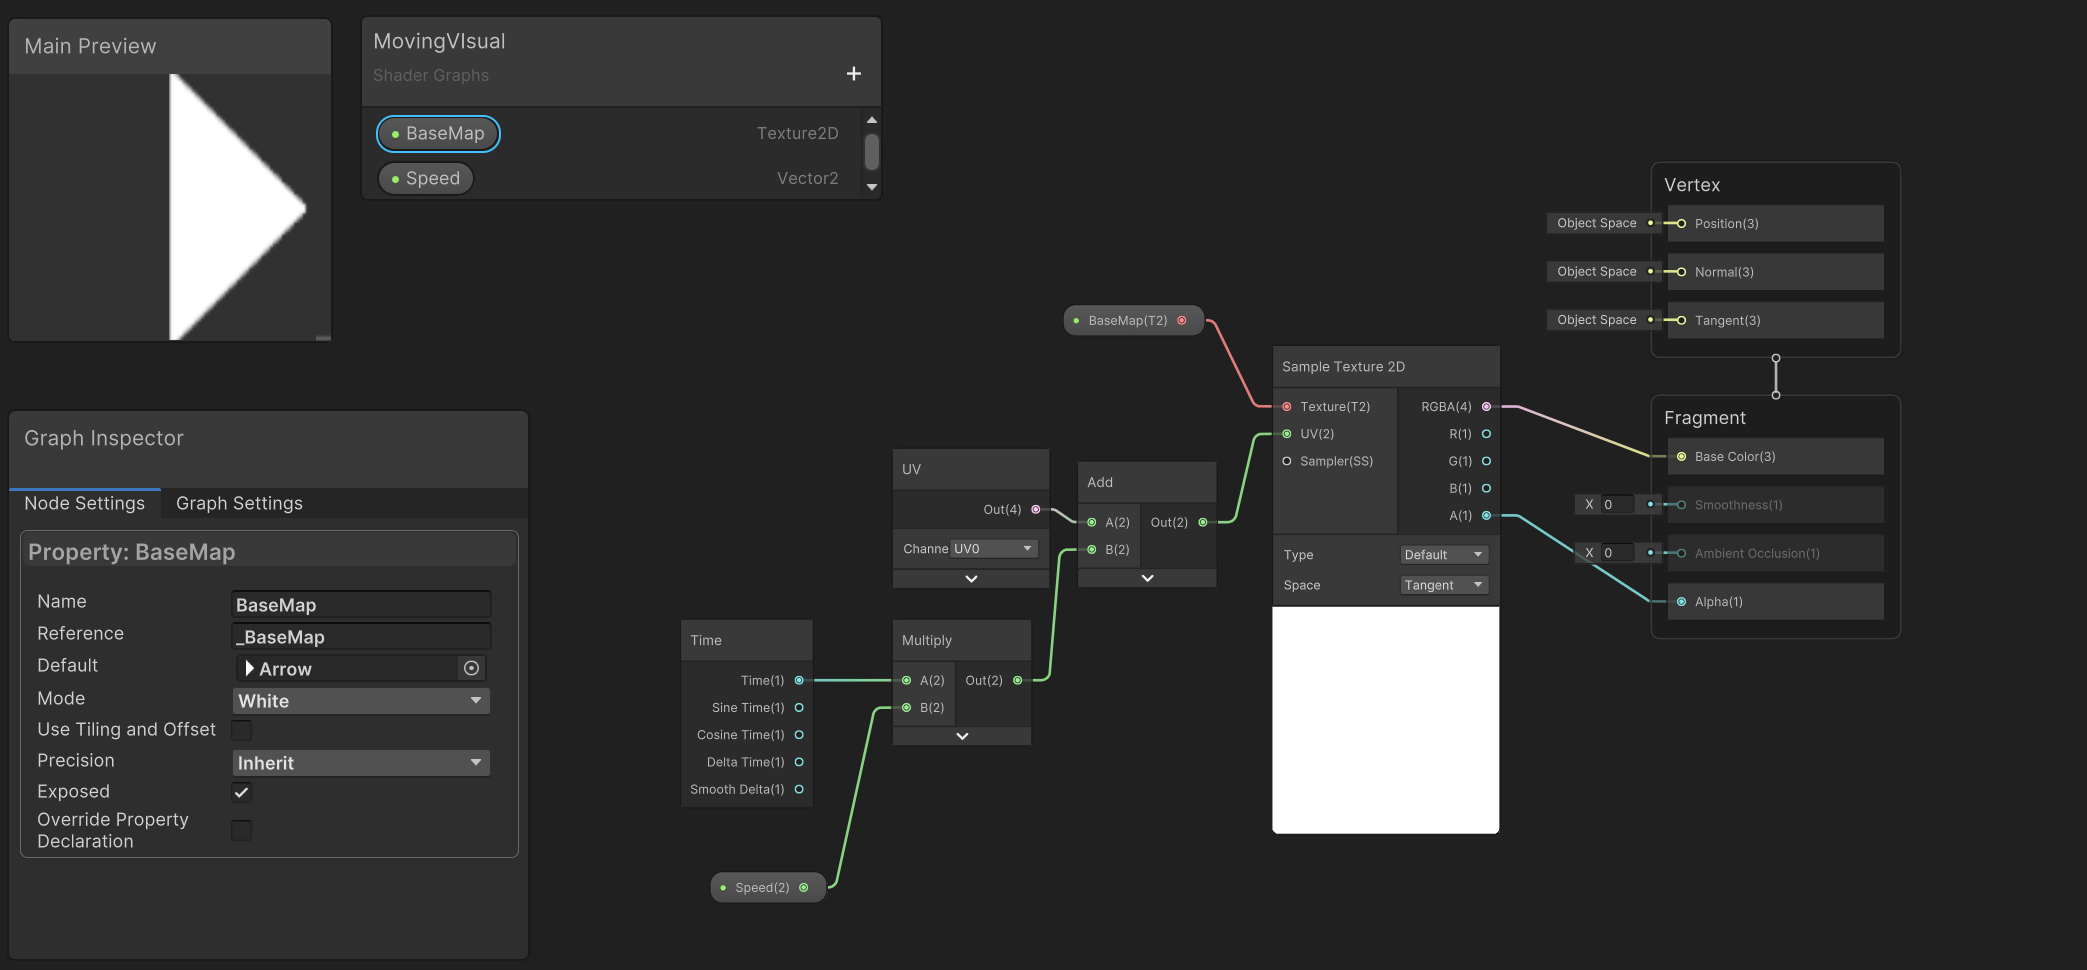
接下来使用ShaderGraph创建一个shader来实现送餐台上的箭头效果,新建文件夹Shaders,右键->Create->Shader Graph->URP->Lit Shader Graph命名为MovingVisual.shadergraph(实际上Unlit在这里的效果更好,不用担心透明部分的反光问题),在_Assets/Material文件夹下右键->Create->Material,新建一个材质,命名为DeliveryArrow.mat,将shader文件拖动到材质文件上
在ShaderGraph中,在Graph Inspector面板的Graph Settings中将SurfaceType改为Transparent,用Sample Transform 2D采样纹理,通过将uv加上一个Vector2做出偏移的效果
在DeliveryCounter.prefab中右键->Create->3D Object->Quad,将材质赋予该面片并将BaseMap设置为这张Arrow图片
运行游戏,送餐台可以正常显示效果并且删除物品
目前为止的工程文件
15 订单管理器与订单图标 Delivery Manager & Delivery Manager UI
15.1 Delivery Manager
接下来我们会实现检查通过送餐台送出的餐品是否在订单中的逻辑,首先我们要实现相应的逻辑在控制台输出的效果,下一小节会实现对应的UI
在Scirpts文件夹新建DeliveryManager.cs,在场景中新建空物体DeliveryManager,添加脚本
为了检查送进去的菜品是否符合要求,我们需要保存一个菜品的List,而每个菜品又是一个KitchenObjectSO的List,所以我们需要一个List<List<\KitchenObjectSO>>,但是我们希望保持代码尽可能整洁,所以我们先来新建一个新的ScriptableObject保存菜品所需的菜和菜品名称的对应关系
在Scripts/ScriptableObject文件夹新建RecipeSO.cs
// RecipeSO.cs
using System.Collections.Generic;
using UnityEngine;[CreateAssetMenu()]
public class RecipeSO : ScriptableObject
{public List<KitchenObjectSO> kitchenObjectSOList;public string recipeName;
}
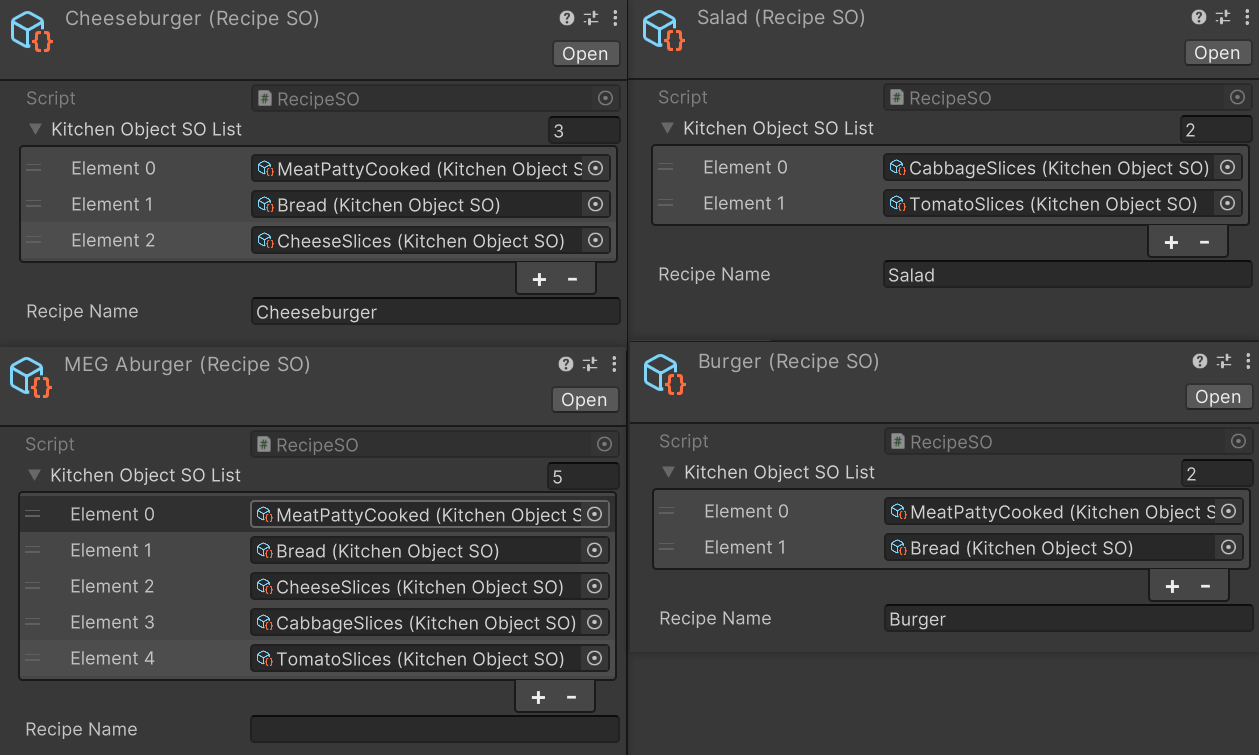
在ScriptableObjects文件夹下新建RecipeSO文件夹,在该文件夹下右键->Create->Recipe SO创建Burger.asset、Cheeseburger、MEGAburger、Salad,配置相应List和Recipe Name
接下来我们可以直接在DeliveryManager.cs序列化一个List然后在编辑器中一个个添加来保存我们的所有菜品,但是这样做如果有其他脚本也要使用到这个拥有所有菜品的List,就又要创建一次这个List,所以为了不在游戏中重复创建这个List和之后使用的方便,我们可以用一个ScriptableObject来保存所有菜品,当需要用到这个有所有菜品的List时,只需要去添加这个ScriptableObject即可
在Scripts/ScriptableObjects中新建RecipeListSO.cs
// RecipeListSO.cs
using System.Collections.Generic;
using UnityEngine;[CreateAssetMenu()]
public class RecipeListSO : ScriptableObject
{public List<RecipeSO> recipeSOList;
}
在ScriptableObjects/RecipeSO文件夹中右键->Create->Recipe List SO,命名为_RecipeListSO(加一个下划线是因为我们希望它显示在最前面,一会我们会将RecipeListSO.cs中的[CreateAssetMenu()]去掉,避免我们创建第二个菜品列表),在列表中添加所有菜品

在DeliveryManager.cs中使用了单例模式,使得整个场景只能由一个DeliveryManager,在Update()中每隔一段时间向等待列表随机添加菜品,并且将菜品名输出到控制台,这个脚本中还有一个DeliverRecipe()方法,该方法接受一个带盘子的对象,然后判断该对象是否与订单中的菜品有相同的,如果有则删除订单中的对应菜品,并在控制台输出成功信息,如果没有则输出失败信息
// DeliveryManager.cs
using System.Collections.Generic;
using UnityEngine;public class DeliveryManager : MonoBehaviour
{public static DeliveryManager Instance { get; private set; }[SerializeField] private RecipeListSO recipeListSO;private List<RecipeSO> waitingRecipeSOList;private float spawnRecipeTimer;private float spawnRecipeTimerMax = 4f;private int waitingRecipesMax = 4;private void Awake(){Instance = this;waitingRecipeSOList = new List<RecipeSO>();}private void Update(){spawnRecipeTimer -= Time.deltaTime;if (spawnRecipeTimer <= 0f){spawnRecipeTimer += spawnRecipeTimerMax;if (waitingRecipeSOList.Count < waitingRecipesMax){RecipeSO waitingRecipeSO = recipeListSO.recipeSOList[Random.Range(0, recipeListSO.recipeSOList.Count)];Debug.Log(waitingRecipeSO.recipeName);waitingRecipeSOList.Add(waitingRecipeSO);}}}public void DeliverRecipe(PlateKitchenObject plateKitchenObject){for (int i = 0; i < waitingRecipeSOList.Count; i++){RecipeSO waitingRecipeSO = waitingRecipeSOList[i];if (waitingRecipeSO.kitchenObjectSOList.Count == plateKitchenObject.GetKitchenObjectSOList().Count){// 订单中的菜品与送上去的菜品由同样数量的物品组成bool plateContentsMatchesRecipe = true;foreach (KitchenObjectSO recipeKitchenObjectSO in waitingRecipeSO.kitchenObjectSOList){// 遍历订单中的菜品所组成的物品bool ingredientFound = false;foreach (KitchenObjectSO plateKitchenObjectSO in plateKitchenObject.GetKitchenObjectSOList()){// 遍历送上去的菜品所组成的物品if (recipeKitchenObjectSO == plateKitchenObjectSO){// 订单中的菜品与送上去的菜品由同样的物品组成ingredientFound = true;break;}}if (!ingredientFound){// 订单中的菜品与送上去的菜品由不同的物品组成plateContentsMatchesRecipe = false;}}if (plateContentsMatchesRecipe){Debug.Log("Player delivered the correct recipe!");waitingRecipeSOList.RemoveAt(i);return;}}}// 遍历了所有订单,没有找到匹配的订单Debug.Log("Player did not deliver a correct recipe!");}
}
在DeliveryCounter.cs中与订单台交互时实例化DeliveryManager并调用DeliverRecipe()方法判断送餐与订单是否匹配
设置好组件的变量,运行游戏,即可在控制台看到订单管理器输出的信息
目前为止的工程文件
15.2 Delivery Manager UI
在场景中右键->UI->Canvas新建一个Canvas,将Canvas Scaler中的UI Scale Mode改为Scale With Screen Size,将Reference Resolution改为1920 1080,将Match改为1,完全匹配高度
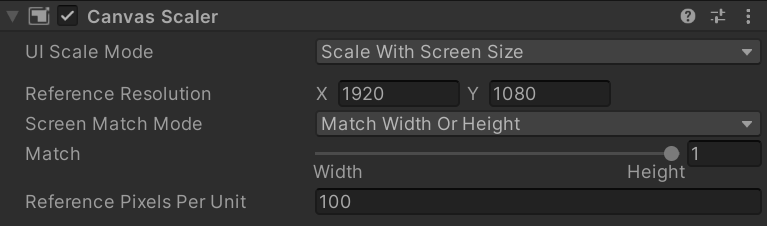
这样设置意味着Canvas上的UI在游戏视口宽度改变时不会改变,在高度改变时会等比例缩小,选择这样的设置是因为这样我们就可以只关心UI的横向排布,而当纵向改变时该组件会自动帮我们缩放,如图,可以在Canvas下创建一个Image,颜色改为红色进行测试
在Canvas下新建空物体命名为DeliveryManagerUI,在AnchorPresets中调整为随父级宽度高度都拉伸,将Left、Top、Right、Bottom都设为0以填充Canvas大小
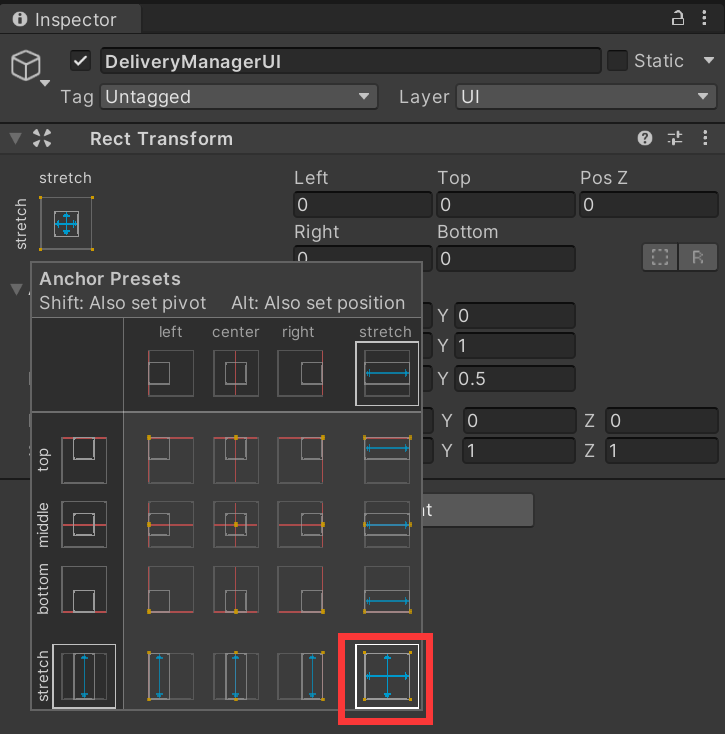
在DeliveryManagerUI下右键->UI->Text命名为TitleText,内容写上”RECIPES WAITING…“,字体设置为加粗(Bold),将锚点设置到左上角,Width和Hight设为0,Wrapping设为Disabled,移动到合适位置,可以打开Game窗口查看位置

在DeliveryManagerUI下新建空物体命名为Container,锚点设置到左上角,调整位置到刚刚设置的文字的下方;Container下新建空物体命名为RecipeTemplate,锚点和位置设置到左上角(按住Shift设置锚点即可一块调整位置);在RecipeTemplate下右键->UI->Image,同样调整为随父级宽度高度都拉伸,Left、Top、Right、Bottom都设为0,颜色调整为黑色,透明度降低一些;在RecipeTemplate下右键->UI->Text,锚点改为右上角,调整位置,字体大小改为20,Width、Hight改为0,Wrapping设为Disabled
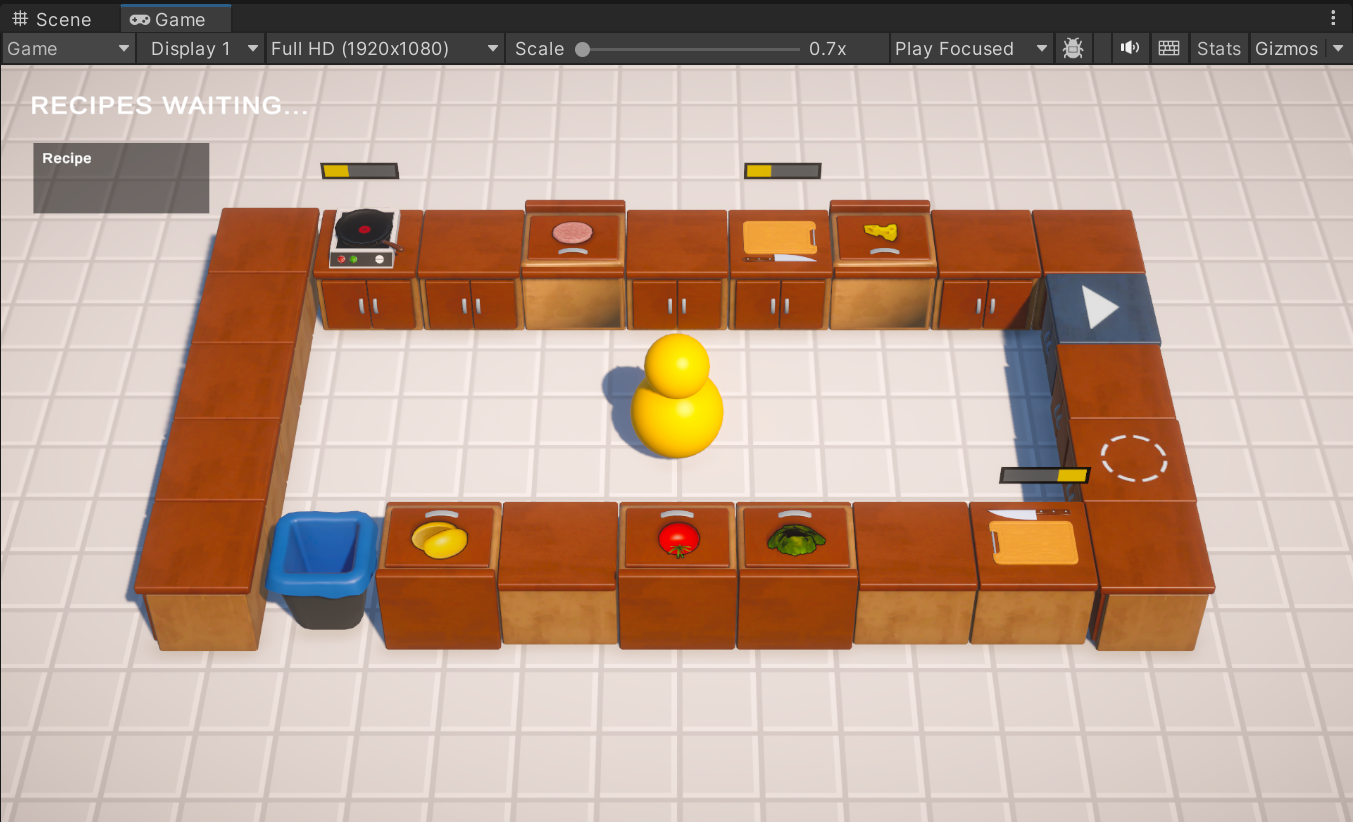
在Countainer上添加VerticalLayoutGroup组件,Spacing(间距)增加一些,复制几个Recipe Template,就能看到纵向排布的订单列表
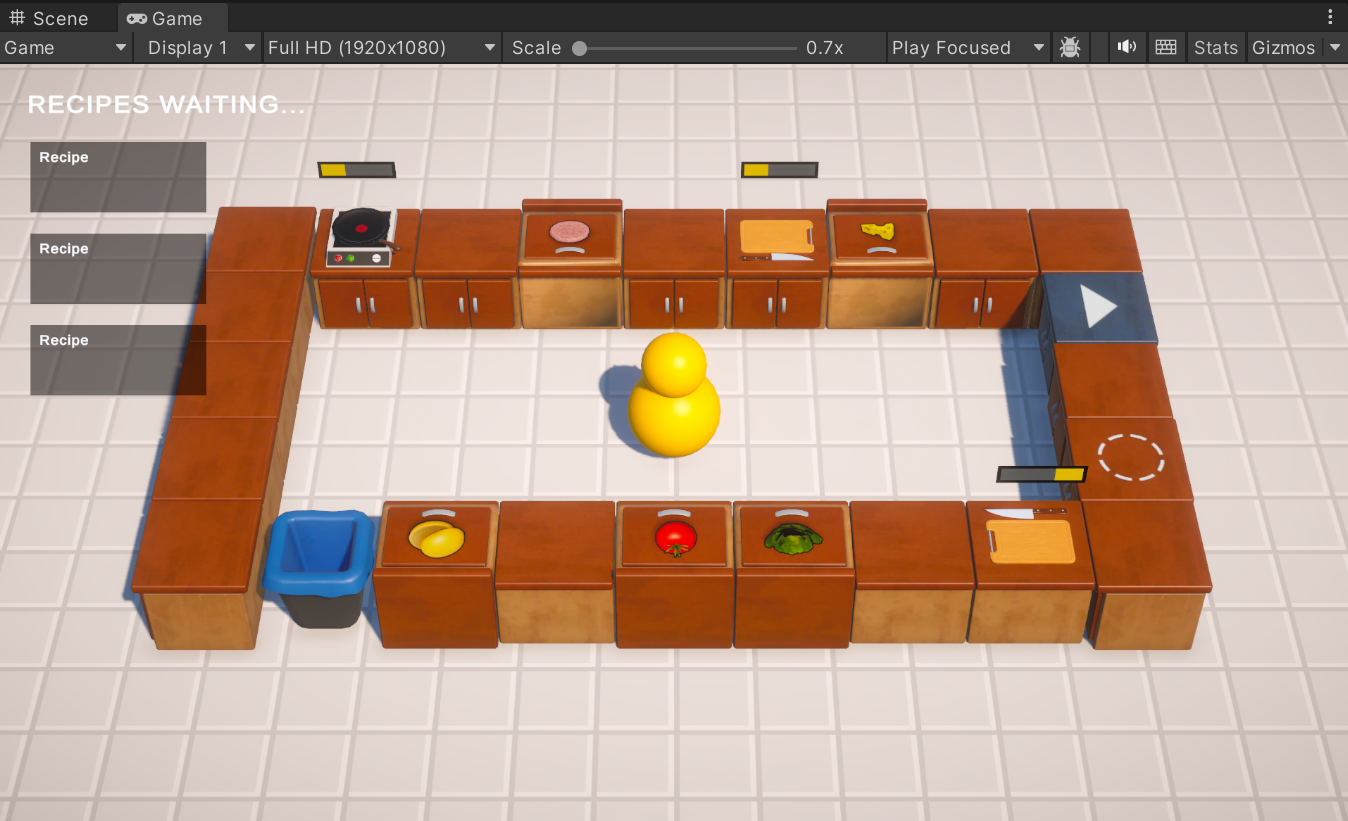
在Scripts文件夹下新建DeliveryManagerUI.cs,添加到DeliveryManagerUI上,在DeliveryManager.cs中,新添加两个EventHandler委托,分别在订单出现和订单完成时触发,这两个EvnetHandler委托调用的函数写在DeliveryManagerUI.cs,主要是去更新UI,现在我们更新UI的逻辑只需要处理一下订单的初始化然后遍历订单中的每一个菜品然后实例化recipeTemplate(因为DeliveryManager用了单例模式,我们可以在DeliveryManager.cs中写一个public的GetWaitingRecipeSOList()方法在这里调用)。另外使用EventHandler需要使用using System,而System库和UnityEngine库中都有Random()这个函数,所以这里使用Random()时使用UnityEngine.Random说明要使用UnityEngine库中的Random()
// DeliveryManager.cs
...
public class DeliveryManager : MonoBehaviour
{public event EventHandler OnRecipeSpawned;public event EventHandler OnRecipeCompleted;  ...private void Update(){...if (waitingRecipeSOList.Count < waitingRecipesMax){// 生成订单RecipeSO waitingRecipeSO = recipeListSO.recipeSOList[UnityEngine.Random.Range(0, recipeListSO.recipeSOList.Count)];OnRecipeSpawned?.Invoke(this, EventArgs.Empty);}}}public void DeliverRecipe(PlateKitchenObject plateKitchenObject){for (int i = 0; i < waitingRecipeSOList.Count; i++){...if (waitingRecipeSO.kitchenObjectSOList.Count == plateKitchenObject.GetKitchenObjectSOList().Count){...if (plateContentsMatchesRecipe){...OnRecipeCompleted?.Invoke(this, EventArgs.Empty);return;}}}// 遍历了所有订单,没有找到匹配的订单}public List<RecipeSO> GetWaitingRecipeSOList(){return waitingRecipeSOList;}
}
// DeliveryManagerUI.cs中
using System;
using UnityEngine;public class DeliveryManagerUI : MonoBehaviour
{[SerializeField] private Transform container;[SerializeField] private Transform recipeTemplate;private void Awake(){recipeTemplate.gameObject.SetActive(false);}private void Start(){DeliveryManager.Instance.OnRecipeSpawned += DeliveryManager_OnRecipeSpawned;DeliveryManager.Instance.OnRecipeCompleted += DeliveryManager_OnRecipeCompleted;UpdateVisual();}private void DeliveryManager_OnRecipeSpawned(object sender, EventArgs e){UpdateVisual();}private void DeliveryManager_OnRecipeCompleted(object sender, EventArgs e){UpdateVisual();}private void UpdateVisual(){foreach (Transform child in container){if (child == recipeTemplate) continue;Destroy(child.gameObject);}foreach (RecipeSO recipeSO in DeliveryManager.Instance.GetWaitingRecipeSOList()){Transform recipeTransform = Instantiate(recipeTemplate, container);recipeTransform.gameObject.SetActive(true);}}
}
运行游戏,可以看到每隔四秒生成一个新的RecipeTemplate
接下来根据生成订单的不同改变Text的内容,而不是都显示Recipe,我们可以直接用Find(“RecipeNameText”)找到显示文字的子级对象,但我们并不希望使用字符串,所以这里依然选择新创建一个脚本实现获取该对象上TextMeshPro组件的功能
在Scripts文件夹下新建DeliveryManagerSingleUI.cs,将该脚本添加到RecipeTemplate上,由于我们已经有了很多关于UI的脚本,所以这里整理了一下,在Scripts文件夹下新建了一个UI文件夹,将与UI相关的脚本都放进去了
在DeliveryManagerSingleUI.cs中,我们接收一个从UI->Text创建的对象然后改变内容,注意这里要写的类为TextMeshProGUI,如果我们是从3D Object->Text创建的对象,才应该用TextMeshPro类
// DeliveryManagerSingleUI.cs中
using TMPro;
using UnityEngine;public class DeliveryManagerSingleUI : MonoBehaviour
{[SerializeField] private TextMeshProUGUI recipeNameText;public void setRecipeSO(RecipeSO recipeSO){recipeNameText.text = recipeSO.recipeName;}
}
在编辑器面板设置好变量,在DeliveryManagerUI.cs中更新UI的方法中调用setRecipeSO方法将UI上的文字换为从DeliveryManager接收到菜品的名称
// DeliveryManagerUI.cs中
...
public class DeliveryManagerUI : MonoBehaviour
{...private void UpdateVisual(){...foreach (RecipeSO recipeSO in DeliveryManager.Instance.GetWaitingRecipeSOList()){...recipeTransform.GetComponent<DeliveryManagerSingleUI>().setRecipeSO(recipeSO);}}
}
运行游戏,就能看到生成的订单UI上显示了菜品名称
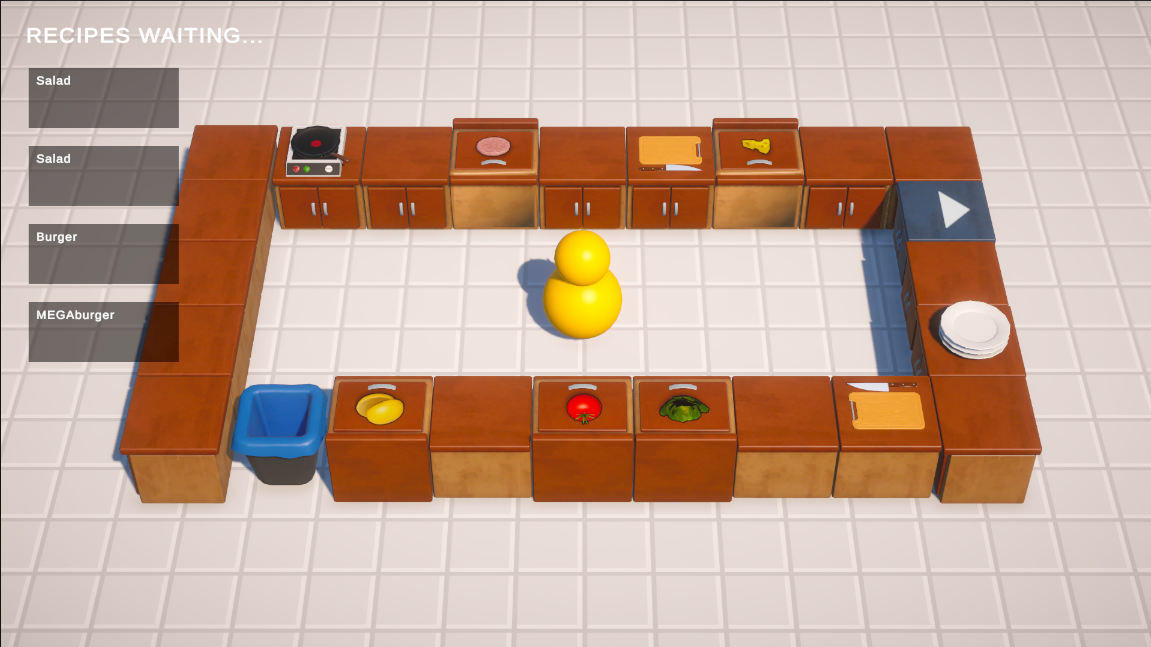
接下来开始处理图标的显示,我们希望在每个RecipeTemplate中显示制作该菜品所需的物品
在RecipeTemplate下新建空物体命名为IconContainer,将Width和Height设置为0,移到合适位置;在IconContainer下右键->UI->Image命名为IngredientImage,调整Width和Height,暂时设置一张图标;在IconContainer上添加Horizontal Layout Group组件,多复制几个IngredientImage查看效果
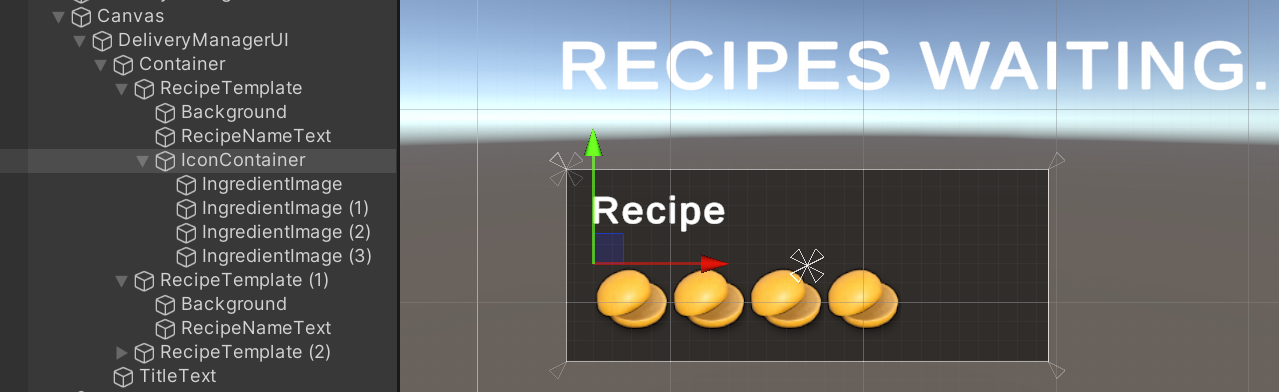
接下来在DeliveryManagerSingleUI.cs中写对应的初始化和更新图标的逻辑
// DeliveryManagerSingleUI.cs中
using TMPro;
using UnityEngine;
using UnityEngine.UI;public class DeliveryManagerSingleUI : MonoBehaviour
{...[SerializeField] private Transform iconContainer;[SerializeField] private Transform iconTemplate;private void Awake(){iconTemplate.gameObject.SetActive(false);}public void setRecipeSO(RecipeSO recipeSO){...foreach (Transform child in iconContainer){if (child == iconTemplate) continue;Destroy(child.gameObject);}foreach (KitchenObjectSO kitchenObjectSO in recipeSO.kitchenObjectSOList){Transform iconTransform = Instantiate(iconTemplate, iconContainer);iconTransform.gameObject.SetActive(true);iconTransform.GetComponent<Image>().sprite = kitchenObjectSO.sprite;}}
}
在编辑器面板设置相应参数,运行游戏即可看到订单UI处显示了对应图标
目前为止的工程文件
16 背景音乐与音效 Music & Sound Effects
16.1 背景音乐
添加背景音乐很简单,在_Assets/Sounds/Music下有一个Music.wav文件,该文件是一个做好的可以循环播放的背景音乐,该在场景中新建空物体命名为MusicManager,添加一个Audio Source组件,将AudioClip设置为准备好的Music.wav文件,勾上Loop让音乐循环播放,设置Priority到0,在unity中不能同时播放过多的音乐,Priority的值越大在音频过多时就越可能不被播放,Volume在后面的教程中会有在游戏中调整的方法,这里先设置为0.5
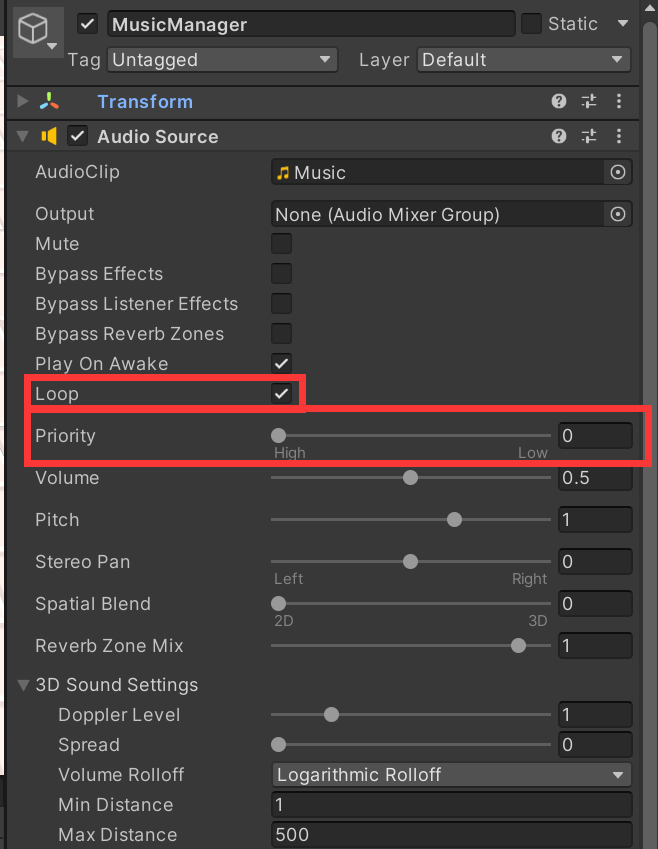
确保Main Camera上有Audio Listener组件,运行游戏即可听到声音。另外unity中还有Audio mixer可以进行简单的混音,这里游戏中没有使用
目前为止的工程文件
16.2 音效
16.2.1 SoundManager & AudioClipRefsSO
除了使用Audio Source组件,在unity中还可以通过AudioSource.playClipAtPoint(AudioClip clip, Vector3 position, float volume = 1.0F)来播放音频(但是相比AudioSource很多东西都无法调整,如果想要调整AudioSource中的东西可以给每个音频都创建一个prefab,然后想要使用音频时实例化该prefab)
在场景中创建一个空物体命名为SoundManager,在Scripts文件夹新建SoundManager.cs添加到SoundManager上,与15.1中创建表示所有菜品的List的需求相同,这里我们也希望将所有音效通过ScriptableObject创建的对象保存起来,所以在写其他逻辑之前,在Scripts/ScripatableObjects文件夹下新建AudioClipRefsSO.cs
// AudioClipRefsSO.cs中
using UnityEngine;[CreateAssetMenu]
public class AudioClipRefsSO : ScriptableObject
{public AudioClip[] chop;public AudioClip[] deliveryFail;public AudioClip[] deliverySuccess;public AudioClip[] footstep;public AudioClip[] objectDrop;public AudioClip[] objectPickup;public AudioClip stoveSizzle;public AudioClip[] trash;public AudioClip[] warning;
}
在ScriptableObjects文件夹中右键->Create->Audio Clip Refs SO,根据不同种类将_Assets/Sounds/SFX中的音频文件按分类添加好
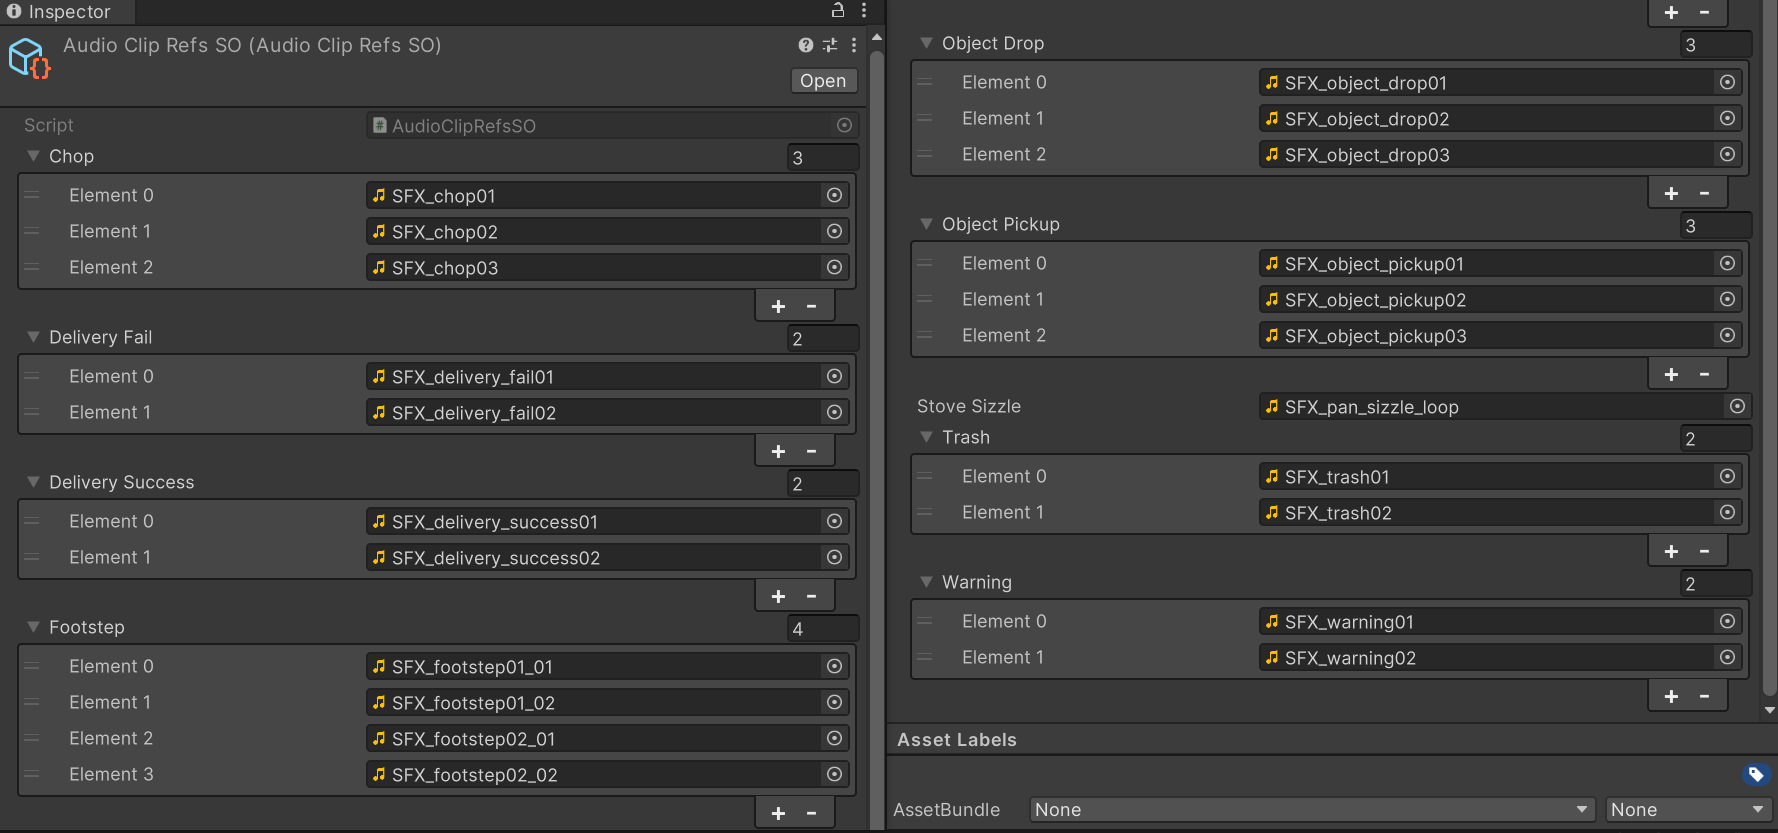
16.2.2 送餐台音效
首先处理送餐台的音效,在DeliveryManager.cs中,我们声明两个EventHandler委托,分别在菜品匹配订单成功和失败时触发,在SoundManager.cs中为这两个委托添加调用的函数,播放对应的的音效。由于我们的游戏中只有一个送餐台,所以我们也可以在DeliveryCounter.cs中使用单例模式,在SoundManager.cs获取该实例的位置,这样我们就可以在送餐台的位置播放对应音效
// DeliveryManager.cs中
...
public class DeliveryManager : MonoBehaviour
{...public void DeliverRecipe(PlateKitchenObject plateKitchenObject){for (int i = 0; i < waitingRecipeSOList.Count; i++){...if (waitingRecipeSO.kitchenObjectSOList.Count == plateKitchenObject.GetKitchenObjectSOList().Count){...if (plateContentsMatchesRecipe){// 找到了匹配的订单,送餐成功OnRecipeSuccess?.Invoke(this, EventArgs.Empty);...}}}// 遍历了所有订单,没有找到匹配的订单OnRecipeFailed?.Invoke(this, EventArgs.Empty);}...
}
// DeliveryCounter.cs中
public class DeliveryCounter : BaseCounter
{public static DeliveryCounter Instance { get; private set; }private void Awake(){Instance = this;}public override void Interact(Player player){if (player.HasKitchenObject()){if (player.GetKitchenObject().TryGetPlate( out PlateKitchenObject plateKitchenObject)){DeliveryManager.Instance.DeliverRecipe(plateKitchenObject);player.GetKitchenObject().DetroySelf();}}}
}
// SoundManager.cs中
using System;
using UnityEngine;public class SoundManager : MonoBehaviour
{[SerializeField] private AudioClipRefsSO audioClipRefsSO;private void Start(){DeliveryManager.Instance.OnRecipeSuccess += DeliveryManager_OnRecipeSuccess;DeliveryManager.Instance.OnRecipeFailed += DeliveryManager_OnRecipeFailed;}private void DeliveryManager_OnRecipeSuccess(object sender, EventArgs e){DeliveryCounter deliveryCounter = DeliveryCounter.Instance;PlaySound(audioClipRefsSO.deliverySuccess, deliveryCounter.transform.position);}private void DeliveryManager_OnRecipeFailed(object sender, EventArgs e){DeliveryCounter deliveryCounter = DeliveryCounter.Instance;PlaySound(audioClipRefsSO.deliveryFail, deliveryCounter.transform.position);}private void PlaySound(AudioClip[] audioClipArray, Vector3 position, float volume = 1f){PlaySound(audioClipArray[UnityEngine.Random.Range(0, audioClipArray.Length)], position, volume);}private void PlaySound(AudioClip audioClip, Vector3 position, float volume = 1f){AudioSource.PlayClipAtPoint(audioClip, position, volume);}
}
16.2.3 切菜台音效
由于我们已经在做切菜动画时在CuttingCounter.cs中定义了一个叫OnCut的EventHandler委托,该委托在每次按下F键时触发,在这里我们只需要为这个委托添加一个播放对应音效的函数即可
与送餐台不同的是,场景中有多个切菜台,我们并不希望SoundManager订阅所有的切菜台,所以不能使用单例模式让场景中只存在一个CuttingCounter实例,然而我们可以声明一个静态的委托,让所有切菜台在触发OnCut委托时也触发这个委托,这样我们就可以只为该委托添加触发的函数
// CuttingCounter.cs中
...
public class CuttingCounter : BaseCounter, IHasProgress
{public static EventHandler OnAnyCut;...  public override void InteractAlternate(Player player){if (HasKitchenObject() && HasRecipeWithInput(GetKitchenObject().GetKitchenObjectSO())){...// 柜子上有物品,开始切菜OnAnyCut?.Invoke(this, EventArgs.Empty);...}}...
}
// SoundManager.cs中
...
public class SoundManager : MonoBehaviour
{...private void Start(){...CuttingCounter.OnAnyCut += CuttingCounter_OnAnyCut;} ...private void CuttingCounter_OnAnyCut(object sender, EventArgs e){CuttingCounter cuttingCounter = sender as CuttingCounter;PlaySound(audioClipRefsSO.chop, cuttingCounter.transform.position);}...
}
16.2.4 角色拿起物品音效
在Player.cs中我们写过一个SetKitchenObject()方法,每次在角色拿起物品时都会调用此方法,所以刚好适合我们用来做拿起物品的音效
在Player.cs中,声明一个EventHandler委托,在调用SetKitchenObject()方法时触发,在SoundManager.cs中添加触发的函数,播放对应音频
// Player.cs
...
public class Player : MonoBehaviour, IKitchenObjectParent
{...public event EventHandler OnPickUpSomething;...public void SetKitchenObject(KitchenObject kitchenObject){...if (kitchenObject != null){OnPickUpSomething?.Invoke(this, EventArgs.Empty);}}
}
// SoundManager.cs中
...
public class SoundManager : MonoBehaviour
{...private void Start(){...Player.Instance.OnPickUpSomething += Player_OnPickUpSomething;}... private void Player_OnPickUpSomething(object sender, EventArgs e){PlaySound(audioClipRefsSO.objectPickup, Player.Instance.transform.position);}
}
16.2.5 角色放下物品音效
与拿起物品类似,我们在BaseCounter.cs中也有一个SetKitchenObject()方法,在角色向柜台放物品时触发,所以同样在BaseCounter.cs中添加一个EventHandler委托,在SetKitchenObject()中触发,在SoundManager.cs中添加调用的函数,与切菜台类似,也声明一个静态的委托
// BaseCounter.cs中
...
public class BaseCounter : MonoBehaviour, IKitchenObjectParent
{...public static event EventHandler OnAnyObjectPlacedHere;...public void SetKitchenObject(KitchenObject kitchenObject){this.kitchenObject = kitchenObject;if (kitchenObject != null){OnAnyObjectPlacedHere?.Invoke(this, EventArgs.Empty);}}
}
// SoundManager.cs中
...
public class SoundManager : MonoBehaviour
{...private void Start(){...BaseCounter.OnAnyObjectPlacedHere += BaseCounter_OnAnyObjectPlacedHere;}... private void Player_OnPickUpSomething(object sender, EventArgs e){PlaySound(audioClipRefsSO.objectPickup, Player.Instance.transform.position);}
}
16.2.6 扔垃圾音效
我们的垃圾箱类也继承了BaseCounter,但是并没有实现GetKitchenObject()方法,而是直接删除角色手上的物品,所以只在Interact()方法中触发委托即可
// TrashCounter.cs中
...
public class TrashCounter : BaseCounter
{public static event EventHandler OnAnyObjectTrashed;public override void Interact(Player player){if (player.HasKitchenObject()){...OnAnyObjectTrashed?.Invoke(this, EventArgs.Empty);}}
}
// SoundManager.cs中
...
public class SoundManager : MonoBehaviour
{...private void Start(){...TrashCounter.OnAnyObjectTrashed += TrashCounter_OnAnyObjectTrashed;}... private void TrashCounter_OnAnyObjectTrashed(object sender, EventArgs e){TrashCounter trashCounter = sender as TrashCounter;PlaySound(audioClipRefsSO.trash, trashCounter.transform.position);}
}
16.2.7 炉灶台音效
炉灶台音效有些不同,我们希望根据炉灶台循环播放音频,并根据不同的状态来播放和暂停,所以我们在StoveCounter.prefab中单独创建控制音频的物体用AudioSouce组件和单独写的脚本来控制音频
在StoveCounter.prefab中新建空物体命名为Sound,AudioClip选择对应的炉灶台的声音,在该空物体上添加Audio Source组件,取消勾选Play On Awake、勾选Loop、Spatial Blend改为1让它是一个3d音效
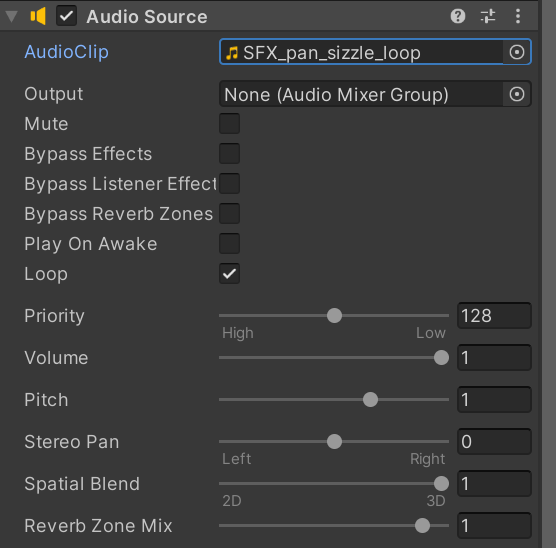
在Scripts文件夹新建StoveCounterSound.cs添加到Sound物体上,之前在StoveCounter.cs中我们有一个OnStateChanged的EventHandler委托,该委托在状态改变时触发,我们在toveCounterSound.cs中为该委托添加调用的函数,当当前炉灶台的状态为Frying或Fried的时候开始播放音频,其他状态时暂停
// StoveCounterSound中
using UnityEngine;public class StoveCounterSound : MonoBehaviour
{[SerializeField] private StoveCounter stoveCounter;private AudioSource audioSource;private void Awake(){audioSource = GetComponent<AudioSource>();}private void Start(){stoveCounter.OnStateChanged += StoveCounter_OnStateChanged;}private void StoveCounter_OnStateChanged(object sender, StoveCounter.OnStateChangedEventArgs e){bool playSound = e.state == StoveCounter.State.Frying || e.state == StoveCounter.State.Fried;if (playSound){audioSource.Play();} else{audioSource.Pause();}}
}
16.3 角色脚步声
角色脚步声我们使用和炉灶台差不多的方式,同样用一个单独的脚本来控制音频,不过这次我们不再在Player下创建一个子物体,而是直接给Player本身添加脚本
新建PlayerSounds.cs,添加到Player上,我们的脚步声音频文件很短,我们可以在PlayerSounds.cs中每隔 footstepTimerMax 秒来检测角色是否在行走而判断是否播放音频,我们可以像其他对象一样在PlayerSounds.cs声明EventHandler委托,然后在SoundManager.cs中添加其调用的函数,或者我们也可以在Player.cs中直接调用SoundManager中的方法去播放音频,第二种做法意味着我们的PlayerSounds.cs和SoundManager.cs没有很好的解耦,然而我们PlayerSounds这个类就不是为了独立存在而设计的,而是必须要与SoundManager类一起使用,所以这种情况下我们可以直接去这样调用方法而不使用事件
我们可以在SoundManager.cs中使用单例模式或者在PlayerSounds中用SerializeField接收该对象,这里我们使用单例模式
// SoundManager.cs中
...
public class SoundManager : MonoBehaviour
{public static SoundManager Instance { get; private set; }private void Awake(){Instance = this;}...public void PlayFootStepsSound(Vector3 position, float volume){PlaySound(audioClipRefsSO.footstep, position, volume);}
}
// PlayerSounds.cs中
using UnityEngine;public class PlayerSounds : MonoBehaviour
{private Player player;private float footstepTimer;private float footstepTimerMax = 0.1f;private void Awake(){player = GetComponent<Player>();}private void Update(){footstepTimer -= Time.deltaTime;if (footstepTimer < 0f){footstepTimer = footstepTimerMax;if (player.IsWalking()){float volume = 1f;SoundManager.Instance.PlayFootStepsSound(player.transform.position, volume);    }}}
}
启动游戏,即可听见游戏内的各种音效,目前为止的工程文件
17 其他界面
17.1 Scene Manager
在场景中新建空物体命名为KitchenObjectManager,Scripts文件夹新建KitchenObjectManager.cs添加到该对象上
我们同样用状态机来表示游戏的各个状态,在一开始我们先用计时器来控制各个状态间的改变,这里我们也使用了单例模式
// KitchenObjectManager.cs
using System;
using UnityEngine;public class KitchenGameManager : MonoBehaviour {public static KitchenGameManager Instance { get; private set; }public event EventHandler OnStateChanged;private enum State {WaitingToStart,CountdownToStart,GamePlaying,GameOver,}private State state;private float waitingToStartTimer = 1f;private float countdownToStartTimer = 3f;private float gamePlayingTimer = 10f;private void Awake() {Instance = this;state = State.WaitingToStart;}private void Update() {switch (state) {case State.WaitingToStart:waitingToStartTimer -= Time.deltaTime;if (waitingToStartTimer < 0f) {state = State.CountdownToStart;}break;case State.CountdownToStart:countdownToStartTimer -= Time.deltaTime;if (countdownToStartTimer < 0f) {state = State.GamePlaying;}break;case State.GamePlaying:gamePlayingTimer -= Time.deltaTime;if (gamePlayingTimer < 0f) {state = State.GameOver;}break;case State.GameOver:break;}Debug.Log(state);}
}
这时运行游戏,可以看到控制台可以根据计时器输出当前状态
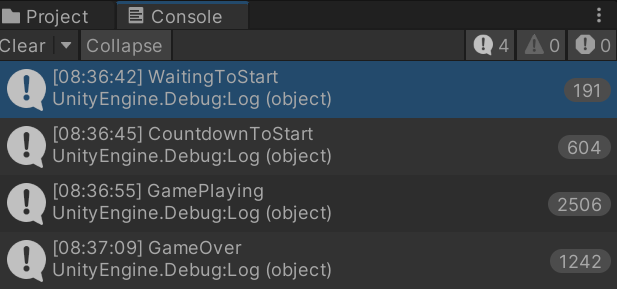
17.2 开始倒计时与结束界面
我们希望角色在除了状态为GamePlaying时可以让角色与物品交互,其他状态都不能交互,在KitchenObjectManager.cs中,添加一个方法来判断当前状态是否为GamePlaying,在Player.cs中调用角色交互相关的方法前使用上面的方法
// KitchenObjectManager.cs中
...
public class KitchenGameManager : MonoBehaviour {...public bool IsGamePlaying() {return state == State.GamePlaying;}
}
// Player.cs中
...
public class Player : MonoBehaviour, IKitchenObjectParent {...private void GameInput_OnInteractAlternateAction(object sender, EventArgs e) {if (!KitchenGameManager.Instance.IsGamePlaying()) return;...}private void GameInput_OnInteractAction(object sender, System.EventArgs e) {if (!KitchenGameManager.Instance.IsGamePlaying()) return;...}...
}
接下来我们在游戏在CountdownToStart状态时显示一个倒计时,在Canvas新建空物体命名为GameStartCountdownUI,将位置宽高属性都改为0,右键->UI->Text新建文本对象命名为CountdownText,将位置宽高属性都改为0、Warpping Disabled、Alignment改为center和Middle、内容暂时写上3,后面的文字内容基本上都类似设置的,如果没有太大区别笔记里不再写了
TextMeshPro默认的材质是全局的,所以如果我们直接在下面的材质面板更改颜色描边等属性,游戏中其他的文本的材质也会变化,为了单独更改该对象的材质,我们双击Font Asset
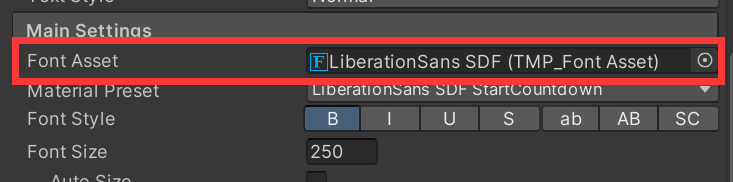
在文件夹中找到这个文字文件,复制该文件下的材质文件(.mat),重命名为LiberationSans SDF StartCountdown,注意名字的前面部分不能改变,否则无法在面板进行选择
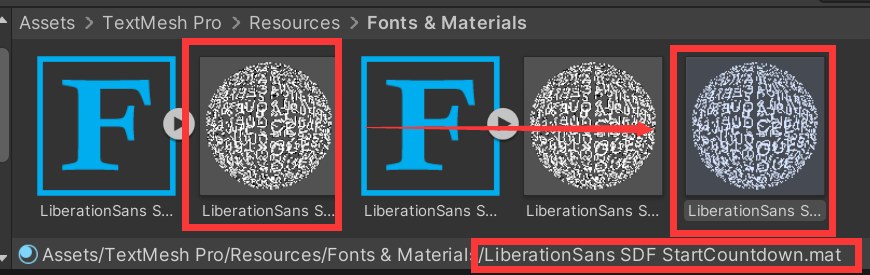
改变刚刚的Font Asset下面的Material Preset为我们复制的StartCountdown材质,在调整文字属性、材质面板中设置Outline后即可在场景中看到效果,还可以在Game窗口看到游戏运行起来的大致效果

在Scripts/UI文件夹下新建GameStartCountdown.cs,添加到场景的对象上,在KitchenGameManager.cs中添加两个方法,一个判断当前状态是否为CountdownToStart状态,另一个得到CountdownToStart状态的计时器,再添加一个EventHandler委托,状态改变时触发该委托;在GameStartCountdown.cs判断状态后改变倒计时文本的显示与隐藏,在Update()根据倒计时显示对应文本(我们可以在每帧都去发送事件传递当前计时器的秒数,但是这样做比较耗时,所以我们直接在KitchenGameManager.cs中添加了一个方法来得到当前计时器的值)
// KitchenGameManager.cs中
...
public class KitchenGameManager : MonoBehaviour {...private void Update() {switch (state) {case State.WaitingToStart:...if (waitingToStartTimer < 0f) {...OnStateChanged?.Invoke(this, EventArgs.Empty);}break;case State.CountdownToStart:...if (countdownToStartTimer < 0f) {state = State.GamePlaying;...}break;case State.GamePlaying:...if (gamePlayingTimer < 0f) {...OnStateChanged?.Invoke(this, EventArgs.Empty);}break;case State.GameOver:break;}Debug.Log(state);}...public bool IsCountdownToStartActive() {return state == State.CountdownToStart;}public float GetCountdownToStartTimer() {return countdownToStartTimer;}
}
// GameStartCountdown.cs中
using TMPro;
using UnityEngine;public class GameStartCountdownUI : MonoBehaviour {[SerializeField] private TextMeshProUGUI countdownText;private void Start() {KitchenGameManager.Instance.OnStateChanged += KitchenGameManager_OnStateChanged;Hide();}private void KitchenGameManager_OnStateChanged(object sender, System.EventArgs e) {if (KitchenGameManager.Instance.IsCountdownToStartActive()) {Show();} else {Hide();}}private void Update() {countdownText.text = Mathf.Ceil(KitchenGameManager.Instance.GetCountdownToStartTimer()).ToString();}private void Show() {gameObject.SetActive(true);}private void Hide() {gameObject.SetActive(false);}
}
运行游戏,可以看见倒计时,目前为止的工程文件
接下来做一下结束画面,我们希望在结束画面中显示我们成功送餐的数量
在Cancas文件夹下新建空物体命名为GameOverUI,更改属性;新建Image命名为Background,改为stretch,更改属性,颜色调为黑色,透明度降低一些;新建Text分别命名为GameOverText、LabelRecipesDeliveredText、RecipesDeliveredText,更改相应属性
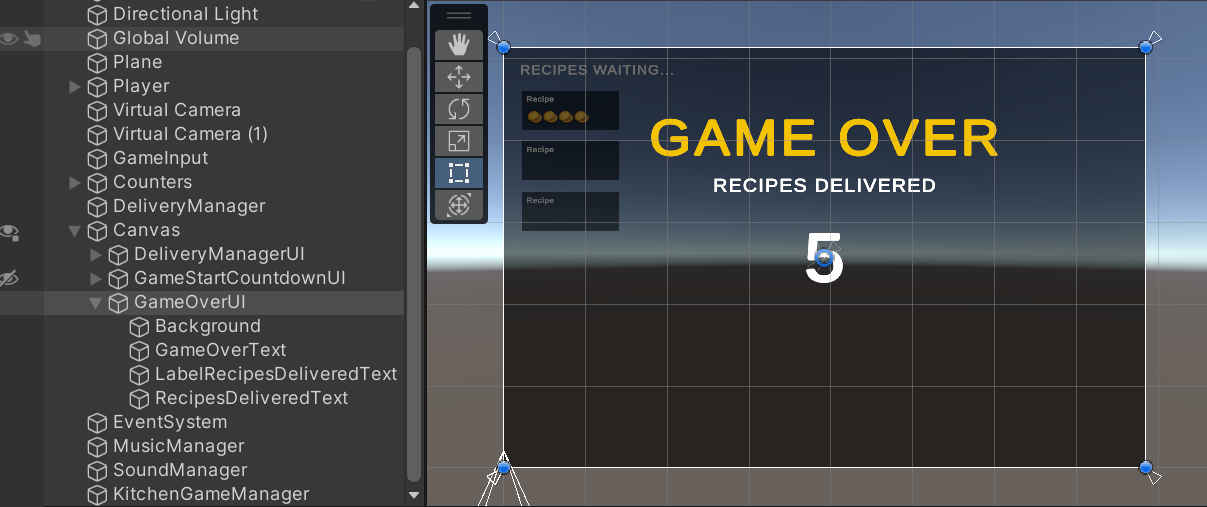
在Scripts/UI文件夹中新建GameOverUI.cs添加到对象上,我们需要在KitchenGameManager.cs中添加一个方法判断当前是否为GameOver状态,在DeliveryManager.cs中保存成功送餐的数量并添加相应方法获取该数量,在GameOverUI.cs中隐藏与显示UI
// KitchenGameManager.cs中
...
public class KitchenGameManager : MonoBehaviour
{...public bool IsGameOver(){return state == State.GameOver;}...
}
// DeliveryManager.cs中
...
public class DeliveryManager : MonoBehaviour
{...private int successfulRecipesAmount;...public void DeliverRecipe(PlateKitchenObject plateKitchenObject){...for (int i = 0; i < waitingRecipeSOList.Count; i++){...// 找到了匹配的订单,送餐成功successfulRecipesAmount++;...}...}... public int GetSuccessfulRecipesAmount(){return successfulRecipesAmount;}
}
// GameOverUI.cs中
using TMPro;
using UnityEngine;public class GameOverUI : MonoBehaviour
{[SerializeField] private TextMeshProUGUI recipesDeliveredText;private void Start(){KitchenGameManager.Instance.OnStateChanged += KitchenGameManager_OnGameStateChanged;Hide();}private void KitchenGameManager_OnGameStateChanged(object sender, System.EventArgs e){if (KitchenGameManager.Instance.IsGameOver()){Show();recipesDeliveredText.text = DeliveryManager.Instance.GetSuccessfulRecipesAmount().ToString();} else{ Hide();  }}private void Show(){gameObject.SetActive(true);}private void Hide(){gameObject.SetActive(false);}
}
运行游戏,当游戏结束时即可看到对应UI
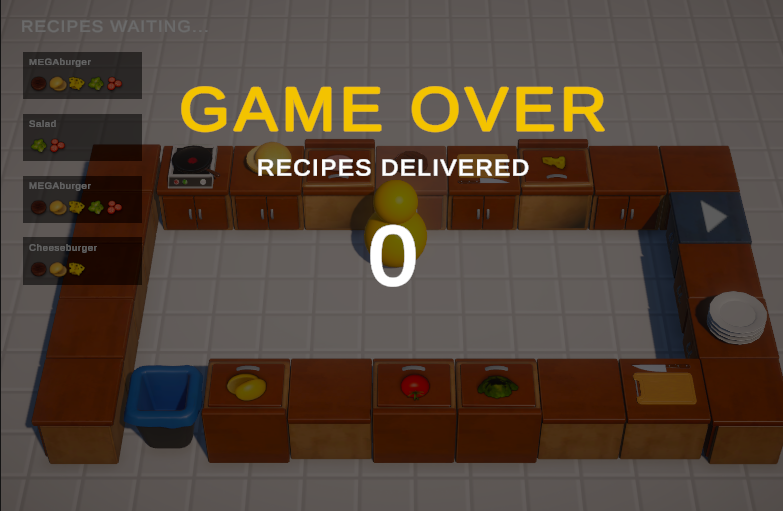
接下来在游戏运行场景的右上角做一个圆形的进度条来表示开始游戏后过去的时间
在Canvas下新建空物体命名为GamePlayingClockUI,更改属性调整锚点;在该物体下新建Image命名为Background,SourceImage选择Circle,调整颜色,可以添加Outline和Shadow组件;复制Background改名为TimerImage,注意顺序放到Background的后面,主要将Image Type改为Fiiled,其他属性进行调整,添加组件(下图为TimerImage的Inspector面板)
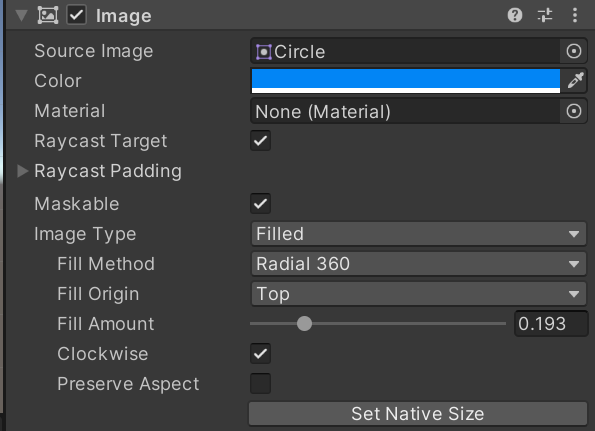
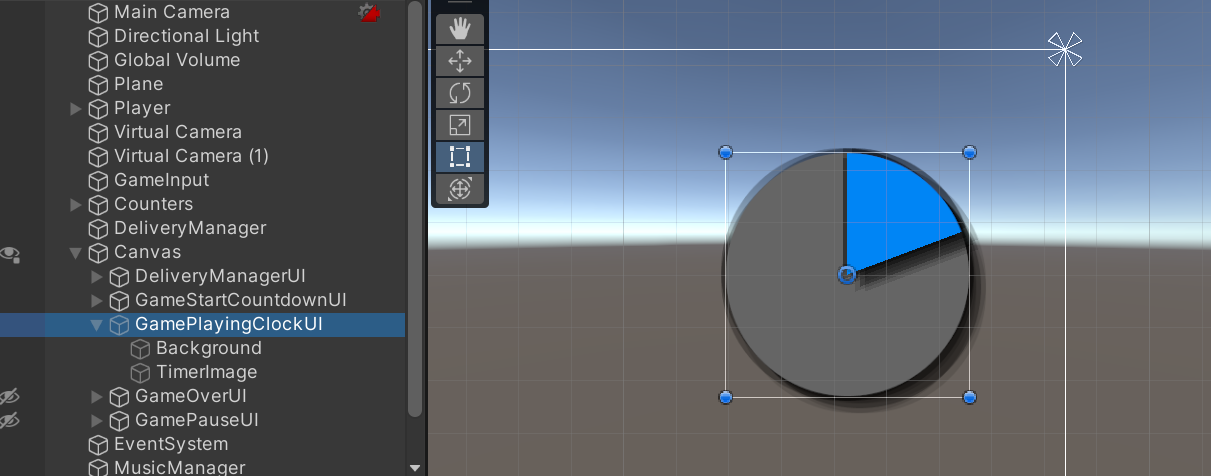
在Scripts/UI文件夹中新建GamePlayingClockUI.cs,添加到对象上,在KitchenGameManager.cs中添加一个方法得到归一化后的计时器的值,在GamePlayingClockUI.cs中根据归一化的值填充图形
// KitchenGameManager.cs中
...
public class KitchenGameManager : MonoBehaviour
{...private float gamePlayingTimerMax = 10f;...public float GetGamePlayingTimerNormalized(){return 1 - gamePlayingTimer / gamePlayingTimerMax;}...
}
运行游戏,即可看到圆形的进度条
目前为止的工程文件
17.3 主菜单页面与加载页面
在Scenes文件夹右键->Create->Scene新建一个场景,命名为MainMenuScene.unity;在场景中右键->UI->Canvas新建一个Canvas,将Canvas Scaler中的UI Scale Mode改为Scale With Screen Size,将Reference Resolution改为1920 1080,将Match改为1,完全匹配高度;在Canvas下新建一个空物体,命名为MainMenuUI,改为stretch;在MainMenuUI下右键->UI->Button新建PlayButton,加组件调整属性,复制一个改名为QuitButton,安排好后效果如下
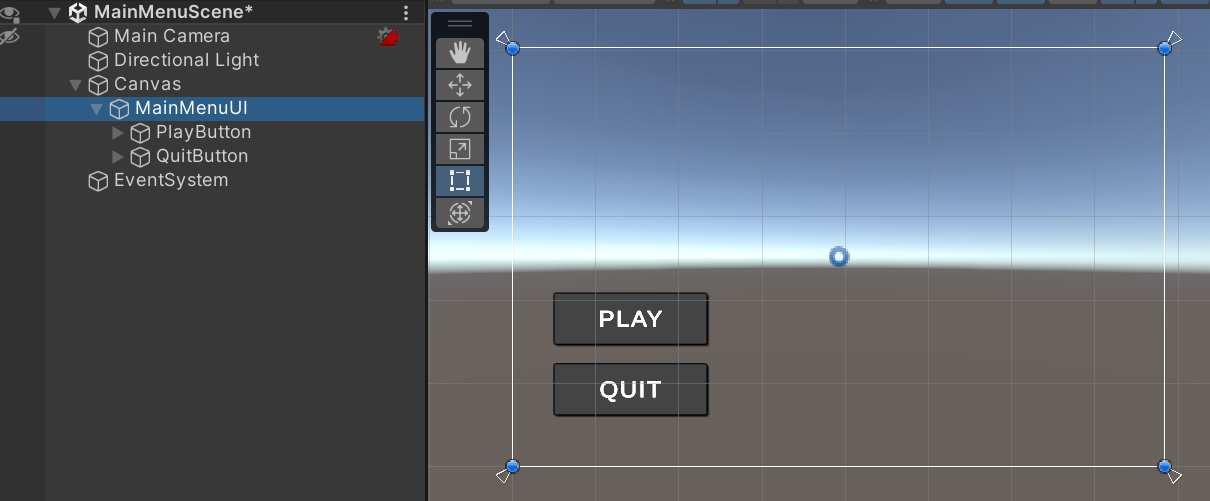
我们可以装饰一下菜单场景,将GameScene中的GlobalVolume和Plane复制到MainMenuScene,可以将_Assets/PrefabsVisuals中的、PlayerViusal.prefab拖动到场景,还可以改变其材质、使用cineMachine插件添加Virtual Camera、在MainMenuUI下添加Image,Source Image选择KitchenChaosLogo添加游戏logo,最终效果如下

在File->Build Settings中将MainMenuScene添加为第一个场景,对应的索引为0

在Scripts/UI文件夹下新建MainMenuUI.cs,将脚本挂载到对象上,用匿名函数给两个按钮添加按下按钮调用的方法
// MainMenuUI.cs
using UnityEngine;
using UnityEngine.UI;public class MainMenuUI : MonoBehaviour
{[SerializeField] private Button playButton;[SerializeField] private Button quitButton;private void Awake(){playButton.onClick.AddListener(() =>{SceneManager.LoadScene(1);});quitButton.onClick.AddListener(() => {Application.Quit();});}
}
如果现在就运行游戏,我们会在主菜单场景和游戏场景中卡顿一下,这是因为我们的游戏场景加载需要一定时间,这样的“冻结”的画面会让玩家体验很不好,并且如果游戏内容很多,加载的时间会更长,所以我们来在中间加一个加载的场景
在Scenes文件夹新建场景LoadingScene.unity;在MainCamera中将Background改为黑色;新建Canvas,属性修改同上;在Canvas下右键->UI->Text,调整属性与文字内容,打开Game窗口效果如下

我们要在主菜单的场景通过脚本来到这个加载场景,然而当场景变化时,一个场景中的物体都会被销毁,所以我们需要一个特殊的脚本能在场景之间传输数据,在主菜单场景告诉加载场景我们要去的场景是哪个(我们也可以用Object.DontDestroyOnLoad来让某个对象在场景切换时不被销毁,不过这里我们使用其他的方法)
在Scripts文件夹新建Loader.cs,我们需要一个Static的类,并且不继承自MonoBehaviour,在这个脚本中,使用枚举类型定义一下各个场景,避免调用方法时使用string或索引。我们不能使用SceneManager调用LoadScene方法加载LoadingScene之后马上去加载targetScene,这样我们还是会卡在targetScene,我们必须等待LoadingScene加载出来(即Update()开始运行时)再去加载targetScene,所以这里要使用一个回调函数。在Scripts文件夹新建LoaderCallback.cs,场景中新建空物体命名为LoaderCallback并添加脚本,在LoaderCallback.cs中只需要在Update()的第一帧开始调用这个回调函数即可
// Loader.cs中
using UnityEngine.SceneManagement;public static class Loader
{public enum Scene{MainMenuScene,GameScene,LoadingScene}private static Scene targetScene;public static void Load(Scene targetScene){Loader.targetScene = targetScene;SceneManager.LoadScene(Scene.LoadingScene.ToString());}public static void LoaderCallback(){SceneManager.LoadScene(targetScene.ToString());}
}
// LoaderCallback.cs中
using UnityEngine;public class LoaderCallback : MonoBehaviour
{private bool isFirstUpdate = true;private void Update(){if (isFirstUpdate){isFirstUpdate = false;Loader.LoaderCallback();}}
}
最后在之前的MainMenuUI.cs中,不直接使用SceneManager,而是使用Loader.cs中的Load()方法切换场景,就能达到先切换到加载场景的效果
// MainMeneUI.cs
...
public class MainMenuUI : MonoBehaviour
{...private void Awake(){playButton.onClick.AddListener(() =>{Loader.Load(Loader.Scene.GameScene);});...}
}
运行游戏,可以正常达到加载场景

目前为止的工程文件
17.4 暂停游戏与返回主页
在PlayerInputAction.inputactions中,添加一个暂停Action,绑定Escape键

在GameInput.cs中,为该按键触发的委托添加会调用的函数,函数中触发了一个EventHandler委托,我们在KitchenGameManager.cs中为这个委托添加会调用的函数,让委托触发时将Time.timeScale在0f和1f之间切换,Time.timeScale = 0时,游戏时间会暂停。这里教程中还在GameInput.cs中用了单例模式。
// GameInput.cs中
...
public class GameInput : MonoBehaviour
{public static GameInput Instance { get; private set; }...public event EventHandler OnPauseAction;...private void Awake(){Instance = this;...playerInputActions.Player.Pause.performed += Pause_performed;}private void OnDestroy(){...playerInputActions.Player.Pause.performed -= Pause_performed;playerInputActions.Disable();}...private void Pause_performed(UnityEngine.InputSystem.InputAction.CallbackContext obj){OnPauseAction?.Invoke(this, EventArgs.Empty);}...
}
// KitchenGameManager.cs中
...
public class KitchenGameManager : MonoBehaviour
{...public event EventHandler OnGameUnpaused;...private void Start(){GameInput.Instance.OnPauseAction += GameInput_OnPauseAction;}...private void GameInput_OnPauseAction(object sender, EventArgs e){TogglePauseGame();}...public void TogglePauseGame(){isGamePaused = !isGamePaused;if (isGamePaused){Time.timeScale = 0f;} else{Time.timeScale = 1f;}}
}
现在在游戏中按下esc键,游戏就会暂停,再次按下,游戏就会恢复,接下来我们来做暂停的UI
在Canvas下新建空对象命名为GamePauseUI,stretch;在GamePauseUI下右键->UI->Image,颜色调黑,透明度低一点,stretch;右键->UI->Text,命名PauseText,调整属性;右键->UI->Button新建两个button,分别调整属性,一个是恢复暂停用的Resume按钮,一个是回到主菜单的MainMenu按钮,创建完后效果如下
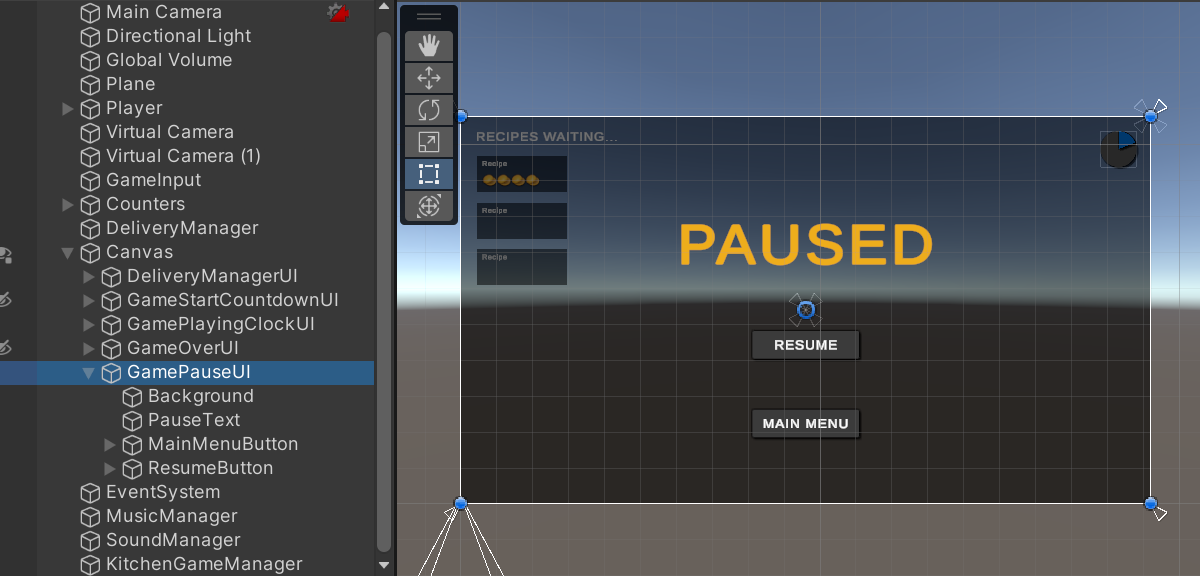
在Scripts/UI文件夹新建GamePauseUI.cs,在KitchenGameManager.cs中添加两个EventHandler委托,分别在游戏进入暂停和恢复时触发,在GamePauseUI.cs中进行UI的隐藏和显示和按钮触发的函数
// KitchenGameManager.cs中
...
public class KitchenGameManager : MonoBehaviour
{...public event EventHandler OnGamePaused;public event EventHandler OnGameUnpaused;...public void TogglePauseGame(){isGamePaused = !isGamePaused;if (isGamePaused){...OnGamePaused?.Invoke(this, EventArgs.Empty);} else{...OnGameUnpaused?.Invoke(this, EventArgs.Empty);}}
}
// GamePauseUI.cs中
using System;
using UnityEngine;
using UnityEngine.UI;public class GamePauseUI : MonoBehaviour
{[SerializeField] private Button resumeButton;[SerializeField] private Button mainMenuButton;private void Awake(){resumeButton.onClick.AddListener(() =>{KitchenGameManager.Instance.TogglePauseGame();});mainMenuButton.onClick.AddListener(() =>{Loader.Load(Loader.Scene.MainMenuScene);});}private void Start(){KitchenGameManager.Instance.OnGamePaused += KitchenGameManager_OnGamePaused;KitchenGameManager.Instance.OnGameUnpaused += KitchenGameManager_OnGameUnpaused;Hide();}private void KitchenGameManager_OnGamePaused(object sender, EventArgs e){Show();}private void KitchenGameManager_OnGameUnpaused(object sender, EventArgs e){Hide();}private void Show(){gameObject.SetActive(true);}private void Hide(){gameObject.SetActive(false);}
}
运行游戏,可以正常恢复暂停或回到主菜单,但是我们遇到了很多问题
第一个问题:游戏在再次进入到主菜单和进入游戏时时间依然是暂停的,这是因为我们的Time.timeScale暂停后就一直是0,没有恢复,为了恢复我们可以在MainMenuUI.cs中将Time.timeScale重置回1
// MainMenuUI.cs中
using UnityEngine;
using UnityEngine.UI;public class MainMenuUI : MonoBehaviour
{[SerializeField] private Button playButton;[SerializeField] private Button quitButton;private void Awake(){playButton.onClick.AddListener(() =>{Loader.Load(Loader.Scene.GameScene);});quitButton.onClick.AddListener(() => {Application.Quit();});Time.timeScale = 1f;}
}
第二个问题:一般我们场景中的实例都会在场景销毁后被销毁,但是PlayerInputActions类,也就是我们用到的新的input system中使用到的一个类的实例不会自动销毁,我们需要手动在场景销毁时将它销毁,OnDestroy()会在销毁时被调用,可以用它去取消事件的订阅,并且使用Dispose()销毁该实例
// GameInput.cs中
...
public class GameInput : MonoBehaviour
{...private void OnDestroy(){playerInputActions.Player.Interact.performed -= Interact_performed;playerInputActions.Player.InteractAlternate.performed -= InteractAlternate_performed;playerInputActions.Player.Pause.performed -= Pause_performed;playerInputActions.Dispose();}...
}
第三个问题:static修饰的变量或方法不属于某一个实例,它不会被销毁。在Loader中使用static没有什么问题,但是有些地方使用static可能会导致第二次从主菜单进入游戏场景时受到来自上一次游戏的某些影响,这里我们的代码中有三处会收到影响,分别是CuttingCounter.cs中的OnAnyCut、BaseCounter.cs中的OnAnyObjectPlacedHere、TrashCounter.cs中的OnAnyObjectTrashed,这三个都是我们不希望类每个实例都单独发送发送事件而设置成static的EventHandler委托,我们只需要在相应的脚本中加上重置的方法,然后在一个新的脚本中调用即可。
三个类中重置static变量的方法,注意其他两个类都继承自BaseCounter,所以都使用一个函数名可能会报错,我们需要加上new关键字
// CuttingCounter.cs中
...
public class CuttingCounter : BaseCounter, IHasProgress
{...new public static void ResetStaticData(){OnAnyCut = null;}...
}
// BaseCounter.cs中
...
public class BaseCounter : MonoBehaviour, IHasProgress
{...public static void ResetStaticData(){OnAnyObjectPlacedHere = null;}...
}
// TrashCounter.cs中
...
public class BaseCounter : BaseCounter, IHasProgress
{...public static void ResetStaticData(){OnAnyObjectTrashed = null;}...
}
新建ResetStaticDataManager.cs并在主菜单场景新建空物体命名为ResetStaticDataManager,添加脚本
// ResetStaticDataManager.cs
using UnityEngine;public class ResetStaticDataManager : MonoBehaviour
{private void Awake(){CuttingCounter.ResetStaticData();BaseCounter.ResetStaticData();TrashCounter.ResetStaticData();}
}
再次运行游戏后在多次进入场景后就不会出现上述问题,目前为止的工程文件
17.7 音量设置
接下来来做一个设置界面,我们希望在游戏暂停时有一个Option按钮,按下可以显示一些设置选项,我们先做音量设置的选项,两个调整音量的设置选项都有十个级别,每次按下时增大一个等级
在GameScene中的Canvas下新建空物体,命名为OptionsUI,调整属性;在OptionsUI下新建Image作为背景,Stretch填充背景、颜色改为黑色降低一点透明度;新建Text显示OPTIONS;新建三个按钮SoundEffectsButton、MusicButton和CloseButton,调整属性,最后效果如下

在Scripts/UI文件夹下新建OptionsUI.cs;在SoundManager.cs(管理音效的)中写改变音量的方法添加到对应对象上,并在处理声音播放的PlaySound()方法使用我们调整后的音量大小;新建MusicManager.cs添加到对应对象上,和SoundManager中差不多,但是是调整AudioSource组件的属性来改变的音量;在OptionUI.cs中进行订阅
// SoundManager.cs中
...
public class SoundManager : MonoBehaviour
{...private float volume = 1f;...private void PlaySound(AudioClip audioClip, Vector3 position, float volumeMultiplier = 1f){AudioSource.PlayClipAtPoint(audioClip, position, volumeMultiplier * volume);}...public void ChangeVolume(){volume += 0.1f;if (volume > 1f){volume = 0f;}}
}
// MusicManager.cs中
using UnityEngine;public class MusicManager : MonoBehaviour
{public static MusicManager Instance { get; private set; }private AudioSource audioSource;private float volume = 0.3f;private void Awake(){Instance = this;audioSource = GetComponent<AudioSource>();audioSource.volume = volume;}public void ChangeVolume(){volume += 0.1f;if (volume > 1f){volume = 0f;}audioSource.volume = volume;}public float GetVolume(){return volume;}
}
// OptionsUI.cs
using TMPro;
using UnityEngine;
using UnityEngine.UI;public class OptionsUI : MonoBehaviour
{public static OptionsUI Instance { get; private set; }[SerializeField] private Button soundEffectsButton;[SerializeField] private Button musicButton;[SerializeField] private Button closeButton;[SerializeField] private TextMeshProUGUI soundEffectsText;[SerializeField] private TextMeshProUGUI musicText;private void Awake(){Instance = this;soundEffectsButton.onClick.AddListener(() =>{SoundManager.Instance.ChangeVolume();UpdateVisual();});musicButton.onClick.AddListener(() =>{MusicManager.Instance.ChangeVolume();UpdateVisual();});}private void Start(){UpdateVisual();}private void UpdateVisual(){soundEffectsText.text = "Sound Effects: " + Mathf.Round(SoundManager.Instance.GetVolume() * 10f);musicText.text = "Music: " + Mathf.Round(MusicManager.Instance.GetVolume() * 10f);}
}
这时运行游戏,按下暂停键时暂停界面和设置界面会同时出现,可以正常调整音量,接下来我们来写从暂停界面到设置界面的逻辑
在GamePauseUI下添加一个按钮OptionsButton,调整相应属性,调整完如下
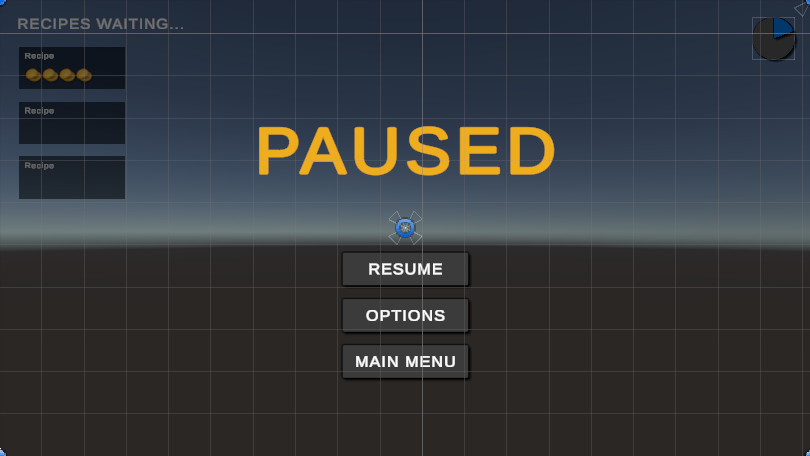
在OptionsUI.cs中添加显示和隐藏显示隐藏UI相关的代码(注意由于在暂停状态下按esc可以退出该模式,所以还要订阅事件添加一个按下esc隐藏这些UI的函数),在GamePauseUI.cs中,给上面的OptionsButton添加触发的函数
// OptionsUI.cs中
...
public class OptionsUI : MonoBehaviour
{...private void Awake(){...closeButton.onClick.AddListener(() =>{Hide();});}private void Start(){...Hide();}private void KitchenGameManager_OnGameUnpaused(object sender, System.EventArgs e){Hide();}...public void Show(){gameObject.SetActive(true);}public void Hide(){gameObject.SetActive(false);}
}
// GamePauseUI.cs中
...
public class GamePauseUI : MonoBehaviour
{...private void Awake(){...optionsButton.onClick.AddListener(() =>{OptionsUI.Instance.Show();});}...
}
这时运行游戏我们可以正常进入和退出设置界面和正常调整音量,但是当我们完全退出游戏再次打开游戏时音量又被恢复为了我们初始化时设置的值,如果我们希望保存这个数据,可以使用PlayerPrefs.SetFloat()来保存变量、GetFloat()来获取变量,这里又要用到字符串,我们不希望使用字符串,所以先将字符串存为一个变量,在SoundManager.cs和MusicManager.cs中保存变量
// SoundManager.cs中
...
public class SoundManager : MonoBehaviour
{private const string PLAYER_PREFS_SOUND_EFFECTS_VOLUME = "SoundEffectsVolume";private void Awake(){...volume = PlayerPrefs.GetFloat(PLAYER_PREFS_SOUND_EFFECTS_VOLUME, 1f);}...public void ChangeVolume(){...PlayerPrefs.SetFloat(PLAYER_PREFS_SOUND_EFFECTS_VOLUME, volume);PlayerPrefs.Save();}
}
// MusicMnanager.cs中
...
public class MusicManager : MonoBehaviour
{private const string PLAYER_PREFS_MUSIC_VOLUME = "MusicVolume";...private void Awake(){...volume = PlayerPrefs.GetFloat(PLAYER_PREFS_MUSIC_VOLUME, 0.3f);audioSource.volume = volume;}public void ChangeVolume(){...PlayerPrefs.SetFloat(PLAYER_PREFS_MUSIC_VOLUME, volume);PlayerPrefs.Save();}
}
这样就可以在每次进入游戏后都加载已经保存的数据了,这里我们游戏单局事件比较短,所以没有保存其他游戏的数据,如果想要将游戏数据保存为json格式可以看CodeMonkey的这期视频
目前为止的工程文件
17.6 按键绑定设置
在OptionsUI对象下新建Text和Button,创建需要绑定的按键的文本和按钮,效果如下

在OptionsUI.cs中获取按钮与按钮中的文字
// OptionsUI.cs中
public class OptionsUI : MonoBehaviour
{ ...[SerializeField] private Button moveUpButton;[SerializeField] private Button moveDownButton;[SerializeField] private Button moveLeftButton;[SerializeField] private Button moveRightButton;[SerializeField] private Button interactButton;[SerializeField] private Button interactAlternateButton;[SerializeField] private Button pauseButton;[SerializeField] private TextMeshProUGUI soundEffectsText;[SerializeField] private TextMeshProUGUI musicText;[SerializeField] private TextMeshProUGUI moveUPText;[SerializeField] private TextMeshProUGUI moveDownText;[SerializeField] private TextMeshProUGUI moveLeftText;[SerializeField] private TextMeshProUGUI moveRightText;[SerializeField] private TextMeshProUGUI interactText;[SerializeField] private TextMeshProUGUI interactAlternateText;[SerializeField] private TextMeshProUGUI pauseText;...
}
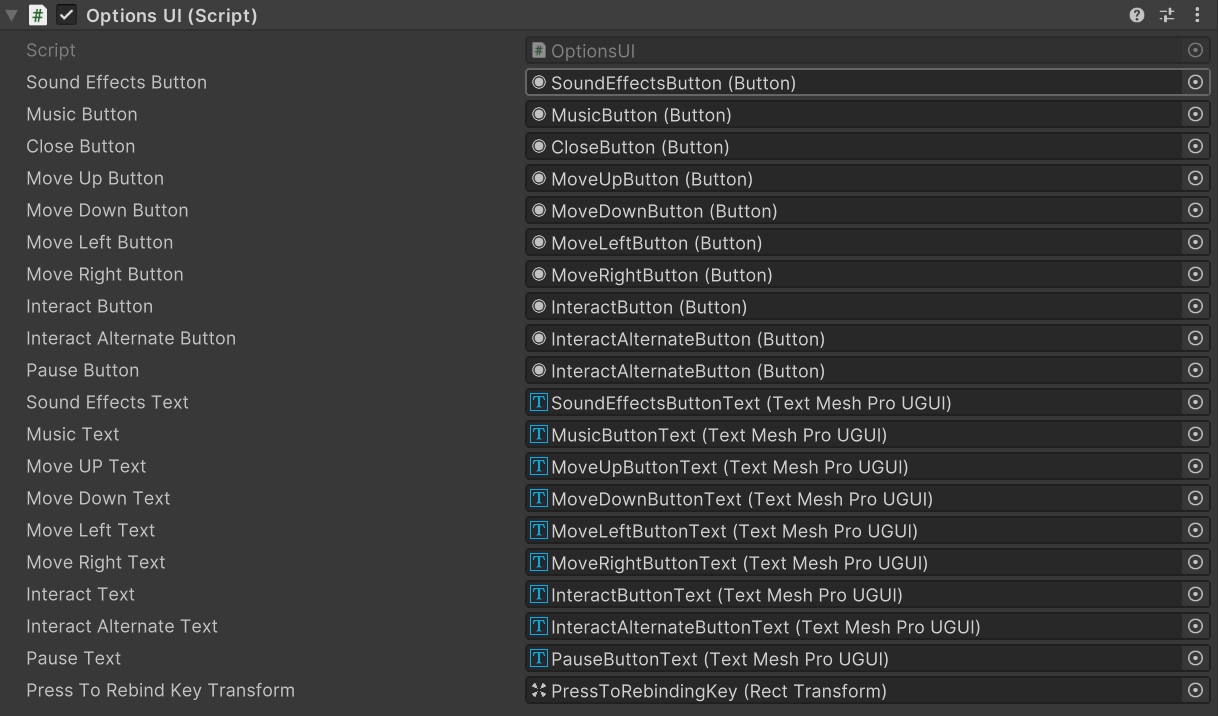
首先将按键上的文字都换成对应的默认绑定的按键,我们不希望直接在OptionsUI.cs中直接通过playerInputActions去获取绑定的按键,我们希望我们可以通过调用一个方法在不知道用了底层用了什么系统的情况下就获取到了对应按键,因此我们需要在GameInput.cs中写一个GetBindingText()方法用于获取当前绑定的按键,在OptionsUI.cs中的UpdateVisual()中更新按钮上的文本
// GameInput.cs中
...
public class GameInput : MonoBehaviour
{public enum Binding{Move_Up,Move_Down,Move_Left,Move_Right,Interact,InteractAlternate,Pause}public string GetBindingText(Binding binding){switch (binding){default:case Binding.Move_Up:return playerInputActions.Player.Move.bindings[1].ToDisplayString();case Binding.Move_Down:return playerInputActions.Player.Move.bindings[2].ToDisplayString();case Binding.Move_Left:return playerInputActions.Player.Move.bindings[3].ToDisplayString();case Binding.Move_Right:return playerInputActions.Player.Move.bindings[4].ToDisplayString();case Binding.Interact:return playerInputActions.Player.Interact.bindings[0].ToDisplayString();case Binding.InteractAlternate:return playerInputActions.Player.InteractAlternate.bindings[0].ToDisplayString();case Binding.Pause:return playerInputActions.Player.Pause.bindings[0].ToDisplayString();}}
}
// OptionsUI.cs中
...
public class OptionsUI : MonoBehaviour
{ ...private void UpdateVisual(){...moveUPText.text = GameInput.Instance.GetBindingText(GameInput.Binding.Move_Up);moveDownText.text = GameInput.Instance.GetBindingText(GameInput.Binding.Move_Down);moveLeftText.text = GameInput.Instance.GetBindingText(GameInput.Binding.Move_Left);moveRightText.text = GameInput.Instance.GetBindingText(GameInput.Binding.Move_Right);interactText.text = GameInput.Instance.GetBindingText(GameInput.Binding.Interact);interactAlternateText.text = GameInput.Instance.GetBindingText(GameInput.Binding.InteractAlternate);pauseText.text = GameInput.Instance.GetBindingText(GameInput.Binding.Pause);}
}
接下来开始处理游戏中的按键绑定,首先先来测试一下,重新绑定上键。在GameInput.cs中添加一个进行交互式绑定的方法,在OptionsUI.cs中订阅上键按下的事件(这里教程视频中写的代码其实多让RebindBinding()方法接收了一个Binding类型的参数,这个参数在后面才会用到)
// GameInput.cs中
...
public class GameInput : MonoBehaviour
{...public void RebindBinding(){playerInputActions.Player.Disable();playerInputActions.Player.Move.PerformInteractiveRebinding(1).OnComplete(callback =>{Debug.Log(callback.action.bindings[1].path);Debug.Log(callback.action.bindings[1].overridePath);callback.Dispose();playerInputActions.Player.Enable();}).Start();}
}
// OptionsUI.cs中
...
public class OptionsUI : MonoBehaviour
{...private void Awake(){...moveUpButton.onClick.AddListener(() =>{GameInput.Instance.RebindBinding();});...}
}
这里我还没看作者的讲新的input system的视频,找到了文档但还是每太看明白,问了一下newbing看懂了,注意这里链式调用,是先执行的Start()再执行的OnComplete()
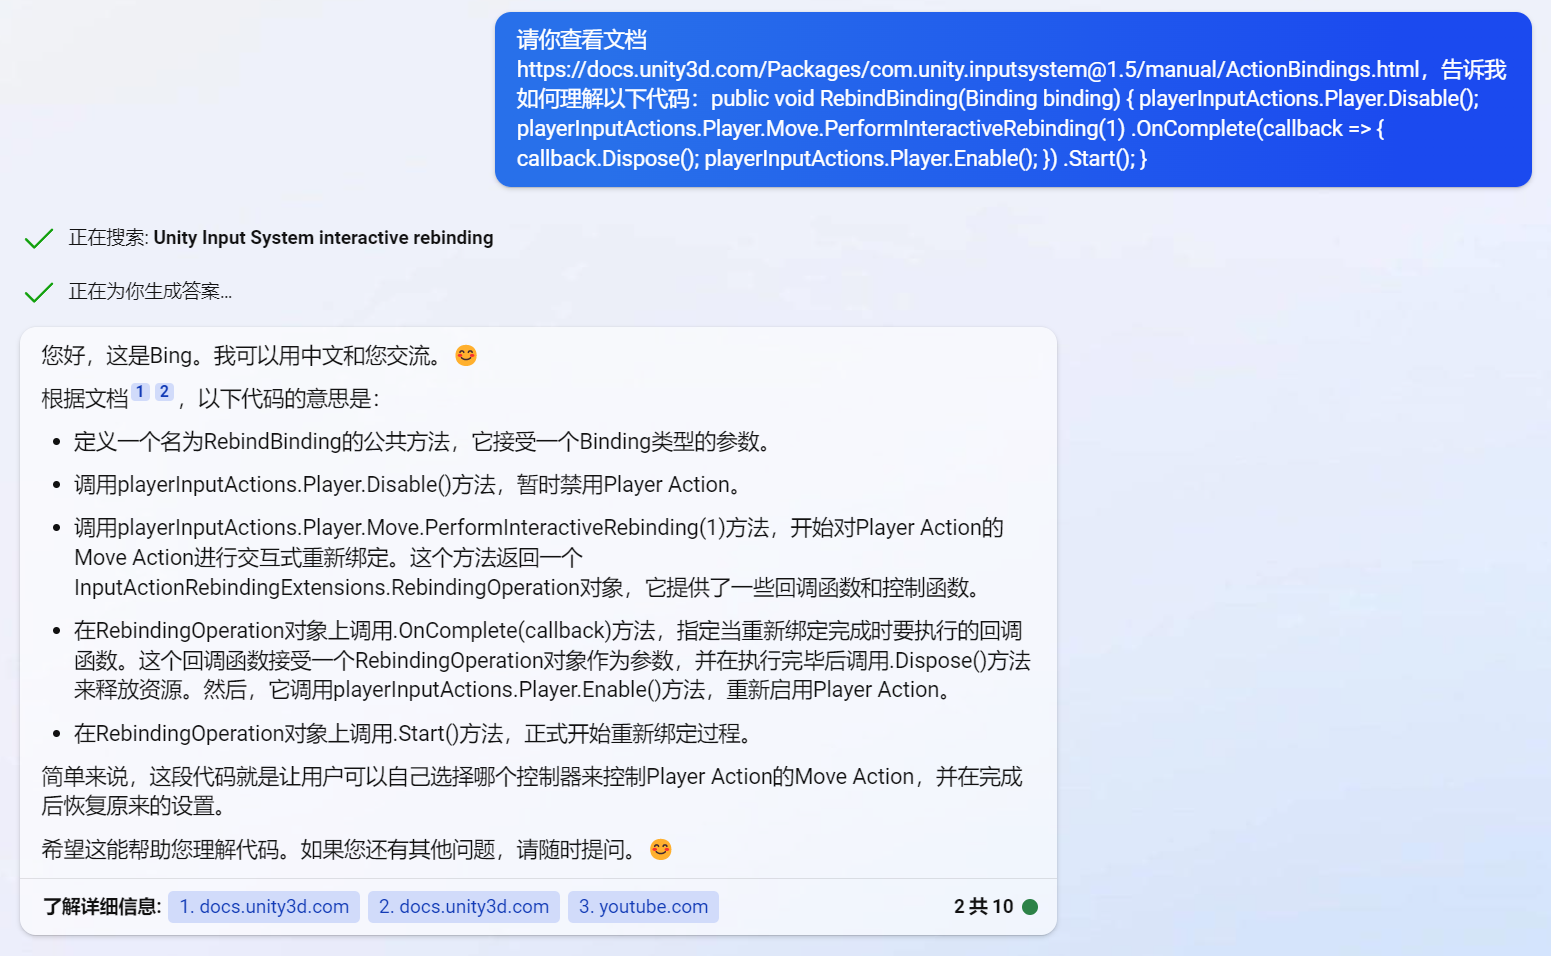
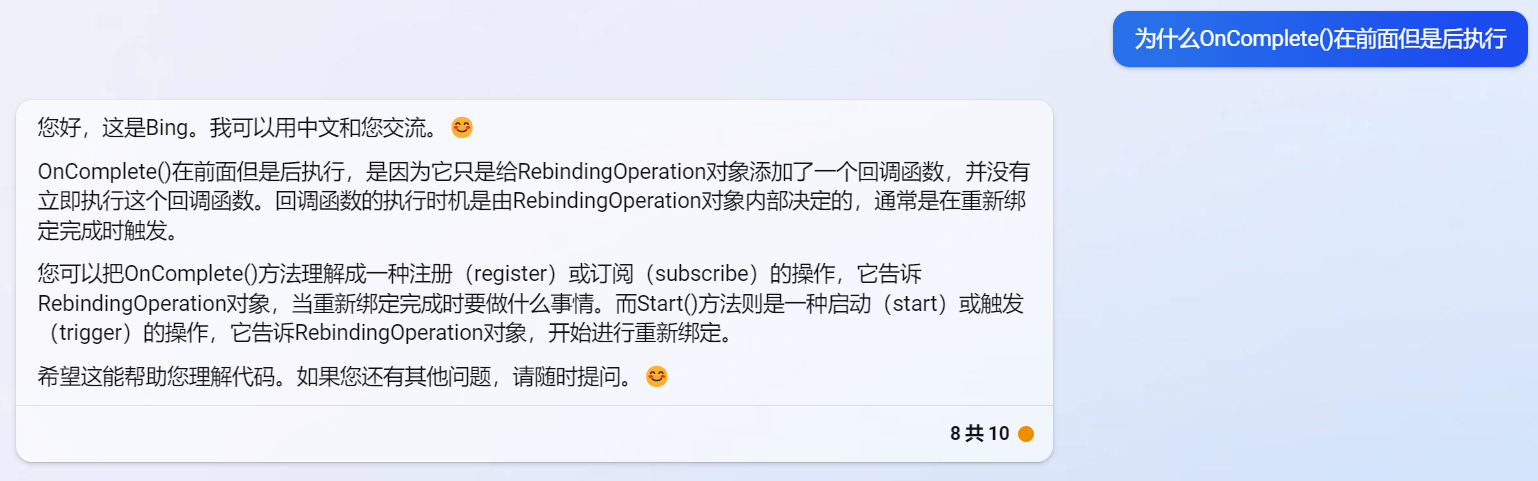
在检查运行游戏确实可以更改上键的绑定,并且可以在控制台打印出更改前后的按键是哪个,接下来我们可以在绑定的过程中增加一个提示画面,让玩家按下一个按键来绑定,同时在绑定后更改原按钮上的文本。
在OptionsUI对象上,新建空物体PressToRebindingKey,修改属性;在空物体下新建Image对象和Text对象,调整属性,效果如下

在GameInput.cs中,我们让RebindBinding()方法接收一个Action委托,在OptionsUI.cs中使用时再套一个函数为委托添加更新按键文本和显示关闭UI的方法
// GameInput.cs中
...
public class GameInput : MonoBehaviour
{...public void RebindBinding(Action onActionRebind){playerInputActions.Player.Disable();playerInputActions.Player.Move.PerformInteractiveRebinding(1).OnComplete(callback =>{callback.Dispose();playerInputActions.Player.Enable();onActionRebind();}).Start();}
}
// OptionsUI.cs中
...
public class OptionsUI : MonoBehaviour
{...private void Awake(){...moveUpButton.onClick.AddListener(() =>{RebindBinding();});...}private void Start(){...HidePressToRebindKey();...}...private void ShowPressToRebindKey(){pressToRebindKeyTransform.gameObject.SetActive(true);}private void HidePressToRebindKey(){pressToRebindKeyTransform.gameObject.SetActive(false);}...private void RebindBinding(GameInput.Binding binding){ShowPressToRebindKey();GameInput.Instance.RebindBinding(() =>{HidePressToRebindKey();UpdateVisual();});}
}
运行游戏,即可在绑定按键时看到绑定提示和绑定后的变化了,接下来,为所有其他的按键添加绑定的方法,这次我们在GameInput.cs的RebindBinding()方法中还需要接收一个Binding对象,用于确定绑定的具体是哪个按键,由于绑定的按键很多,调用各个函数的步骤基本相同,所以用switch语句对不同案件所需的不同变量进行改变,然后再调用完成交互式按键绑定的函数
// GameInput.cs中
...
public class GameInput : MonoBehaviour
{...public void RebindBinding(Binding binding, Action onActionRebind){playerInputActions.Player.Disable();InputAction inputAction;int bindingIndex;switch (binding){default:case Binding.Move_Up:inputAction = playerInputActions.Player.Move;bindingIndex = 1;break;case Binding.Move_Down:inputAction = playerInputActions.Player.Move;bindingIndex = 2;break;case Binding.Move_Left:inputAction = playerInputActions.Player.Move;bindingIndex = 3;break;case Binding.Move_Right:inputAction = playerInputActions.Player.Move;bindingIndex = 4;break;case Binding.Interact:inputAction = playerInputActions.Player.Interact;bindingIndex = 0;break;case Binding.InteractAlternate:inputAction = playerInputActions.Player.InteractAlternate;bindingIndex = 0;break;case Binding.Pause:inputAction = playerInputActions.Player.Pause;bindingIndex = 0;break;}inputAction.PerformInteractiveRebinding(bindingIndex).OnComplete(callback =>{callback.Dispose();playerInputActions.Player.Enable();onActionRebind();}).Start();}
}
// OptionsUI.cs中
...
public class OptionsUI : MonoBehaviour
{...private void Awake(){...moveUpButton.onClick.AddListener(() => { RebindBinding(GameInput.Binding.Move_Up); });moveDownButton.onClick.AddListener(() => { RebindBinding(GameInput.Binding.Move_Down); });moveLeftButton.onClick.AddListener(() => { RebindBinding(GameInput.Binding.Move_Left); });moveRightButton.onClick.AddListener(() => { RebindBinding(GameInput.Binding.Move_Right); });interactButton.onClick.AddListener(() => { RebindBinding(GameInput.Binding.Interact); });interactAlternateButton.onClick.AddListener(() => { RebindBinding(GameInput.Binding.InteractAlternate); });pauseButton.onClick.AddListener(() => { RebindBinding(GameInput.Binding.Pause); });...}...private void RebindBinding(GameInput.Binding binding){ShowPressToRebindKey();GameInput.Instance.RebindBinding(binding, () =>{HidePressToRebindKey();UpdateVisual();});}
}
运行游戏,即可在游戏中绑定所有按键
最后,我们可以在GameInput.cs中使用新的input system中的SaveBindingOverridesAsJson()方法来保存设置,然后使用Playerprefs.setString()将设置保存为字符串,注意在Awake()中读取设置时需要在PlayerInputActions实例化之后,playerInputActions.Player.Enable()之前
// GameInput.cs中
...
public class GameInput : MonoBehaviour
{private const string PLAYER_PREFS_BINDINGS = "InputBindings";...private void Awake(){...if (PlayerPrefs.HasKey(PLAYER_PREFS_BINDINGS)){playerInputActions.LoadBindingOverridesFromJson(PlayerPrefs.GetString(PLAYER_PREFS_BINDINGS));}...}...public void RebindBinding(Binding binding, Action onActionRebind){...inputAction.PerformInteractiveRebinding(bindingIndex).OnComplete(callback =>{...PlayerPrefs.SetString(PLAYER_PREFS_BINDINGS, playerInputActions.SaveBindingOverridesAsJson());}).Start();}
}
运行游戏,即可在完全退出游戏后仍然保存之前的按键设置,目前为止的工程文件
17.7 手柄输入与手柄菜单导航
打开PlayerInputActions.inputactions,首先在用新的input system重构角色移动的代码时作者已经说过,Move只要再绑定一个Left Stick [Gamepad]即可完成通用的手柄左摇杆的绑定,但是这样做没有处理deadzone,轻轻推一下摇杆角色就会移动我们需要在Processors中添加一个Stick Deadzone调整参数;然后在Interact添加一个Binding,绑定Button South[Gamepad];InteractAlternate绑定Button West[Gamepad];Pause绑定Start[Gamepad]
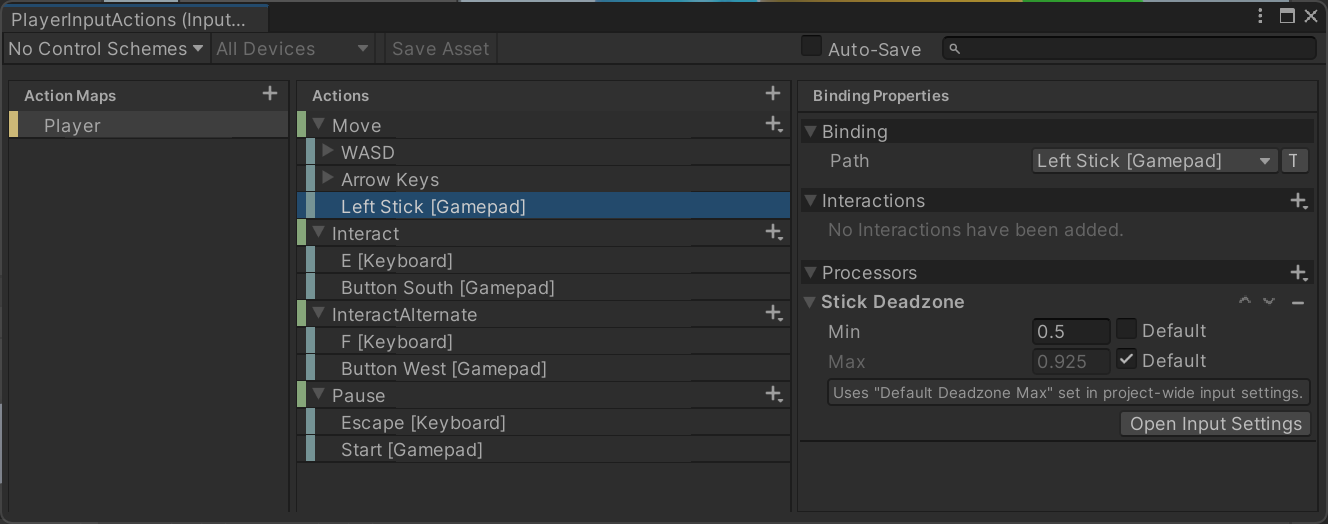
现在运行游戏可以发现一个问题,当我们朝向柜子移动时,总会不自觉地向左向右转,这是因为我们的键盘只有四个方向键,我们为了让顶着柜子时按左右移动顺畅加了一些逻辑,但是手柄的摇杆很难走正前正后方向,稍微偏一些就会被识别为其他方向的移动,这里为了解决这个问题在Player.cs中更改了之前写的 moveDir.x != 0和moveDir.z != 0
// Player.cs中
...
if (!canMove)
{...// canMove = moveDir.x != 0 && !Physics.CapsuleCast(transform.position, transform.position + Vector3.up * playerHeight, playerRadius, moveDirX, moveDistance);(moveDir.x < -0.5f || moveDir.x > 0.5f) && !Physics.CapsuleCast(transform.position, transform.position + Vector3.up * playerHeight, playerRadius, moveDirX, moveDistance);...if (canMove){...} else{...// canMove = moveDir.z != 0 && !Physics.CapsuleCast(transform.position, transform.position + Vector3.up * playerHeight, playerRadius, moveDirZ, moveDistance);(moveDir.z < -0.5f || moveDir.z > 0.5f) && !Physics.CapsuleCast(transform.position, transform.position + Vector3.up * playerHeight, playerRadius, moveDirZ, moveDistance);...if (canMove){...} else{...}}
}
接下来让我们支持在游戏中绑定手柄按键,在GameInput.cs中补上相应的枚举类型以及相应的方法
// GameInput.cs
...
public class GameInput : MonoBehaviour
{...public enum Binding{...Gamepad_Interact,Gamepad_InteractAlternate,Gamepad_Pause}...public string GetBindingText(Binding binding){switch (binding){default:...case Binding.Gamepad_Interact:return playerInputActions.Player.Interact.bindings[1].ToDisplayString();case Binding.Gamepad_InteractAlternate:return playerInputActions.Player.InteractAlternate.bindings[1].ToDisplayString();case Binding.Gamepad_Pause:return playerInputActions.Player.Pause.bindings[1].ToDisplayString();}}public void RebindBinding(Binding binding, Action onActionRebind){...switch (binding){...case Binding.Gamepad_Interact:inputAction = playerInputActions.Player.Interact;bindingIndex = 1;break;case Binding.Gamepad_InteractAlternate:inputAction = playerInputActions.Player.InteractAlternate;bindingIndex = 1;break;case Binding.Gamepad_Pause:inputAction = playerInputActions.Player.Pause;bindingIndex = 1;break;}...}
}
在选项界面加上对应的UI
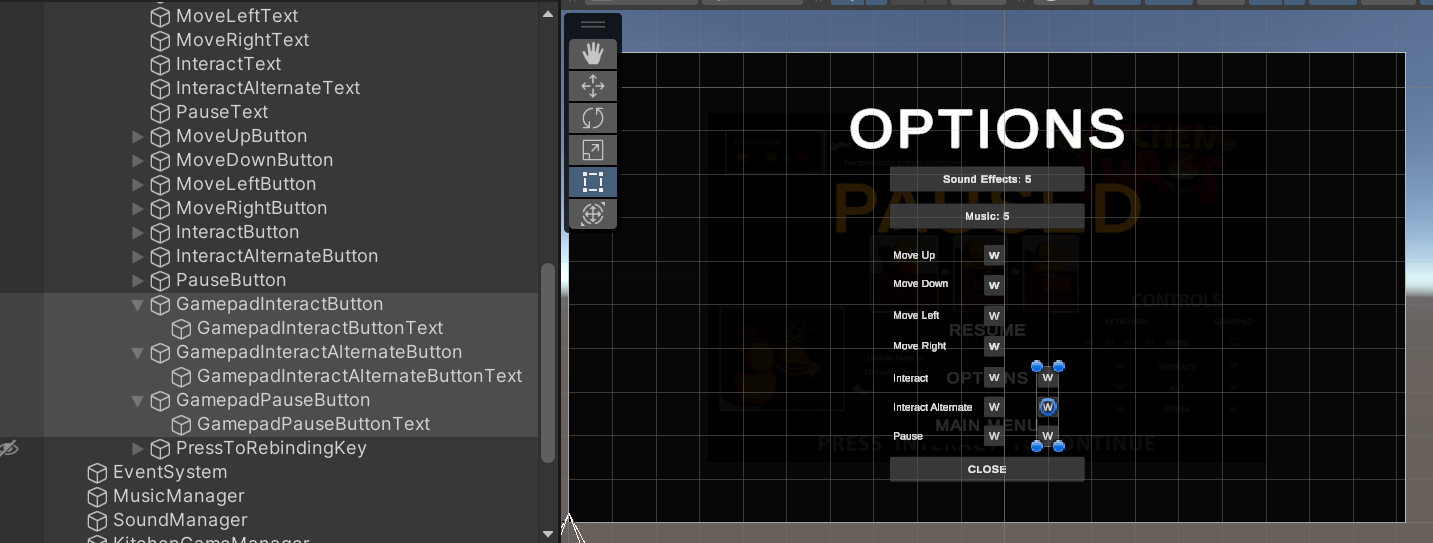
在OptionsUI.cs中添加相应逻辑
// OptionsUI.cs中
...
public class OptionsUI : MonoBehaviour
{...[SerializeField] private TextMeshProUGUI gamepadInteractText;[SerializeField] private TextMeshProUGUI gamepadInteractAlternateText;[SerializeField] private TextMeshProUGUI gamepadPauseText;[SerializeField] private Transform pressToRebindKeyTransform;private void Awake(){...gamepadInteractButton.onClick.AddListener(() => { RebindBinding(GameInput.Binding.Gamepad_Interact); });gamepadInteractAlternateButton.onClick.AddListener(() => { RebindBinding(GameInput.Binding.Gamepad_InteractAlternate); });gamepadPauseButton.onClick.AddListener(() => { RebindBinding(GameInput.Binding.Gamepad_Pause); });}...private void UpdateVisual(){...gamepadInteractText.text = GameInput.Instance.GetBindingText(GameInput.Binding.Gamepad_Interact);gamepadInteractAlternateText.text = GameInput.Instance.GetBindingText(GameInput.Binding.Gamepad_InteractAlternate);gamepadPauseText.text = GameInput.Instance.GetBindingText(GameInput.Binding.Gamepad_Pause);}...
}
现在我们可以用手柄进入菜单、选项界面,但是在这些界面时只能使用鼠标操作,我们希望使用手柄也可以上下移动看到当前选择的是哪个选项然后按A确认
首先在场景中的EventSystem中,点击Replace with InputSystemUIInputModule
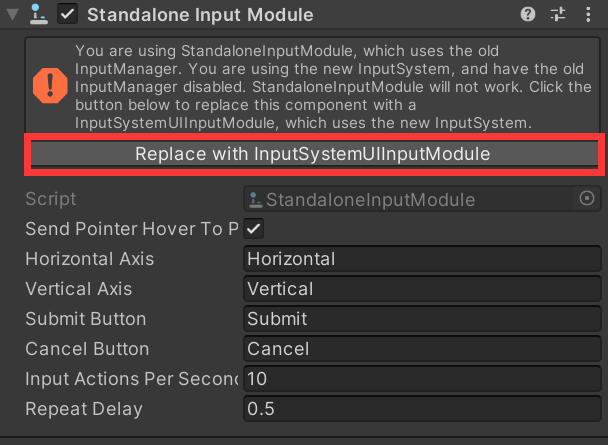
将所有按钮的SelectedColor改为一个显眼的颜色
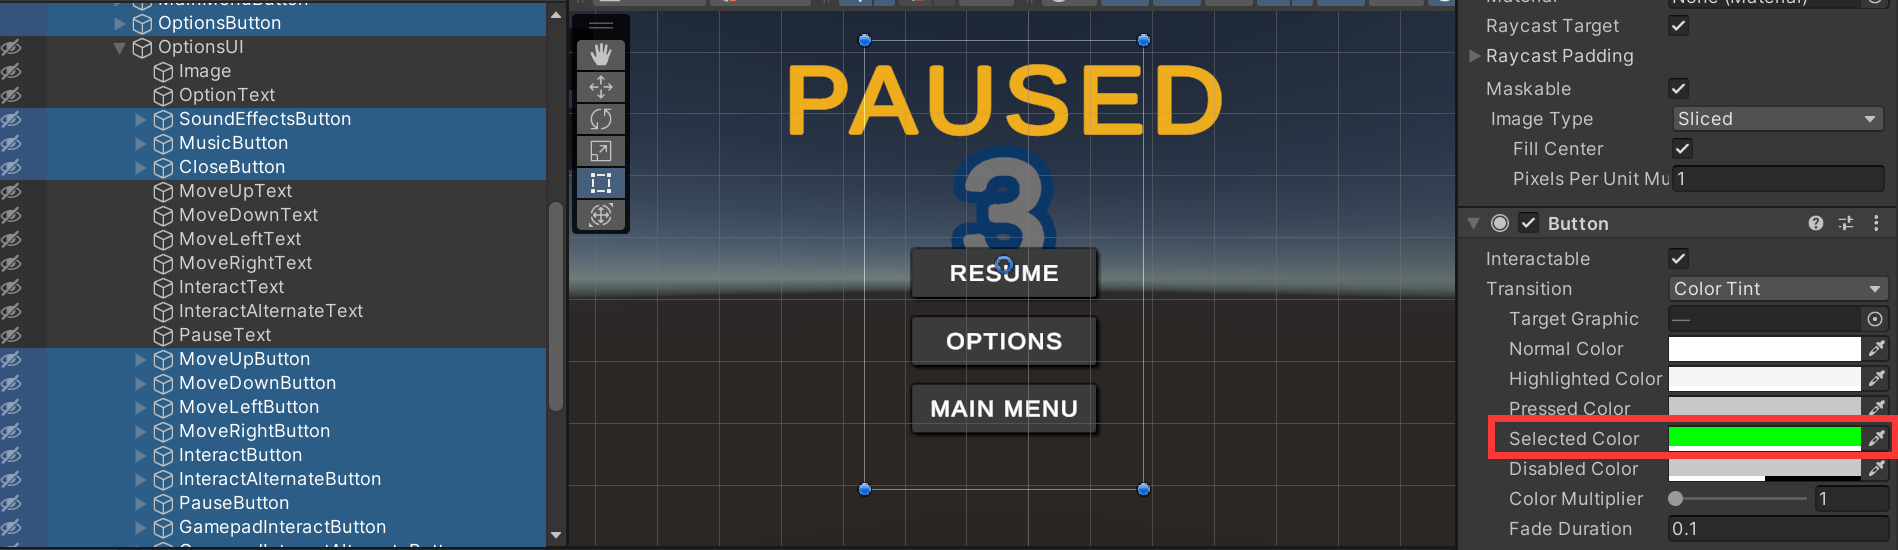
这时候运行游戏,如果我们先用鼠标按下一个按键然后在按键外松开,就可以发现这个按键带上了了Selected Color,这时就能用键盘上下键或者手柄去控制了,因此我们只要确保暂停或其他界面开启时有一个按钮已经是被选择状态了即可
// GamePauseUI.cs中
...
public class GamePauseUI : MonoBehaviour
{...private void Show(){...resumeButton.Select();}
}
// OptionsUI.cs中
...
public class OptionsUI : MonoBehaviour
{...public void Show(){...soundEffectsButton.Select();}...
}
运行游戏,进入暂停和选项界面时都有按钮可以选,但是在设置里的按钮时会选到后面的暂停界面的选项
这是因为我们的选项和暂停其实都在一个界面上,全都是激活状态,unity会在这个界面上自动寻找按钮然后自动导航,选择一个Button,在Button组件的Navigation处有一个Visualize,点击即可可视化地显示unity自动生成的导航
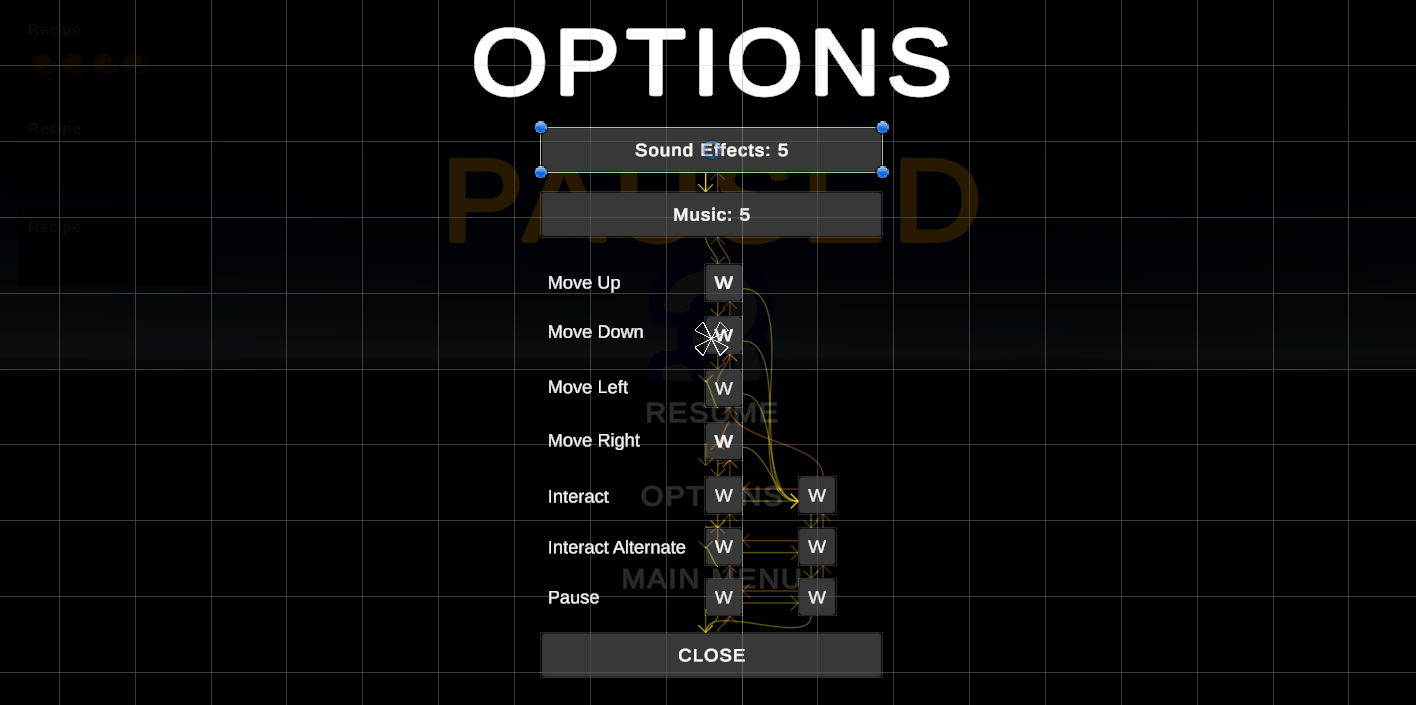
一个解决方案是,在一些导航不正确的Button上,我们可以将Navigation处的Automatic改为Explicit手动设置上下左右会导航到哪个按钮上;第二个解决方案是,我们在开启设置页面时隐藏掉暂停页面相关的对象
在OptionsUI.cs中,给Show()方法添加一个参数,这个参数是一个Action委托,该Action委托在设置界面关闭时被调用,我们希望调用GamePauseUI.cs中的Show()方法显示暂停界面,同时在GamePauseUI.cs中让玩家在暂停界面按下设置按钮显示设置界面时隐藏暂停界面
// OptionsUI.cs中
...
public class OptionsUI : MonoBehaviour
{...private Action onCloseButtonAction;private void Awake(){...closeButton.onClick.AddListener(() =>{...onCloseButtonAction();});...}...public void Show(Action onCloseButtonAction){this.onCloseButtonAction = onCloseButtonAction;...}...
}
// GameInput.cs中
...
public class GamePauseUI : MonoBehaviour
{...private void Awake(){...optionsButton.onClick.AddListener(() =>{...OptionsUI.Instance.Show(Show);});}
}
再次运行游戏,即可正常导航
另外主菜单还有两个按键,去MainMenuScene.unity,这里我们只有两个按钮,所以可以直接把PlayButton拖到EventSystem的First Selected上即可
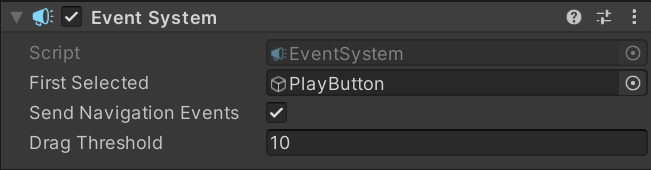
目前为止的工程文件
18 打磨细节 Polish
18.1 给游戏场景添加墙壁
在场景中添加一些Cube,一些做成墙壁,添加上_Assets/Materials中的Wall.mat材质,一些做成外围的黑色,添加上Black.mat材质
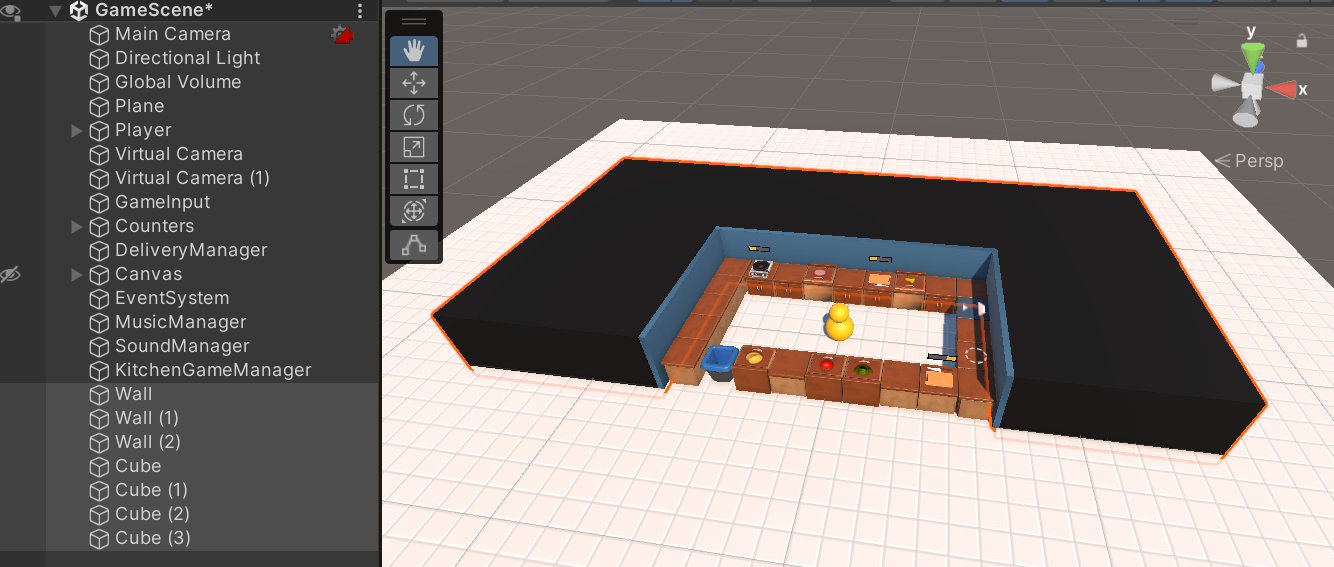
运行游戏,即可看到效果
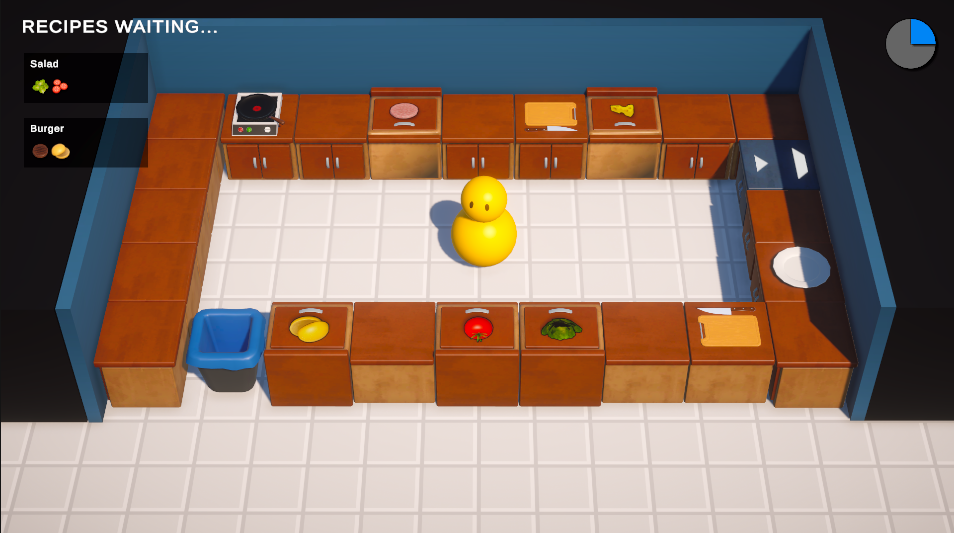
18.2 角色移动粒子特效
在_Assets/PrefabsVisuals中已经做好了一个PlayerMovingParticles.prefab,从Inspector面板可以看到,这个效果主要在Particle System中调整了Emission这个属性,将Rate over Time调为0,Rate over Distance调为了4,另外将Simulation Space调为了World,让该粒子效果能随着位置的变化而发射粒子

将该物体拖入场景中,手动移动可以即可看到效果
将该对象拖到Player下作为子物品,运行游戏,当角色移动时即可看到效果
18.3 教学页面
在Canvas下新建空物体命名为TutorialUI;在下面新建Image命名为BackGround,给一个有点透明度的白色背景 ;再来一个Image,调整大小Source Image选择一个叫Tutorial的图片;这张图片上没有按钮的图片,我们自己新建Image命名为各个键的名字,然后下面新建背景Source Image选Circle,新建Text,复制出来把名字都改为对应的按键;我们希望这个页面上的按键是跟随我们在游戏中的按键绑定的,所以再Scripts/UI新建TutorialUI.cs,获取对应文字对象

在GameInput.cs中添加一个EventHandler委托,在游戏中绑定按键后触发;在TutorialUI.cs中,为这个委托添加函数来更新文字
// GameInput.cs中
...
public class GameInput : MonoBehaviour
{...public event EventHandler OnBindingRebind;...public void RebindBinding(Binding binding, Action onActionRebind){...inputAction.PerformInteractiveRebinding(bindingIndex).OnComplete(callback =>{OnBindingRebind?.Invoke(this, EventArgs.Empty);}).Start();}
}
// TutorialUI.cs中
using System;
using UnityEngine;
using TMPro;public class TutorialUI : MonoBehaviour
{[SerializeField] private TextMeshProUGUI keyMoveUpText;[SerializeField] private TextMeshProUGUI keyMoveDownText;[SerializeField] private TextMeshProUGUI keyMoveLeftText;[SerializeField] private TextMeshProUGUI keyMoveRightText;[SerializeField] private TextMeshProUGUI keyInteractText;[SerializeField] private TextMeshProUGUI keyInteractAlternateText;[SerializeField] private TextMeshProUGUI keyPauseText;[SerializeField] private TextMeshProUGUI keyGamepadInteractText;[SerializeField] private TextMeshProUGUI keyGamepadInteractAlternateText;[SerializeField] private TextMeshProUGUI keyGamepadPauseText;private void Start(){GameInput.Instance.OnBindingRebind += GameInput_OnBindingRebind;UpdateVisual();}private void GameInput_OnBindingRebind(object sender, EventArgs e){UpdateVisual();}private void UpdateVisual(){keyMoveUpText.text = GameInput.Instance.GetBindingText(GameInput.Binding.Move_Up);keyMoveDownText.text = GameInput.Instance.GetBindingText(GameInput.Binding.Move_Down);keyMoveLeftText.text = GameInput.Instance.GetBindingText(GameInput.Binding.Move_Left);keyMoveRightText.text = GameInput.Instance.GetBindingText(GameInput.Binding.Move_Right);keyInteractText.text = GameInput.Instance.GetBindingText(GameInput.Binding.Interact);keyInteractAlternateText.text = GameInput.Instance.GetBindingText(GameInput.Binding.InteractAlternate);keyPauseText.text = GameInput.Instance.GetBindingText(GameInput.Binding.Pause);keyGamepadInteractText.text = GameInput.Instance.GetBindingText(GameInput.Binding.Gamepad_Interact);keyGamepadInteractAlternateText.text = GameInput.Instance.GetBindingText(GameInput.Binding.Gamepad_InteractAlternate);keyGamepadPauseText.text = GameInput.Instance.GetBindingText(GameInput.Binding.Gamepad_Pause);}
}
接下来处理该页面的显示与隐藏,之前我们在KitchenGameManager.cs中设置了游戏开始倒计时前有1秒,这里我们不再使用这个一秒的计时器,而是什么时候按下交互键什么时候开始进入倒计时状态
在KitchenGameManager.cs中,不再使用之前的1秒的计时器,为在GameInput中按下交互键触发的委托添加调用函数,将游戏状态由WaitingToStart变为ountdownToStart,并触发OnStateChanged的委托;在TutorialUI.cs中,为该委托添加调用函数,处理教学页面的隐藏和显示
// KitchenGameManager.cs中
public class KitchenGameManager : MonoBehaviour
{...// private float waitingToStartTimer = 1f;...private void Start(){...GameInput.Instance.OnInteractAction += GameInput_OnInteractAction;}...private void GameInput_OnInteractAction(object sender, EventArgs e){if (state == State.WaitingToStart){state = State.CountdownToStart;OnStateChanged?.Invoke(this, EventArgs.Empty);}}...
}
// TutorialUI.cs中
...
public class TutorialUI : MonoBehaviour
{...private void Start(){...KitchenGameManager.Instance.OnStateChanged += Instance_OnStateChanged;...}...private void Instance_OnStateChanged(object sender, EventArgs e){if (KitchenGameManager.Instance.IsCountdownToStartActive()){Hide();}}...private void Show(){gameObject.SetActive(true);}private void Hide(){gameObject.SetActive(false);}
}
18.4 倒计时文本动画
给场景中的GameStartCountdownUI添加一个Animator组件,在_Assets/Animations中右键->Create->Animator Controller,新建CountdownUI.controller,拖动到组件对应位置;打开Animation窗口,点击Create新建CountdownUI_NumberPopup.animation;给GameStartCountdownUI添加一个CanvasGroup组件,这个组件可以方便地调整Alpha值;在Animation窗口中打关键帧k一个时常为1秒地动画,效果如下

在Animator窗口中,Any State右键->Make Transition到CountdownUI_NumberPopup,过渡时间Transition Duration改为0,在Parameter新建一个Trigger NumberPopup,在这个Transition中添加Conditions为NumberPopup
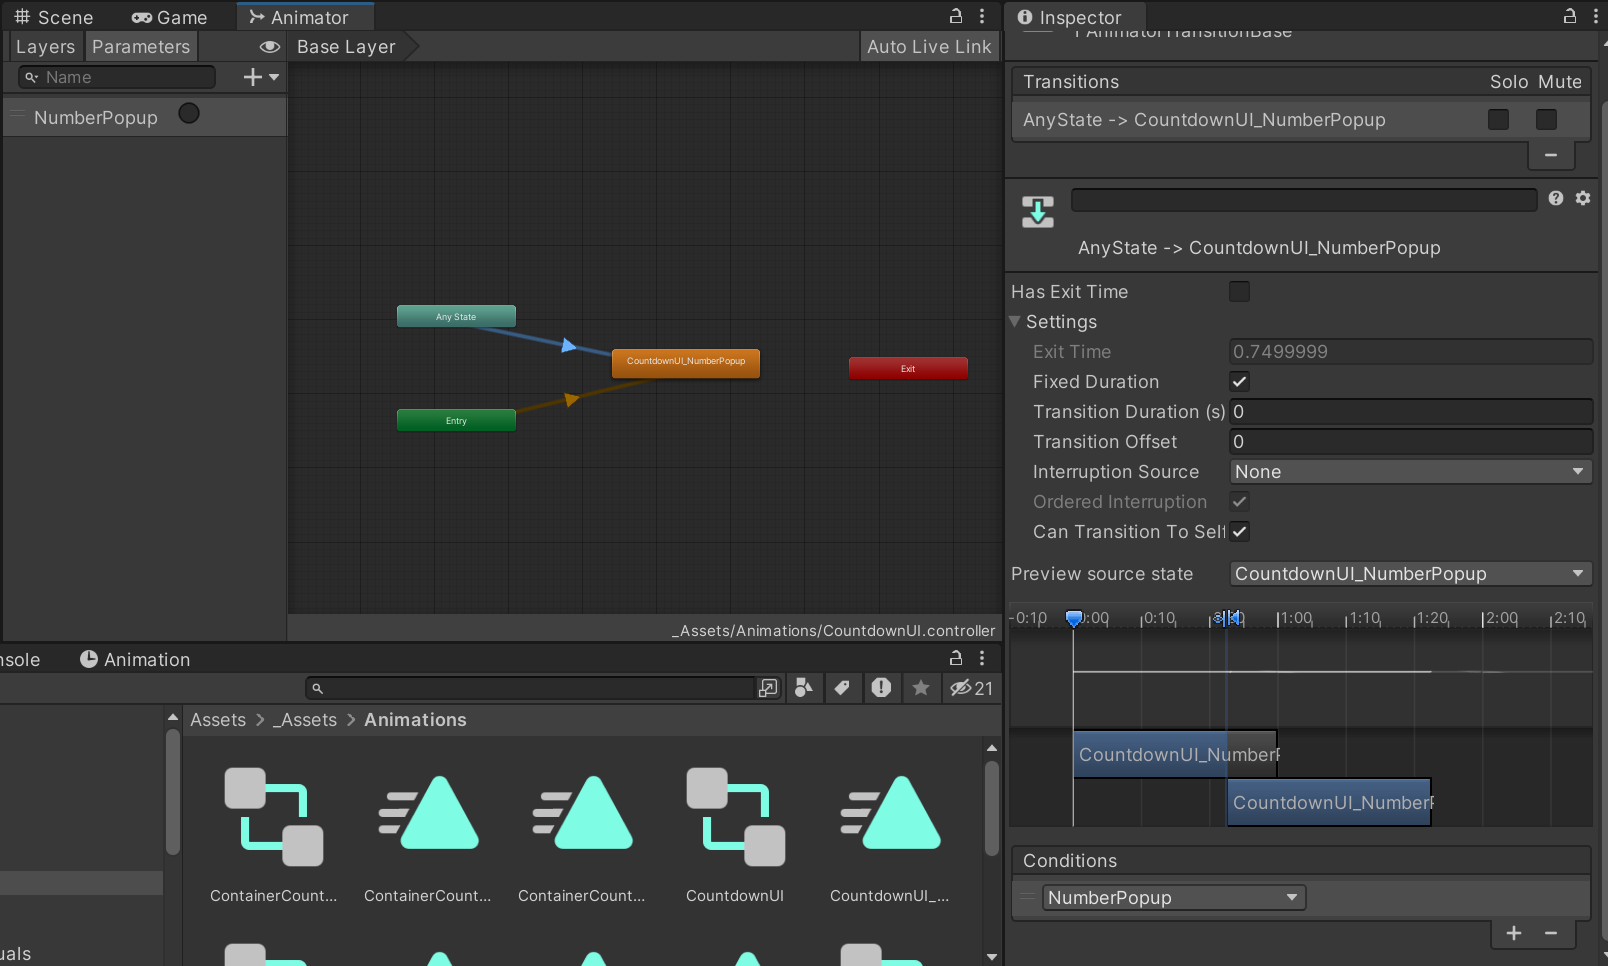
接下来我们要添加相应的逻辑,对于UI的视觉和逻辑的代码我们不一定要分开,因为他们经常是紧密相关的,所以这里我们在GameStartCountdownUI.cs中写对应的逻辑,同时添加声音,为此还要在SoundManager.cs中添加一个播放倒计时声音的方法
在GameStartCountdownUI.cs中在Update()中通过对比当前显示的countdownNumber和上一帧保存的previousCountdownNumber是否相同来判断是否触发动画中的trigger和播放音效
// SoundManager.cs中
...
public class SoundManager : MonoBehaviour
{...public void PlayCountdownSound(){PlaySound(audioClipRefsSO.warning, Vector3.zero);}...
}
// GameStartCountDownUI.cs中
...
public class GameStartCountDownUI : MonoBehaviour
{private const string NUMBER_POPUP = "NumberPopup";...private Animator animator;private int previousCountdownNumber;...private void Awake(){animator = GetComponent<Animator>();}...private void Update(){int countdownNumber = Mathf.CeilToInt(KitchenGameManager.Instance.GetCountdownToStartTimer());countdownText.text = countdownNumber.ToString();if (previousCountdownNumber != countdownNumber){previousCountdownNumber = countdownNumber;animator.SetTrigger(NUMBER_POPUP);SoundManager.Instance.PlayCountdownSound();}}
}
运行游戏,游戏倒计时动画以及声音正常播放
18.5 炉灶台提示UI与音效
首先先实现在炉灶台在煎肉时第二个进度条走到一般出现警告标志的逻辑
在StoveCounter.prefab中新建Canvas命名为StoveBurnWarningUI,调整Render Mode为World Space,添加之前做的Look At Camera组件,移动到进度条上面的位置;调整该物体下面新建一个Image,Image Source选择Warning,效果如下
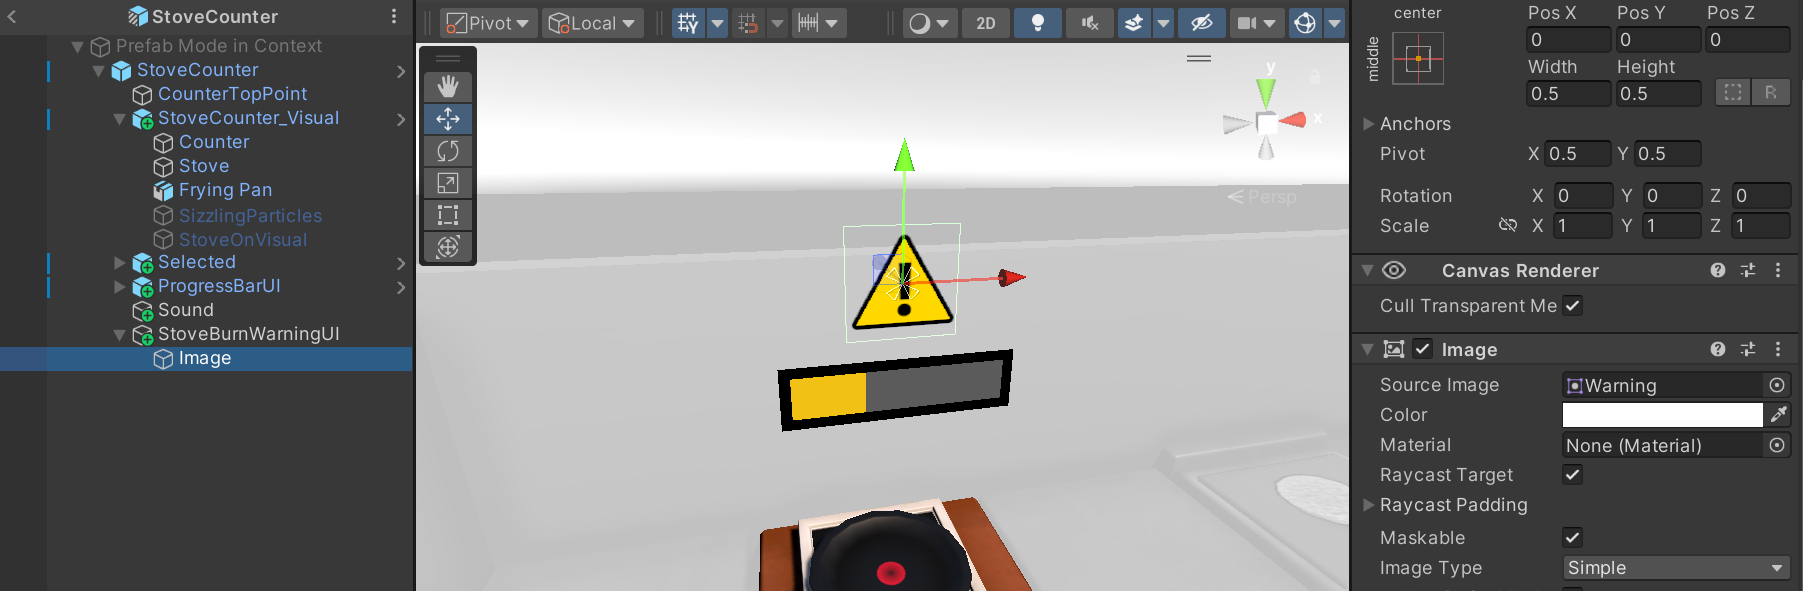
在Scripts/UI文件夹新建StoveBurnWarningUI.cs,在StoveCounter.cs中添加一个方法判断当前是否处于Fried状态,在StoveBurnWarningUI.cs中写隐藏显示该警告标志的逻辑
// StoveCounter.cs中
...
public class StoveCounter : BaseCounter, IHasProgress
{...public bool IsFried(){return state == State.Fried;}
}
// StoveBurnWarningUI.cs中
using UnityEngine;public class StoveBurnWarningUI : MonoBehaviour
{[SerializeField] private StoveCounter stoveCounter;private void Start(){stoveCounter.OnProgressChanged += StoveCounter_OnProgressChanged;Hide();}private void StoveCounter_OnProgressChanged(object sender, IHasProgress.OnProgressChangedEventArgs e){float burnShowProgressAmount = 0.5f;bool show = stoveCounter.IsFried() && e.progressNormalized >= burnShowProgressAmount;if (show){Show();} else{Hide();}}private void Show(){gameObject.SetActive(true);}private void Hide(){gameObject.SetActive(false);}
}
现在运行游戏即可看到进度条第二条走到一半时标志出现,现在添加标志出现时进度条同时开始闪烁的动画
给StoveBurnWarningUI添加Animator组件和Canvas Grounp组件;在_Assets/Animations创建StoveBurnWarningUI,拖到组件处;在Animator面板点击Create创建StoveBurnWarningUI_Flash.anim,给Canvas Group组件上的Alpha值打关键帧

我们只需要让图标在显示的时候一直播放该动画,所以不需要再在Animator中去调整。我们还有一个警告的音效,在SoundManager.cs中,添加一个PlayWarningSound()方法,在StoveCounterSound.cs中判断状态每隔0.2秒播放一次
// SoundManager.cs中
...
public class SoundManager : MonoBehaviour
{...public void PlayCountdownSound(){PlaySound(audioClipRefsSO.warning, Vector3.zero);}...
}
// StoveCounterSound.cs中
...
public class StoveCounterSound : MonoBehaviour
{...private bool playWarningSound;...private void Start(){...stoveCounter.OnProgressChanged += StoveCounter_OnProgressChanged;}...private void StoveCounter_OnProgressChanged(object sender, IHasProgress.OnProgressChangedEventArgs e){float burnShowProgressAmount = 0.5f; playWarningSound = stoveCounter.IsFried() && e.progressNormalized >= burnShowProgressAmount;}...private void Update(){if (playWarningSound){warningSoundTimer -= Time.deltaTime;if (warningSoundTimer <= 0f){float warningSoundMax = 0.2f;warningSoundTimer = warningSoundMax;SoundManager.Instance.PlayWarningSound(stoveCounter.transform.position);}   }}
}
接下来为进度条添加红黄色的闪烁动画
给ProgressBarUI添加Animator组件;在_Assets/Animations创建StoveBurnFlashBar,拖到组件处;在Animator面板点击Create创建StoveBurnFlashBar_Idle.anim,k一个和之前颜色一样的帧,复制一个anim文件重命名为StoveBurnFlashBar_Flash,拖到animator窗口中,k颜色黄红闪烁的动画,效果如下
在Animator窗口,让Idle和Flashing间互相可以Transition,添加一个IsFlashing参数,设置两个Transition加上conditions
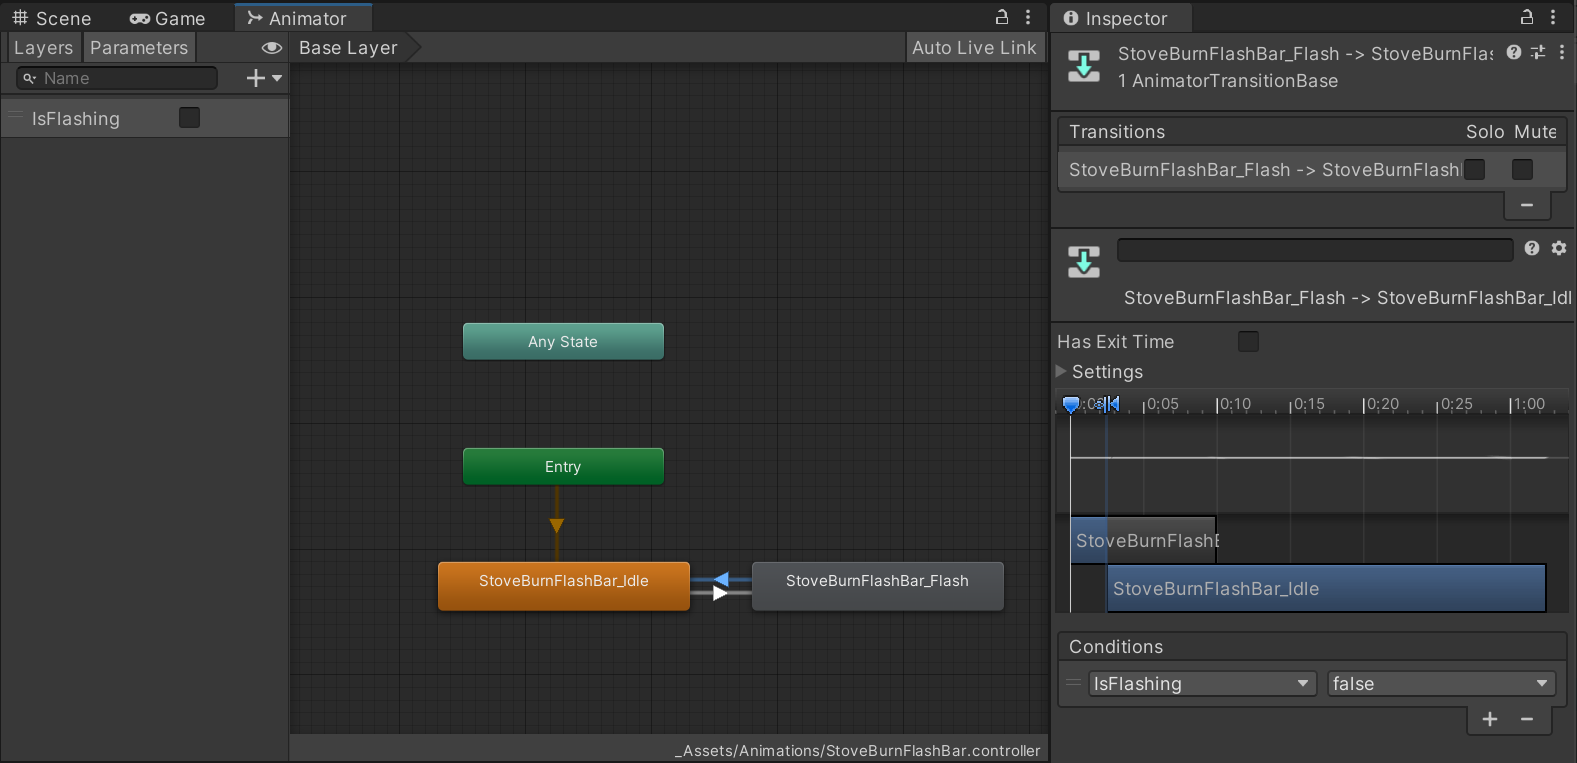
在Scripts/UI文件夹新建StoveBurnFlashingBarUI.cs,判断当前是否处于第二条进度条的一半时间之后然后设置Animator中设置的布尔值
// StoveBurnFlashingBarUI.cs中
using UnityEngine;public class StoveBurnFlashingBarUI : MonoBehaviour
{private const string IS_FLASHING = "IsFlashing";[SerializeField] private StoveCounter stoveCounter;private Animator animator;private void Awake(){animator = GetComponent<Animator>();}private void Start(){stoveCounter.OnProgressChanged += StoveCounter_OnProgressChanged;animator.SetBool(IS_FLASHING, false);}private void StoveCounter_OnProgressChanged(object sender, IHasProgress.OnProgressChangedEventArgs e){float burnShowProgressAmount = 0.5f;bool show = stoveCounter.IsFried() && e.progressNormalized >= burnShowProgressAmount;animator.SetBool(IS_FLASHING, show);}
}
运行游戏,可以播放闪烁动画

18.6 送餐提示UI
在DeliveryCounter.orefab中新建Canvas命名为DeliveryResultUI,Render Mode改为World Space,将位置放到里相机较近的位置;在DeliveryResultUI下新建Image命名为Background,调整属性;新建Text命名为MessageText,调整属性,新建Image命名为IconImage,调整属性,最后效果如下
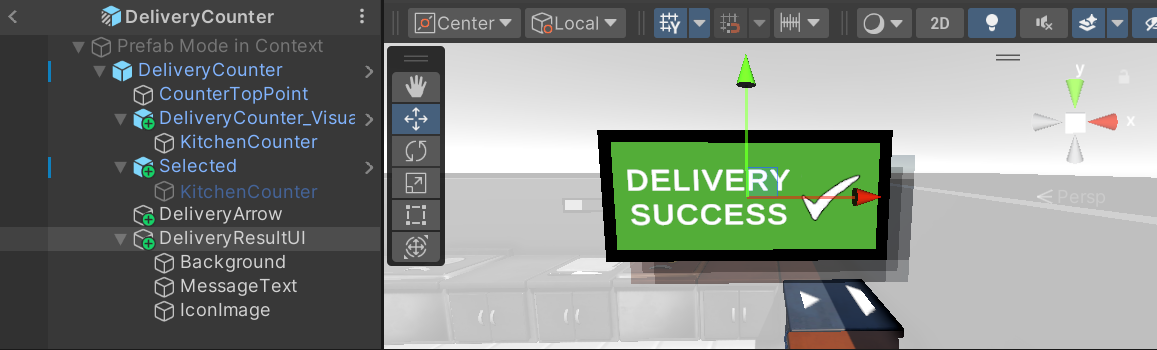
我们想要做和倒计时一样的动画,但是我们又想让它最后加上Look At Camera组件避免左右颠倒,这个动画与该组件有冲突,所以我们这里新创建一个空物体命名为DeliveryResultUI_LookAtCamera,让该空物体和DeliveryResultUI在同一位置,然后拖动DeliveryResultUI作为这个空物体的子级,将位移信息改为0,现在我们可以旋转DeliveryResultUI_LookAtCamera来做旋转动画了
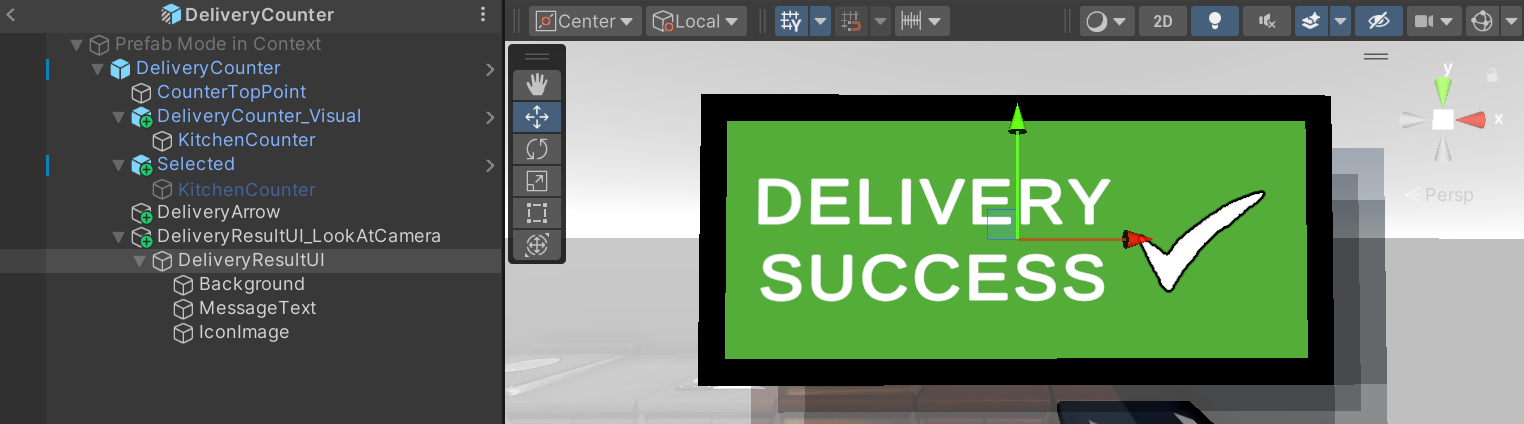
在DeliveryResultUI上添加Canvas Grounp组件用于调整透明度,添加Animator组件在_Assets/Animations文件夹创建DeliveryResultUI.controller,在Animation面板点击Create新建DeliveryResultUI_Popup.anim,k缩放旋转和透明度,效果如下
在Animator面板从Any State右键->Make Transition指向Popup动画,设置属性,添加一个trigger叫Popup,Transition的Condisions设置为Popup,默认该动画是循环播放的,我们需要找到.anim文件然后取消勾选Loop Time
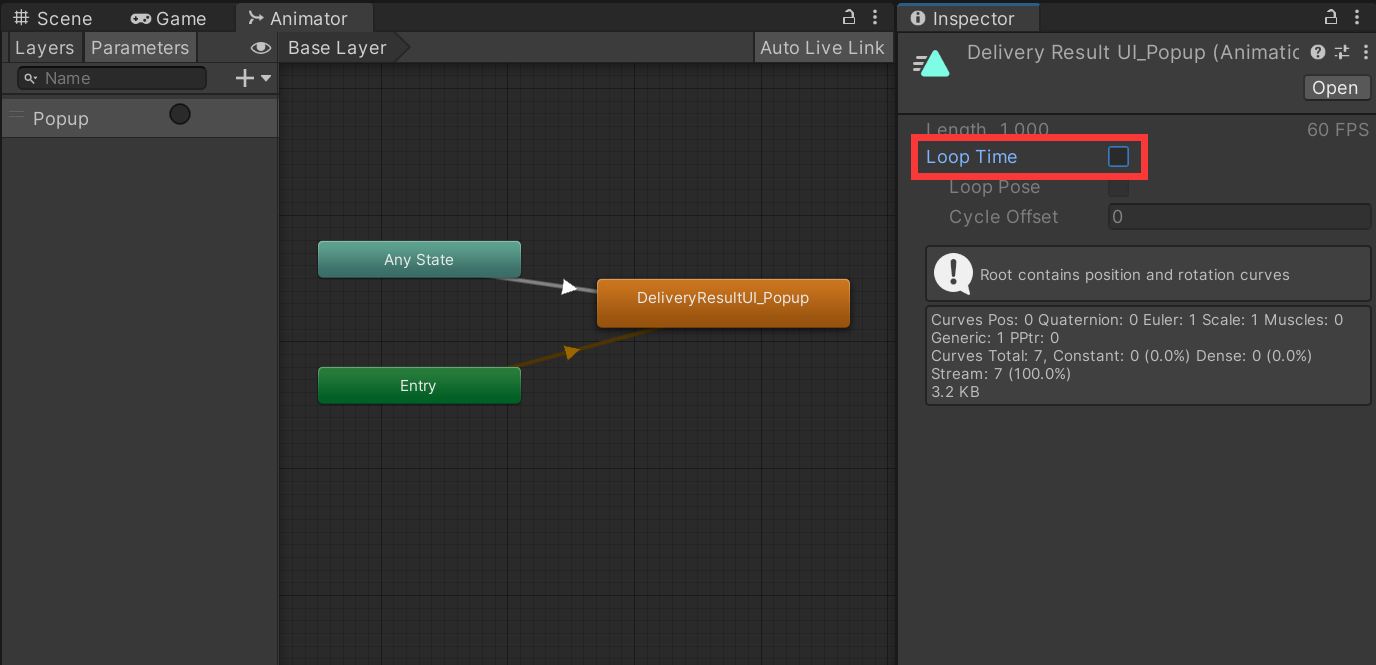
在Scripts/UI文件夹新建DeliveryResultUI.cs,写隐藏显示UI与播放动画的代码
// DeliveryResultUI.cs中
using TMPro;
using UnityEngine;
using UnityEngine.UI;public class DeliveryResultUI : MonoBehaviour
{private const string POPUP = "Popup";[SerializeField] private Image backgroundImage;[SerializeField] private Image iconImage;[SerializeField] private TextMeshProUGUI messageText;[SerializeField] private Color successColor;[SerializeField] private Color failedColor;[SerializeField] private Sprite successSprite;[SerializeField] private Sprite failedSprite;private Animator animator;private void Awake(){animator = GetComponent<Animator>();}private void Start(){DeliveryManager.Instance.OnRecipeSuccess += DeliveryManager_OnRecipeSuccess;DeliveryManager.Instance.OnRecipeFailed += DeliveryManager_OnRecipeFailed;gameObject.SetActive(false);}private void DeliveryManager_OnRecipeSuccess(object sender, System.EventArgs e){gameObject.SetActive(true);animator.SetTrigger(POPUP);backgroundImage.color = successColor;iconImage.sprite = successSprite;messageText.text = "DELIVERY\nSUCCESS";}private void DeliveryManager_OnRecipeFailed(object sender, System.EventArgs e){gameObject.SetActive(true);animator.SetTrigger(POPUP);backgroundImage.color = failedColor;iconImage.sprite = failedSprite;messageText.text = "DELIVERY\nFAILED";}
}
在组件处设置好相应参数
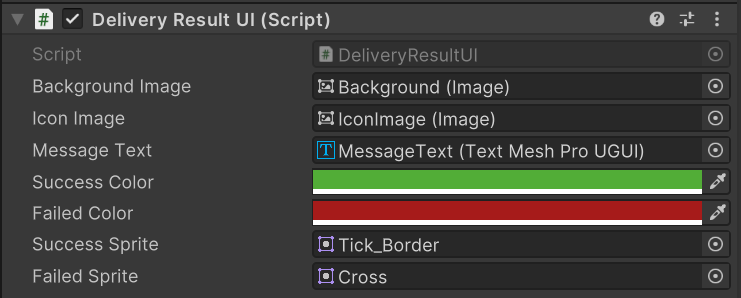
运行游戏,即可看到正确弹出的送餐提示

最终的工程文件