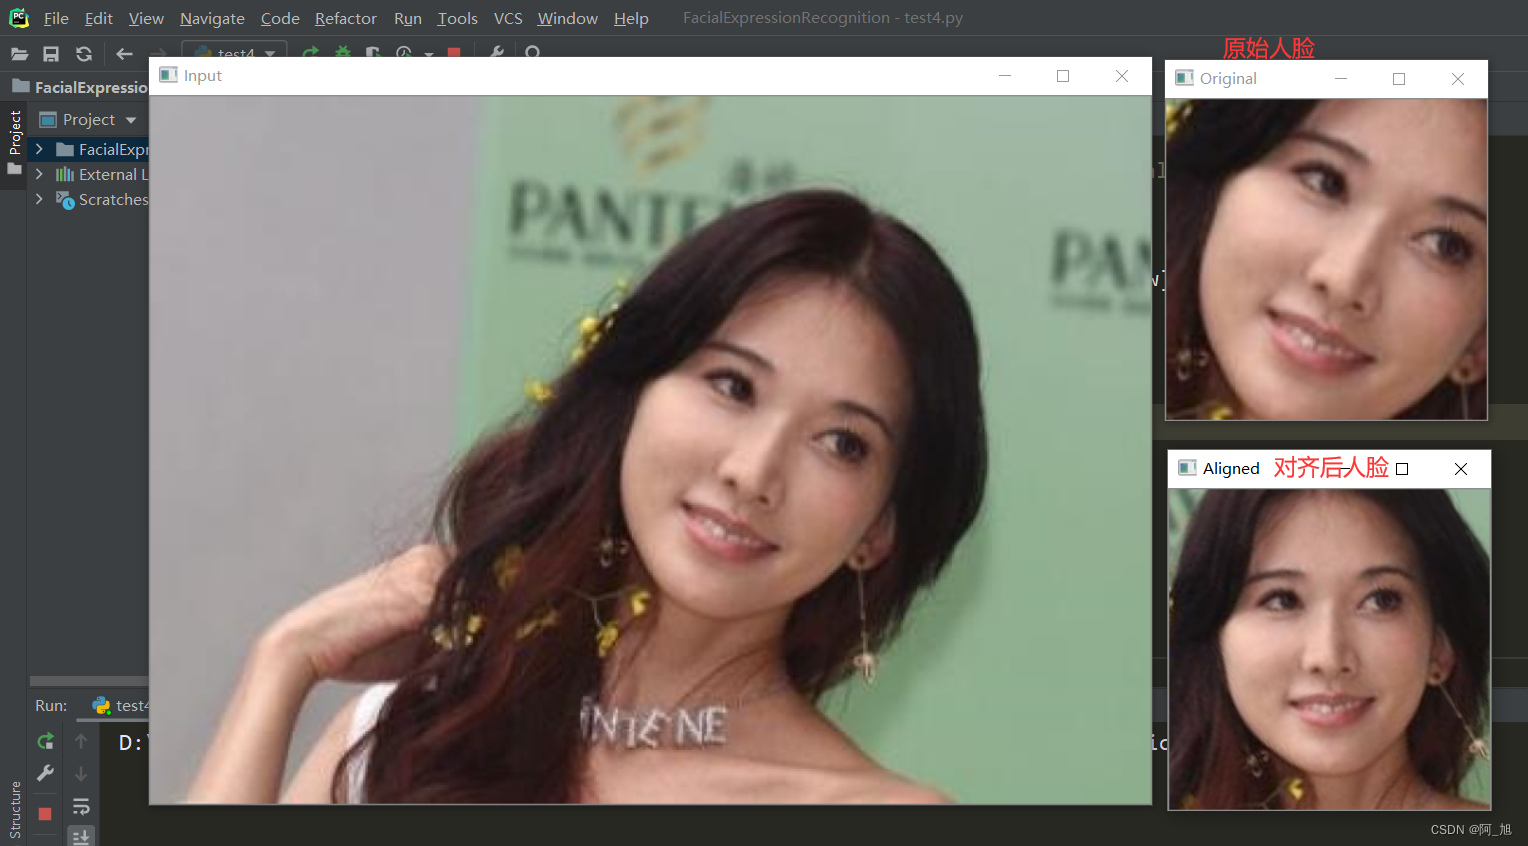
一、人脸对齐
训练好的模型库文件(替换你的模型文件位置)
import cv2
import dlib
import matplotlib.pyplot as pltpath="D:\python\Lib\site-packages\cv2\photo.jpg"
img=cv2.imread(path)
gray=cv2.cvtColor(img,cv2.COLOR_BGR2GRAY)#人脸分类器
detector=dlib.get_frontal_face_detector()
#获取人脸检测器
#predictor = dlib.shape_predictor(r"D:\python\Lib\site-packages\face_recognition_models\models\shape_predictor_68_face_landmarks.dat")
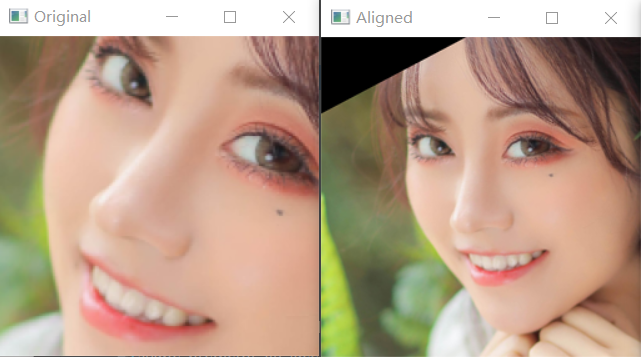
predictor = dlib.shape_predictor(r"D:\python\Lib\site-packages\face_recognition_models\models\shape_predictor_5_face_landmarks.dat")dets=detector(gray,1)#第二个参数代表将原图放大多少倍在进行检测,提高小人脸的检测效果for face in dets:# 使用predictor进行人脸关键点检测 shape为返回的结果shape=predictor(img,face) #寻找人脸的5个标定点#遍历所有点,打印出其坐标,并圈出来for pt in shape.parts():pt_pos=(pt.x,pt.y)img=cv2.circle(img,pt_pos,3,(255,0,0),1)plt.imshow(img)
plt.axis('off')
plt.show()
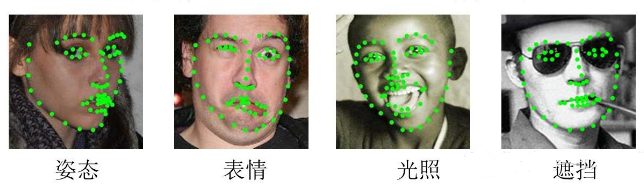
#运行结果:5点5点运行结果

68点运行结果

二、人脸识别
import cv2
import face_recognition
import matplotlib.pyplot as pltknown_image=cv2.imread("D:\python\Lib\site-packages\cv2\qiu.jpg")
known_image=face_recognition.load_image_file("D:\python\Lib\site-packages\cv2\qiu.jpg")unknown_image=cv2.imread("D:\python\Lib\site-packages\cv2\photo.jpg")
unknown_image=face_recognition.load_image_file("D:\python\Lib\site-packages\cv2\photo.jpg")known_encoding=face_recognition.face_encodings(known_image)[0]
unknown_encoding=face_recognition.face_encodings(unknown_image)[0]results=face_recognition.compare_faces([known_encoding],unknown_encoding,tolerance=0.6)
if results[0]==True:print('匹配成功,该未知图片与已有图片人脸可匹配!')
else:print('匹配失败!')
print(known_encoding)
print(unknown_encoding)
plt.imshow(known_image)
plt.axis('off')  #去掉坐标轴
plt.show()plt.imshow(unknown_image)
plt.axis('off')  #去掉坐标轴
plt.show()


更换图片后 识别成功


调整人脸识别的容错率和敏感度
如果一张脸识别出不止一个结果,那么这意味着他和其他人长的太像了(本项目对于小孩和亚洲人的人脸识别准确率有待提升)。可以把容错率调低一些,使识别结果更加严格。
通过传入参数 tolerance 来实现这个功能,默认的容错率是0.6,容错率越低,识别越严格准确。
三、使用dir、inspect查看一个module的成员、类、文档
1.dir的用法——查询一个类或者对象的所有属性和方法
dir() 将对象的所有属性、方法以列表形式返回
函数不带参数时,返回当前范围内的变量、方法和定义的类型列表;带参数时,返回参数的属性、方法列表。
实例
>>>dir()   #  获得当前模块的属性列表
['__builtins__', '__doc__', '__name__', '__package__', 'arr', 'myslice']>>> dir([ ]) # 查看列表的方法
['__add__', '__class__', '__contains__', '__delattr__', '__delitem__', '__delslice__', '__doc__', '__eq__', '__format__', '__ge__', '__getattribute__', '__getitem__', '__getslice__', '__gt__', '__hash__', '__iadd__', '__imul__', '__init__', '__iter__', '__le__', '__len__', '__lt__', '__mul__', '__ne__', '__new__', '__reduce__', '__reduce_ex__', '__repr__', '__reversed__', '__rmul__', '__setattr__', '__setitem__', '__setslice__', '__sizeof__', '__str__', '__subclasshook__', 'append', 'count', 'extend', 'index', 'insert', 'pop', 'remove', 'reverse', 'sort'] >>>>> dir(max)
['__call__', '__class__', '__delattr__', '__dir__', '__doc__', '__eq__', '__format__', '__ge__', '__getattribute__', '__gt__', '__hash__', '__init__', '__init_subclass__', '__le__', '__lt__', '__module__', '__name__', '__ne__', '__new__', '__qualname__', '__reduce__', '__reduce_ex__', '__repr__', '__self__', '__setattr__', '__sizeof__', '__str__', '__subclasshook__', '__text_signature__']
2.inspect模块
使用inspect.getmembers(obj)这个方法能够获取到更详尽的自省信息,且可读性更佳,下面将其和dir内置函数进行比较:
import inspect
#示例对象--某个函数
def foo(a: int, b: str) -> int:return a + int(b)dir(foo)
-->['__annotations__', '__call__', '__class__',...]inspect.getmembers(foo)
-->[
('__annotations__', {'a': <class 'int'>, 'b': <class 'str'>, 'return': <class 'int'>}),
('__call__', <method-wrapper '__call__' of function object at 0x032C7B70>),
('__class__', <class 'function'>),
...]
可以看到使用dir()仅仅获得一个字符串列表,而使用inspect.getmembers()可以获得每个属性的类型信息。
3.还可以通过python docs查询模块、函数等的使用方法