1 简介
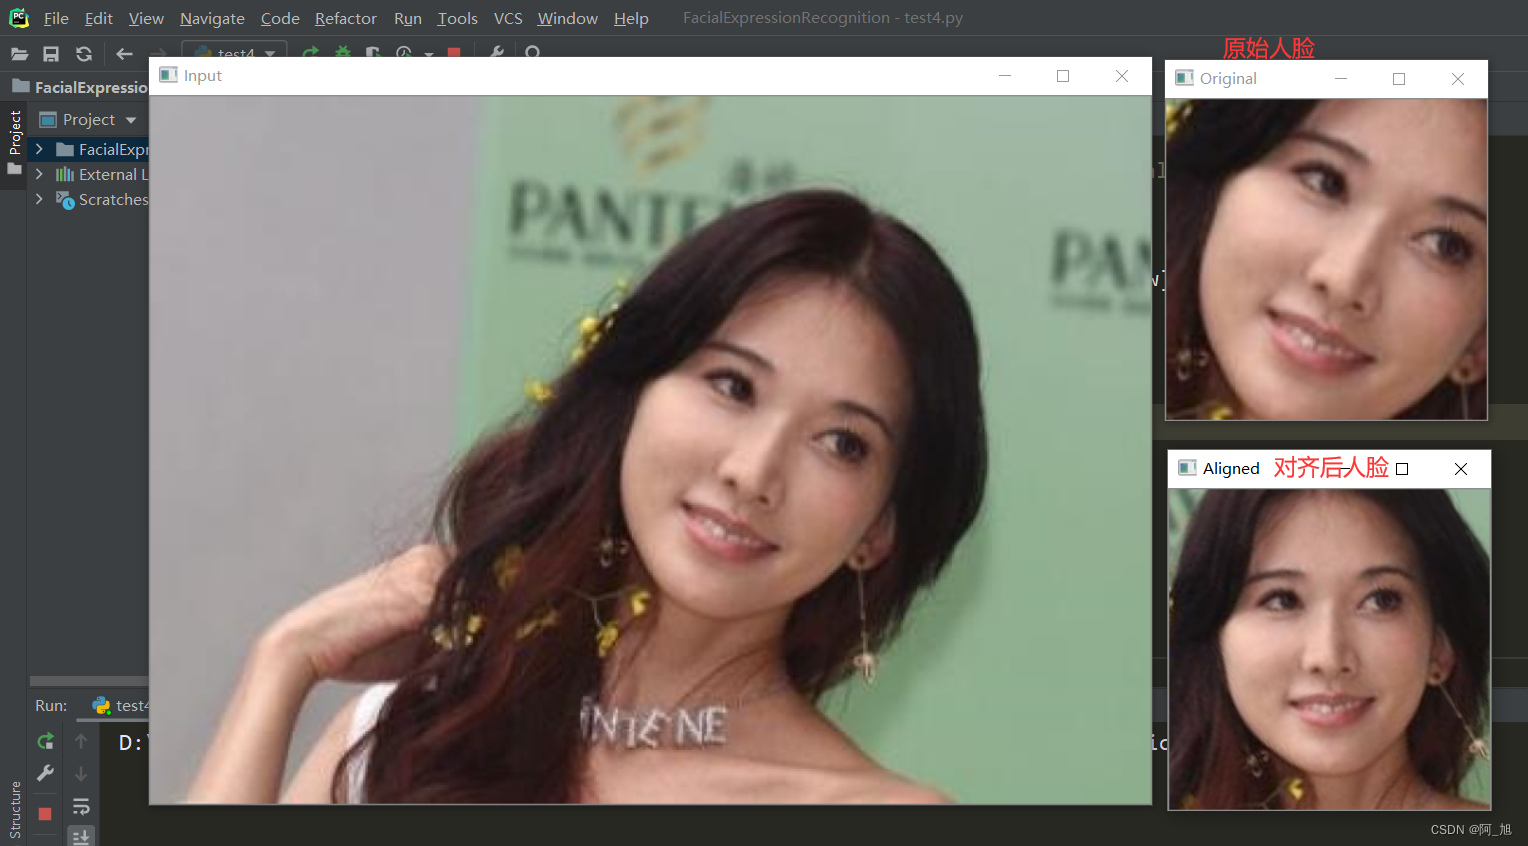
- 对于人脸识别任务,人脸预处理至关重要。首先我们需要检测出图像中的人脸,然后通过人脸相似性变换得到对齐后的标准人脸。然后在对其进行人脸识别。
- 在人脸识别过程中,往往检测到的人脸是倾斜的。相似性变换根据检测到的关键点和目标点得到变换矩阵,把整张脸乘变换矩阵得到对齐后的人脸。因为如果没有人脸对齐这一步操作,或者训练的对齐方式与验证的对齐方式不同,这将导致很大的性能差距。
- 目前科研人员基本都用一致的对齐方法,就是MTCNN检测五个人脸关键点,然后使用相似性变换得到对齐后的人脸,大小为112×112。
- 博主找了好几种方法,结果效果都不一致,最后参考insightface的方法,达到了一致的效果。
2 具体方法
2.1 下载insightface源码及RetinaFace预训练模型
https://github.com/deepinsight/insightface
安装后解压,我们需要使用其中的几个文件,分别为:
- gender-age文件夹下的mtcnn-model文件夹,mtcnn_detector,helper
- deploy文件夹下的mtcnn_detector
- detection/RetinaFace文件夹下的rcnn文件夹,retinaface
- recognition/common文件夹下的face_align
下载预处理模型:
https://pan.baidu.com/s/1C6nKq122gJxRhb37vK0_LQ
将这些置于一个文件夹中。

2.2 搭建开发环境
我是用的是pycharm+anaconda+win10
软件包安装
pip install opencv-python numpy tqdm scikit-image Cython
pip install mxnet-cu101 (根据自己的cuda版本来安装mxnet)
2.3 编译rcnn的pyx文件
参考博客:链接
第一步:
打开rcnn/cython文件夹下的cpu_nms文件,将
cdef np.ndarray[np.int_t, ndim=1] order = scores.argsort()[::-1]
改为
cdef np.ndarray[np.int_t, ndim=1] order = scores.argsort()[::-1].astype(np.int32)
第二步:
将setup.py改为
try:from setuptools import setupfrom setuptools import Extension
except ImportError:from distutils.core import setupfrom distutils.extension import Extension
from Cython.Distutils import build_ext
import numpy as np###这里的try...except...是百度的网上的帖子,必须加上,否则会出现Unable to find vcvarsall.bat错误。try:numpy_include = np.get_include()
except AttributeError:numpy_include = np.get_numpy_include()ext_modules = [Extension("bbox",["bbox.pyx"],extra_compile_args=["/openmp"],include_dirs=[numpy_include]),Extension("anchors",["anchors.pyx"],extra_compile_args=["/openmp"],include_dirs=[numpy_include]),Extension("cpu_nms",["cpu_nms.pyx"],extra_compile_args=["/openmp"],include_dirs = [numpy_include]),
]setup(name='frcnn_cython',ext_modules=ext_modules,# inject our custom trigger# cmdclass={'build_ext': custom_build_ext},cmdclass={'build_ext': build_ext},
)
第三步:
进入cython文件夹下,在终端输入指令:
python setup.py build_ext --inplace
2.4 编写代码
import cv2
import numpy as np
import face_align
from retinaface import RetinaFace
from tqdm import tqdm
import os
from mtcnn_detector import MtcnnDetector
import mxnet as mx'''
使用mtcnn检测,对于一些mtcnn检测不出的图像,可以使用retainface检测。
检测对齐结果与别人完全一致。
'''gpu_id = 0 # gpu号
det_prefix = 'C:/Users/win10/Desktop/face_align/retinaface-R50/R50' # retinaface预训练模型
model_folder = 'C:/Users/win10/Desktop/face_align/mtcnn-model' # mtcnn预训练模型
input_root = "E:/Dataset/lfw" # 原始图像
output_root = "E:/Dataset/lfw_align" # 处理后的图像
image_size = 112 # 处理后大小
align_mode = 'arcface' # 参考点选择
target_size = 400 # 目标尺寸
max_size = 800 # 限制图像最大尺寸# 得到校正后的图像
def get_norm_crop(image_path):im = cv2.imread(image_path) # 读取图像im_shape = im.shape # 尺寸 (w,h,3)im_size_min = np.min(im_shape[0:2]) # 最小值im_size_max = np.max(im_shape[0:2]) # 最大值im_scale = float(target_size) / float(im_size_min) # 比例# 防止原图尺寸过大if np.round(im_scale * im_size_max) > max_size:im_scale = float(max_size) / float(im_size_max)# 检测五个关键点 bbox是五个参数,前四个是2个坐标点参数,最后一个是得分 landmark由10个参数(5个坐标点)ret = detector_mtcnn.detect_face(im, det_type=0)if ret is None:# return None# 如果mtcnn没检测到,就是用retinaface检测bbox, landmark = detector_retinaface.detect(im, threshold=0.5, scales=[im_scale])# # 如果还没有检测到,放宽要求进行在次检测# if bbox.shape[0] == 0:#     bbox, landmark = detector_retinaface.detect(im, threshold=0.05, scales=[im_scale * 0.75, im_scale, im_scale * 2.0])#     print('refine', im.shape, bbox.shape, landmark.shape)else:bbox, landmark = ret# 判断是否检测到了,检测到进行根据五个特征点相似变换nrof_faces = bbox.shape[0]if nrof_faces > 0:det = bbox[:, 0:4] # 存储2个坐标点用于计算bbox大小img_size = np.asarray(im.shape)[0:2] # 原图尺寸bindex = 0# 如果一张图检测到多个人脸,通过bbox大小以及离中心的程度来选择人脸if nrof_faces > 1:bounding_box_size = (det[:, 2] - det[:, 0]) * (det[:, 3] - det[:, 1]) # 人脸bbox尺寸img_center = img_size / 2 # 图像中心点坐标offsets = np.vstack([(det[:, 0] + det[:, 2]) / 2 - img_center[1],(det[:, 1] + det[:, 3]) / 2 - img_center[0]]) # 计算bbox中心点离图像中心点的距离offset_dist_squared = np.sum(np.power(offsets, 2.0), 0) # 平方bindex = np.argmax(bounding_box_size - offset_dist_squared * 2.0)  # 选择最合适的人脸bbox# _bbox = bbox[bindex, 0:4] # bboxif ret == None:_landmark = landmark[bindex]  # 特征点 retinafaceelse:_landmark = [[landmark[bindex][j], landmark[bindex][j + 5]] for j in range(5)] # 特征点 mtcnn_landmark = np.array(_landmark, dtype=float)# 选取参考点,进行相似性变换warped = face_align.norm_crop(im, landmark=_landmark, image_size=image_size, mode=align_mode)return warpedelse:return Noneif __name__ == '__main__':# 创建输出文件夹if not os.path.isdir(output_root):os.mkdir(output_root)# 检测器初始化detector_mtcnn = MtcnnDetector(model_folder=model_folder, ctx=mx.gpu(gpu_id),num_worker=1, accurate_landmark=True, threshold=[0.6, 0.7, 0.8])detector_retinaface = RetinaFace(det_prefix, 0, gpu_id, network='net3')# 处理 input_root下存放文件夹for subfolder in tqdm(os.listdir(input_root)): # 读取input_root文件夹下的文件夹名称# 读取到的是文件夹,然后创建它if not os.path.isdir(os.path.join(output_root, subfolder)):os.mkdir(os.path.join(output_root, subfolder))# 读取文件夹下的图片,进行处理for image_name in os.listdir(os.path.join(input_root, subfolder)):print("Processing\t{}".format(os.path.join(input_root, subfolder, image_name))) # 打印信息# 如果报错说明没有检测到人脸try:warped_face = get_norm_crop(os.path.join(input_root, subfolder, image_name)) # 检测并对齐if image_name.split('.')[-1].lower() not in ['jpg', 'jpeg']:  # 加后缀.jpgimage_name = '.'.join(image_name.split('.')[:-1]) + '.jpg'cv2.imwrite(os.path.join(output_root, subfolder, image_name), warped_face) # 保存except Exception:print("{} is discarded due to exception!".format(os.path.join(input_root, subfolder, image_name)))continue
3 总结
本方式使用insightface的mtcnn加相似性变换,如果mtcnn没有找到人脸,就使用retinaface处理,如果还没找到就提示信息。
该方法应该与那些处理好的数据集是一个检测对齐处理方式,用lfw数据集测试完全一致。处理后的人脸为112×112大小。