使用springboot+mybatis-plus+(Druid/Hikari)实现多数据源配置
操作步骤:
- 引入相应的maven坐标
- 编写mybatis配置,集成mybatis或mybatis-plus(如果已集成可跳过)
- 编写数据源配置类
- 编写注解,并通过aop进行增强(编写数据源切换代码)
- 类或方法中使用注解,对数据源进行切换
第一步:引入需要相应maven坐标
<dependency><groupId>org.springframework.boot</groupId><artifactId>spring-boot-starter-web</artifactId></dependency><!-- aop注解实现aspectjweaver依赖 --><dependency><groupId>org.aspectj</groupId><artifactId>aspectjweaver</artifactId><version>1.9.6</version></dependency><!-- mysql-plus 依赖 --><dependency><groupId>com.baomidou</groupId><artifactId>mybatis-plus-boot-starter</artifactId><version>3.3.0</version></dependency><!-- Mysql驱动包 --><dependency><groupId>mysql</groupId><artifactId>mysql-connector-java</artifactId></dependency><!--阿里数据库连接池 --><dependency><groupId>com.alibaba</groupId><artifactId>druid-spring-boot-starter</artifactId><version>1.1.14</version></dependency><dependency><groupId>org.projectlombok</groupId><artifactId>lombok</artifactId><optional>true</optional></dependency>
第二步:编写mybatis-plus配置集成
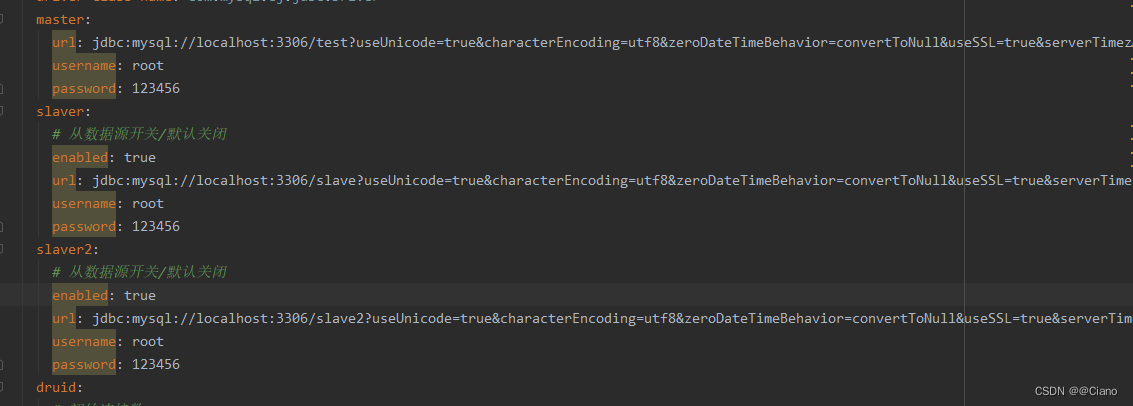
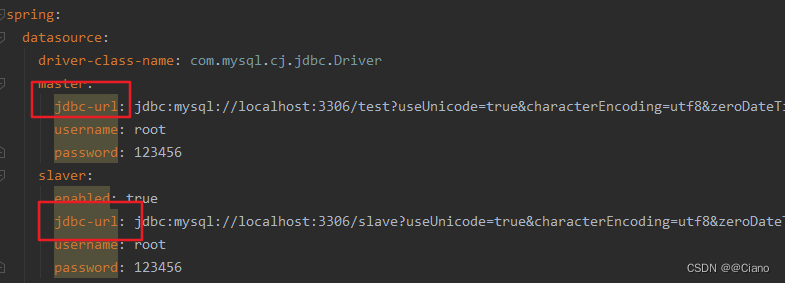
server:port: 8000spring:datasource:driver-class-name: com.mysql.cj.jdbc.Drivermaster:url: jdbc:mysql://localhost:3306/test?useUnicode=true&characterEncoding=utf8&zeroDateTimeBehavior=convertToNull&useSSL=true&serverTimezone=GMT%2B8&allowMultiQueries=trueusername: rootpassword: 123456slaver:# 从数据源开关/默认关闭enabled: falseurl: jdbc:mysql://localhost:3306/slave?useUnicode=true&characterEncoding=utf8&zeroDateTimeBehavior=convertToNull&useSSL=true&serverTimezone=GMT%2B8&allowMultiQueries=trueusername: rootpassword: 123456druid:# 初始连接数initial-size: 5# 最小连接池数量min-idle: 10# 最大连接池数量max-active: 20# 获取连接等待超时时间max-wait: 60000
mybatis-plus:mapper-locations: classpath*:mapper/*Mapper.xmllogging:level:com.example.demo: debug
以下是集成mp相关的代码,不需要可直接跳过!!!(以user表为例)
userMapper
package com.example.demo.datesource.service;import com.baomidou.mybatisplus.extension.service.IService;
import com.example.demo.datesource.domain.User;import java.util.List;public interface UserService extends IService<User> {List<User> getUserList();List<User> getUserListByXml();List<User> testSlave();
}
userMapper.xml
<?xml version="1.0" encoding="UTF-8" ?>
<!DOCTYPE mapperPUBLIC "-//mybatis.org//DTD Mapper 3.0//EN""http://mybatis.org/dtd/mybatis-3-mapper.dtd">
<mapper namespace="com.example.demo.datesource.mapper.UserMapper"><select id="getUserListByXml" resultType="com.example.demo.datesource.domain.User">select * from user</select>
</mapper>
userService
package com.example.demo.datesource.service;import com.baomidou.mybatisplus.extension.service.IService;
import com.example.demo.datesource.domain.User;import java.util.List;public interface UserService extends IService<User> {List<User> getUserList();List<User> getUserListByXml();List<User> testSlave();
}
userServiceImpl
package com.example.demo.datesource.service.impl;import com.baomidou.mybatisplus.extension.service.impl.ServiceImpl;
import com.example.demo.datesource.annotation.UseDataSource;
import com.example.demo.datesource.domain.User;
import com.example.demo.datesource.enums.DataSourceType;
import com.example.demo.datesource.mapper.UserMapper;
import com.example.demo.datesource.service.UserService;
import org.springframework.beans.factory.annotation.Autowired;
import org.springframework.stereotype.Service;import java.util.List;@Service
public class UserServiceImpl extends ServiceImpl<UserMapper, User> implements UserService {@Autowiredprivate UserMapper userMapper;@Overridepublic List<User> getUserList() {return list();}@Overridepublic List<User> getUserListByXml(){return userMapper.getUserListByXml();}@Overridepublic List<User> testSlave() {return list();}
}
User
package com.example.demo.datesource.domain;import com.baomidou.mybatisplus.annotation.TableId;
import com.baomidou.mybatisplus.annotation.TableName;
import lombok.Data;@Data
@TableName("user")
public class User {@TableIdprivate Long id;private String name;private String sex;private int age;
}
mybatis-plus 集成完毕!
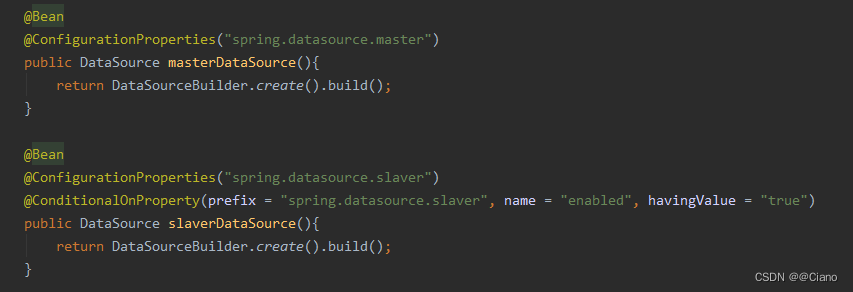
第三步:编写数据源的配置类(例:Druid、Hikari)
一、@ConfigurationProperties要和配置文件中的配置对应上
(1)Druid:
package com.example.demo.datesource.config;import com.alibaba.druid.pool.DruidDataSource;
import com.alibaba.druid.spring.boot.autoconfigure.DruidDataSourceBuilder;
import com.alibaba.druid.spring.boot.autoconfigure.properties.DruidStatProperties;
import com.example.demo.datesource.config.properties.DruidPropertiesConfig;
import com.example.demo.datesource.datasource.DynamicDataSource;
import com.example.demo.datesource.enums.DataSourceType;
import com.example.demo.datesource.utils.SpringUtils;
import org.springframework.beans.factory.annotation.Qualifier;
import org.springframework.boot.autoconfigure.condition.ConditionalOnProperty;
import org.springframework.boot.context.properties.ConfigurationProperties;
import org.springframework.context.annotation.Bean;
import org.springframework.context.annotation.Configuration;
import org.springframework.context.annotation.Primary;import javax.sql.DataSource;
import javax.swing.*;
import java.util.HashMap;
import java.util.Map;@Configuration
public class DruidConfig {@Bean@ConfigurationProperties("spring.datasource.master")public DataSource masterDataSource(DruidPropertiesConfig propertiesConfig){DruidDataSource dataSource = DruidDataSourceBuilder.create().build();return propertiesConfig.setDataSourceProperties(dataSource);}@Bean@ConfigurationProperties("spring.datasource.slaver")@ConditionalOnProperty(prefix = "spring.datasource.slaver", name = "enabled", havingValue = "true")public DataSource slaverDataSource(DruidPropertiesConfig propertiesConfig){DruidDataSource dataSource = DruidDataSourceBuilder.create().build();return propertiesConfig.setDataSourceProperties(dataSource);}@Bean@Primarypublic DynamicDataSource dataSource(DataSource masterDataSource){Map<Object,Object> targetDataSource = new HashMap<>();targetDataSource.put(DataSourceType.MASTER.name(),masterDataSource);setDataSource(targetDataSource,DataSourceType.SLAVE.name(),"slaverDataSource");return new DynamicDataSource(masterDataSource,targetDataSource);}public void setDataSource(Map<Object,Object> targetDataSource,String sourceName,String beanName){try {DataSource dataSource = SpringUtils.getBean(beanName);targetDataSource.put(sourceName,dataSource);}catch (Exception e){}}}
增加DruidPropertiesConfig类,用于给数据源配置上配置文件对应的属性
package com.example.demo.datesource.config.properties;import com.alibaba.druid.pool.DruidDataSource;
import org.springframework.beans.factory.annotation.Value;
import org.springframework.context.annotation.Configuration;@Configuration
public class DruidPropertiesConfig {@Value("${spring.datasource.druid.initial-size}")private int initialSize;@Value("${spring.datasource.druid.min-idle}")private int minIdle;@Value("${spring.datasource.druid.max-active}")private int maxActive;@Value("${spring.datasource.druid.max-wait}")private int maxWait;public DruidDataSource setDataSourceProperties(DruidDataSource dataSource){dataSource.setInitialSize(this.initialSize);dataSource.setMinIdle(this.minIdle);dataSource.setMaxActive(this.maxActive);dataSource.setMaxWait(this.maxWait);return dataSource;}}
(2)Hikari:配置上基本和druid相同,只需把配置类改为如下且配置文件的“url”改为“jdbc-url”即可
二、增加SpringUtils类,用于读取spring中的bean
package com.example.demo.datesource.utils;import org.springframework.beans.BeansException;
import org.springframework.beans.factory.config.BeanFactoryPostProcessor;
import org.springframework.beans.factory.config.ConfigurableListableBeanFactory;
import org.springframework.stereotype.Component;@Component
public class SpringUtils implements BeanFactoryPostProcessor {private static ConfigurableListableBeanFactory beanFactory;@Overridepublic void postProcessBeanFactory(ConfigurableListableBeanFactory configurableListableBeanFactory) throws BeansException {SpringUtils.beanFactory = configurableListableBeanFactory;}public static <T> T getBean(String name){return (T) beanFactory.getBean(name);}}
三、添加DynamicDataSource类
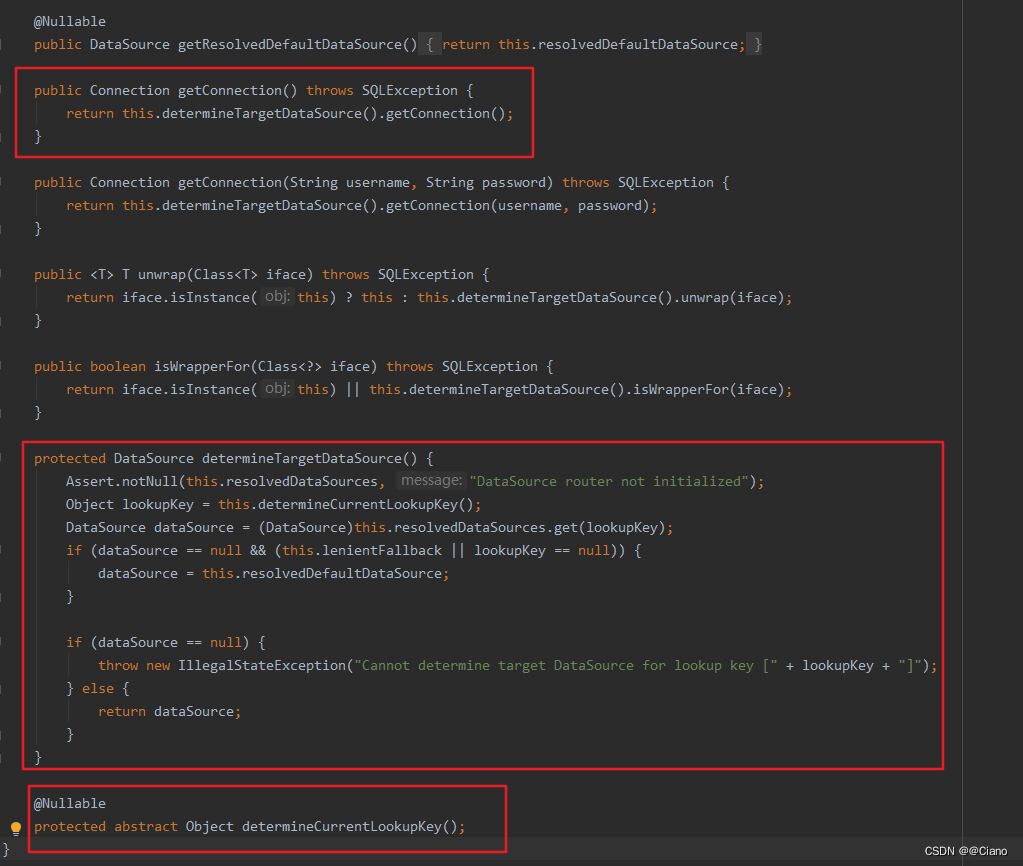
(1)此类是用来配置动态数据源的关键。该类继承spring的抽象类AbstractRoutingDataSource,通过这个类可以实现动态数据源切换。其中维护着默认数据源(defaultTargetDataSource)和数据源列表(targetDataSources),通过afterPropertiesSet()方法对数据源列表进行解析以及设置数据源。
程序每次对数据库发起连接时,都会访问到AbstractRoutingDataSource的getConnection()方法,此方法会调用determineCurrentLookupKey的相应实现,此处实现为获取线程变量。
package com.example.demo.datesource.datasource;import org.springframework.jdbc.datasource.lookup.AbstractRoutingDataSource;import javax.sql.DataSource;
import java.util.Map;public class DynamicDataSource extends AbstractRoutingDataSource {public DynamicDataSource(DataSource defaultTargetDataSource, Map<Object, Object> targetDataSources){super.setDefaultTargetDataSource(defaultTargetDataSource);super.setTargetDataSources(targetDataSources);super.afterPropertiesSet();}@Overrideprotected Object determineCurrentLookupKey() {return DynamicDataSourceContextHolder.getDataSourceType();}
}
(2)添加DynamicDataSourceContextHolder类,此类用于切换数据源,根据ThreadLocal做多线程数据隔离,每一次切换都能保证不影响其他线程的正常运行
package com.example.demo.datesource.datasource;import org.slf4j.Logger;
import org.slf4j.LoggerFactory;public class DynamicDataSourceContextHolder {public static final Logger log = LoggerFactory.getLogger(DynamicDataSourceContextHolder.class);private static final ThreadLocal<String> CONTEXT_HOLDER =  new ThreadLocal<>();/*** 设置数据源的变量*/public static void setDataSourceType(String dsType){log.info("切换到{}数据源",dsType);CONTEXT_HOLDER.set(dsType);}/*** 获得数据源的变量*/public static String getDataSourceType(){return CONTEXT_HOLDER.get();}/*** 清空数据源变量,此方法可调动gc对线程进行清除*/public static void clearDataSourceType(){CONTEXT_HOLDER.remove();}}
AbstractRoutingDataSource切换线程变量来切换数据源源码。
此处就是获取之前在DynamicDataSourceContextHolder中set到线程中的数据源名,通过数据源名获取维护的数据源列表中对应的数据源
第四步:使用
大致思路:定义一个切换数据源注解,通过注解aop的形式对数据源进行切换,在类或方法中使用注解,设置对应的数据源名称以此来达到数据源切换
一、定义一个切换数据源注解
package com.example.demo.datesource.annotation;import com.example.demo.datesource.enums.DataSourceType;import java.lang.annotation.ElementType;
import java.lang.annotation.Retention;
import java.lang.annotation.RetentionPolicy;
import java.lang.annotation.Target;@Target({ElementType.METHOD,ElementType.TYPE})
@Retention(RetentionPolicy.RUNTIME)
public @interface UseDataSource {public DataSourceType dataSource() default DataSourceType.MASTER;}
二、编写aop代码
@within:此注解可以作用于类中的所有方法,如果@UseDataSource放到类上,此类下的所有的方法都会被当做切点拦截
@Order(1):提升组件注册到spring中的优先级
point.proceed():原来执行的程序,也就是原请求,想要做环绕增强就再这周围写就可以了
package com.example.demo.datesource.aspectj;import com.example.demo.datesource.annotation.UseDataSource;
import com.example.demo.datesource.datasource.DynamicDataSourceContextHolder;
import org.aspectj.lang.ProceedingJoinPoint;
import org.aspectj.lang.Signature;
import org.aspectj.lang.annotation.Around;
import org.aspectj.lang.annotation.Aspect;
import org.aspectj.lang.annotation.Pointcut;
import org.aspectj.lang.reflect.MethodSignature;
import org.springframework.core.annotation.AnnotationUtils;
import org.springframework.core.annotation.Order;
import org.springframework.stereotype.Component;import javax.sql.DataSource;
import java.util.Objects;@Aspect
@Order(1)
@Component
public class DataSourceAspect {@Pointcut("@annotation(com.example.demo.datesource.annotation.UseDataSource) || @within(com.example.demo.datesource.annotation.UseDataSource)")public void pointCut(){}@Around("pointCut()")public Object around(ProceedingJoinPoint point) throws Throwable{UseDataSource useDataSource = getDataSource(point);if(Objects.nonNull(useDataSource)){DynamicDataSourceContextHolder.setDataSourceType(useDataSource.dataSource().name());}try {return point.proceed();}finally {//清空threadlocalMap的entry。避免内存泄漏DynamicDataSourceContextHolder.clearDataSourceType();}}public UseDataSource getDataSource(ProceedingJoinPoint point){MethodSignature signature = (MethodSignature) point.getSignature();UseDataSource annotation = AnnotationUtils.findAnnotation(signature.getMethod(), UseDataSource.class);if(Objects.nonNull(annotation)){return annotation;}return AnnotationUtils.findAnnotation(signature.getDeclaringType(),UseDataSource.class);}}
三、编写注解到类或方法上
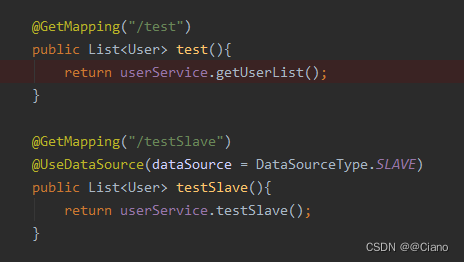
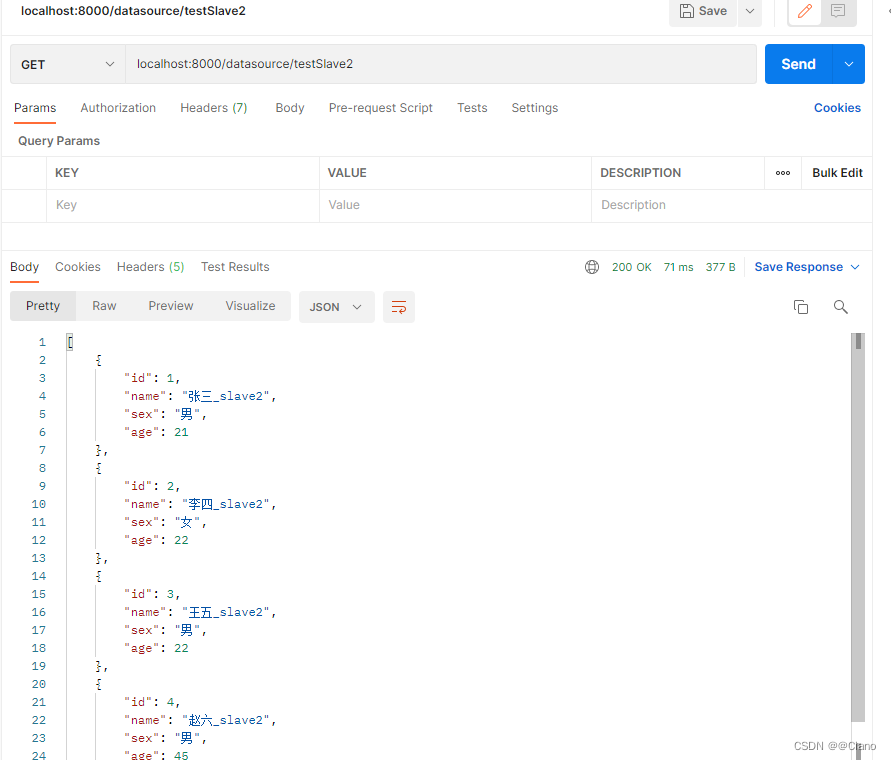
运行结果:

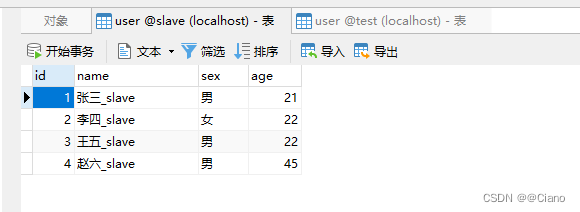
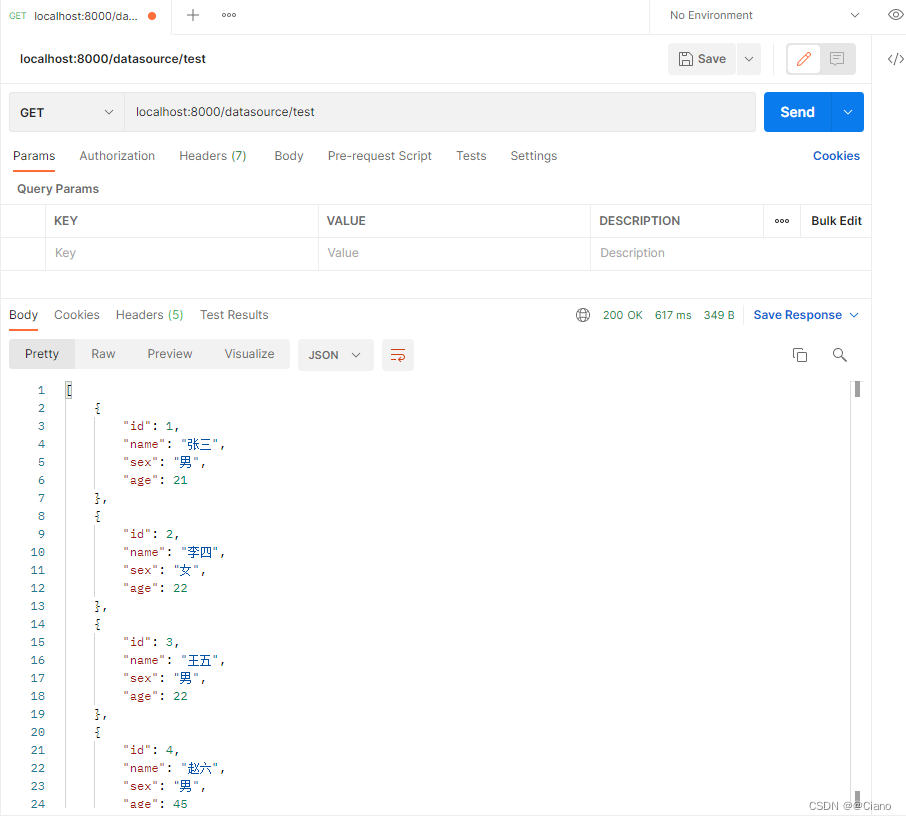
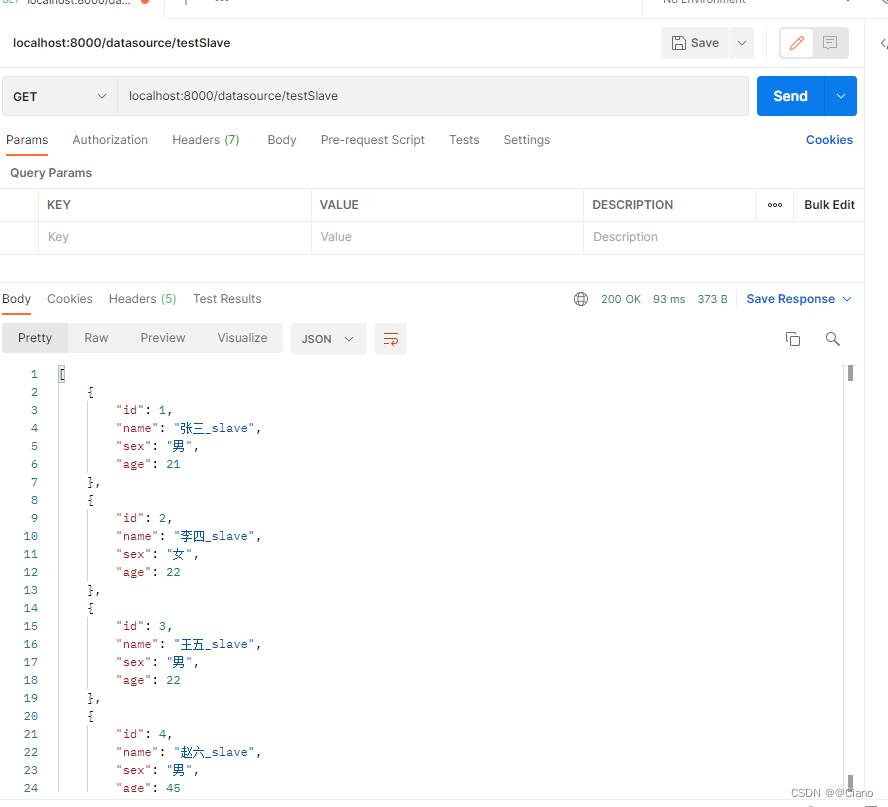
至此,数据源切换成功!!!
另外,如果需要增加新的数据源需要的操作:
1、启动配置文件中增加新的数据源参数
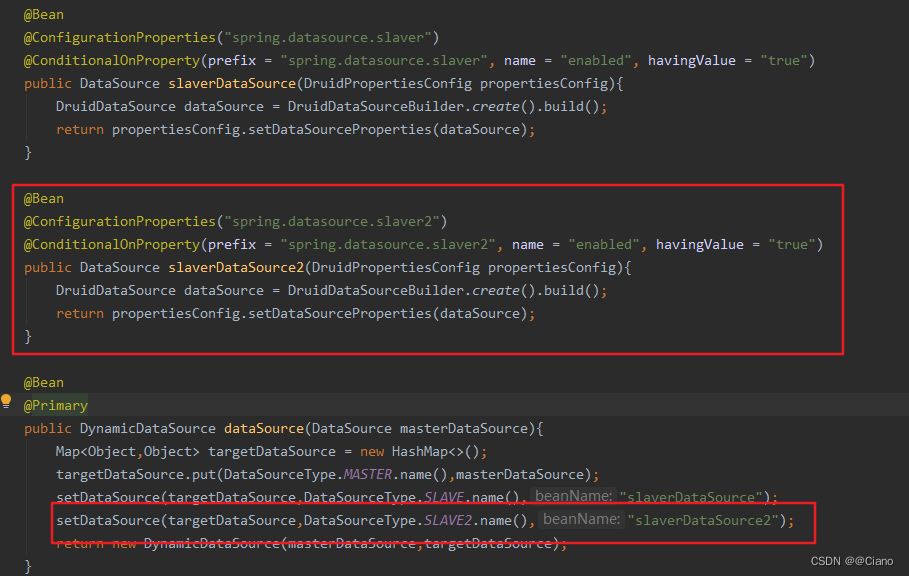
2、数据源配置类中,新增配置源bean,并且把数据源set到targetDataSource中
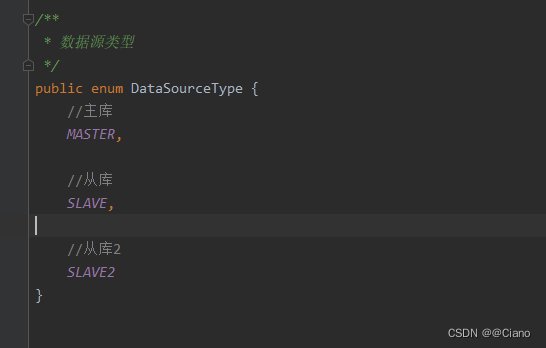
3、DataSourceType枚举类中,添加新数据源的枚举
如图所示: