一、前言
Android动画经常会在切换activity、数据加载时会用到动画效果,以前接触的比较少,用的都是封装好的动画效果,自己写的比较少,今天心血来潮想写一个自己设计的动画效果,发现学习动画代码比较简单,但是要实现某些特定的动画效果需要很多逻辑,感觉就麻烦了,正好把动画animation整理一下。
二、概述
Android动画实现一般都用animation,动画包含三大类型View Animation,帧动画(Drawable Animation),Property Animation(属性动画);属性动画比较好用,可以重点关注一下。
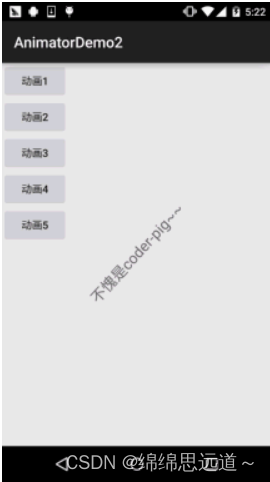
三、View Animation
只能被用来设置View的动画,动画效果包含四个子类:(位置(TranslateAnimation)、大小(ScaleAnimation)、旋转(RotateAnimation)、透明度(AlphaAnimation);实现View动画的方式有两种,一种是在xml中直接写动画效果,一种是在activity代码中写。
注意:动画效果有一个很大的问题,就是当移动到指定位置后,点击该位置是无效的,只能点击原来的位置才有效,它并不是真的移动到该位置了,可以通过下面的属性动画来解决。
(1)xml编辑动画的方式:
1、首先在res\anim文件夹下创建xml,
<?xml version="1.0" encoding="utf-8"?>
<!--interpolator:差值器,表示动画运行时的时间正常方式,fillAfter:表示动画停留在最后运动的结果-->
<set xmlns:android="http://schemas.android.com/apk/res/android"android:fillAfter="true"android:interpolator="@android:anim/decelerate_interpolator"><!--透明度标签:表示透明0到不透明1之间的变换--><alphaandroid:fromAlpha="0.0"android:toAlpha="1.0" ></alpha><!--旋转标签:fromDegrees:表示旋转角度的起始角度,toDegrees:结束角度。pivotX:表示旋转的X轴坐标;pivotY:表示旋转的Y轴坐标--><rotateandroid:fromDegrees="0.0"android:toDegrees="720"android:pivotX="50%"android:pivotY="50%"/><!--缩放标签:fromXScale,toXScale表示水平缩放的起始值和结束值;fromYScale,toYScale竖直方向的缩放起始值和结束值。pivotX,pivotY,表示缩放动画效果的基准点x,y轴--><scaleandroid:fromXScale="0.4"android:fromYScale="0.4"android:toXScale="1.2"android:toYScale="1.2"android:pivotX="50%"android:pivotY="50%"></scale><!--移动标签:fromXDelta,toXDelta表示x轴移动的像素点;fromYDelta,toYDelta表示Y轴移动的像素点--><translateandroid:fromXDelta="0"android:toXDelta="300"android:fromYDelta="0"android:toYDelta="300"></translate>
</set>
2、在activity代码中调用animation,实现动画效果
/*xml自定义动画功能*/fun setXmlAnimation(){//加载xml动画var xmlAnimation=AnimationUtils.loadAnimation(this,R.anim.animation_all)//设置动画播放时长xmlAnimation.duration=2000photo_id?.startAnimation(xmlAnimation)}(2) 通过代码实现动画效果
代码实现动画效果的属性其实和在xml中写差不多,但是在代码中写会更加灵活,可以更好的设置重复次数,可以根据加载view的长宽来动态加载移动的位置。
1、实现代码如下:
    /*代码实现动画的四个功能*/fun blendAnimation(){/**  创建一个AnimationSet,它能够同时执行多个动画效果*  构造方法的入参如果是“true”,则代表使用默认的interpolator,如果是“false”则代表使用自定义interpolator*/val mAnimationSet = AnimationSet(true)//透明度动画,从完全透明到不透明,我们的动画都是float型的,所以,在写数字的时候,要加fval alphAnima = AlphaAnimation(0.0f, 1.0f)/**  创建一个旋转动画对象*  入参列表含义如下:*  1.fromDegrees:从哪个角度开始旋转*  2.toDegrees:旋转到哪个角度结束*  3.pivotXType:旋转所围绕的圆心的x轴坐标的类型,有ABSOLUT绝对坐标、RELATIVE_TO_SELF相对于自身坐标、RELATIVE_TO_PARENT相对于父控件的坐标*  4.pivotXValue:旋转所围绕的圆心的x轴坐标,0.5f表明是以自身这个控件的一半长度为x轴*  5.pivotYType:y轴坐标的类型*  6.pivotYValue:y轴坐标*/val rotateAnim = RotateAnimation(0f, 720f, Animation.RELATIVE_TO_SELF, 0.5f,Animation.RELATIVE_TO_SELF, 0.5f)/**  创建一个缩放效果的动画*  入参列表含义如下:*  fromX:x轴的初始值*  toX:x轴缩放后的值*  fromY:y轴的初始值*  toY:y轴缩放后的值*  pivotXType:x轴坐标的类型,有ABSOLUT绝对坐标、RELATIVE_TO_SELF相对于自身坐标、RELATIVE_TO_PARENT相对于父控件的坐标*  pivotXValue:x轴的值,0.5f表明是以自身这个控件的一半长度为x轴*  pivotYType:y轴坐标的类型*  pivotYValue:轴的值,0.5f表明是以自身这个控件的一半长度为y轴*/var scaleAnimation = ScaleAnimation(0f,1f,0f,1f,Animation.RELATIVE_TO_SELF,0.5f,Animation.RELATIVE_TO_SELF,0.5f);
/** 创建一个移动动画效果* 入参的含义如下:* fromXType:移动前的x轴坐标的类型* fromXValue:移动前的x轴的坐标* toXType:移动后的x轴的坐标的类型* toXValue:移动后的x轴的坐标* fromYType:移动前的y轴的坐标的类型* fromYValue:移动前的y轴的坐标* toYType:移动后的y轴的坐标的类型* toYValue:移动后的y轴的坐标*/var translateAnimation = TranslateAnimation(Animation.RELATIVE_TO_SELF,0f,Animation.ABSOLUTE,360f,Animation.RELATIVE_TO_SELF,0f,Animation.ABSOLUTE,360f)mAnimationSet.addAnimation(alphAnima)mAnimationSet.addAnimation(rotateAnim)mAnimationSet.addAnimation(scaleAnimation)mAnimationSet.addAnimation(translateAnimation)mAnimationSet.setDuration(2000)//动画持续时间时间mAnimationSet.setInterpolator(DecelerateInterpolator()) //添加插值器,下面会有说明mAnimationSet.setFillAfter(true)photo_id?.startAnimation(mAnimationSet)}| Animation类的方法 | 解释 |
|---|---|
| reset() | 重置Animation的初始化 |
| cancel() | 取消Animation动画 |
| start() | 开始Animation动画 |
| setAnimationListener(AnimationListener listener) | 给当前Animation设置动画监听 |
| hasStarted() | 判断当前Animation是否开始 |
| hasEnded() | 判断当前Animation是否结束 |
既然补间动画只能给View使用,那就来看看View中和动画相关的几个常用方法吧,如下:
| View类的常用动画操作方法 | 解释 |
|---|---|
| startAnimation(Animation animation) | 对当前View开始设置的Animation动画 |
| clearAnimation() | 取消当View在执行的Animation动画 |
setInterpolator差值器的说明:也可以自定义差值器
| java类 | xml id值 | 描述 |
|---|---|---|
| AccelerateDecelerateInterpolator | @android:anim/accelerate_decelerate_interpolator | 动画始末速率较慢,中间加速 |
| AccelerateInterpolator | @android:anim/accelerate_interpolator | 动画开始速率较慢,之后慢慢加速 |
| AnticipateInterpolator | @android:anim/anticipate_interpolator | 开始的时候从后向前甩 |
| AnticipateOvershootInterpolator | @android:anim/anticipate_overshoot_interpolator | 类似上面AnticipateInterpolator |
| BounceInterpolator | @android:anim/bounce_interpolator | 动画结束时弹起 |
| CycleInterpolator | @android:anim/cycle_interpolator | 循环播放速率改变为正弦曲线 |
| DecelerateInterpolator | @android:anim/decelerate_interpolator | 动画开始快然后慢 |
| LinearInterpolator | @android:anim/linear_interpolator | 动画匀速改变 |
| OvershootInterpolator | @android:anim/overshoot_interpolator | 向前弹出一定值之后回到原来位置 |
| PathInterpolator | 新增,定义路径坐标后按照路径坐标来跑。 |
2、帧动画(Drawable Animation)
Drawable动画其实就是Frame动画(帧动画),它允许你实现像播放幻灯片一样的效果,这种动画的实质其实是Drawable,所以这种动画的XML定义方式文件一般放在res/drawable/目录下,但是容易引起内存溢出,只适合小型图片的播放功能:
<?xml version="1.0" encoding="utf-8"?>
<!--根标签为animation-list,其中oneshot代表着是否只展示一遍,设置为false会不停的循环播放动画根标签下,通过item标签对动画中的每一个图片进行声明android:duration 表示展示所用的该图片的时间长度-->
<animation-list xmlns:android="http://schemas.android.com/apk/res/android"android:oneshot="false" ><item android:drawable="@drawable/wifi1" android:duration="500"/><item android:drawable="@drawable/wifi2" android:duration="500"/><item android:drawable="@drawable/wifi3" android:duration="500"/><item android:drawable="@drawable/wifi4" android:duration="500"/><item android:drawable="@drawable/wifi5" android:duration="500"/>
</animation-list>
java代码:
var animDrawable = ContextCompat.getDrawable(this,R.drawable.drawle_animation) as AnimationDrawablephoto_id?.background=animDrawableanimDrawable.start()
四、Property Animation(属性动画)
相对于View animation,功能更加强大的。而且是真正的视图移动,点击移动后的视图会有点击效果。属性动画有两个类:ValueAnimator和ObjectAnimator。
ValueAnimator:可以设置开始值和结束值来动态改变view的移动位置
ObjectAnimator:功能更加强大,可以控制位移、透明度、旋转、缩放。
1、ValueAnimator的使用
移动的时候使用,使用起来较简单,代码如下
fun playAnimation(){//获得xml中TextView的宽度和高度val spec = View.MeasureSpec.makeMeasureSpec(0, View.MeasureSpec.UNSPECIFIED)photo_id.measure(spec, spec)val measuredWidth = photo_id.measuredWidthval measuredHeight = photo_id.measuredHeight// ofInt(),其中还包括ofFloat,区别只是写入的内容不同,作用有:// 1. 创建动画实例// 2. 将传入的多个Int参数进行平滑过渡:此处传入0和400,表示将值从0平滑过渡到400// 如果传入了3个Int参数 a,b,c ,则是先从a平滑过渡到b,再从b平滑过渡到C,以此类推// ValueAnimator.ofInt()内置了整型估值器,直接采用默认的.不需要设置,即默认设置了如何从初始值 过渡到 结束值anim= ValueAnimator.ofInt(0,400)// 设置动画的播放各种属性// 设置动画运行的时长anim?.duration=5000// 设置动画延迟播放时间anim?.startDelay=1000// 设置动画重复播放次数 = 重放次数+1// 动画播放次数 = infinite时,动画无限重复anim?.repeatCount=0// 设置重复播放动画模式// ValueAnimator.RESTART(默认):正序重放// ValueAnimator.REVERSE:倒序回放anim?.repeatMode=ValueAnimator.RESTART//动画改变监听器,5ms/帧anim?.addUpdateListener { animation ->// 获得改变后的值var curValue : Int=animation.animatedValue as IntLog.i("feng","时间值____"+curValue)// 将改变的值手动赋值给对象的属性值:通过动画的更新监听器// 设置 值的更新监听器// 即:值每次改变、变化一次,该方法就会被调用一次// 输出改变后的值:依次代表控件的左端、顶端、右端、和底端photo_id?.layout(curValue,curValue,curValue+measuredWidth,curValue+measuredHeight)}anim?.start()// 启动动画}顺便记录一下在xml写动画效果的方法,该方法不如用kotlin代码写灵活,不太复杂的动画可以使用。
// ValueAnimator采用<animator>  标签
<animator xmlns:android="http://schemas.android.com/apk/res/android"  android:valueFrom="0"   // 初始值android:valueTo="100"  // 结束值android:valueType="intType" // 变化值类型 :floatType & intTypeandroid:duration="3000" // 动画持续时间(ms),必须设置,动画才有效果android:startOffset ="1000" // 动画延迟开始时间(ms)android:fillBefore = “true” // 动画播放完后,视图是否会停留在动画开始的状态,默认为trueandroid:fillAfter = “false” // 动画播放完后,视图是否会停留在动画结束的状态,优先于fillBefore值,默认为falseandroid:fillEnabled= “true” // 是否应用fillBefore值,对fillAfter值无影响,默认为trueandroid:repeatMode= “restart” // 选择重复播放动画模式,restart代表正序重放,reverse代表倒序回放,默认为restart|android:repeatCount = “0” // 重放次数(所以动画的播放次数=重放次数+1),为infinite时无限重复android:interpolator = @[package:]anim/interpolator_resource // 插值器,即影响动画的播放速度。/>  在Java代码中启动动画
Animator animator = AnimatorInflater.loadAnimator(context, R.animator.set_animation);
// 载入XML动画animator.setTarget(view);
// 设置动画对象animator.start();
// 启动动画
2、ObjectAnimator
可实现平移、旋转、透明度、颜色、背景色等。
效果图如下:

实现代码:
/*ObjectAnimator的使用*/fun playObjectAnimation(){val set = AnimatorSet()//控制透明度的,我用ofInt没好使,还是用float吧var animator1=ObjectAnimator.ofFloat(photo_id,"alpha",0f,1f)animator1?.duration=2000//延X轴移动var animator2=ObjectAnimator.ofFloat(photo_id,"translationX",0f,300f)animator2?.duration=2000animator2?.interpolator=DecelerateInterpolator()//延y轴移动,起始位置和结束位置var animator3=ObjectAnimator.ofFloat(photo_id,"translationY",0f,500f,200f)animator3?.duration=2000animator3?.interpolator=DecelerateInterpolator()//沿X轴旋转var animator4=ObjectAnimator.ofFloat(photo_id,"rotationX",0f,720f)animator4?.duration=2000//沿Y轴旋转var animator5=ObjectAnimator.ofFloat(photo_id,"rotationY",0f,720f)animator5?.duration=2000//缩放,可以根据X轴和Y轴缩放var animator6=ObjectAnimator.ofFloat(photo_id,"scaleX",0f,4f,2f)animator6?.duration=3000//改变颜色var animator7=ObjectAnimator.ofInt(photo_id,"backgroundColor",Color.RED, Color.BLUE, Color.GRAY, Color.GREEN)animator7?.duration=2000set.play(animator1).before(animator2) //先执行anim动画之后在执行anim2set.play(animator2).before(animator3)set.play(animator3).before(animator4)set.play(animator4).before(animator5)set.play(animator5).before(animator6)set.play(animator6).before(animator7)set.start()}