堆栈设置
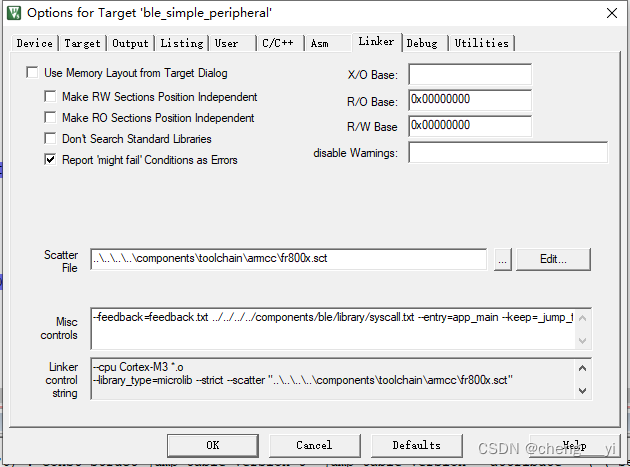
fr8008gp使用自定义的linker脚本:
;256k bytes, which is 2M ROM
;ROM 0x00000000  0x40000	0x30000
ROM 0x10000000  0x800000
{ER_TABLE +0{*(jump_table_0)*(jump_table_1)*(jump_table_2)*(jump_table_3)*(jump_table_4)}ER_RO 0x10002000 FIXED{*(+RO)}ER_BOOT 0x11000000{boot_vectors.o (RESET, +FIRST)}USER_RE_RAM 0x11000C40{*(ram_code)}
;	USER_EX_RAM 0x23000000 0x100000
;	{
;		.ANY (EXRAM)
;   }ER_RW +0{*(+RW)}ER_STACK +0{*(stack_section)}ER_ZI +0{*(+ZI)}HEAP_KE +0 {*(heap_ke)}
}
这里有一个特殊的字段ER_TABLE 用于应用程序代码和协议栈进行程序设置相关沟通,我们这里看jump_table_3有如下内容:
#define SYSTEM_STACK_SIZE           0x800  //栈内存分配2k
/** LOCAL VARIABLES*/
__attribute__ ( ( section ( "stack_section" ) ) ) static uint32_t system_stack[SYSTEM_STACK_SIZE / sizeof ( uint32_t )];const struct jump_table_version_t _jump_table_version __attribute__ ( ( section ( "jump_table_3" ) ) ) = {.stack_top_address = &system_stack[SYSTEM_STACK_SIZE / sizeof ( uint32_t )],.firmware_version = 0x00000000,
};const struct jump_table_image_t _jump_table_image __attribute__ ( ( section ( "jump_table_1" ) ) ) = {.image_type = IMAGE_TYPE_APP,.image_size = 0x80000,
};
可以看到应用程序通过SYSTEM_STACK_SIZE宏设置堆栈,默认为2K,在运行代码的时候查看使用到的堆栈已经超过了2K:
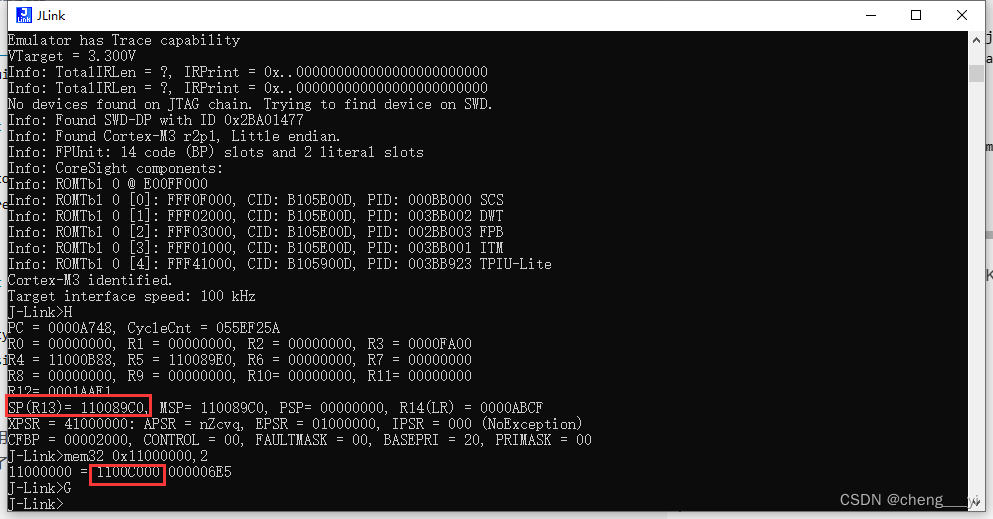

所以必须调大系统堆栈,这里可以设置为8K:

lv_timer_handler定时器研究和优化
本文摘录于:https://blog.csdn.net/m0_66557301/article/details/124776689只是做学习备份之用,绝无抄袭之意,有疑惑请联系本人!
原厂提供的demo是按照如下方式调用lv_timer_handler定时器的:
#define LV_TICK_COUNT               10
__attribute__ ( ( section ( "ram_code" ) ) ) void timer0_handler ( void )
{timer_int_clear ( Timer0 );lv_tick_inc ( LV_TICK_COUNT );//uart_putc_noint_no_wait(UART0_BASE, 'T');
}
__attribute__ ( ( section ( "ram_code" ) ) ) void timer1_handler ( void )
{gpio_write_pin(GPIO_C, GPIO_PIN_6, GPIO_PIN_SET);uint32_t tick;timer_int_clear ( Timer1 );timer_stop ( Timer1 );tick = lv_timer_handler();timer_init ( Timer1, system_get_clock_config() * 1000 * tick, TIMER_DIV_NONE );timer_start ( Timer1 );printf ( "tick:%d\r\n", tick);gpio_write_pin(GPIO_C, GPIO_PIN_6, GPIO_PIN_CLEAR);
}
void gui_main ( void )
{
.....................................................................................
timer_init ( Timer0, system_get_clock_config() * 1000 * LV_TICK_COUNT, TIMER_DIV_NONE );timer_start ( Timer0 );NVIC_SetPriority ( TIMER0_IRQn, 5 );NVIC_EnableIRQ ( TIMER0_IRQn );timer_init ( Timer1, system_get_clock_config() * 1000 * 100, TIMER_DIV_NONE );//100MStimer_start ( Timer1 );NVIC_SetPriority ( TIMER1_IRQn, 6 );NVIC_EnableIRQ ( TIMER1_IRQn );
}
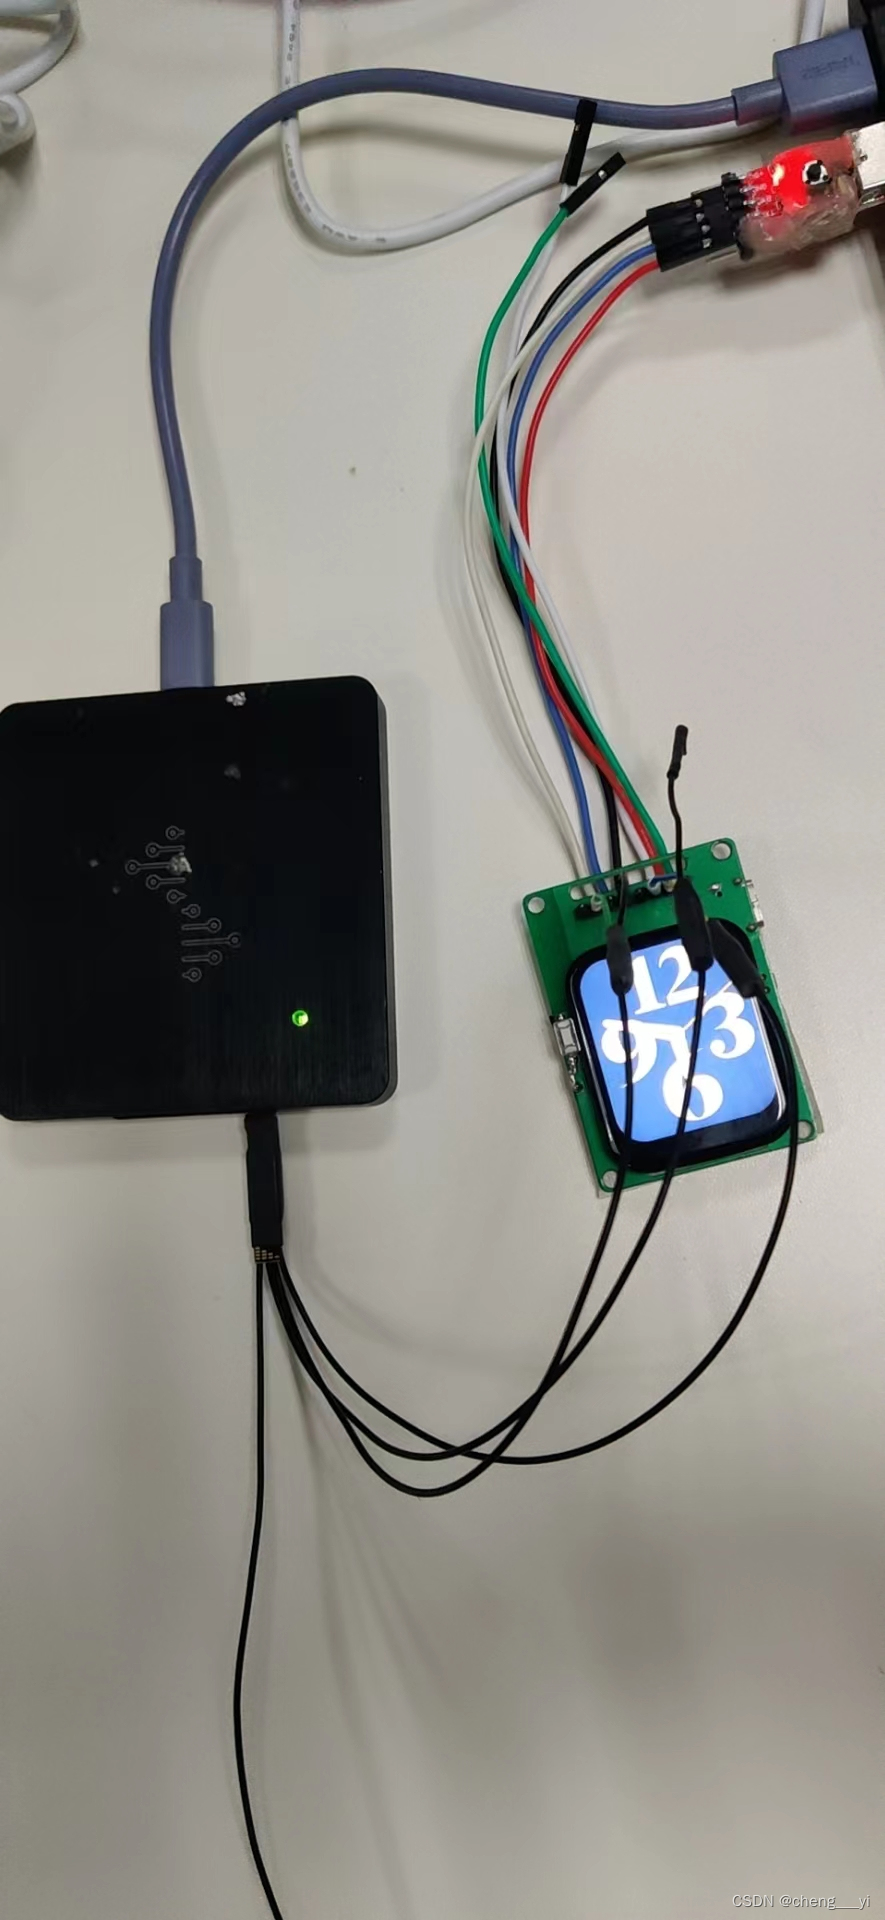
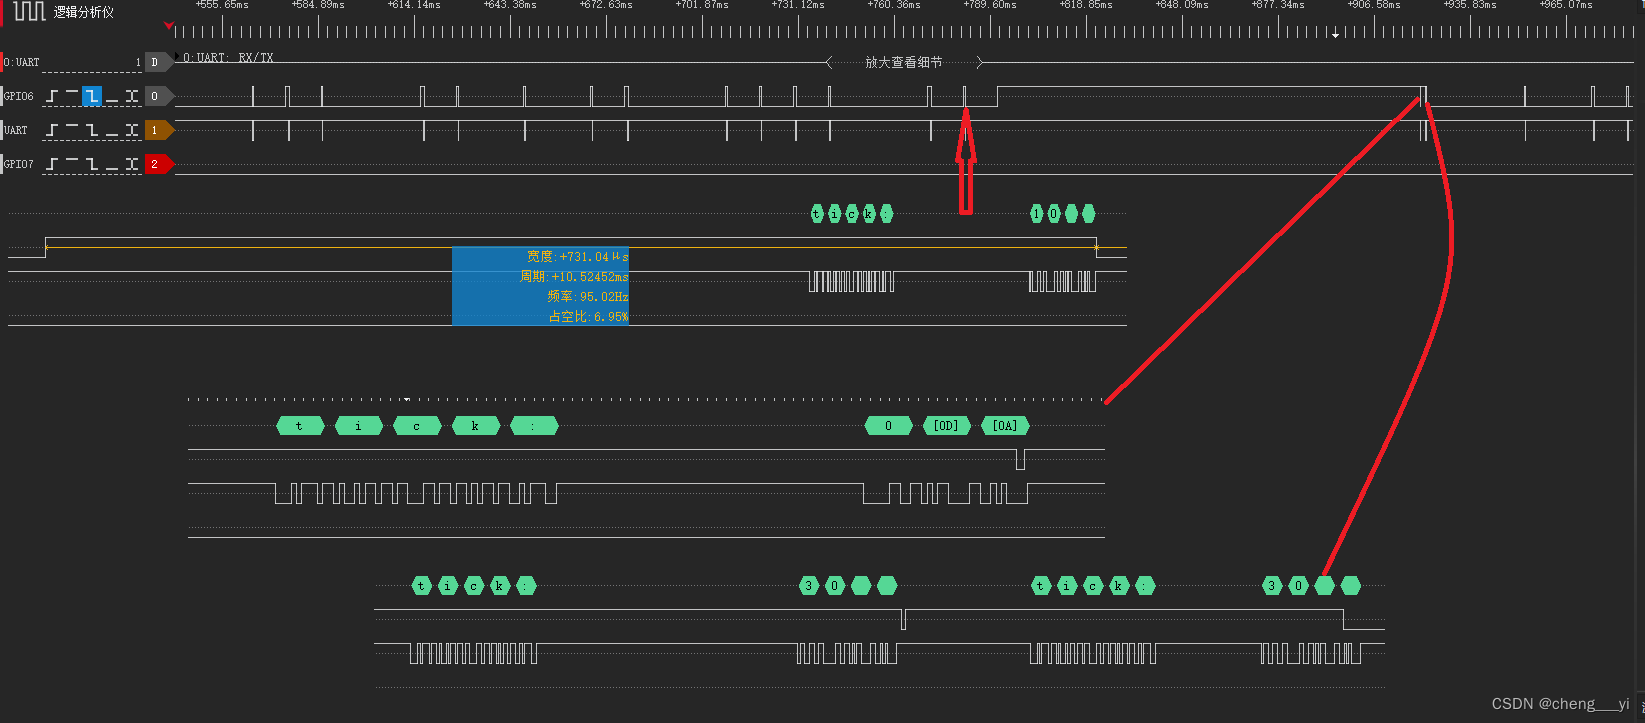
我们看到定时器的间隔一般都是10,20,30ms(lvgl的切换率为10MS),按照这样的方式定义定时器最大的问题是TIMER1被频繁的开关,这个对定时器的精度和代码的效率有很大的影响:
按照LVGL的说法lv_timer_handler函数应该在main的while主循环调用:

所以这里打算修改timer定时器的机制,首先我们来看看定时器运行的时间:
波形请从如下地址下载:https://download.csdn.net/download/cheng___yi/87378807
可以看到当lv_timer_handler函数返回0的时候lv_timer_handler运行的时间特别长,所以按照道理说lv_timer_handler函数不应该放到定时器中来运行,结合文章:https://blog.csdn.net/m0_66557301/article/details/124776689的说法,这里打算把lv_timer_handler函数拿到while主循环中运行!
这里建立lv_main_loop函数并且在main_loop中调用:
__attribute__ ( ( section ( "ram_code" ) ) ) void timer0_handler ( void )
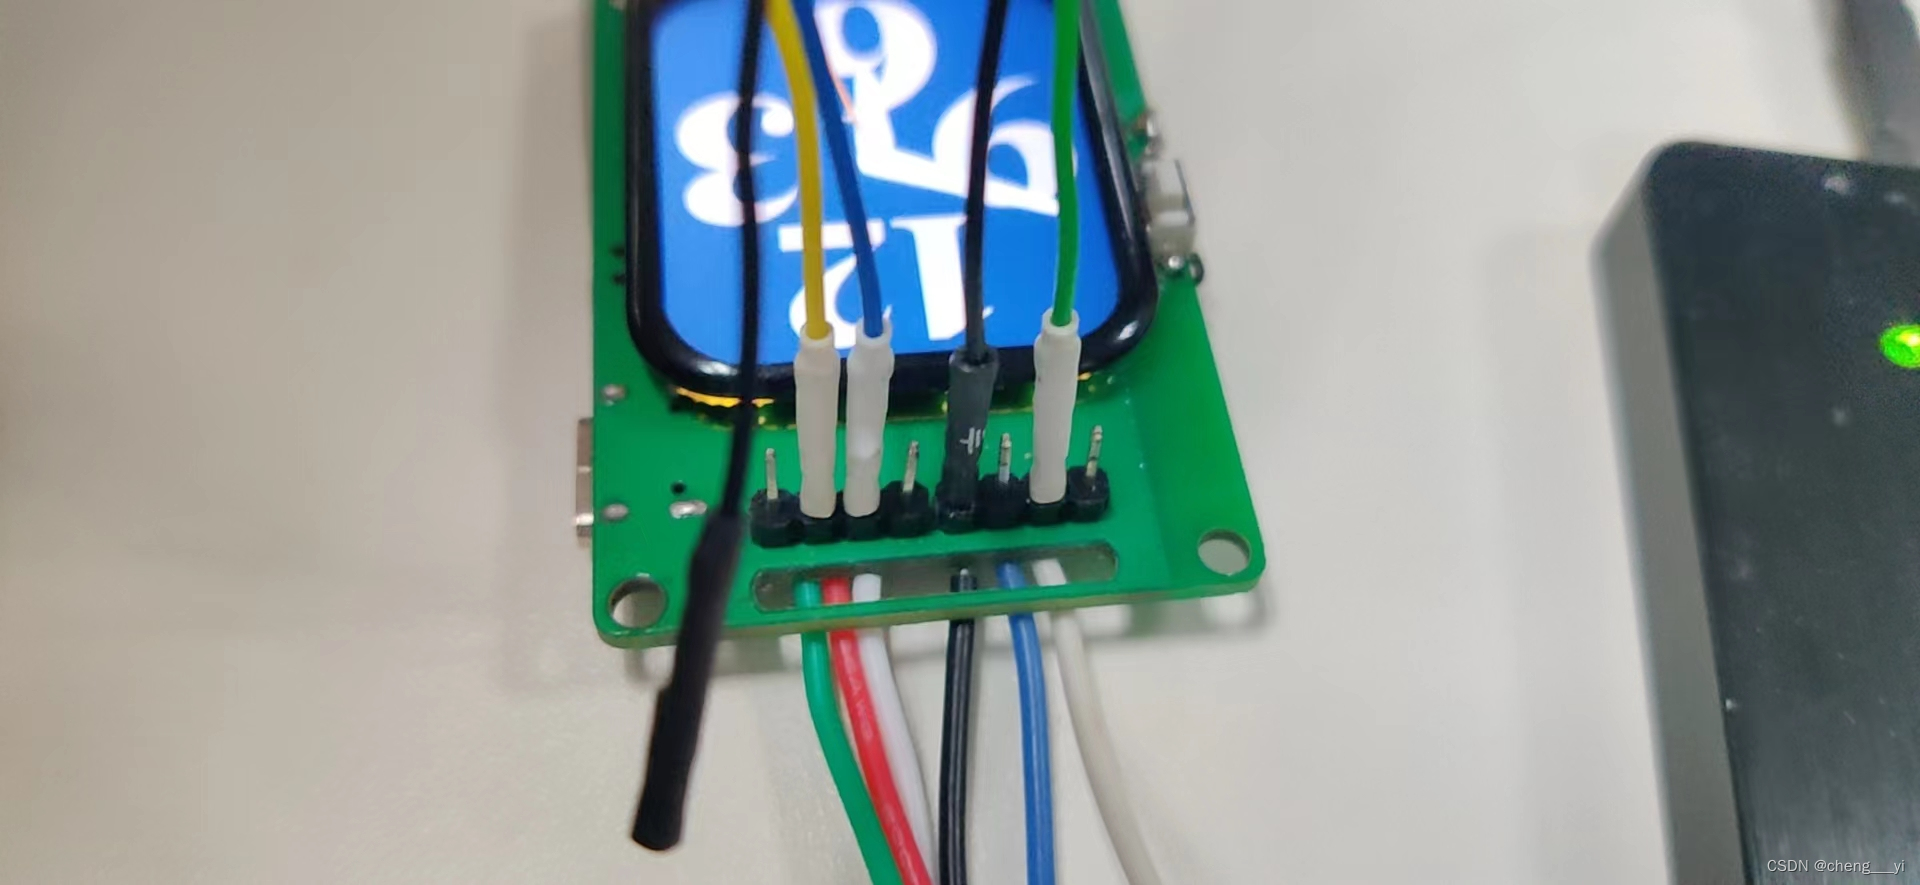
{gpio_write_pin(GPIO_C, GPIO_PIN_7, GPIO_PIN_SET);timer_int_clear ( Timer0 );lv_tick_inc ( LV_TICK_COUNT );//uart_putc_noint_no_wait(UART0_BASE, 'T');if(lv_timer_tick>=LV_TICK_COUNT) lv_timer_tick-=LV_TICK_COUNT;gpio_write_pin(GPIO_C, GPIO_PIN_7, GPIO_PIN_CLEAR);
}
__attribute__ ( ( section ( "ram_code" ) ) ) void lv_main_loop ( void )
{if(lv_timer_tick<LV_TICK_COUNT){gpio_write_pin(GPIO_C, GPIO_PIN_6, GPIO_PIN_SET);lv_timer_tick = lv_timer_handler();printf ( "tick:%d\r\n", lv_timer_tick);gpio_write_pin(GPIO_C, GPIO_PIN_6, GPIO_PIN_CLEAR);}
}
extern void lv_main_loop ( void );
__attribute__ ( ( section ( "ram_code" ) ) ) void main_loop ( void )
{while ( 1 ) {lv_main_loop();if ( ble_stack_schedule_allow() ) {/*user code should be add here*//* schedule internal stack event */ble_stack_schedule();}GLOBAL_INT_DISABLE();switch ( ble_stack_sleep_check() ) {case 2: {ble_stack_enter_sleep();}break;default:break;}GLOBAL_INT_RESTORE();ble_stack_schedule_backward();}
}
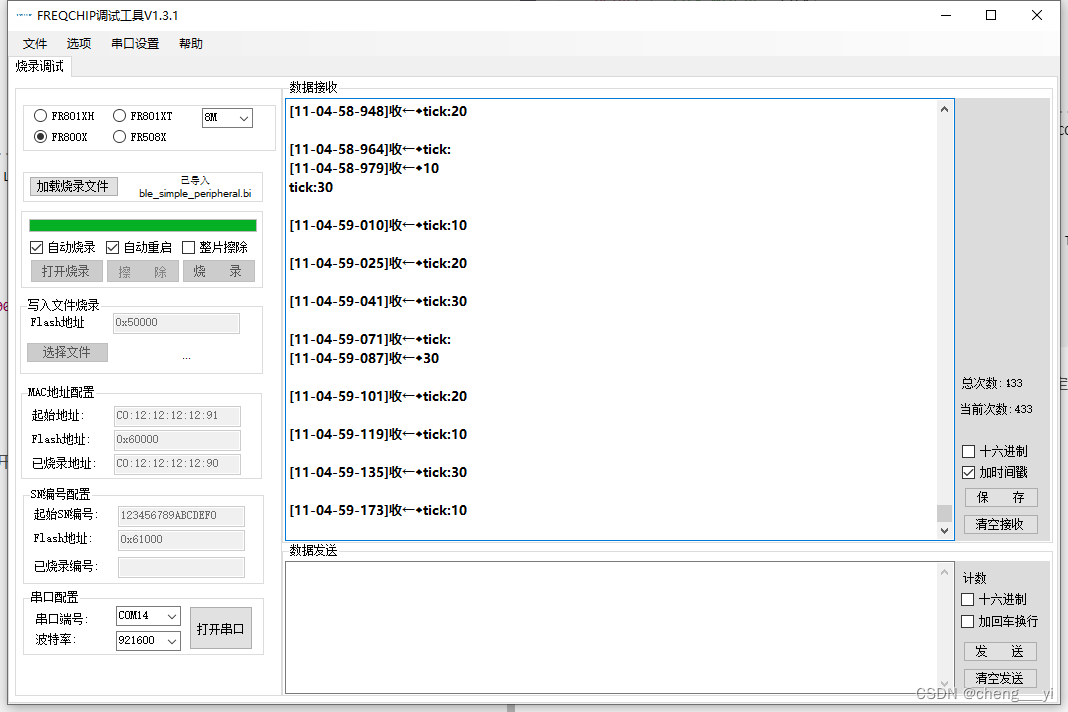
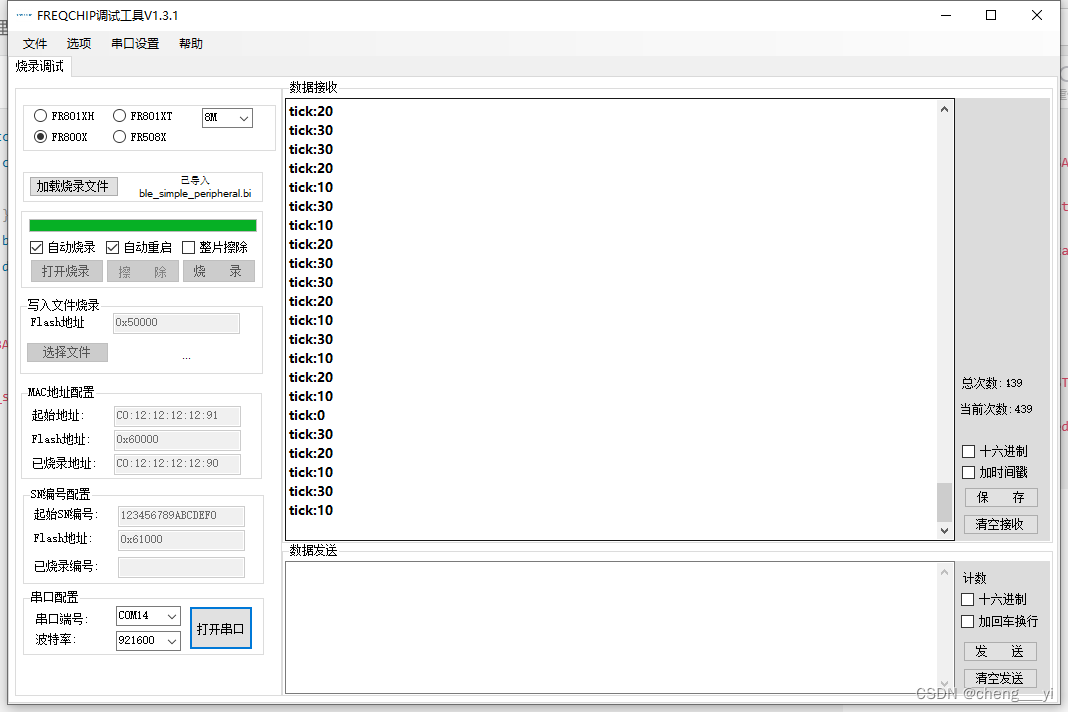
可以看到打印非常的快:
逻辑分析仪上看到lv_timer_handler函数执行非常长的情况还是存在:

正常情况下lv_timer_handler消耗时间还是比较短的:


具体波形请看:https://download.csdn.net/download/cheng___yi/87378851
广播数据中不用定义GAP_ADTVYPE_FLAGS
如果在广播数据中定义了GAP_ADTVYPE_FLAGS,比如如下代码:
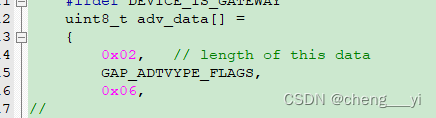
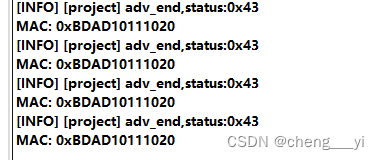
会发现广播结束数据会来得非常快,这其实是因为广播数据设置出错:
这是因为GAP_ADTVYPE_FLAGS字段底层协议栈会自动填充,不需要应用层指定!
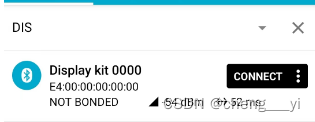
广播使用设备唯一地址
user_main函数中使用如下方式定义蓝牙地址可以做到所有设备唯一一个地址,当然也可以自定义地址:
void user_main(void)
{/* initialize log module */log_init();/* initialize PMU module at the beginning of this program */pmu_sub_init();pmu_ioldosw_ctrl(true);/* enable gpio clock */__SYSTEM_GPIO_CLK_ENABLE();/* set system clock */system_set_clock(SYSTEM_CLOCK_SEL);/* set local BLE address */mac_addr_t mac_addr;
//    mac_addr.addr[0] = 0xbd;
//    mac_addr.addr[1] = 0xad;
//    mac_addr.addr[2] = 0x10;
//    mac_addr.addr[3] = 0x11;
//    mac_addr.addr[4] = 0x10;
//    mac_addr.addr[5] = 0x20;
//    gap_address_set(&mac_addr, BLE_ADDR_TYPE_PUBLIC);	//BLE_ADDR_TYPE_RANDOM_RESOVABLEsystem_get_unique_ID(mac_addr.addr);gap_address_set(&mac_addr, BLE_ADDR_TYPE_PUBLIC);
两台设备广播如下: