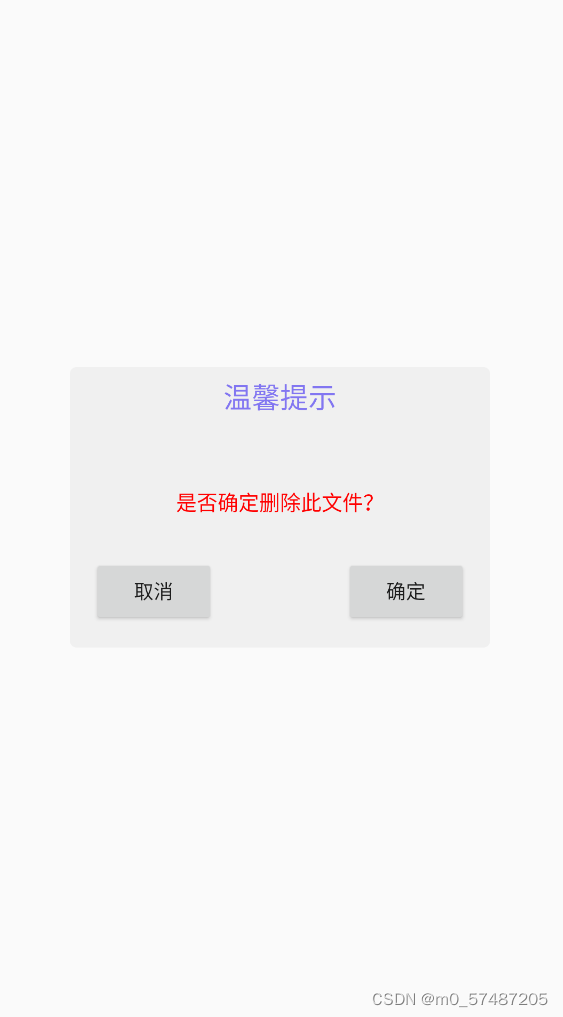
文章目录 效果 dialog样式 dialog 背景 common_dialog_bg dialog布局 base_common_dialog_layout 全局工具类 CommonDialog(建造者模式) 使用
<style name="custom_dialog2" parent="@android:style/Theme.Dialog"><item name="android:windowFrame">@null</item><!-- Dialog的windowFrame框为无 --><item name="android:windowIsFloating">true</item><!-- 是否漂现在activity上 --><item name="android:windowIsTranslucent">true</item><!-- 是否半透明 --><item name="android:windowNoTitle">true</item><item name="android:background">@null</item><item name="android:windowBackground">@android:color/transparent</item><item name="android:windowContentOverlay">@null</item><!-- 去除黑色边框的关键设置项 --><item name="android:backgroundDimEnabled">true</item><!-- 屏幕背景是否变暗 --><item name="android:backgroundDimAmount">0.3</item></style>
<shape xmlns:android="http://schemas.android.com/apk/res/android"><solid android:color="@color/white" /><corners android:radius="15dp" />
</shape>
<?xml version="1.0" encoding="utf-8"?>
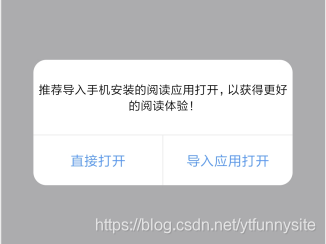
<LinearLayout xmlns:android="http://schemas.android.com/apk/res/android"android:layout_width="match_parent"android:layout_height="match_parent"android:background="@drawable/common_dialog_bg"android:clipChildren="false"android:orientation="vertical"><LinearLayoutandroid:layout_width="match_parent"android:layout_height="145dp"android:layout_gravity="center"android:orientation="vertical"><TextViewandroid:id="@+id/tv_dialog_title"android:layout_width="match_parent"android:layout_height="0dp"android:layout_weight="3"android:padding="5dp"android:gravity="center"android:text="推荐*********体验!"android:textColor="#666666"android:textSize="14sp" /><ImageViewandroid:layout_width="match_parent"android:layout_height="1dp"android:background="@color/background_grey" /><!--取消确认--><LinearLayoutandroid:layout_width="match_parent"android:layout_height="0dp"android:layout_alignParentBottom="true"android:layout_weight="2"android:orientation="horizontal"><TextViewandroid:id="@+id/tv_dialog_pos"android:layout_width="0dp"android:layout_height="match_parent"android:layout_weight="1"android:gravity="center"android:text="直接打开"android:textColor="@color/blue"android:textSize="16sp" /><ImageViewandroid:layout_width="1dp"android:layout_height="match_parent"android:background="@color/background_grey" /><TextViewandroid:id="@+id/tv_dialog_neg"android:layout_width="0dp"android:layout_height="match_parent"android:layout_weight="1"android:gravity="center"android:text="导入应用打开"android:textColor="@color/blue"android:textSize="16sp" /></LinearLayout></LinearLayout></LinearLayout>
import android.app.Activity
import android.app.Dialog
import android.content.Context
import android.content.DialogInterface
import android.text.TextUtils
import android.view.*
import android.widget.TextView
import com.beans.base.R/*** @Author yangtianfu* @CreateTime 2020/4/7 11:16* @Describe 通用弹窗*/class CommonDialog(context: Context?, themeResId: Int) : Dialog(context!!, themeResId) {class Builder (private val context: Context) {private var title: String? = nullprivate var message: String? = nullprivate var positiveButtonContent: String? = nullprivate var negativeButtonContent: String? = nullprivate var positiveButtonListener: DialogInterface.OnClickListener? = nullprivate var negativeButtonListener: DialogInterface.OnClickListener? = nullprivate var contentView: View? = nullprivate var color: Int = 0private var withOffSize: Float = 0.toFloat()private var heightOffSize: Float = 0.toFloat()fun setTitle(title: String): Builder {this.title = titlereturn this}fun setTitle(title: Int): Builder {this.title = context.getText(title) as Stringreturn this}fun setMessage(message: String): Builder {this.message = messagereturn this}fun setMessageColor(color: Int): Builder {this.color = colorreturn this}fun setPositiveButton(text: String, listener: DialogInterface.OnClickListener): Builder {this.positiveButtonContent = textthis.positiveButtonListener = listenerreturn this}fun setPositiveButton(textId: Int, listener: DialogInterface.OnClickListener): Builder {this.positiveButtonContent = context.getText(textId) as Stringthis.positiveButtonListener = listenerreturn this}fun setNegativeButton(text: String, listener: DialogInterface.OnClickListener): Builder {this.negativeButtonContent = textthis.negativeButtonListener = listenerreturn this}fun setNegativeButton(textId: Int, listener: DialogInterface.OnClickListener): Builder {this.negativeButtonContent = context.getText(textId) as Stringthis.negativeButtonListener = listenerreturn this}fun setContentView(v: View): Builder {this.contentView = vreturn this}fun setWith(v: Float): Builder {this.withOffSize = vreturn this}fun setContentView(v: Float): Builder {this.heightOffSize = vreturn this}fun create(): CommonDialog {/*** 初始化Dialog*/val dialog = CommonDialog(context,R.style.custom_dialog2)/*** 初始化Dialog的布局页面*/val inflater = context.getSystemService(Context.LAYOUT_INFLATER_SERVICE) as LayoutInflaterval dialogLayoutView = inflater.inflate(R.layout.base_common_dialog_layout,null)dialog.addContentView(dialogLayoutView, ViewGroup.LayoutParams(ViewGroup.LayoutParams.WRAP_CONTENT, ViewGroup.LayoutParams.WRAP_CONTENT))if (!TextUtils.isEmpty(title)) {(dialogLayoutView.findViewById<View>(R.id.tv_dialog_title) as TextView).text = title}if (color != 0) {val viewById = dialogLayoutView.findViewById<View>(R.id.tv_dialog_title) as TextViewviewById.setTextColor(color)}if (!TextUtils.isEmpty(message)) {(dialogLayoutView.findViewById<View>(R.id.tv_dialog_title) as TextView).text = message}if (!TextUtils.isEmpty(positiveButtonContent)) {(dialogLayoutView.findViewById<View>(R.id.tv_dialog_pos) as TextView).text = positiveButtonContentif (positiveButtonListener != null) {(dialog.findViewById<View>(R.id.tv_dialog_pos) as TextView).setOnClickListener { positiveButtonListener!!.onClick(dialog, -1) }}} else {(dialogLayoutView.findViewById<View>(R.id.tv_dialog_pos) as TextView).visibility = View.GONEdialogLayoutView.findViewById<View>(R.id.line).visibility = View.GONE}if (!TextUtils.isEmpty(negativeButtonContent)) {(dialogLayoutView.findViewById<View>(R.id.tv_dialog_neg) as TextView).text = negativeButtonContentif (negativeButtonListener != null) {(dialogLayoutView.findViewById<View>(R.id.tv_dialog_neg) as TextView).setOnClickListener { negativeButtonListener!!.onClick(dialog, -2) }}} else {(dialogLayoutView.findViewById<View>(R.id.tv_dialog_neg) as TextView).visibility = View.GONE}/*** 将初始化完整的布局添加到dialog中*/dialog.setContentView(dialogLayoutView)/*** 禁止点击Dialog以外的区域时Dialog消失*/dialog.setCanceledOnTouchOutside(false)val window = dialog.windowval context = this.context as Activityval windowManager = context.windowManagerval defaultDisplay = windowManager.defaultDisplayval attributes = window!!.attributesif (withOffSize.toDouble() != 0.0) {attributes.width = (defaultDisplay.width * withOffSize).toInt()} else {attributes.width = (defaultDisplay.width * 0.77).toInt()}if (heightOffSize.toDouble() != 0.0) {attributes.height = (defaultDisplay.height * heightOffSize).toInt()}window.attributes = attributesreturn dialog}}
}
CommonDialog.Builder(this).setMessage("推荐导入体验!").setNegativeButton("导入应用打开",DialogInterface.OnClickListener{p0,p1 -> p0.dismiss()}).setMessageColor(Color.BLACK).setPositiveButton("直接打开",DialogInterface.OnClickListener({ dialog, which -> dialog.dismiss()})).setWith(0.8f).create().show()