目录
一:效果展示
二:Qt UI界面设计
三:源码分享
一:效果展示
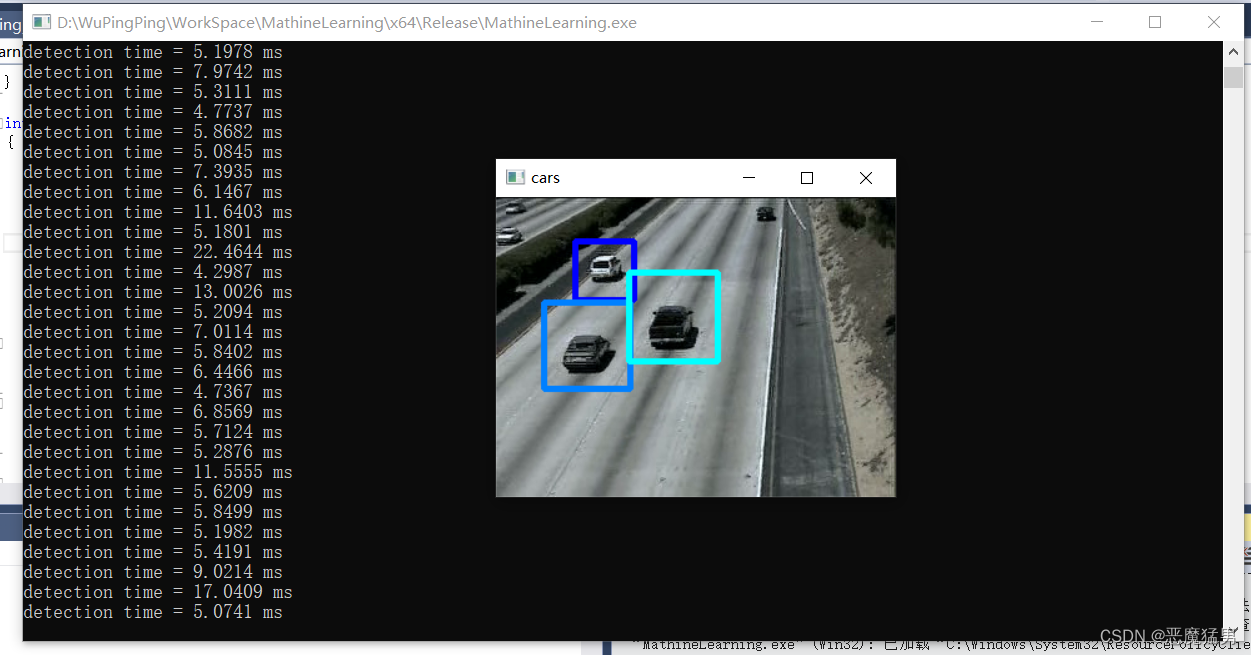
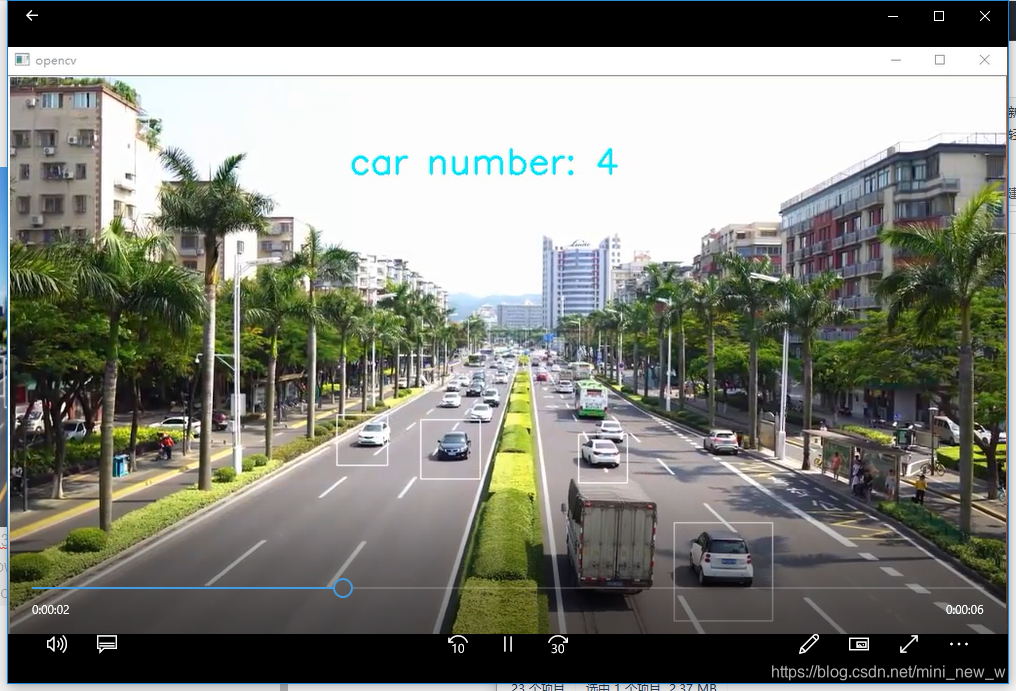
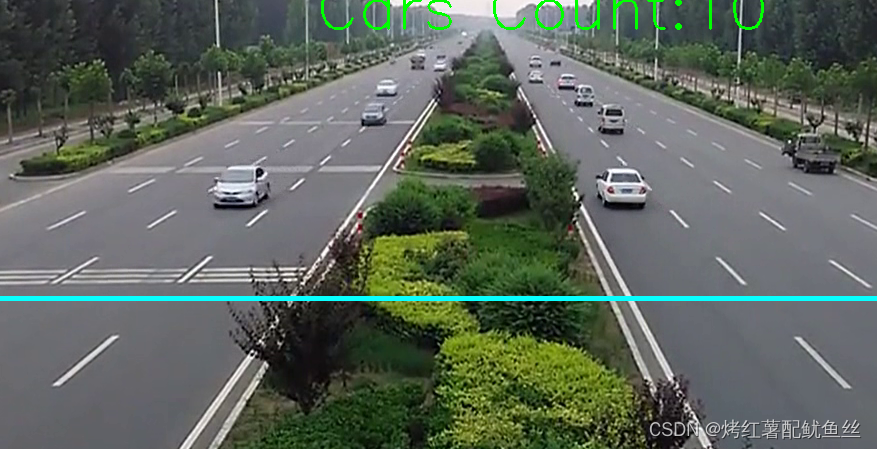
使用Qt界面实现 点击 线程启动按钮播放视频 同时
左边界面显示原视频 右边界面显示车辆识别视频
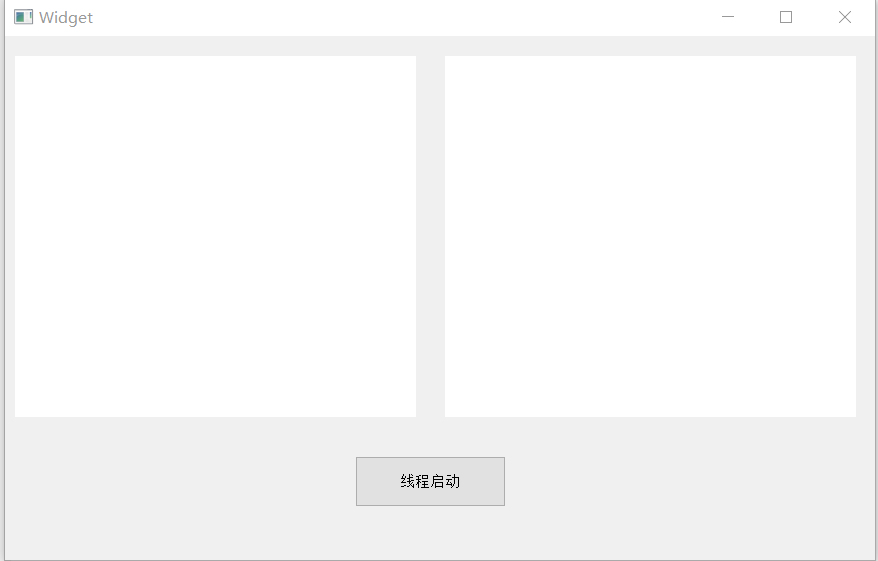
初始界面
点击线程启动后,即可车辆识别 框选车辆

二:Qt UI界面设计
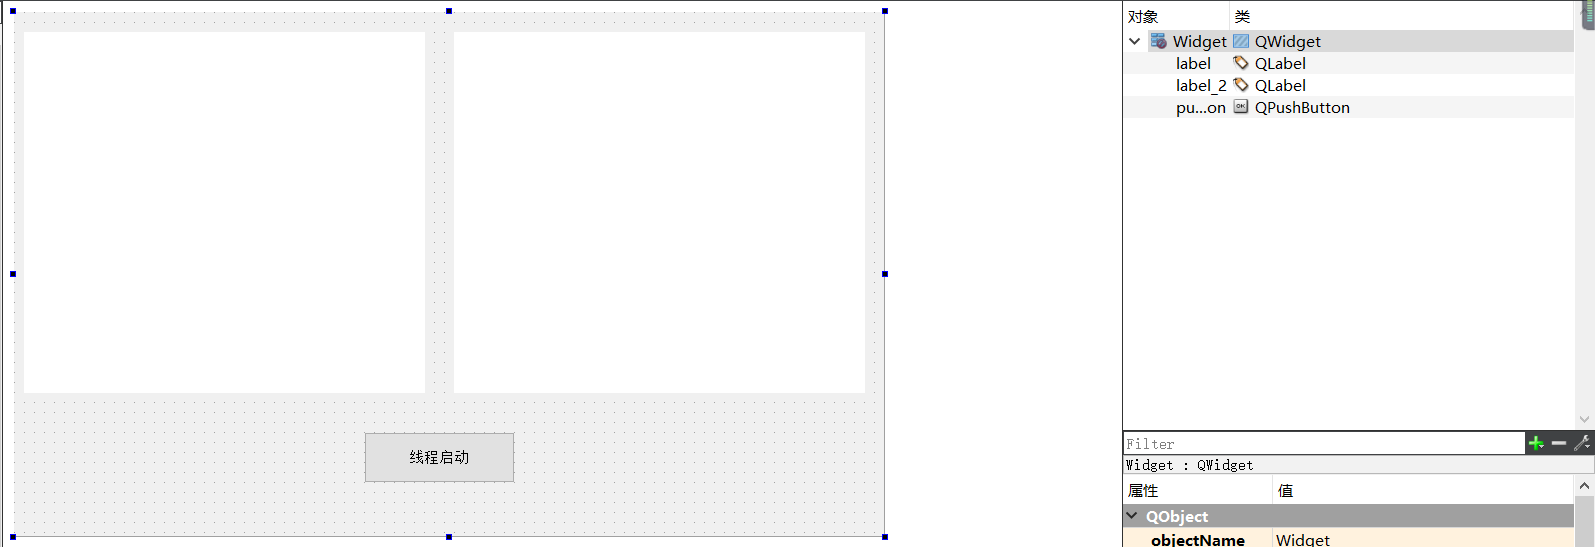
在设计好界面之后最好先保存一下
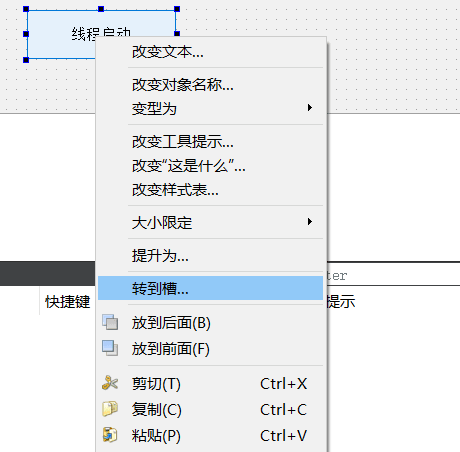
对按钮可以设置槽函数
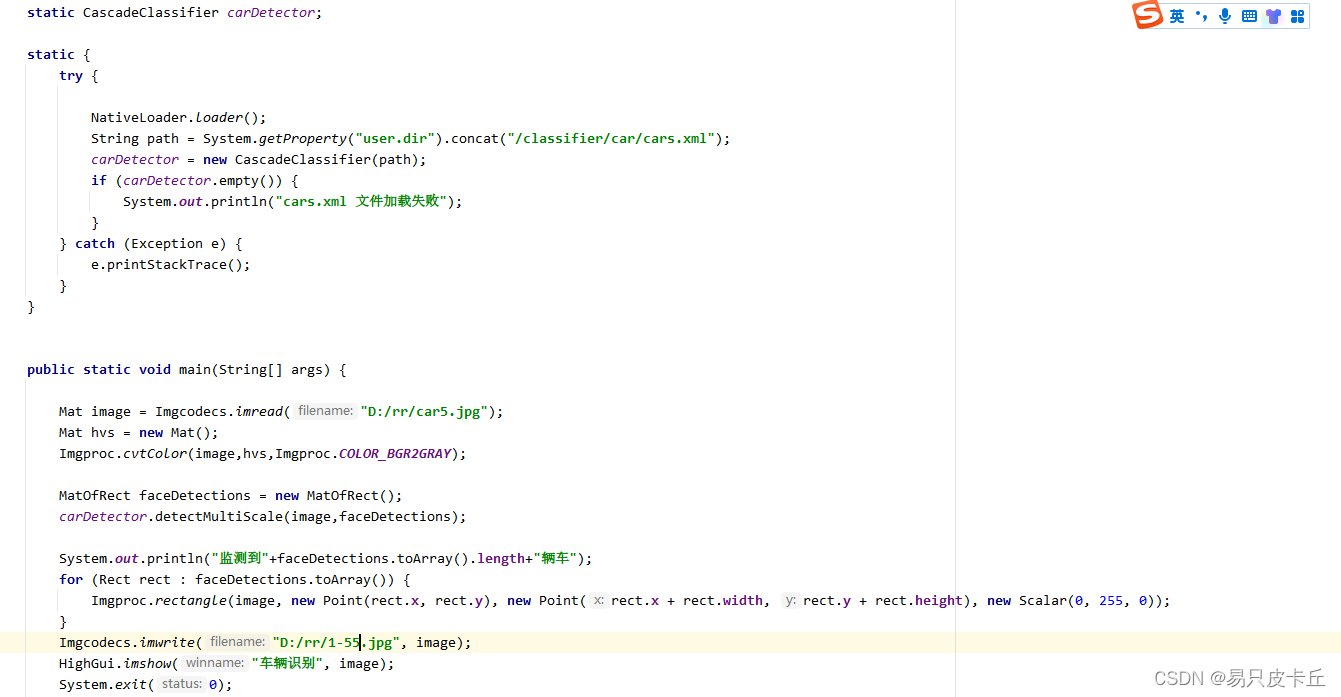
三:源码分享
难点在于:
线程同步问题
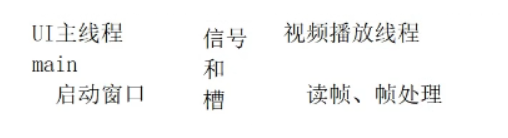
需要使用到connect函数中的第五个参数【第五个参数 具体说明如下】
1 AutoConnection 为默认参数,由发送信号决定,如果发送信号和接受信号是同一个线程,则调用DirectConnection。如果不在同一个线程则调用QueuedConnection;
2 DirectConnection 槽函数运行于信号发送者所在的线程,效果上就像是直接在信号发送的位置调用了槽函数
3 QueuedConnection 槽函数在控制回到接收者所在线程的事件循环时被调用,槽函数运行于信号接收者所在线程。发送信号后,槽函数不会立即被调用,等到接收者当前函数执行完,进入事件循环之后,槽函数才会被调用。多线程下用这个类型
4 BlockingQueuedConnection 槽函数的调用时机与Qt::QueuedConnection 一致,不过在发送完信号后,发送者所在线程会阻塞,直到槽函数运行完。接收者和发送者绝对不能在一个线程,否则会死锁。在多线程间需要同步的场合会用到这个
5 UniqueConnection 此类型可通过 “|” 与以上四个结合在一起使用。此类型为当某个信号和槽已经连接时,在进行重复连接时就会失败,可避免重复连接。如果重复连接,槽函数会重复执行
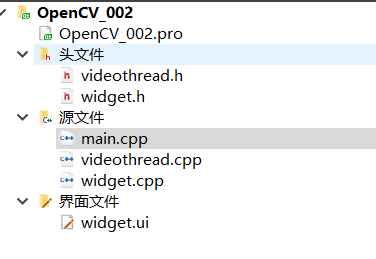
Widget.h头文件导入OpenCV包
#ifndef WIDGET_H
#define WIDGET_H
#include <QWidget>
#include<opencv2/opencv.hpp>
#include"videothread.h"using namespace cv;namespace Ui {
class Widget;
}class Widget : public QWidget
{Q_OBJECT
public:explicit Widget(QWidget *parent = 0);~Widget();void paintEvent(QPaintEvent *e);
private slots:void on_pushButton_clicked();
public slots://绑定线程 需要两帧画面 原图和处理之后的图   接收由同一个信号发送来的两帧画面void ChangeImg(Mat oldimg,Mat newimg);
private:Ui::Widget *ui;videothread *pthread;QImage oldimg;QImage newimg;
};#endif // WIDGET_H
Widget.cpp源文件 界面实现
#include "widget.h"
#include "ui_widget.h"Widget::Widget(QWidget *parent) :QWidget(parent),ui(new Ui::Widget)
{ui->setupUi(this);this->pthread = new videothread("D:/00000000000003jieduanshipincailliao/carMove.mp4");//由于线程同步问题 需要使用第五个参数connect(this->pthread,SIGNAL(send2UI(Mat,Mat)),this,SLOT(ChangeImg(Mat,Mat)),Qt::BlockingQueuedConnection);
}Widget::~Widget()
{delete ui;
}void Widget::paintEvent(QPaintEvent *e)
{ui->label->setPixmap(QPixmap::fromImage(this->oldimg));ui->label_2->setPixmap(QPixmap::fromImage(this->newimg));//qDebug()<<"paintEvent";
}void Widget::on_pushButton_clicked()
{this->pthread->start();
}void Widget::ChangeImg(Mat oldimg,Mat newimg)
{//Mat是BGR 而QImage是RGB 需要转换颜色cvtColor(oldimg,oldimg,CV_BGR2RGB);cvtColor(newimg,newimg,CV_BGR2RGB);this->oldimg = QImage(oldimg.data,oldimg.cols,oldimg.rows,QImage::Format_RGB888);this->oldimg = this->oldimg.scaled(ui->label->width(),ui->label->height());this->newimg = QImage(newimg.data,newimg.cols,newimg.rows,QImage::Format_RGB888);this->newimg = this->newimg.scaled(ui->label_2->width(),ui->label_2->height());//update();
}
VideoThread.h头文件导入OpenCV包
#ifndef VIDEOTHREAD_H
#define VIDEOTHREAD_H
#include<QThread>
#include<opencv2/opencv.hpp>
#include<vector>
#include<QDebug>
#include <QObject>using namespace std;
using namespace cv;class videothread : public QThread
{Q_OBJECT
public://explicit videothread(QObject *parent = 0);//线程传参视频路径videothread(char *path);void run();
private:VideoCapture cap;Mat frame;//读一帧Mat temp;//保存上一帧
signals://发送信号void send2UI(Mat oldimg,Mat newimg);
public slots:
};#endif // VIDEOTHREAD_H
VideoThread.cpp源文件 帧差法 车辆识别
#include "videothread.h"videothread::videothread(char *path):QThread()
{//打开一个视频cap.open(path);
}void videothread::run()
{int count = 0;Mat resFrame,diff;Mat frontGray,afterGray;vector<vector<Point>>contours;Mat element = cv::getStructuringElement(MORPH_RECT,Size(3,3));Mat element2 = cv::getStructuringElement(MORPH_RECT,Size(20,20));int x,y,w,h;while (cap.read(frame)){count++;if(count == 1){//保存第一帧temp = frame.clone();continue;}else {//绘制矩形 使用此帧resFrame = frame.clone();//1 灰度处理 目的 RGB三通道转灰度单通道 压缩到原图片三分之一大小cvtColor(temp,frontGray,CV_RGB2GRAY);cvtColor(frame,afterGray,CV_RGB2GRAY);//2 帧差处理 目的 找到帧与帧之间的差异(正在运动的物体)absdiff(frontGray,afterGray,diff);//3 二值化处理 目的 将灰度图继续识别转换为黑白分明的图像threshold(diff,diff,25,255,CV_THRESH_BINARY);//4 图像降噪//4-1 腐蚀处理 目的 去除白色噪点erode(diff,diff,element);//4-2 膨胀 目的 把白色区域变大dilate(diff,diff,element2);//5 提取关键点//5-1 查找特征点findContours(diff,contours,CV_RETR_EXTERNAL,CV_CHAIN_APPROX_SIMPLE,Point(0,0));//qDebug()<<contours.size();//5-2 提取关键点vector<vector<Point>>contours_poly(contours.size());vector<Rect>boundRect(contours.size());//5-3 确定下四个点来用于框选目标物体int num=contours.size();for(int i = 0;i < num;i++){approxPolyDP(Mat(contours[i]),contours_poly[i],3,true);//多边拟合boundRect[i]=boundingRect(Mat(contours_poly[i]));x=boundRect[i].x;y=boundRect[i].y;w=boundRect[i].width;h=boundRect[i].height;//绘制矩形rectangle(resFrame,Point(x,y),Point(x+w,y+h),Scalar(0,0,255),2);}}temp = frame.clone();emit send2UI(frame,resFrame);msleep(1);}
}
主入口测试:
#include "widget.h"
#include <QApplication>int main(int argc, char *argv[])
{QApplication a(argc, argv);Widget w;w.show();return a.exec();
}