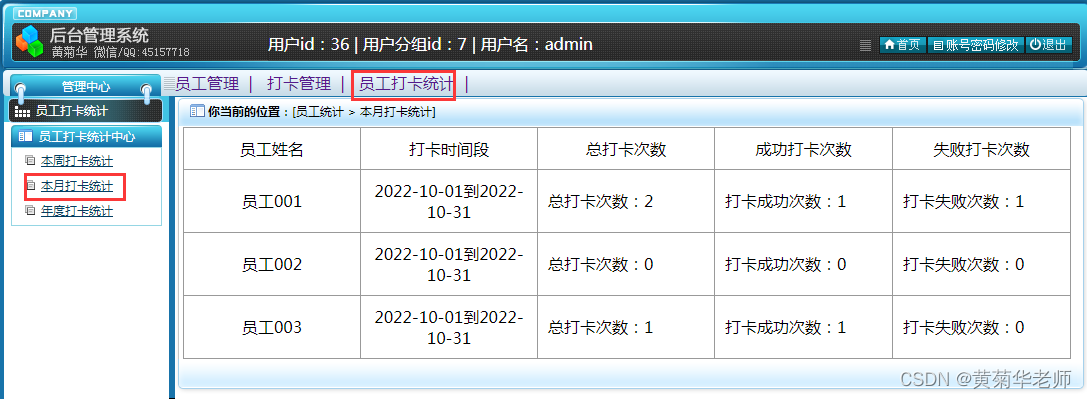
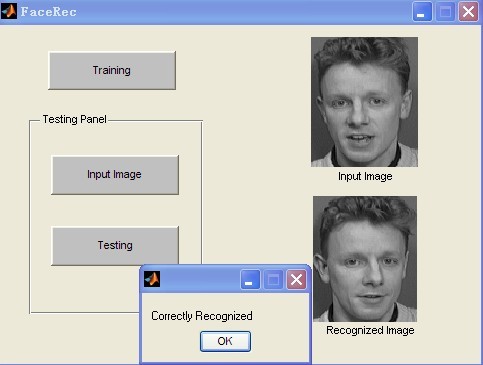
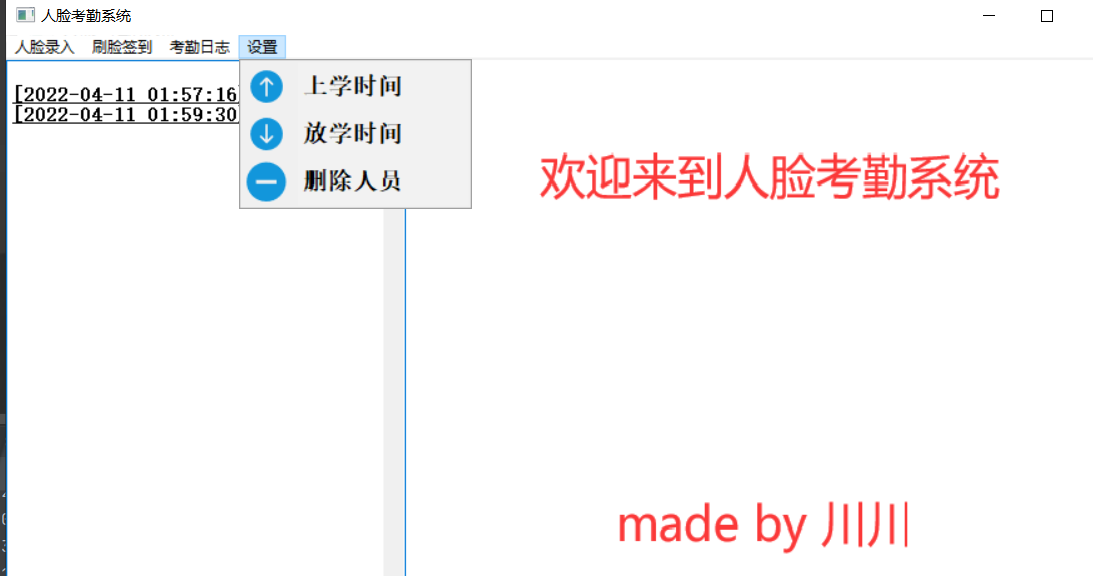
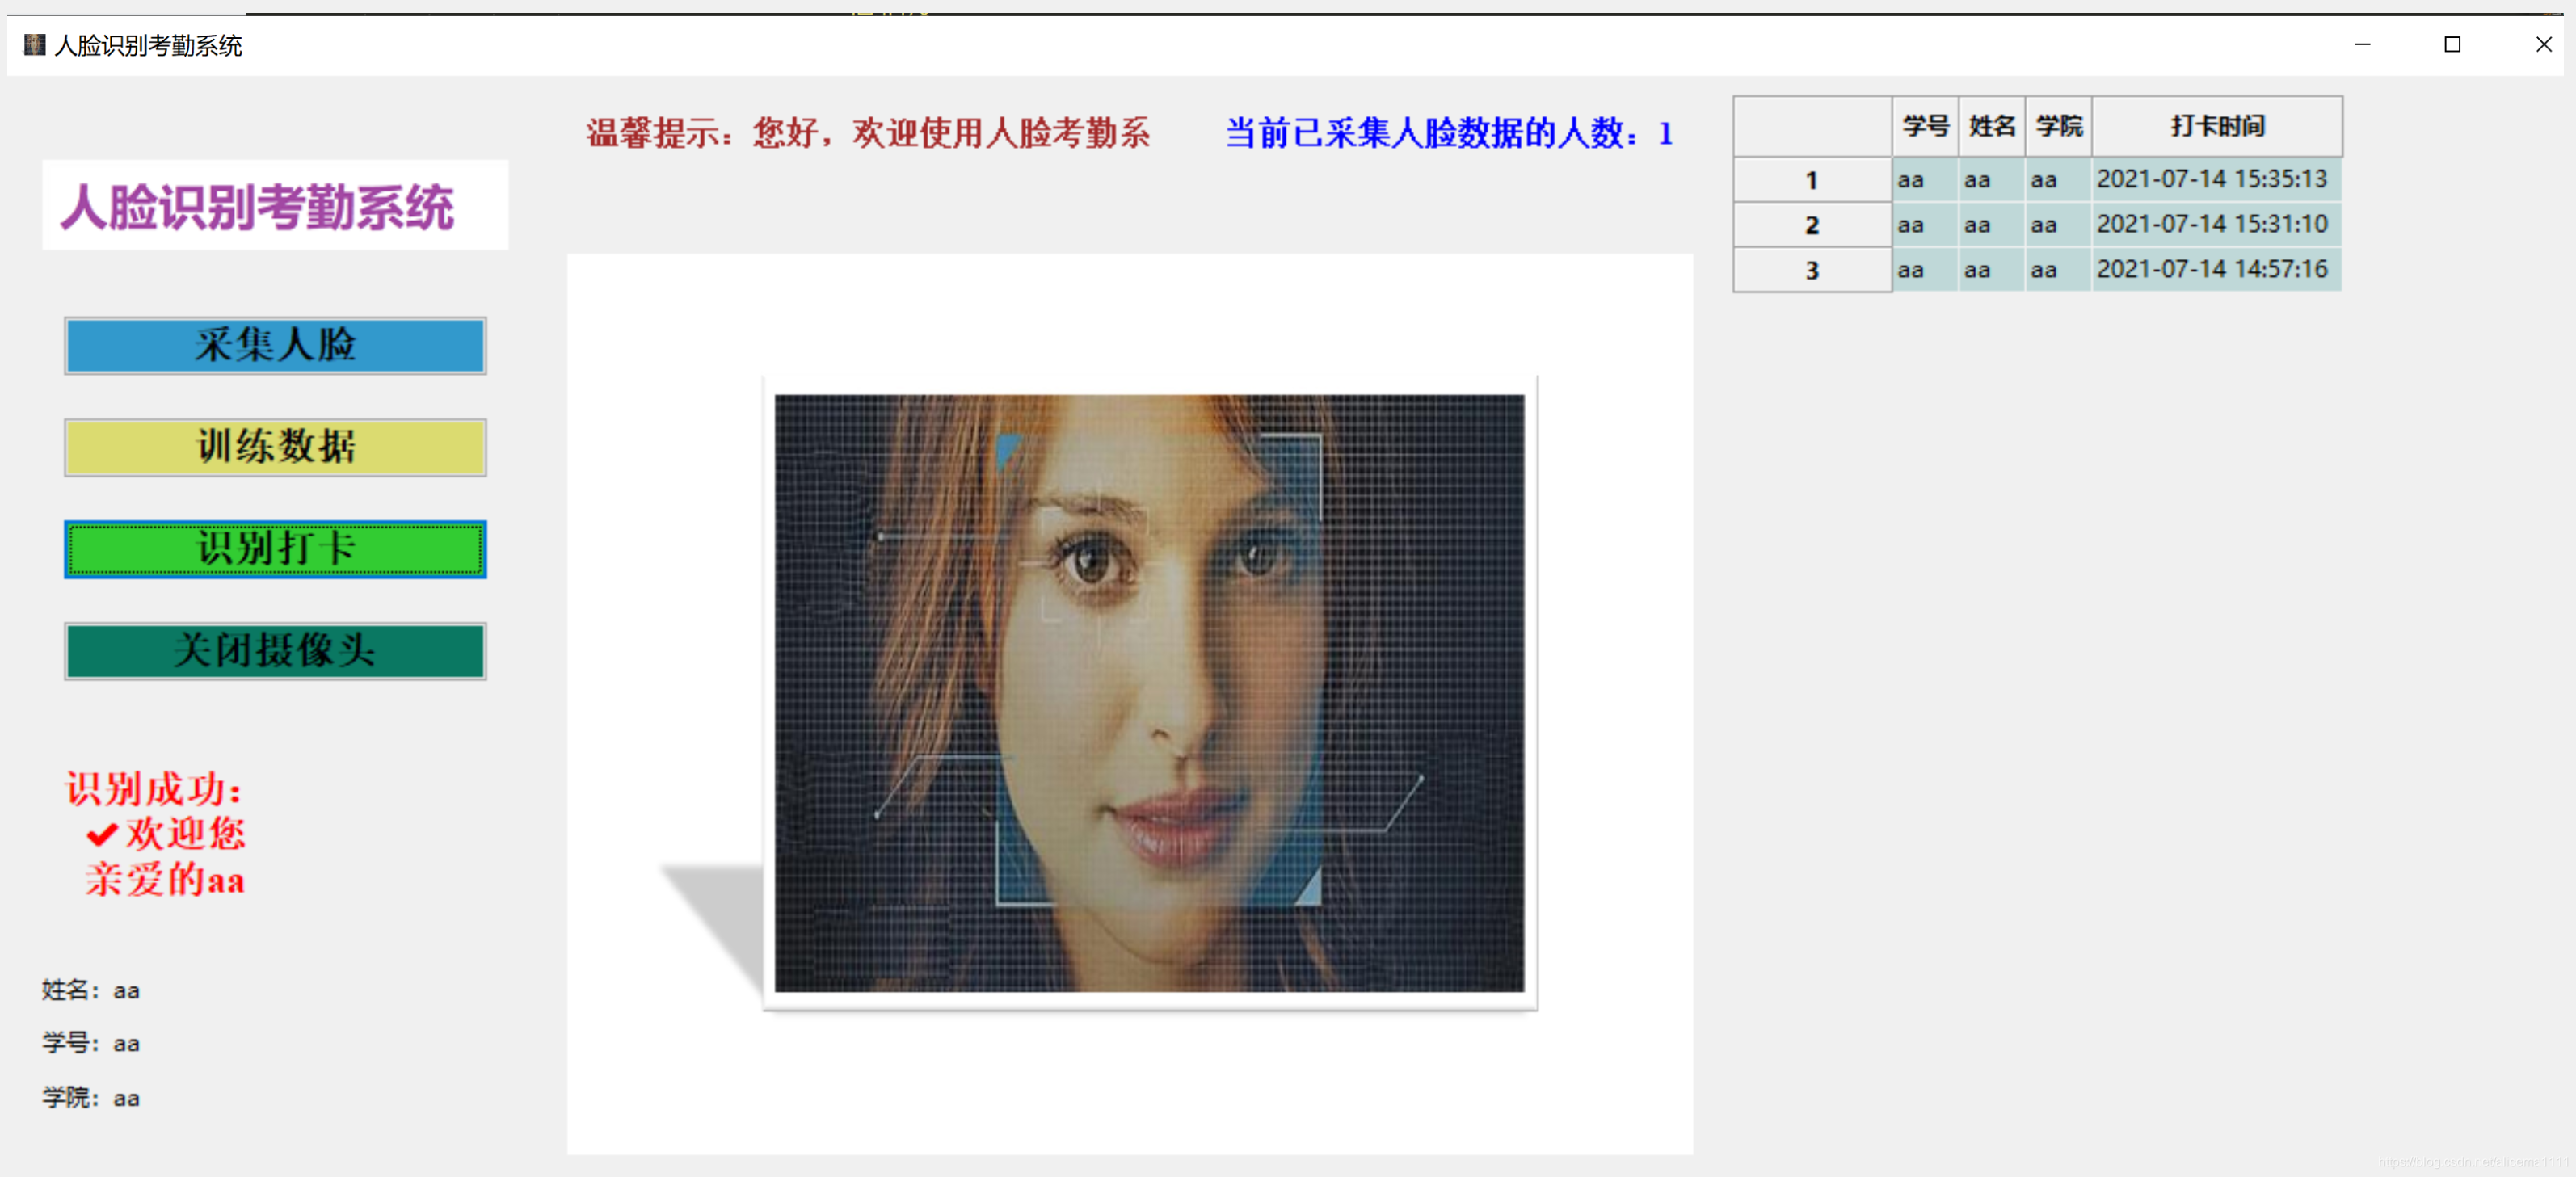
Python人脸识别考勤打卡系统
如需安装运行环境或远程调试,可加QQ905733049, 或QQ2945218359由专业技术人员远程协助!
运行结果如下:
主要代码:
import random
import cv2
import numpy
import datetime
import os
import time
import cv2 as cv
import numpy as np
import threading
from PIL import Image, ImageFont, ImageDrawdatabase_file_path = './resources/data.db'
picture_dir_path = "./resources/pictures"
trainer_file_path = './resources/Trainer/trainer.yml'
font_file_path = './resources/simsun.ttc'
zsc_circle_file_path = './resources/zsc.jpg'
zsc_rectangle_file_path = './resources/zsc.png'
haarcascade_frontalface_file_path = './resources/haarcascade_frontalface_default.xml'
capture_opt = 0  # 摄像头参数,0,1为本机摄像头# 继承wx库里面的Frame类来使用
class MainFrame(wx.Frame):def __init__(self):# 初始化窗体数据wx.Frame.__init__(self, None, -1, '人脸识别考勤系统', pos=(100, 100), size=(1337, 600))panel = wx.Panel(self, -1)sizer = wx.BoxSizer(wx.HORIZONTAL)sizer1 = wx.BoxSizer(wx.VERTICAL)sizer2 = wx.BoxSizer(wx.VERTICAL)font = wx.Font(15, wx.ROMAN, wx.NORMAL, wx.BOLD)# 设置窗口以及托盘图标icon = wx.Icon()icon.CopyFromBitmap(wx.Bitmap(wx.Image((zsc_circle_file_path), wx.BITMAP_TYPE_JPEG)))self.SetIcon(icon)# 设置左边背景学院logoimage = wx.Image(zsc_rectangle_file_path, wx.BITMAP_TYPE_PNG).ConvertToBitmap()self.background = wx.StaticBitmap(panel, -1, bitmap=image, style=wx.ALIGN_CENTER)sizer1.Add(self.background, proportion=10, flag=wx.ALIGN_CENTER, border=10)# 设置采集人脸按钮self.command1 = wx.Button(panel, -1, '采集人脸')self.command1.SetFont(font)self.command1.SetBackgroundColour('#3299CC')sizer1.Add(self.command1, proportion=5, flag=wx.ALL | wx.EXPAND, border=10)# 设置训练数据按钮self.command2 = wx.Button(panel, -1, '训练数据')self.command2.SetFont(font)self.command2.SetBackgroundColour('#DBDB70')sizer1.Add(self.command2, proportion=5, flag=wx.ALL | wx.EXPAND, border=10)# 设置人脸识别按钮self.command3 = wx.Button(panel, -1, '识别打卡')self.command3.SetFont(font)self.command3.SetBackgroundColour('#32CC32')sizer1.Add(self.command3, proportion=5, flag=wx.ALL | wx.EXPAND, border=10)# 设置退出系统按钮self.command4 = wx.Button(panel, -1, '关闭摄像头')self.command4.SetFont(font)self.command4.SetBackgroundColour((random.randint(1, 255), random.randint(0, 255), random.randint(0, 255)))sizer1.Add(self.command4, proportion=5, flag=wx.ALL | wx.EXPAND, border=10)# 设置消息提示文本self.text5 = wx.StaticText(panel, -1, '\n\n', style=wx.ALIGN_CENTER)self.text5.SetFont(font)self.text5.SetForegroundColour('Red')sizer1.Add(self.text5, proportion=15, flag=wx.ALL | wx.EXPAND, border=10)# 设置个人信息文本self.text6 = wx.StaticText(panel, -1, '姓名:')self.text7 = wx.StaticText(panel, -1, '学号:')self.text8 = wx.StaticText(panel, -1, '学院:')sizer1.Add(self.text6, proportion=3, flag=wx.LEFT, border=0)sizer1.Add(self.text7, proportion=3, flag=wx.LEFT, border=0)sizer1.Add(self.text8, proportion=3, flag=wx.LEFT, border=0)# 把分布局全部加入整体顶级布局sizer.Add(sizer1, flag=wx.EXPAND | wx.ALL, border=20)# 设置右上边消息提示文本sizer3 = wx.BoxSizer(wx.HORIZONTAL)font = wx.Font(12, wx.ROMAN, wx.NORMAL, wx.BOLD)self.text9 = wx.StaticText(panel, -1, '', style=wx.ALIGN_LEFT)self.text9.SetFont(font)self.text9.SetForegroundColour('brown')self.text9.SetLabel(u''+'您好,欢迎使用人脸考勤系统!')self.text10 = wx.StaticText(panel, -1, '', style=wx.ALIGN_RIGHT)self.text10.SetFont(font)self.text10.SetForegroundColour('Blue')self.data_num = 0self.updateSumData()sizer3.Add(self.text9, proportion=1, flag= wx.ALL|wx.EXPAND, border=10)sizer3.Add(self.text10, proportion=1, flag= wx.ALL|wx.EXPAND, border=10)sizer2.Add(sizer3, proportion=1, flag=wx.EXPAND | wx.ALL, border=0)# 封面图片self.image_cover = wx.Image(zsc_circle_file_path, wx.BITMAP_TYPE_ANY).Scale(575, 460)self.bmp = wx.StaticBitmap(panel, -1, wx.Bitmap(self.image_cover))sizer2.Add(self.bmp, proportion=1, flag=wx.ALL|wx.EXPAND ,border=0)# 加入顶级布局sizer.Add(sizer2, flag=wx.EXPAND | wx.ALL, border=10)# 实例化数据库操作对象self.mySqlDao = MySQLDao(self)self.grid = MyGrid(panel, self.mySqlDao)self.grid.updateGrid()# 打卡记录表sizer.Add(self.grid, proportion=1, flag=wx.EXPAND | wx.ALL, border=10)panel.SetSizer(sizer)# 四个按钮对应的事件self.command1.Bind(wx.EVT_BUTTON, self.command1_event)self.command4.Bind(wx.EVT_BUTTON, self.command4_event)self.command3.Bind(wx.EVT_BUTTON, self.command3_event)self.command2.Bind(wx.EVT_BUTTON, self.command2_event)# 关闭事件self.Bind(wx.EVT_CLOSE,self.onClose)# 窗口居中,显示self.Center()self.Show()# 控制摄像头的开启与关闭self.recognition = Falseself.collected = False'''主窗体关闭事件'''def onClose(self,event):self.command4_event(event)# 等待子线程完成 再关闭,防止不正常退出time.sleep(1)self.Destroy()'''采集数据按钮的响应事件'''def command1_event(self, event):self.text6.SetLabel('姓名:')self.text7.SetLabel('学号:')self.text8.SetLabel('学院:')self.text5.SetLabel(u'\n温馨提示:\n' + '⚪正在进学生信息录入...')self.text5.Update()collectFrame = CollectFrame(self,self.mySqlDao)collectFrame.Show()'''训练数据按钮的响应事件'''def command2_event(self, event):self.trainData()'''识别打卡按钮的响应事件'''def command3_event(self, event):self.text5.SetLabel(u'')self.recognition = Falset1 = threading.Thread(target=self.recognitionFace)t1.start()'''关闭摄像头按钮的响应事件'''def command4_event(self, event):if self.collected == False:self.collected = Trueif self.recognition == False:self.recognition = Truedef updateSumData(self):self.data_num = 0for list in os.listdir(picture_dir_path):if len(os.listdir(picture_dir_path + '/' + list)) >= 200:self.data_num += 1self.text10.SetLabel(u'当前已采集人脸数据的人数:' + str(self.data_num))self.text10.Update()'''@Author:Himit_ZH@Function:处理收集人脸每一帧生成图片存入对应文件夹'''def collect(self,face_id):self.text5.SetLabel(u'\n温馨提示:\n' + '请看向摄像头\n准备采集200张人脸图片...')count = 0  # 统计照片数量path = picture_dir_path+"/Stu_" + str(face_id)  # 人脸图片数据的储存路径# 读取视频cap = cv.VideoCapture(capture_opt)print(cap.isOpened())if cap.isOpened() == False:self.text5.SetLabel(u'\n错误提示:\n' + '×采集人脸数据失败!\n原因:未能成功打开摄像头')return# 加载特征数据face_detector = cv.CascadeClassifier(haarcascade_frontalface_file_path)if not os.path.exists(path):  # 如果没有对应文件夹,自动生成os.makedirs(path)while self.collected == False:flag, frame = cap.read()# print('flag:',flag,'frame.shape:',frame.shape)if not flag:break# 将图片灰度gray = cv.cvtColor(frame, cv.COLOR_BGR2GRAY)faces = face_detector.detectMultiScale(gray, 1.1, 3)if len(faces) > 1:  # 一帧出现两张照片丢弃,原因:有人乱入,也有可能人脸识别出现差错continue# 框选人脸,for循环保证一个能检测的实时动态视频流for x, y, w, h in faces:cv.rectangle(frame, (x, y), (x + w, y + h), color=(0, 255, 0), thickness=2)count += 1cv.imwrite(path + '/' + str(count) + '.png', gray[y:y + h, x:x + w])# # 显示图片# cv.imshow('Camera', frame)# 将一帧帧图片显示在UI中image1 = cv2.cvtColor(frame, cv2.COLOR_BGR2RGB)image2 = cv2.resize(image1, (575, 460))height, width = image2.shape[:2]pic = wx.Bitmap.FromBuffer(width, height, image2)# 显示图片在panel上self.bmp.SetBitmap(pic)self.bmp.Update()self.text9.SetLabel(u'温馨提示:\n' + '已采集'+ str(count)+'张人脸照片')if count >= 200:  #默认采集200张照片break# 关闭资源if count >=200:self.text5.SetLabel(u'\n温馨提示:\n' + '✔已成功采集到人脸数据!')self.updateSumData()else:self.text5.SetLabel(u'\n错误提示:\n' + '×采集人脸数据失败!\n未能收集到200张人脸数据!')# 删除该文件夹下的所有数据ls = os.listdir(path)for file_path in ls:f_path = os.path.join(path, file_path)os.remove(f_path)os.rmdir(path)cv.destroyAllWindows()cap.release()self.bmp.SetBitmap(wx.Bitmap(self.image_cover))'''@Author:Himit_ZH@Function:遍历指定文件夹里面的人脸数据,根据文件夹名字,训练对应数据'''def trainData(self):self.text5.SetLabel(u'\n温馨提示:\n' + '⚪正在整合训练的人脸数据\n请稍后...')# 图片路径path = picture_dir_pathfacesSamples = []imageFiles = []ids = []for root, dirs, files in os.walk(path):# root 表示当前正在访问的文件夹路径# dirs 表示该文件夹下的子目录名list# files 表示该文件夹下的文件list# 遍历文件for file in files:imageFiles.append(os.path.join(root, file))# 检测人脸的模型数据face_detector = cv2.CascadeClassifier(haarcascade_frontalface_file_path)# 遍历列表中的图片stu_map =  self.mySqlDao.getIdfromSql()for imagefile in imageFiles:  # 获得所有文件名字imagefile = imagefile.replace('\\', '/')sno = imagefile.split('/')[3].split('_')[1]if stu_map.get(sno):PIL_img = Image.open(imagefile).convert('L')  # 打开图片并且转为灰度图片# 将图像转换为数组img_numpy = np.array(PIL_img, 'uint8')faces = face_detector.detectMultiScale(img_numpy)for x, y, w, h in faces:facesSamples.append(img_numpy[y:y + h, x:x + w])ids.append(int(stu_map.get(sno)))if __name__ == '__main__':app = wx.App()app.locale = wx.Locale(wx.LANGUAGE_CHINESE_SIMPLIFIED)frame = MainFrame()app.MainLoop()
运行结果如下:
Python, C++, PHP语言学习参考实例连接:
C++学习参考实例:
C++实现图形界面五子棋游戏源码:
https://blog.csdn.net/alicema1111/article/details/90035420
C++实现图形界面五子棋游戏源码2:
https://blog.csdn.net/alicema1111/article/details/106479579
C++ OpenCV相片视频人脸识别统计人数:
https://blog.csdn.net/alicema1111/article/details/105833928
VS2017+PCL开发环境配置:
https://blog.csdn.net/alicema1111/article/details/106877145
VS2017+Qt+PCL点云开发环境配置:
https://blog.csdn.net/alicema1111/article/details/105433636
C++ OpenCV汽车检测障碍物与测距:
https://blog.csdn.net/alicema1111/article/details/105833449
Windows VS2017安装配置PCL点云库:
https://blog.csdn.net/alicema1111/article/details/105111110
VS+VTK+Dicom(dcm)+CT影像切片窗体界面显示源码
https://blog.csdn.net/alicema1111/article/details/106994839
Python学习参考实例:
Python相片更换背景颜色qt窗体程序:
https://blog.csdn.net/alicema1111/article/details/106919140
OpenCV汽车识别检测数量统计:
https://blog.csdn.net/alicema1111/article/details/106597260
OpenCV视频识别检测人数跟踪统计:
https://blog.csdn.net/alicema1111/article/details/106113042
OpenCV米粒检测数量统计:
https://blog.csdn.net/alicema1111/article/details/106089697
opencv人脸识别与变形哈哈镜:
https://blog.csdn.net/alicema1111/article/details/105833123
OpenCV人脸检测打卡系统:
https://blog.csdn.net/alicema1111/article/details/105315066
Python+OpenCV摄像头人脸识别:
https://blog.csdn.net/alicema1111/article/details/105107286
Python+Opencv识别视频统计人数:
https://blog.csdn.net/alicema1111/article/details/103804032
Python+OpenCV图像人脸识别人数统计:
https://blog.csdn.net/alicema1111/article/details/105378639
python人脸头发身体部位识别人数统计:
https://blog.csdn.net/alicema1111/article/details/116424942
VS+QT+VTK三维网格图像显示GUI
https://blog.csdn.net/alicema1111/article/details/117060734
PHP网页框架:
PHP Laravel框架安装与配置后台管理前台页面显示:
https://blog.csdn.net/alicema1111/article/details/106686523