1、首先打开官网
2、搭建父子工程项目
3、父POM文件配置依赖包
4、创建核心配置文件
5、编写单元测试
1、首先打开官网
spring官网
找到Spring Framework

找到核心技术Core technologies
或者从这选择相应的版本,选择其文档
最终来到这个页面Core Technologies (spring.io)


2、搭建父子工程项目
搭建父子工程项目

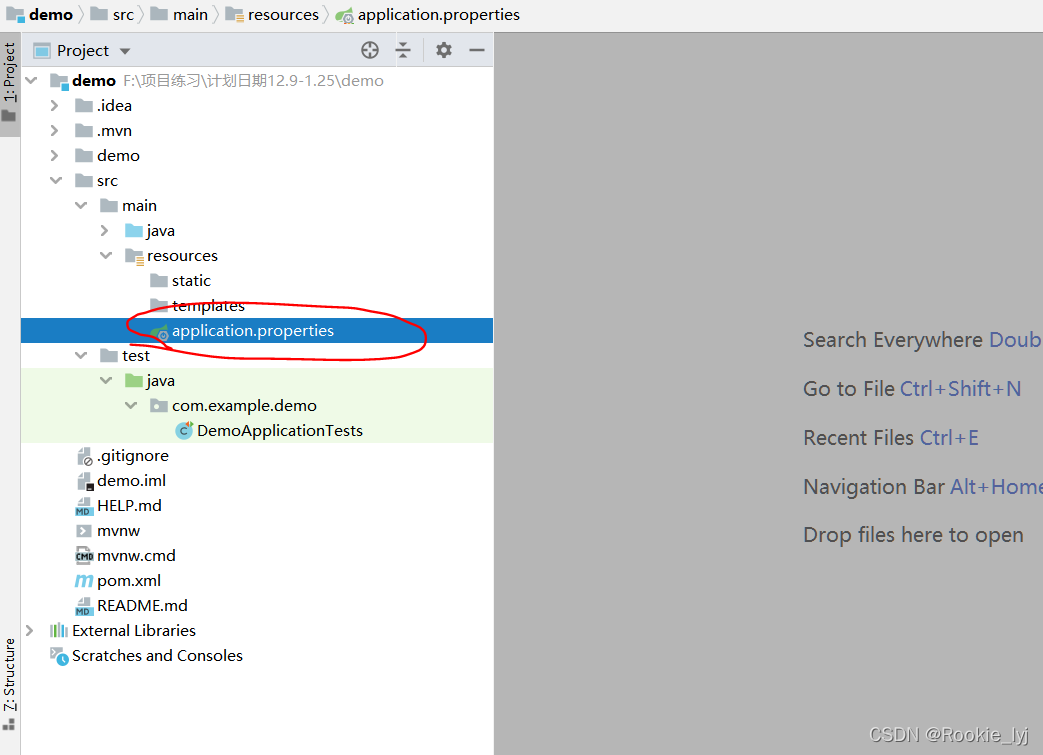
3、父POM文件配置依赖包


<dependencies><dependency><groupId>org.springframework</groupId><artifactId>spring-webmvc</artifactId><version>5.3.0</version></dependency><dependency><groupId>junit</groupId><artifactId>junit</artifactId><version>4.13</version></dependency></dependencies>
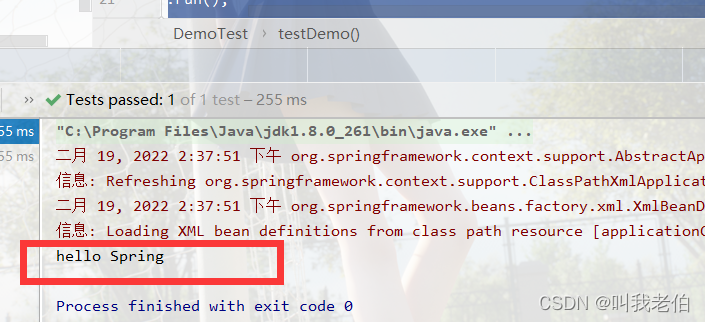
4、创建核心配置文件
核心配置文件名随便取
官网的配置如图

这里我们取名为student.xml

<?xml version="1.0" encoding="UTF-8"?>
<beans xmlns="http://www.springframework.org/schema/beans"xmlns:xsi="http://www.w3.org/2001/XMLSchema-instance"xsi:schemaLocation="http://www.springframework.org/schema/beanshttps://www.springframework.org/schema/beans/spring-beans.xsd"><bean id="student" class="com.lingaolu.Student"><property name="name" value="林高禄"/></bean></beans>
Student类代码
package com.lingaolu;/*** @author 林高禄* @create 2020-11-03-9:19*/
public class Student {private Long id;private String name;public Long getId() {return id;}public void setId(Long id) {this.id = id;}public String getName() {return name;}public void setName(String name) {this.name = name;}@Overridepublic String toString() {return "Student{" +"id=" + id +", name='" + name + '\'' +'}';}
}
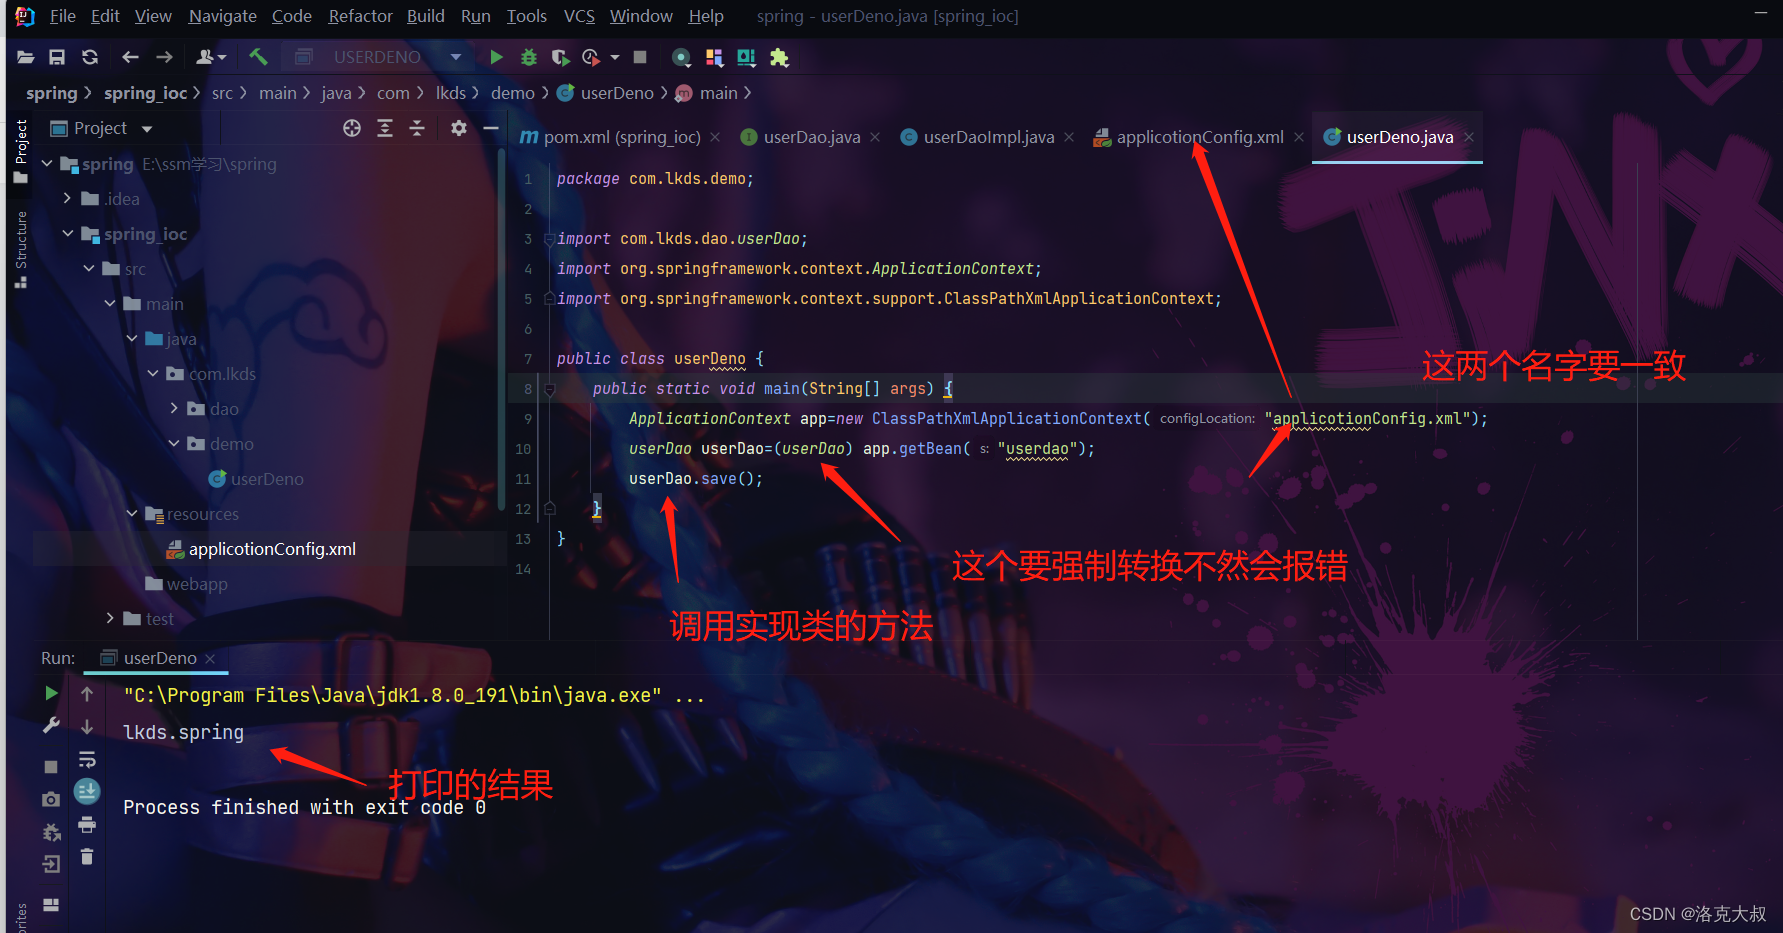
5、编写单元测试
官网获取方式

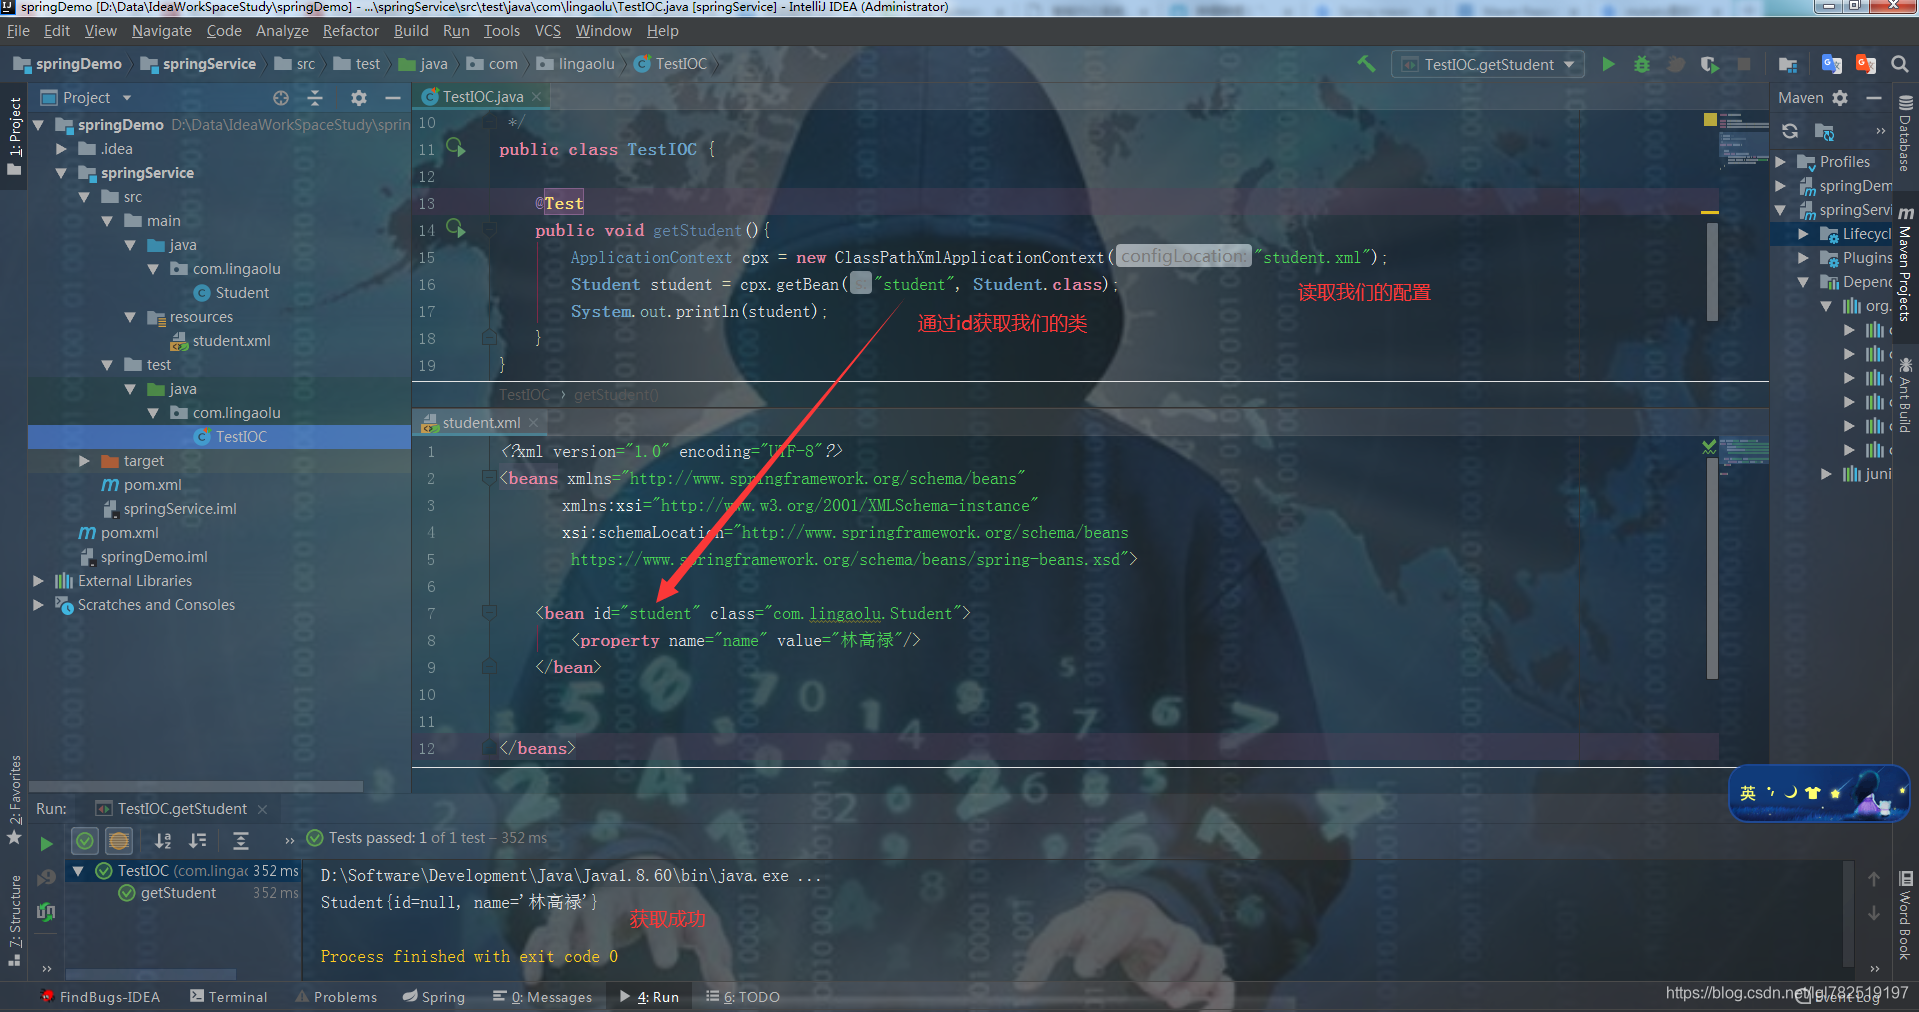
package com.lingaolu;import org.junit.Test;
import org.springframework.context.ApplicationContext;
import org.springframework.context.support.ClassPathXmlApplicationContext;/*** @author 林高禄* @create 2020-11-03-9:22*/
public class TestIOC {@Testpublic void getStudent(){ApplicationContext cpx = new ClassPathXmlApplicationContext("student.xml");Student student = cpx.getBean("student", Student.class);System.out.println(student);}
}


![[Spring]Spring框架搭建详解](https://img-blog.csdn.net/20170308125133005?watermark/2/text/aHR0cDovL2Jsb2cuY3Nkbi5uZXQvS29uYWpp/font/5a6L5L2T/fontsize/400/fill/I0JBQkFCMA==/dissolve/70/gravity/SouthEast)