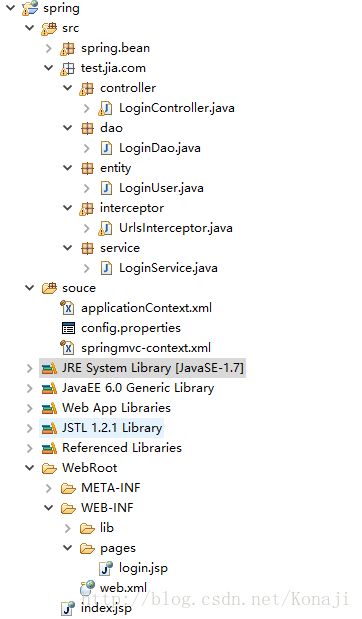
首先是框架结构图解
Spring常用的xml标头
<?xml version="1.0" encoding="UTF-8"?>
<beans xmlns="http://www.springframework.org/schema/beans"xmlns:xsi="http://www.w3.org/2001/XMLSchema-instance" xmlns:tx="http://www.springframework.org/schema/tx"xmlns:beans="http://www.springframework.org/schema/beans"xmlns:aop="http://www.springframework.org/schema/aop"xmlns:mvc="http://www.springframework.org/schema/mvc"xmlns:context="http://www.springframework.org/schema/context"xsi:schemaLocation="http://www.springframework.org/schema/beans http://www.springframework.org/schema/beans/spring-beans-3.0.xsd http://www.springframework.org/schema/tx http://www.springframework.org/schema/tx/spring-tx-3.0.xsdhttp://www.springframework.org/schema/aop http://www.springframework.org/schema/aop/spring-aop-3.0.xsdhttp://www.springframework.org/schema/context http://www.springframework.org/schema/context/spring-context-3.0.xsdhttp://www.springframework.org/schema/beans http://www.springframework.org/schema/beans/spring-beans-3.0.xsdhttp://www.springframework.org/schema/mvc http://www.springframework.org/schema/mvc/spring-mvc-3.0.xsd"></beans>
第一步:在web.xml中配置Spring的入口DispatcherServlet
<servlet><servlet-name>appServlet</servlet-name><servlet-class>org.springframework.web.servlet.DispatcherServlet</servlet-class><init-param><param-name>contextConfigLocation</param-name><param-value>classpath:springmvc-context.xml</param-value></init-param><load-on-startup>1</load-on-startup></servlet><servlet-mapping><servlet-name>appServlet</servlet-name><url-pattern>/</url-pattern></servlet-mapping>第二步:在springmvc-context.xml中配置注解扫描与视图解析器
<!-- 对web包中的所有类进行扫描,以完成Bean创建和自动依赖注入的功能如果扫描到有@Component @Controller@Service等这些注解的类则把这些类注册为bean--><context:component-scan base-package="test.jia.com" /> <!-- 这个类用于Spring MVC视图解析 --><beans:bean id="viewResolver"class="org.springframework.web.servlet.view.InternalResourceViewResolver"><beans:property name="prefix" value="/WEB-INF/pages/" /><beans:property name="suffix" value=".jsp" /></beans:bean>到这里,Spring最基本的框架已经搭建完成了,可以写个Controller测试一下
@Controller
@RequestMapping("LoginController")
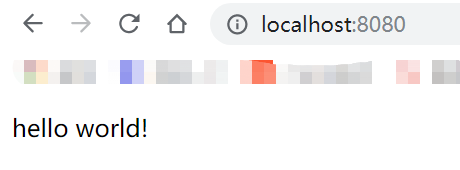
public class LoginController {@RequestMapping("login")public String login(HttpServletRequest request , HttpServletResponse response){System.out.println(" welcome ! ");return "login";}}启动web项目后,在浏览器访问是通过的,Spring最基本的框架搭建完成。下面我们在此框架的基础上进行功能扩展。
第三步:在springmvc-context.xml中配置Spring拦截器
<!-- 拦截器配置 --> <mvc:interceptors> <mvc:interceptor> <mvc:mapping path="/*/*"/> <bean class="test.jia.com.interceptor.UrlsInterceptor"> <property name="urls"> <list> <!-- 如果请求中包含以下路径,则不进行拦截 --> <!-- 静态资源 --><value>/js</value> <value>/css</value> <value>/image</value> <value>/images</value> <value>/png</value> <value>/jpg</value> <!-- <value>/xxx.do</value> --> </list> </property> </bean> </mvc:interceptor> </mvc:interceptors> 创建UrlsInterceptor拦截器
public class UrlsInterceptor implements HandlerInterceptor {//存放被拦截的资源路径private String[] urls;public void setUrls(String[] urls) {this.urls = urls;}@Overridepublic void afterCompletion(HttpServletRequest arg0,HttpServletResponse arg1, Object arg2, Exception arg3)throws Exception {}@Overridepublic void postHandle(HttpServletRequest arg0, HttpServletResponse arg1,Object arg2, ModelAndView arg3) throws Exception {}@Overridepublic boolean preHandle(HttpServletRequest request, HttpServletResponse response,Object object) throws Exception {//设置回传格式与编码response.setContentType("text/html;charset=UTF-8");//获取请求String requestURI = request.getRequestURI();//判断uri是否为不拦截的资源for(String url : urls){if(requestURI.indexOf(url)!=-1){return true;}}//逻辑判断,是否拦截if (1==1) {//放行return true;}else {//拦截return false;}}
}
第四步:在springmvc-context.xml中读取property配置文件
<!-- 引入配置文件 --> <context:property-placeholder location="classpath:config.properties"/><!-- 测试:将配置文件的username对应的值注入LoginUser的构造中 --><beans:bean id="loginUser" class="test.jia.com.entity.LoginUser" ><constructor-arg value="${username}"></constructor-arg></beans:bean>注:一定要在web.xml配置Spring监听,因为Bean的注入依赖ContextLoaderListener监听
<context-param><param-name>contextConfigLocation</param-name> <param-value>classpath:springmvc-context.xml </param-value></context-param><!-- Spring 监听器 --><listener> <listener-class>org.springframework.web.context.ContextLoaderListener</listener-class> </listener> config.properties配置文件里的内容
username=username测试:从控制层读取注入的loginUser
@RequestMapping("login")public String login(HttpServletRequest request , HttpServletResponse response){System.out.println(" welcome ! ");WebApplicationContext context = WebApplicationContextUtils.getWebApplicationContext(request.getSession().getServletContext());LoginUser loginUser = context.getBean("loginUser", LoginUser.class);System.out.println(loginUser);return "login";}第五步:在springmvc-context.xml配置:避免IE执行AJAX时,返回JSON出现下载文件
<!-- 避免IE执行AJAX时,返回JSON出现下载文件 --><!-- ①错误:Not found org.springframework.http.converter.json.MappingJacksonHttpMessageConverter解决方案:Spring版本变化导致,将class里的MappingJacksonHttpMessageConverter改为MappingJackson2HttpMessageConverter②错误:NoClassDefFoundError: com/fasterxml/jackson/core/JsonProcessingException解决方案:需要jackson相关Jar包支持Jar依赖: jackson-core-2.6.0-rc4.jarjackson-databind-2.6.0-rc4.jarjackson-annotations-2.6.0-rc4.jar--><bean id="mappingJacksonHttpMessageConverter"class="org.springframework.http.converter.json.MappingJackson2HttpMessageConverter"><property name="supportedMediaTypes"><list><value>text/html;charset=UTF-8</value></list></property></bean>第六步:在springmvc-context.xml配置Spring的文件上传相关内容
<!-- 配置springmvc的上传功能 id必须是multipartResolver --><!-- 错误:NoClassDefFoundError: org/apache/commons/fileupload/FileItemFactory解决方案:Spring的CommonsMultipartResolver需要apache的FileItemFactory支持Jar依赖: commons-fileupload.jarcommons-io.jar--><bean id="multipartResolver"class="org.springframework.web.multipart.commons.CommonsMultipartResolver"><!-- maxUploadSize:文件上传的最大值以byte为单位 --><property name="maxUploadSize" value="102400000"></property><!-- 设置默认编码 --><property name="defaultEncoding" value="utf-8" /></bean>第七步:在web.xml配置字符编码过滤器
<!-- 字符编码过滤器 --><filter><filter-name>encodingFilter</filter-name><filter-class>org.springframework.web.filter.CharacterEncodingFilter</filter-class><!-- 注入默认属性 --><init-param><description>字符集编码</description><param-name>encoding</param-name><param-value>UTF-8</param-value></init-param></filter><filter-mapping><!-- 过滤器名称 --><filter-name>encodingFilter</filter-name><!-- 拦截哪些请求 --><url-pattern>/*</url-pattern></filter-mapping>