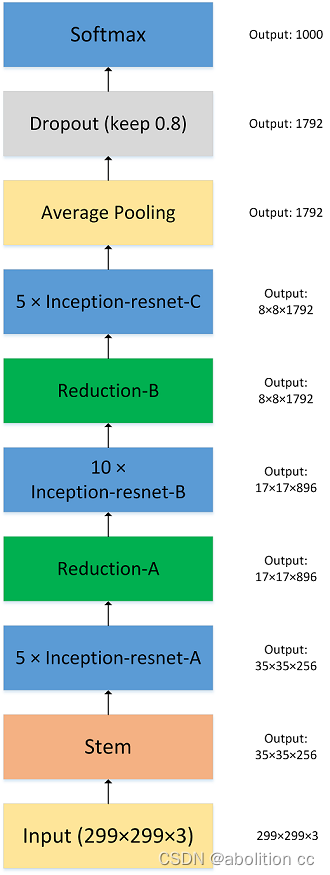
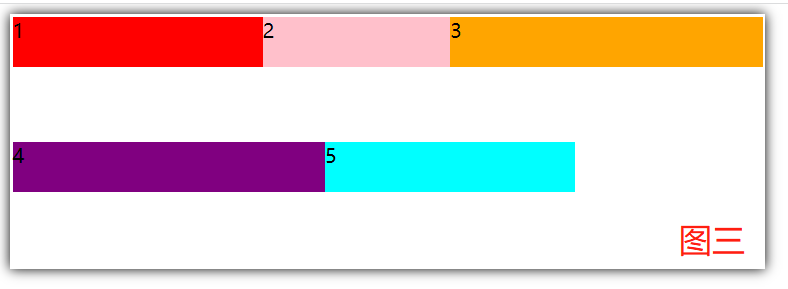
在论文(Image Style Transfer Using Convolutional Neural Networks)中(https://www.cv-foundation.org/openaccess/content_cvpr_2016/papers/Gatys_Image_Style_Transfer_CVPR_2016_paper.pdf),风格转换使用了19层VGG网络中的特征,它由一系列卷积层和池化层以及几个全连接层组成。在下面的图像中,卷积层是根据堆栈及其在堆栈中的顺序命名的。Conv_1_1是图像在第一个堆栈中通过的第一个卷积层。Conv_2_1是第二个堆栈中的第一个卷积层。网络中卷积层最深的是conv_5_4。
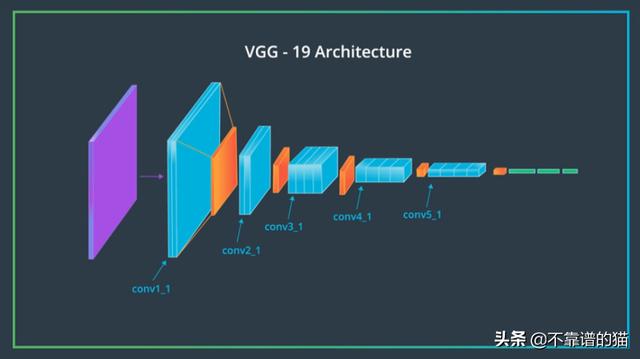
VGG19中的卷积层堆栈
分离风格与内容
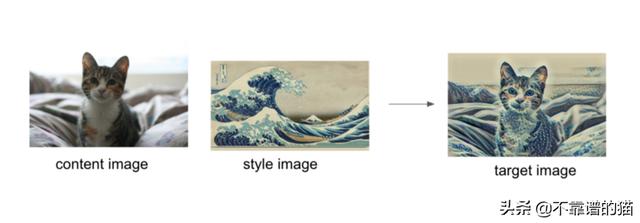
风格转换依赖于分离图像的内容和风格。给定一个内容图像和一个风格图像,我们的目标是创建一个新的目标图像,该图像应该包含我们想要的内容和风格组件:
- 对象及其排列与内容图像相似
- 样式、颜色和纹理与风格图像相似
下面是一个例子,内容图像是一只猫,风格图像是葛饰北斋的巨浪。所生成的目标图像仍然包含猫,但是用波浪、蓝色和米色的颜色进行了风格化处理。
在本文中,我们将使用一个预训练的VGG19网络从传入的图像中提取内容或风格特征。然后,我们将形成内容和风格损失的概念,并使用这些损失来迭代地更新我们的目标图像,直到得到我们想要的结果。
# import resources%matplotlib inlinefrom PIL import Imageimport matplotlib.pyplot as pltimport numpy as npimport torchimport torch.optim as optimfrom torchvision import transforms, models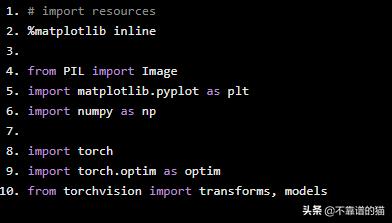
加载VGG19(特征)
VGG19分为两部分:
- vgg19.features,卷积层和池化层
- vgg19.classifier,最后的三个线性、分类器层
我们只需要特征部分,我们将加载并“冻结”权重。
# get the "features" portion of VGG19 (we will not need the "classifier" portion)vgg = models.vgg19(pretrained=True).features# freeze all VGG parameters since we're only optimizing the target imagefor param in vgg.parameters(): param.requires_grad_(False)# move the model to GPU, if availabledevice = torch.device("cuda" if torch.cuda.is_available() else "cpu")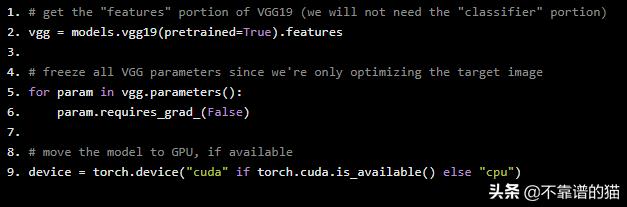
加载内容和风格图像
你可以载入任何你想要的图片!下面,我们提供了一个辅助函数,用于加载任何类型和大小的图像。load_image函数还将图像转换为归一化张量。
def load_image(img_path, max_size=400, shape=None): ''' Load in and transform an image, making sure the image is <= 400 pixels in the x-y dims.''' image = Image.open(img_path).convert('RGB') # large images will slow down processing if max(image.size) > max_size: size = max_size else: size = max(image.size) if shape is not None: size = shape in_transform = transforms.Compose([ transforms.Resize(size), transforms.ToTensor(), transforms.Normalize((0.485, 0.456, 0.406), (0.229, 0.224, 0.225))]) # discard the transparent, alpha channel (that's the :3) and add the batch dimension image = in_transform(image)[:3,:,:].unsqueeze(0) return image
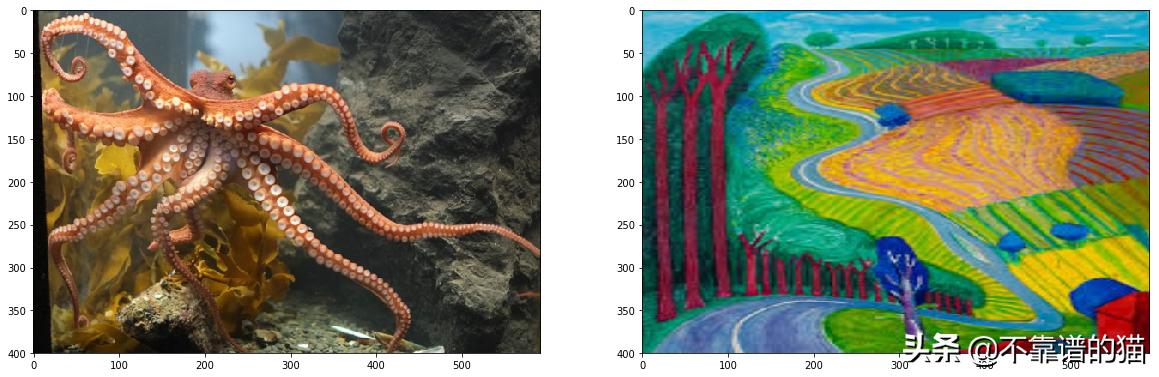
接下来,我将按文件名加载图像,并强制风格图像与内容图像的大小相同。Python代码如下:
# load in content and style imagecontent = load_image('images/octopus.jpg').to(device)# Resize style to match content, makes code easierstyle = load_image('images/hockney.jpg', shape=content.shape[-2:]).to(device)# helper function for un-normalizing an image # and converting it from a Tensor image to a NumPy image for displaydef im_convert(tensor): """ Display a tensor as an image. """ image = tensor.to("cpu").clone().detach() image = image.numpy().squeeze() image = image.transpose(1,2,0) image = image * np.array((0.229, 0.224, 0.225)) + np.array((0.485, 0.456, 0.406)) image = image.clip(0, 1) return image# display the imagesfig, (ax1, ax2) = plt.subplots(1, 2, figsize=(20, 10))# content and style ims side-by-sideax1.imshow(im_convert(content))ax2.imshow(im_convert(style))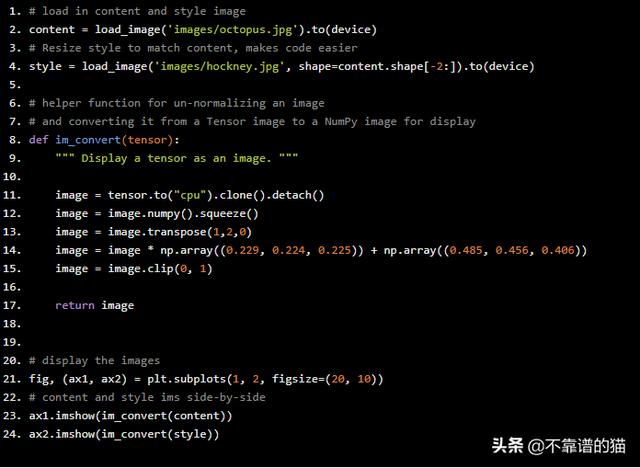
VGG19 Layers
要获得图像的内容和风格表示,我们必须通过VGG19网络向forward through图像,直到到达所需的层,然后从该层获得输出。
print(vgg)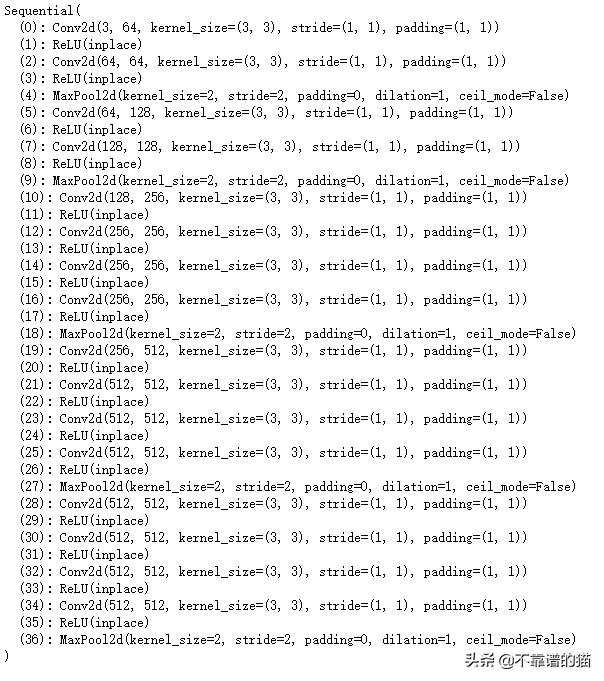
内容和风格特征
TODO:完成将层名称映射到文章中用于内容表示和风格表示的名称。
def get_features(image, model, layers=None): """ Run an image forward through a model and get the features for a set of layers. Default layers are for VGGNet matching Gatys et al (2016) """ ## TODO: Complete mapping layer names of PyTorch's VGGNet to names from the paper ## Need the layers for the content and style representations of an image if layers is None: layers = {'0': 'conv1_1', '5': 'conv2_1', '10': 'conv3_1', '19': 'conv4_1', '28': 'conv5_1', '21': 'conv4_2'} ## -- do not need to change the code below this line -- ## features = {} x = image # model._modules is a dictionary holding each module in the model for name, layer in model._modules.items(): x = layer(x) if name in layers: features[layers[name]] = x return features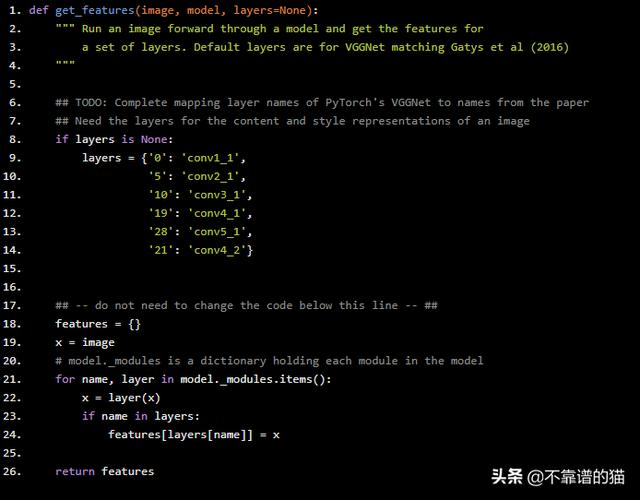
Gram矩阵
每个卷积层的输出都是一个张量,张量的维数与batch_size、深度d以及高度(h)和宽度( w)相关,卷积层的Gram矩阵计算如下:
- 使用batch_size,d,h,w = tensort . size,获取张量的深度、高度和宽度
- Reshape张量,使空间维度flattened
- 计算g矩阵的方法是用重塑的张量乘以它的转置
注意:您可以使用torch.mm(matrix1 matrix2)将两个矩阵相乘。
TODO:完成gram_matrix函数
def gram_matrix(tensor): """ Calculate the Gram Matrix of a given tensor Gram Matrix: https://en.wikipedia.org/wiki/Gramian_matrix """ ## get the batch_size, depth, height, and width of the Tensor batch_size, d, h, w = tensor.size() ## reshape it, so we're multiplying the features for each channel tensor = tensor.view(tensor.shape[1], -1) ## calculate the gram matrix gram = torch.mm(tensor, torch.t(tensor)) return gram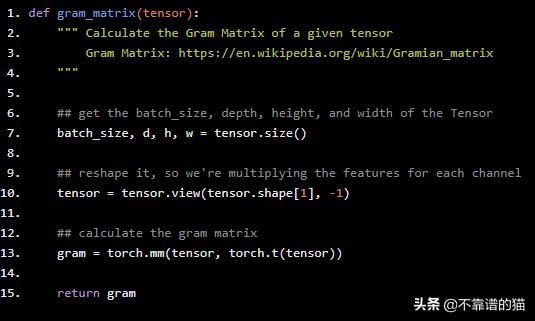
把它们放在一起
现在我们已经编写了提取特征和计算给定卷积层的矩阵的函数;让我们把这些放在一起!我们将从图像中提取我们的特征,并在风格表示中计算每个层的gram矩阵。
# get content and style features only once before forming the target imagecontent_features = get_features(content, vgg)style_features = get_features(style, vgg)# calculate the gram matrices for each layer of our style representationstyle_grams = {layer: gram_matrix(style_features[layer]) for layer in style_features}# create a third "target" image and prep it for change# it is a good idea to start of with the target as a copy of our *content* image# then iteratively change its styletarget = content.clone().requires_grad_(True).to(device)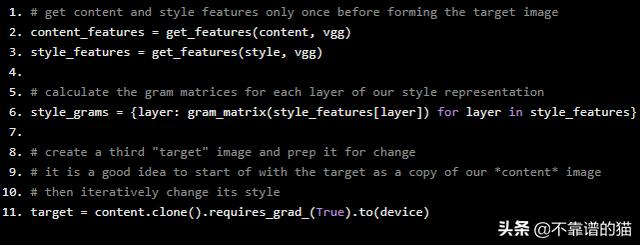
损失和权重
单层样式权重
下面,您可以选择在每个相关层对风格表示进行加权。建议您使用0-1之间的范围来对这些层进行加权。通过对前面的层(conv1_1和conv2_1)进行更多的加权,您可以期望在最终的目标图像中得到更大风格特征。如果您选择对后面的层进行加权,那么您将更加强调较小的特征。这是因为每一层都有不同的大小,它们一起创建了多尺度的风格表示!
内容和风格权重
就像在论文中一样,我们定义了一个alpha (content_weight)和一个beta (style_weight)。这个比例会影响最终图像的风格化程度。建议您保留content_weight = 1并设置style_weight以达到您想要的比例。
# weights for each style layer # weighting earlier layers more will result in *larger* style artifacts# notice we are excluding `conv4_2` our content representationstyle_weights = {'conv1_1': 1., 'conv2_1': 0.8, 'conv3_1': 0.5, 'conv4_1': 0.3, 'conv5_1': 0.1}# you may choose to leave these as iscontent_weight = 1 # alphastyle_weight = 1e6 # beta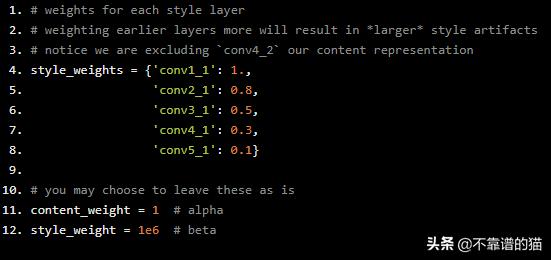
更新目标并计算损失
您将决定更新图像的步骤,这类似于您之前看到的训练循环,只是我们正在更改目标图像而不是VGG19或任何其他图像。因此,步骤的数量取决于你的设置!我建议使用至少2000步以获得良好效果。但是,如果您只是测试不同的权重值或尝试不同的图像,您可能希望以较少的步骤开始
在迭代循环中,您将计算内容和风格损失,并相应地更新目标图像。
内容损失
在conv4_2层,内容损失将是目标和内容特征之间的均方差。这可以计算如下:
content_loss = torch.mean((target_features['conv4_2'] - content_features['conv4_2'])**2)
风格损失
风格损失的计算方法与此类似,只是您必须遍历许多层,这些层由字典style_weights中的名称指定。
您将计算目标图像的gram矩阵、target_gram和每个层的样式图像style_gram,并比较这些gram矩阵,计算layer_style_loss。
全部损失
最后,通过将风格和内容损失相加并使用指定的alpha和beta对它们进行加权,您将创建总损失!
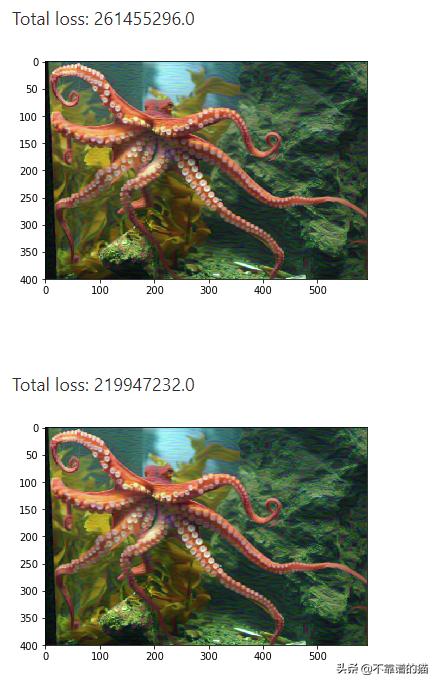
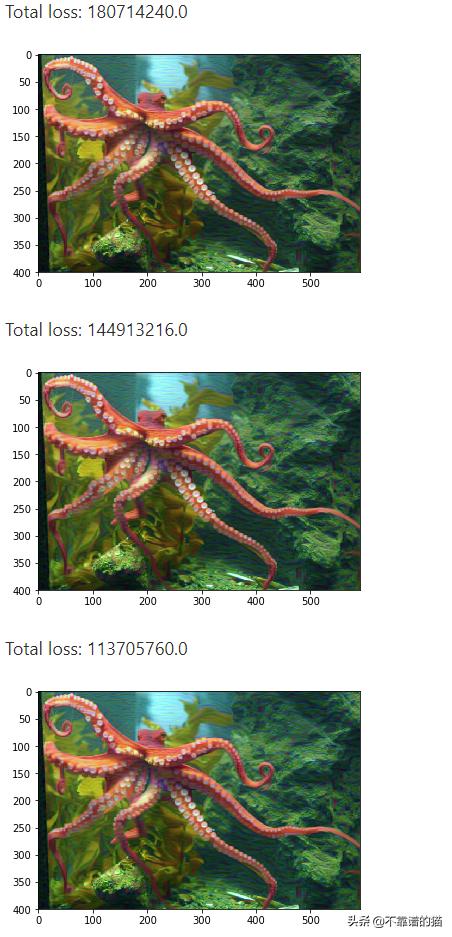
如果损失很大,不要惊慌。图像样式的改变需要一些时间,您应该关注目标图像的外观,而不是任何损失。但是,您应该看到随着迭代次数的增加,这种损失会减少。
# for displaying the target image, intermittentlyshow_every = 20# iteration hyperparametersoptimizer = optim.Adam([target], lr=0.003)steps = 100 # decide how many iterations to update your image (5000)for ii in range(1, steps+1): ## TODO: get the features from your target image ## Then calculate the content loss target_features = get_features(target, vgg) content_loss = torch.mean((target_features['conv4_2'] - content_features['conv4_2'])**2) # the style loss # initialize the style loss to 0 style_loss = 0 # iterate through each style layer and add to the style loss for layer in style_weights: # get the "target" style representation for the layer target_feature = target_features[layer] _, d, h, w = target_feature.shape ## TODO: Calculate the target gram matrix target_gram = gram_matrix(target_feature) ## TODO: get the "style" style representation style_gram = style_grams[layer] ## TODO: Calculate the style loss for one layer, weighted appropriately layer_style_loss = style_weights[layer] * torch.mean((target_gram - style_gram)**2) # add to the style loss style_loss += layer_style_loss / (d * h * w) ## TODO: calculate the *total* loss total_loss = content_weight * content_loss + style_weight * style_loss ## -- do not need to change code, below -- ## # update your target image optimizer.zero_grad() total_loss.backward() optimizer.step() # display intermediate images and print the loss if ii % show_every == 0: print('Total loss: ', total_loss.item()) plt.imshow(im_convert(target)) plt.show()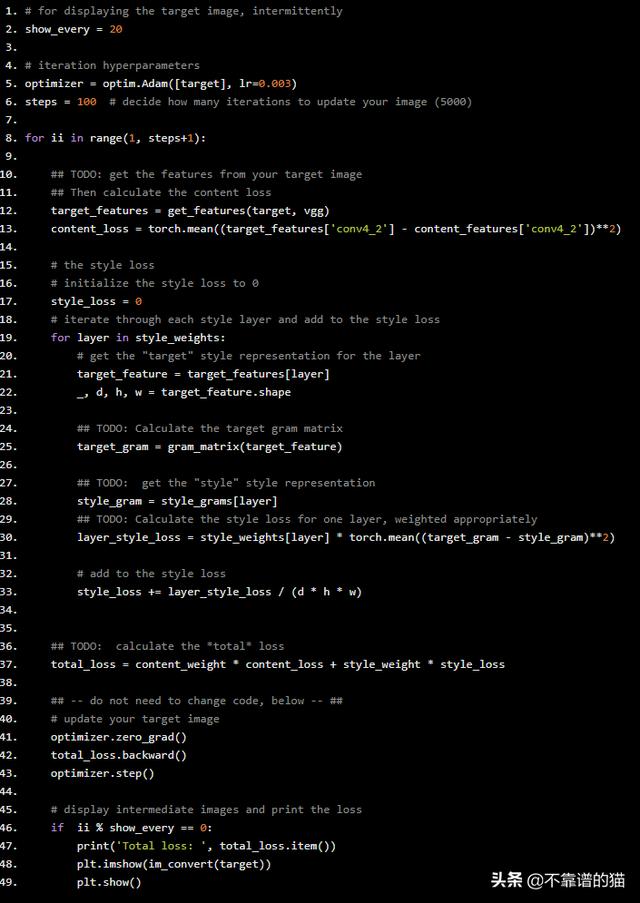
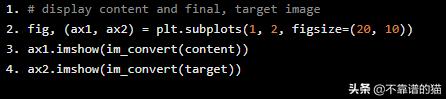
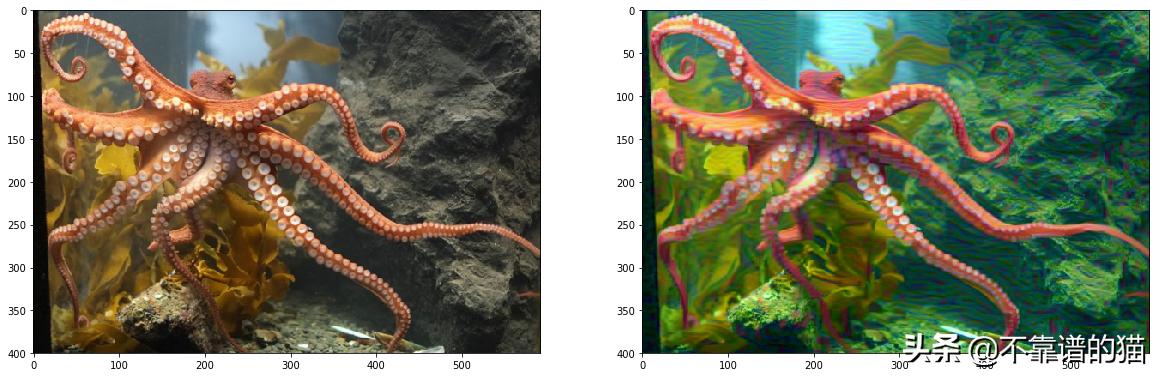
显示目标图像
# display content and final, target imagefig, (ax1, ax2) = plt.subplots(1, 2, figsize=(20, 10))ax1.imshow(im_convert(content))ax2.imshow(im_convert(target))